Integrating Google Drive with your WordPress media library offers a seamless way to manage, store, and access your files directly from your website.
You can view all your Google Drive images from your dashboard and save server space. This can also save you lots of time and effort. Plus, it is a great way to share files with other WordPress users without giving out your Google password.
To find the easiest way to connect Google Drive with the WordPress media library, we tried several methods and tested various plugins. Along the way, we discovered that some options were too complicated or missing key features, while others didn’t offer the reliability or ease of use we needed.
After testing multiple solutions, we found one that makes connecting Google Drive to your media library simple and seamless.
In this article, we will show you step-by-step instructions on how to connect Google Drive to your WordPress media library.
Why Connect Google Drive to Your WordPress Media Library?
Google Drive is one of the most popular free Google tools and is a great way to store and share all kinds of files, including images.
If you regularly upload images to Google Drive, then you can save time and effort by connecting your Google Drive account to the WordPress media library.
You can then access any image in your Google Drive account directly from the WordPress dashboard.
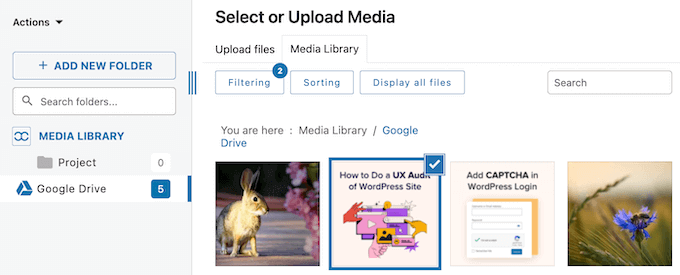
With this integration in place, you can add Google Drive images to any page or post with the click of a button.
Do you manage a multi-author WordPress blog or accept guest blogs?
If you share the WordPress dashboard with other people, then connecting Google Drive to WordPress allows you to share images and files without sharing your Google password.
This helps to keep your Google account safe and makes it easier to lock people out of your Google Drive when they no longer need access.
That said, let’s see how you can connect Google Drive to your WordPress media library.
How to Connect Google Drive to Your WordPress Media Library
The easiest way to connect Google Drive to WordPress is by using the JoomUnited WP Media Folder Cloud Addon Google Drive Integration.
This plugin and addon allow you to access Google Drive files from the WordPress media library. You can also create folders and organize the files inside your Google account.
You can see our detailed WP Media Folder review to learn more.
Set Up the WP Media Folder Plugin
The first thing you need to do is install and activate the WP Media Folder plugin. For more details, see our step-by-step guide on how to install a WordPress plugin.
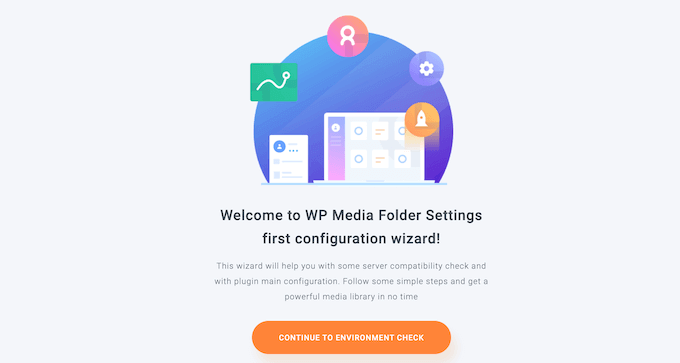
Upon activation, you will see the setup wizard. To get started, click on the ‘Continue to environment check’ button.
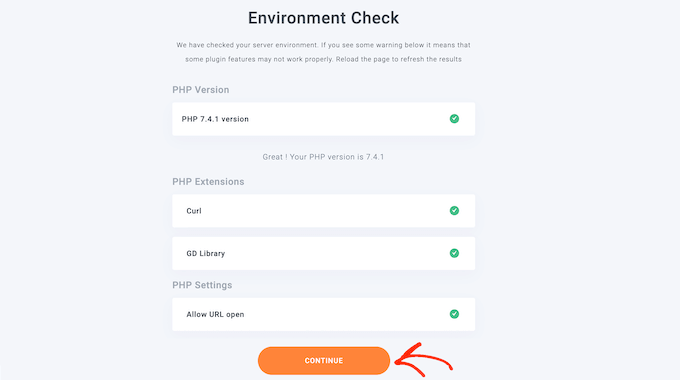
After a few moments, the WP Media Folder will show some information about your WordPress environment, such as its PHP version and extensions.
To carry on, click the ‘Continue’ button.
You can now choose whether to disable the gallery and lightbox features.
These features allow you to create, edit, and delete folders inside the WordPress media library, so we recommend leaving them enabled.
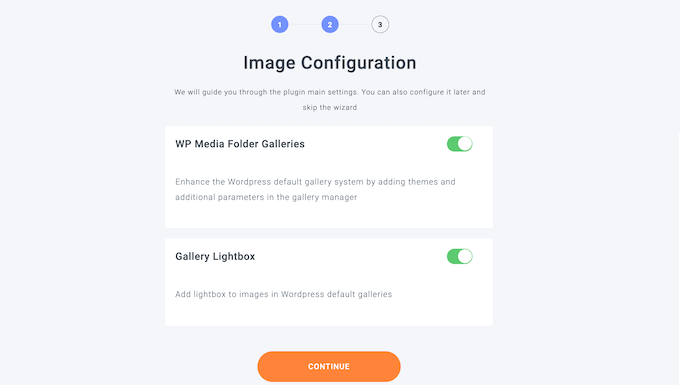
With that done, click on the ‘Continue’ button.
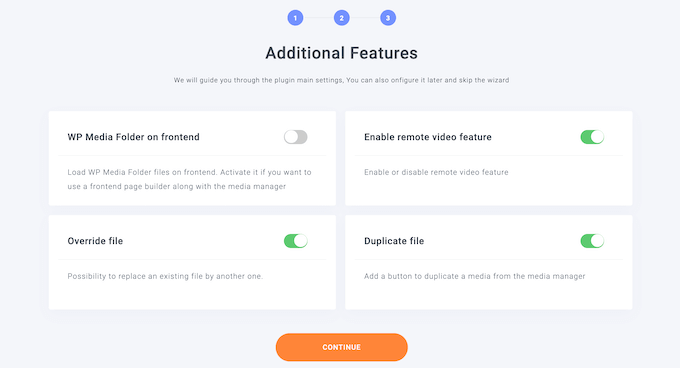
You will now see some extra features you may want to use. The default settings should work well for most WordPress websites, but you can enable the additional features using their toggles.
For example, if you are using a WordPress page builder, then you may want to enable the ‘WP Media Folder on frontend’ feature.
When you are happy with the settings, click on ‘Continue’.
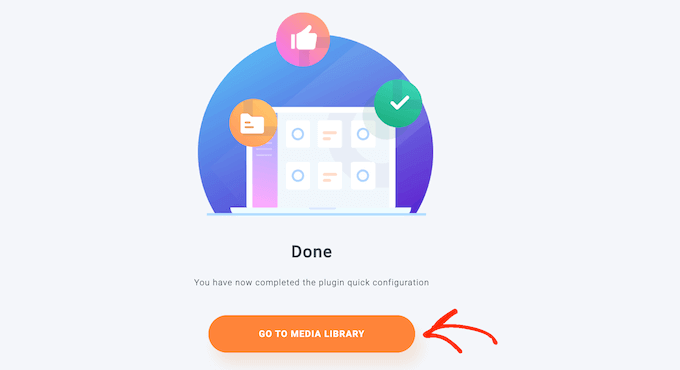
After a few moments, you will see the following message: ‘You have now completed the plugin quick configuration.’
When you are ready, click the ‘Go to Media Library’ button.
Install the WP Media Folder Cloud Addon
Next, you will need to install and activate the WP Media Folder Cloud addon. You can install this addon in the same way you install a WordPress plugin.
WP Media Folder has an automatic connector that allows you to link WordPress to Google Drive without creating a project in the Google Cloud Console. For that reason, we recommend using the automatic connector.
However, in case you can’t use the connector, we will show you how to connect to Google Drive manually at the end of this guide.
To connect Google Drive to your WordPress media library, you need to go to Settings » General.
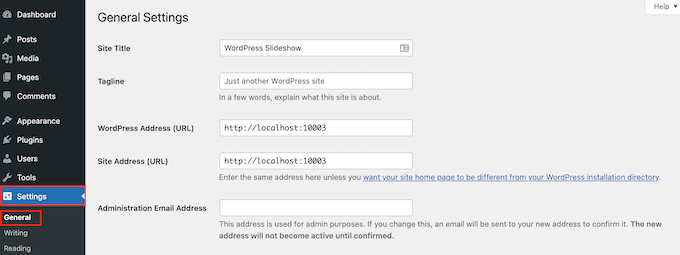
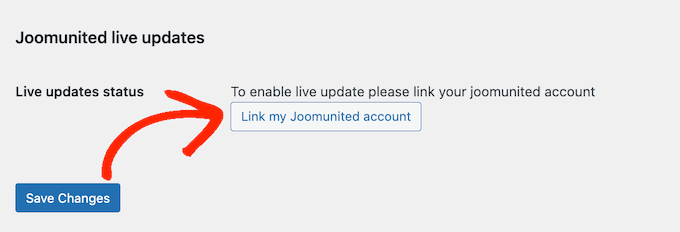
Here, scroll to the ‘Joomunited live updates’ section.
Then, click on ‘Link my Joomunited account.’
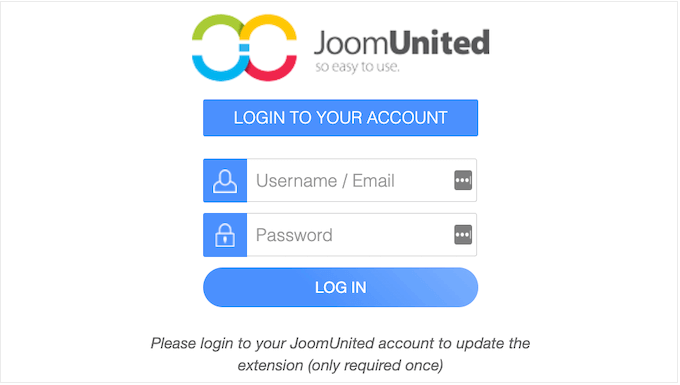
In the popup that appears, type in the email and password for your JoomUnited account.
After that, simply click on ‘Log in’.
Now, you are ready to connect Google Drive to your WordPress blog.
Simply go to Settings » WP Media Folder to get started.
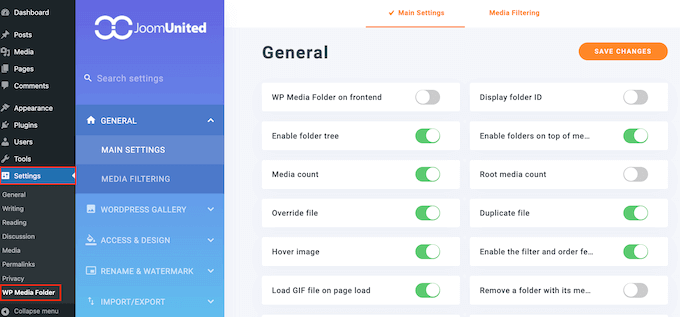
In the left-hand menu, select ‘Cloud’ and ‘Google Drive’.
Here, simply click on ‘Automatic’.
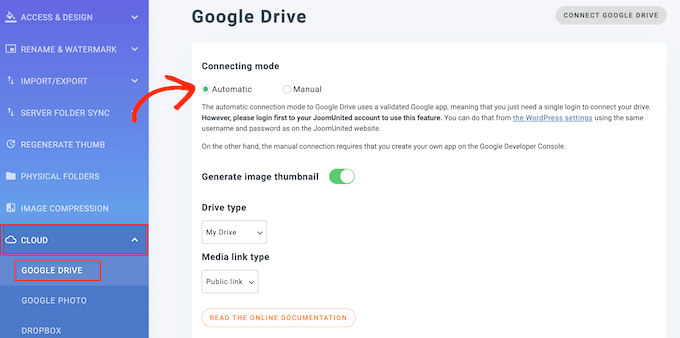
You can now go ahead and click on the ‘Connect Google Drive’ button.
How to Organize Your Google Drive Images
Once you are connected to Google Drive, you can access and organize your files directly in the WordPress dashboard.
Simply go to Media » Library and select the new Google Drive option in the left-hand menu.
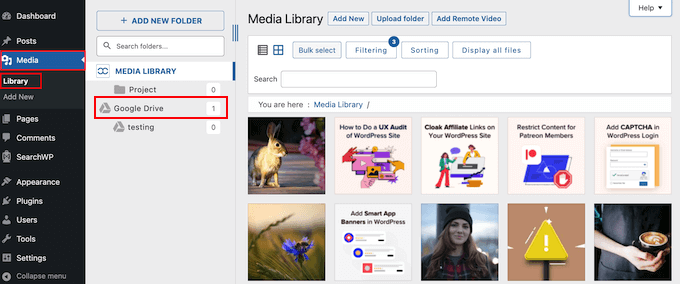
You can now browse through all the images in your Google Drive.
Additionally, you can filter and sort these images or show more file types using the row of buttons in the toolbar.
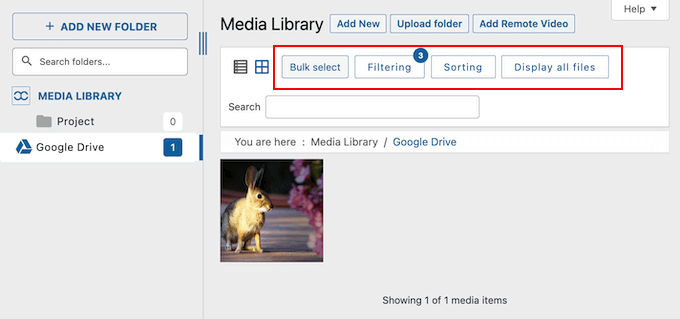
You can also create new folders to manage your images. Any changes you make in the WordPress dashboard will be synchronized to the connected Google Drive account automatically.
This way, users can organize and manage images even if they don’t have direct access to the connected Google account.
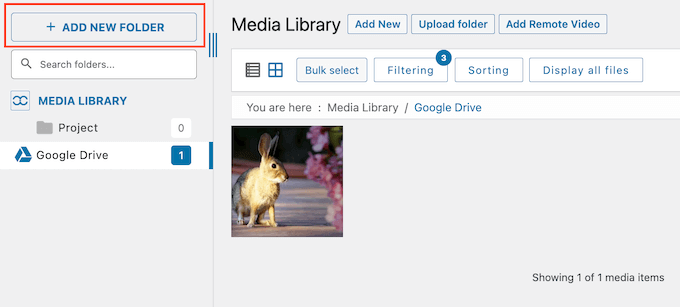
To start, you can create a new folder by clicking on the ‘Add New Folder’ button.
In the popup that appears, type in a name for the folder.
Then, just click on ‘Create’.

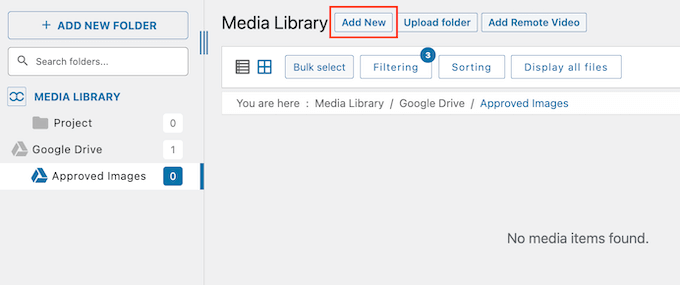
This creates a new folder under the Google Drive parent folder.
To add images to the folder, click on the ‘Add New’ button and then select a file from your local computer. This image will be added to both the WordPress media library and your Google Drive account.
If you have been running your WordPress website for a while, then you may already have lots of images in the media library. In this case, you can easily back up your WordPress content to Google Drive by uploading these files to your Google account.
To do this, simply select ‘Media Library’.
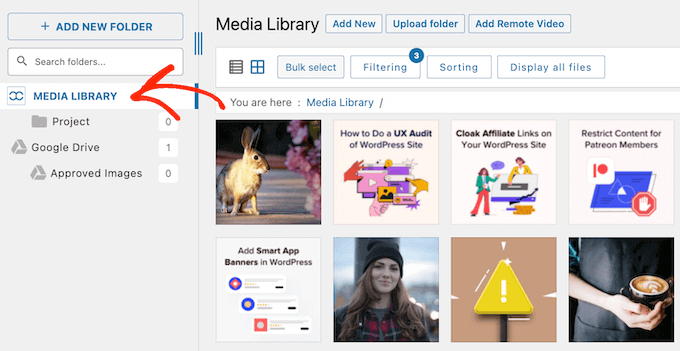
Then, find the image that you want to upload to Google Drive.
You can either drag and drop the image into the parent Google Drive folder or any sub-folder you have created.
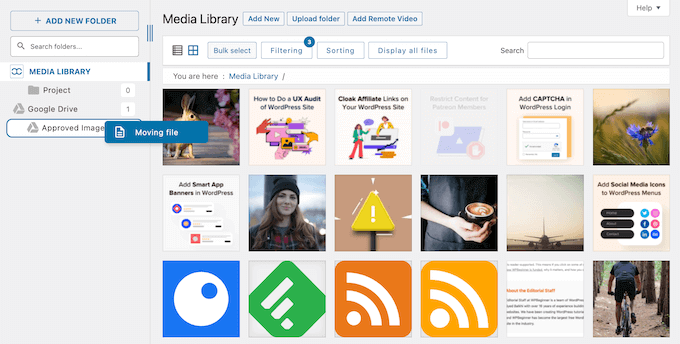
Simply repeat these steps to organize the WordPress files in your media library.
Add Google Drive Images to Your WordPress Website
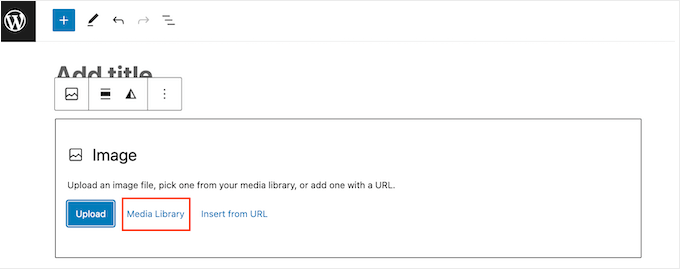
You can now easily add any Google Drive image to your WordPress pages and posts. To do this, simply add an Image block in the WordPress content editor and then click on the ‘Media Library’ button.
In the WordPress media library, either select ‘Google Drive’ or choose any Google Drive folder.
You will now see all the media files that you can add.
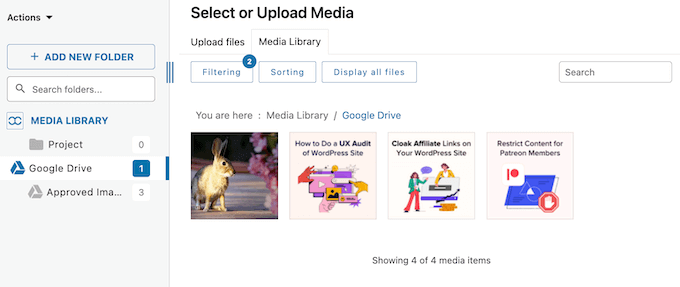
Simply click on the file you want to use.
With that done, you can type in image alt text, add captions, and more in exactly the same way you add any image in WordPress.
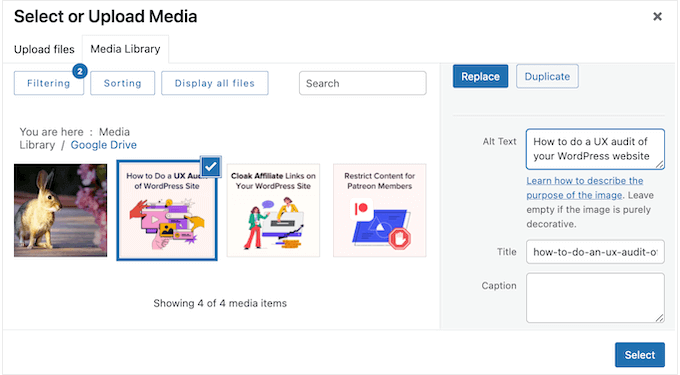
When you are ready, just click on the ‘Select’ button. WP Media Folder will now add the image to your WordPress page or post.
Manually Connect Google Drive to Your WordPress Media Library
If you don’t want to use WP Media Folder’s automatic connector, then you can connect to Google Drive manually in the Google Cloud Console.
Create a Google Cloud Project
To get started, head over to the Google Cloud Console. If this is your first time visiting the console, then you will need to accept the terms and conditions and choose whether you want to get email updates.
With that done, click on ‘Agree and Continue’.
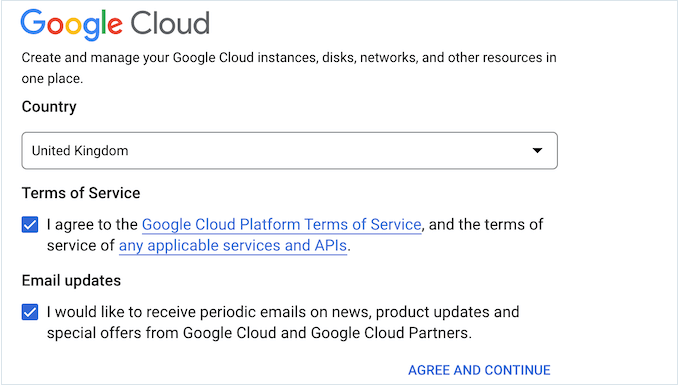
This takes you to the Google Cloud Console.
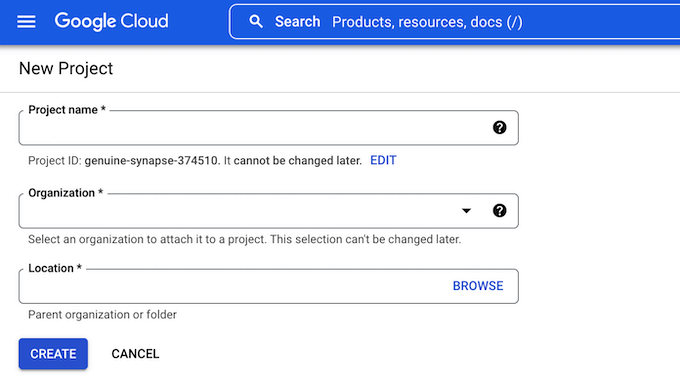
You will need to create a new project, so click on ‘Select a project’.
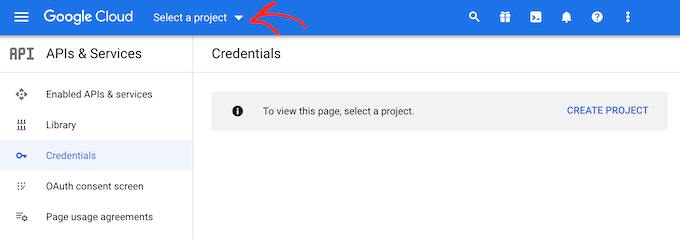
In the popup that appears, select ‘New Project’.
You can now type in a name for the project. This is just for your reference, so you can use anything you want.
On this screen, you can also add an optional organization and change the location where Google Cloud Console will create your project.
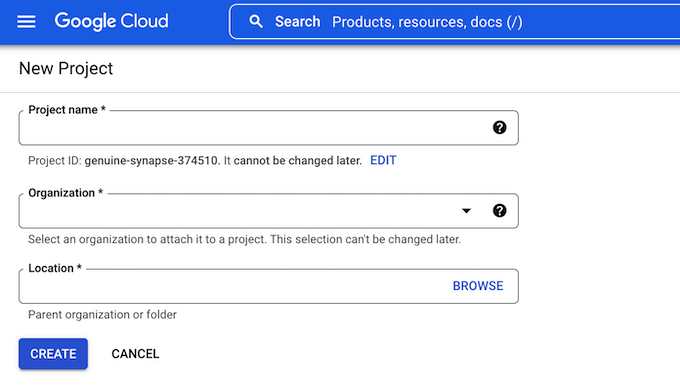
When you are happy with the information you have entered, go ahead and click on ‘Create’.
Enable the Google Drive API
After that, select ‘Enabled APIs & Services’ from the left-hand menu and then click ‘Enable APIs and Services’.
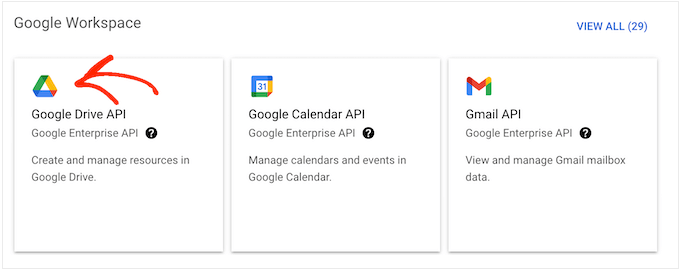
This screen shows all the different APIs you can enable. For example, you can show the latest videos from your YouTube channel by enabling the YouTube Data API or add a Google Calendar in WordPress using the Calendar API.
To connect Google Drive to WordPress, scroll to the ‘Google Workspace’ section and click on ‘Google Drive API.’
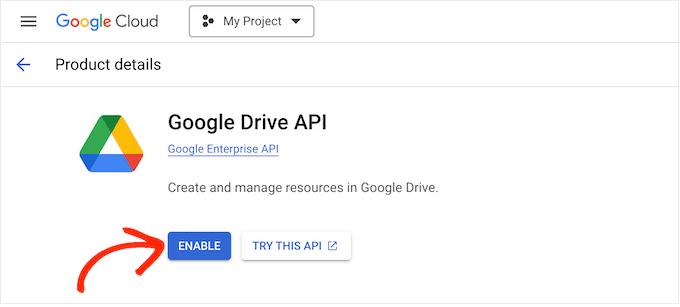
This takes you to a screen where you can activate the key that WordPress will use to access your Google Drive.
Simply go ahead and click the ‘Enable’ button.
Create an OAuth 2.0 Client ID
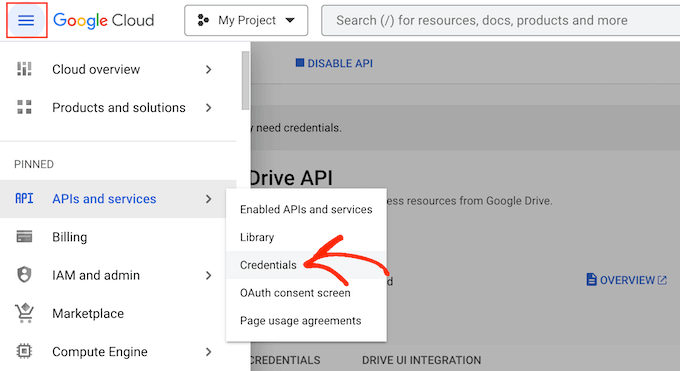
With that done, open the menu by clicking the line icon in the top left corner.
Then, select ‘APIs & Services’, followed by ‘Credentials’.
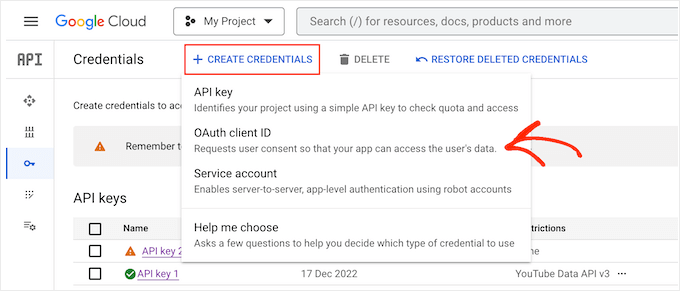
Here, you need to click on ‘Create Credentials’.
In the dropdown menu, you must select ‘OAuth client ID’.
On the next screen, click the ‘Configure Consent Screen’ button.
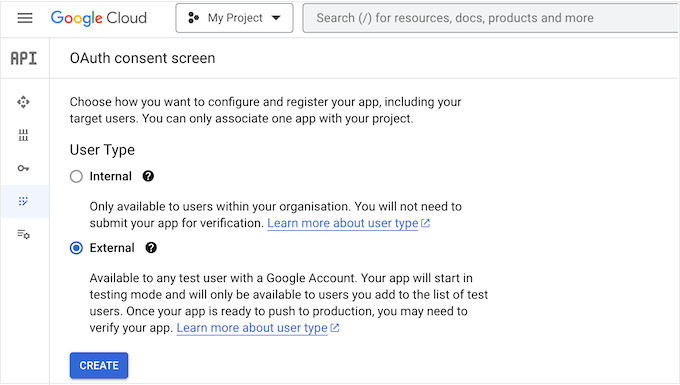
You can now choose whether to create an internal or external app. If you select ‘Internal’, then only G Suite users within your organization will be able to access the app. If you select ‘External’, then your app will be available to anyone with a Google account.
After making your decision, you can click on ‘Create’.
Now, you will need to type in some information about the Google app and add your business email address.
You will also need to type in the domain name where you plan to use the application.
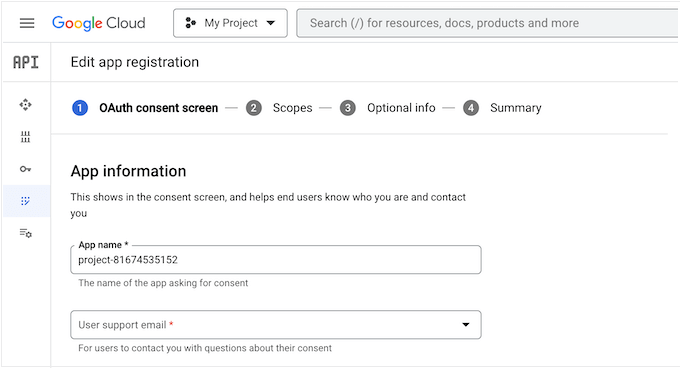
After completing this form, click the ‘Save and Continue’ button.
By adding scopes, you can now specify the content that the app can access and the actions it can perform. To see all the different Google Drive scopes, just click on the ‘Add or remove scopes’ button.
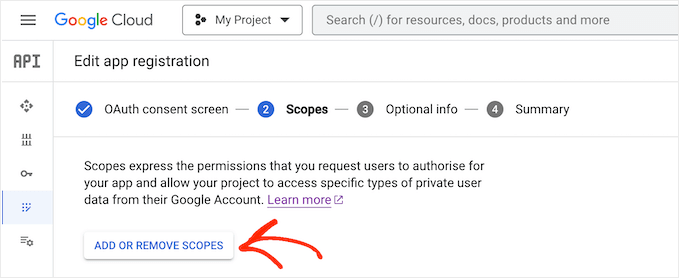
To add a scope to your project, simply check its box.
Just be aware that Google will review any scopes that are marked sensitive.
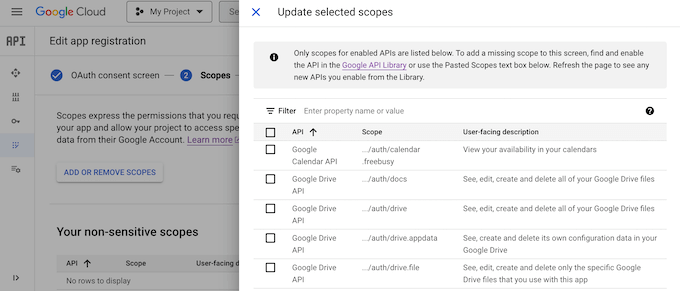
After adding all the scopes you want to use, you need to click on ‘Update’.
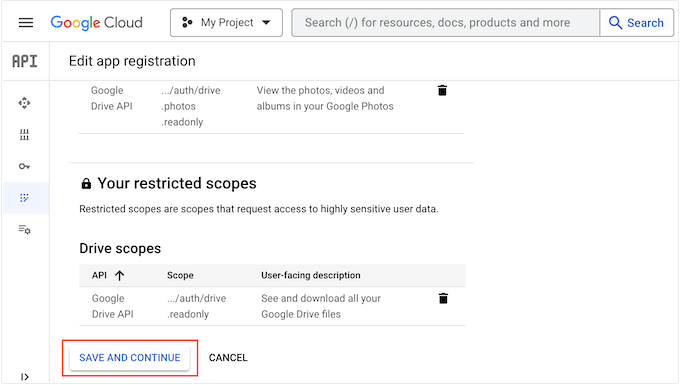
To move to the next screen, click ‘Save and continue.’
At this point, you may want to enter some more information about your app, including how you plan to use the application.
This step is optional, but it may help Google to verify and approve your project more quickly.
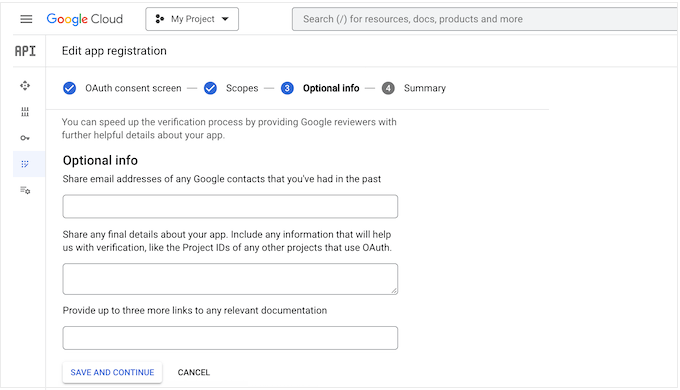
When you are ready to move on, just click the ‘Save and continue’ button. Google will now show a summary of all the information you have entered.
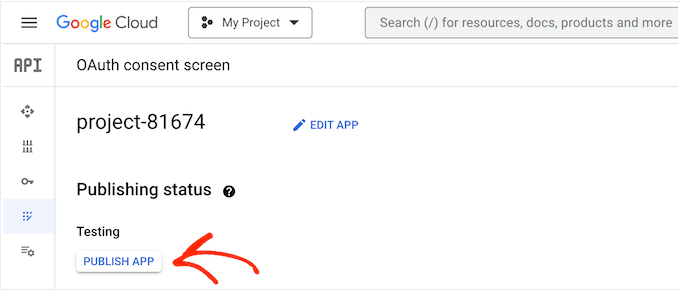
Next, open the menu by clicking on the line icon and then select ‘oAuth Consent Screen’.
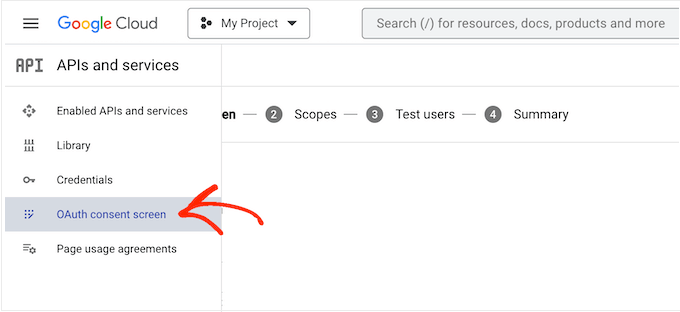
You will see that your app is currently in test mode.
To make it live, go ahead and click ‘Publish App’.
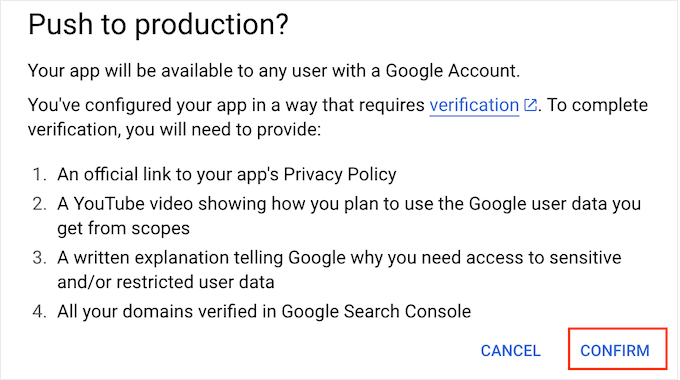
The Google Cloud Console will now show some information about extra steps you will need to take in order to pass the verification process. These include adding a link to your privacy policy and adding your WordPress site to the Google Search Console.
After reading this information, just click on the ‘Confirm’ button.
Add the Client ID and Client Secret to WordPress
With that done, you are ready to create the client ID and secret key.
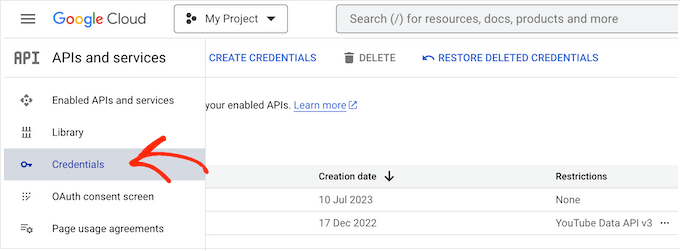
In the left-hand menu, select ‘Credentials’.
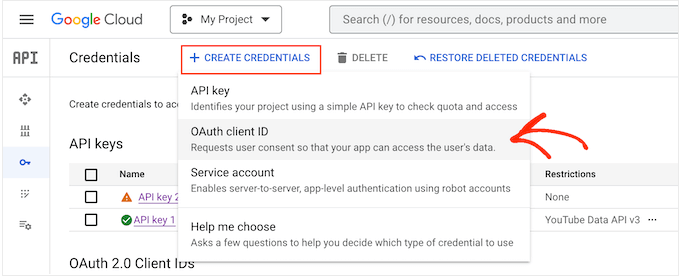
Then, click on ‘Create Credentials’.
In the dropdown that appears, you need to select ‘OAuth client ID’.
On the next screen, open the dropdown menu and select ‘Web application’.
You can now type in a name for your OAuth 2.0 client. This is just for your reference, so you can use anything you want.
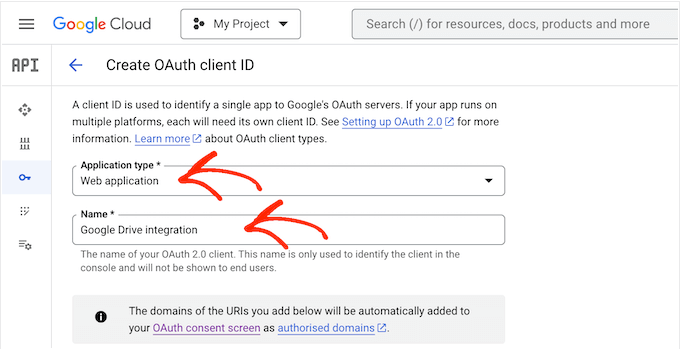
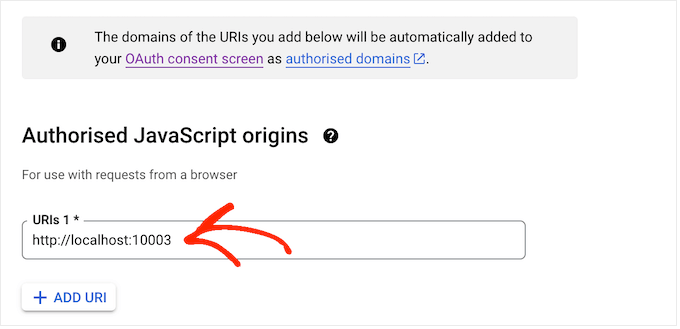
Next, scroll to the ‘Authorized JavaScript origins’ section.
In the field, type in your website’s domain name.
Under ‘Authorised redirect URIs,’ add the following URL, making sure to replace ‘https://your-domain.com’ with your own domain name:
https://your-domain.com/wp-admin/options-general.php?page=option-folder&task=wpmf&function=wpmf_authenticated
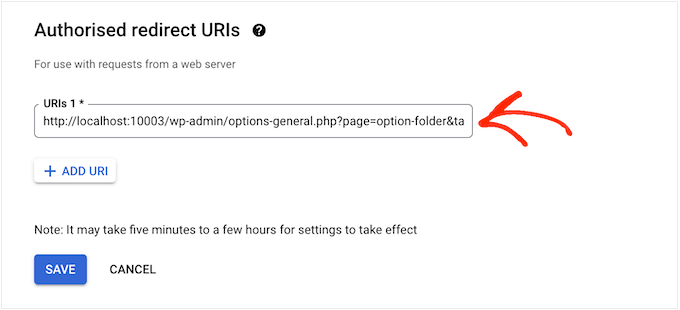
With that done, scroll to the bottom of the screen and click on ‘Create’.
After a few moments, Google will show your client ID and client secret in a popup. You will need this information, so make a note of it somewhere safe.
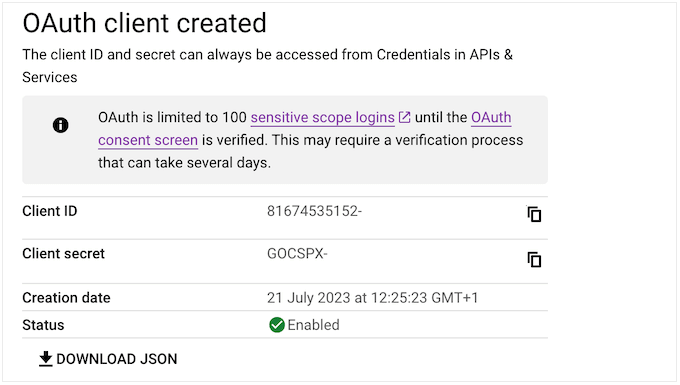
You can also download the information as a JSON file.
To add the client ID and client secret to WordPress, go to Settings » WP Media Folder in the WordPress dashboard.
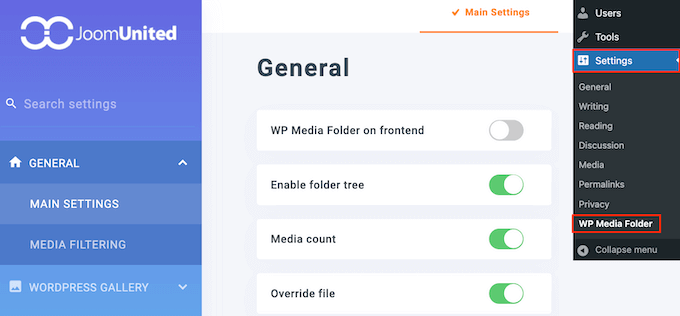
In the left-hand menu, select ‘Cloud’ followed by ‘Google Drive’.
Then, you need to select ‘Manual’.
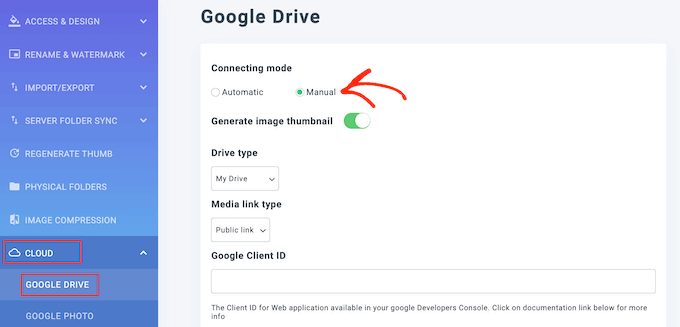
With that done, simply paste the client ID and client secret into the ‘Google Client ID’ and ‘Google Client Secret’ fields.
Now, click on ‘Connect to Google Drive’.
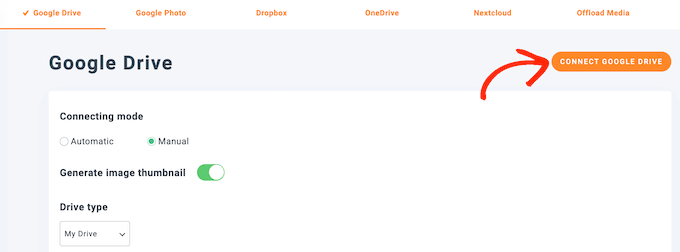
In the popup that appears, select the Google Drive account that you want to use.
You will now see some information about all the data the app will be able to access and the tasks it can perform. Simply check the box next to each permission the app is requesting.
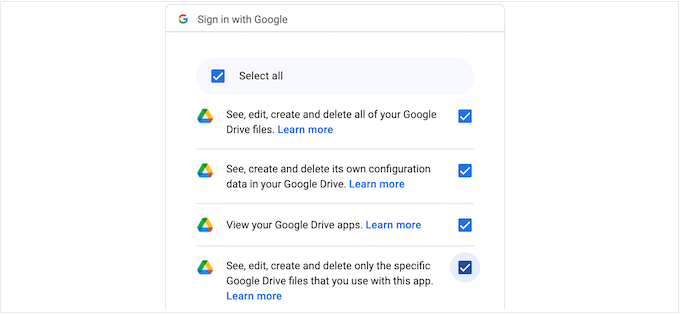
Then, click on ‘Continue’.
Finally, click on the ‘Save Changes’ button.
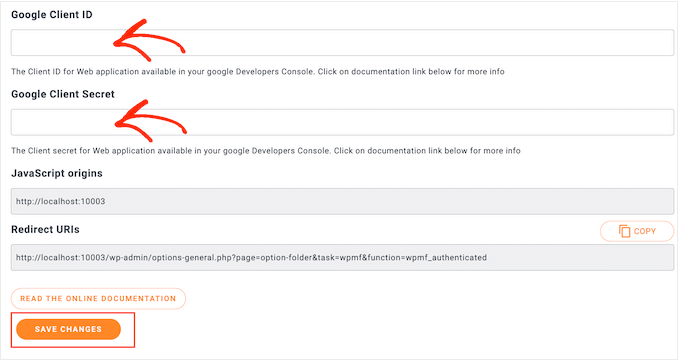
You’ve now successfully connected Google Drive to your WordPress media library.
Bonus: Import Google Docs to WordPress
Apart from connecting Google Drive with your website, you can also import Google Docs into WordPress.
For example, if you accept guest posts on your website and a user submits a post on Google Docs, then you cannot directly copy and paste the content in the block editor.
If you do that, then you will get lots of unwanted HTML tags, and sometimes, you may even lose all the original formatting.
In that case, it is much easier to import the Google Docs file than to copy and paste the content into WordPress. To do this, you can use Grammarly, which is a popular grammar tool.
Simply create an account on the platform and then paste the Google Docs content into its editor.
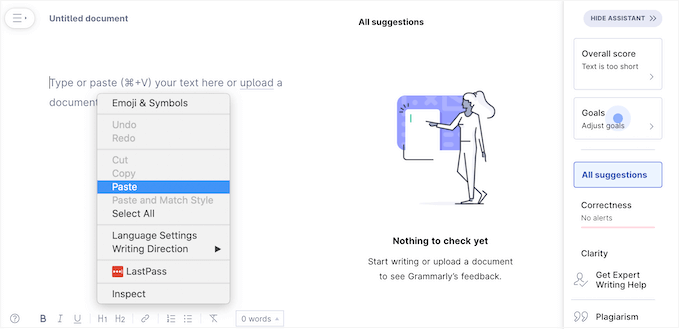
Once you do that, all the HTML tags will automatically be removed from the content. You can now copy and paste the blog post into the WordPress block editor where it will be displayed in proper formatting with no HTML tags.
For detailed instructions, please see our tutorial on how to easily import Google Docs to WordPress.
We hope this article helped you learn how to connect Google Drive to your WordPress media library. You may also want to see our guide on how to make a WordPress database backup manually or see our expert pick of the best Dropbox plugins for WordPress.
If you liked this article, then please subscribe to our YouTube Channel for WordPress video tutorials. You can also find us on Twitter and Facebook.


Jiří Vaněk
Is it possible to connect the plugin to only a specific folder on Google Drive, or does it see all the content? I want to know if it is possible to create a single folder on Google Drive for media files for the website, but at the same time, I don’t want the plugin to access other folders on Google Drive that are not related to the website. Is it possible to set it to access only a specific folder, or is this solution not applicable?
WPBeginner Support
It would depend on the method you are using but the plugin does have the option to have a specific folder for the content.
Admin
Jiří Vaněk
That’s great news because I want to connect to Google Drive for my personal photos, but at the same time, I don’t want the plugin to see other content. You’ve made me very happy. Thanks!
Mrteesurez
Weldone, this is a great idea and a good use case of Google drive in WordPress. Once the plugin allow to specify folder, it will be easier to categorize the files and serve different media format appropriatly.
Mrteesurez
Whaooo, this is fantastic.
Wordpress is promising with these types of exciting integration.
If this is the case, that means it’s possible I host files like ebooks and audios on Google drive and serve it for downloads through WordPress ?
WPBeginner Support
Yes, you are able to do that
Admin
Mrteesurez
Thanks for your reply and support. I like to serve files for download by users and this integration will greatly be of help. This will save me some space on my server and also allow me to backup those file on a remote location like that if Google Drive.
Yinka
hi,
please is there a way to Link media from hard drive on computer with wp site, instead of uploading it to media library… thanks
WPBeginner Support
We do not have a recommended method for that at the moment as that would require your computer to send the images to anyone trying to view them on your site and if your computer is ever turned off they would no longer be able to see images on your site until it is turned back on.
Admin
Mrteesurez
But is this even possible because the computer needs be connected online with a server that will be rendering the images and serve it to site visitors ?
WPBeginner Comments
It is theoretically possible, but there are too many disadvantages for us to recommend it.
Mrteesurez
Wahoo ! Happy to hear the integration is possible, thanks for your answer. This is another knowledge for me because I don’t think would be possible.
I respect your experience on the disadvantages attached so it shouldn’t be recommended. Thanks for the support.
sashi hari sulochan
i am using this plugin to embed videos in my wordpress website, how to hide the poput option of google drive
WPBeginner Support
For customizing the plugin, you would want to reach out to the plugin’s support and they should be able to assist you
Admin
Ted Keith
I get all the way through this and have the import from google button. Click on the button and sign in with google. Nothing happens, Just goes right back to the import from google button screen. Sigh… wish stuff just worked sometimes. That’s an hour wasted.
Gabriel
Same as below. I can import photos from Google Drive but it doesn’t upload properly, it shows a grey box. Images are not imported. What should I change? Thanks for your support
derred beh
after following the steps, I can import photos from Google Drive,
but the file size is just 962B, and when try to view them, I just see a black page, with the square box in it.
Looks like the images are not properly imported?
How to fix this?
Giwa
my clients newly design WordPress e-commerce site and he is selling eBook. can he use google drive as storage where the buyer can download the eBook after payment?
thisisyeeseul
I am using it but it’s still using WordPress storage.
i wonder, is it possible to use it without storing wordpress?
plz let me know! thanks!
Stephanie
I just tried to install the plugin and it crashed my entire site. Anything I click on gives me this error.
Parse error: syntax error, unexpected in /home/content/02/14034602/html/wp-content/plugins/external-media/plugins/Box.php on line 75
This error is the only thing showing on my site to the public right now.
HELP!
WPBeginner Support
Hi Stephanie,
Please uninstall the plugin. Here is how to deactivate plugins when not able to access WordPress admin area.
Admin
Kerry
Hi TARIQ, CAn you help me?
On the AOath consent screen..there is a place to click on your Gmail account …my husband’s keeps coming up and it’s not giving me any way to put in my address. This occurs right before “product name shown to users”. How will it know to access my Gmail account/photos.?
Courtney
This is not working. I uploaded the plugin and had to do a very complicated Developer setup on Google and Wordpress setup. But it is does not do what I need. I need to be able to upload the photos out of my Google Photos into my Wordpress.org site, period. This does not display all my updated photos and instead has my documents from years back. The few photos it does show import in as a Google code instead of a picture.
Please develop a simple Google Photos upload plug-in instead of this.
Arsyila Maulidia
Yes, nice info, i just apply on my web and succsesfully connect to google drive,
I’m arsyila
Great from Indonesia
Succses for wpbeginner
Tariq
Question,
Is this method will fit Google SEO requirements? I dont think so and this will reduce our score. (If it will work)
The correct way using google drive with ANY website is to have G-Suit account and point an Google website (Only available in G-Suite since last Aug, 31 2017) as a sub domain in your website. This way you will increase your score by hosting static content in CDN.
Good luck.
J. Nijhuis
This is not a CDN, it;s just an addon for directly browsing Google Drive images from within WP. The files are imported into your WP media library just like any other image you upload.
Mayank
Found an error, unable to work.
Uncaught TypeError: Cannot read property ‘add’ of undefined
at Object. (external-media-view.js:23)
Abdulaziz Alnasi
as you know that google offers Google photos service for free with unlimited storage, so what I think about is to store my images into google photos instead of having them on my host.
since I have shared hosting this method will decrease the load on my server.
so the question is: is (Google Drive) way will allow me to store my images into Google photos instead of google drive?
sachin
Google not giving permission for uplkoading iamges from drive
Tariq
No, Google give permission to host your image and call it from Google drive folder inside your website but ONLY if you are G-Suit member.
Virgo
With the plugin version 1.10.14 the callback url is changed from
example.com/index.php?external_media_plugin=GooglePickerAPI
to
example.com/index.php?external_media_plugin=GoogleDrive
And in the Google API Console you need to enable the Google Drive APi too!
Paresh Wadhwani
do the 2 mb file size limit applies while transfering files from google drive…..Please reply
galodu
Great plugin. Thanks a lot for through instructions. Everything is in place. Only issue I am facing is that the images are not properly imported to media library. Images are corrupted. Please let me know how to solve the issue.
Orestis Rovakis
That’s very informational and i will use it soon. But what brought me here waas the search for a way to transfer all my media filew to Google Drive so i can save space from my server. Does anyone know anyway to do that?
Dinil Abeygunawardane
This is great, but this imports files to WP!
Is there a way to display images on WP without importing them?
Tony
I totally agree. This is what brought me here too. A way to display images from a cloud storage service such as Dropbox or Google Drive without storing them into WordPress Media Library!
This would be totally useful. What about CDN’s, do they do that?
vikash
hi Tony
Do Know that how is it possible? please tell me in detail i really need this for my website. thank you
Tariq
This already Google drive offer it exactly in the way you ask but you need to be Google Suit member for 5$/m and they are giving you a real big benefit for this money, not only G-Drive, but much much more.