


What if you could increase your WooCommerce sales simply by bundling products your customers already want to buy?
Instead of selling items individually, you can combine complementary products into one convenient package, often at a discounted price.
We use this strategy in our own WordPress businesses. For example, our partner brand, Smash Balloon, lets customers buy individual social media plugins or save money by purchasing them together in a bundle.
The best part? With the right WooCommerce plugin, you can create bundles, set prices, and let customers choose the items they want.
In this guide, we’ll show you how to bundle products in WooCommerce, step by step. You’ll learn how to create flexible bundles, offer discounts, and make it easier for customers to buy more from your store.
This tutorial assumes you already have WooCommerce installed and active on your site.
Do Product Bundles Increase Sales?
Yes, product bundles can boost sales in WooCommerce by encouraging customers to buy multiple products in one discounted purchase.
This can increase average order value and reduce refunds, since customers get everything they need in one purchase.
The right bundling strategy depends on your goal, whether that’s increasing perceived value, selling more products, or moving slow-selling inventory. Here’s a quick overview.
| Bundle Type | Description | Example |
|---|---|---|
| Pure Bundling | Products are only sold together as a bundle, not individually | A software suite where individual programs cannot be purchased separately |
| Mixed Bundling | Products are available both individually and as part of a bundle | A “meal deal” at a restaurant where items can also be bought à la carte |
| Leader Bundling | A popular “leader” product is bundled with a less popular or complementary “follower” product | A new gaming console bundled with a less popular game title or accessory |
| Cross-Sell Bundling | Bundling complementary products from different categories | A smartphone bundled with a case, screen protector, and charger |
| Quantity Bundling | Offering a discount for purchasing multiple units of the same product | “Buy 2, Get 1 Free” or “3 for $20” t-shirts |
While WooCommerce includes a basic grouped products feature, it has limitations. You can’t set a custom bundle price different from the sum of individual items.
To truly increase sales with bundles, you’ll want a plugin that lets you create flexible, discounted bundles with control over pricing and product selection.
Here are the steps we’ll cover in this guide.
- Step 1: Install YITH WooCommerce Product Bundles Plugin
- Step 2: Create a WooCommerce Product Bundle
- Step 3: Configure Product Bundle Settings
- Step 4: Customize the Bundled Product's Style and Labels
- Step 5: Publish Your Product Bundle
- Frequently Asked Questions About Selling Product Bundles in WooCommerce
Step 1: Install YITH WooCommerce Product Bundles Plugin
We recommend YITH WooCommerce Product Bundles because it offers a free tier you can try before upgrading. The free version lets you group simple products into a bundle at a fixed price.
The Pro version costs $89.99 per year and unlocks advanced pricing features, including variable products, per-item pricing with individual discounts, optional items, and minimum and maximum purchase quantities.
To show you these features, we’ll be using the Pro plan in this tutorial.
To get started, purchase YITH WooCommerce Product Bundles. Then, log in to your YITH account and download the plugin from the ‘Licenses & Downloads’ section. Then make sure to activate the license on your site.
If you want to start with the free version, install it from the WordPress plugin directory and skip the license step below. For help, see our guide on how to install a WordPress plugin.
Step 2: Create a WooCommerce Product Bundle
Before you start bundling products, make sure you have all the individual items ready in your store. You can also import your WooCommerce products in bulk to make the process faster.
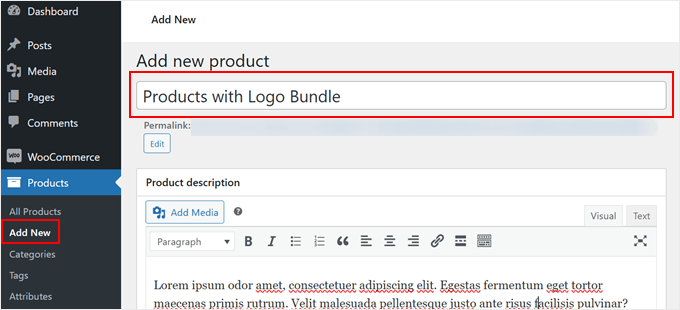
Then, head to Products » Add New in your WordPress dashboard.
Give your bundle an attention-grabbing product name and product description, just like you would for any regular item.
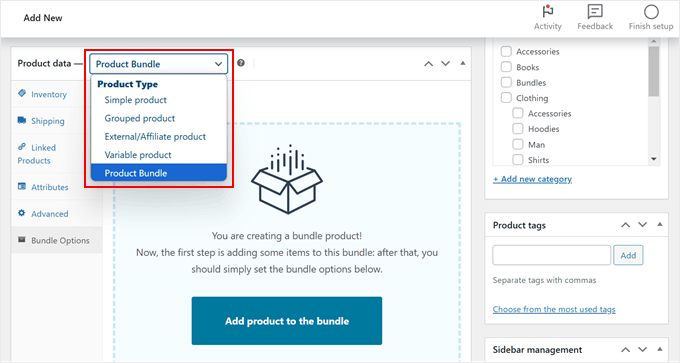
Next, scroll down to the ‘Product data’ section.
Select ‘Product Bundle’ from the dropdown menu.
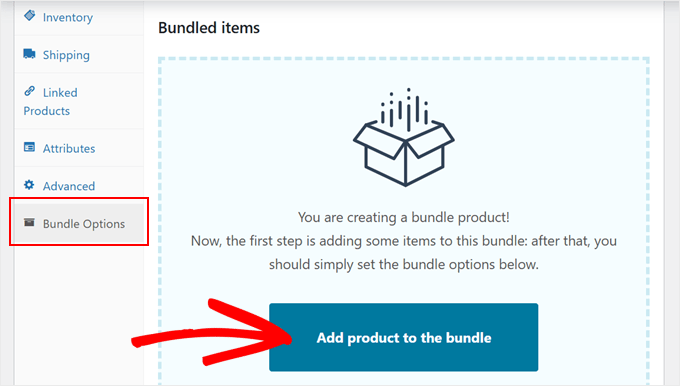
After that, go to the ‘Bundle Options’ tab in the left-hand menu.
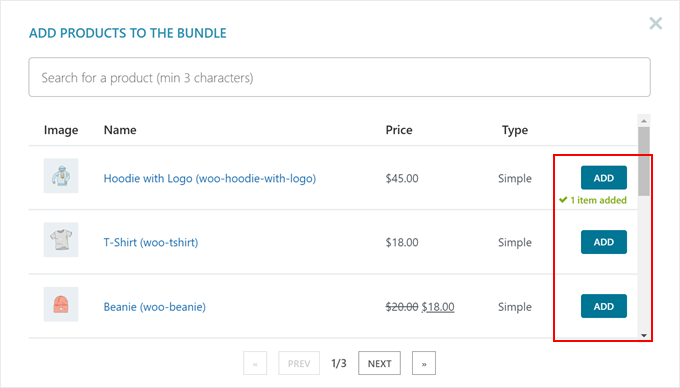
Here, click the ‘Add product to the bundle’ button to start building your package.
A popup will appear showing your available products.
Click ‘Add’ for each item you want to include and close the popup when you’re done selecting products.
Now you can customize each bundled product. For variable products, you can filter which variations to include.
For example, if you’re bundling a t-shirt, this setting lets you decide if customers can choose their size and color right from the bundle page.
You can also leave this field empty so all of the options are available.
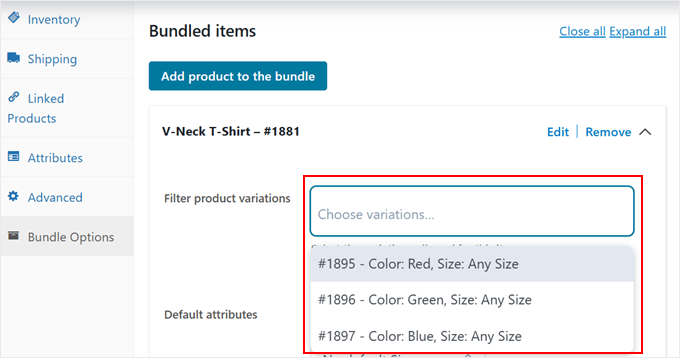
You can set default variants too, or skip this step if you don’t need it.
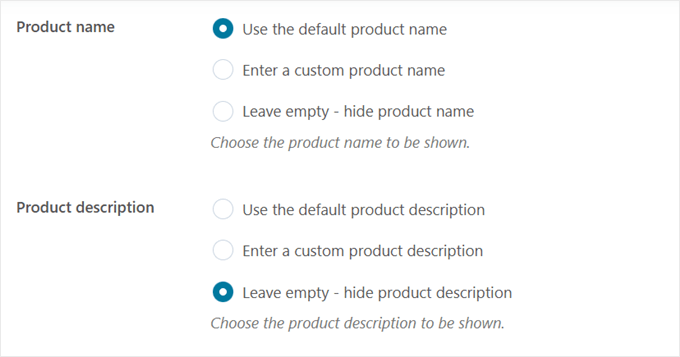
Next, change the settings for the product name and description. You can use the default product details, create a custom product name and description, or hide them altogether.
For the product name, we recommend using the default one to maintain consistency and help customers easily identify items.
You can hide the product description to avoid cluttering the product page.
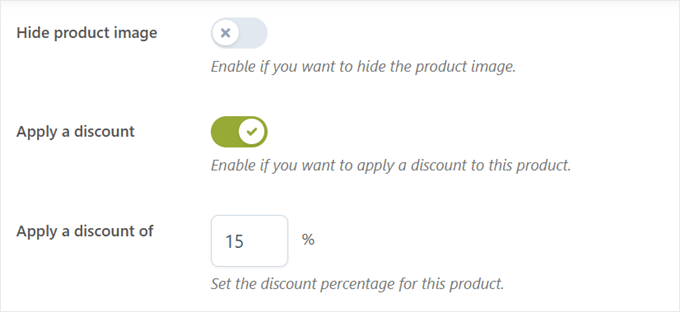
The next setting lets you hide product images, but we suggest keeping them visible so customers can see what’s included in their bundle.
At this point, you can also apply individual item discounts. These only apply if you price the bundle by its items, which we’ll call Per-Item Pricing.
Each product keeps its own price and discount. For example, you could set Product A at 15% off its original price, Product B at 20% off, and Product C at 10% off.
YITH calculates the final bundle price automatically from these individual discounts. To use this approach, enable the ‘Apply a discount’ setting and enter your preferred percentage.
The other option is Fixed Bundle Pricing, where the whole bundle gets one price. You’ll choose between the two in a moment.
Each product in your bundle can also have a minimum and maximum purchase quantity, which is useful when stock for certain items is low.
You can also set the product as optional, letting customers choose whether to add it to the bundle, or hide the product in the bundle entirely.
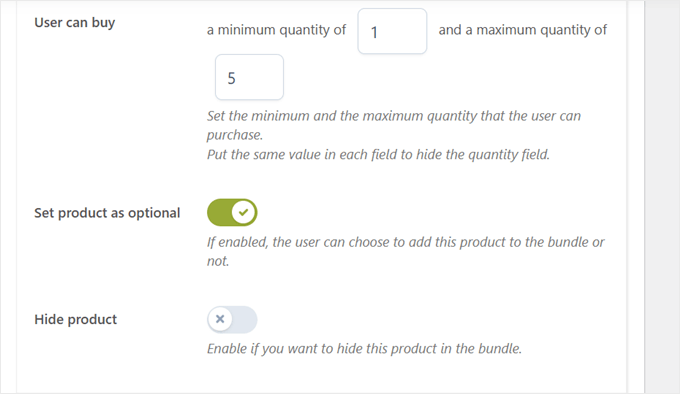
Repeat these customization steps for each item in your bundle.
Then, scroll down to the ‘Bundle Price’ setting to choose how the bundle is priced.
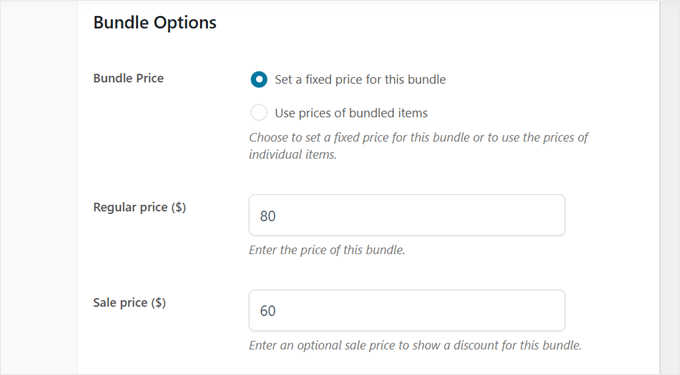
If you choose ‘Set a fixed price for this bundle,’ the bundle gets one price, regardless of what the individual products cost. This is the Fixed Bundle Pricing option.
This option works well when you want a clear price point, like “$120 for the complete set.”
With this option, you can add a ‘Regular price’ and a ‘Sale price,’ which shows customers how much the bundle saves them.
You can also enable ‘Show saving amount’ to highlight the bundle’s value. For instance, if your total regular price is $80 and the sale price is $60, this will add a ‘Save $20’ label.
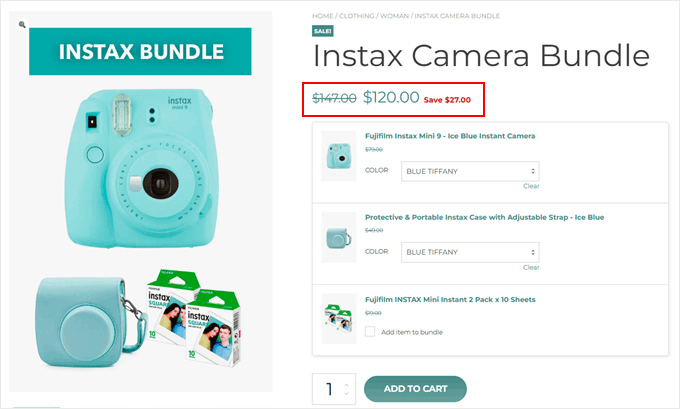
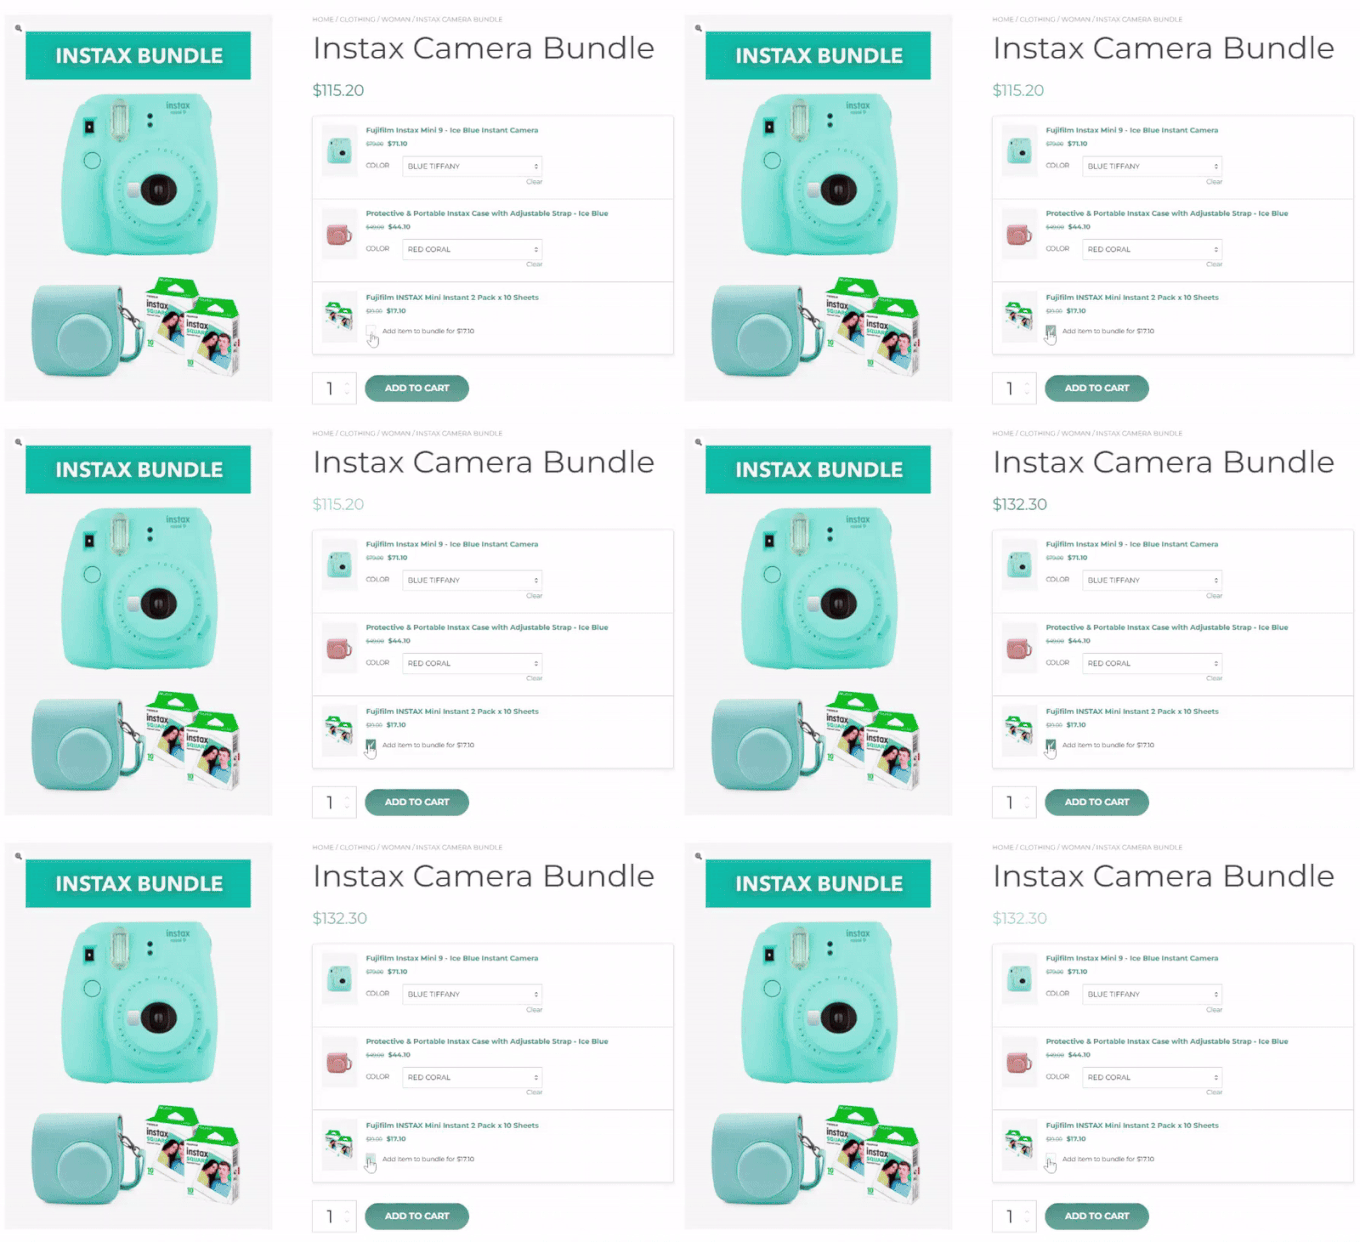
The ‘Use prices of bundled items’ option calculates the bundle’s total price based on the individual prices and discounts of the products it contains. This is the per-item pricing feature we mentioned earlier.
It’s a great option if you want customers to see the total update as they customize their bundle. However, the final price may be less predictable since it depends on the items they choose.
For example, a shirt costs $30 with a 15% discount, while pants cost $40 with a 20% discount. Customers see the discounted price for each item, and the bundle’s total updates automatically as they make their selections.
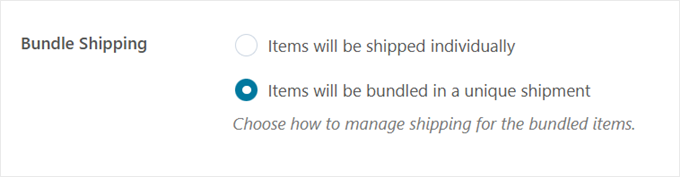
After that, scroll down to the ‘Bundle Shipping’ section and decide whether to ship items individually or in a unique shipment.
With individual shipping, each product has its own shipping fee. With unique shipping, one fee covers everything.
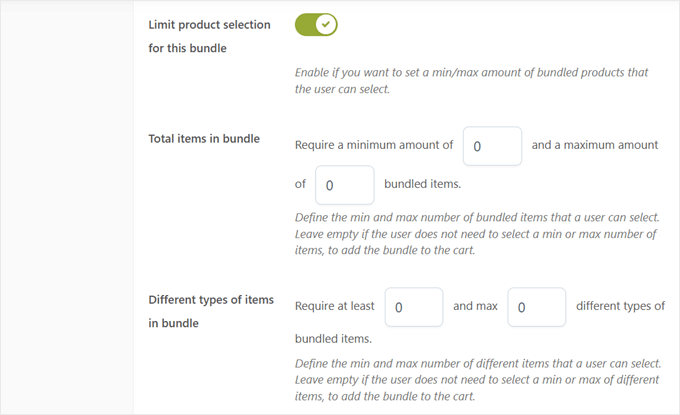
Finally, you can enable ‘Limit product selection for this bundle’. It is perfect for flexible bundles where customers choose their own items within set parameters.
For example, you could create a “Build Your Own Gift Box” bundle where customers select 3 to 5 items from your collection of gourmet snacks.
This works well for subscription box services, where customers can choose the products they want in each box while staying within your set item limits.
Once you’re satisfied with your settings, add finishing touches like product tags, categories, and a compelling product image gallery.
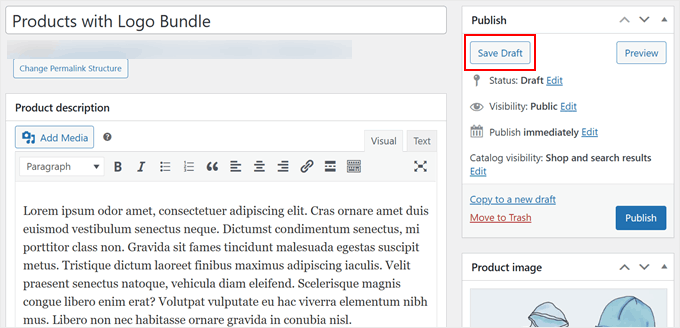
Save your bundle as a draft so you can configure the remaining settings without losing your work.
Step 3: Configure Product Bundle Settings
Now that your bundle is set up, let’s configure the settings that determine how bundles work and appear across your store.
Head to YITH » Product Bundles and click the ‘General Settings’ tab.
The first setting handles out-of-stock situations for your bundled products. You can hide the entire bundle, mark the bundle as out-of-stock, or show the bundle without allowing purchases.
We recommend the last option, which is the default. It lets customers see what’s included even when some items aren’t available. This helps them plan future purchases.
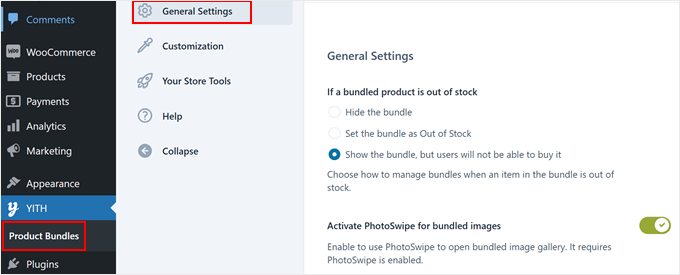
Next is ‘Activate PhotoSwipe for bundled images.’
Enabling this lets customers click a product image in the bundle to open a full-screen lightbox gallery.
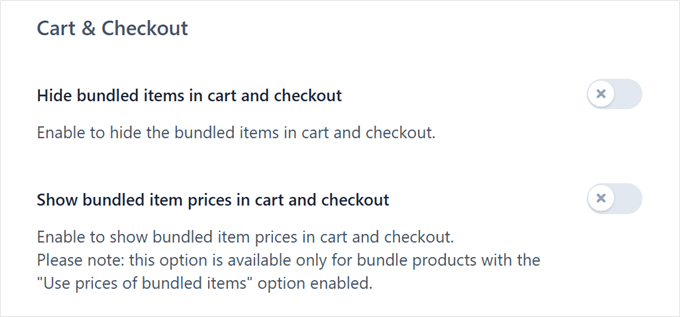
The Cart & Checkout settings come next.
By default, both the bundle and its individual products appear on these pages. But you can enable ‘Hide bundled items in cart and checkout’ to show the bundle as a single product.
You can also choose to display individual product prices within the bundle on your cart and checkout pages. This is useful if you chose Per-Item Pricing, since it lets customers see the price breakdown of their bundle.
For Fixed Bundle Pricing, keep this disabled to maintain a cleaner checkout experience.
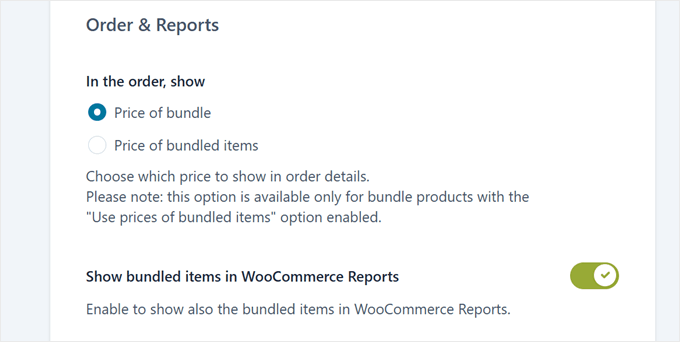
Under Order & Reports, decide how prices appear on the Order details and Reports page in the admin area.
Choose ‘Price of bundle’ to show the bundle’s price as a whole, or ‘Price of bundled items’ to display each item’s price separately.
By default, product bundles appear as a single item in your WooCommerce Reports page.
Enable ‘Show bundled items in WooCommerce Reports’ to see both the bundle and its individual products there.
Click ‘Save Options’ to store your changes.
Step 4: Customize the Bundled Product’s Style and Labels
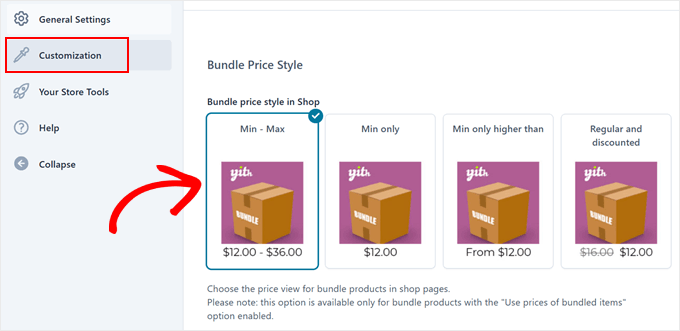
Now that the basic settings are in place, switch to the ‘Customization’ tab to style your bundle. The ‘Bundle Price Style’ option controls how bundle prices appear on your shop pages.
It only applies to bundles that use Per-Item Pricing, since a fixed-price bundle has just one price to show.
You have four layout choices.
- Min-Max shows the complete price range, like “$100 to $150.”
- Min only displays just the starting price.
- Min only higher than shows “From $100” style pricing.
- Regular and discounted shows the discounted and original prices, with the original struck through.
Once you’ve chosen your layout, you can customize the labels that appear on your product pages.
The ‘Bundles’ title’ setting lets you add a heading above your bundled items list, such as “What’s Included” or “Bundle Contents,” or you can leave it blank.
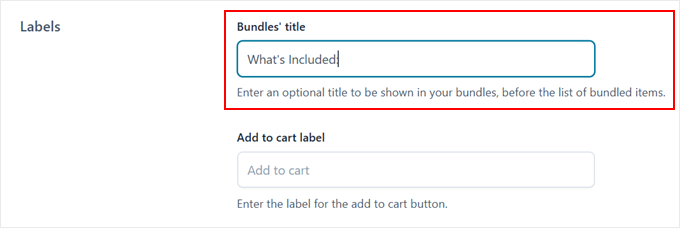
You can also personalize the ‘Add to cart’ button text to make it more compelling. Effective examples include “Get the Bundle” or “Claim Your Bundle.”
For optional items in your bundles, you can customize two more labels.
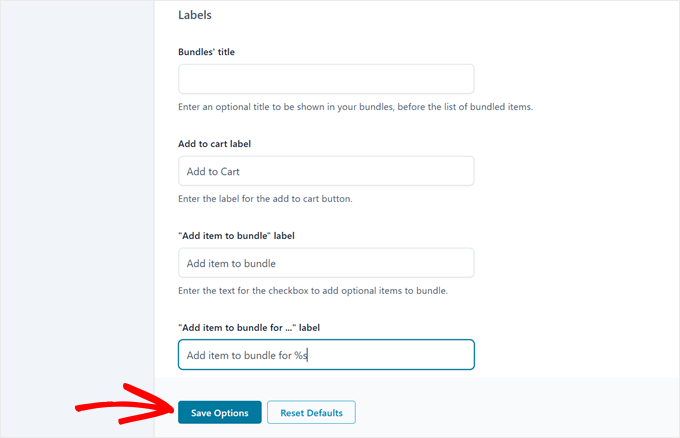
The ‘Add item to bundle’ label appears next to optional items, and the ‘Add item to bundle for…’ label shows up when you’re using Per-Item Pricing.
You can use the “%s” placeholder to automatically display the price in that second label.
For example, entering ‘Add to bundle for %s’ displays a message like “Add to bundle for $19.99” next to each optional item, letting customers know how much it will add to the bundle’s total price.
Click ‘Save Options’ once you are done.
Step 5: Publish Your Product Bundle
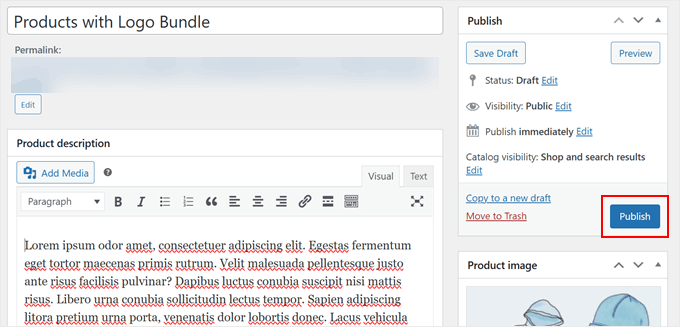
Now that everything is configured and customized, you can make your bundle live. Find the product bundle you saved as a draft earlier and click ‘Publish’.
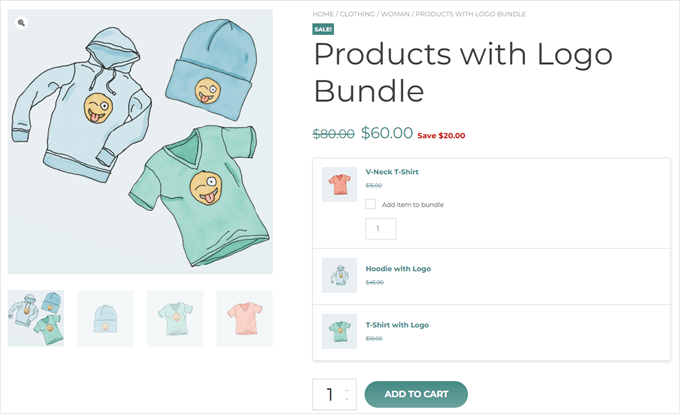
Your WooCommerce product bundle is now live and ready for customers to purchase.
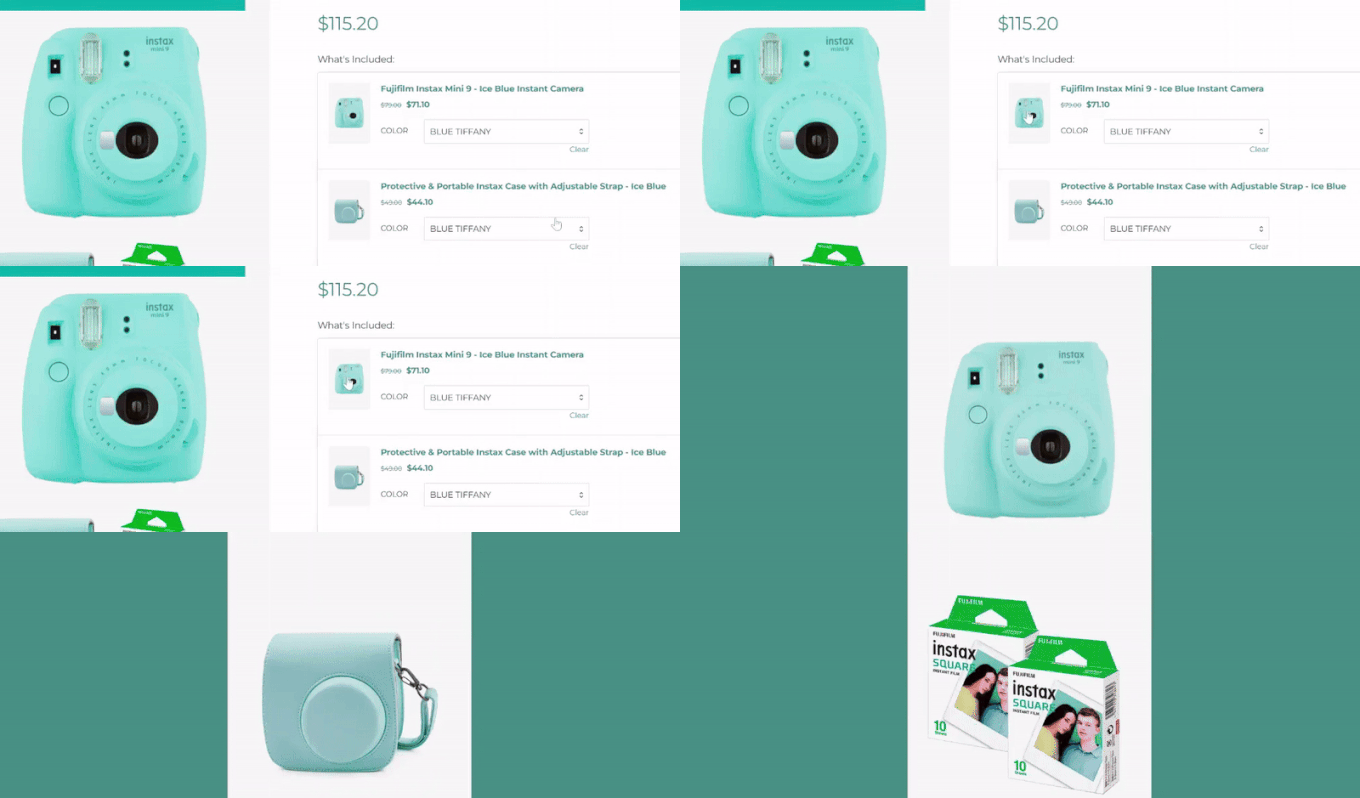
Here’s an example of what our product bundle looks like.
Frequently Asked Questions About Selling Product Bundles in WooCommerce
What’s the difference between a bundled product and a grouped product in WooCommerce?
A grouped product in WooCommerce displays several individual products together on one page. Customers still add each item to their cart separately at its regular price.
A product bundle, created with a plugin like YITH, allows you to package multiple items to be sold as a single product. This lets you offer a special discounted price for the entire package.
How does inventory management work for product bundles?
A good product bundle plugin will handle inventory automatically. When a customer purchases a bundle, the stock count for each individual product included in that bundle is reduced accordingly. This ensures your inventory levels stay accurate.
Can I include variable products in a bundle?
Yes, you can include variable products in a bundle.
The premium version of the YITH WooCommerce Product Bundles plugin allows you to add products with options like size or color. Customers can then select their preferred variations right on the bundle product page.
What are some effective product bundle examples?
Effective bundles often group related items that customers would buy together.
For example, a “Beginner’s Photography Kit” could include a camera, lens, and memory card. A “Complete Skincare Set” might have a cleanser, serum, and moisturizer.
Is there a free way to bundle products in WooCommerce?
Yes. The free version of YITH WooCommerce Product Bundles lets you bundle simple products at one fixed price. Variable products, per-item pricing, and optional items need the Pro version. The official WooCommerce Product Bundles extension is premium only.
We hope this article helped you learn how to sell product bundles in WooCommerce. You may also want to see our guide on how to upsell products in WooCommerce and our handpicked list of the best WooCommerce plugins.
If you liked this article, then please subscribe to our YouTube Channel for WordPress video tutorials. You can also find us on Twitter and Facebook.



Have a question or suggestion? Please leave a comment to start the discussion.