Do you ever feel like you’re drowning in a sea of photos and videos on your WordPress site? We’ve all been there! Keeping your WordPress media library organized can feel like a never-ending battle.
At WPBeginner, we’ve been helping people manage their WordPress media and files for 15 years, and we’re here to share our simple-but-effective secret: custom library folders!
By default, WordPress automatically creates folders for different years and months and then adds each media file to the right folder based on its upload date. However, one size doesn’t always fit all, and you may get better results by using your own system of folders and sub-folders.
In this easy-to-follow guide, we’ll show you exactly how to organize your WordPress files using folders.

Why Organize Your Files in Media Library Folders?
By default, WordPress stores all images and other media files in the /wp-content/uploads/ folder. Inside this folder, it also creates sub-folders for the years and months. WordPress will then add your files to different directories based on the date when you uploaded them.
For example, an image that you uploaded in January 2023 will be stored in the /wp-content/uploads/2023/01/ folder.
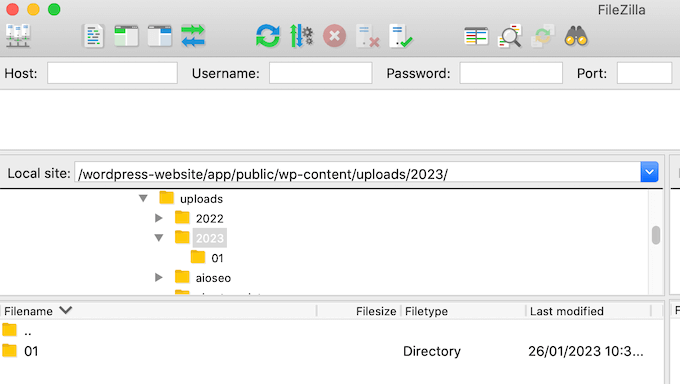
This works well for most websites, but sometimes, you might want to customize how WordPress stores media files. For example, you may want to organize media uploads by users, or arrange your files into topic, location, or event folders.
Having said that, let’s take a look at how to easily create folders to organize your WordPress media files. Here are the topics we’ll cover:
How to Organize Your WordPress Files With Media Library Folders Plugin
The easiest way to create custom media upload folders in WordPress is by using Media Library Folders. This free plugin adds a user interface for you to create folders and move, delete, and rename files directly in the WordPress backend admin.
This is much more user-friendly than managing your media files using FTP, or your web host’s file manager.
First, you need to install and activate the Media Library Folders plugin. For more details, see our step-by-step guide on how to install a WordPress plugin.
Upon activation, go to Media Library Folders in the WordPress dashboard. You’ll now see all the folders inside your WordPress upload directory.
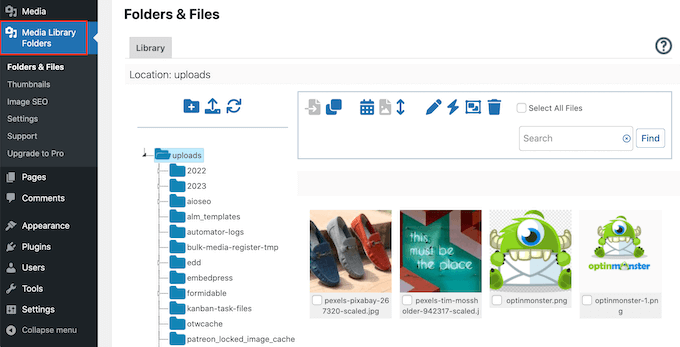
From here, you can create new folders and add files to them. You can also move, copy, rename, or delete files on your WordPress website.
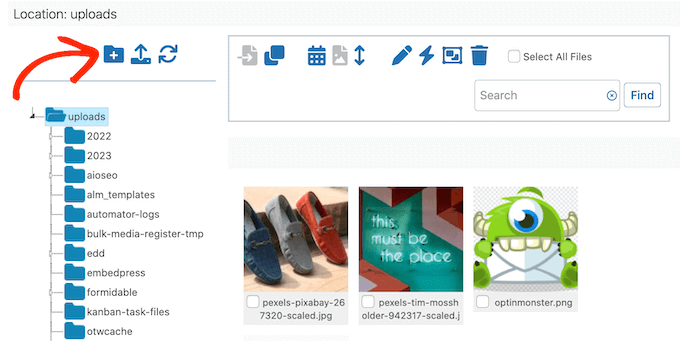
To create a new folder, simply click the ‘Add Folder’ icon, which looks like a small folder with an ‘+’ symbol on it.
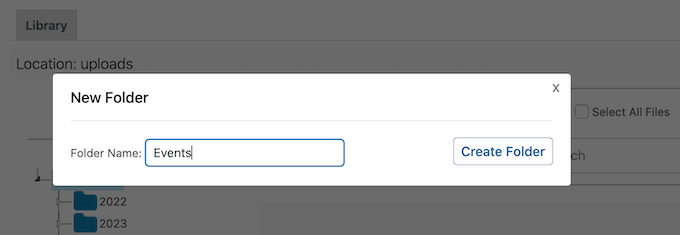
In the popup, type in a name for the folder. You can’t use spaces in folder names, so you’ll need to separate words using a hyphen or underscore. This name will be added to the image URL, so you may be able to improve your image SEO by adding relevant keywords.
After that, click on the ‘Create Folder’ button.
You can also create subfolders by selecting the parent folder towards the left of the screen.
Then, go ahead and click on the ‘Add Folder’ icon.
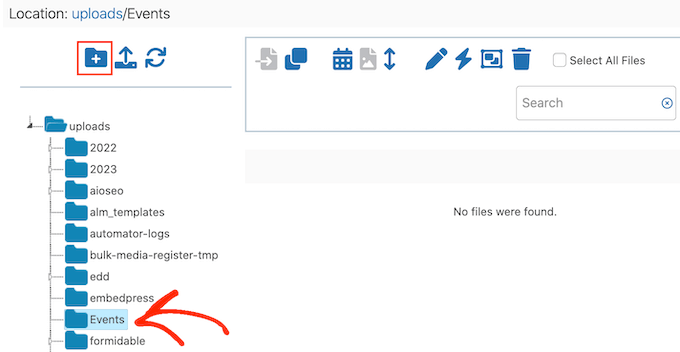
You can now give the subfolder a name and click on ‘Create Folder.’
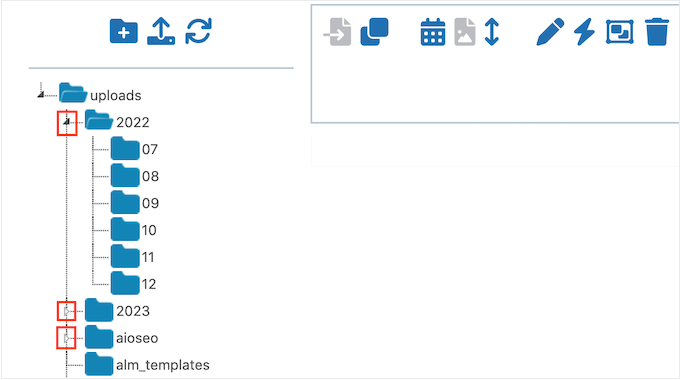
To see your folder structure, simply click on the small white arrow next to any parent folder.
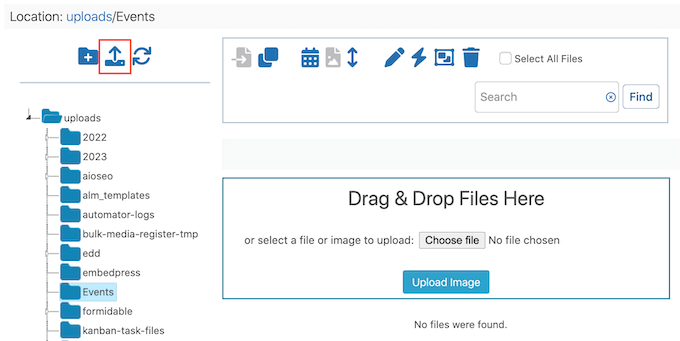
To add new files, click to select the specific folder where you want to store these items. Then click on the ‘Upload Files’ icon, which has an upward arrow.
You can now go ahead and upload as many files as you want.
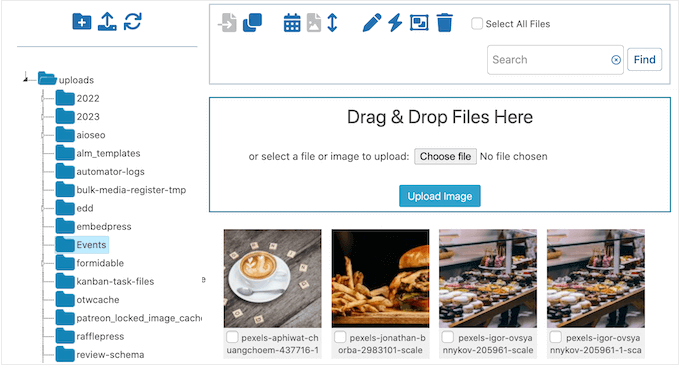
After a few moments, you’ll see a preview of all the files and their filenames on your WordPress blog.
You can now add these images to your WordPress posts, posts, or image galleries, just like any other files that you’ve uploaded to the media library.
How to Move and Copy Your Files in Media Library Folders
Sometimes, you may need to move an existing media file into a different location. With this plugin, you can either move the original file or create a copy in the new WordPress media library folder.
Moving an Image to a New Folder in the Media Library
To move an image or any other file, simply click on the ‘Move’ icon so that it turns blue. You’ll also see the following message: ‘Drag and drop is set for moving files.’
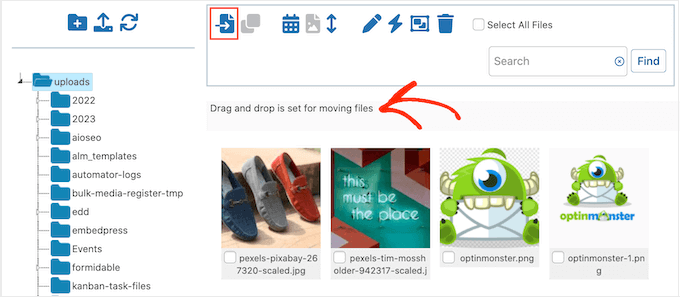
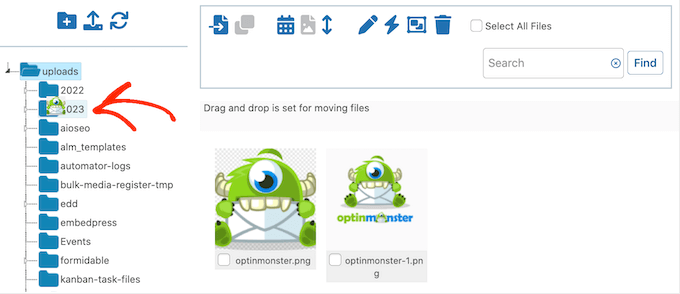
Now, find the image that you want to move and drag it to the new location.
Just before you release the file, the destination folder should be highlighted in blue. When you see this highlight, drop the file to move it to the new media folder in the sidebar.
Copying an Image to a Different Folder in the Media Library
Sometimes, you may want to create a copy of a file in a new location. For example, you may want to resize an image or do some basic image editing in WordPress, without affecting the original file.
If you prefer to copy the image then make sure you click on the ‘Copy’ icon so that it turns blue. It will also show the message: ‘Drag and drop is set for copying files.’
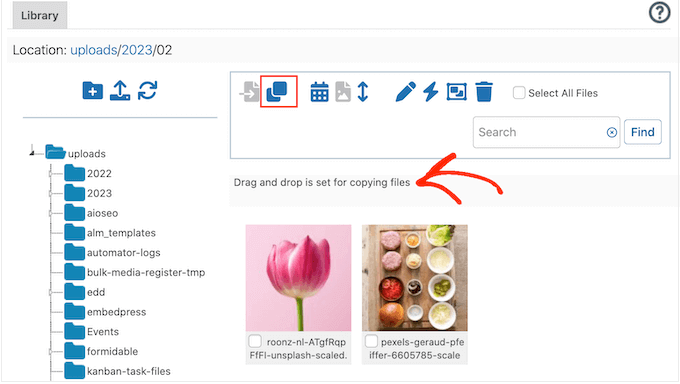
Now, find the image that you want to copy and drag it into the new destination folder. Just before releasing the file, make sure the folder is highlighted in blue.
Media Library Folders will now create a copy and add it to the new folder while keeping the original file in place.
How to Rename Files and Folders in Media Library Folders
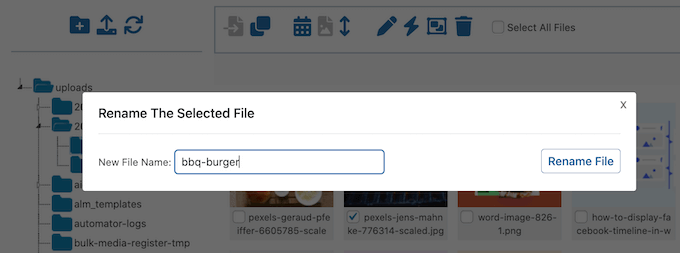
You can also change a file’s name using the Media Library Folders plugin. First, find the file that you want to change and click the checkbox below it. Next, click the ‘Rename a File’ button, which looks like a small pencil.
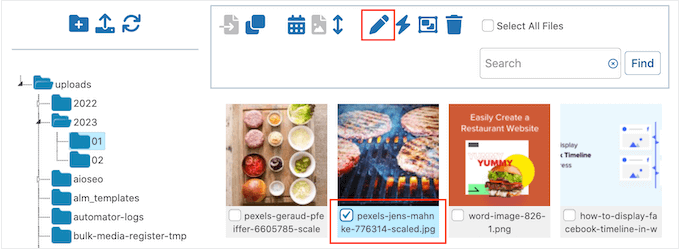
In the popup, type in the filename that you want to use. An SEO-friendly name can help optimize your images, so we recommend using keywords wherever possible.
To save the new name, click on the ‘Rename’ file button.
Just be aware that you can’t rename or move folders inside the Media Library Folders plugin. Instead, you’ll need to use a workaround where you create a new folder in the desired location, move all your files into it, and then delete the original folder.
When you’re ready to delete the folder, right-click on it and then select ‘Delete this folder?’
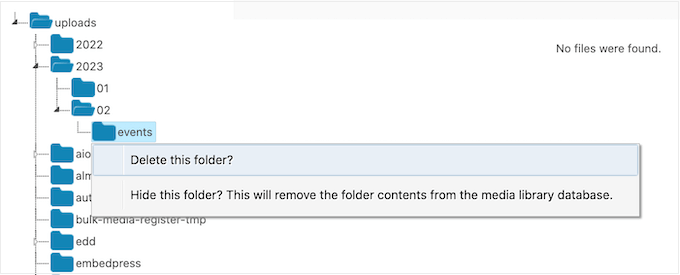
You’ll now see a message asking if you really want to delete the folder. To go ahead and permanently remove it, simply click on ‘OK.’
You can also use this trick to remove unwanted folders, and clean up the WordPress media library.
Sometimes, you may see the message ‘This folder is not empty and could not be deleted’ even though the folder looks empty. This usually happens because WordPress automatically creates additional versions of your images, which you still need to delete.
To see these images, simply click on the ‘Sync folder contents’ button.
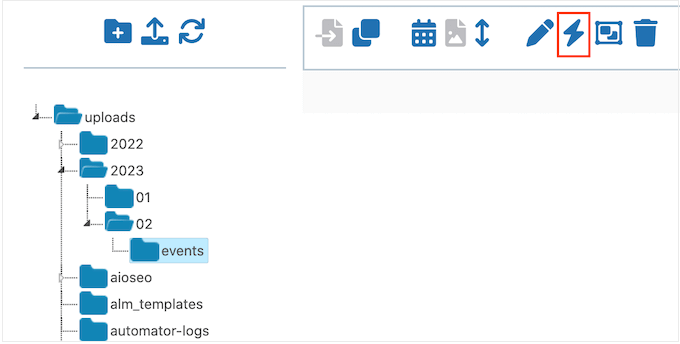
After this, you should see all the duplicate images. Simply delete these copies following the same process described above, and then try deleting the folder again.
For more image troubleshooting tips, see our guide on how to fix common image issues.
Learn More Ways to Optimize Your WordPress Media Library
Need more tips and tricks to manage your WordPress media files? Check out these guides below:
- How to Add Categories and Tags to WordPress Media Library
- How to Connect Google Drive to Your WordPress Media Library
- How to Change the Default Media Upload Location in WordPress
- How to Prevent Image Theft in WordPress
- How to Automatically Add Watermark to Images in WordPress
- Great WordPress Plugins for Managing Images (Updated)
We hope this article helped you learn how to organize WordPress files in media library folders. You might also want to check out our guide on how to optimize images for web performance, or see our expert pick of the best featured image plugins and tools.
If you liked this article, then please subscribe to our YouTube Channel for WordPress video tutorials. You can also find us on Twitter and Facebook.


Syed Balkhi says
Hey WPBeginner readers,
Did you know you can win exciting prizes by commenting on WPBeginner?
Every month, our top blog commenters will win HUGE rewards, including premium WordPress plugin licenses and cash prizes.
You can get more details about the contest from here.
Start sharing your thoughts below to stand a chance to win!
Paul Barrett says
Great article.
If I understand correctly, the folder name will get added to the media item’s URL. If I move existing images into folders, will that break all existing links to those files?
I have thousands of media items linked to in multiple places. Losing those links would be a disaster
TIA
WPBeginner Support says
The plugin does a search and replace for the instances of the image in your posts and pages to prevent the image from breaking
Admin
Dan Cochrane says
Hello!
Is it possible to make the folders viewable to the public? I have moved all my images into corresponding folders, but once I go to my gallery they do not display. My intention was to organize the images so that when a user visits our website they can look at each event separately. Is this possible and if so how?
WPBeginner Support says
Not at the moment, for what you’re wanting to do it would be better to look into image gallery plugins that allow albums like the plugin from our guide below
https://www.wpbeginner.com/plugins/how-to-create-a-photo-gallery-with-albums-in-wordpress/
Admin
Jiří Vaněk says
Thank you for the article. I have around 1200 articles on my website, and I never really focused on organizing media too much. I usually arranged images by their names and was always able to find them using keywords from the image title. However, as the website grows, I’ll have to start organizing media better. Thanks for the helpful advice.
WPBeginner Support says
You’re welcome, there is nothing wrong with continuing to go with the default organization method if it is working for you
Admin
Craig says
Can this be done without a plugin?
Thanks
Judith says
Hi, Thanks for the article, it’s something that bothered me since a long time without really realizing that it was a problem
My only question: if using this plugin does it physically create those folders in the backend and move the images to the correct location? And if so, does it then automatically relink my website pages where those images are used?
thanks!
Antony says
I tried it, and No, it’s just on the frontend for easy access and order.
Sorta like those “Folders” plugins that let you organize posts and other stuff.
You can manually move the files in your CPANEL, but it causes broken image links on your site, so a plugin is the only usable option that I know of.
Tristan says
Hi, the media folder access can be restricted by WordPress User or WordPress user role in the plugin WP Media Folder. Admin would still have access to all the media. This is pretty convenient for website with multiple editors
xavier says
is there a convenient way so that each user get access to a separate folder in the media gallery ?
WPBeginner Support says
We would recommend reaching out to the plugin’s support to see if that can be an option in the future.
Admin