Are you looking for a PublishPress review, to help you decide whether it’s the right publishing toolkit for you?
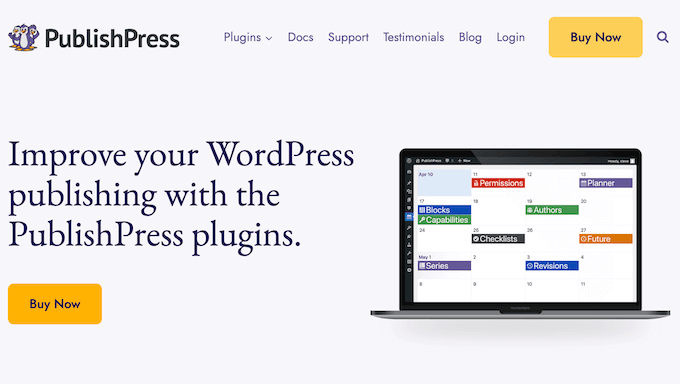
PublishPress is a suite of 10 premium plugins that aim to streamline every step of the editorial process. They can help you create a content calendar, manage multiple authors, schedule post updates, create custom blog statuses, and more.
In this PublishPress review, we’ll take a closer look at this popular publishing toolkit, to see whether it’s right for your WordPress website.
PublishPress Review: Why Use It in WordPress?
PublishPress is a popular publishing suite that’s designed to improve your blog’s editorial workflow. It covers the entire process, from planning your content right through to updating previously-published blogs.
With this suite, you can add editorial calendars and author profiles to WordPress, create profiles for guests authors, set up custom notifications for editors and site admins, and much more.
You can also create blog checklists that will scan for missing content, or areas the author can optimize. For example, it can remind authors to add image alt text, or upload a featured image.
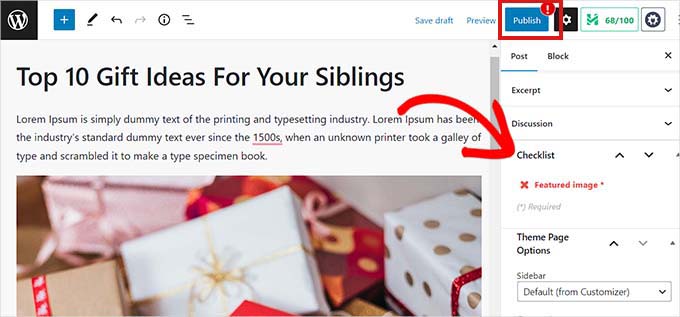
In this way, PublishPress can improve the quality of the content that’s submitted by guest bloggers and other contributors. This can save your editors and site admins a ton of time, while making sure all published content meets your standards and guidelines.
As the author completes each task, the blog checklist will update to reflect those changes. Once they’ve checked off every task, the author can go ahead and submit their work for review.
Going further, WordPress comes with a few built-in status options, such as ‘Draft’ and ‘Published.’ With PublishPress, you can add extra statuses like ‘Pending Review’ and ‘Needs Edits’ so that WordPress better matches your unique editorial workflow.
If you’re just getting started or have a limited budget, then there’s a lite version of every PublishPress plugin. You can download these plugins from the official WordPress repository and use them for free.
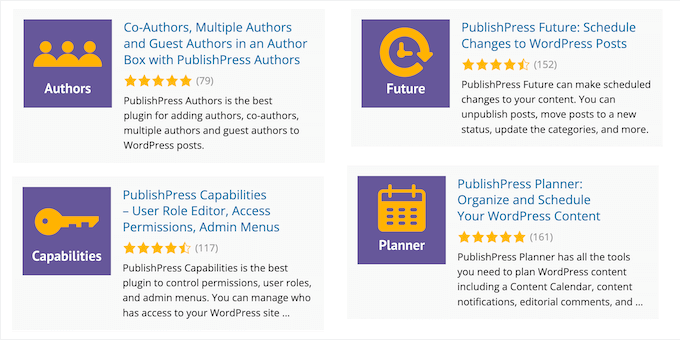
However, if you want access to all the features mentioned in this article, then you’ll need to buy a PublishPress plan. These plans include the premium version of all the PublishPress plugins including Checklists, Permissions, Planner, and Revisions.
PublishPress Review: The Right Publishing Toolkit for You?
No matter whether you’re an experienced blogger or just getting started, most WordPress blog owners can benefit from some extra editorial tools and features.
This can help you plan and schedule your posts in advance, and manage all your posts and authors no matter how big your website gets. With that said, let’s see if PublishPress is the right publishing toolkit for you.
Since PublishPress is a suite of plugins, we’ll look at each plugin in turn.
1. PublishPress Permissions
Do you run a multi-author WordPress blog, accept guest posts, or share your dashboard with other people?
In WordPress, there are five default user roles that have their own permissions. However, you may want to go further and control exactly which posts, pages, and custom post types these roles can access.
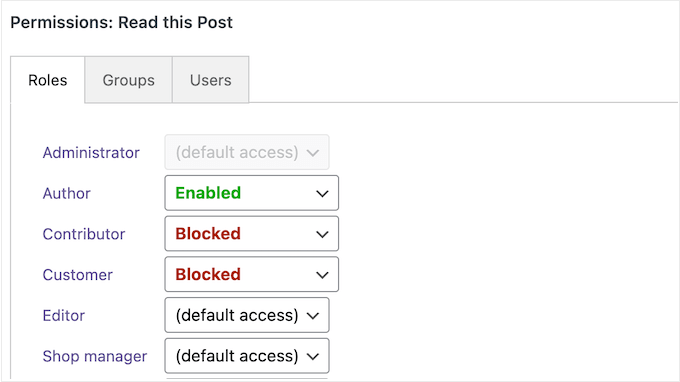
To start, PublishPress Permissions lets you create unique rules for a specific piece of content. Simply open that content in the WordPress block editor, and you’ll find a new ‘Permissions’ meta box. Here, you can choose the user roles that can read or edit this content.
Another option is creating permission groups.
In this way, you can give multiple user roles access to a particular content type. For example, you might create a ‘Tutorial’ group that can create, edit, and delete all posts that have the ‘Tutorial’ category or tag.
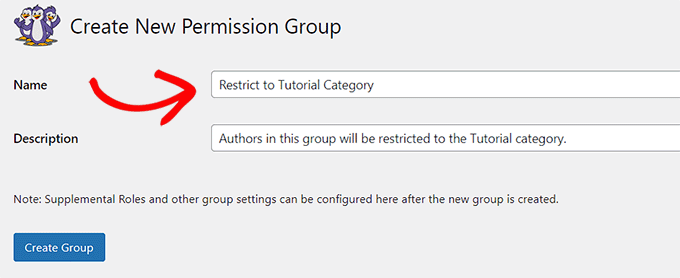
With that done, you can start assigning people to this permission group.
Beyond that, you can decide who can edit and view files in your media library, and even show snippets of restricted content to visitors. This can be useful if you run a membership site, as it encourages non-members to upgrade, in order to see the full version.
2. PublishPress Capabilities
As already mentioned, WordPress comes with built-in user roles that have their own capabilities. However, you may want to add and remove capabilities from a specific role. For example, you might give contributors permission to edit their own posts after being approved.
That’s where PublishPress Capabilities come in. This plugin adds a ‘Role Capabilities’ page, where you can customize the different user roles.
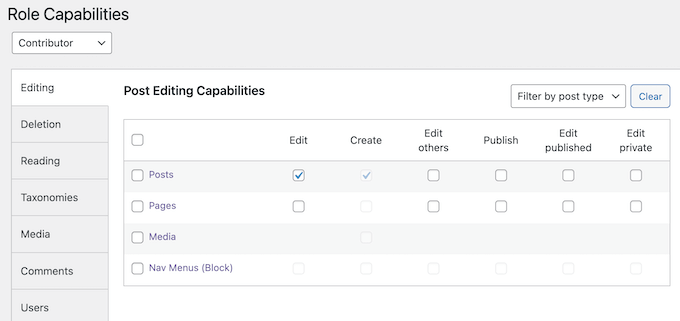
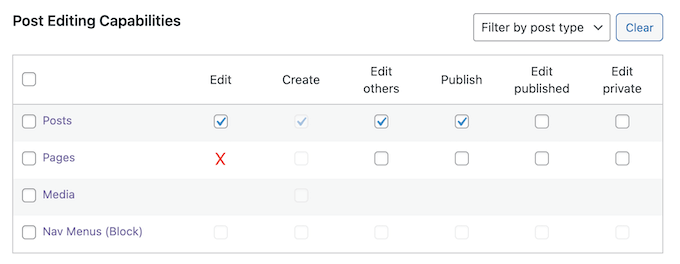
To get started, simply select the role in question. Then, check each capability you want to give to that user role.
To remove a capability, simply uncheck its box.
Do you run an online store?
PublishPress Capabilities integrates with WooCommerce, so you can set unique permissions for your products, orders, WooCommerce coupons, and WooCommerce taxonomies.
In addition, you can copy an existing user role, or create an entirely new role. If you run a WordPress multisite network, then you can apply these changes to a single website or sync them across an entire network.
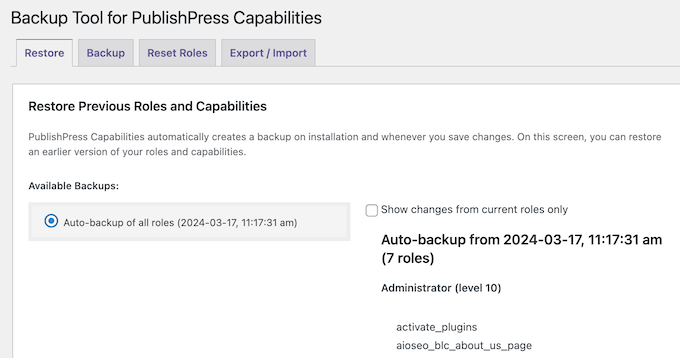
Each time you edit the site’s capabilities, PublishPress creates a backup automatically. This makes it easy to undo your changes, if you make a mistake.
3. PublishPress Planner
With WordPress, you can schedule your posts to go live at a future date and time.
The downside is that you need to open each post separately and schedule it inside the WordPress content editor. This can take time, especially if you’re scheduling lots of posts. WordPress also doesn’t have a content calendar, which can make it difficult to plan your content.
That’s where PublishPress Planner comes in.
Unlike external tools like Google Calendar and Asana, PublishPress adds an editorial calendar to the WordPress dashboard. This makes it easy to organize your content by showing all the scheduled posts across your entire WordPress website.
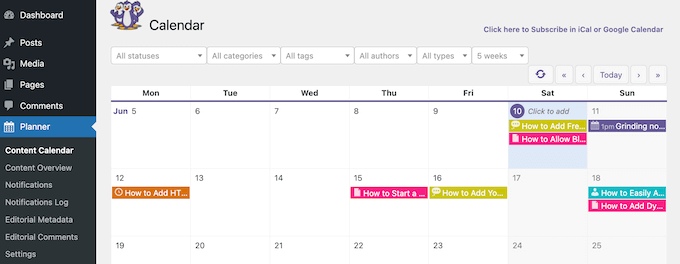
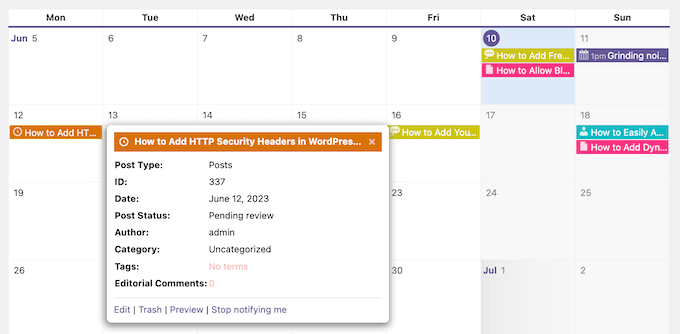
To learn more about a particular blog post, simply give it a click.
This opens a popup where you can see the post type, categories and tags, the post author, and other important information.
Do you need to share this schedule with people who don’t have access to the WordPress dashboard? Creating user accounts simply to show people a calendar, is bad for WordPress security. Instead, PublishPress has a Content Overview screen that shows a printable overview of your schedule.
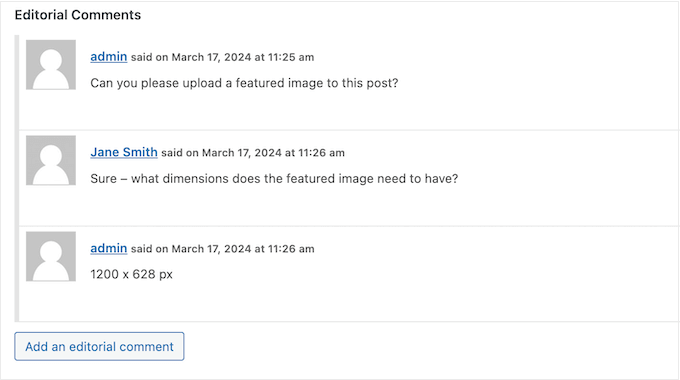
Beyond the calendar, PublishPress Planner allows editors to post comments and feedback on individual posts.
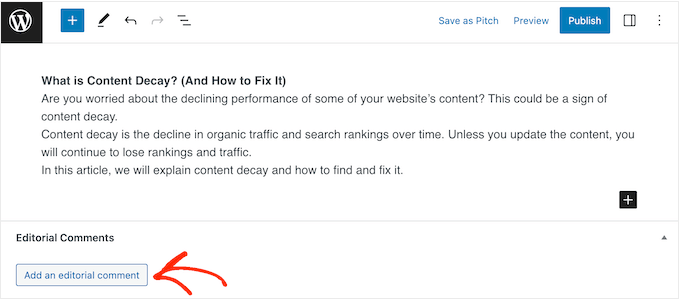
They can also upload files. For example, an editor might upload a PDF file containing some extra resources the author should use for this post.
After posting a comment, the author can respond to it. This allows your content team to discuss an article directly in the WordPress dashboard, and without having to use external communication tools.
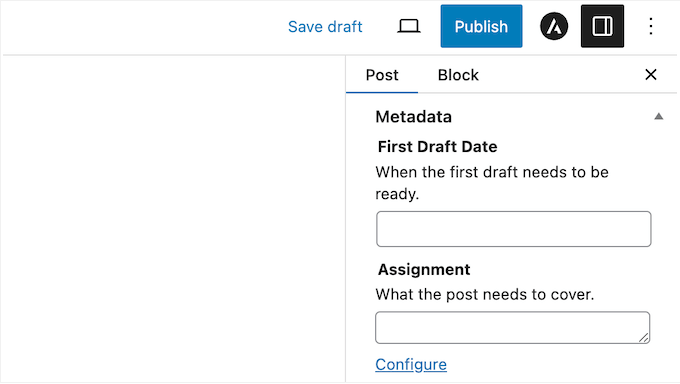
PublishPress Planner also adds some extra metadata fields to your posts, so editors and authors can share information.
By default, it adds ‘First Draft Date’ and ‘Assignment’ fields to the WordPress content editor, but you can also create custom fields in the plugin’s settings.
By default, PublishPress Planner emails the site administrator every time it publishes a scheduled post, or someone posts a new editorial comment.
However, you can easily configure the plugin to send these notification to the post’s author, too.
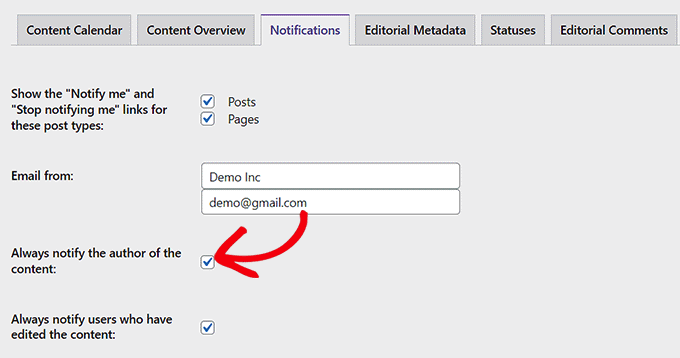
In addition, you can notify the editor by checking the ‘Always notify users who have edited the content’ option.
Beyond that, you can create additional notifications and then schedule them based on the post’s publication date. For example, you might send a notification 1 day before a post is scheduled. This can remind other team members to prepare their social media posts, email newsletters, and other marketing activities, ready for when the post goes live.
When creating a notification, you can use a mix of static text and shortcodes.
Every time it creates an email, PublishPress will replace these shortcodes with real values. For example, you might include the author’s name and a link to the blog post that’s waiting for review.
Pro Tip: If you use notification emails, then you’ll want to make sure those messages arrive safely in the user’s inbox, and not in the spam folder. With that in mind, we recommend using an SMTP service provider to improve your email deliverability rates.
If you prefer, then PublishPress Planner can send its notifications to a Slack channel instead. This is a great way to update entire teams in real time.
4. PublishPress Revisions
By default, WordPress allows you to schedule posts to be published at a specific time.
However, you can’t schedule an update for a page or post that’s already live. For example, if you run a business website, then you may want to update a landing page with the latest special offers or promotions.
Instead of making these changes and publishing them straight away, you can use PublishPress Revisions to schedule content updates in advance. After installing and activating PublishPress, you’ll see a ‘New Revision’ link next to each page and post.

This option creates a draft of the original post, ready for you to edit. For example, you might add your latest WooCommerce promotion, or change the prize for your monthly WordPress giveaway.
With that done, you can set the date and time when this draft will replace the current live version.
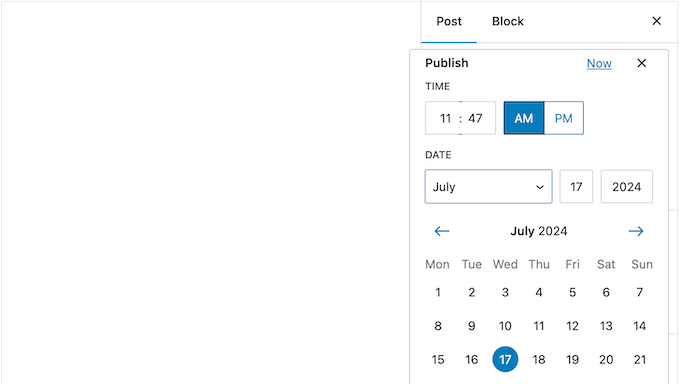
You can either schedule the update, or submit it for approval by an Editor or site admin.
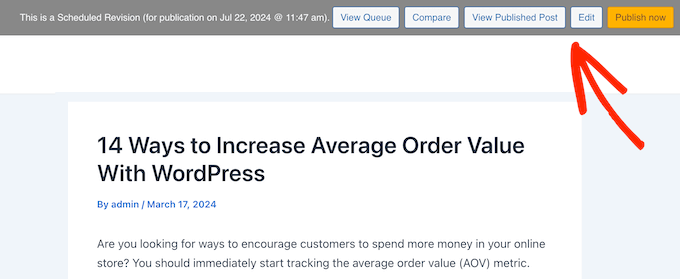
Once the revision is scheduled, you’ll see a notification bar with the date and time when the draft will go live. The notification bar also includes shortcuts for different actions, such as editing the draft, or comparing the two versions.
To help manage your scheduled updates, PublishPress comes with a Revision Queue page.
Here, you’ll see all your scheduled updates, complete with their release dates.
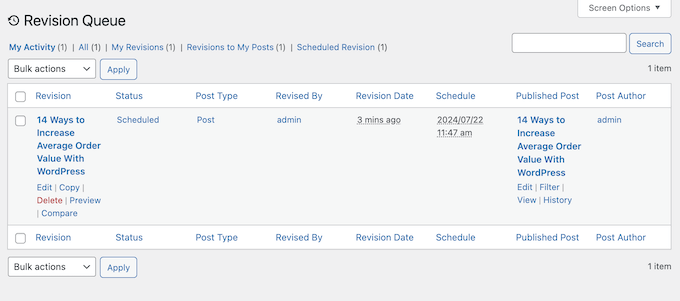
Beyond that, PublishPress Revision integrates with many popular WordPress plugins and tools you may already be using.
If you’re using a page builder, then you can create revisions for content that was built using the Divi theme or Beaver Builder.
You can also add revisions for multi-language sites created using WPML. Even better, WPML’s language filters work perfectly with the Revision Queue, so you can filter content based on language and easily find the revision you need.
5. PublishPress Checklist
A blog checklist can help make your posts the best they can possibly be.
They’re also a great tool for managing guest bloggers, as they can encourage everyone to write in the same style. Checklists can also remind writers to add categories and tags, optimize their post for the search engines, and perform other important tasks.
With that said, PublishPress can add a checklist to the WordPress block editor. Even better, it will detect when the author completes each task and check them off automatically.
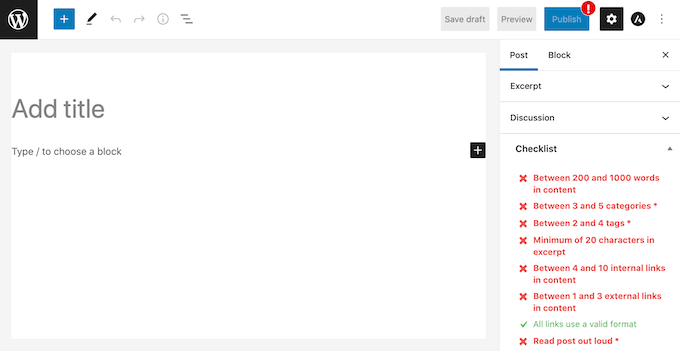
PublishPress Checklists also integrates with OpenAI so it can scan your articles for the correct grammar and spelling, and the right tone.
PublishPress has a list of ready-made tasks that you can add to your checklists, or you can create custom tasks. The only downside is that PublishPress can’t check whether the author has completed these custom tasks.

When adding tasks to a checklist, you can mark them as required or recommended.
If a task is ‘Required,’ then the author cannot publish their post without completing this task.
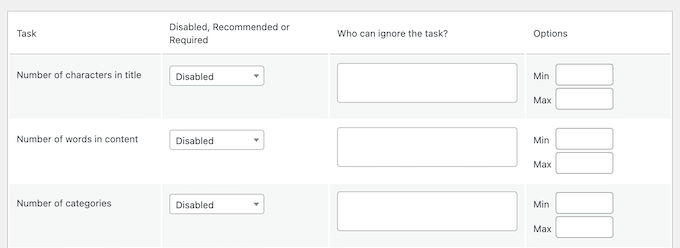
In fact, if the user clicks ‘Publish’ without completing all ‘Required’ tasks, then they’ll get an error.
They’ll need to fix this problem, before publishing the post.

When it comes to ‘Recommended’ tasks, the editor will encourage authors to perform the related action or upload the missing content, before publishing.
However, the author can choose to ignore the warning, and publish the post regardless.
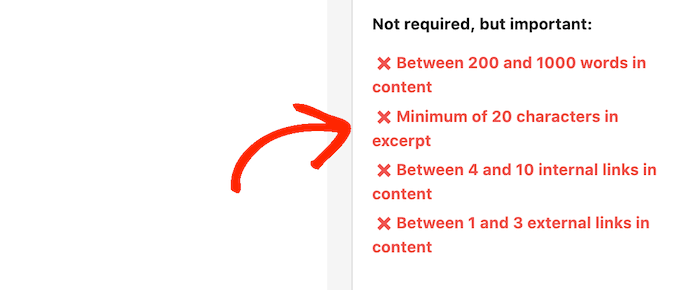
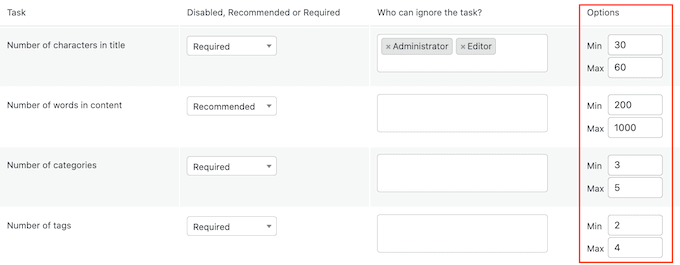
You can also set a maximum and minimum value for certain tasks.
For example, research suggests that longer content tends to rank higher in the search results. With that said, PublishPress Checklists can enforce a minimum word count, which may boost your WordPress SEO and get more traffic for your blog.
Do you run a WooCommerce store?
With PublishPress, you can create checklists for your WooCommerce products. In fact, you can define over 20 requirements that a product must meet before going live on your online marketplace or store.
6. PublishPress Authors
If you run a multi-author WordPress site, then you may want to add an author info box to your posts. In that case, PublishPress Authors allows you to create detailed author profiles.
By default, these info boxes show the person’s first and last name, email address, and website. However, you can customize these fields or even add completely new author fields.
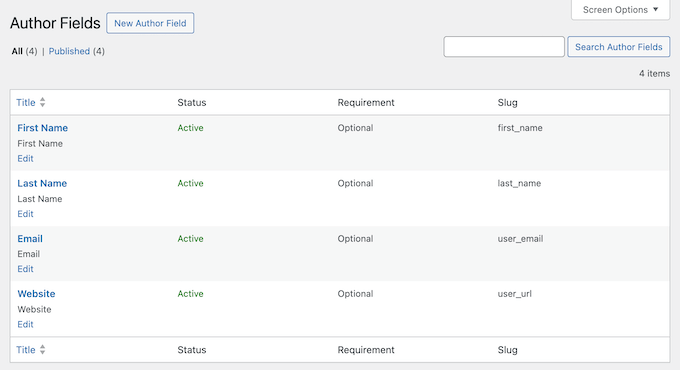
That done, PublishPress adds a new area where authors can create and edit their profiles.
Site admins can also update an author’s profile. For example, you might upload a new author photo if the current image isn’t a good fit for your WordPress website.

Do you accept guest posts?
With this plugin, you can create profiles for guest authors without giving them access to your WordPress dashboard.
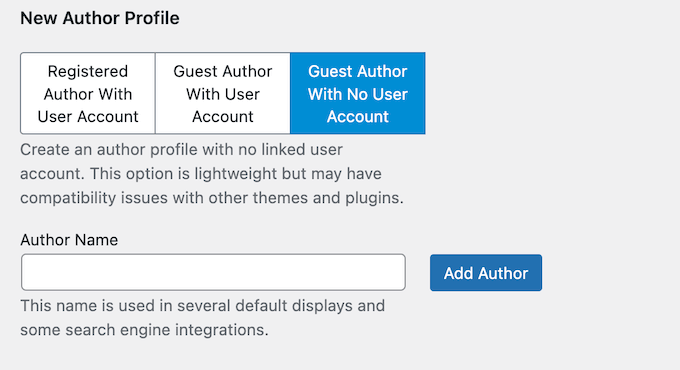
Even better, PublishPress Authors can organize your writers into categories, such as Guest Bloggers and Reviewers.
After creating your author profiles, you can customize how they look on your WordPress website. For example you can choose between various pre-built layouts.
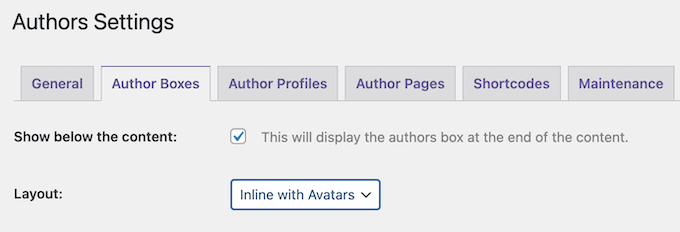
By default, WordPress only allows you to add a single author per post.
PublishPress removes this limit so you can add multiple authors to the same article. Simple select each author in the WordPress content editor.
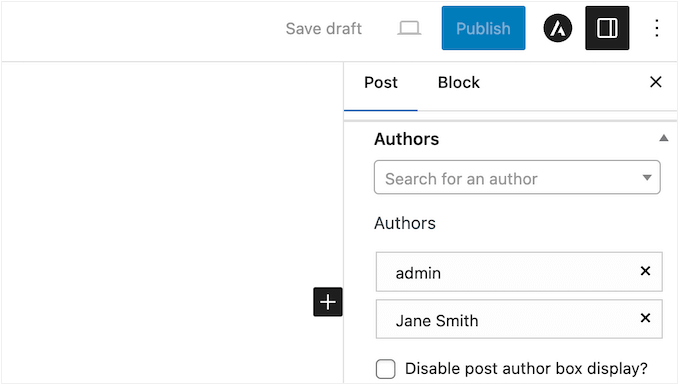
Alternatively, you can add an author box to any page, post, or widget-ready area using a shortcode that PublishPress creates automatically.
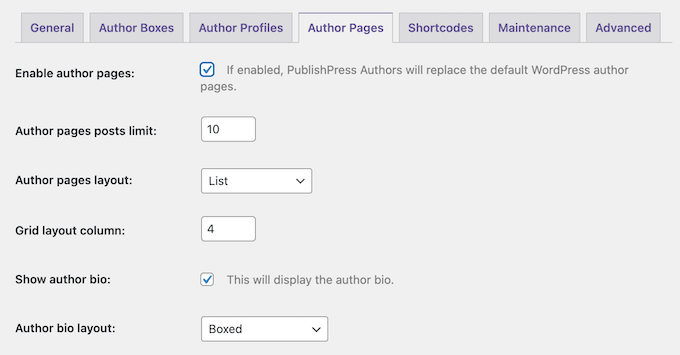
Finally, you may want to replace the default WordPress author profile pages with PublishPress pages. Unlike the built-in designs, the PublishPress pages are fully customizable so you can choose what information to include.
7. PublishPress Future
Sometimes, you may want to change a post’s status. For example, when an event such as a promotion, giveaway, or sale ends you might move the related announcement post into an ‘Archived’ category.
With PublishPress Future, you can schedule changes to posts, pages and custom post types, including popular WooCommerce products and LearnDash courses.
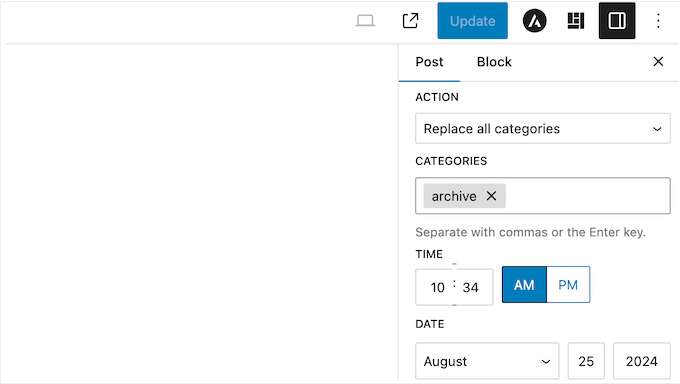
You can choose the date and time when you want the post to expire, directly inside the WordPress content editor.
You can also set the action that PublishPress Future will perform when expiring the post. For example, you might send the post to draft, change its category, add a new category, make it sticky, or even delete the content completely.
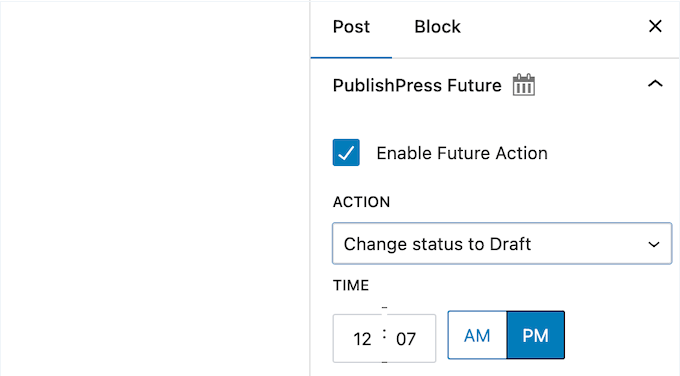
This can save you a ton of time and effort, while making sure the change happens at exactly the right time.
In addition, you may want to let visitors know about the post’s expiration date. This encourages them to a read the post, sign up for its coupon code, complete the form, or perform some other task before that content is gone forever. In this way, you can use FOMO to achieve your goals.
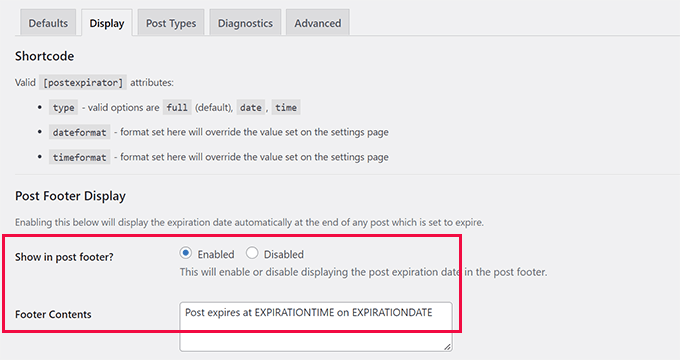
If you need to change your schedule at any point, then PublishPress integrates with the WordPress ‘Bulk Edit’ and ‘Quit Edit’ features.
This means you can quickly add actions or change the expiration date for multiple posts.
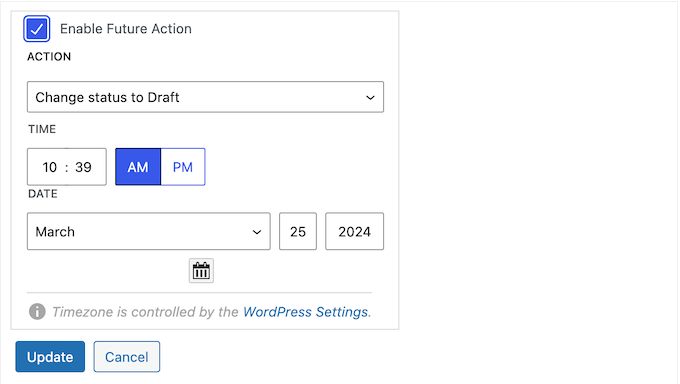
As you can see, with PublishPress Future you can create simple automated workflows. However, it’s still a good idea to monitor what’s happening on your website.
With that said, PublishPress Future can send an email every time it updates your content.
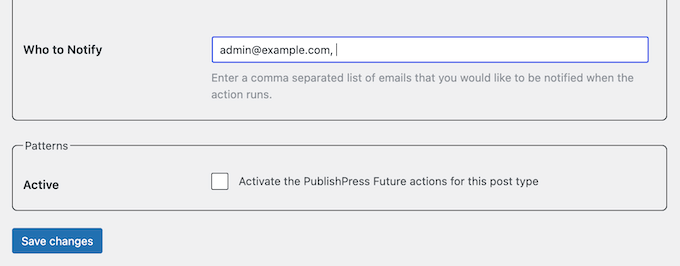
It also maintains a log of all the changes it makes to your content. You can check this record at any time, directly in the WordPress dashboard.
8. PublishPress Blocks
PublishPress Blocks is a powerful block library that comes with 24 additional layout options, sliders, buttons, icons, image galleries, maps, tabs, testimonials, accordions, and more.
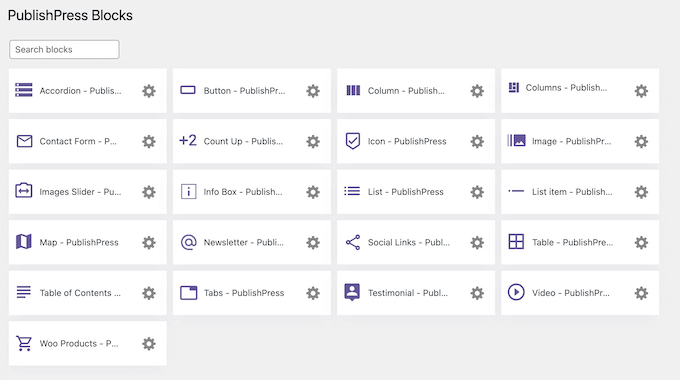
It also has a Content Display block that can arrange your posts, pages, and custom post types in a nicely organized layout.
Even better, you can filter this content based on factors such as the author, category, and tag. In this way, you can display lists of curated content.
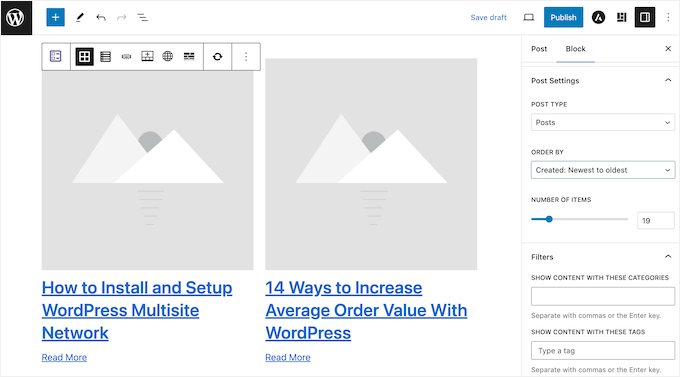
PublishPress Blocks even supports WooCommerce so you can show your latest products with ease. Similar to the PublishPress Content Display block, you can filter these products based on factors such as category, status, and order.
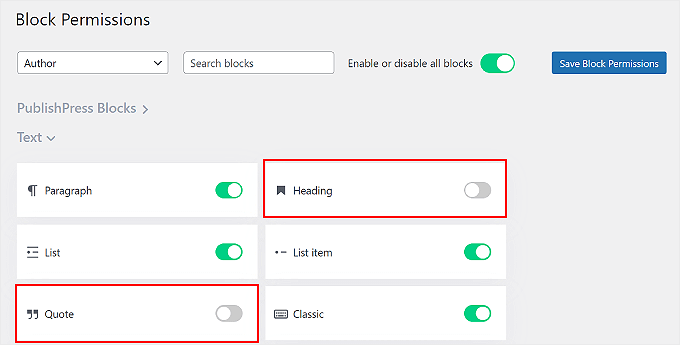
Beyond that, you can control who has access to certain blocks. For example, you might disable the ‘Classic’ block for all guest bloggers, to stop them from using it.
To hide blocks from specific users, simply select the role in question and then either enable or disable each block.
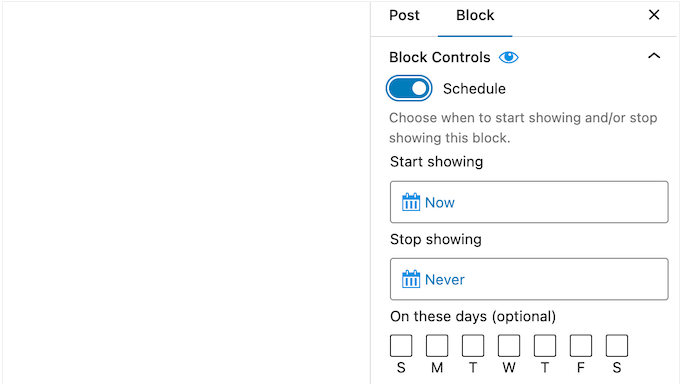
You can also schedule your blocks, so people see different content depending on when they visit your website.
For example, you might show a different call to action button based on the time of day, or automatically remove a website banner once the promotion has ended.
For more advanced users, you can create custom CSS styles for your blocks and make them available to your users.
9. PublishPress Series
Do you run an online magazine, comic, newspaper, or similar publication?
PublishPress Series can organize your posts and custom post types into issues. For example, you might group related tutorials together or arrange articles into a monthly online magazine.
You can create as many series as you want, and even organize those series into categories. This is similar to how the built-in categories and subcategories work in WordPress.
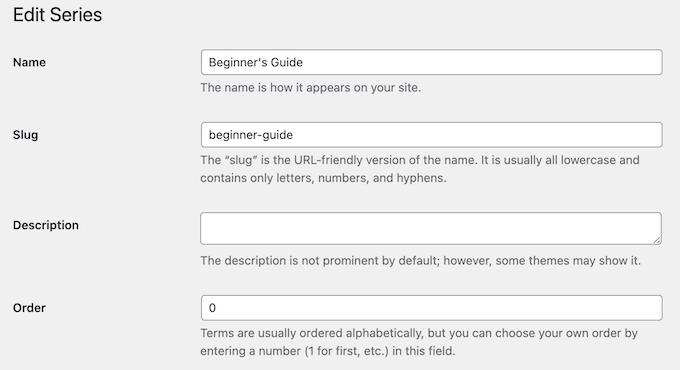
That done, you can add posts to each series, simply by checking a box in the WordPress editor.
You can even add a new post into the middle of an existing series, and PublishPress will adjust the order.
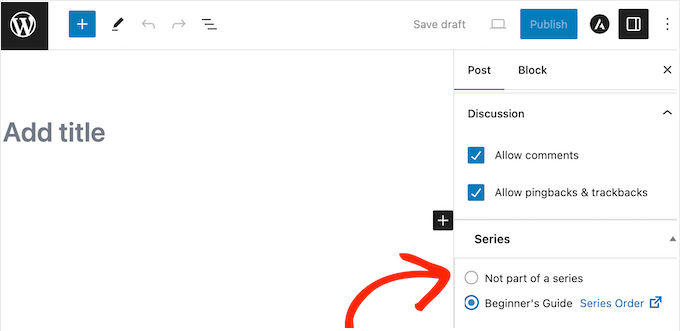
If you upgrade to the premium plugin, then you can add the same post to multiple series.
With that done, PublishPress will display some information about the series, at the top of each blog post.
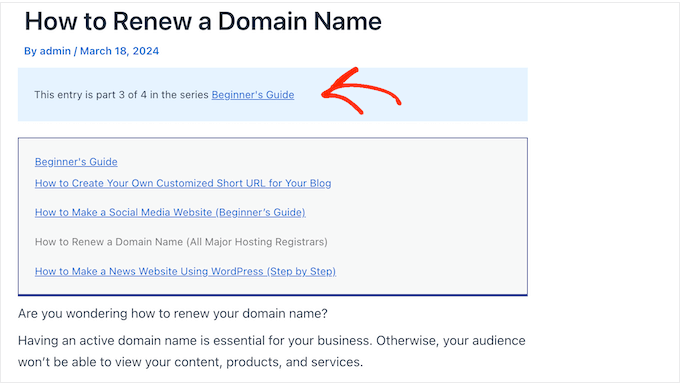
This can encourage readers to check out more of your content, which may increase your pageviews and reduce your bounce rate.
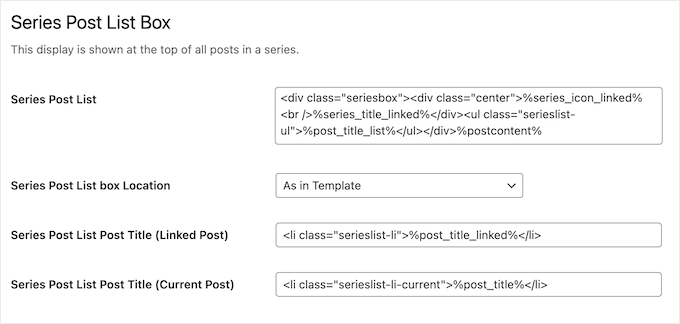
You can also add the series info boxes to any page, post, or widget-ready area using shortcodes that PublishPress creates automatically. This is a great way to promote the different series across your entire WordPress website.
Even better, you can customize how these info boxes look, by visiting the PublishPress settings.
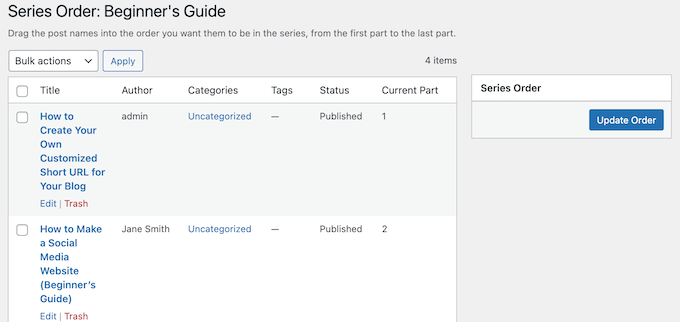
To help organize your content, PublishPress provides a central location where you can see all the posts in a particular series.
Here, you can schedule, publish, or unpublish each post in a series, or change their order.
10. PublishPress Statuses
Post statuses organize your articles based on where they are in the editorial workflow, such as ‘Draft’ or ‘Published.’ This helps you manage your own posts, and even blogs submitted by guest authors and other users.
By default, WordPress has 8 blog post statuses, but you may want to create some custom statuses too. For example, you might use ‘Pitch’ to describe blog ideas submitted by potential guest contributors.
PublishPress Statuses lets you add custom post statuses to your WordPress website. You can then use them in exactly the same way as the built-in WordPress statuses.
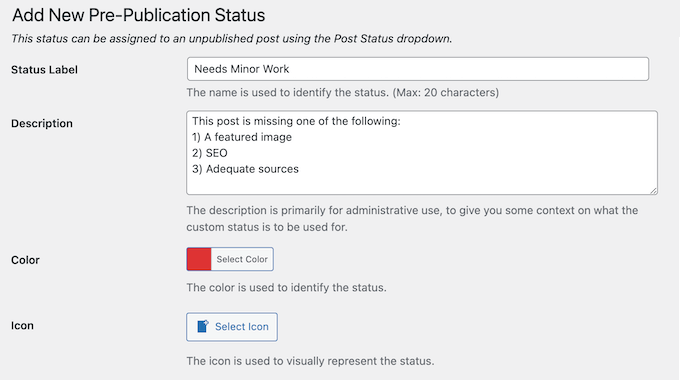
Out-of-the-box, WordPress has a pre-publication workflow that every post follows, from ‘Draft’ right through to ‘Approved.’
With PublishPress, you can change this default workflow by adding and removing statuses, or rearranging them to better represent the way you work.
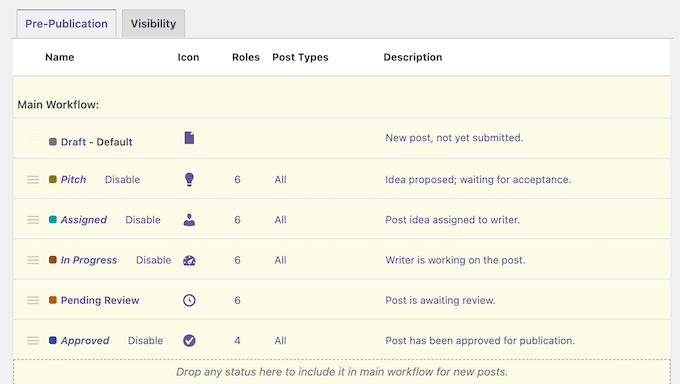
Going one step further, you can create branching workflows by adding alternative states such as Deferred, or Rejected.
After perfecting your workflow, you may want to restrict who can assign each status. You can also limit who can see, edit, and delete posts that have a particular status.
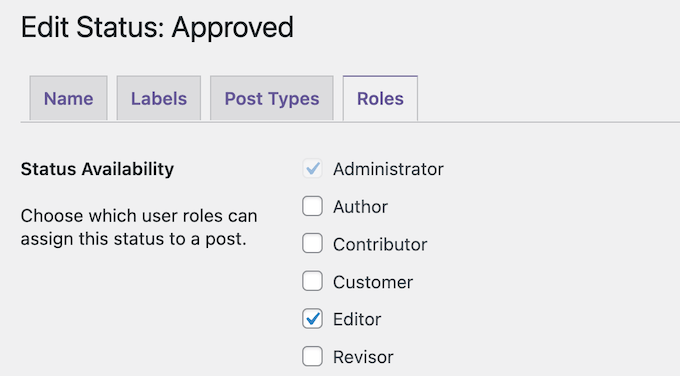
By using this PublishPress plugin carefully, you can improve your workflow and avoid misunderstandings, no matter how big your business grows.
11. Community and Professional Support
PublishPress is a complete publishing toolkit for all kinds of websites, ranging from multi-author blogs, to online magazines, and small business sites.
No matter how you plan to use this plugin suite, at some point you may need additional help. To start, PublishPress has detailed documentation covering each separate plugin.
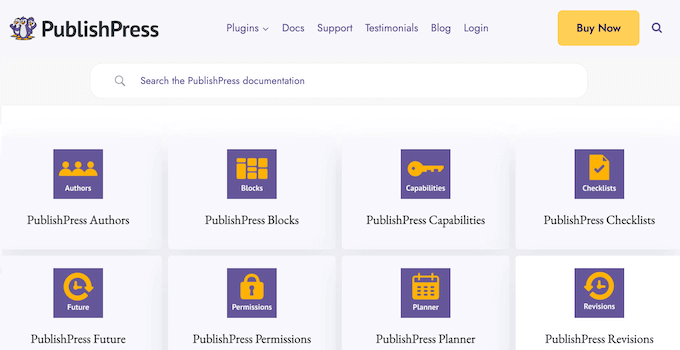
There’s also a PublishPress blog where they explore a range of topics. Here, you’ll find guides on how to fix common WordPress errors you may encounter when using the PublishPress plugins, right through to advice on how to write a great blog post.
If you upgrade to a premium plan, then you’ll also get access to professional support. Simply submit a ticket and a member of the PublishPress support team will aim to respond within 24 hours, Monday-Friday.
For more on this topic, see our guide on how to properly ask for WordPress support and get it.
PublishPress Review: Pricing and Plans
If you’re just getting started or have a limited budget, then you can download a lite version of each PublishPress plugin. However, if you want to use all the features mentioned in this review, then you’ll need to buy a PublishPress license.
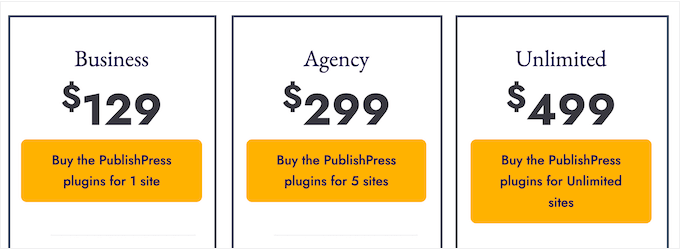
There are 3 plans to choose from, and each plan includes all the premium PublishPress plugins. With that said, your perfect plan will vary depending on the number of sites where you want to use PublishPress:
- Business. For $129 per year, you can use the PublishPress plugins on a single website.
- Agency. Priced at $299, Agency allows you to install PublishPress on up to 5 websites. With that in mind, it’s a good option for WordPress developers and smaller agencies. It may also be a good fit if you own several sites, such as multiple affiliate marketing blogs.
- Unlimited. For $499, you can use the PublishPress plugins on as many websites as you want. With that said, we recommend this plan for larger WordPress development agencies. You can simply buy a single license and then use the PublishPress suite across all your client sites.
PublishPress Review: The Right Publishing Toolkit for You?
With PublishPress, you can improve your editorial workflow by creating a content calendar, scheduling post and page revisions, customizing your author permissions and capabilities, and much more.
You can download the PublishPress lite plugins from WordPress.org. However, you’ll need a premium plan to access the more advanced features.
The best premium plan for you will vary based on how many sites you own or manage. If you run a single blog, website, or online marketplace, then we recommend the Business plan.
However, if you need to use PublishPress on multiple websites, then Agency raises this limit to 5 sites, while Unlimited lets you use PublishPress on as many sites as you want.
We hope this PublishPress review helped you decide whether it’s the right publishing toolkit for your WordPress website. You can also check out our guide on how to make money online blogging, or see our expert pick of the best SEO plugins and tools.
If you liked this article, then please subscribe to our YouTube Channel for WordPress video tutorials. You can also find us on Twitter and Facebook.


Syed Balkhi says
Hey WPBeginner readers,
Did you know you can win exciting prizes by commenting on WPBeginner?
Every month, our top blog commenters will win HUGE rewards, including premium WordPress plugin licenses and cash prizes.
You can get more details about the contest from here.
Start sharing your thoughts below to stand a chance to win!