WordPress offers several ways to create lists in your posts and pages. But we’ve also found some great plugins that can help you create more visually appealing and customized lists. This is great for making your content more engaging and easier to read.
Lists are also a great way to share step-by-step instructions or complicated data with your visitors. Sometimes, search engines may even give higher ranking to pages that use lists.
In this article, we will show you how to easily add bullet points and numbered lists in WordPress using various methods, from the built-in editor to advanced plugins.
When to Add Bullet Points and Numbered Lists in WordPress
Instead of showing visitors a wall of text, it’s a good idea to break your content into scannable sections. There are lots of ways to make your pages more reader-friendly, including creating tables, using subheadings, adding videos, and creating lists.
A list can help visitors understand your content at a glance (like in a table of contents), even if you are sharing complicated information. This can improve the user experience and keep people on your WordPress website for longer.
With that in mind, let’s see how you can add bullet points and numbered lists in WordPress. Simply use the quick links below to jump straight to the method you want to use:
Method 1: Using the Built-in WordPress List Block (Easy)
The easiest way to add bullet points and numbered lists is by using the List block and the WordPress Gutenberg block editor.
This allows you to create simple numbered or bullet lists without installing a separate WordPress plugin. That said, this default block only has a few customization options.
If you want to fine-tune your lists with custom icons, horizontal layouts, different colors, and more, then we recommend using one of the other methods in this article.
To get started, simply open the block editor for the WordPress post or page where you want to add a list. Or, you can open the widget editor to add the bullet list to a widget area, like a sidebar.
You can then choose whether to create a bullet point or a numbered list.
How to Create a Bullet Point List in WordPress
To create a bullet point list, click on the ‘+’ icon to add a new WordPress block.
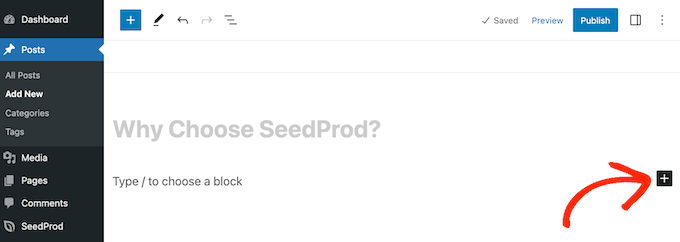
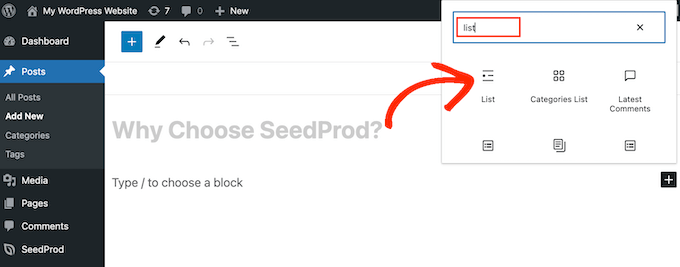
In the popup that appears, type in ‘List.’
When the right block shows up, click to add it to the page.
This creates the first item in a bullet point list. Simply type in the text you want to use for the first list item.
With that done, press the ‘Enter’ key on your keyboard to move to the next line. WordPress will create the second bullet point automatically.
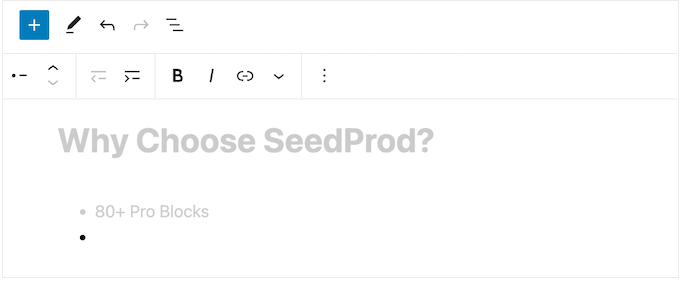
You can now go ahead and type in the text you want to use for the second bullet point. Simply repeat these steps to add more items to the list.
If you want to create a nested list, then click the ‘Indent’ button. This moves the cursor one step to the right, ready for you to type in the indented text.
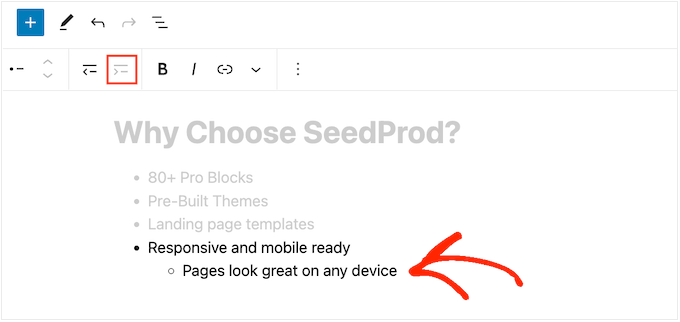
You can click on the ‘Indent’ button again to create two levels of nested bullet points.
As you can see in the following image, each level uses a different icon.

To decrease the indent, click on the ‘Outdent’ button.
This moves the cursor one step to the left, ready for you to start typing.
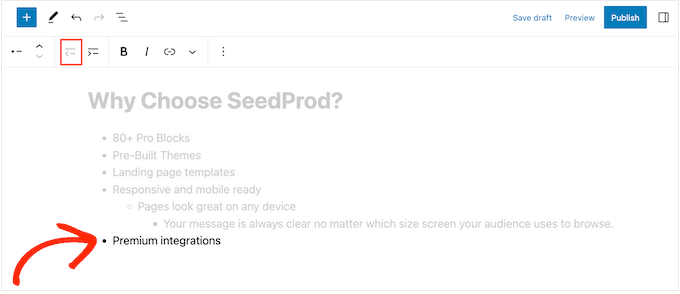
By pressing the ‘Indent’ and ‘Outdent’ buttons, you can create nested lists with multiple different levels.
By default, the WordPress block editor will use the ‘Medium’ font size, but you can switch between small, large, and extra large using the ‘Typography’ settings in the right-hand block options.
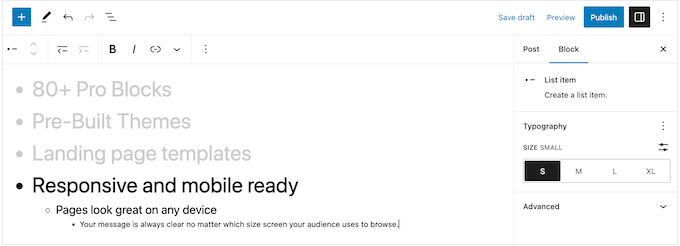
You can also add links or use standard text formatting options, such as bold and italic. This makes your lists even easier to scan and understand at a glance.
How to Create a Numbered List in WordPress
To create a numbered list in WordPress, simply press the ‘1’ key on your keyboard followed by a period/full stop (.)
WordPress will automatically turn this text into the first item in a numbered list.
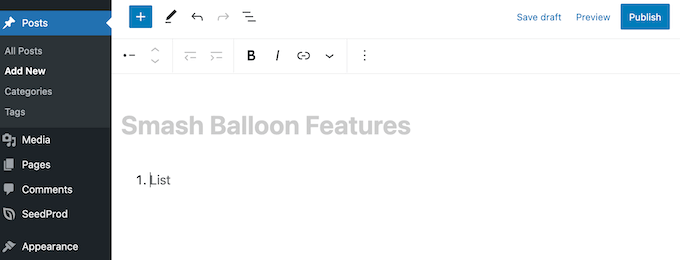
You’re now ready to type the first item in the numbered list.
After that, just press the ‘Return’ key on your keyboard, and WordPress will create the next numbered point automatically.
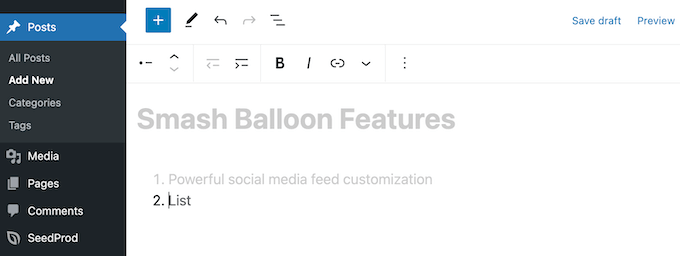
Just like with bullet points, you can create nested lists by clicking on the ‘Indent’ and ‘Outdent’ buttons.
This creates an indented bullet point underneath the numbered bullet point.
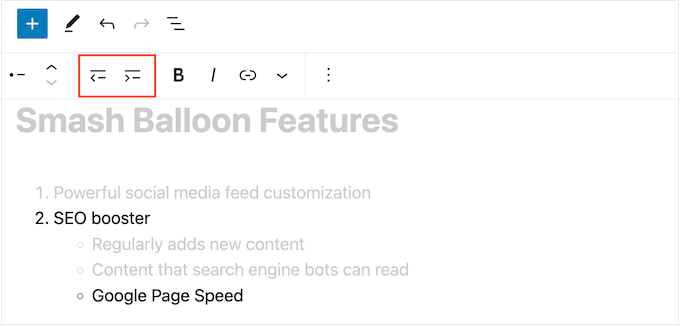
Unlike bullet point lists, you can only use a single level of indenting.
When you are happy with how the list looks, simply click on the ‘Update’ or ‘Publish’ button to make it live on your WordPress website.
Method 2: Using Shortcodes Ultimate (Lists With Custom Icons)
The built-in List block is perfect for creating text-based lists, but sometimes, you may want to create a list with custom icons. This way, you can make your lists more visually appealing and better suited to your content theme.
The easiest way to do this is by using Shortcodes Ultimate. This plugin allows you to create lists with custom icons using simple shortcodes.
For this, we will use the free version of the plugin as it’s already enough for this method. But if you want more advanced features, you can upgrade to a paid plan.
To use Shortcodes Ultimate, go ahead and install the WordPress plugin in your admin area. After that, create a new post or edit an existing one in the block editor.
Now, click the ‘+’ button anywhere on the page and select the ‘Shortcode’ block.
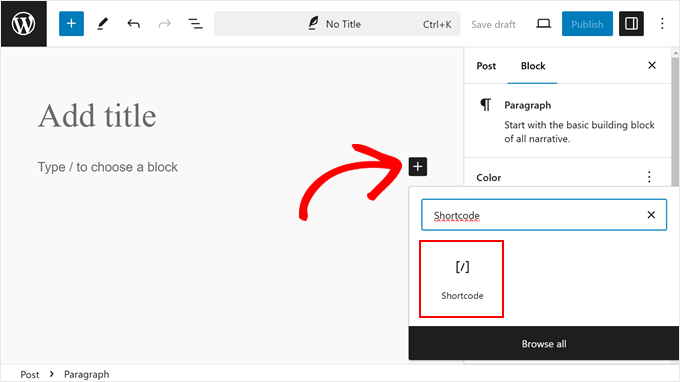
At this stage, go ahead and paste the shortcode below into the block:
[su_list icon="icon: star" icon_color="#ffde0f"]
<ul>
 	<li>List item</li>
 	<li>List item</li>
 	<li>List item</li>
</ul>
[/su_list]
This shortcode will display three bullet list items with yellow star icons, like so:
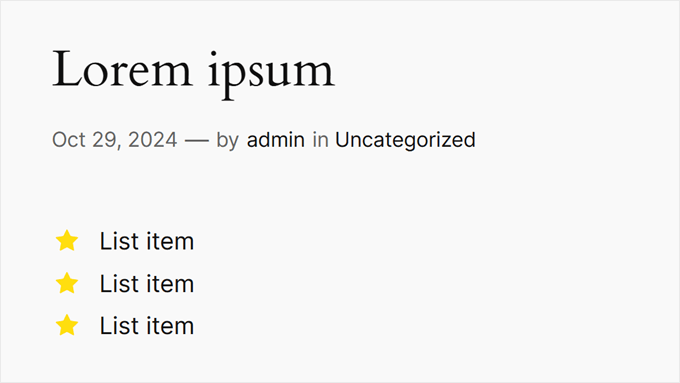
To customize the icon and the color, you can go to the Fork Awesome website. This is where you will see all the icons you can use for your bullet lists. Here, simply look for an icon that you want to use.
For example, we will use the ‘flag’ icon. Now, copy the icon’s name, and go back to the block editor.
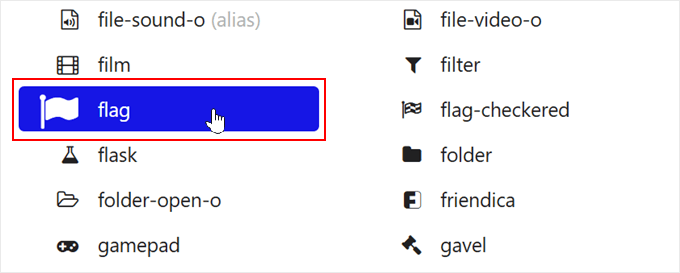
Once there, just replace star with it. So instead of icon: star, we will use icon: flag.
To change the color, replace the HEX code in icon_color="#ffde0f" with the HEX code of your desired color.
So if you want to make the icon green, you need to type in icon_color="#008000". You can learn more about finding the right colors in our article on how to find the perfect color scheme for your WordPress site.
Now, don’t forget to replace List item with your own text.
Here’s what our code looks like now:
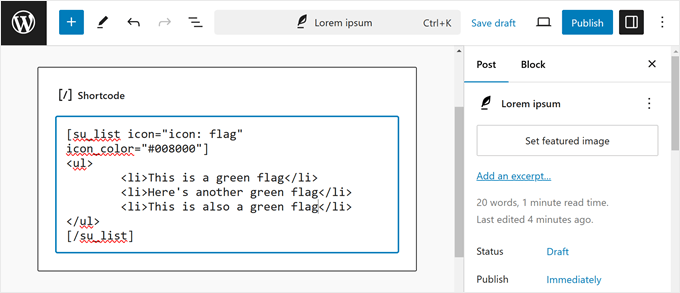
When you are happy with how the list looks, you can either click on the ‘Update’ or ‘Publish’ button to make it live on your WordPress blog or website.
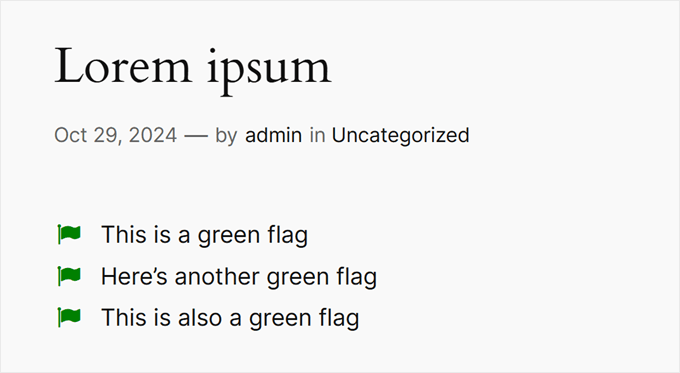
This is what the list looks like on the front end:
Method 3: Using a Page Builder Plugin (Best for Landing Pages)
If you want to create beautiful lists with custom styling, then you may want to use SeedProd.
This advanced WordPress theme and page builder plugin lets you create professionally designed pages using a simple drag-and-drop editor.
It also comes with a ready-made List block that lets you fine-tune every part of the list design, including changing the space in between individual items, replacing the standard bullet points with custom icons, and more.
SeedProd makes it easy to design standalone pages that have a unique design, so this is also a great choice if you want to add lists to a custom home page or landing page.
Note: There is also a free version of SeedProd that you can use to create custom page designs, no matter what your budget is.
The first thing you need to do is install and activate SeedProd. For more details, see our step-by-step guide on how to install a WordPress plugin.
Upon activation, you need to enter your license key.

You can find this information in your account on the SeedProd website. After adding the license key, simply click on ‘Verify Key.’
Choose a Professionally-Designed Template
After that, go to SeedProd » Landing Pages and click on ‘Add New Landing Page.’
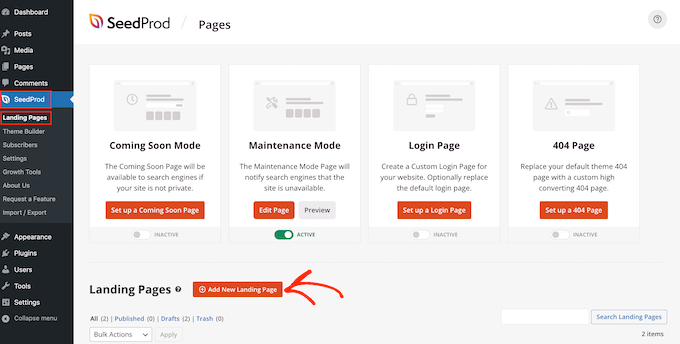
On the next screen, you’ll be asked to choose a template.
SeedProd comes with over 300+ beautiful templates that are organized into different categories, such as 404-page templates and custom WooCommerce ‘thank you’ pages.
Simply click on any tab to see the different templates within that category.
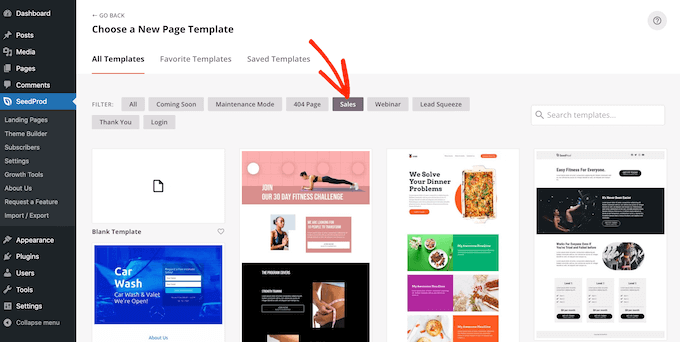
When you find a template you want to use, hover your mouse over it and then click the checkmark icon.
We are using the ‘Explosive Growth Webinar’ template in all our images, but you can use any design you want.

Next, you need to give the page a title.
SeedProd will automatically create a URL based on the page title, but you can change this to anything you want. For example, adding relevant keywords to a URL often improves your WordPress SEO and helps the page appear in relevant search results.
To learn more, please see our guide on how to do keyword research for your WordPress blog.
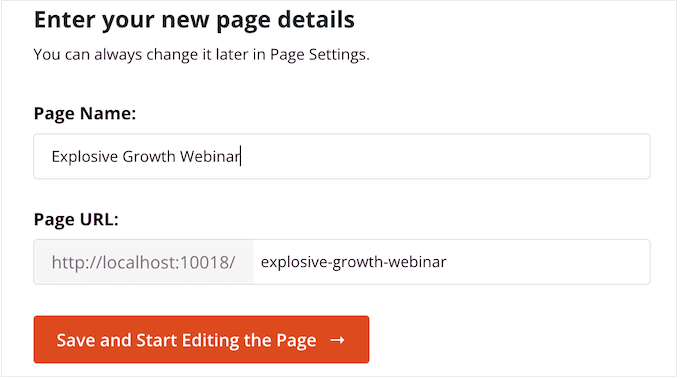
When you are happy with the title and URL, just click on ‘Save and Start Editing the Page.’
Build Your Custom Page Layout
SeedProd will now open your template in its drag-and-drop editor. On the right, you’ll see a live preview of the page design, with some settings on the left.

SeedProd comes with lots of blocks that you can add to your design, including blocks that allow you to add social share buttons, videos, contact forms, and more.
For more information, please see our guide on how to create a custom page in WordPress.
To add a list to your design, find the ‘List’ block and drag it onto the page.
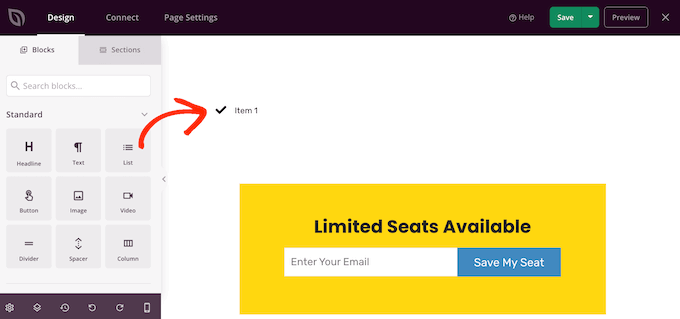
This adds a vertical list to your page with a placeholder ‘Item 1.’
If you want to create a horizontal list instead, then click on the ‘Advanced’ tab and then select the ‘Horizontal’ button.
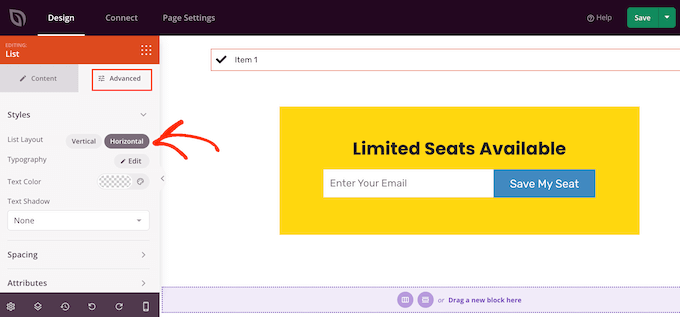
You are now ready to start building your list by selecting the ‘Content’ tab.
To replace the default text with your own messaging, click on ‘Item 1’ in the left-hand menu.
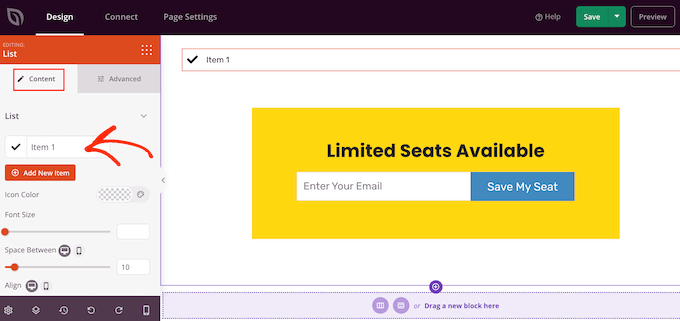
You can now type your list item into the small text editor that appears.
Here, you can also apply any formatting you want to use, such as bold or italic.
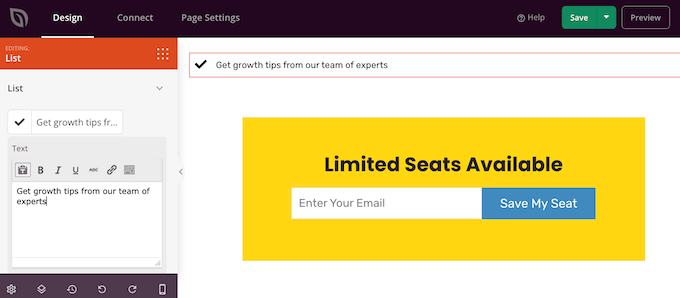
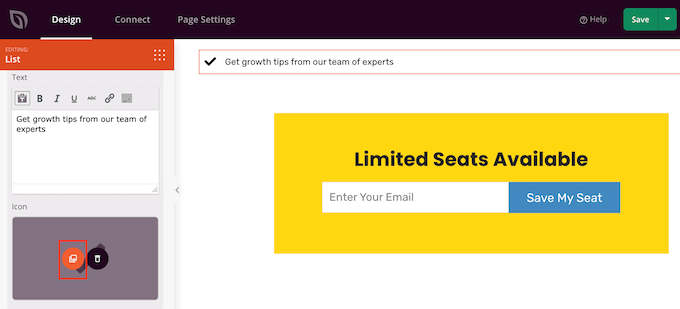
By default, SeedProd uses a checkmark for each bullet point, but it has a built-in library of icon fonts, which includes 1400 Font Awesome icons that you can use instead.
To replace the checkmark, simply hover your mouse over it and then click on ‘Icon Library’ when it appears.
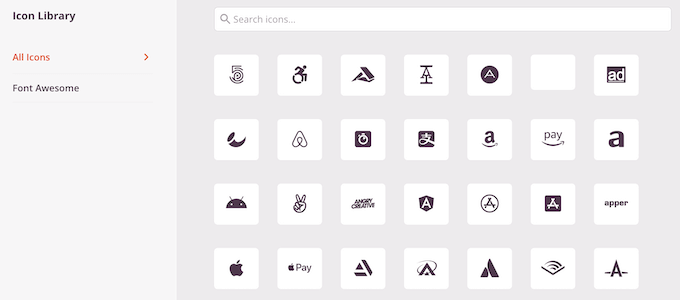
This opens a popup where you can choose the icon you want to use instead.
You can use different icons for individual bullet points within the list, so this is a great way to create more interesting and eye-catching lists.
To create more bullet points, simply click on the ‘Add New Item’ button.
You can now add text and change the default icon by following the exact same process described above.
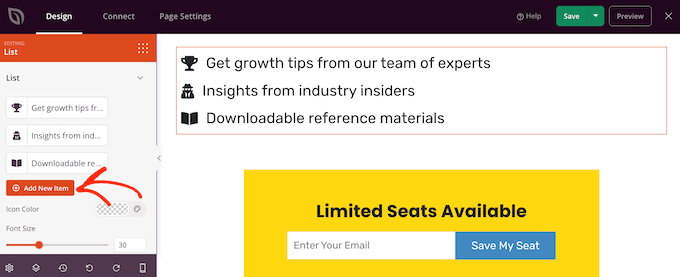
After adding all the items to your list, you can change the font size and alignment using the settings in the left-hand menu.
You can also increase or decrease the space between the individual list items using the ‘Space Between’ slider.
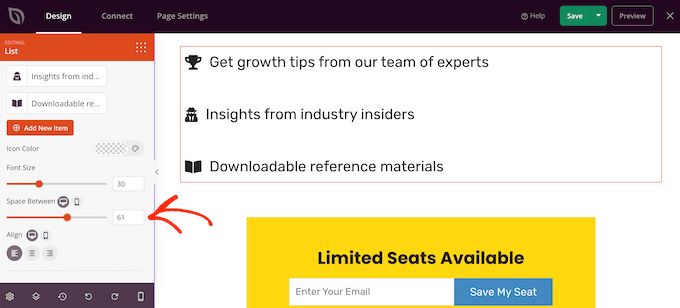
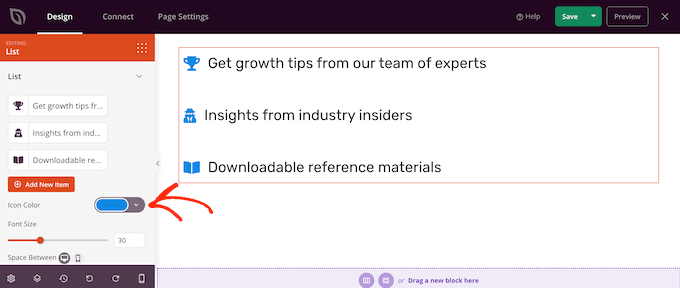
After that, you may want to change the color of the icons in the list. Even if you’re using different icons, SeedProd will apply the same color to every item so the design will always look consistent.
To make this change, click on the ‘Icon Color’ area and then choose a new color from the popup that appears.
With that done, you may want to click on ‘Advanced’ and look at some additional settings. We’ve already seen how you can switch between vertical and horizontal list layouts, but you can also change the text color and font.
To really make your list stand out, you can even add a box shadow or CSS animation.
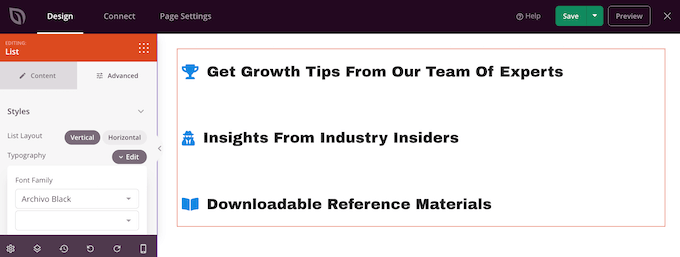
Most of the settings in the ‘Advanced’ tab are fairly self-explanatory, so it’s worth exploring them to see what effects you can create.
With that done, you can continue working on your page design by adding more blocks and then customizing them using the settings in the left-hand menu.
When you are happy with how the page looks, just click the dropdown menu on the ‘Save’ button and select ‘Publish.’

You can now visit this page to see the list live on your online store or website.
Method 4: Using Code to Add Bullet Points and Number Lists (Advanced)
You can also create lists using the built-in WordPress code editor and HTML.
This is more complicated, so it isn’t the best method for beginners. However, it does allow you to use more styles and formatting in the built-in List block. For example, you can quickly and easily add heading styles to list items using tags like h1 and h2.
For more on this topic, see our guide on how to edit HTML in the WordPress code editor.
To get started, open the page or post where you want to show the list. Then, click on the three-dotted icon in the upper-right corner and select ‘Code editor.’
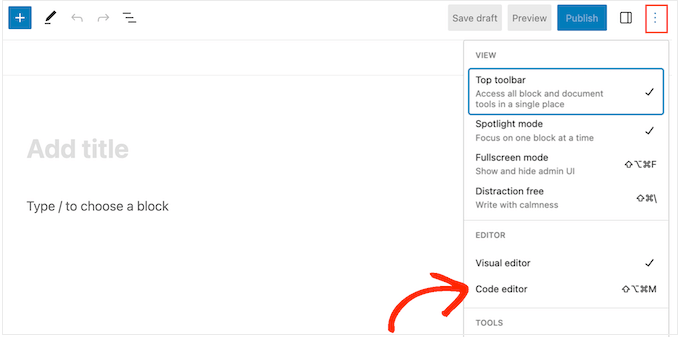
The next steps will vary depending on whether you want to add a bullet point list or a numbered list.
How to Create a Bullet Point List Using Code
To create a bullet point list, start by typing in the following:
<!-- wp:list -->
<ul>
The ul stands for ‘unordered list,’ which means the list doesn’t have any numbers, and the wp:list tells WordPress that you are creating a List block manually.
Next, press the ‘Return’ key to move onto a new line and create your first list item:
<!-- wp:list -->
<ul>
<!-- wp:list-item -->
<li>Red</li>
<!-- /wp:list-item -->
Here, li stands for ‘list item,’ and we’re closing the line with /li.
You can repeat this process to create more list items. For example:
<!-- wp:list -->
<ul>
<!-- wp:list-item -->
<li>Red</li>
<!-- /wp:list-item -->

<!-- wp:list-item -->
<li>Orange</li>
<!-- /wp:list-item -->

<!-- wp:list-item -->
<li>Green</li>
<!-- /wp:list-item -->
When you’ve finished, close the code block with another ‘unordered list’ flag:
</ul>
<!-- /wp:list -->
This gives us the following list code:
<!-- wp:list -->
<ul>
<!-- wp:list-item -->
<li>Red</li>
<!-- /wp:list-item -->

<!-- wp:list-item -->
<li>Orange</li>
<!-- /wp:list-item -->

<!-- wp:list-item -->
<li>Green</li>
<!-- /wp:list-item -->
</ul>
<!-- /wp:list -->
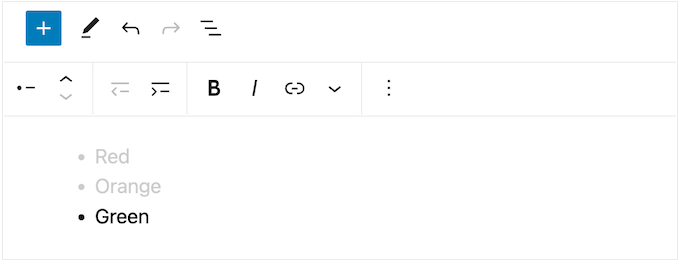
As you can see in the following image, this creates a very simple list, but you can customize it by adding other HTML, such as heading tags.
How to Create a Numbered List Using Code
To create a numbered list, simply type in the following:
<!-- wp:list {"ordered":true} -->
You can then type in ol which stands for ordered list:
<!-- wp:list {"ordered":true} -->
<ol>
After that, add each list item by following the same process described above:
<!-- wp:list {"ordered":true} -->
<ol>
<!-- wp:list-item -->
<li>Red</li>
<!-- /wp:list-item -->
Finally, close the ordered list using an /ol tag and wp:list.
<!-- wp:list {"ordered":true} -->
<ol>
<!-- wp:list-item -->
<li>Red</li>
<!-- /wp:list-item -->

<!-- wp:list-item -->
<li>Orange</li>
<!-- /wp:list-item -->

<!-- wp:list-item -->
<li>Green </li>
<!-- /wp:list-item -->
</ol>
<!-- /wp:list -->
We hope this tutorial helped you learn how to add bullet points and numbered lists in WordPress. You may also want to learn how to add collaboration in the WordPress block editor and our expert picks of the best Gutenberg block plugins for WordPress.
If you liked this article, then please subscribe to our YouTube Channel for WordPress video tutorials. You can also find us on Twitter and Facebook.


Jiří Vaněk
I had a big problem creating sublevels where the main levels were supposed to be numbered 1, 2, 3, and the sublevels were supposed to start with just a dot. I didn’t know how to properly create this in WordPress. Now I had to write an affiliate article on the site that required exactly these levels, and I was once again faced with the question of how to handle it. In the end, I managed to do it following this guide. Next time, I won’t have to worry about it anymore.
Julius Szabo
Hi there, I always create HOW-TO posts like list-based content. It’s the same as your HOW-TO articles, like this one. E.g. here you have 4 main points:
Method 1:
Method 2:
Method 3:
Method 4:
Are these 4 points also within some list? Or were they added manually as separate blocks? Sometimes I have even 150 H3 titles and always write numbers to them manually…
WPBeginner Support
For this article we manually added the numbers to each section
Admin
Dennis Muthomi
The bullet points in my theme use plain square icons by default. I was wondering if there’s a way for me to change those square icons to checkmark icons instead?
WPBeginner Support
It would depend on your specific theme, if you check with your theme’s support they can normally assist with the styling change
Admin
Dayo Olobayo
Thanks WPBeginner for making blogging easy for me. Please I’d like to know if the first method of listing above will show up in search engine as formatted on my blog?
WPBeginner Support
It is up to the search engine for if it uses the same format as on your site, there is no guaranteed method for forcing the list to appear at the moment.
Admin