WordPress has evolved so much over the years, and with each update, it brings new features to make website building easier. One of the common questions we get is about using the new Full Site Editing (FSE) feature introduced in WordPress 5.9.
We personally use a custom theme based on the Genesis framework and a page builder like SeedProd for custom pages. However, with the Full Site Editor becoming more widely used, a lot of users are curious about how to leverage this new feature for their websites.
Full Site Editing essentially extends the block editor concept to the entire site. This allows you to visually edit not just your content, but also your site’s header, footer, and other structural elements.
In this article, we will show you how to use the WordPress Full Site Editor. Whether you’re new to WordPress or an experienced user looking to explore this new feature, this guide will help you create a great-looking website with WordPress in no time.
What Is Full Site Editing (FSE) in WordPress?
WordPress Full Site Editing (FSE) is essentially a continuation of the Gutenberg project. It’s a feature that uses the block content editor interface for WordPress.org’s built-in website and theme customization tools.
This means you can use the block content editor not just for creating your page or post content but also for a header, footer, sidebar, and more.
The goal of Full Site Editing is to simplify website building in WordPress. While WordPress is pretty user-friendly, it wasn’t always the easiest to use for beginners.
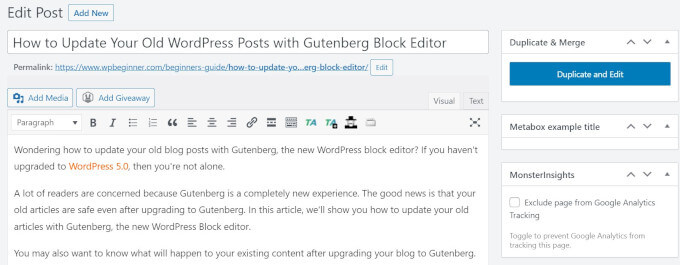
For starters, the previous Classic Editor is quite barebones. When you create a new page, you can’t see what it looks like right away. Instead, you have to switch back and forth between the preview page and the editing interface to see the page’s appearance on the front end.
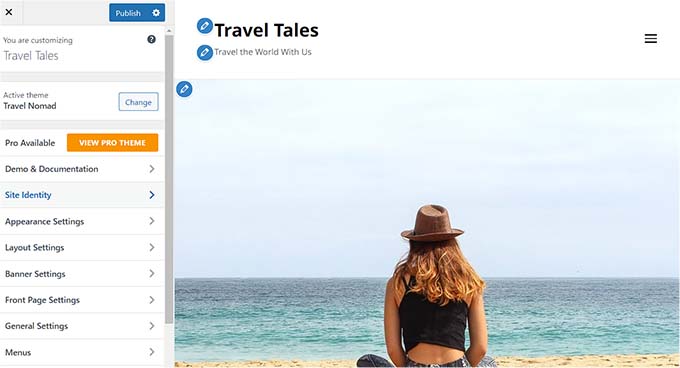
Some people also find the WordPress Theme Customizer limiting as it doesn’t have a drag-and-drop functionality.
In other words, you can’t move and edit elements around exactly how you want to. That’s why many people install a WordPress page builder plugin to get more flexibility in their design.
The Gutenberg project aims to solve these problems by introducing newer, more user-friendly website-building tools, including Full Site Editing.
With FSE, beginners can create their WordPress websites using an easy drag-and-drop block editor and see a live preview as they make changes.
What You Should Know Before Using WordPress Full Site Editing
Before using the WordPress Full Site Editor, you should know that this feature is only available for WordPress block theme users.
If you use a non-block (classic) theme, then you won’t have access to the Full Site Editor. Instead, you’ll have to use the WordPress theme customizer or a supported page builder to make customizations.
If you want to see some block theme inspiration, then go ahead and check out our guide to the best WordPress Full Site Editing themes.
Another thing to remember is that WordPress Full Site Editing works the same way as the Gutenberg block content editor. With that in mind, we recommend reading our guide on how to use the WordPress block editor.
In this guide, we will focus on how to use WordPress Full Site Editing features to edit your web page design, content, and layout. You can use these quick links to skip to a specific topic:
- How to Access WordPress Full Site Editing Features
- How to Edit Your Navigation Menu With FSE
- How to Change Your Website’s Global Styles With FSE
- How to Customize WordPress Pages With FSE
- How to Edit WordPress Templates With FSE
- How to Modify WordPress Patterns With FSE
- Tips to Make the Most Out of WordPress Full Site Editing
- Limitations of WordPress Full Site Editing
How to Access WordPress Full Site Editing Features
To access the WordPress Full Site Editor, you need to go to your WordPress dashboard and head to Appearance » Editor.
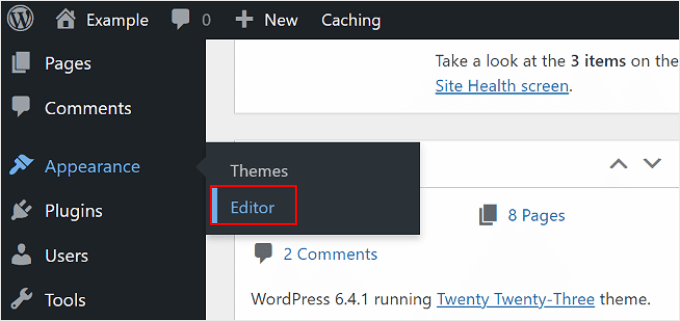
After that, you will land on the WordPress Full Site Editor.
Here’s what the interface looks like:

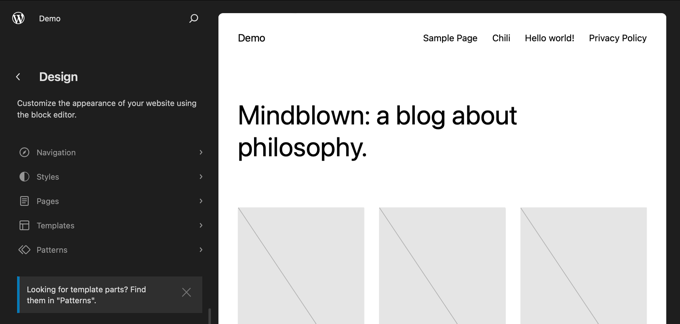
On the left side, you will find a panel with the main settings. Meanwhile, the right side has a preview of what your website looks like. You can click on that side if you want to edit your website right away.
There are 5 main settings: Navigation, Styles, Pages, Templates, and Patterns. Let’s go through all of them one by one.
How to Edit Your Navigation Menu With FSE
The first setting at the top is Navigation, which allows you to edit your block theme’s navigation menu. Go ahead and click on it.
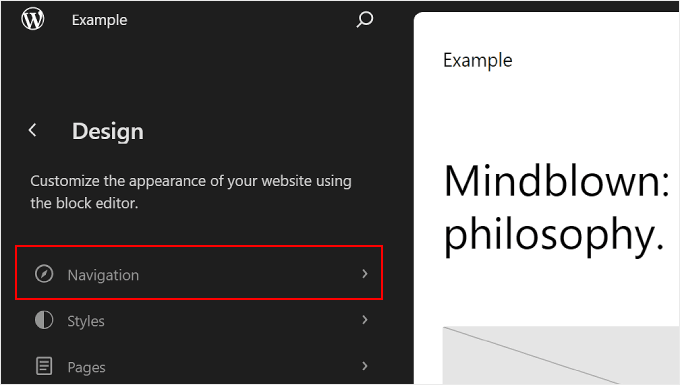
There are several things you can do on this page.
When you click on the three-dot button next to ‘Navigation,’ you can Rename, Duplicate, or Delete the menu.
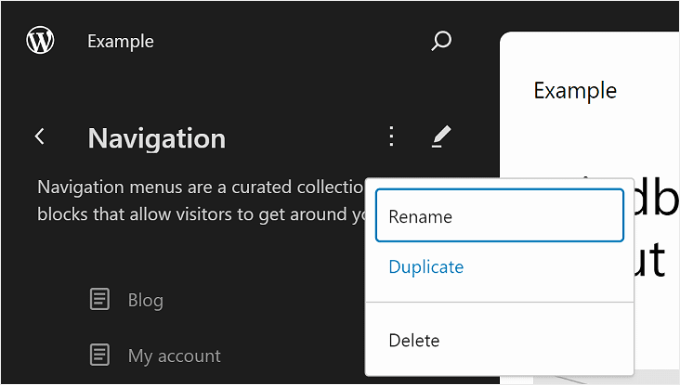
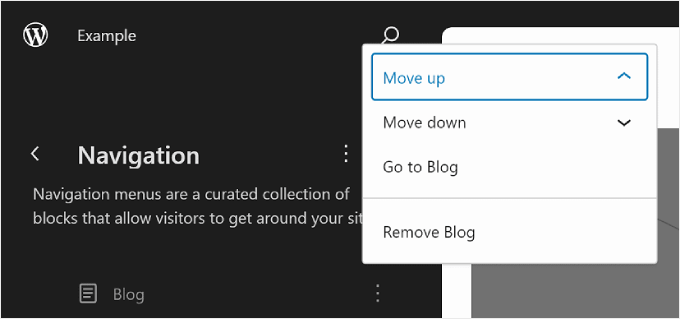
You can also rearrange or remove the page(s) listed in the menu.
To do this, click the three-dot button next to one of the pages. You’ll see options to Move up, Move down, and Remove the page. If you want to edit that specific page, then you can select the ‘Go to …’ button.
Another thing you can do is customize the menu design and links.
To do that, just click the pencil ‘Edit’ icon to open the block editor.
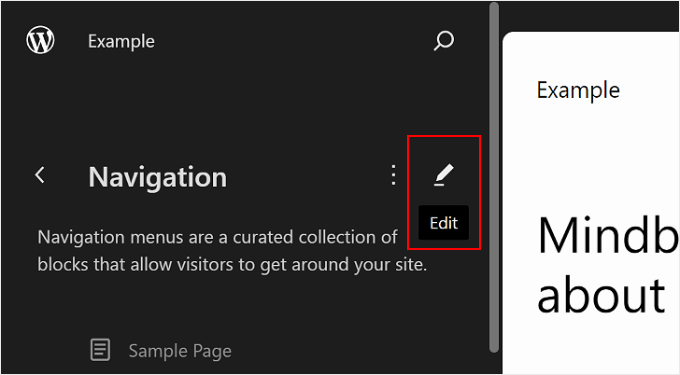
Now, the editing interface for the navigation menu will appear, which looks like the regular Gutenberg editor.
Adding, Editing, Removing, and Rearranging Menu Elements
Before we continue, note that the location of your website navigation menu will depend on your theme. It may be at the top, on the side, or hidden, appearing only when you click a certain button.
To add a new page link, you can click the ‘+’ add block button within the menu. Now, simply type in the name of the page, post title, or external URL you want to insert into the navigation menu and select it.
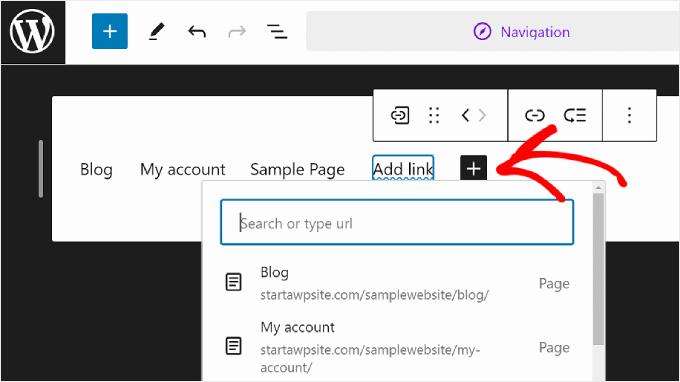
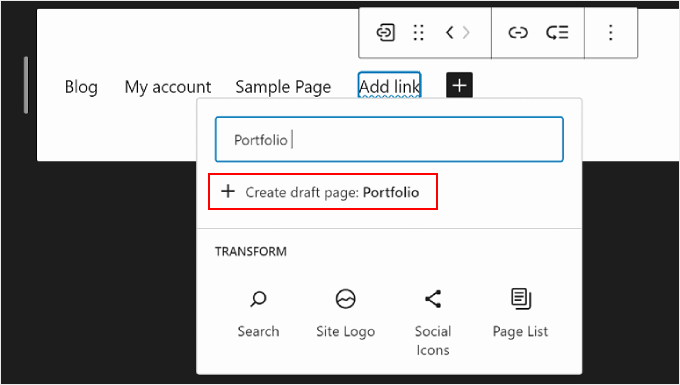
If the page you want to link to has not been created yet, then you can still add a link to the navigation menu.
Just type in the name of the draft page in the search bar and click ‘Create draft page.’ WordPress will then make a page using that name that you can edit later.
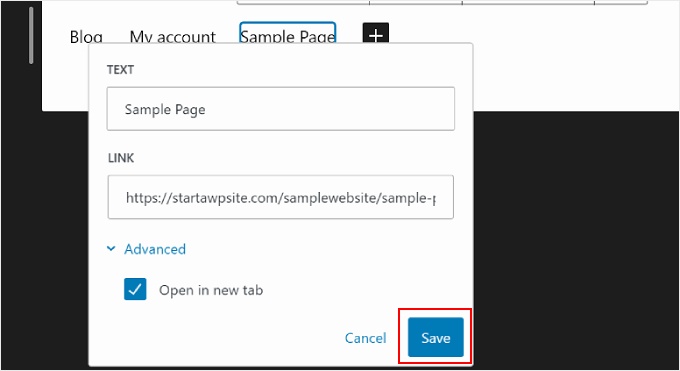
If you want to edit the page’s link, name, and tab settings, simply select the page and click the link icon in the block toolbar.
Once you’ve done that, select the pencil button.
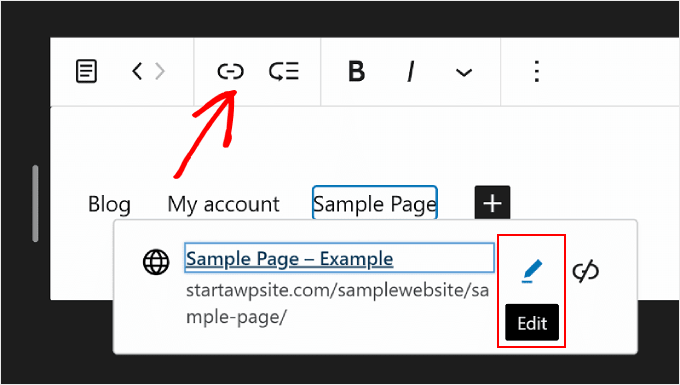
Now, you’ll be able to change the page’s link and make the link open in a new tab.
Once done, just hit ‘Save.’
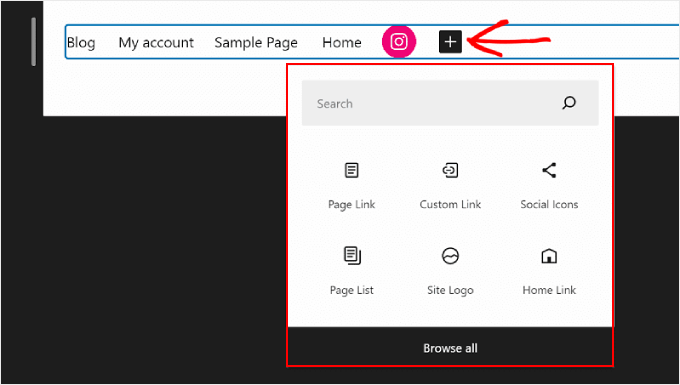
You can also add new navigation menu elements here besides page links.
All you need to do is click the ‘+’ add block button. After that, you will find some navigation block options that are available for you to use, like the Site Logo or Site Tagline.
Sometimes, you may have to scroll down to find these blocks. You can also choose ‘Browse all’ to see the complete list of the block choices.
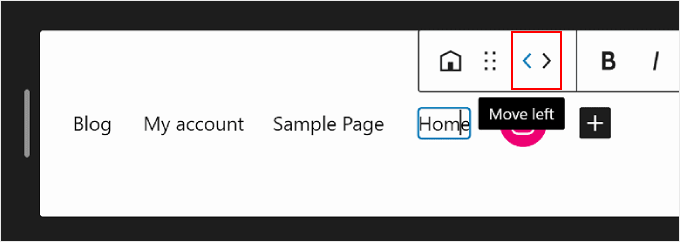
At one point, you may also want to rearrange the menu elements.
To do that, select a block and choose one of the arrow icons to move the block to the left or right.
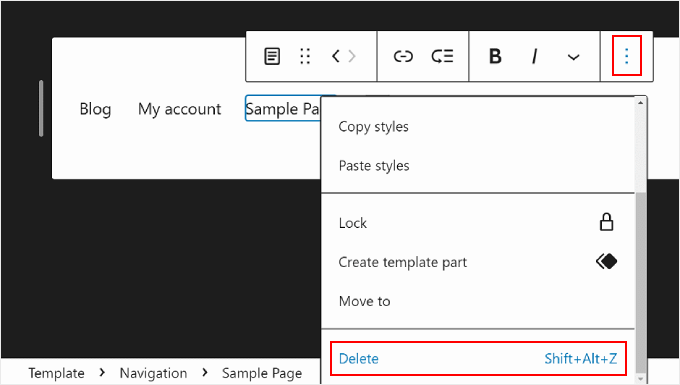
Now, if you want to remove a page link or other menu elements, you can select the element you want to delete.
Then, click the three-dot menu on the block toolbar and choose ‘Delete.’
For more details, see our tutorial on how to remove a block in WordPress.
Creating a Submenu
If you have a lot of web pages, like if you run an online store, then you may want to create a dropdown submenu. This way, your navigation menu won’t be cluttered with many links and will look much more organized.
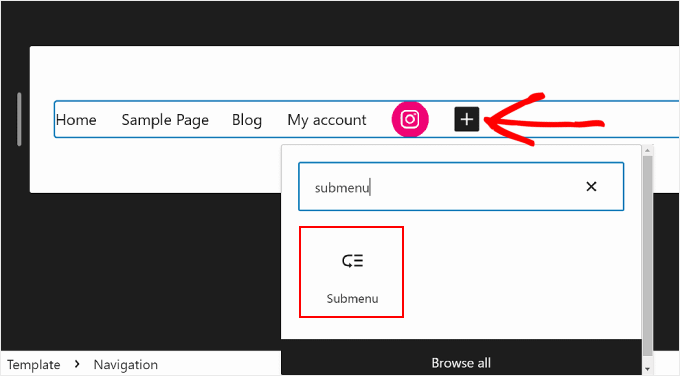
The first step to creating a submenu is clicking the ‘+’ add block button and selecting the ‘Submenu’ block.
Next, you will select a page or URL that functions as the submenu’s parent menu.
For instance, if you run a blog, then you may use your blog page as the parent menu. Within the submenu, there will be links to the individual category pages of your blog content.
In this example, we will select ‘Blog.’
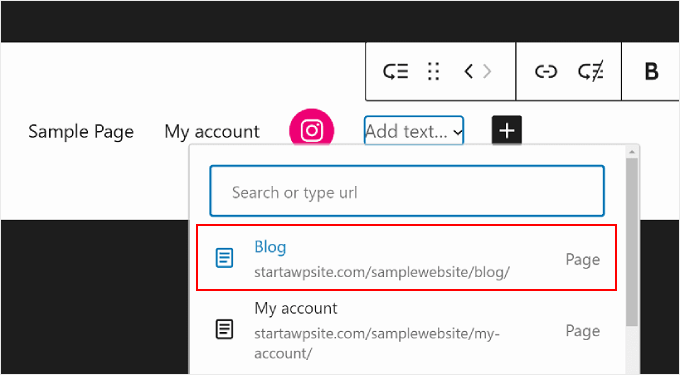
After you’ve done that, simply click the ‘+’ add block button.
It should be below the parent menu.
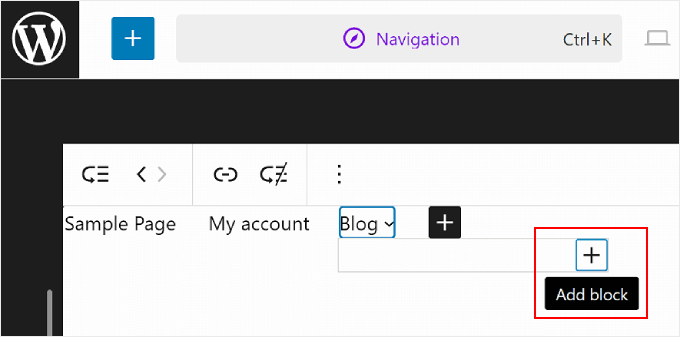
At this point, you can type in the name of the page link you want to insert and select that. Feel free to repeat this step to add as many submenu links as needed.
Once you are done with the navigation menu, don’t forget to save your changes by clicking the ‘Save’ button in the top right corner.

How to Change Your Website’s Global Styles With FSE
The next setting below Navigation is Styles. This feature lets you change the design of your entire website.
Once you are inside the Styles page, you will see some predefined style options, each with different colors, typography, and layout choices. Note that these predefined options will look different from one block theme to another.
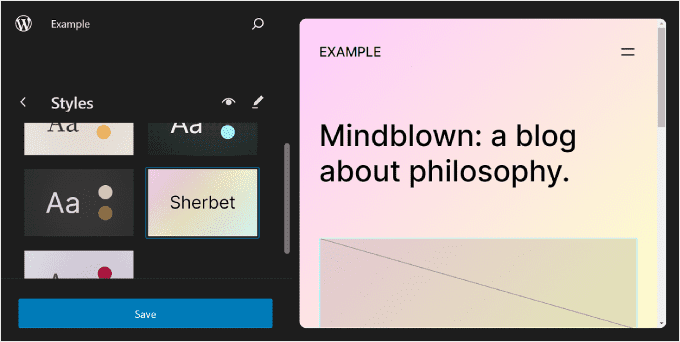
You can also click on the eye icon next to ‘Styles,’ which represents the Style Book.
With this, you’ll be able to see the style options’ typography and what the text blocks will look like using this style, like the headings, paragraphs, lists, and so on.
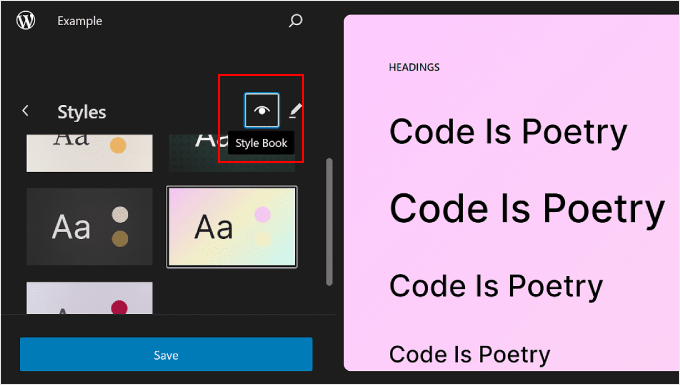
Similar to the previous section, the pencil button on this page will bring you to the editing interface.
Here, you will mainly use the right-hand panel to change the typography, colors, background image, shadows, and layout to your exact needs. You can also customize the appearance of specific blocks for the entire website.
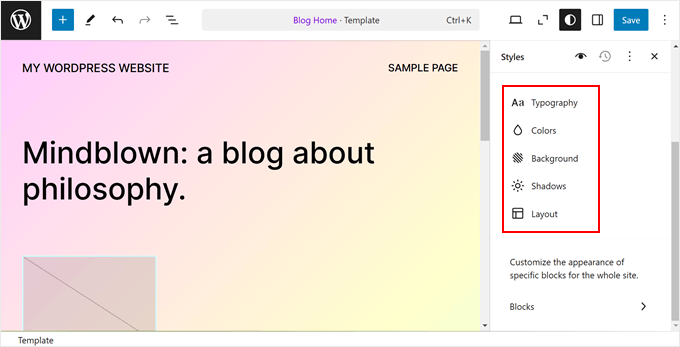
Typically, you will see your homepage in the editor. However, the changes you make here will also be reflected in the other web pages.
Editing Your Website’s Typography
To change your website’s fonts, navigate to the Styles sidebar on the right and select ‘Typography.’
Now, you’ll see several Text elements you can edit: Text, Links, Headings, Captions, and Buttons.
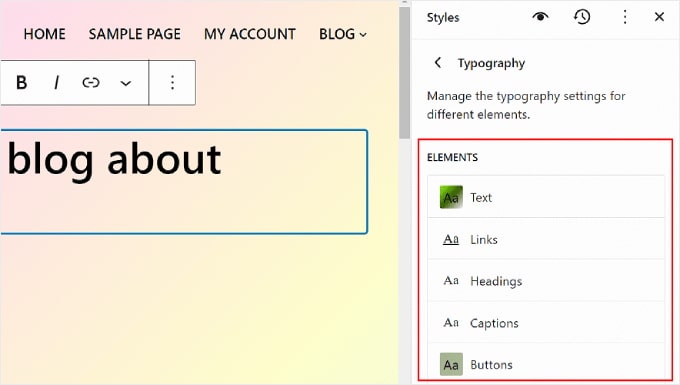
The settings in the Text element determine what the fonts across your entire site will look like. That means if you make changes to this element, they will be reflected in all the blocks that use text on your website.
That said, you can click on the Links, Headings, Captions, or Buttons element to edit the style of these specific blocks so that they look different from the rest of the text.
For instance, if you want your headings to have a different font from the paragraph block to stand out more, then you can configure the settings in the Headings element.
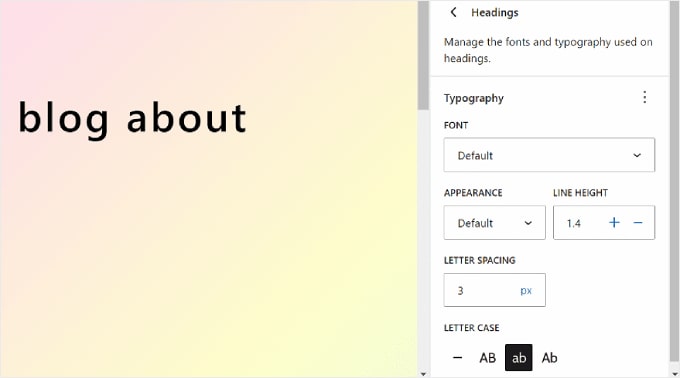
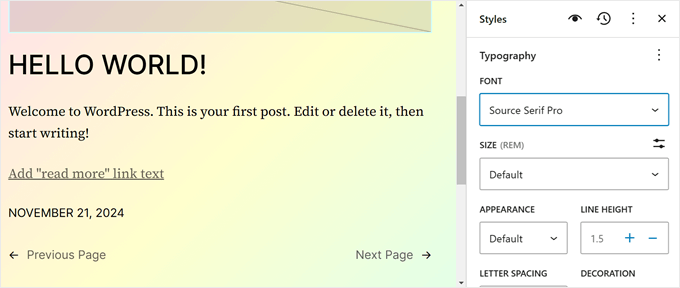
Generally, you can modify each element’s Font, Size, Appearance, and Line Height.
The font choices depend on the theme you are using. Meanwhile, Appearance controls whether you want to use a regular, bolded, or italic version of the font.
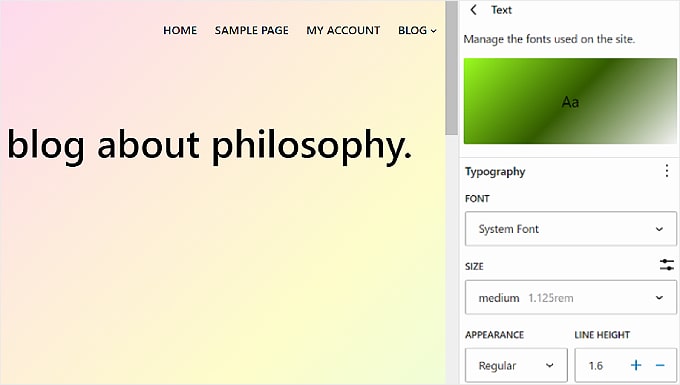
Some elements may have specific settings, so be sure to explore them one by one.
For instance, the Headings element has options to customize the letter spacing and letter case.
Customizing Your Website’s Color Palette
Let’s move on to setting the color scheme for your website. To do that, simply click on ‘Colors’ in the Styles panel. You’ll see two sections: Palette and Color.
Choose the colors within ‘Palette.’
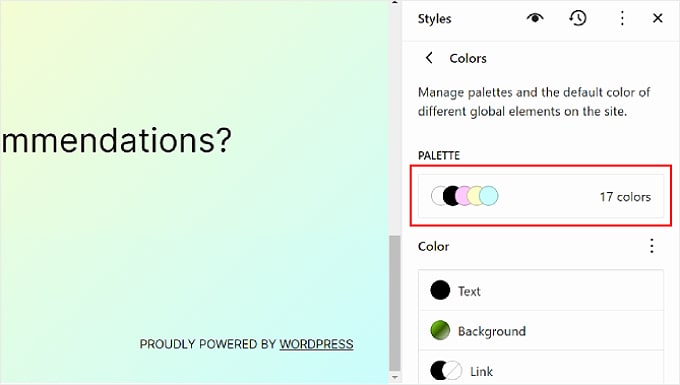
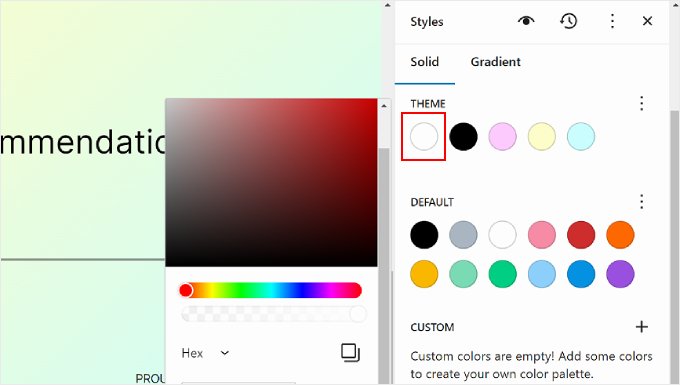
In the Palette’s Solid tab, you’ll see the Theme, Default, and Custom sections.
Theme includes colors that can be used to customize the color palette of your entire website.
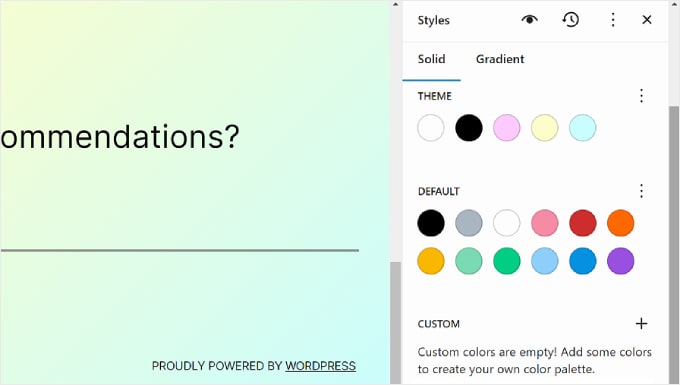
Meanwhile, the Default colors can modify blocks with color settings. Note that some themes may not include this feature, so you might not see this in your editor.
Lastly, Custom colors are colors that you can add to the theme. You can use this setting if neither the Theme or Default color options are suitable for you.
To add a new Custom color, just click the ‘+ Add color’ button and use the color picker tool.
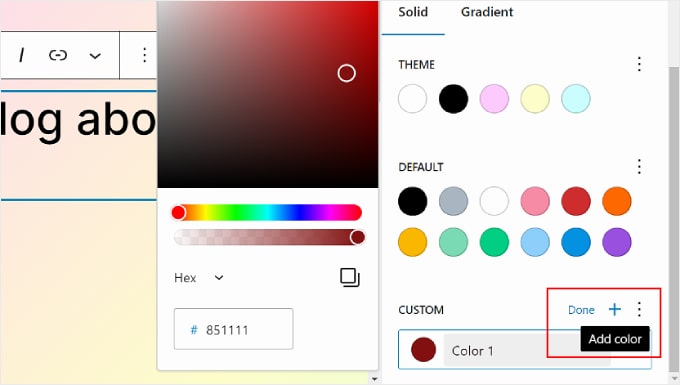
If you want to change a Theme, Default, or Custom color, simply select a color and use the color picker tool to switch to a different option.
Remember that blocks that use these colors will also be affected.
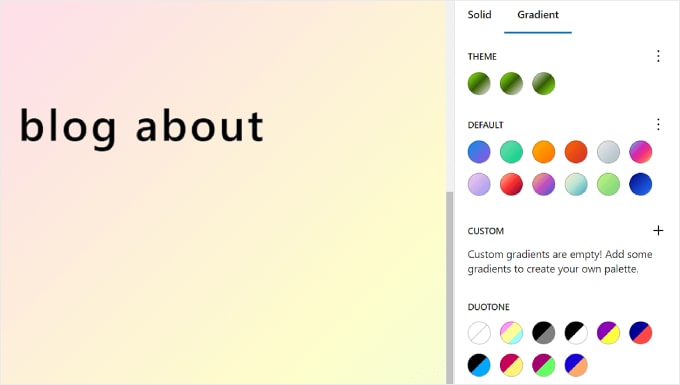
Let’s switch to the ‘Gradient’ tab. It’s similar to the Solid tab, but the color options are in the form of gradients, which are a mix of two or more colors.
The Theme options include some gradient options using the theme’s solid colors. On the other hand, the Default settings are color gradients that you can use to customize blocks.
Duotone colors are filters you can add to blocks with images. You can only view which duotones are available, but you can’t edit them here.
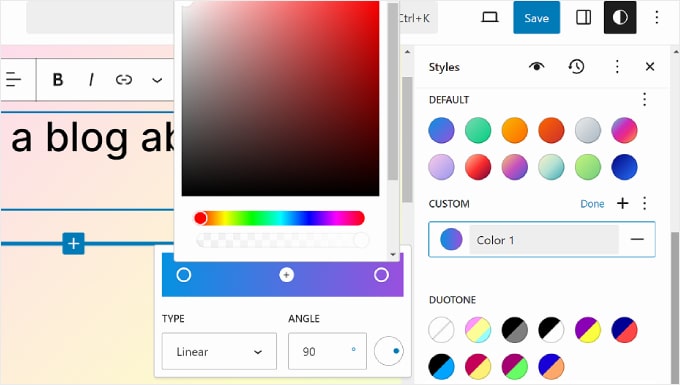
You can also create custom gradients if needed.
To do that, simply click the ‘+ Add color’ button. Then, you can select the Linear or Radial gradient type and customize the direction of the gradient by changing the Angle.
Additionally, feel free to select more colors into the gradient mix by clicking on a spot in the slider. A color picker will show up for you to choose a color.
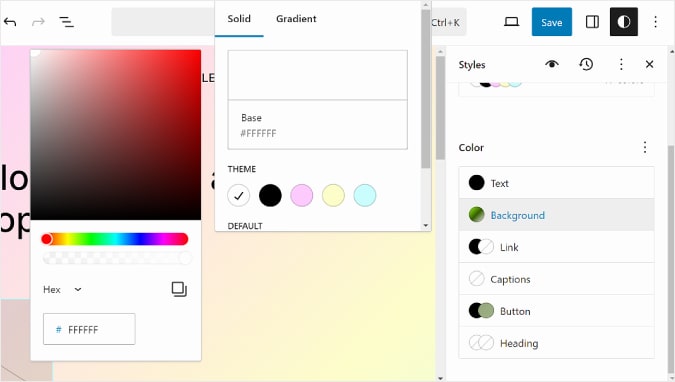
Going back to the Colors tab, you can customize the specific color settings of your Text, Background, Link, Captions, Button, and Heading.
Simply click on an element and select a Solid or Gradient color to change the element’s color. You can also select the preview section to access the color picker.
Adding a Background Image
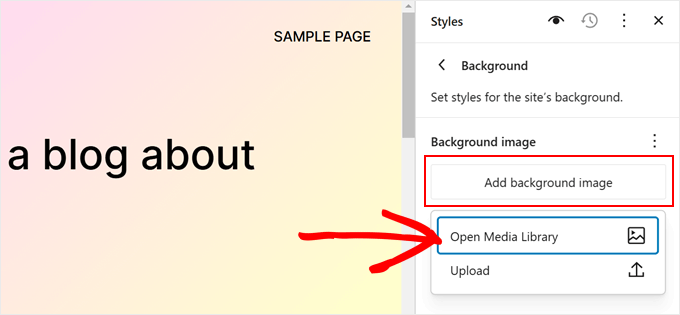
If you want to use a background image rather than a background color in your block theme, you can click on the ‘Background’ option in the Styles main menu.
From here, you can select an existing image from the media library or upload a new, large image.
Changing Drop Shadow Effects
Another thing you can change in the Full Site Editor is the shadow effects that are applied to blocks. You can enable this effect in certain blocks like the call-to-action button.
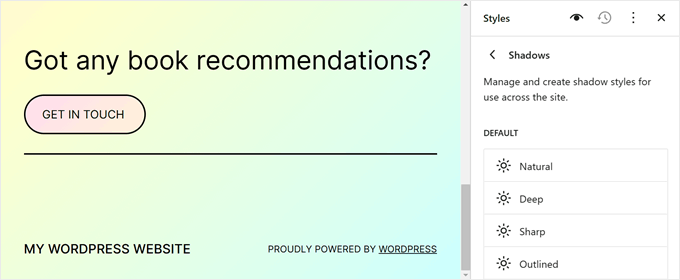
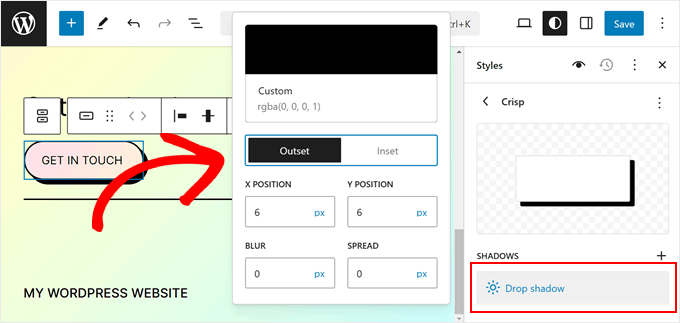
To edit a shadow effect, simply click on one of the options below ‘Default.’
Then, you can change the shadow’s color, outset or inset, position, blur, and spread settings.
Adjusting Your Website’s Layout
The last option in the Styles tab is Layout. This is where you can modify the space between your web page elements.
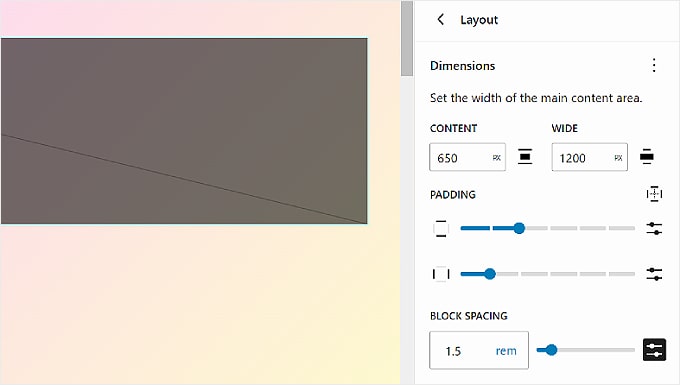
At the top of the Layout panel, you will find settings to change your page’s Content and Wide width. The Content width determines the default width for an individual block when their alignment setting is None in the block toolbar.
On the other hand, the Wide width decides the default width for blocks when they are set to Wide width alignment.
Below that is Padding, which controls the outer spaces around your web page content.
Using the available sliders, you can set the top, bottom, left, and right padding. If you want to be more specific with the padding size, then you can click on the slider icon to insert a pixel size, like in the screenshot below.
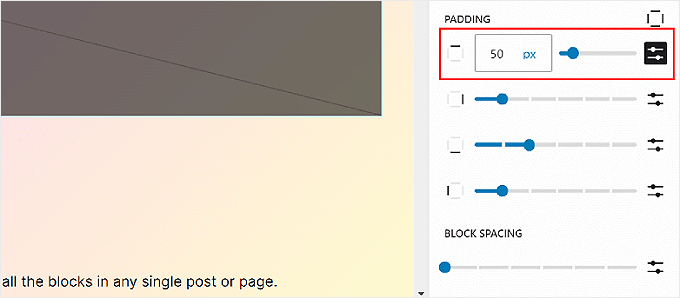
Toward the bottom, you will see the Block Spacing settings. This option determines the spaces between individual blocks so that they are not too close or far from each other. You can edit this the same way as you edit the Padding.
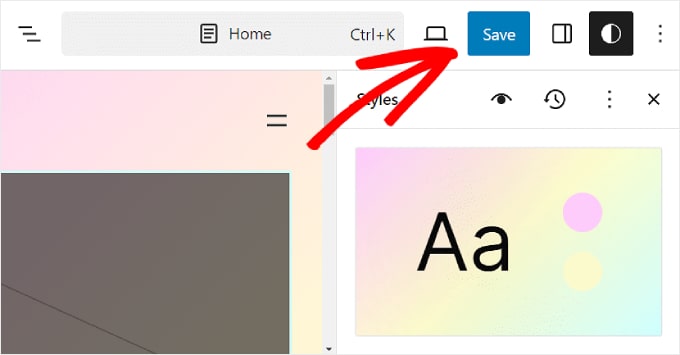
Remember to click the ‘Save’ button at the top right corner to make your changes official.
Changing a Specific Block’s Appearance
If you want to customize the appearance of a specific block throughout your entire website, you can click on the ‘Blocks’ option in the main menu of the Styles panel.
From here, you can select one of the default WordPress blocks available.
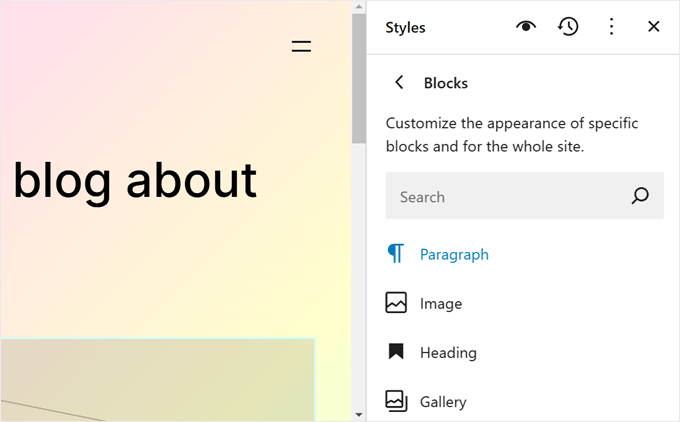
The specific Style settings for each block will differ.
For example, if you choose the Paragraph block, you can change its font, line height, letter spacing, and so on. Some blocks also include the option to change their height and width.
Adding Custom CSS
If you want to add custom CSS to your block theme, you can do so in this setting.
Simply click on the three-dot menu in the Styles’ main menu. Then, select ‘Additional CSS.’
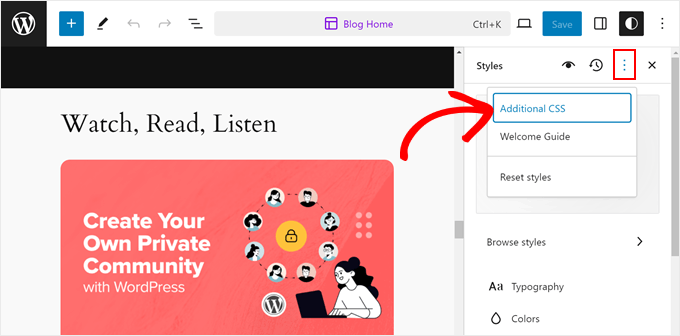
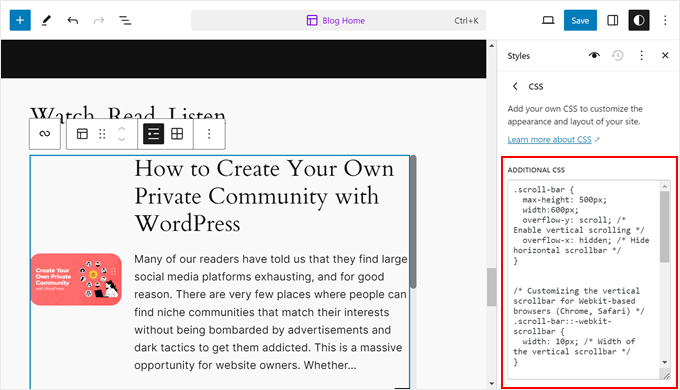
From here, you can insert some CSS code into the appropriate box.
Like so:
How to Customize WordPress Pages With FSE
So far, we’ve covered Navigation and Styles. Let’s now move on to Pages. In this tab, you will see a list of your existing pages. We will talk more about editing them later.
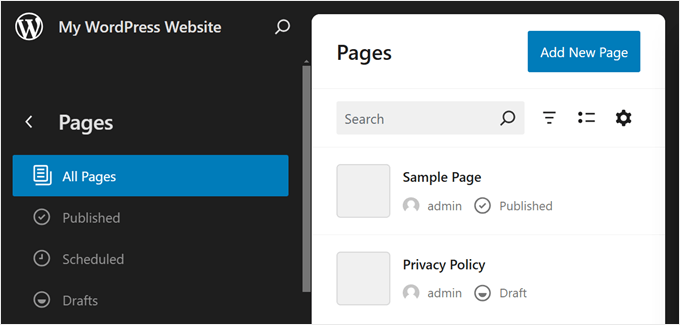
You can also create a new page right in the Full Site Editor.
To do that, simply click the on the ‘Add New Page’ button. After that, give your new page a name and hit ‘Create draft.’
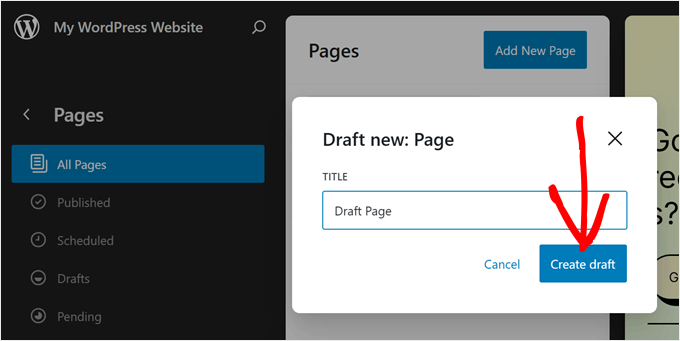
From there, you can start customizing the page.
To edit an existing page, select a page that you want to modify. In this case, it’s ‘Privacy Policy.’
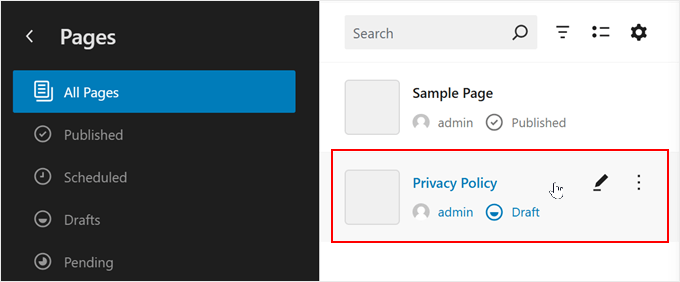
Editing pages using the Full Site Editor is essentially the same as using the block editor.
For more information about this, we have several guides for you to read. You can start with these:
- How to Create a Custom Page Using the Full-Site Editor (Block-Based Themes Only)
- How to Create a Landing Page in WordPress Using the Block Editor (No Plugin Required)
- How to Create a Separate Page for Blog Posts in WordPress
How to Edit WordPress Templates With FSE
On the Templates page in the WordPress Full Site Editor, you’ll see a list of the templates provided by your theme.
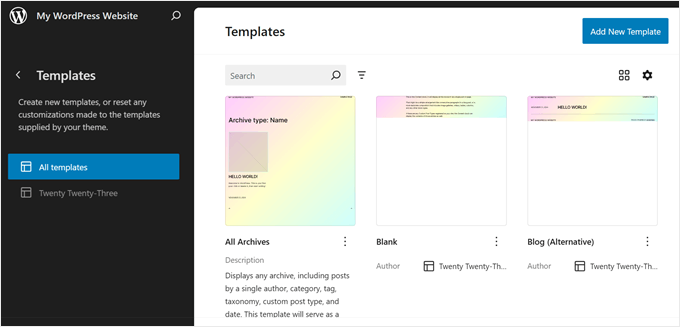
In WordPress Full Site Editing, Templates are predefined structures that you can use to design a specific type of page on your website.
For instance, many WordPress block themes will come with a Single Post template. This page template defines the layout of a blog post page, which means that every blog post on that website will use that template.
This feature can be helpful if you have multiple pages on your WordPress blog and many of them use the same layout.
If you need to change the same element on those pages but don’t want to edit each one individually, then you can simply modify the template. Then, the changes will apply to all the pages using that template.
If you want to create a custom template, select the ‘Add New Template’ button.
From here, just select which page the new template should apply to.
Alternatively, you can scroll down to the bottom and choose ‘Custom template.’
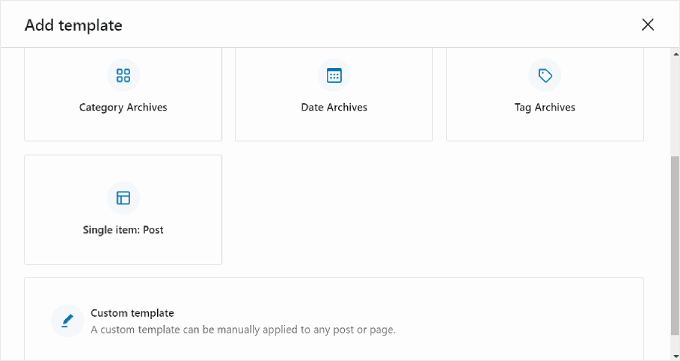
At this stage, you will see the editing interface with a blank page that you can start adding blocks to. For a step-by-step example, check out our guide on how to create a custom homepage template using the block editor.
To edit an existing template, you can simply click on it.
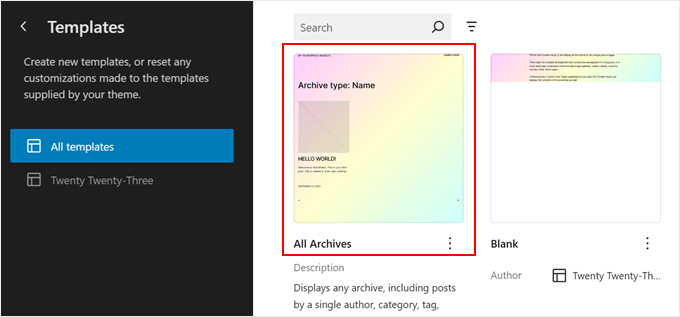
Now, you can edit the page template like you edit other elements using the block editor. You can add new blocks and customize the block or page settings.
If you are editing a page or post using the block editor and want to change its template without going to Full Site Editing mode, then you can also do that.
Simply go to the page or post and open the Page or Post Settings sidebar. Then, find the ‘Template’ section within ‘Summary’ and click on it.

You can use the dropdown menu to change the page template or click ‘Edit template’ to access the template editor right away. Alternatively, feel free to click the ‘Add template’ button to create a new custom template from scratch.
How to Modify WordPress Patterns With FSE
In WordPress Full Site Editing, Patterns are ready-to-use sets of blocks that you can insert into a page or post. When you create a pattern, it will be added to your block directory, and you can easily add it to any post or page on your website.
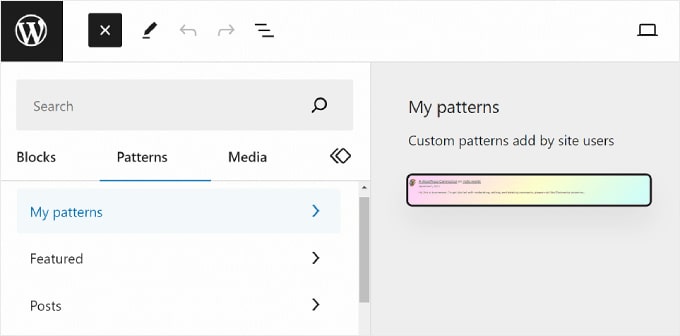
Patterns are useful when you need to use the same set of blocks for multiple pages or posts. Many people have used it to design custom call-to-action banners or image galleries in their blog posts.
Plus, you have the option to make these patterns ‘synced.’ This means that if a pattern is used in multiple posts or pages, then any modifications you make will automatically apply to all instances where the pattern is used.
On the Patterns page in WordPress Full Site Editor, you will see a collection of patterns.
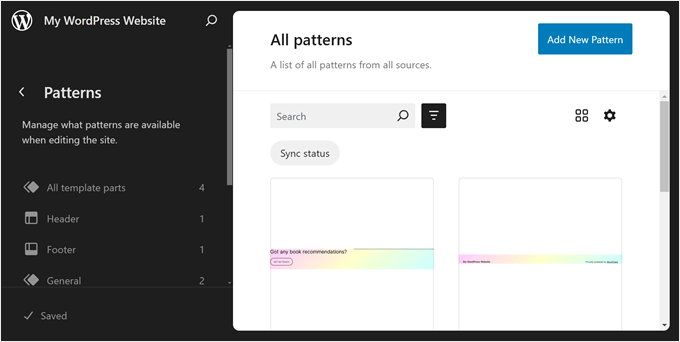
The menus marked with a folder icon contain a list of default patterns offered by your chosen theme. These are locked and cannot be edited.
Below that, you’ll find ‘Template Parts,’ which are a special type of pattern used in your website structure and not necessarily a part of your page content. Examples include your website’s header, footer, comment section, and so on. These are all customizable.
To add a new pattern, click the ‘+ Create pattern’ button in the left panel and choose between creating a new pattern or a template part.
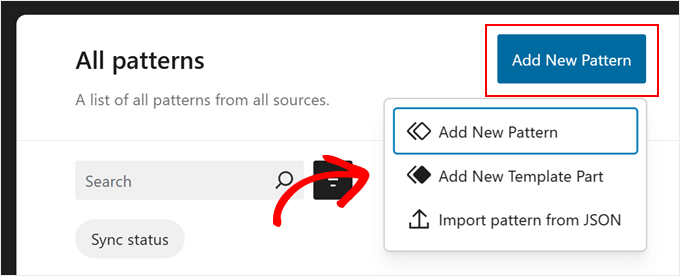
If you are confused about which one you should pick, then a pattern is similar to a reusable block you can add to your page or post content. Meanwhile, a template part is more like a set of blocks that are a part of your template structure, like a header, footer, or sidebar.
A template part will automatically have a syncing ability, so all the changes made to it will apply across your website. Think of parts like the header or footer.
On the other hand, a pattern can be synced or unsynced.
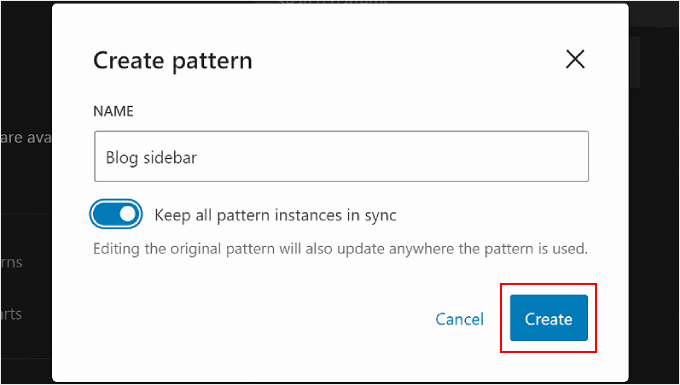
After that, you must name the template part or pattern and choose whether to make it synced. Once you’ve done that, simply hit ‘Create,’ and you’ll be redirected to the editing interface.
For more information about creating and using patterns, you can check out our beginner’s guide on how to use WordPress block patterns.
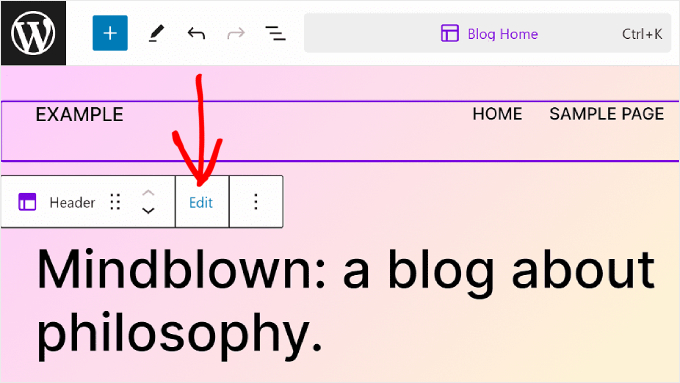
When editing a page or template, you may want to adjust a block pattern or template part, too. You can do that right in the editor without going to the Patterns menu.
Simply hover over the pattern or template part. After that, click ‘Edit.’ You will then be redirected to the Full Site Editor for that element.
Tips to Make the Most Out of WordPress Full Site Editing
Now that you are familiar with the basics of Full Site Editing, let’s discuss some tips and tricks to make the most out of it.
Use the Command Search Bar
With the command search bar, you can navigate quickly to a certain part of your website or perform actions to edit your web design.
This feature can be helpful if you want to find a specific setting in the Full Site Editor immediately instead of going through different buttons and menus.
If you are in the main menu of the Full Site Editor, then you can click on the magnifying glass icon to use it.
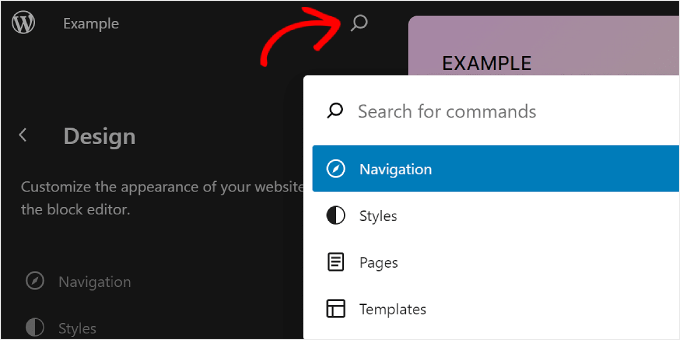
Alternatively, you can press Ctrl/Command+K on your keyboard while in the editing interface.
Then, simply type in what you want to find or do. For instance, you can add a new post or page without returning to the WordPress dashboard.

Manage Blocks With List View
When you are editing a page, template, or pattern, you may find yourself adding so many blocks that it’s hard to keep track of them all.
This is where the List View can come in handy. With this feature, you can see every block added to the page, template, or pattern, including the ones nested in another parent block.
To activate the List View feature, all you have to do is hit the three-line button at the top left side of the editor’s menu bar. You will then see all the blocks used in that page, post, template, or pattern.
If you want to configure a specific block that’s inside a group, row, column, or similar, just click on that block from the List View. From there, the block will be selected, and the toolbar will appear.
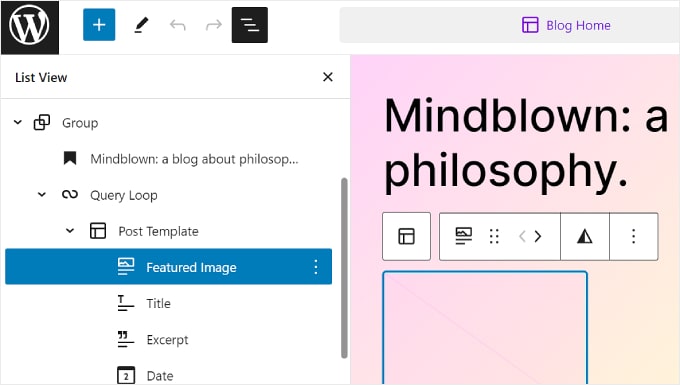
Check out the screenshot above for an example. Here, we want to edit the featured image block, but whenever we click on it, the query loop block gets selected instead.
Using the List View helps us see all of the blocks nested inside the query loop block and select the block we actually want to edit.
Get Familiar With Keyboard Shortcuts
If you want to get faster at editing your website, consider learning keyboard shortcuts. With shortcuts, you can navigate through different buttons and settings using your keyboard instead of going back and forth by moving your mouse.
The shortcuts used in the block content editor will also work in Full Site Editing. You can check out our list of WordPress keyboard shortcuts for more information.
Create a Child Block Theme
One of the problems of using a WordPress theme is that if you make customizations to the core theme files, those changes might get lost during a theme update. This is where a child block theme comes in handy.
A child block theme inherits all the styles and functionalities of your parent block theme, allowing you to make modifications without affecting the core theme files. This way, you can easily update your parent theme in the future without losing your customizations.
If you’ve created child themes for classic themes before, creating a child block theme works a bit differently.
This is because block themes use a theme.json file to store theme information and CSS to style the website. There’s no need to modify the parent theme’s PHP files in a child block theme.
Thankfully, creating a child block theme is not as complicated as it seems. The easiest way we’ve found is using the Create Block Theme plugin.
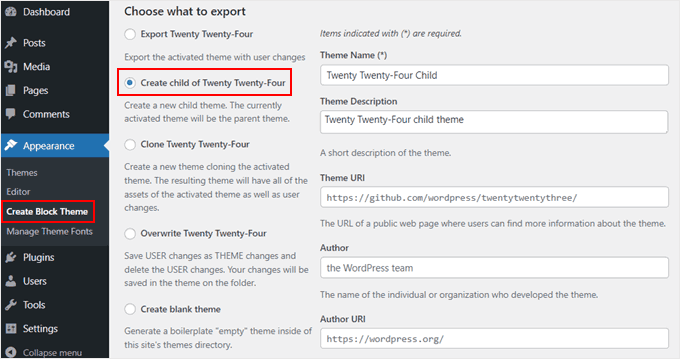
The Create Block Theme plugin not only allows you to easily create a child block theme for your existing theme, but it’s also a great tool to create your own block theme from scratch.
This way, you have complete control over the design and functionality of your website without relying on a pre-made theme.
For more information on creating child themes in WordPress, you can check out our guide on how to create a child theme.
Limitations of WordPress Full Site Editing
WordPress Full Site Editing has definitely made it easier for new WordPress users to customize their websites. Still, this feature has some shortcomings.
For one, you will need a block theme to use it. There are many new block themes available, but there are not as many as regular WordPress themes. If you use WooCommerce, then your theme choices may be even more limited.
Other than that, some WordPress users don’t like the fact that block themes don’t have widgets. While blocks offer more flexibility in placement, some users prefer the simplicity of drag-and-drop widgets in designated areas.
Plus, switching themes can be a hassle, as you will have to set up the theme again and check if there are compatibility issues with your WordPress plugins.
Furthermore, a lot of your customization relies on the options offered by your WordPress theme. This can limit your creativity when building your site.
How to Use a Full Site Editing Alternative
If you are looking for a WordPress Full Site Editing alternative, then you can check out SeedProd. It’s a powerful page builder plugin and theme builder with 300+ mobile-friendly templates to create any kind of website.
The drag-and-drop builder is easy to use, and there are 90+ page blocks available for content elements. There are also dozens of pre-built sections, like calls to action, that are optimized for conversions, so you won’t need to design these elements from scratch.
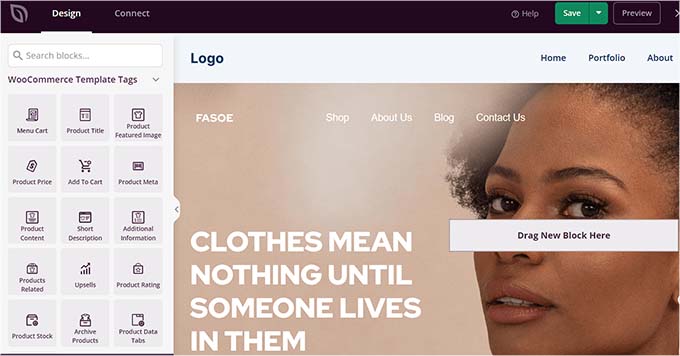
You can read our SeedProd review and our article on how to create a custom WordPress theme for more information.
We hope this beginner’s guide has helped you learn how to use WordPress Full Site Editing (FSE). You may also want to check out our article on common WordPress block editor problems and our ultimate guide on WordPress SEO.
If you liked this article, then please subscribe to our YouTube Channel for WordPress video tutorials. You can also find us on Twitter and Facebook.


Oyatogun Oluwaseun Samuel
Thank you for this resource on wordpress full site editing. I like the flexibility that word press block editor offer to web developer like me. Also the fact that I can use patter is of immense benefits and time saving. Anyone who is able to master wordpress full site edition will be able to create stunning customized websites with ease and efficiency. I appreciate you for sharing this.
Simone
Thanks for the comprehensive guide.
Im looking a way to add custom icons (for example Font Awesome) near items (pages, categories, submenus, custom links) in the navigation. Is that possible?
WPBeginner Support
For icons like Font Awesome, we would recommend taking a look at our article below:
https://www.wpbeginner.com/wp-themes/how-to-easily-add-icon-fonts-in-your-wordpress-theme/
Admin
Mrteesurez
For me, I still love Classic editing, yes. Even some ecommerce plugins and other recommendations Classic editior.
Gutenberg is quite slow, sluggish, and not in anyway friendly on mobile.
I prefer using page builder may be like Seedprod or elementor instead of gutenberg.
There are still many works for the community to do on that part of gutenberg to make it friendly, fast and mobile optimize.
WPBeginner Support
Thank you for sharing your feedback on the current block editor
Admin
Mrteesurez
But one thing I am thinking of is that, one day, Gutenberg might chase away page builders once it’s well developed to be friendly and fast.
Block editor should be the best if given attention the community, may be later in future.
This gives me a hope that WordPress still have future.
Moinuddin Waheed
Gutenberg is the future as for as wordpress is concerned.
see as for the WordPress developers are concerned, they are making every effort possible to make the WordPress as accessible and available open source as possible.
As for complexity, we have been used to using classic editor for a long time, given the time and energy invested, it is but natural to have an inclination towards it.
Jiří Vaněk
I avoided editing the website using full site editing for quite a long time. For one simple reason. I don’t like working in Gutenberg, so I automatically assumed that working with full site editing would be as uncomfortable as working in Gutenberg. But after reading this article, I will probably give this possibility a chance and try to explore it more deeply. Thanks to wpbeginner, I’ve already learned to control quite a lot of things in Gutenberg, so I’m slowly getting used to finally knowing where to find what and where to set what specifically.
THANKGOD JONATHAN
Can I do the full site editing without any coding skills? As I always egnore this action in my WP admin dashboad because of been afraid not to cause any problems on my site but now as always, I will try to edit some global settings of my site if the editing is visual.
WPBeginner Support
You certainly can use the full site editor without coding knowledge
Admin
Moinuddin Waheed
Full site edit is very good to use for the site to be light and no extra code required. when we install any external plugin for page building, though it makes our task easy but at the same time there is some tradeoff in terms of page speed and load. This full site editor I think will help us build a lightning fast blog which will have fast loading time and Efficient.
thank you for let us know about full site edit.
WPBeginner Support
You’re welcome
Admin
Jiří Vaněk
That’s not quite the case. It always depends on the creator of the website. I built about 7 websites on Elementor, and in pagespeed Insight they all have speeds of 98 to 99. It’s not the pagebuilder, but the overall optimization of the website. Unfortunately, full site editing does not guarantee a fast website. It is important to consider the web as a complex unit.
Ralph
Wow, this looks really powerful! Do you guys think it may be answear to the elementor builder? I’ve heard using elementor is bad, as it may slow down website a lot.
WPBeginner Support
It heavily depends on how you design the site for speed concerns, the plugin itself should not cause a massive performance drop. While the full site editor is improving we would recommend taking a look at the final section of the article for our opinion
Admin