Is your blog getting a lot of attention from non-English-speaking audiences? While English is widely used online, it’s not everyone’s first language. This means you could be missing out on connecting with many potential readers.
We noticed this issue at WPBeginner. We’ve always tried to use simple English, but sometimes, the language can still be a barrier for non-native speakers. That’s why we translated our guides into languages like Portuguese, German, Italian, and Japanese.
We know that manually translating a website can be time-consuming and expensive, especially for small sites or blogs. That’s where automatically translating WordPress comes in handy.
We’ve found an easy method to automatically translate WordPress websites, and we’ll show you how to use it in this guide.
When to Automatically Translate Your WordPress Site
Automatic translation is particularly useful when you need to translate large amounts of content quickly or when you have no budget to hire professional translators. It’s also great for frequently updated content like blog posts, news articles, or even product pages.
But automatic translation isn’t always the best choice.
For things like legal pages, technical instructions, or content that’s very specific to your brand, it’s often better to have a professional manually translate them. These materials need careful wording that automatic tools might get wrong.
Can you translate a WordPress site without a plugin?
Yes, you can, but it will take a lot of time. You’d have to make separate versions of your site for each language and translate every page and post yourself. This is hard work and needs more technical skills, which can be tough for most multilingual website owners.
With that out of the way, let’s look at how you can translate your WordPress content automatically with the WordPress Multilingual (WPML) plugin. You can use the quick links below to navigate through the steps:
Step 1: Install and Set Up the WPML Plugins
Out of all the WordPress multilingual plugins we’ve tried, WPML offers the best automatic translation feature. Besides having multiple automatic translation engines, it is also easy to use and quick at translating your content.
One thing to note is that this plugin is paid, and the automatic translation feature is only available in the higher-tier plans. Other than that, you will need credits to use any of the automatic translation engines, which can be pre-paid, or you can pay as you use them.
That being said, the automatic translation engines include Microsoft Azure, Google Translate, DeepL Translate, and WPML’s own AI, which are all known for their accuracy and reliability.
In our opinion, you’d be getting your money’s worth if you often need to translate large amounts of content or if you’re managing a multilingual website with frequent updates.
For more information, check out our WPML review.
First, go to the WPML website and click ‘Buy and Download.’
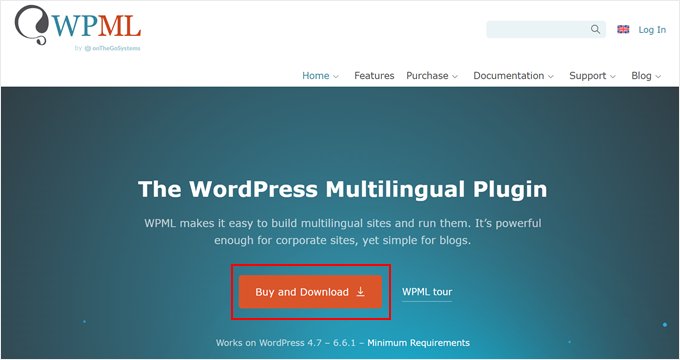
You’re now on their pricing page.
Here, make sure to pick either Multilingual CMS or Multilingual Agency, as that’s where the automatic translation feature is available.
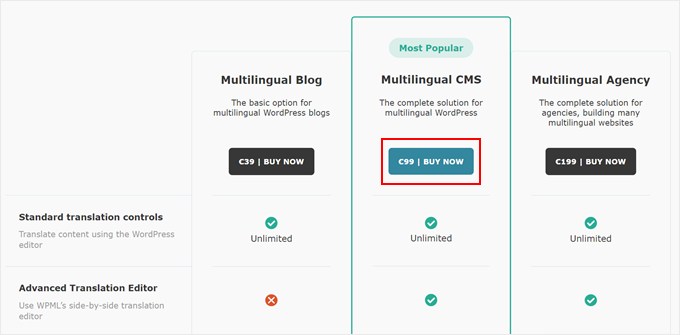
After that, simply complete your payment and create an account.
Then, log in to your new WPML account and open the ‘Downloads’ page. You can do this by clicking on your username at the top right corner and selecting ‘Downloads.’
There, you should see a section that says ‘Quick and Easy Installation.’ Go ahead and click the ‘Download’ button to download the OTGS Installer plugin.
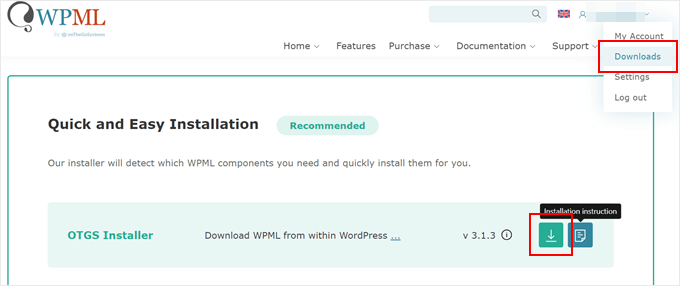
With that done, simply install and activate this new WordPress plugin in your admin area as usual.
Once the plugin is active, you have to go to OTGS Installer. Then, switch to the ‘Commercial’ tab.
Now, you need to click on the ‘Register WPML’ button.

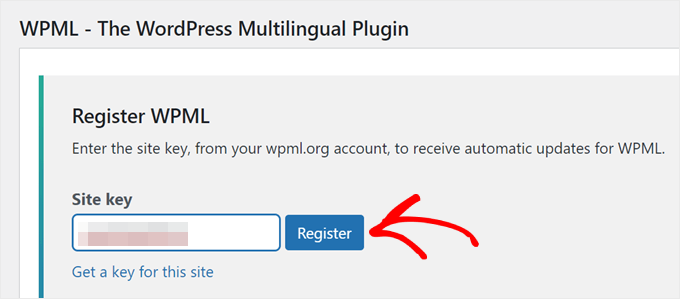
At this point, you need to enter your site key.
You can do this by clicking on the ‘Get a key for this site’ link.
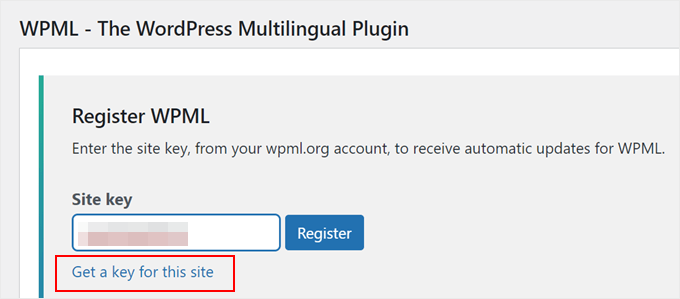
You will now get redirected to your account page on the WPML website.
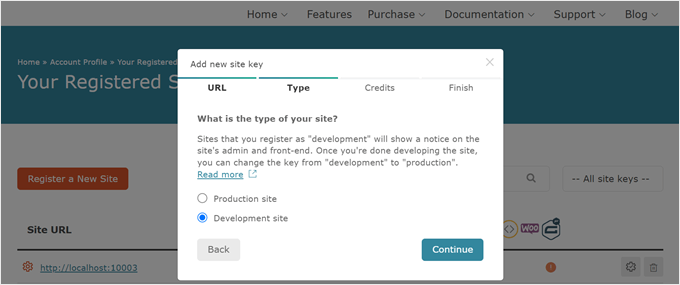
First, choose whether you’re creating a production site (a live website) or a development site. Once you’ve made your choice, click ‘Continue.’
We’re going to pick ‘Development site’ simply because our site is for demonstration purposes only.
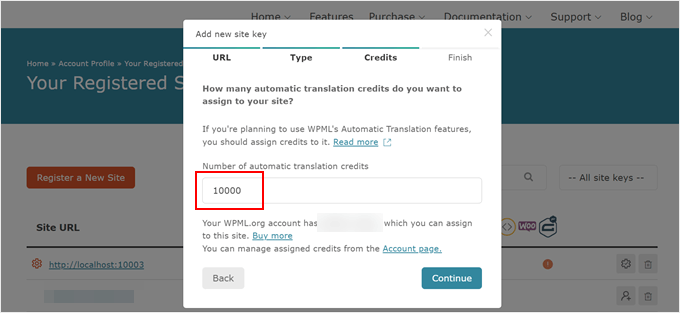
Next, go ahead and assign some automatic translation credits to your WPML plugin. If you don’t have any yet, then you can purchase some credits here.
Once you have assigned the credits, click ‘Continue.’
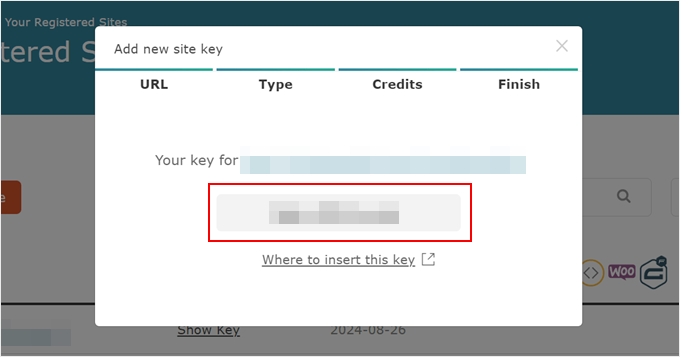
You should now see your newly generated site key.
Go ahead and copy this key, and switch back to your WordPress admin.
Back in the OTGS plugin page, paste your site key in the appropriate field.
Then, simply click on the ‘Register’ button.
Once the registration is successful, you should see a list of WPML plugins you can install. For this tutorial, you will need to choose ‘WPML Multilingual CMS’ and ‘String Translation.’
Below, tick the ‘Activate after download’ checkbox and click on the ‘Download’ button.
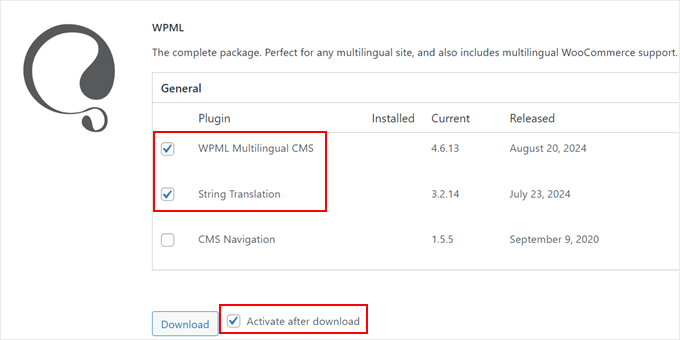
Your WPML translation plugins should now be active, and you can continue to the next step to set up automatic translation.
Step 2: Configure Your WPML Plugin
Now that the plugins are active, you will be redirected to the WPML setup wizard.
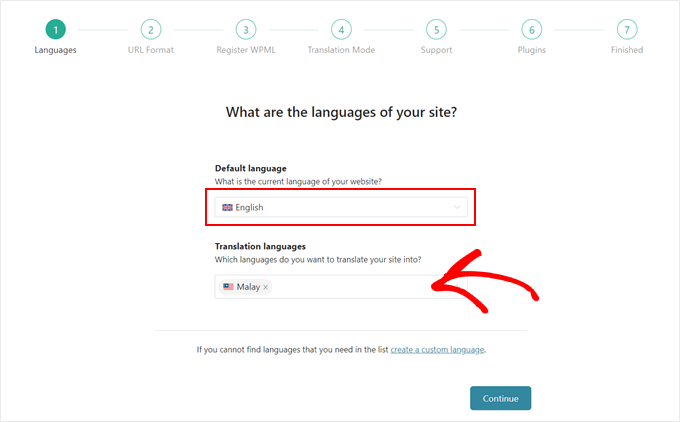
First, you need to choose the default and translation languages of your site. For demonstration purposes, we chose ‘English’ as our default language and ‘Malay’ as our translation language. You can choose more than one translation language if needed.
Once done, click ‘Continue.’
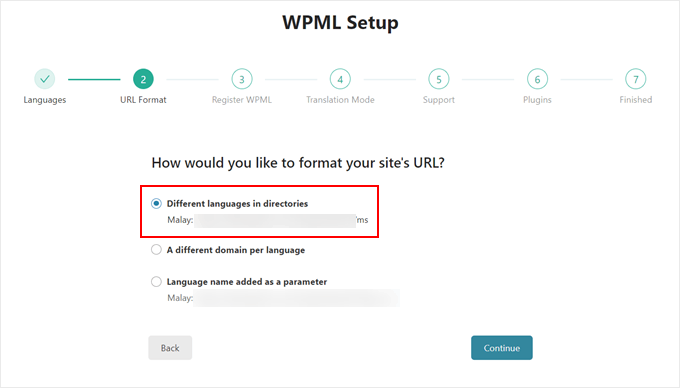
Next, let’s choose the URL format of the translated versions of your content. You can choose between:
- A directory for each language. So, for Malay, an example would be example.com/ms.
- A different domain per language. An example would be example.ms for Malay.
- The language name added as a parameter, like example.com/?lang=ms.
We decided to go with the first option, as it’s pretty simple and we don’t need to purchase a new domain name with a different domain extension. It’s also the format we use here at WPBeginner (e.g. wpbeginner.com/de/).
Once you’ve made your choice, click ‘Continue.’
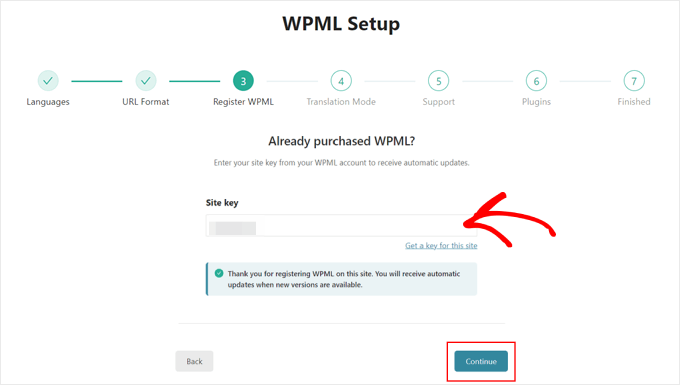
At this stage, you can register your site key again. You can use the one generated earlier and enter it here.
Once done, click ‘Continue.’
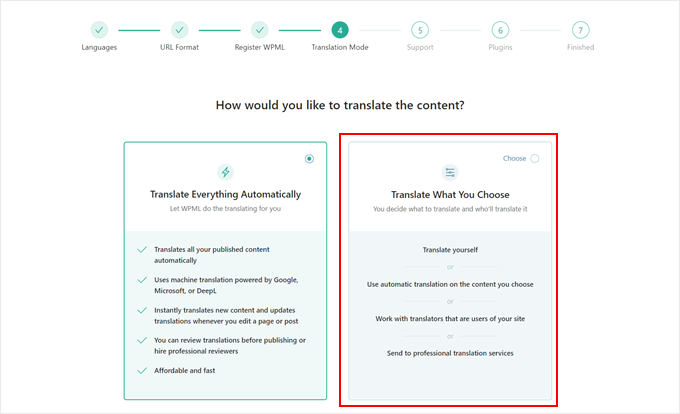
Now, you need to choose a translation mode. One is to translate everything automatically or to translate what you choose.
The choice is up to you, but we recommend going with the second option. This way, you can control what gets translated and how many automatic translation credits get used.
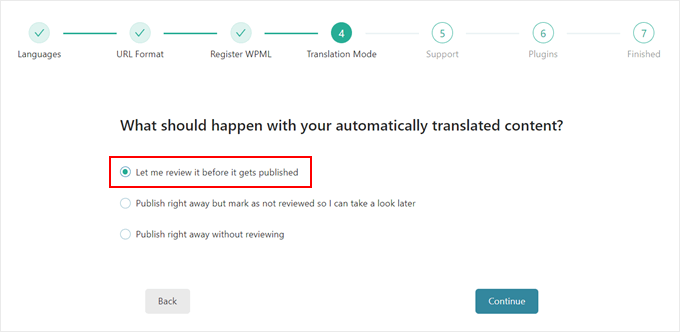
Next, you can choose what happens after the content gets translated. You can review the content before it’s published, publish it right away but mark it as unreviewed to take a look later, or publish it immediately without any review process.
Again, you can pick the best option for your needs, but we’ll select the first one. This is so that we can make sure everything looks good before the content goes live.
Then, click on the ‘Continue’ button.
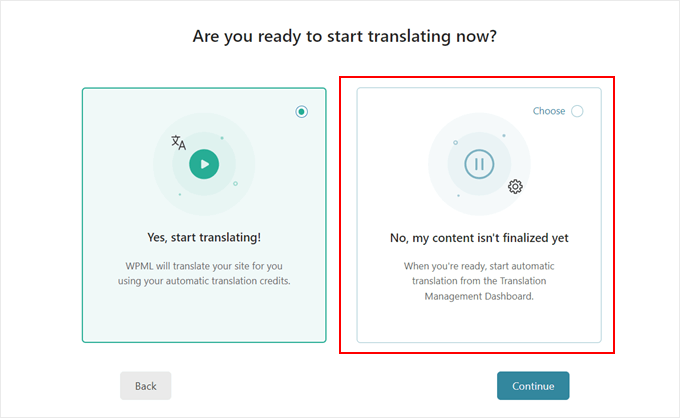
In the next step, you can choose whether to translate the content right now or later.
For the sake of demonstration, we’ll go with the second choice, as there are certain settings you have to configure first.
After that, click ‘Continue.’
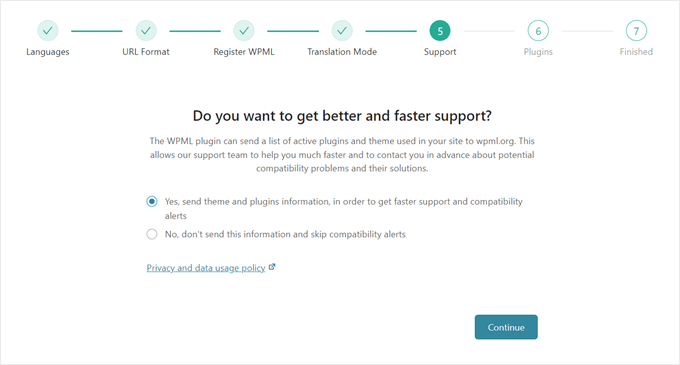
At this stage, you can opt to send WPML your plugin and theme information so that they can figure out any potential compatibility issues that may happen.
You can also skip this step and just hit the ‘Continue’ button.
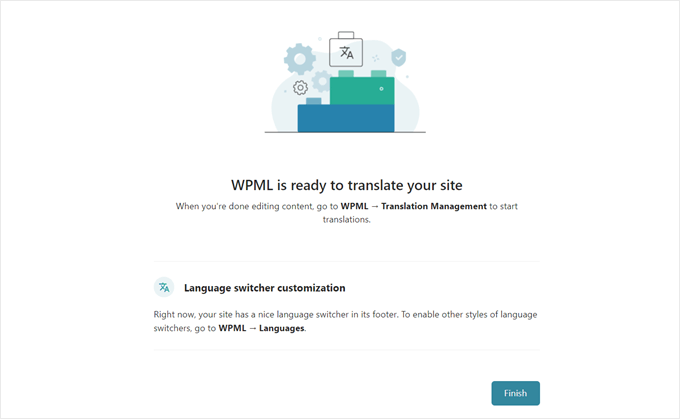
And that’s it for setting up our WordPress translation plugin.
Go ahead and click the ‘Finish’ button.
Step 3: Start Translating Your Content
We can now begin using the translate plugin. But first, we need to configure the automatic translation engine.
To do this, go to WPML » Translation Management and switch to the ‘Tools’ tab.
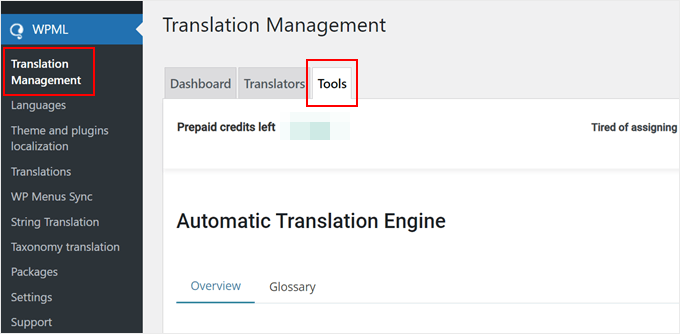
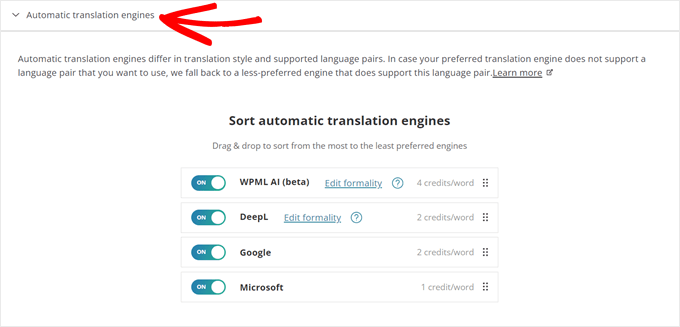
Next, scroll down to the ‘Automatic translation engines’ tab. You should now see all the automatic translation engines used by WPML: WPML AI, DeepL, Google Translate, and Microsoft Azure.
WPML AI is the plugin’s translation engine. It actually integrates DeepL and Google translation technologies, so you can get a much better, more accurate translation with this option.
However, it’s only available for translating English content to German, Spanish, French, Portuguese, and Italian. Plus, every word translated using this engine will cost you 4 credits.
On the other hand, DeepL is considered very accurate and natural sounding for a translation engine. We prefer using this to Google and Microsoft, and it costs 2 credits per word.
Microsoft and Google are comparable in that they can translate your content pretty accurately, but they may not be great for content that contains a lot of context or nuance.
In this tab, you can sort the translation engines from the most to the least prioritized. You can also enable or disable certain engines if needed to save even more credits.
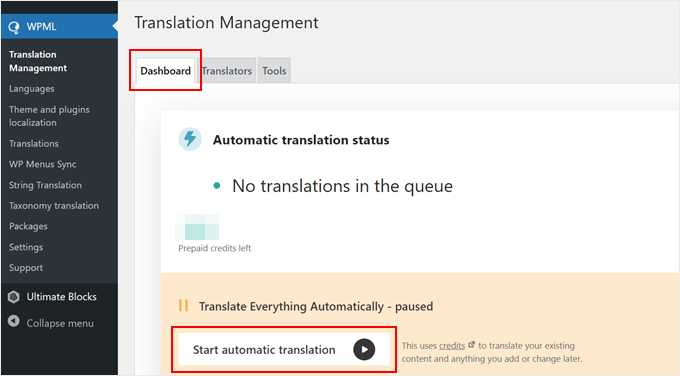
Now that you have configured your automatic translation engines, you can switch to the ‘Dashboard’ tab.
If you want to translate your entire site right away, then you can just click on the ‘Start automatic translation’ button. But if you just want to translate certain pieces of content, then you can skip this part and move on to the next step.
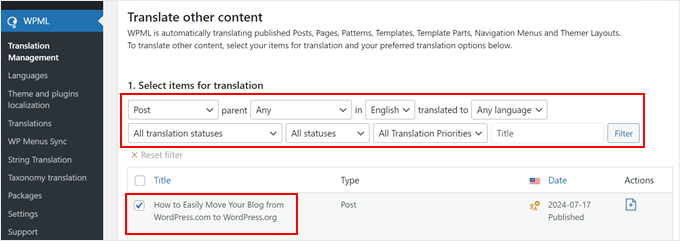
To be more selective about which pages, posts, or parts of your site are translated, scroll down to the ‘Translate other content’ section.
Now, you can tick off the checkboxes for the content you want translated. You can also use the filters to select multiple posts or pages at once.
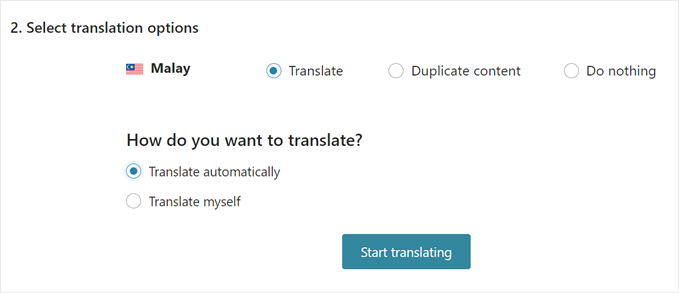
Once you have chosen the content to translate, scroll down to the ‘Select translation options’ section.
Then, choose ‘Translate’ and ‘Translate automatically’ for the translation mode.
After that, click on the ‘Start translating’ button.
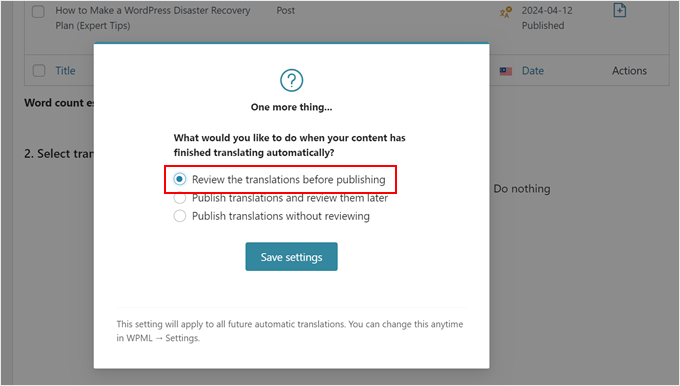
A popup will appear asking you how you should review the content: review the translations before publishing, publish translations and review them later, or publish translations without reviewing them.
Since we want to show you this translation plugin’s review feature, we will pick ‘Review the translations before publishing.’ Next, click ‘Save settings.’
All you need to do now is wait a few minutes until the translation is done.
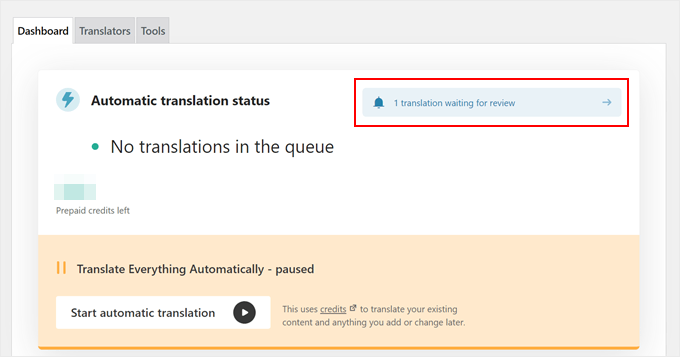
When everything is finished, you will see a ‘X translation waiting for review’ notification button. Click on it to move on to the next step.
Step 4: Review and Publish Your Translated Content
After you click on the button from the last step, you will now arrive at the ‘Translations queue’ page. This is where you will see all of the content the plugin has automatically translated.
To see what it looks like, click on the ‘Review’ button.

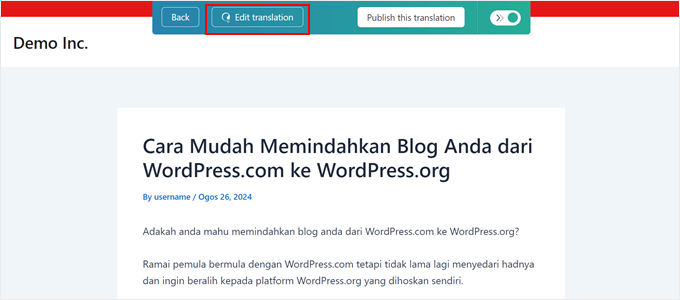
You will now see the preview version of your translated page or post.
If you want to make some tweaks to the translation, then click on the ‘Edit translation’ button at the top.
You should now be inside WPML’s translation editor, which is in dark mode.
The left side shows your original content in the default language, while the right side displays your translated content.
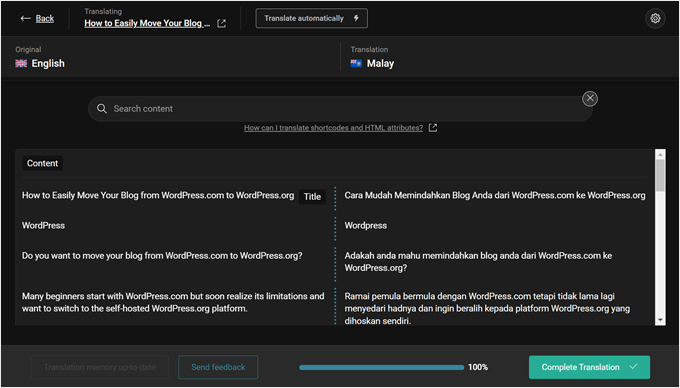
To start editing, you can click on any of the text snippets on the right side of the page. Then, just make your modifications, and click ‘Save.’
You can also have the plugin re-translate the text automatically by clicking on the ‘Translate automatically’ button.

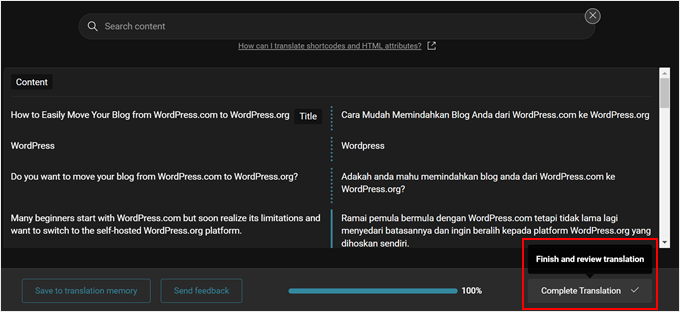
Once you are satisfied with what the translation looks like, just click on the ‘Complete Translation’ button.
You will then return to the preview version of your translated content.
Make sure to read your translated content once again so that everything looks good. If you’re not a native speaker of this language, then we suggest asking a second or third opinion from someone who does speak the language.
When you’re satisfied with the translation, hit the ‘Publish this translation’ button.

Your translated content should now be published in the translated version of your website.
You can access it by visiting the front end of your website and scrolling down until you find WPML’s language switcher in the footer section.
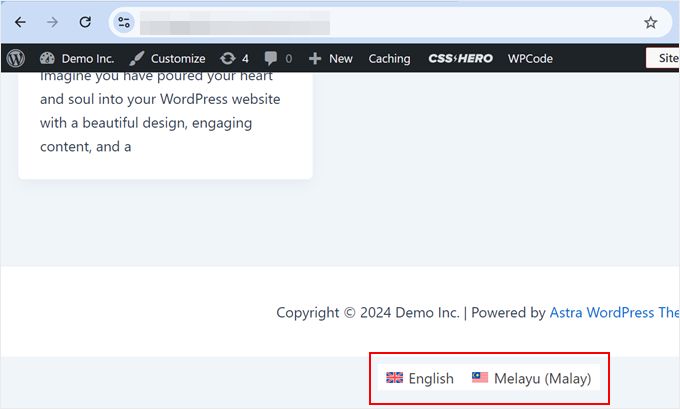
You should then see an identical version of your site that contains all of your translated content there.
You will also notice that the site uses a language subdirectory (if you use the directory URL format).
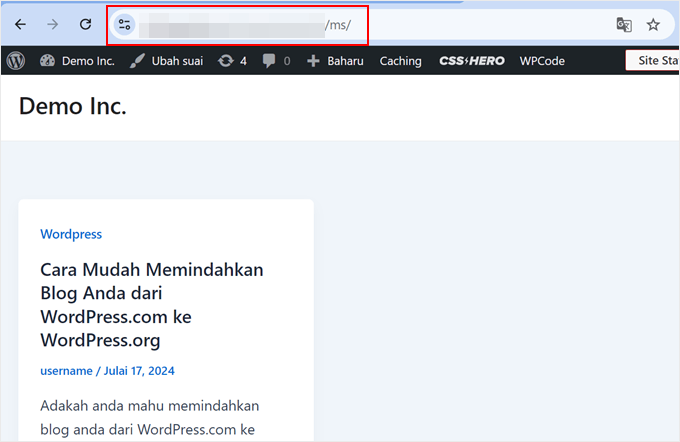
And that’s it! If you want more information, you can check out our guide on how to easily create a multilingual WordPress site with WPML.
Alternative: Use SeedProd’s AI Content Generator to Translate Your Landing Pages
If you’re looking for a quick way to translate specific pages on your WordPress site, then SeedProd offers an alternative solution. As one of the popular page builders for WordPress, SeedProd includes an AI assistant feature that can translate content into over 50 languages.
This tool is particularly useful for translating WooCommerce product descriptions, landing pages, or specific sections of your WordPress website. It’s especially handy for those running an online store and wanting to reach international customers.
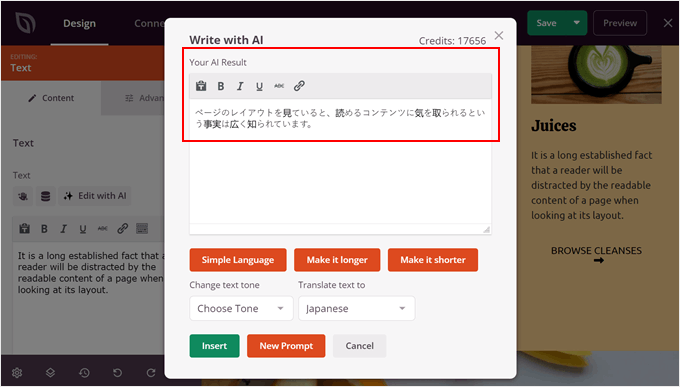
To use it, you can click on any text in the SeedProd editor. Then, click ‘Edit with AI’ in the left sidebar.
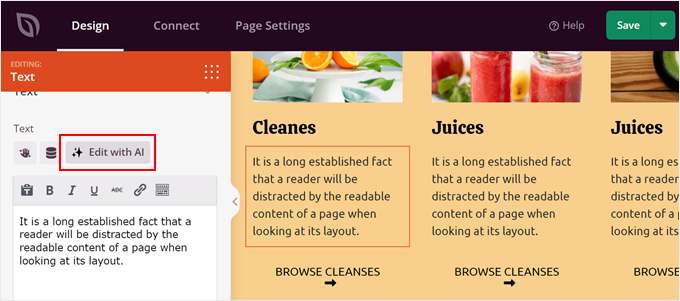
The AI Assistant will now appear.
After that, you can choose one of the languages to translate the text into.
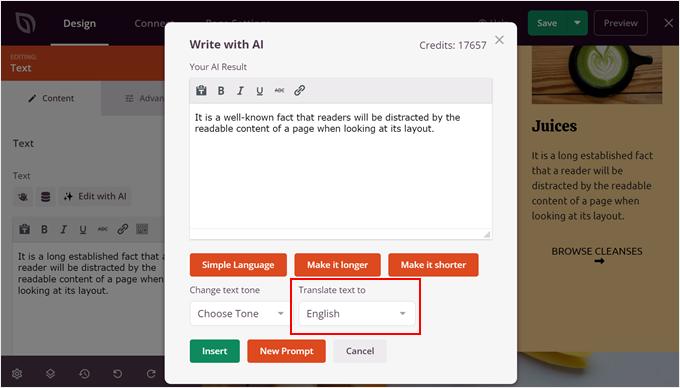
Once you have chosen one of the languages, you can keep optimizing the text by making it simpler, longer, or shorter and even changing the tone.
When you’re happy with how it looks, just click ‘Insert.’
For more information about the plugin’s AI feature, check out these guides:
- SeedProd Review: Is it the Right Page Builder For You?
- How to Use AI to Boost Your Marketing
- Tips for Using AI to Skyrocket Your Lead Generation Campaign
Learn More Multilingual WordPress Tips and Tricks
Want more tips and tricks to launch a multilingual WordPress site? Check out these guides:
- How to Easily Create a Multilingual WordPress Site
- How to Add Multilingual Search in WordPress
- How to Find and Translate a Translation-Ready WordPress Theme
- Best RTL WordPress Themes (Right to Left Language Support)
- How to Easily Create a Multilingual Sitemap in WordPress
- Weglot coupon code: Get 15% OFF
We hope this article has helped you learn how to easily translate WordPress automatically. You may also want to check out our guide on how to translate a WordPress plugin in your language and our expert picks of the best multi-currency WordPress plugins.
If you liked this article, then please subscribe to our YouTube Channel for WordPress video tutorials. You can also find us on Twitter and Facebook.


Vegard O.
With this method, it would seem you must always initiate the translation operation manually. Isn’t there a way to make this automatic?
WPBeginner Support
We do not have a recommended method at the moment as the plugin expects you to double-check the translations.
Admin
Amir
This is Amir from WPML team. The next release of WPML (version 4.5) will allow you to translate the entire content of the site automatically without having to manually send pages for translation. To ensure good quality, the default would be for you to review the translations before publishing them.
We’re preparing a beta version very soon and the production version is scheduled for the summer.
WPBeginner Support
We hope our article helps simplify the process for you
Admin
Romel Bezerra
It seems to be very good. I will try to test it as soon as possible.