Contact forms are a must-have for connecting with your website visitors. We use one on our own site, and it’s been a great way to stay in touch with our readers.
On top of that, placing your contact form in a popup makes it easy for visitors to reach out, leading to more inquiries, feedback, and potential conversions.
However, popups can be intrusive if not used wisely. Overusing or showing them at the wrong times can frustrate users. So, finding the right balance is important so your popup contact form is helpful and not disruptive.
At WPBeginner, we’re big fans of WPForms because it’s user-friendly, powerful, and perfect for creating all kinds of forms. The good news is that you can use it together with OptinMonsters to easily create a contact form popup.
In this article, we will guide you through the steps to add a contact form popup in WordPress.

Why Use a Contact Form Popup?
Every WordPress blog or website needs a contact form for users to submit questions, feedback, or problems.
However, if your contact form is only on a single page, then it’s hard for people to find it. As a result, your users may end up leaving your site before contacting you, and you could lose potential leads and conversions.
A contact form popup helps solve this issue by allowing your visitors to quickly view the form by clicking a button. This way, they can get in touch with you from whatever page they’re on.
This type of contact form also helps keep people on your website, as they don’t have to exit the page they are viewing. Plus, you can grow your email list using a contact form popup.
That said, you will first need to create a contact form and display it in a popup on your web pages.
But don’t worry. In the following sections, we will guide you through creating a contact form and adding it to a popup in WordPress.
We will also share our expert tips on creating a popup that grabs attention without being intrusive. This approach makes sure your WordPress site stays user-friendly while maximizing interaction opportunities.
And here’s a quick overview of all the steps you’ll go through:
Ready? Let’s get started.
Step 1: Create a WordPress Contact Form
First, you will need to select a WordPress contact form plugin.
There are many free and paid options you can choose from, but we recommend using WPForms, as it’s the best option for beginners.
We use it ourselves on our website to display contact forms, annual user surveys, and site migration forms. For details on our experience with the plugin, check out our WPForms review.
WPForms is a beginner-friendly form plugin that offers a drag-and-drop builder for creating contact forms in WordPress with just a few clicks. It also offers prebuilt form templates and lots of customization options.
For this tutorial, we will use the WPForms Lite version, which is free and offers a contact form template.
However, you can also use its premium version to unlock more features. For instance, WPForms Pro offers 2,000+ form templates, more customization options, powerful add-ons, and the ability to collect online payments with no additional transaction fees.
To start, you will first need to install and activate the WPForms Lite plugin. If you need help, then you can see our step-by-step guide on how to install a WordPress plugin.
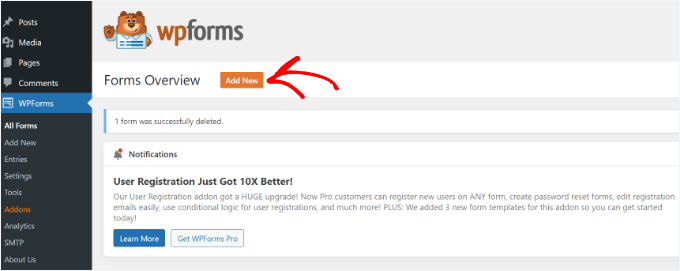
Once the plugin is active, you are ready to create your contact form. All you have to do is go to WPForms » Add New from your WordPress dashboard.
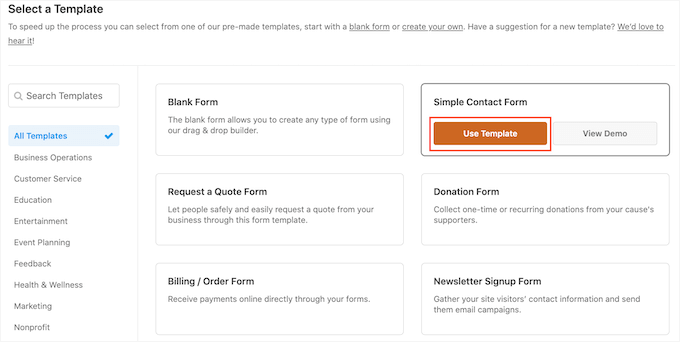
After that, WPForms will ask you to name your form and select a template.
After entering a form name, go ahead and select the ‘Simple Contact Form’ template.
Next, you can add fields in the form using the drag-and-drop builder.
Simply drag the fields you want to add to the form from the options given in the menu on your left. You can also reorder the positions of each field in the form.
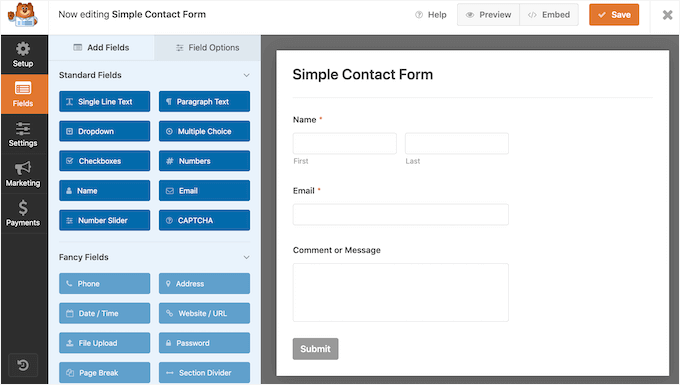
WPForms also lets you customize each field in the contact form.
For example, if you click on the ‘Name’ field, then you’ll get different options, such as changing its label and format. You can even add a description or mark any field as required.
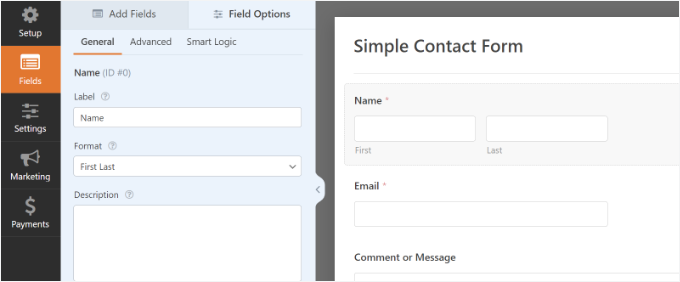
Once you are done, go ahead and click the ‘Settings’ option to configure the form notification and confirmation.
In the ‘General’ section, you can rename the form, change the submit button text, enable anti-spam protection, and more.
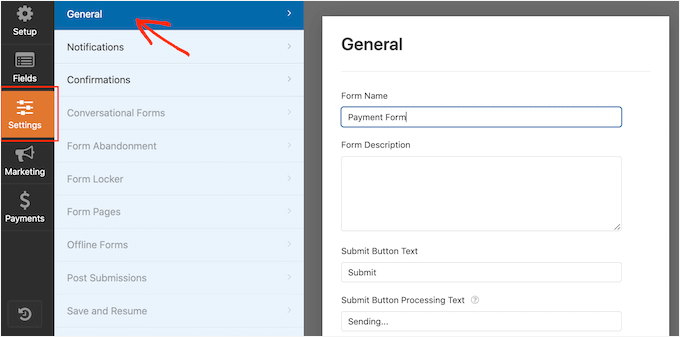
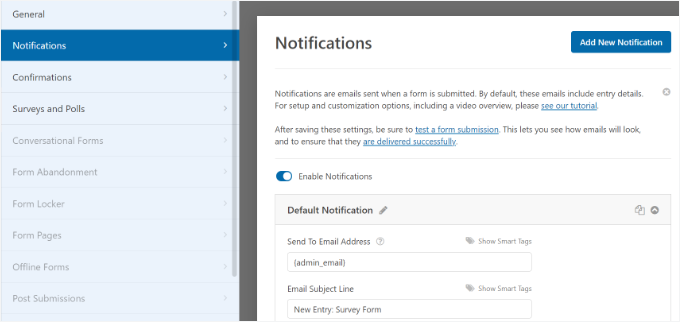
Next, you can go to the ‘Notifications’ settings option. By default, the notifications are sent to the admin email that is set up on your WordPress website.
However, you can send your contact form notification to any email address you want. If you wish to receive send form notifications to multiple emails, then separate each email with a comma.
For the email subject line, WPForms uses the name of the form you entered earlier. However, you can edit the subject line’s text to whatever you wish.
Now, let’s go to the ‘Confirmations’ option.
WPForms will use ‘Message’ as the default confirmation type. Upon submitting a form, this will show your visitors a thank-you message.
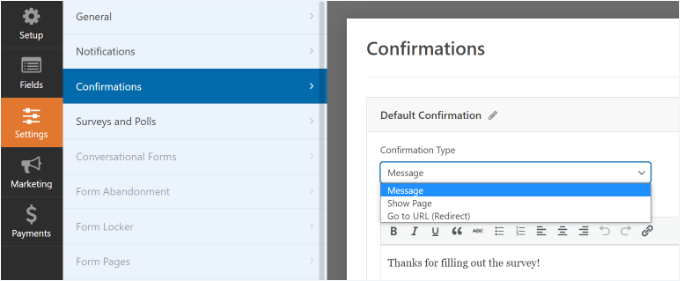
However, you can change the message type and redirect users to a specific page on your website when they complete a form.
Once you are done creating a contact form, make sure to click the ‘Save’ button at the top right corner to save your changes.
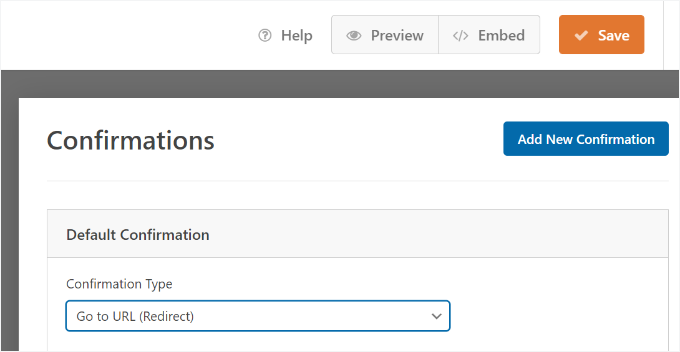
Next, you can click the ‘Embed’ option in the top corner next to the ‘Save’ button to get the form’s shortcode. You will need this information to display your form on a popup.
When a new popup appears, you can select the ‘use a shortcode’ option.
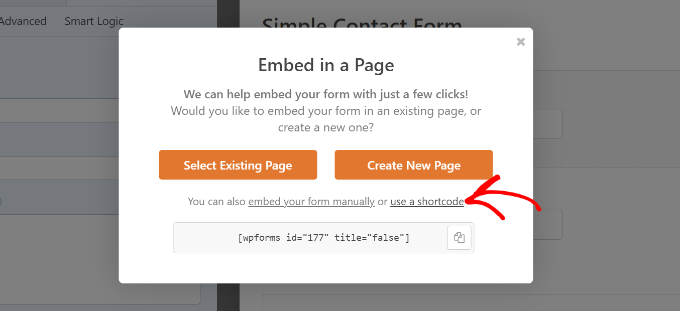
WPForms will then display the shortcode for your contact form as soon as you click the link. We suggest you keep this tab/window open as you will need it in the next step, where we’ll show you how to add your contact form in a popup.
Step 2: Add a Contact Form Popup to Your WordPress Site
To create a contact form popup, you will need a WordPress popup plugin.
We recommend using OptinMonster, as it’s the best lead generation and conversion optimization plugin for WordPress. It’s also one of the most popular, with over 1.2 million websites using this powerful tool.
At WPBeginner, we use Optinmonster for various tasks, including promoting special offers and deals on popups, slide-ins, and header banners. If you want more information, feel free to read our OptinMonster review.
Related: For more insights, you might also want to read our article on how we increased our email subscribers by 600% with OptinMonster.
For this tutorial, we will use the OptinMonster Pro version, which includes a clutter-free template and advanced display rules to show the popup.
First, let’s sign up for an account by going to the OptinMonster website. Simply visit the website and click the ‘Get OptinMonster Now’ button.

Next, you will need to install and activate the free OptinMonster plugin on your website. For more details, you can follow our guide on how to install a WordPress plugin.
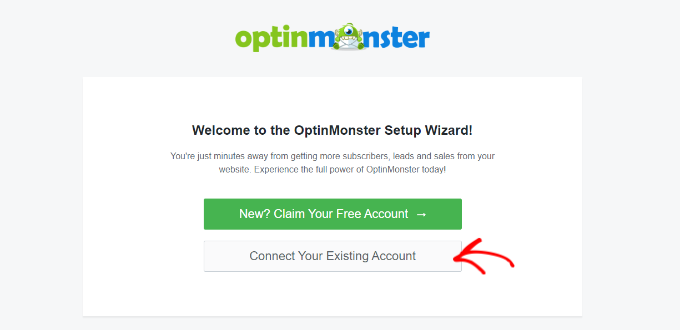
After the plugin is active, you will see the setup wizard. Go ahead and click the ‘Connect Your Existing Account’ button.
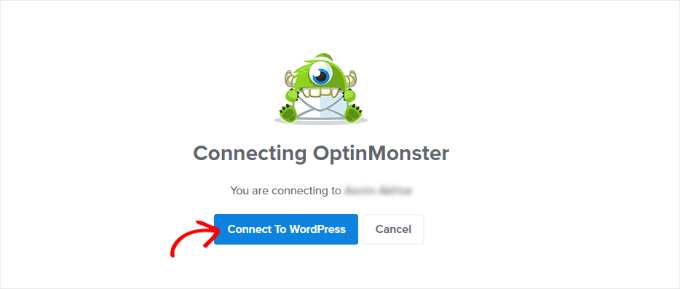
A popup window will now appear, and OptinMonster will ask to connect to your account.
Simply click the ‘Connect To WordPress’ button.
Now that your account is connected, the next thing to do is create a new campaign for your contact form popup.
You can start by going to OptinMonster » Campaigns and then clicking the ‘Create Your First Campaign’ button.

On the next screen, you will have to select a campaign type.
Since we will create a contact form popup, select ‘Popup’ as your campaign type.
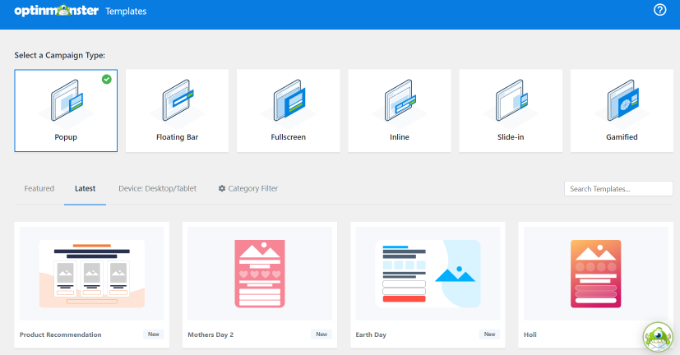
After that, you’ll want to scroll down the page to choose a template.
OptinMonster offers over 75 attractive and highly converting designs for your popups. You can select any template that you like.
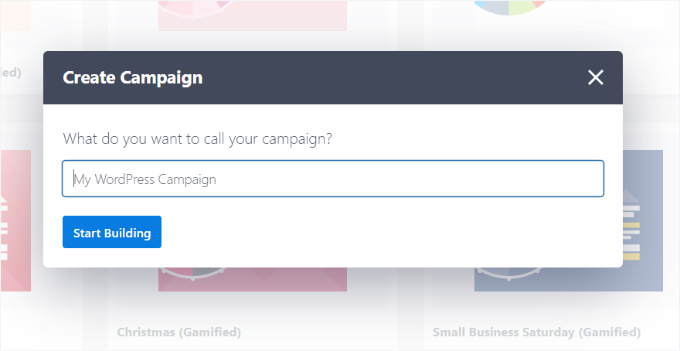
Once you’ve decided on the template, simply enter a name for your campaign and click the ‘Start Building’ button.
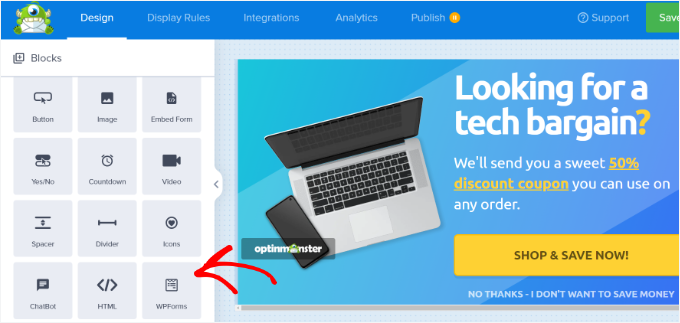
Now, using the drag-and-drop builder in OptinMonster, you can edit your popup template.
You will see different ‘Blocks’ appear in the menu on your left. Let’s locate the ‘WPForms’ block, then drag and drop it onto your template.
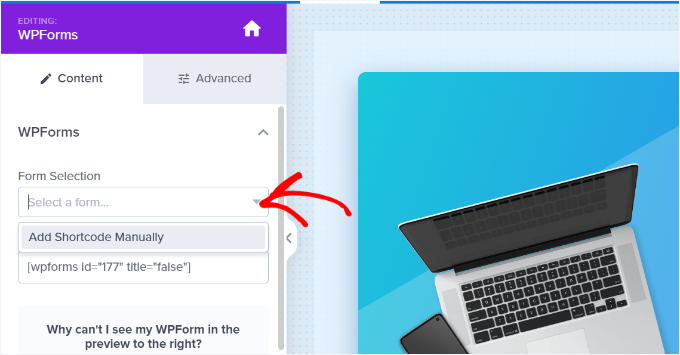
After that, you’ll need to click the ‘Form Selection’ dropdown menu from the block settings in the left menu. Then, select the ‘Add Shortcode Manually’ option.
From here, you can enter your WPForms contact form shortcode in the block. To find the code, you’ll want to go back to your WPForms embed settings and copy the shortcode.
It’s important to note that you won’t see a preview of the contact form in the template when you add the shortcode.
This is normal, as your contact form will appear when the campaign is published.

Next, you can go to the ‘Display Rules’ tab at the top to choose when the popup should appear on your website.
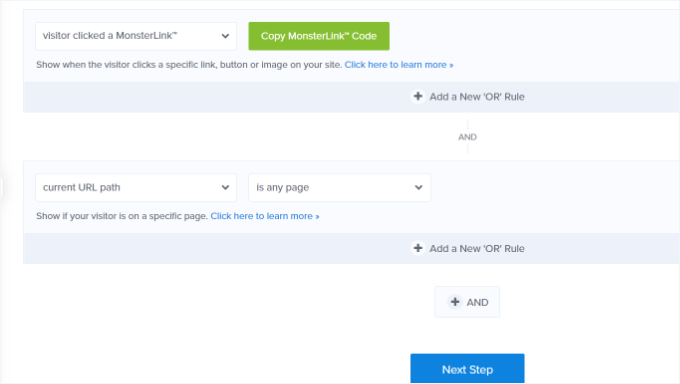
By default, OptinMonster will set it to when the time on the page is 5 seconds, and the popup will appear on any page. However, you can change the display rule settings and select different triggers and targeting options.
We suggest using the MonsterLink (On Click) targeting. This way, your popup will appear when a visitor clicks a link or a button.
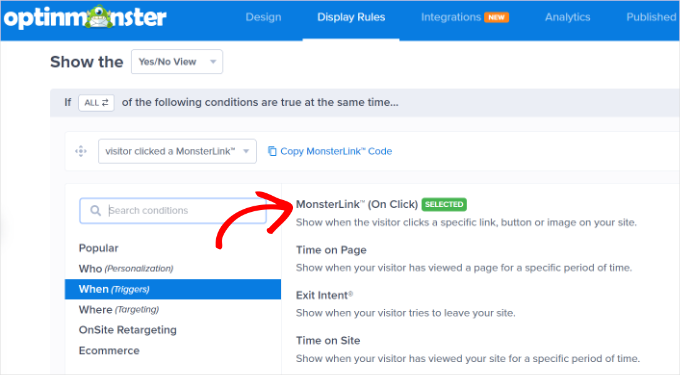
Next, you can click the ‘Copy MonsterLink Code’ button and add it to any text, image, or button on your website.
For more details, you can follow our beginner’s guide on how to add a link in WordPress.
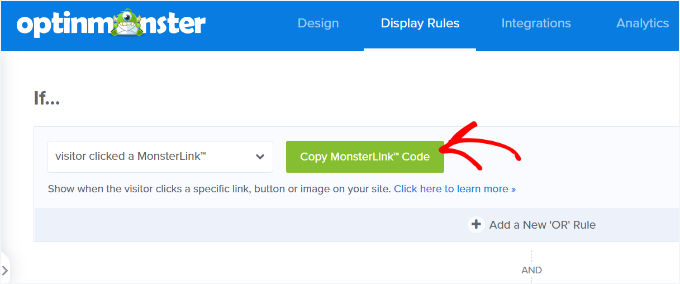
Your MonsterLink code will look like this in HTML:
<a href="https://app.monstercampaigns.com/c/ep6f5qtakxauowbj8097/" target="_blank" rel="noopener noreferrer">Subscribe Now!</a>
However, to embed the link on your WordPress blog post or page, you just need the URL from the code.
Here’s what the URL should look like:
https://app.monstercampaigns.com/c/ep6f5qtakxauowbj8097/
For example, let’s say you want to add a Contact Us button on your site.
In this case, you can start by editing any page or post and go to your WordPress editor. Then, you’ll want to click the (+) plus sign at the top and add a ‘Buttons’ block.
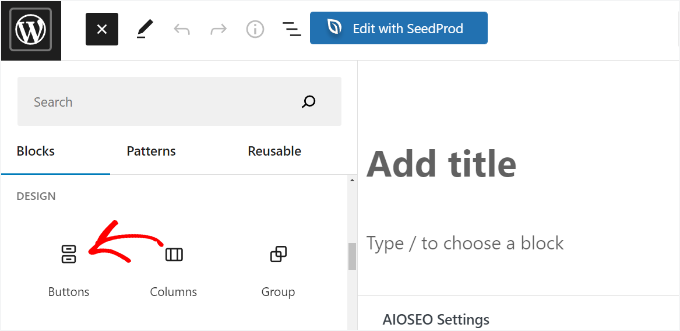
After that, you can enter a text for your button and click the link icon. For example, we use ‘Contact Us’ as the button’s copy.
Now, it’s time to add the MonsterLink URL to your button. Click on the button, then on the link inserter button, and paste the URL.
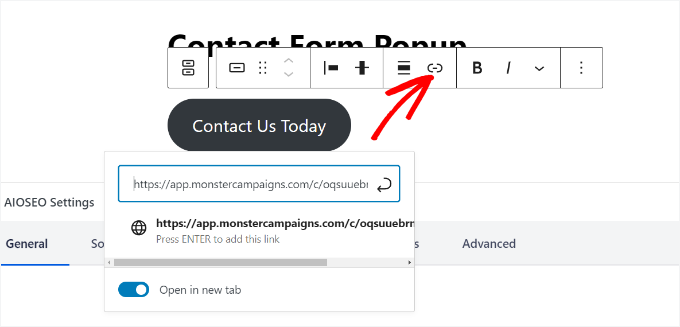
Once you have done that, go ahead and publish your WordPress post or page. The MonsterLink will now be added to your ‘Contact Us’ button.
Now, let’s head back to your OptinMonster campaign to complete the configuration.
After selecting MonsterLink as your target and showing it on any page, you can click the ‘Next’ button at the bottom.
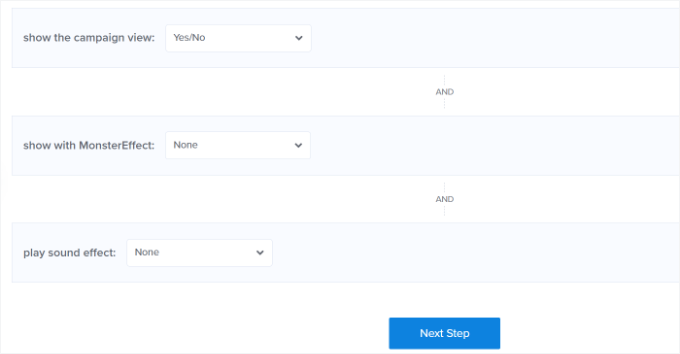
On the next screen, you will see options to change the campaign view type, add a MonsterEffect animation, and play a sound when the popup appears.
You can be creative and experiment with different settings. When you are happy with the configuration, go ahead and click the ‘Next’ button.
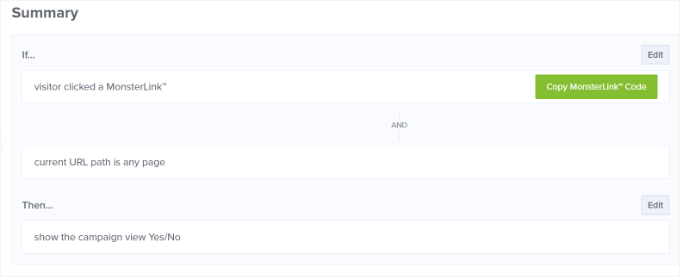
OptinMonster will then show a summary of your ‘Display Rule’ settings.
This helps to ensure you have correctly set up when your campaigns will appear on your website.
Now, you are ready to take your campaign live and publish your contact form popup. To do that, you’ll want to go to the ‘Publish’ tab at the top.
Next, you can click the ‘Preview’ button before publishing your campaign. This will show you a live preview of how your popup will look on your website.
When you are happy with your campaign’s appearance, change the ‘Publish Status’ from ‘Draft’ to ‘Publish.’
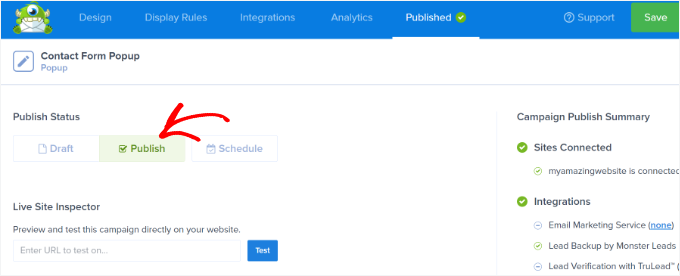
Once done, you can exit the OptinMonster campaign builder and check the status of your campaign from your WordPress dashboard.
To do this, you’ll want to navigate to OptinMonster » Campaigns. From here, simply click the ‘Status’ dropdown menu and change it from ‘Pending’ to ‘Publish.’
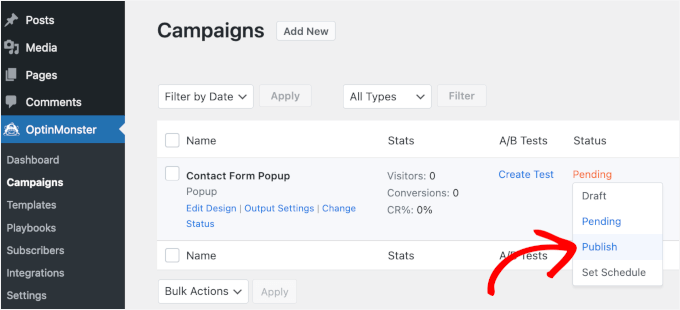
OptinMonster will automatically update the changes.
Next, you’ll want to go to where you display the ‘Contact Us’ button with MonsterLink integration and see the contact form popup in action.
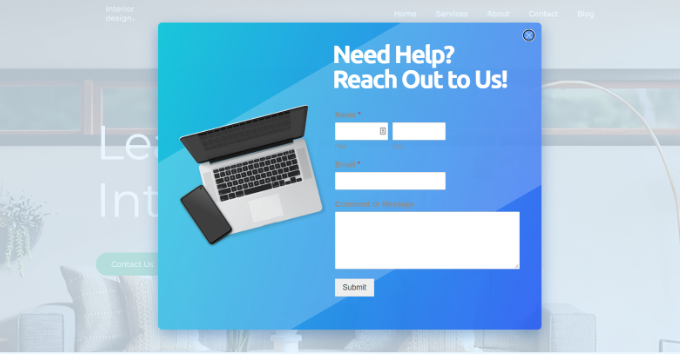
There you have it!
You’ve successfully created a contact form plugin in WordPress. Even more, you’ve done so while ensuring that the form is non-intrusive.
Bonus Tip: Boost Your Popup Signups
Now that you know how to create a contact form popup, the next step is making sure it improves user experience instead of causing visitors to bounce from your site.
To maximize signups, you should focus on creating helpful and relevant popups rather than intrusive ones.
First, timing is key. Popups that appear too soon can frustrate users, so try showing them after a visitor has scrolled or spent some time on your site.
Personalization is another game-changer. To make your popups feel more relevant, you should tailor them to what users are doing, like offering a discount on a product they’re browsing.
To encourage quick action, create urgency with phrases like “Limited time offer” or tap into the fear of missing out (FOMO) by highlighting what they could gain by acting now.
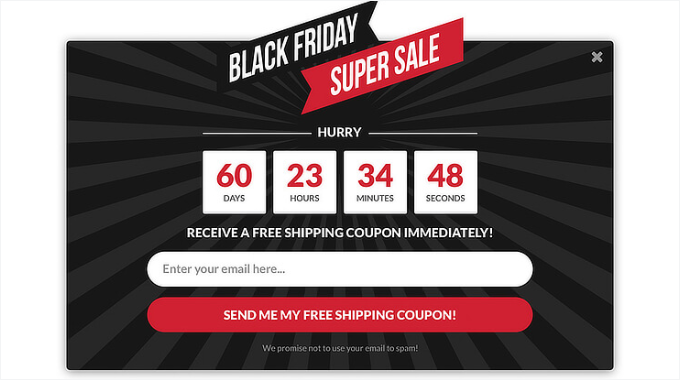
Adding social proof, like reviews or stats, can also build trust and make your popups more convincing. Don’t forget the role of color: bold hues can grab attention, while softer tones build trust and harmony.
By combining these strategies, you can create popups that grab attention, connect with your audience, and drive action without feeling pushy. For more information on this topic, you can check out our guide on how to use the psychology of popups to boost signups by 250%.
Video Tutorial
Before you go, we’ve prepared a video tutorial on adding a contact form popup to your WordPress site. Be sure to check it out!
We hope this article helped you learn how to add a contact form popup in WordPress. Next, you may also want to check out our guide on how to send confirmation emails after WordPress form submissions and how to track and reduce form abandonment.
If you liked this article, then please subscribe to our YouTube Channel for WordPress video tutorials. You can also find us on Twitter and Facebook.


Dennis Muthomi
WOAH, you mean I can add a form that is built by WPForms and use it on OptinMonster?!
I did not even know that two of my most favourite tools can be used together.
THANK YOU SO MUCH WPBeginner, now I have some work to do on my site. You are the best!
Jiří Vaněk
Elementor has a feature that allows you to set animations for popups. This lets you make the popup slide up from the bottom of the webpage like a card instead of just appearing as a traditional popup. This can also be done using tools like OptinMonster with their “slide-in” feature.
kzain
I was looking for this on adding a contact form popup to a WordPress site! The ability to capture leads directly is invaluable, and popups offer a convenient way to grab user attention. The step-by-step instructions with plugin recommendations make it easy to implement. Thanks for sharing this helpful resource
Ankit
A well written article. Must read for non-tech beginners like me.
WPBeginner Support
Glad you found our content helpful
Admin
Deepak
Hi i want to popup form whn i clk button… How i can do this
WPBeginner Support
For what it sounds like you are wanting, you would want to take a look at OptinMonster: https://www.wpbeginner.com/wordpress-plugins/optinmonster-wordpress-popup-plugin/
Admin
Isaac
This is nice, but can you explain/show how to do this without OptinMonster? I don’t want to have to buy a second plugin just to show a form in a popup. This should be do-able with WP Forms and a free lightbox plugin.
Editorial Staff
Hi Isaac, there are likely other plugins that can do this, but we recommend the solution that we’re using ourselves. We have a good tutorial on how to pick the best plugin while you look through the WordPress.org plugin directory.
Admin
Kulwant Singh
can i create differents popup for different post ? it is possible or not
WPBeginner Support
Hi Kulwant,
Yes, you can create different popups for different posts.
Admin
Lela Donelson
My WP menu does not have a WP forms option. I have a GoDaddy managed WP.
WPBeginner Support
Hi Lela,
WPForms is a WordPress Plugin. You will first need to install and activate it. For more details, see our step by step guide on how to install a WordPress plugin.
If you have already installed and activated the plugin, and you still can’t see it in your WordPress admin menu, then please contact WPForms Support or your hosting company.
Admin
Michael Wahhab
Where’s the demo?
Nick Vail
Are pop up windows only available with the paid “business plan”?
Ruben
Before buying I want to ask, can I have two call-to-action buttons in a popup? I want two buttons one for downloading my app from App Store and second from Play Store.
WPBeginner Support
Yes you can.
Admin
shagufta
how to have tabs in the popup that will link to div’s which will open in the same popup
Jhorene
Hello,
Before I buy Optinmonster, can you tell me if it is fully mobile responsive to have a form inside the canvas popup?
Thank you.
Regards,
Jhorene
WPBeginner Support
OptinMonster comes with a feature called mobile friendly popups. You can create different popups for your desktop and mobile users, providing a much better user experience to your mobile audiences.
Admin
Ian Perera
can i pass data to gravity form
Dave E
Hi, I’m looking for the same. Did you ever find a solution? Thanks
Alicia Beale
How can I use this pop-up contact form to notify different email addresses?
Mike Whaling
Is there a way to do this in the new version of Optin Monster? This worked great when I was using the local WP plugin, but it doesn’t seem to recognize the Gravity shortcode now that I’ve switched over to the new OM.
Any tips or suggestions?
WPBeginner Support
Please open a support ticket on OptinMonster website.
Admin
Silvan
could this work as well in a Wordpress navigation? I’m having some trouble adding the data-optin-slug bit via the WP menu system.
sharul
Can you please show us some demo.
Thank you
WPBeginner Staff
Please submit a support ticket on OptinMonster’s support website.
Alvin Ng
heya man, need some help here. No matter what i do, i can’t get optinmonster to pop up. do i need to replace the # with a link?
Don DeMaio
This would be great if they offered a demo to check it out.