WPBeginner is a pretty large website, so sometimes we need a way to quickly find and organize the thousands of images we’ve uploaded over the years. If you have a large site too, you can do this by adding tags and categories to your images, just like you do with posts.
Whether you’re running a blog, an online store, or a portfolio site, being able to quickly locate the right image can make a big difference in your workflow.
In this article, we’ll show you how to tag images in WordPress using the Media Library Assistant plugin.

Why Should You Tag Images in WordPress?
By default, there’s no way to add tags or create categories for images in WordPress. This can make it difficult to organize your files, so it may take longer to find the image you want to use.
This can be a big problem for photographers, designers, and other people who need to add lots of images and photo galleries to WordPress.
It can also be an issue for online stores that have thousands of product images.
The good news is that it is possible to add categories and tags to your images. This will make it easier to organize your files, so you can always find exactly the right image no matter how many files you upload to WordPress.
With that said, let’s see how you can easily add image tags in WordPress. You can use the quick links below to navigate through the tutorial:
Step 1: Install the Media Library Assistant Plugin
The easiest way to create image tags in WordPress is by using Media Library Assistant. This free plugin lets you create an unlimited number of image categories and tags using the familiar WordPress tools.
First, you’ll need to install and activate the Media Library Assistant plugin. For more details, please refer to our guide on how to install a WordPress plugin.
The plugin has no settings for you to configure, so you can start using it straight away.
Step 2: Create Image Categories and Tags in WordPress
To create an image category, go to Media » Att. Category in the WordPress dashboard and type in a name for the category.
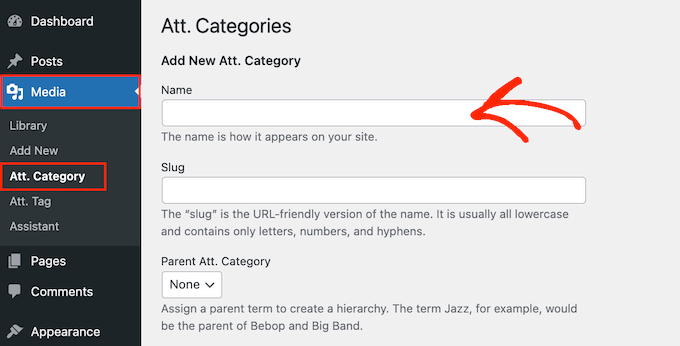
Category titles can help search engines understand your content and how your site is structured. In this way, the category title can improve your WordPress SEO, so it’s important to use a descriptive, helpful title.
For more on this topic, please see our guide on SEO best practices for sorting your content.
When you’re done, go ahead and create the category by clicking on the ‘Add New Att. Category’ button.
To add more categories to your WordPress website, simply follow the same process described above.
Media Library Assistant also allows you to create image subcategories. Simply go to Media » Att. Category, but this time, open the ‘Parent Att. Category’ dropdown menu.
You can now choose the category that you want to use as the parent.
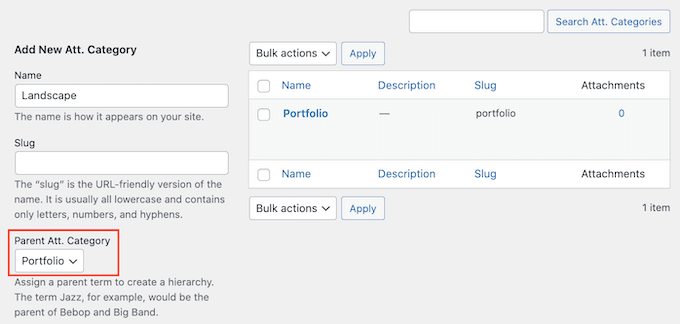
After that, type in some information about the category and click on the ‘Add New Att. Category’ button.
To create image tags on your WordPress blog or website, you need to go to Media » Att. Tag.
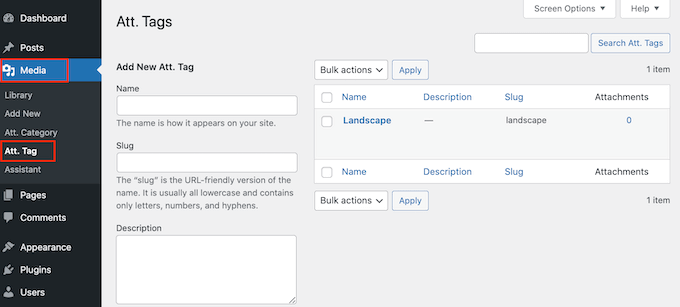
You can now type in the title, slug, and description you want to use. To make the tag live, click on the ‘Add New Att. Tag’ button.
Step 3: Add Tags and Categories to WordPress Media Files
After creating all your categories and tags, you’re ready to add them to your images. If you want to add some images first before doing that, then you can can do this at this stage.
Now, go to Media » Assistant. Here, find the image where you want to add tags or categories and click on its ‘Quick Edit’ link.
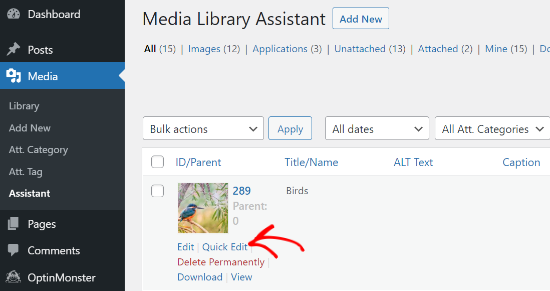
In the ‘Att. Tags’ box, go ahead and type in all the tags you want to add to the image.
You can also select one or more categories from the ‘All Categories’ box.

When you are done, simply click on the ‘Update’ button to store your changes.
How to Search Image Tags and Categories in WordPress
Now that you’ve organized your files, you can now search for them using image tags and categories.
All you need to do is go to Media » Library in the WordPress dashboard. If WordPress shows the list view, then you’ll need to switch to the grid view using the small square grid icon. After that, click on the ‘Terms Search’ button.
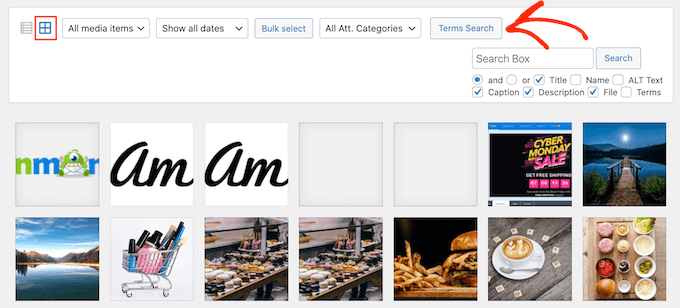
This opens a popup where you can type in the category or tag that you want to search for.
Simply enter the term and then click on ‘Search.’
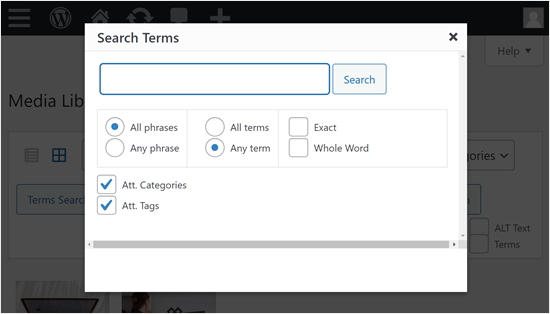
The plugin will now find all the images that have this tag or category.
How to Let Users Search Images Using Image Tags or Categories
Besides asking about how to tag images, some WPBeginner readers are also curious if it’s possible to let visitors search for images using tags and categories.
The answer is yes, if you use the SearchWP plugin. This WordPress search plugin makes it easy to create a custom search engine for your website. You can design this engine to make tags and categories made with the Media Library Assistant searchable.
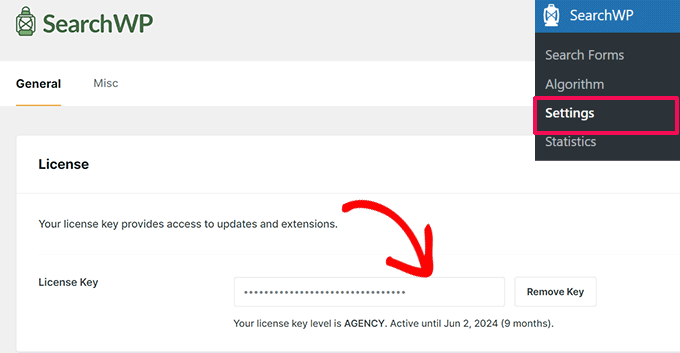
To use SearchWP, you will need to install the WordPress plugin on your website. Then, go to SearchWP » Settings to activate your license key.
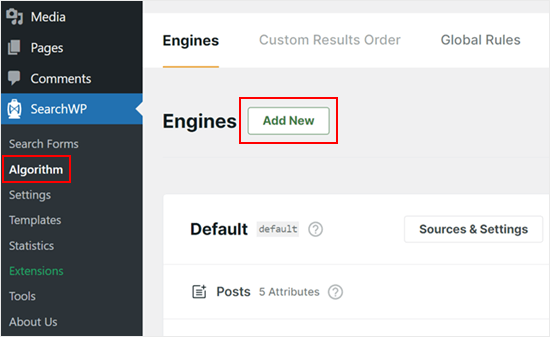
From here, you can go to SearchWP » Algorithm.
Then, click ‘Add New’ to create a custom search engine.
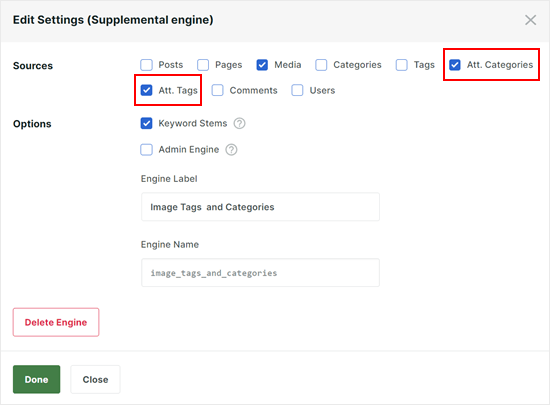
In the popup, select ‘Att. Categories’ and ‘Att. Tags’ in Sources. This will make your new engine index the tags and categories you use for images.
Once finished, click the ‘Done’ button below.
Now, you can continue building your custom search engine by reading these articles:
- How to Create a Custom WordPress Search Form (Step by Step)
- How to Customize the Search Results Page in WordPress
- How to Improve WordPress Search with SearchWP (Quick & Easy)
We hope that this article helped you learn how to tag images in WordPress with Media Library Assistant. You may also want to check out our guide on how to add a gallery with a lightbox effect in WordPress and our expert picks of the best WordPress slider plugins.
If you liked this article, then please subscribe to our YouTube Channel for WordPress video tutorials. You can also find us on Twitter and Facebook.


Patrick Struckmann
is it not possible to use the grid view for the actual media assitant ? with 1000s of files it takes too long to go through in list view
WPBeginner Support
At the moment we do not have a recommended method for using the grid view to achieve this but if that changes we will be sure to share!
Admin
Tim
Does using this plugin allow site visitors to search for images using the tags as well?
WPBeginner Support
No, not with this specific method at the moment.
Admin
mohsen Khatamia
Thanks so much…… wonderful instructions….. started to use them……
Brad Dalton
Good luck to u syad. good stuff and good luck too you son