Tracking email performance is important for understanding how your audience interacts with your content so you can improve your email marketing efforts.
By setting up email tracking in WordPress, you can monitor metrics like opens, clicks, and other engagement data to optimize your campaigns and grow your business. Plus, this tracking makes sure that all your important emails are delivered on time and helps you resend emails that weren’t delivered to recipients.
At WPBeginner, we send newsletter emails to our readers to drive traffic to our site. We also monitor open and click rates to see how many users are engaging with our content and identify ways to improve our email marketing strategies.
In this article, we will show you how to easily set up WordPress email tracking and access valuable data about your email performance.

Note: This article is specifically about emails sent from your WordPress site, such as order receipts, password reset emails, contact form follow-ups, and more. It will not help with marketing emails you send with your email marketing service because those already have built-in open and click tracking.
Why Set Up Email Tracking in WordPress?
By tracking your WordPress site emails, you will be able to see who opens and clicks your emails. Plus, you can get detailed reports about mail deliverability.
This helps ensure that all of your website emails are reaching your users. Tracking emails can help you with the following tasks:
- See which links in your emails are clicked.
- Make sure important membership site and online course emails are sent.
- Check if emails being sent by a certain plugin are delivered.
- Ensure online store order and confirmation emails get to your users.
- Improve deliverability of new user registration information, password reset emails, comments, WordPress update emails, and more.
Whether you run a blog or a small business website, WordPress sends automatic email notifications to your users. Therefore, you must ensure all emails from your website go to your users’ inboxes and not to the spam folder.
The best way to do this is by using an SMTP service provider to improve email deliverability. For more details, see our guide on how to fix the WordPress not sending email issue.
With that said, let’s look at how to set up WordPress email tracking step by step.
How to Set Up Email Tracking in WordPress
The easiest way to set up email tracking in WordPress is by using WP Mail SMTP. It is the best SMTP plugin on the market and is used by over 3 million websites.
It lets you easily send all of your WordPress emails using an SMTP server and improves email deliverability.
Plus, the plugin allows you to track open and click rates, identify delivery issues, enable email logging, and generate reports showing deliverability stats.
Step 1: Install and Set Up WP Mail SMTP
First, you need to install and activate the WP Mail SMTP plugin. For details, see our beginner’s guide on how to install a WordPress plugin.
Note: The plugin has a free version. However, you need the pro plan to unlock email tracking and logging.
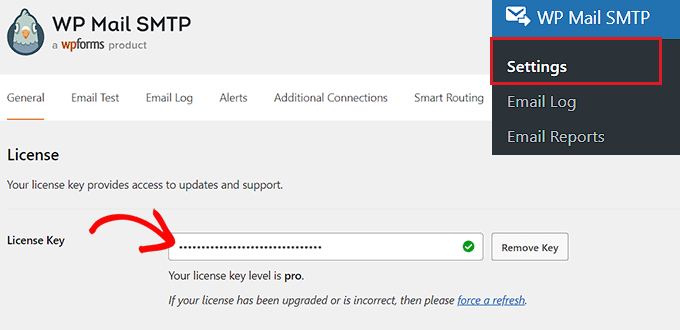
Upon activation, head over to the WP Mail SMTP » Settings page from the WordPress dashboard to enter your license key. After that, click the ‘Verify key’ button.
You can get this information from your account on the WP Mail SMTP website.
Once you have done that, scroll down to the ‘Mailer’ section to choose an SMTP service provider to connect with the plugin.
This service will work along with the WP Mail SMTP to ensure email deliverability.
There are easy setup options for the most popular providers, including SendLayer (recommended), SMTP.com, Brevo, Gmail, Outlook, SendGrid, Amazon SES, and more.
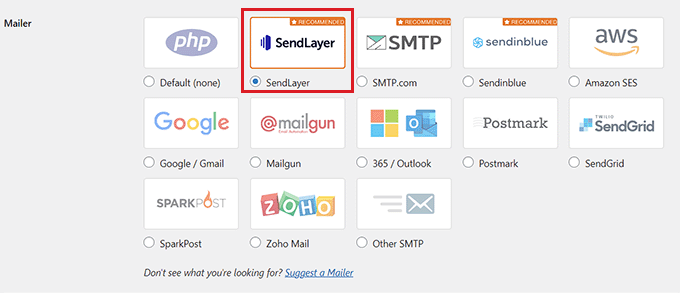
Go ahead and click on the mailer you want to use. There will be detailed instructions on how you can set it up properly. The default option is using the PHP mailer. However, we don’t recommend this method since it’s not reliable.
If you need help setting up your SMTP server, see our step-by-step guide on how to use a free SMTP server to send WordPress emails.
Step 2: Enable WordPress Email Tracking
Now that you have set up the plugin, it’s time to turn on the email logging and email tracking features.
Once activated, the plugin will automatically add a tracking pixel to every email that you send from WordPress.
To do this, visit the WP Mail SMTP » Settings page and switch to the ‘Email Log’ tab. After that, just toggle the ‘Enable Log’ switch to ‘ON.’
This feature records basic details about your emails and stores them in your WordPress database. You will also need to enable this if you want to resend emails in WordPress.
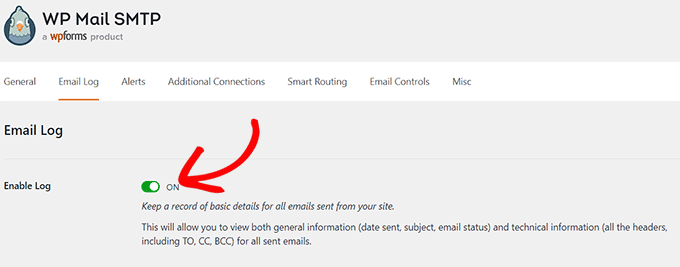
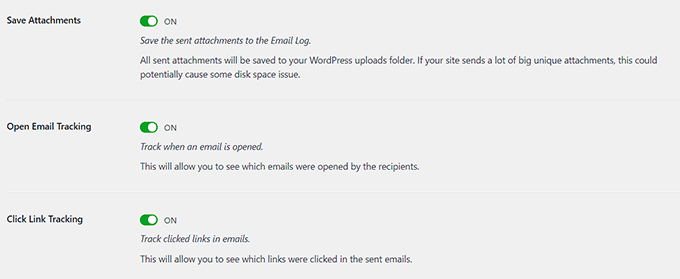
Here, you will see a few more switches that let you turn on additional email tracking options. We recommend toggling on every switch to have more email-tracking data available.
First, you can choose to save a copy of the email body. This lets you search the content of emails and also resend the entire email if it isn’t received. To do this, you must enable the ‘Log Email Content’ switch.

Next, you can toggle the ‘Save Attachments’ switch to save a copy of the attachments sent from your site. This can be helpful if an email isn’t sent and you need to resend the attachment.
After that, you can track when an email is opened and which links get clicked. Go ahead and toggle the ‘Open Email Tracking’ and ‘Click Link Tracking’ switches.
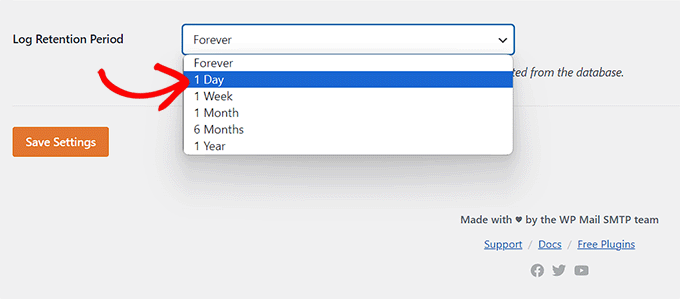
Once that is done, you can set a time period for how long to save your email logs. If you are concerned about disk space, then you can change the setting here.
Go ahead and select the time from the ‘Log Retention Period’ dropdown. Then, don’t forget to click the ‘Save Changes’ button to store your settings.
For more information, see our tutorial on how to set up WordPress email logs.
Step 3: Check Email Tracking Analytics Data in WordPress
Once you have set up the plugin and sent out WordPress emails, you can view your email tracking and analytics data.
To do this, head over to the WP Mail SMTP » Email Log page in your WordPress admin panel. Here, you will be shown basic email data, including opens and clicks, giving you a quick overview of your audience’s engagement.
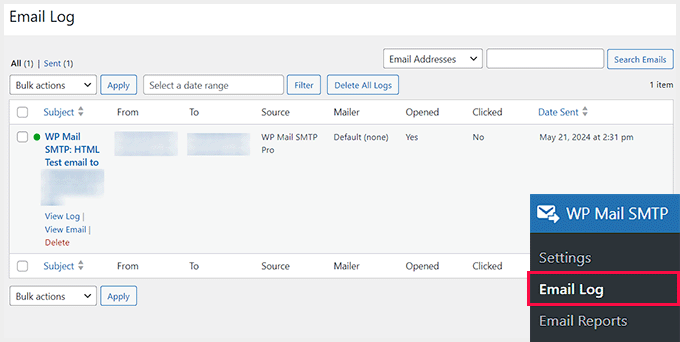
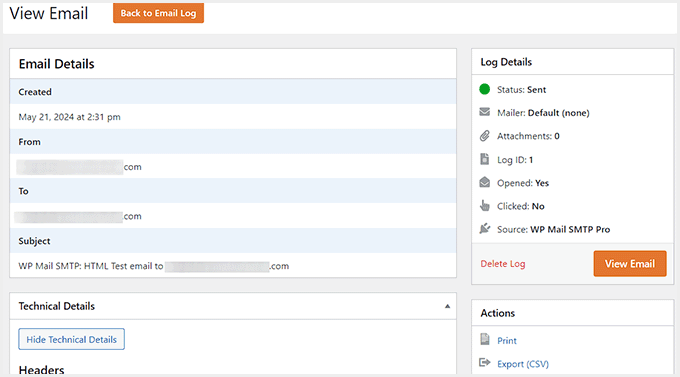
You can also open up individual email logs to see in-depth email information. To do this, simply hover your mouse over an email and click the ‘View Log’ link.
This will open a new screen, where you can see email details like when the email was sent, the subject line, whether the email was opened, and more.
You can also export and print the individual email log from here.
Resend New User Emails in WordPress
Another great feature of WP Mail SMTP is the ability to resend emails. You can take this action by visiting the WP Mail SMTP » Email Log page.
This page shows you every email you have sent and whether or not it was delivered. Here, the red dot signifies an email that wasn’t sent and the green dot means delivered.
To resend an email, hover your mouse over the unsent mail and click the ‘View Log’ link.
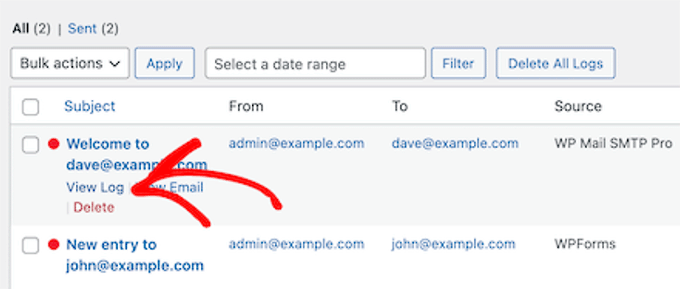
This brings you to the log screen for that individual email.
Here, you must scroll down to the ‘Action’ section on the right and click the ‘Resend’ button.
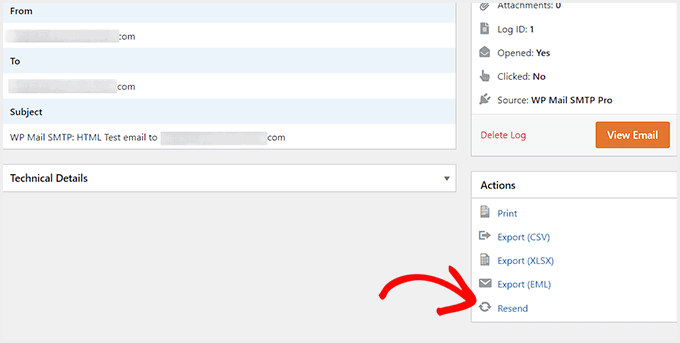
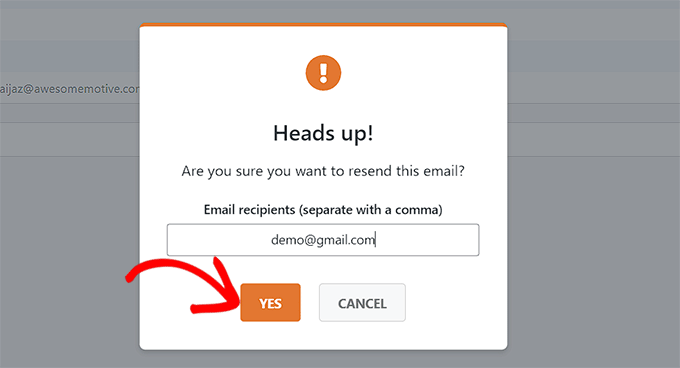
Doing this will open a prompt that will confirm the email address used to send emails.
Go ahead and click the ‘Yes’ button to resend your mail.
If there are multiple failed emails, then you can also use the bulk resend feature from the email log screen.
Simply check the box next to the emails that weren’t sent and select ‘Resend’ from the dropdown list. After that, don’t forget to click the ‘Apply’ button.
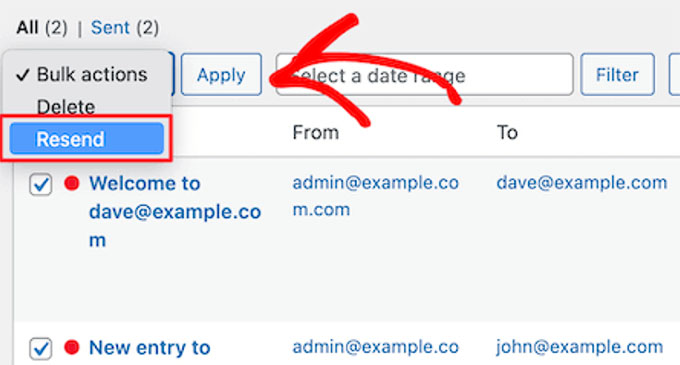
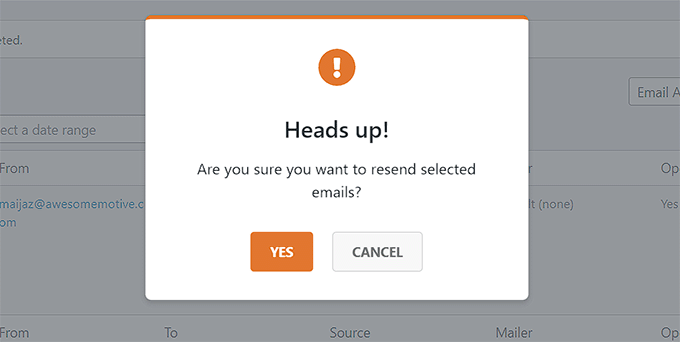
This will open a similar popup on the screen.
Now, simply click the ‘Yes’ button to resend the email to multiple users.
View WordPress Email Engagement Statistics
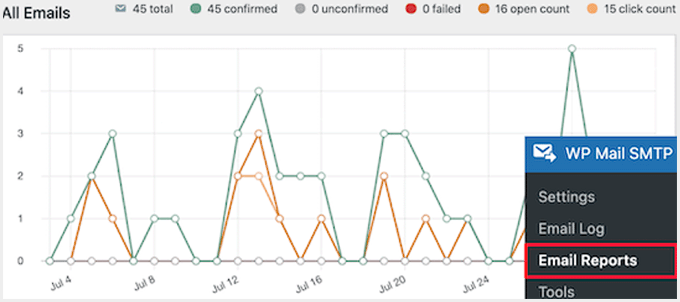
You can also view your full email tracking and reporting data by going to the WP Mail SMTP » Email Reports page.
This brings you to a screen with detailed statistics about your open rates and email deliverability.
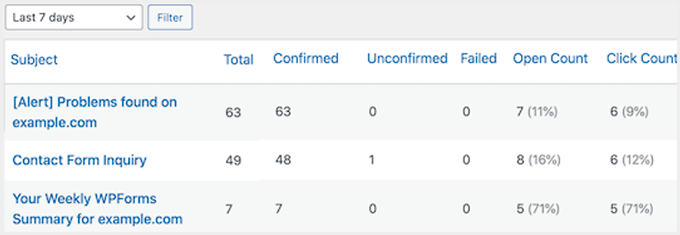
Under the main graph, you will find a breakdown of how your individual emails are performing.
From here, you can view open rates, click-through rates, deliverability breakdowns, and other data.
Bonus: Use Contact Forms to Grow Your Email List
Now that you have set up email tracking, it’s time to grow your email list. The easiest way to capture leads is to use contact forms.
These forms provide a secure way for users to ask questions, book your services, or send feedback while helping you collect user data.
You can also connect these forms with email marketing services to send automated emails, grow subscribers, create newsletters, and more.
To build an email list with forms, we recommend WPForms, which is the best WordPress contact form plugin on the market.

It comes with a drag-and-drop builder, 2,000+ premade templates (including email form templates), conditional logic, and complete spam protection.
Plus, you can integrate the tool with email marketing services like Constant Contact to set up drip campaigns, send welcome messages, reduce abandoned cart rates, and build segmented user lists.
For more details, see our tutorial on how to use a contact form to grow your email list.
We hope this article helped you learn how to set up email tracking in WordPress. You may also like to see our beginner’s guide on how to properly configure WordPress email settings and our tutorial on how to track customer journeys using MemberPress.
If you liked this article, then please subscribe to our YouTube Channel for WordPress video tutorials. You can also find us on Twitter and Facebook.


Have a question or suggestion? Please leave a comment to start the discussion.