Are you wondering how to configure your WordPress email settings?
The default WordPress email settings are not always reliable and can lead to many sending errors and email delivery problems. This means that you and your customers may not receive emails sent from your WordPress website.
In this article, we will show you how to properly configure your WordPress email settings.
Why Do WordPress Email Settings Not Work Properly?
The default email settings on your WordPress website use the PHP mail () function to send emails about form submissions, account activation, and more.
However, your website may experience email delivery problems if your web hosting provider’s mail server is not properly configured. Plus, many popular email services like Gmail can flag these messages as spam.
This means that an outgoing email from your website may end up in the spam folder of the user’s email account, or it may never reach their inbox at all.
Luckily, you can get past this problem by properly configuring your WordPress email settings. To do this, you will need to use an SMTP service or plugin.
What Is SMTP, And How Can It Fix Email Settings in WordPress?
SMTP (Simple Mail Transfer Protocol) is a standard protocol for mail transmission. Unlike the PHP mail () function, SMTP uses proper authentication to send and receive email messages.
By using an SMTP service on your website, you can get high deliverability rates, avoid spam folders, and make sure that your email notifications reach the user’s inbox immediately.
To properly configure your WordPress email settings, you will need to use a popular SMTP service provider like SendLayer, Brevo (formerly Sendinblue), Mailgun, or SMTP.com. These service providers are easy to use and allow you to safely send emails from your WordPress site.
Once you have chosen an SMTP provider, you will have to connect your WordPress website to your mail server.
This is where the WP Mail SMTP plugin comes in.
It is the best WordPress SMTP plugin on the market that allows you to send emails via SMTP. It comes with powerful features like email logs, email controls, priority support, and more.
The premium version of the plugin can even integrate with popular SMTP service providers like SendLayer and Brevo and any WordPress hosting company that offers email accounts.
For more information, you can see our complete WP Mail SMTP review.
Having said that, let’s see how to properly configure your WordPress email settings.
How to Properly Configure Your WordPress Email Settings
It is super easy to configure your WordPress email settings using the WP Mail SMTP plugin and an SMTP service provider.
For this tutorial, we will be using SendLayer, which is the best SMTP service provider on the market.
Step 1: Create an Account with SendLayer
First, you need to visit the SendLayer website and click the ‘Get Started With SendLayer’ button.
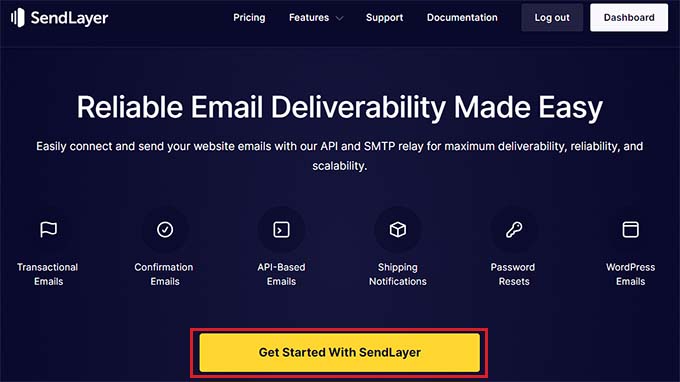
This will take you to the Pricing page, where you can select a plan that suits your needs.
However, if you don’t want to buy SendLayer yet, then you can click on the ‘Try our SendLayer free trial (send up to 200 emails)’ link at the bottom.
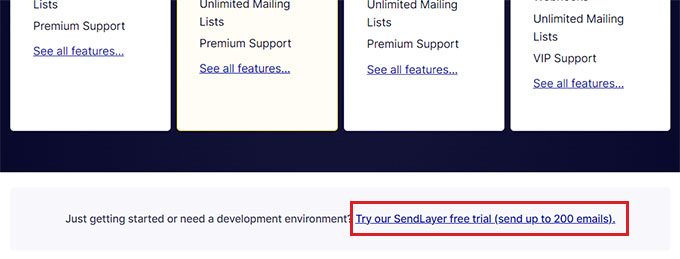
This will take you to the ‘Checkout’ page, where you will have to provide your email account, password, and payment details.
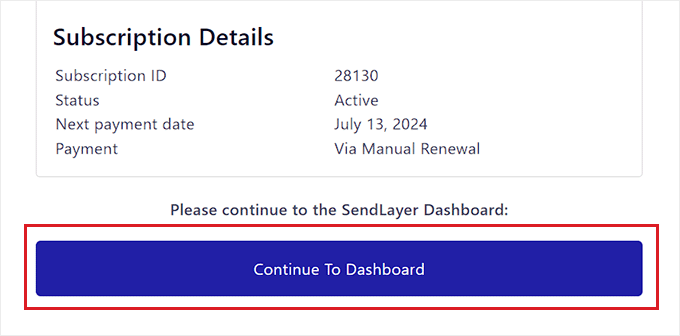
Once your account sign-up has been created, just click the ‘Continue to Dashboard’ button.
Step 2: Add Your Domain For Authorization
Next, you will need to authorize your domain name to allow email servers to recognize you as a verified sender.
This means that the email sent from your account after authorization won’t end up in the spam folder of your users.
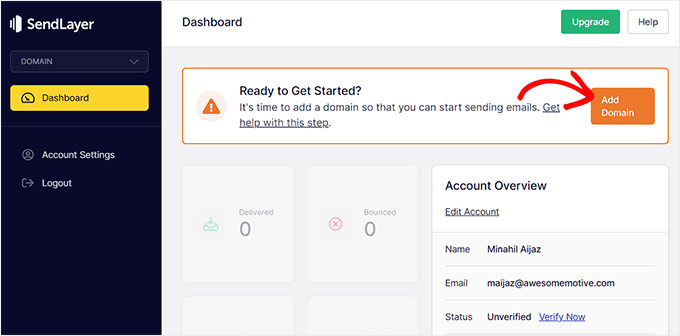
To do this, click the ‘Add Domain’ button in the top right corner of the screen.
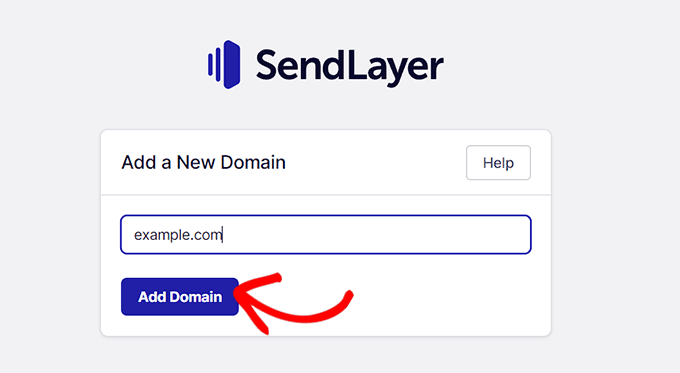
This will open up a new page on your screen where you must type your website domain name into the field.
Once you’ve done that, just click the ‘Add Domain’ button.
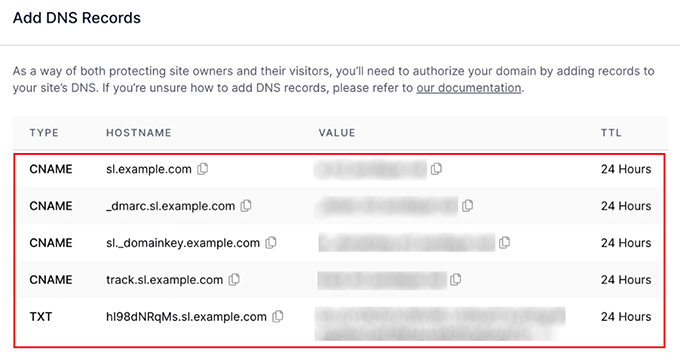
SendLayer will now automatically generate five types of DNS records for your domain.
Now, you have to copy and paste these records into your website’s DNS settings one by one.
To find these DNS settings, you must go to the WordPress hosting account dashboard for your website. The exact location of the DNS settings will depend on your hosting provider, but SendLayer provides some documentation to help you out.
Upon adding all of the DNS records to your hosting dashboard, simply check the ‘I have added these DNS records and am ready to proceed’ box at the bottom of the SendLayer page.
After that, click the ‘Verify DNS Records’ button to continue.
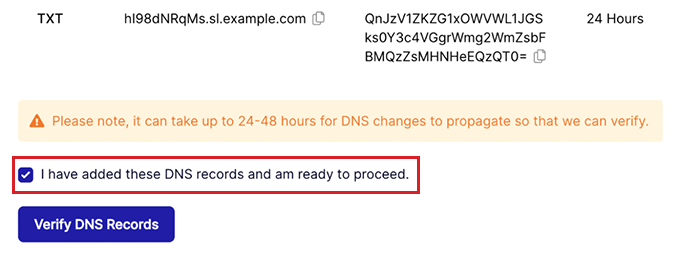
Keep in mind that it can take up to 48 hours for the DNS record changes to take effect.
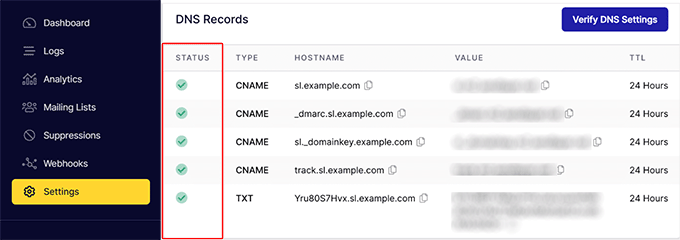
To check your domain authorization status, head over to your SendLayer dashboard and click the ‘Settings’ tab in the left column.
Once you are on the Settings page, switch to the ‘DNS Records & Settings’ tab from the top.
If your DNS settings have been verified, you will now see a green symbol in the Status column for each type of DNS record.
Step 3: Copy the SendLayer API Key
Now that you have authorized your domain name, it’s time for you to copy the API key for your SendLayer account. This API key will allow you to connect the SMTP service with your WordPress website.
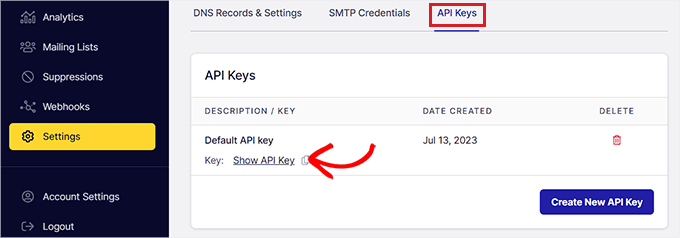
To do this, click on the ‘Settings’ tab in the left column of your SendLayer dashboard. Next, switch to the ‘API Keys’ tab from the top of the page.
Once you are there, click the ‘Show API Key’ link and then copy the key into your clipboard.
Step 4: Set Up the WP Mail SMTP Plugin on Your WordPress Website
Once you have created a SendLayer account and copied the API key, head over to your WordPress website’s dashboard.
Next, install and activate the WP Mail SMTP plugin. For detailed instructions, you may want to see our beginner’s guide on how to install a WordPress plugin.
Note: Keep in mind that you will need the pro version of the WP Mail SMTP plugin to connect it with your SendLayer account.
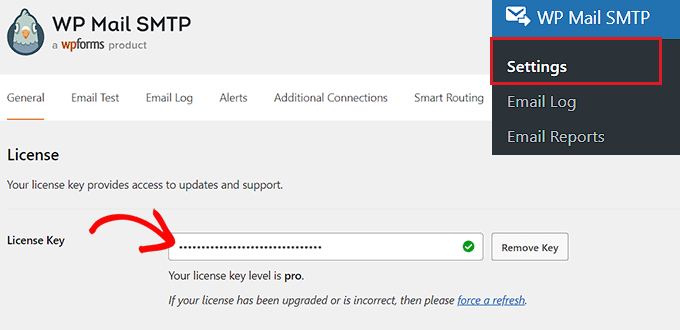
Upon activation, head over to the WP Mail SMTP » Settings page from the WordPress admin sidebar.
Once you are there, add the license key for your plugin next to the ‘License Key’ option. You can find this information on your account page on the WP Mail SMTP website.
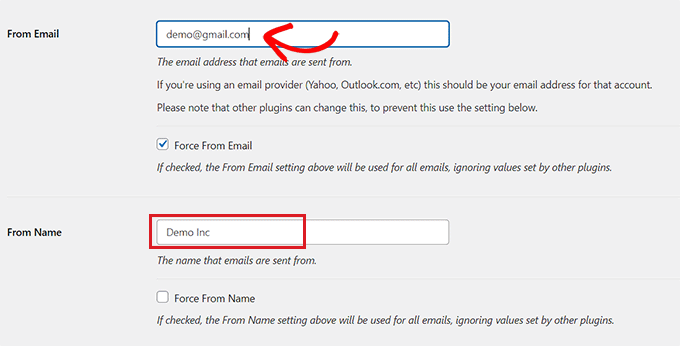
After that, scroll down to the ‘From Email’ section and add the admin email that you want to use to send emails to your users.
If you want the From Email to be the same across your entire site, then simply check the ‘Force From Email’ box.
After that, type the name that you want to use to send emails next to the ‘From Name’ field.
For example, if you have an e-commerce store, then you can use your store’s name in this field. This way, users will immediately know who is sending them a message.
For detailed instructions, you may want to see our tutorial on how to set up WP Mail SMTP with any host.
After that, scroll down to the ‘Mailer’ section and choose the SMTP service that you want to connect with your WordPress site.
For this tutorial, we will be choosing the ‘SendLayer’ option.
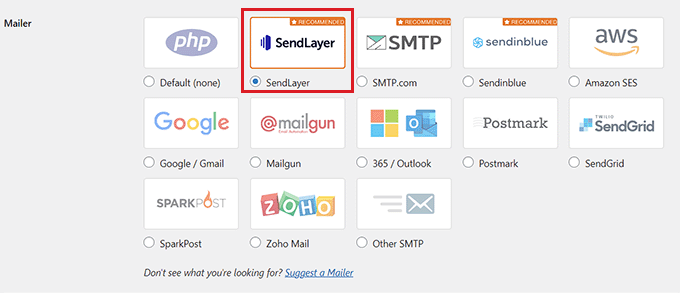
Once you do that, a new ‘SendLayer’ tab will open up on the screen.
Here, you have to paste the API key that you copied earlier from the SendLayer dashboard. If you were unable to copy the key before, then you can just click the ‘Get API Key’ link to be directed back to your SendLayer account.
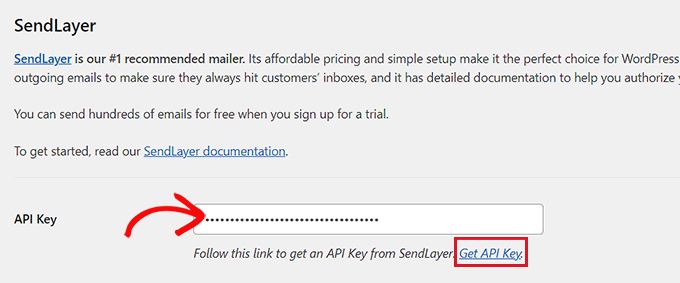
Once you are done, simply click the ‘Save Settings’ button to store your changes.
You have now successfully connected WP Mail SMTP with SendLayer.
Step 5: Send a Test Email
To check if your SMTP service provider and the plugin are working properly, you can easily send a test email.
To do this, switch to the ‘Email Test’ tab from the top of the WP Mail SMTP settings page.
Once you are there, simply add an email account that you have access to in the ‘Send To’ field. After that, go ahead and click the ‘Send Email’ button.
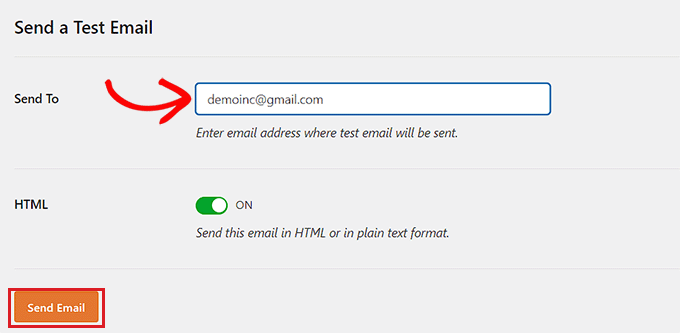
Once the email has been sent, you will see a success message on your screen.
Next, check the inbox for that email address where you will see the test email that you just sent.
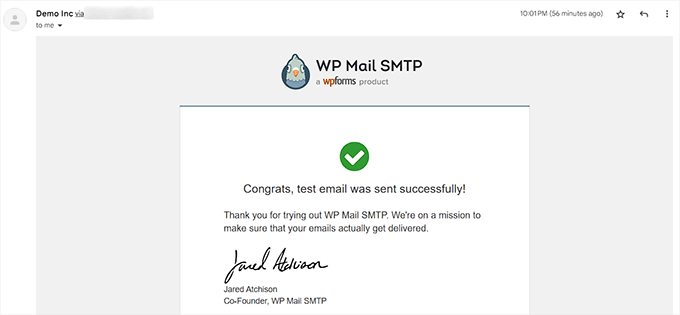
WP Mail SMTP and SendLayer will now eliminate your email deliverability problems by making sure that your emails are sent to your users’ inboxes and don’t end up in the spam folder.
Next Steps: How to Grow Your Email List
Now that you have properly configured your WordPress email settings, it’s time for you to start growing your email list.
Building an email list is extremely important as email marketing is a cost-effective way to bring back your customers and increase conversions.
To do this, you can create popups using OptinMonster that will be displayed on your website as targeted email signup forms.

Similarly, you can also build a lead magnet page, create an email newsletter, or offer content upgrades. For more detailed tips, you may want to see our beginner’s guide on tested and easy ways to build your email list.
You can also host giveaway contests on your WooCommerce store using RafflePress which is the best giveaway plugin on the market.
This way, interested users will have to sign up on your website to enter the giveaway which will help build your email list. For details, you may want to see our tutorial on how to run a successful giveaway/contest in WordPress.
We hope this article helped you learn how to properly configure your WordPress email settings. You may also want to see our step-by-step tutorial on how to use a free SMTP server to send WordPress emails and our expert picks for the best email marketing services for small businesses.
If you liked this article, then please subscribe to our YouTube Channel for WordPress video tutorials. You can also find us on Twitter and Facebook.


Syed Balkhi says
Hey WPBeginner readers,
Did you know you can win exciting prizes by commenting on WPBeginner?
Every month, our top blog commenters will win HUGE rewards, including premium WordPress plugin licenses and cash prizes.
You can get more details about the contest from here.
Start sharing your thoughts below to stand a chance to win!
Ralph says
I think i never had problems with emails on my current blog but I’m planning building new and more professional website and will definitely use this guide to make sure everything works fine.
WPBeginner Support says
We hope you find our recommendations helpful
Admin