Do you want to set up email logs on your WordPress or WooCommerce website?
Email logs allow you to monitor the emails sent by your WordPress site to users. This helps you troubleshoot issues and check the status of email notifications.
In this article, we will show you how to easily set up WordPress email logs and WooCommerce email logs.
After following this tutorial, you will be able to view the email logs directly from your WordPress admin area in an easy-to-understand format.
Why Set Up Email Logs in WordPress or WooCommerce?
Whether you are running a small business website or a WooCommerce store, WordPress automatically sends email notifications to your users.
On a typical WordPress website, these messages include password reset emails, new user notifications, password change notifications, comments, and WordPress update notifications.
If you are also running an online store, then email becomes even more important. WooCommerce will send out customer receipts, order details, new order notifications, and user account emails regularly.
As you can see, email notifications are crucial for your website to function properly and deliver the best user experience.
You need to make sure that those emails reach users’ inboxes and don’t just disappear or end up in spam. The best way to do this is to use a proper SMTP service provider to ensure email deliverability.
For more details, see our guide on how to fix the WordPress not sending email issue.
You will also want to see which emails are sent and to which users. This allows you to keep a record of email activity, which comes in handy in several situations.
Following are just a few of those situations when an email log comes in handy:
- Make sure that email notifications are delivered promptly.
- Track your WordPress contact form plugin emails.
- See if emails sent by a plugin are working.
- Keep track of user activity using the email logs.
- Track user activity if you run a membership website or sell online courses.
- Keep an email log of your WooCommerce orders, receipts, and customer notifications.
That being said, let’s see how to easily set up email logs on your WordPress or WooCommerce website.
Video Tutorial
If you prefer written instructions, then just keep reading.
Setting Up Email Logs in WordPress & WooCommerce
For this tutorial, we will be using the WP Mail SMTP plugin. It allows you to send WordPress emails using any SMTP service provider, including Gmail, Outlook, SendGrid, Amazon SES, and more.
For more information about using the WP Mail SMTP plugin, you can check out our WP Mail SMTP review.
Step 1: Install and Set Up WP Mail SMTP
First, you need to install and activate the WP Mail SMTP plugin. For more details, see our step-by-step guide on how to install a WordPress plugin.
Upon activation, visit the WP Mail SMTP » Settings page to configure the plugin’s settings.
Here, you will have to enter your license key. You can find this information in your account on the WP Mail SMTP website.
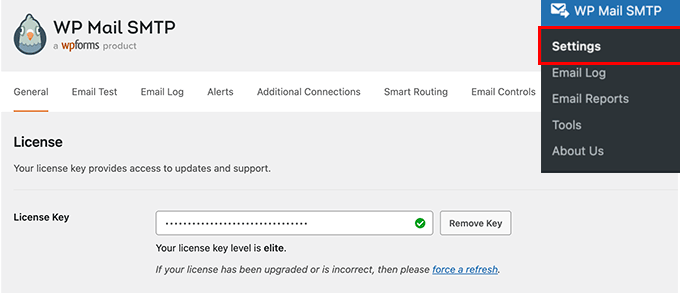
Simply copy and paste your license key and then click on the ‘Verify’ button.
After that, scroll down to the Mailer section and select how you would like to send your WordPress emails.
WP Mail SMTP works with any SMTP service. It has easy configuration options for popular SMTP service providers like SendLayer, SMTP.com, Gmail, Outlook, Brevo, Mailgun, SendGrid, Amazon SES, and other SMTP services.
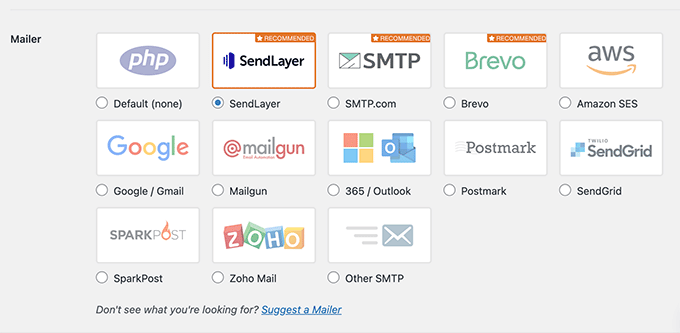
Clicking on the mailer will show you instructions on how to set it up.
The default option is set to PHP mailer. We don’t recommend using that because it is not reliable.
Since most WordPress hosting servers are not properly configured for emails, choosing this option means that your WordPress emails may never reach users’ inboxes or even spam folders.
We recommend using a provider like SendLayer, SMTP.com, or Brevo since they are optimized for the best email deliverability.
If you choose Other SMTP as your mailer option, then you will need to provide SMTP settings. You can get them from your SMTP service provider’s website:
- SMTP Host: Your SMTP host address, which usually looks like this: smtp.yoursmtpserver.com
- Encryption: Usually, it is either SSL or TLS
- SMTP Port: Usually, it is 465
- Authentication: Turn on the authentication
- Username: The username provided by your SMTP service. Usually, it is your email address
- Password: The password for your SMTP service
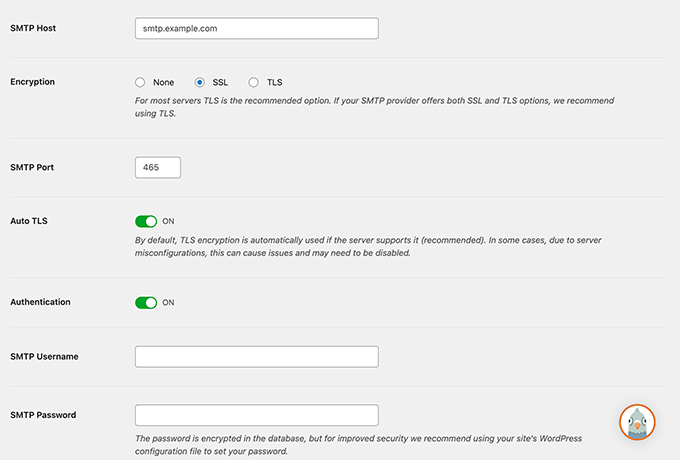
After entering your mailer credentials, don’t forget to click on the ‘Save Settings’ button to store your settings.
Bonus: It’s important to use a professional business email address to make sure that your emails look trustworthy.
Step 2: Enable the Email Log Feature
Now that you have set up mailer settings in the WP Mail SMTP plugin, it is time to turn on the email logging feature.
From the plugin’s settings page, switch to the ‘Email Log’ tab and toggle the ‘Enable log’ switch.
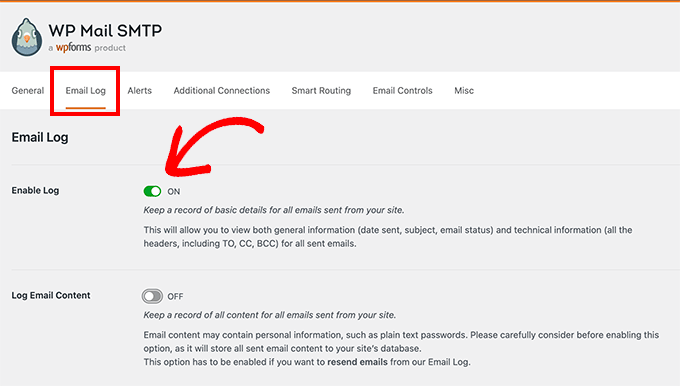
The email log option will save general and troubleshooting information about each email message, including the date and time, subject, email status, email addresses of the sender and recipient, BCC and CC, and attachments.
The plugin also allows you to enable complete WordPress email logs. We don’t recommend enabling this setting because it will save all email contents, including private or sensitive information in your WordPress database, as plain text.
Don’t forget to click on the ‘Save settings’ button to save your changes.
Step 3: Testing WP Mail SMTP Setup
Now that you have set up the WP Mail SMTP plugin, let’s test it to make sure that everything is working as expected.
WP Mail SMTP makes this step easy. Just go to the WP Mail SMTP » Tools page and switch to the ‘Email Test’ tab.
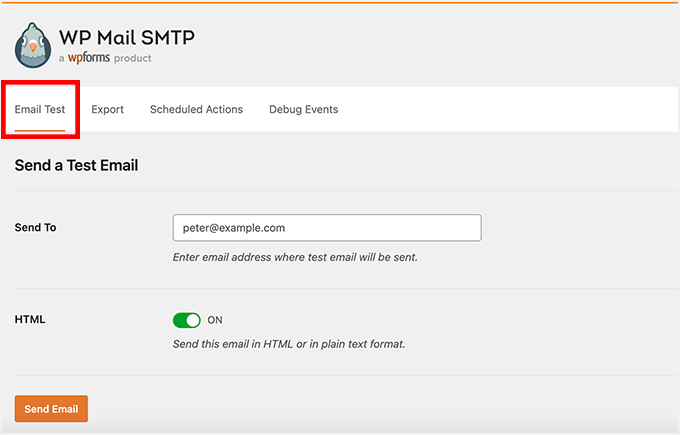
From here, simply enter your email address and click on the ‘Send Email’ button.
The plugin will now send a test email to the address you provided. It will then show you the status of the email delivery on the screen.
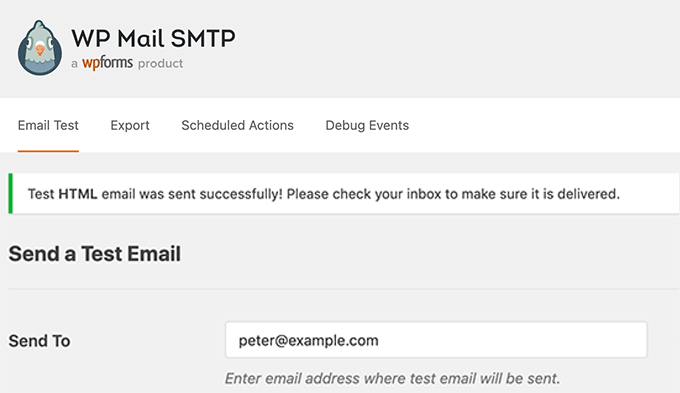
Step 4: Viewing Your Email Logs in WordPress
You can view your WordPress email logs anytime without leaving the WordPress admin area.
Simply go to the WP Mail SMTP » Email Log page. You will see the log with a list of entries since you enabled the email log.
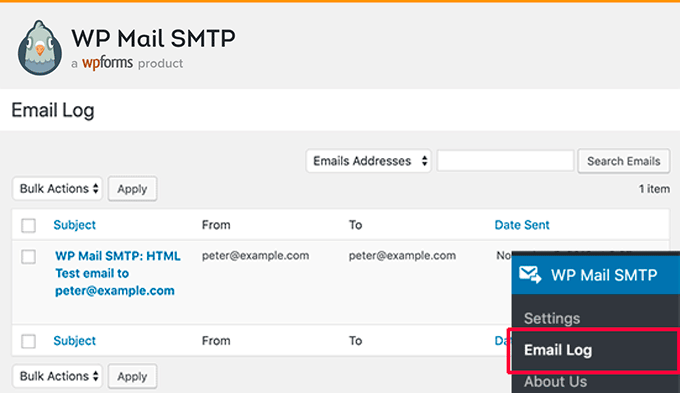
To view entry details, take your mouse over it and then click on the ‘View’ link below it.
This will open the email log entry with a detailed view.
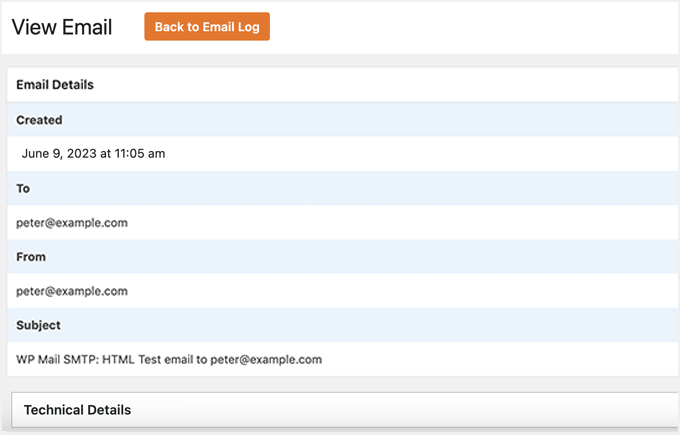
You can use the search feature to look for entries by email address, subject, header, or content (if you enabled content logging).
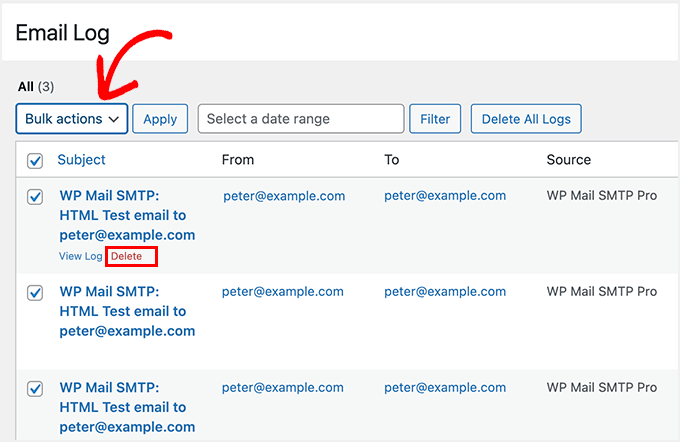
You can also delete older entries from your email log. Simply use the ‘Delete’ link below any entry.
To delete multiple entries, you need to select each email and then click on the ‘Bulk actions’ dropdown menu to select ‘Delete’.
After that, you must click on the ‘Apply’ button.
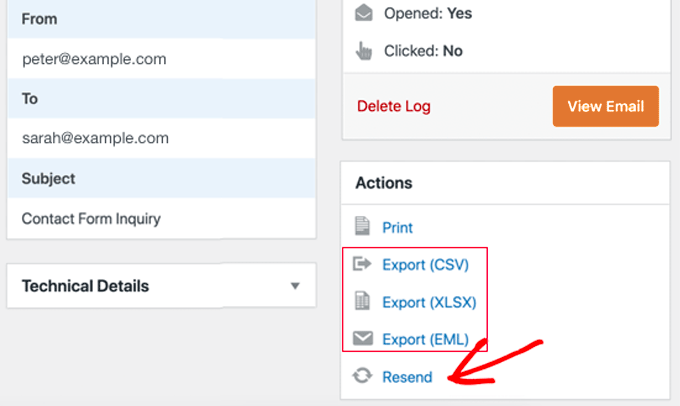
If you need to analyze your email logs more carefully or create your own deliverability reports, then you can export your logs to your favorite spreadsheet software or email marketing service.
You can also easily resend an email that has failed.
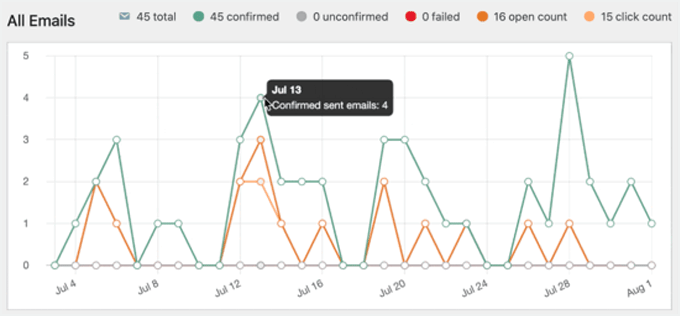
WP Mail SMTP Pro subscribers can also visualize their email deliverability in a chart that shows how many emails were sent, opened, and clicked each day.
This is super useful for WooCommerce users.
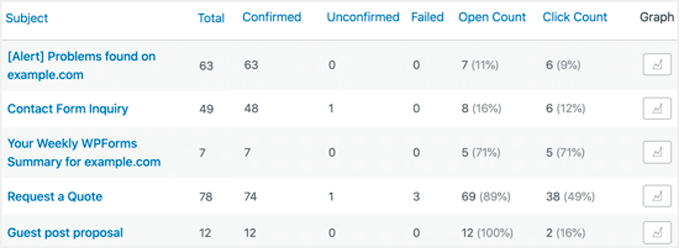
It’s easy to check the engagement of each campaign or newsletter. The logs include open and click counts for each email subject.
Clicking the graph button displays a chart of how the specific email is performing.
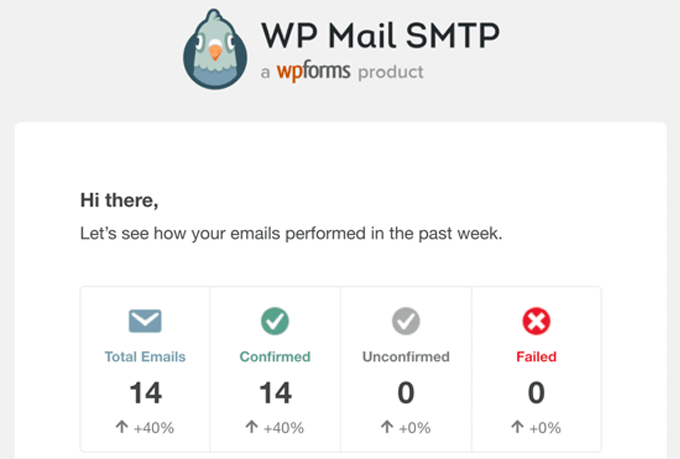
Plus, every week, WP Mail SMTP will email you a helpful summary of your email performance statistics.
It looks something like this.
Bonus: Start Your Email Marketing Campaign in WordPress
Now that you have ensured that your emails will be delivered to users on time, it is time to launch your email marketing campaigns and build an email list.
This will allow you to send emails for discount offers, cart abandonment, welcome messages, and coupons, bringing back customers to your website and ultimately leading to more conversions.
For this, we recommend Constant Contact. It is a popular email marketing service that comes with premade templates, which makes it super easy to create automated email workflows for your website.

You can even create drip campaigns to send different email notifications to users over time. For details, see our guide on how to set up automated drip notifications in WordPress.
However, if you have an online store, then FunnelKit Automations is the better option for you. It lets you send abandoned cart emails, welcome messages, post-purchase messages, and so much more using its intuitive builder.
Plus, you can use its other tools to create order bumps and sliding carts and manage customers’ data with its CRM.

For more instructions, see our tutorial on how to build an email list in WordPress.
We hope this article helped you learn how to set up WordPress email logs and WooCommerce email logs. You may also want to check out our other WordPress guides to improve email deliverability and email logging:
Best WordPress Guides for Your Site
- Beginner’s Guide to WordPress Email Marketing Automation
- How to Monitor User Activity in WordPress with Security Audit Logs
- How to Setup Email Notifications for WordPress Updates
- Must-Have WordPress Plugins to Grow Your Site
- How to Get a Free Email Domain (5 Quick and Easy Methods)
- How to Resend New User Welcome Emails in WordPress
If you liked this article, then please subscribe to our YouTube Channel for WordPress video tutorials. You can also find us on Twitter and Facebook.


Syed Balkhi says
Hey WPBeginner readers,
Did you know you can win exciting prizes by commenting on WPBeginner?
Every month, our top blog commenters will win HUGE rewards, including premium WordPress plugin licenses and cash prizes.
You can get more details about the contest from here.
Start sharing your thoughts below to stand a chance to win!
kzain says
This is a game-changer for understanding email deliverability on my WooCommerce store! Setting up email logs with WP Mail SMTP feels like a great way to provide customers receive important order updates and avoid missed communications. I like that the plugin can track both regular WordPress emails and those triggered by WooCommerce
Jiří Vaněk says
WP Mail SMTP is an absolute necessity these days because the mail function in PHP has not been reliable for some time due to the implementation of SPF and DMARC. That’s why I was looking for a quality solution to send emails from WordPress. I don’t even have the mail function running on my own server, and thanks to this plugin, I can fully send contact forms, website notifications, and much more. I primarily use the free version, which doesn’t have logging, but it’s still one of the few plugins I install on every website.