Lots of businesses add a dedicated review or testimonial page on their website to display feedback from satisfied customers. This approach not only highlights the quality of their products or services but also builds credibility and trust with potential buyers.
Seeing real testimonials helps new visitors feel more confident about their purchasing decisions, as they can read firsthand experiences from others. Plus, a well-designed customer reviews page can make the business feel more genuine, ultimately encouraging more people to try out its offerings.
Our partner brands have been selling WordPress plugins and software for over a decade, including popular tools like WPForms and MonsterInsights. During this time, they have always added customer reviews for each product directly on their websites.
We’ve noticed that these reviews often help visitors feel confident in their choices and reassure them about the reliability and value of their services.
In this article, we will show you how to easily add a customer reviews page in WordPress.

Why Add a Customer Reviews Page in WordPress?
If you are running an online store or a business website, then you probably already have customers who are happy with your products and services.
Showing social proof like customer reviews and testimonials helps you gain the trust of new customers. This can lead to increased sales by convincing potential buyers to make a purchasing decision.
Plus, testimonials can improve your search engine rankings by bringing fresh and unique content to your WordPress website.
Reviews can also increase engagement and create a sense of community, building brand loyalty among users.
That being said, let’s take a look at how to add customer review pages in WordPress. You can use the quick links below to jump to the method you want to use:
Method 1: Add Customer Reviews Using Reviews Feed Pro
The easiest way to display reviews on your WordPress website is by using the Smash Balloons Reviews Feed Pro plugin.
It is the best WordPress customer reviews plugin that allows you to add reviews from the biggest platforms on the internet, including Google, Yelp, and Facebook.
It also automatically copies your website design so that the reviews suit your WordPress theme and look like a natural part of your blog.
First, you need to install and activate the Reviews Feed Pro plugin. For more details, you may want to see our beginner’s guide on how to install a WordPress plugin.
Note: Reviews Feed also has a free version that you can use to integrate with Google or Yelp. However, we will be using the Pro version in our tutorial as it has more features and integrations.
Upon activation, head over to the Reviews Feed menu tab from the WordPress admin sidebar.
Once there, simply copy and paste your license key into the field and click the ‘Activate’ button.
You can get this information from your account on the Smash Balloon website.
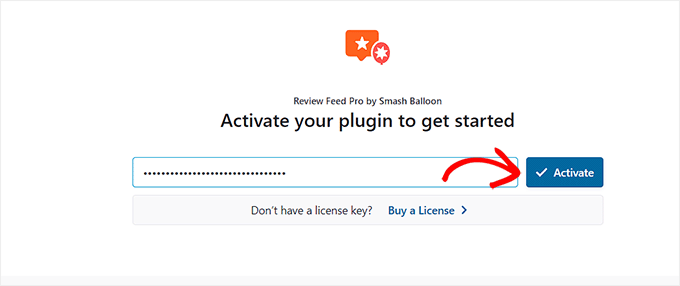
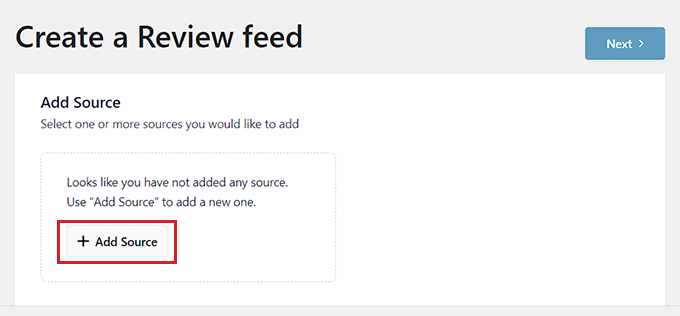
Once you have done that, the ‘Create a Review Feed’ page will open up on your screen.
From here, just click the ‘+ Add Source’ button to add a source for your customer reviews.
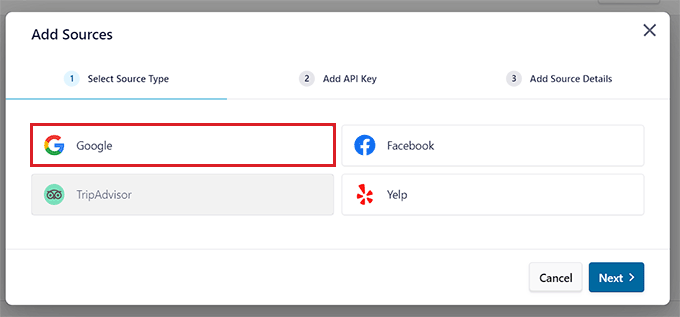
This will open the ‘Add Sources’ prompt on the screen, where you can select the source for your reviews. For this tutorial, we will be using Google as the source.
After making your choice, click the ‘Next’ button to move forward.
You will now be directed to the next step.
Here, you need to add an API key for Google reviews so that the Reviews Feed plugin can fetch data from your account and display it on your WordPress website.
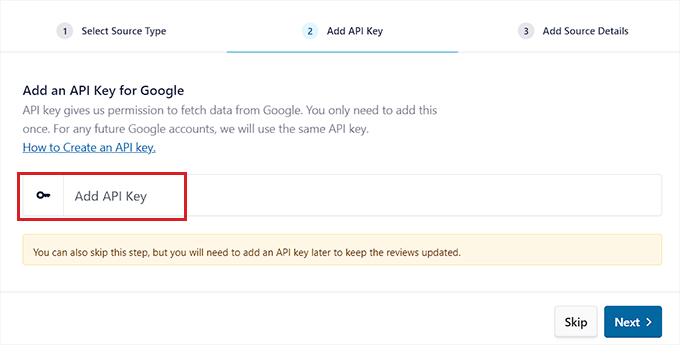
Create a Google API Key
To get an API key for Google reviews, visit Google Console and sign in using your Google account.
Once you are on the ‘Google Cloud’ page, click the ‘Create Project’ button.
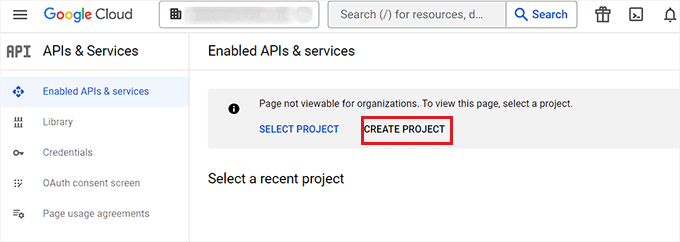
This will take you to the ‘New Project’ page, where you can start by typing in a name. For instance, we will be naming our project’ Customer Reviews Plugin API’.
After that, choose an Organization and Location for the project from the dropdown menus and click the ‘Create’ button.

Once you have created the project, you will be redirected to the ‘APIs & Services’ page.
From here, first, make sure that the project you have created is selected in the dropdown menu at the top.
After that, click the ‘+ Enable APIs & Services’ button.
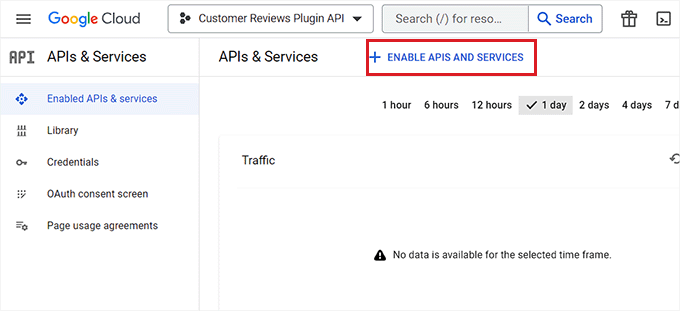
You will now be taken to the API library.
Here, click on the ‘Places API’ option in the right corner of the screen.
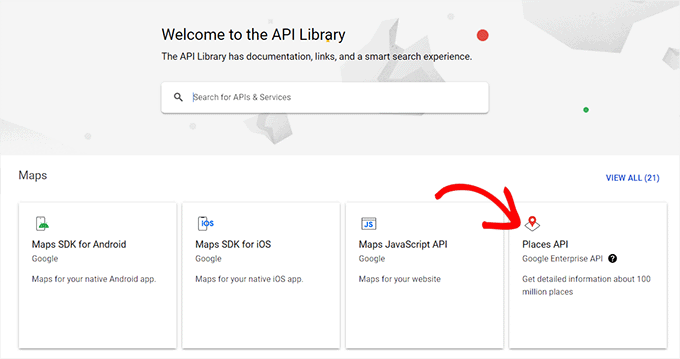
This will take you to a new page where you can activate the key for making Places API requests.
To do this, simply click the ‘Enable’ button.

Now, head back to the ‘APIs & Services’ page and switch to the ‘Credentials’ tab in the left sidebar.
Once you are there, just click the ‘+ Create Credentials’ button to open up a dropdown menu and select the ‘API Key’ option.
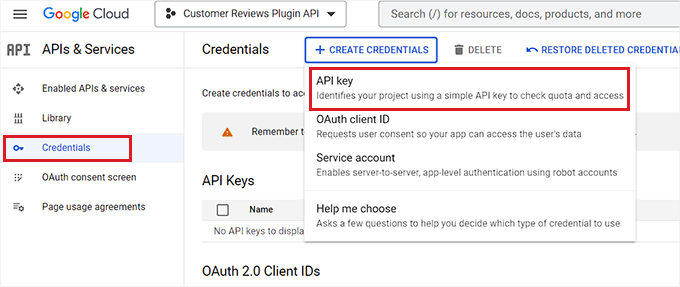
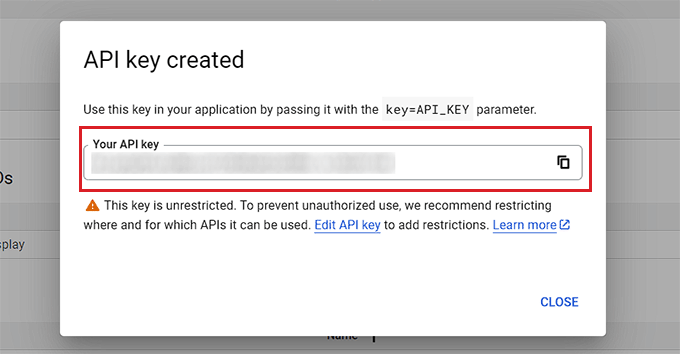
After your API key is created, a new prompt will open up on the screen.
From here, simply copy your key and head back to the WordPress admin dashboard.
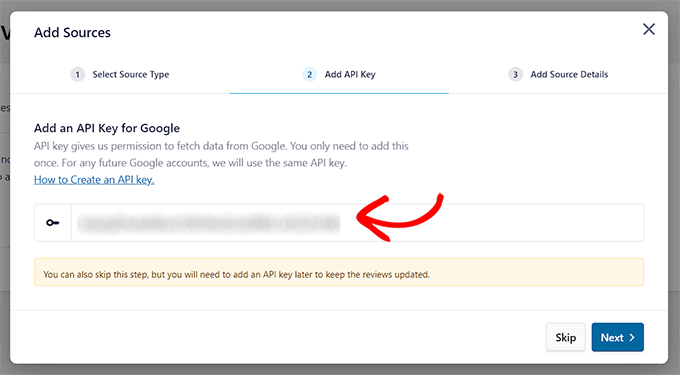
Once you are there, open up the ‘Add Sources’ prompt once again.
After that, paste your Google Reviews API key into the field and click the ‘Next’ button to continue.
Now, you will need to enter the Place ID of the cafe, restaurant, or other physical business that you want to use in your feed.
To do this, visit Google’s Place ID page and scroll down to the ‘Find the ID of a particular place’ section.
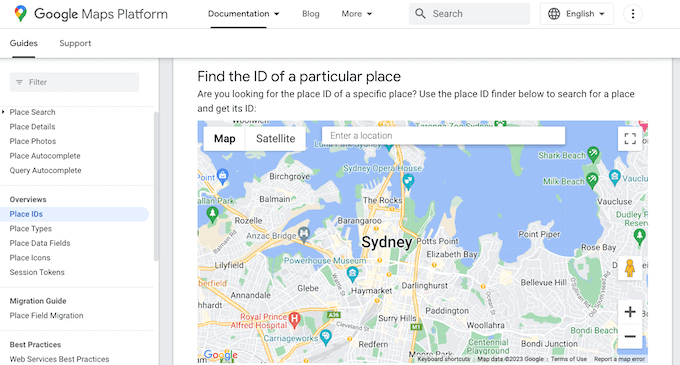
From here, enter the address or name of the venue you want to locate and click on the right one when it appears.
Google will now show the Place ID in a small popup. Simply go ahead and copy the ID.
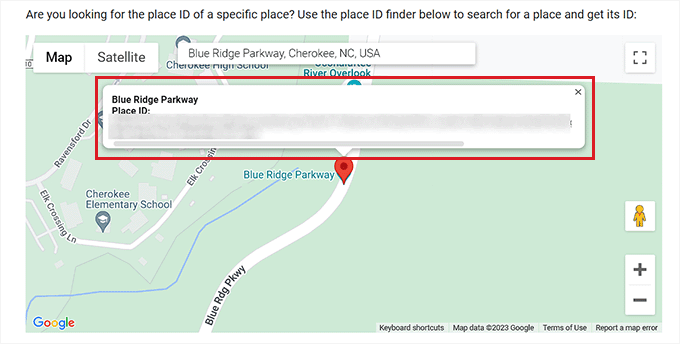
Now, head over to the WordPress dashboard and paste the Place ID into the box.
After that, click the ‘Finish’ button to complete the setup.
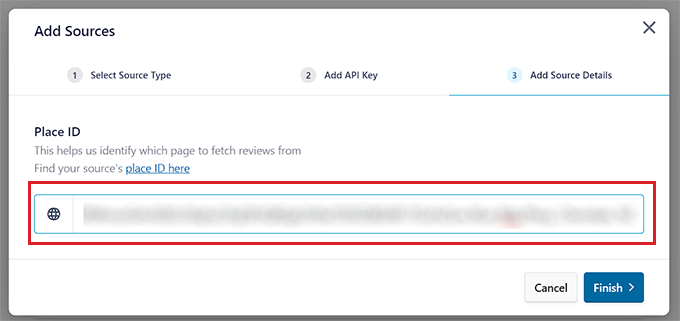
You have now successfully integrated Google Reviews with Smash Balloon Reviews Feed Pro.
Customize the Reviews Feed
The Google Reviews feed will now be displayed in the ‘Add Sources’ section.
From here, simply choose the feed and click the ‘Next’ button at the top.
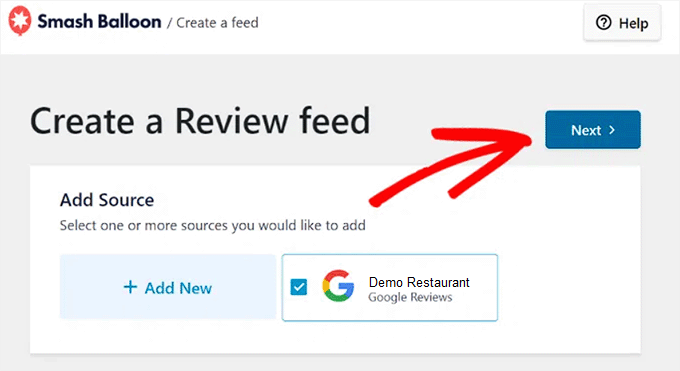
You will now be taken to the ‘Select a Template’ page.
Here, select a template for the reviews feed according to your liking.
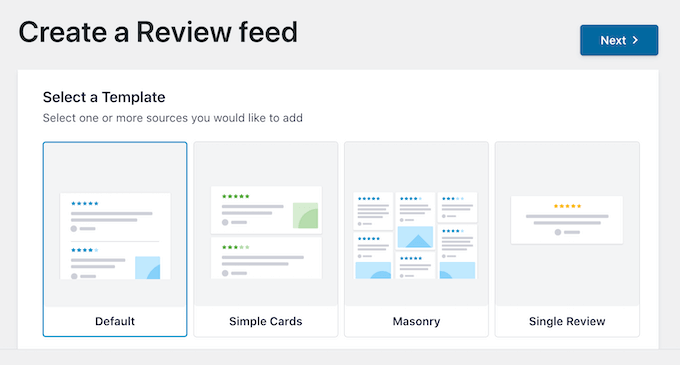
Once you have done that, the feed editor will automatically open up on your screen.
It will show a live preview of your feed on the right and a sidebar with different settings on the left.
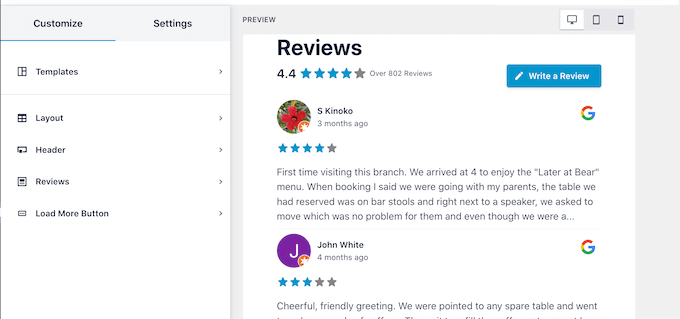
From here, you can customize the layout, header, colors, and more of your reviews feed. For more details, you may want to see our tutorial on how to show Google, Facebook, and Yelp reviews in WordPress.
After you have finished customizing the feed, don’t forget to click the ‘Save’ button at the top right corner to store your settings.
Embed the Customer Reviews Feed on a WordPress Page
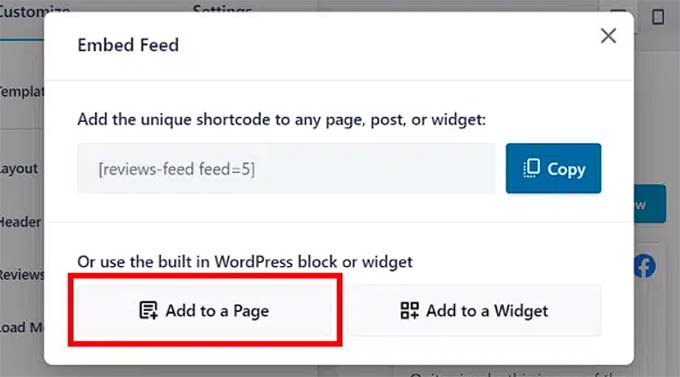
To embed the reviews feed in a WordPress page, click on the ‘Embed’ button at the top right corner.
This will open up the ‘Embed Feed’ prompt on the screen. From here, simply click on the ‘Add to a Page’ button.
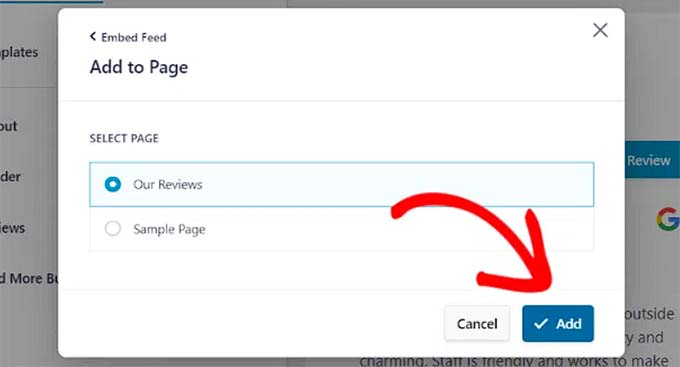
The plugin will now display all the pages on your WordPress website.
You have to click on the page where you want to add the reviews feed and click the ‘Add’ button.
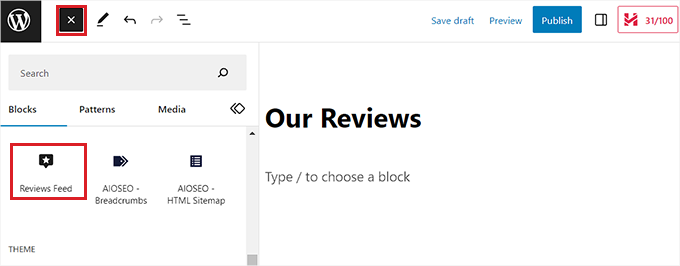
The page you chose will now open up in the block editor.
Here, click the ‘Add Block’ (+) button at the top left corner of the screen and find the ‘Reviews Feed’ block.
Upon doing that, the reviews feed will automatically be added to the WordPress page.
Once you are done, don’t forget to click the ‘Update’ button to save your changes.
Now, you can visit your WordPress blog to check out the reviews feed in action.

Method 2: Create a Customer Reviews Page Using SeedProd
If you want to add customer reviews to your website manually, then this method is for you.
SeedProd is the best WordPress page builder plugin on the market that allows you to create aesthetically pleasing themes and pages without using any code.
It even comes with a Testimonials block that can manually add testimonials and customer reviews to your landing pages.
First, you need to install and activate the SeedProd plugin. For detailed instructions, please see our step-by-step guide on how to install a WordPress plugin.
Note: SeedProd also has a free version that you can try. However, we will be using the premium version in our tutorial as it has more features.
Upon activation, head over to the SeedProd » Settings page to enter the plugin license key.
You can find this information in your account on the SeedProd website.

Next, go to the SeedProd » Landing Pages section from the admin dashboard and click on the ‘Add New Landing Page’ button.
For this tutorial, we will be adding customer reviews to a landing page.
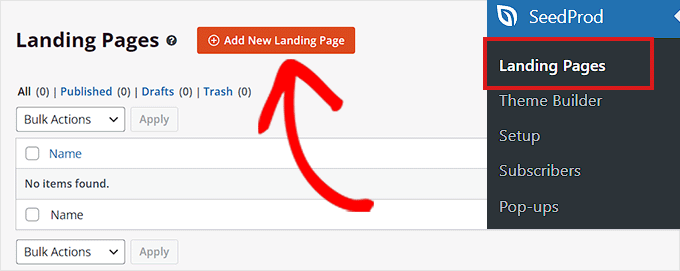
This will direct you to the ‘Choose a New Page Template’ screen.
SeedProd offers many pre-made layouts that you can use for your landing pages. Simply choose one and click on it.
You will then be asked to enter a page name and choose a URL. After entering this information, click on the ‘Save and Start Editing the Page’ button to continue.
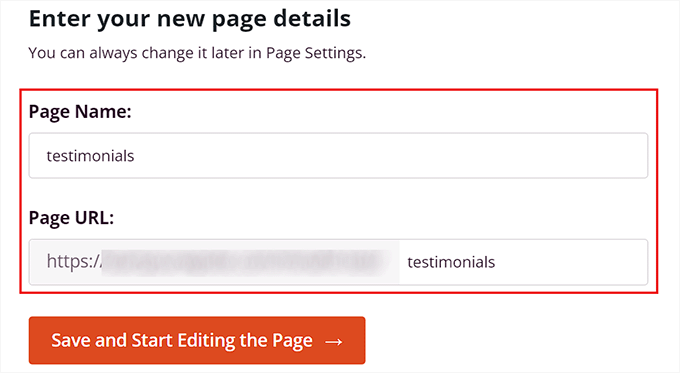
This will launch SeedProd’s drag-and-drop page builder, where you can now start editing your page. For detailed instructions, please see our tutorial on how to create a landing page in WordPress.
Once here, you need to look for the Testimonials block in the block panel on the left side of the screen. Upon finding the block, simply drag and drop it to your preferred location on the landing page.
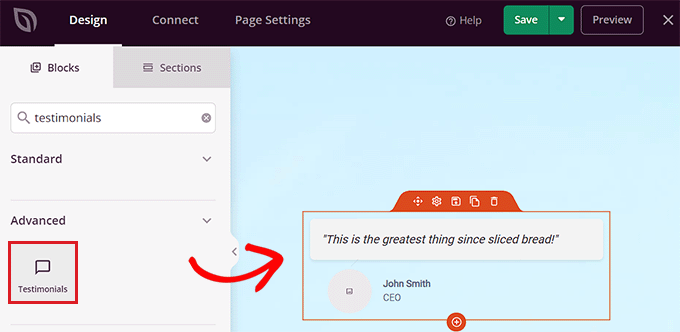
Now that the ‘Testimonials’ block has been added, you can click on it to open its settings in the left sidebar.
After that, click on the demo testimonial to open its settings in the sidebar.
Next, you can add the text, image, name, and title for the customer review.

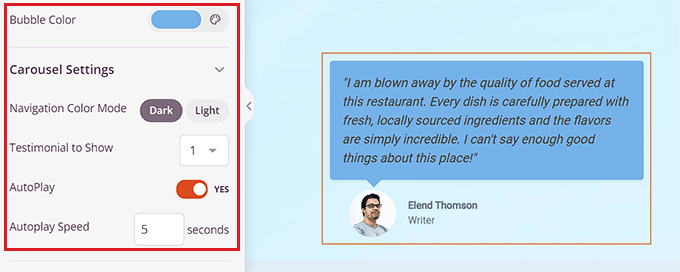
Once you have done that, scroll down to the ‘Carousel Settings’ section in the left column.
From here, you can choose the testimonial color mode, autoplay speed, the number of testimonials shown in a row, and more.
You can even change the color of the speech bubble by clicking on the ‘Bubble Color’ option to open up a color picker.
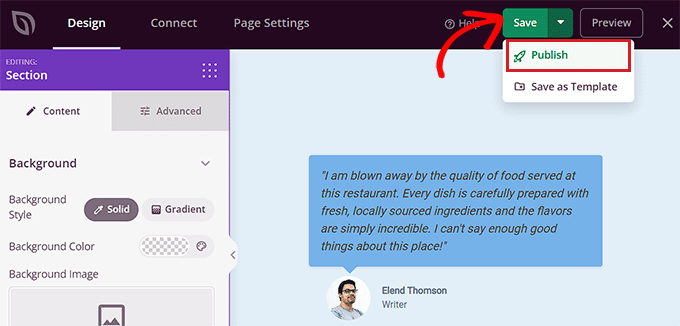
Once you are done, don’t forget to click the ‘Save’ button at the top to store your settings.
Finally, click the ‘Publish’ button to publish the landing page on your website.
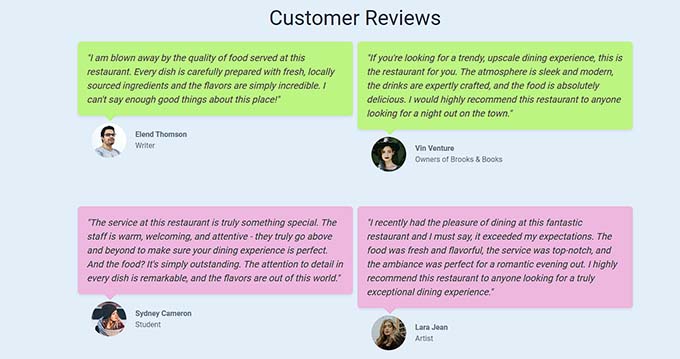
This is how the customer reviews section looked on our demo page.
As you can see, we have different colors for our customer reviews.

Bonus: Add Social Proof in Real-Time to Increase Conversions
Another way to encourage users to buy your products or services is by adding real-time social proof to your WordPress website.
Social proof is a psychological phenomenon where users have a natural urge to copy other people’s actions.
This means that you can show a notification bubble with recent purchases, online reviews, and form submissions by other users on your website in order to encourage potential customers to take action.
You can easily do this using TrustPulse. It is the best WordPress social proof plugin on the market that allows you to display real-time user activity notifications on your website, such as products being purchased or form submissions.

The plugin also includes features like real-time event tracking, smart targeting, flexible design options, actionable analytics, and more. For more information, see our complete TrustPulse review.
With this plugin, you can use FOMO to create anticipation and excitement around your products or store, ultimately leading to increased conversions.
For detailed instructions, you can see our tutorial on how to use FOMO on your WordPress site to increase conversions.
We hope this article helped you learn how to add a customer review page in WordPress. You may also want to see our tutorial on how to automatically add WordPress products in Google Shopping and our top picks for the best front-end posting plugins for WordPress.
If you liked this article, then please subscribe to our YouTube Channel for WordPress video tutorials. You can also find us on Twitter and Facebook.


Dennis Muthomi
a local restaurant reached out to me a few weeks ago to audit their website, and I found that they were using screenshots of user reviews. I hadn’t considered integrating and embedding reviews directly from Google, but after reading this, i will definitly upgrade my client’s review section
thanks WP Beginner! Your content is always so helpful and informative
Jiří Vaněk
User reviews are very valuable feedback. However, I sometimes encounter the problem that many websites only display the positive ones, so I seek reviews elsewhere, for example, using Google. Nevertheless, as a user of Seed Prod, I thank you for the guide on how to make reviews using this builder. This is something I will definitely use and also always recommend to anyone I’ve ever made a website for. It increases trust and provides feedback from people who have already ordered a service from the website owner. And I always recommend including a photo if possible (with the reviewer’s consent).
Moinuddin Waheed
Customer reviews helps in making an informed decision regarding consuming content or product.
I wanted to explore some kind of reviews plugin that works like customer itself gives reviews and that gets appear on the website without having to do anything else.
like we do see many reviews on ecommerce websites and other many such platforms.
is there a way to achieve that through plugin?
WPBeginner Support
There are a few options to achieve that, we would recommend taking a look at our list below for some of the plugin options:
https://www.wpbeginner.com/showcase/best-star-rating-plugins-for-wordpress/
Admin
Moinuddin Waheed
I will explore this list of plugins and see to it which suits my needs.
These recommended tools are really helpful and solves a big problem which otherwise seems insurmountable.
Thanks wpbeginner for the recommendation.
THANKGOD JONATHAN
It just worked perfectly for me in my Wordpress site.
I am using the Review Feed pro plugin and it works. thank you for the tutorial
WPBeginner Support
You’re welcome
Admin
Khaled
Does not work at all. It creates the testimonials page automatically with links to individual testimonials that you publish. But when I click on the link it goes to a page not found page.
WPBeginner Support
You may want to try some of the recommendations in our article below:
https://www.wpbeginner.com/wp-tutorials/how-to-fix-wordpress-posts-returning-404-error/
Admin
Bamidele
This is what have you been looking for, thanks to wpbeginner editor for this wonderful post
WPBeginner Support
You’re welcome, glad our article could help
Admin
Obed
Hi man,
I need to add a rating option to all comments and remove it on single posts.
Please suggest best idea on how to do it or plugin.
Thanks.
JJ
I find it funny, that most reviews plugins always have a (sometimes) optional picture of the person righting the review. In the real world, companies don’t ask for a photo and are lucky to just get the review in the first place
roshan
HI,
i need seperate customer review in every pages. please suggest me best idea or plugin.
Nalin Mishra
Dear Sir,
I want a page for my website ,onto which anyone can share there things there .
Please suggest.
Varsha
I want to add Facebook reviews on my website do u have any idea about it how I can add
RG
Get an admin or editor to copy paste a paragraph from an email? Not to mention most testimonials are collected either via a website form or word of mouth. The free version of this plugin ranks very high on the useless list.
Bachitter Chahal
I want to create a deals page like your so what should I use any special plugin or code.
Please tell me.
WPBeginner Support
Hi Bachitter,
Our deals page is a custom post type with advanced custom fields. our theme is custom made so we have different templates to display deals page and single deal.
Admin
Bachitter Chahal
I want to know the best plugin I can use to for deals page on my site
WPBeginner Support
Please take a look at our guide on creating a coupons site with WordPress and scroll down to section “Adding a Coupons Section to an Existing WordPress Site”.
Bachitter Chahal
Which is the best plugin I can use for this purpose on my site techdino.tk
Bachitter Chahal
Thankz WPBeginner for help me out.