Do you want to use artificial intelligence tools like DALL.E to generate images in WordPress?
AI-generated images can be a good alternative to create images for your WordPress blog posts without worrying about copyright.
In this article, we will show you how to use AI to generate images in WordPress.
Why Use AI Tools to Generate Images for Your WordPress Website?
There are a ton of paid stock image websites offering images to use on your WordPress website for a small fee.
However, the cost of these images is an extra expense. Most bloggers and small businesses don’t have the budget for that.
There are certainly many websites that offer royalty-free images like Unsplash or Shutterstock‘s limited free library.
But those images are highly overused and often too generic.
Now, the best way to create images for your website is by making your own images or using your own photographs. But not everyone is a professional photographer or digital artist.
This is where artificial intelligence comes in.
AI tools like DALL.E can generate unique artwork from text descriptions provided by the users.
These images are not only unique but highly creative and artistic.
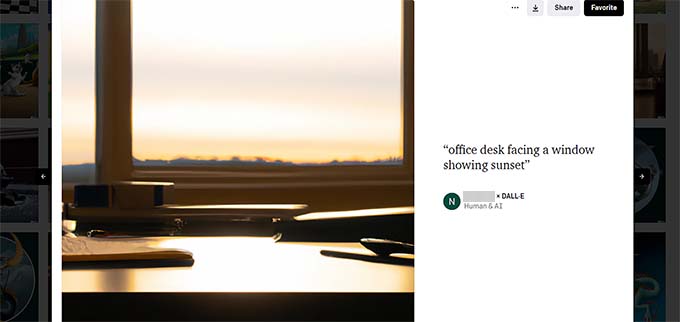
For instance, here is an image of an office desk with a sunset backdrop generated by DALL.E 2. It mimics the style of generic stock image photos that you can find on hundreds of websites.
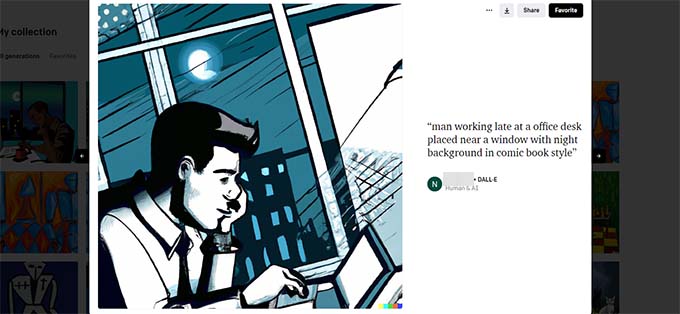
Now, take a look at this example of an artwork created by DALLE.2.
This one is artistic, more colorful, and in a comic book style.
You can see the variety of styles, topics, and ideas you can use on the DALL.E homepage.
The best part is that you are free to use these images for your blog posts, articles, and even landing pages.
That being said, let’s take a look at how to easily use AI-generated images in WordPress.
We will be showing you three methods using three different AI tools; you can choose one that works best for you by clicking on the quick links below:
1. Generate AI Images for WordPress with DALL.E 2
DALL.E 2 is an artificial intelligence tool made by OpenAI. It is quite popular for its artistic rendering, surrealism, creativity, and versatility.
Built on the GPT-3, it is a text-to-image model using deep learning technologies to generate images from natural language descriptions.
It is similar to ChatGPT, which also uses GPT-3 but responds in text. In the generative AI industry, these descriptions are called prompts.
You can create AI images on the DALL.E 2 website and download them to your computer. After that, you can upload those images to your WordPress website.
First, you need to visit the DALL.E 2 website and sign up for a free account, which gives you 50 credits for your first month.
Upon signing up, you’ll see the DALL.E dashboard with a prompt field and some recent artworks generated by DALL.E.
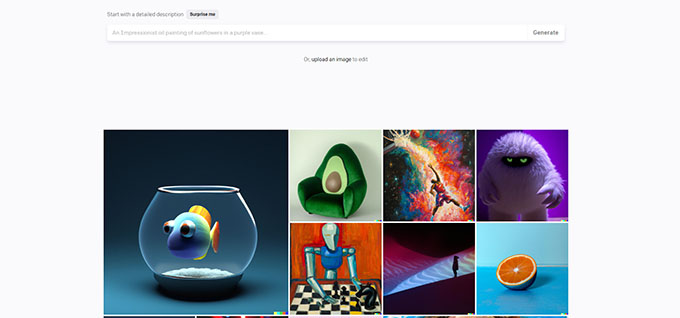
In the prompt field, type a text description of the image you want to generate. You can be as descriptive and creative as you like.
Click on the ‘Surprise Me’ button to see some examples of prompts you can generate.
Once you click on the ‘Generate’ button, the AI will generate images based on the prompt you provided and show you four results.
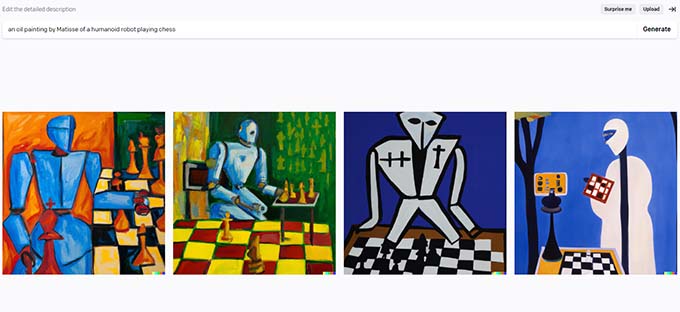
You can download all of them to your computer if you want. You can also click on any of the generated images to edit them.
The image editor in DALL.E allows you to expand the frame or pan in. You can also erase or retouch an area of the image.
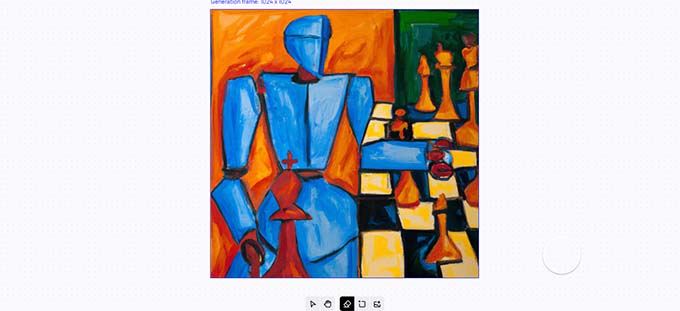
Click on the ‘Generate’ button again for AI to regenerate the image based on your changes.
Once you have downloaded the images to your computer, you can switch back to the admin area of your WordPress website.
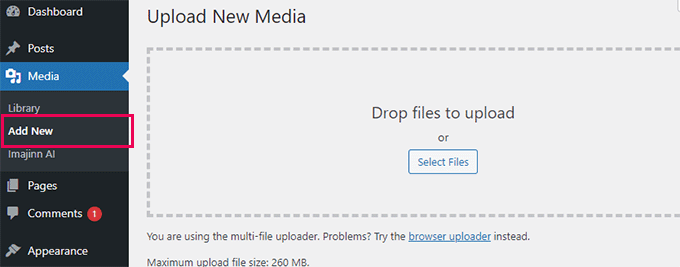
You can now upload the image to your WordPress media library by visiting the Media » Add New page.
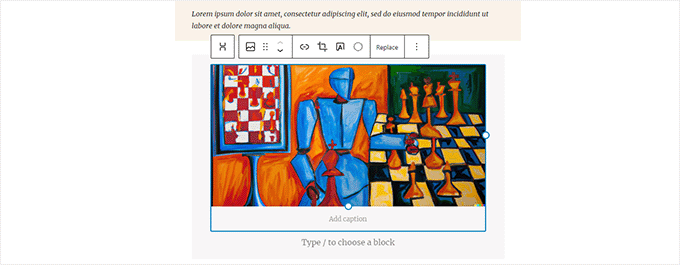
You can also add an image directly to your WordPress posts and pages. Simply edit the post or page where you want to display the image.
On the post edit screen, add the Image block and then upload the image from your computer.
Automatically Generate AI Images in WordPress with DALL.E and Uncanny Automator
If you are looking for a plugin to integrate DALL.E 2 directly with your WordPress website, then you can use Uncanny Automator.
Uncanny Automator is one of the best WordPress automation tools on the market. It offers support for OpenAI’s GPT and DALL-E models to easily generate AI text content and images in WordPress.
You can use the simple recipe builder to create an automation that uses a WPForms submission form to send text and image prompts to GPT and DALL-E.
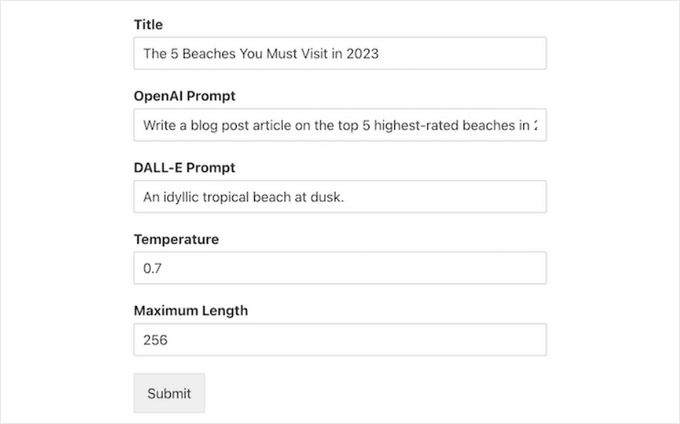
Then, you can create a new post in WordPress using Uncanny Automator’s tokens to automatically pull the data from the text and image generation.
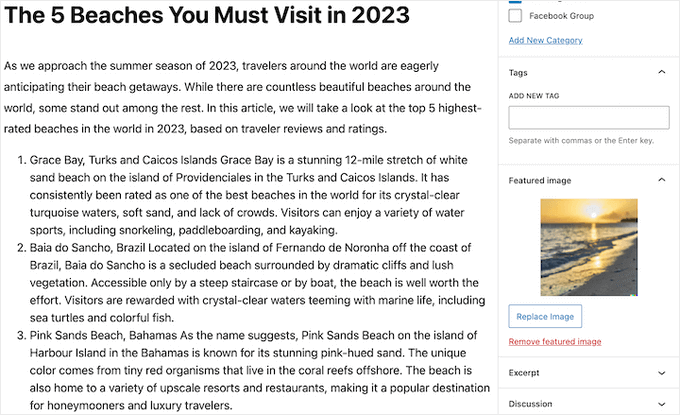
For example, you can use a response token to set the featured image as the AI image you created:

This will turn the text and image prompts from your submission form into a new blog post in just a few clicks.
Uncanny Automator even adds the DALL-E image directly to your WordPress media library, so you don’t need to do it manually.
For more details, see our guide on how to create automated workflows in WordPress with Uncanny Automator.
What is the License Used for Images Generated by DALL.E 2?
You retain the copyright for the images generated by the prompt you provided to DALL.E 2.
You can use the images anywhere you want, including your WordPress website, YouTube videos, eBooks, magazines, and more.
2. Use SeedProd to Generate AI Images in WordPress (Premium Plugin)
For the first method, we will use SeedProd to easily generate AI images in WordPress.
SeedProd is the best drag-and-drop theme builder for WordPress. It allows you to create custom WordPress themes, page layouts, and landing pages without coding.
It also comes with a powerful AI Assistant that uses DALL-E to help you generate AI images in just a few clicks.
To get started, you need to install and activate the SeedProd plugin. If you need help, see our guide on how to install a WordPress plugin.
Note: There is a free version of SeedProd available. However, you need to buy the premium version of SeedProd to access the AI Assistant. You’ll also need to buy AI credits by clicking the link in your SeedProd account dashboard.
Once the plugin is activated, you can use the drag-and-drop builder to create a custom WordPress theme or landing page. For step-by-step instructions, you can follow our tutorials:
Then, you can use the AI Assistant to generate original images for your website pages.
Simply edit the page, drag an Image block from the panel on the left-hand side, and drop it into the live preview area on the right.
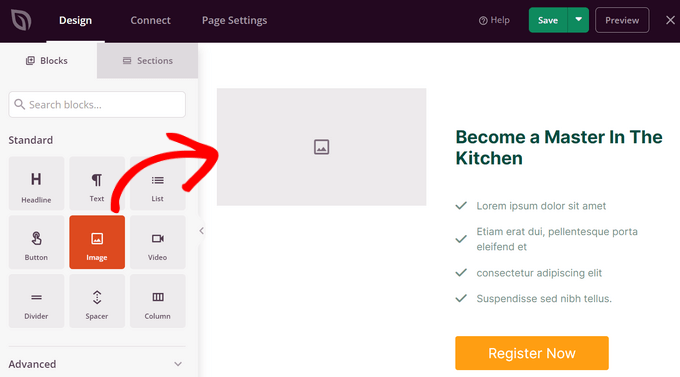
Next, click on the Image block to open up the block settings panel on the left side of the screen.
Then, click on the ‘Add with AI’ button.
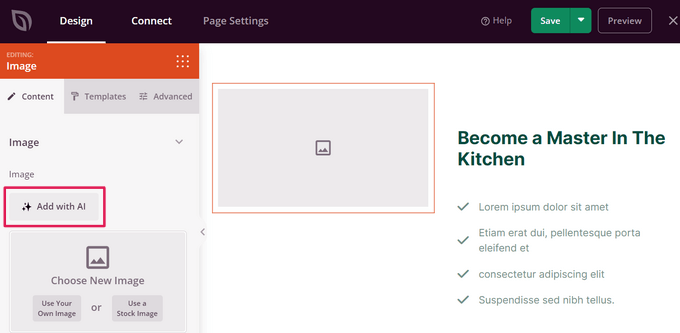
This will open the image prompt panel. Here, you can type a description of the image you want to create for your site or use one of the suggested prompts.
After that, click on the ‘Generate Image’ button.
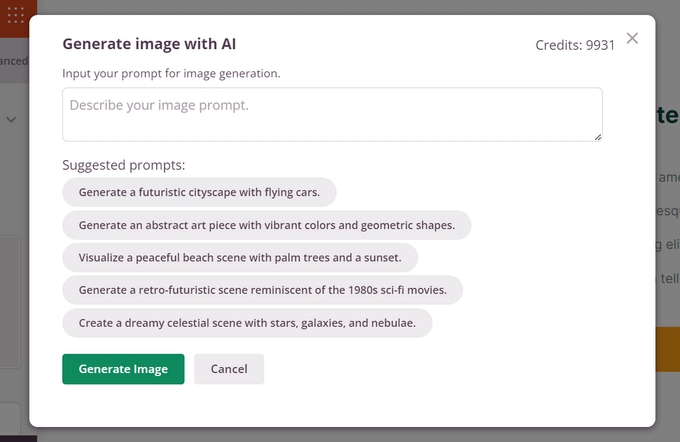
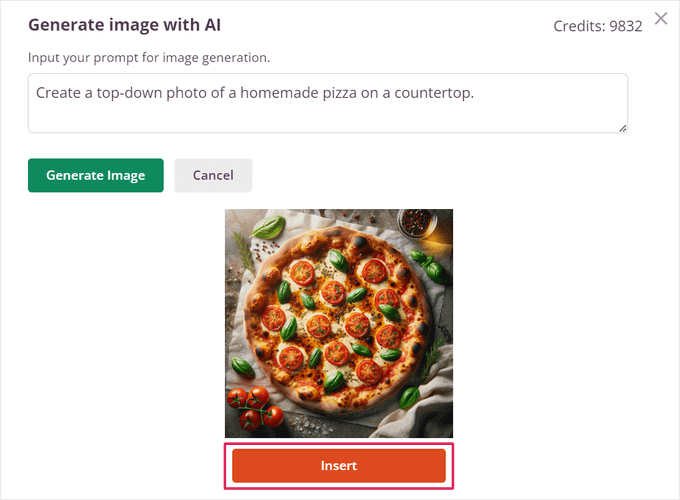
SeedProd will take a few seconds to generate the image.
When it’s done, you’ll see a preview of the image, and you can click the ‘Insert’ button to add it to your page.
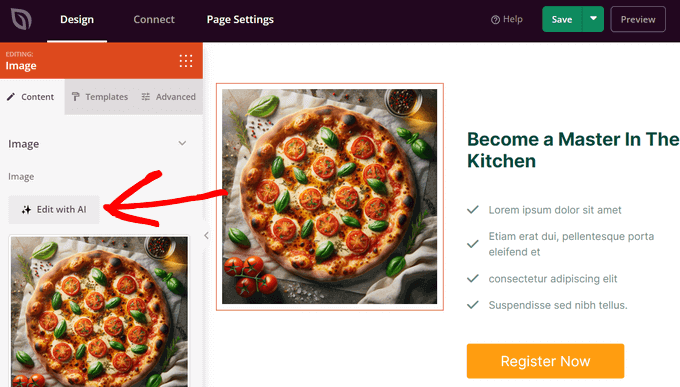
After the image has been added to your page, you can also edit the AI image and generate variations of the same image.
Just click on the generated image from the SeedProd builder and select ‘Edit with AI’ in the block settings panel.
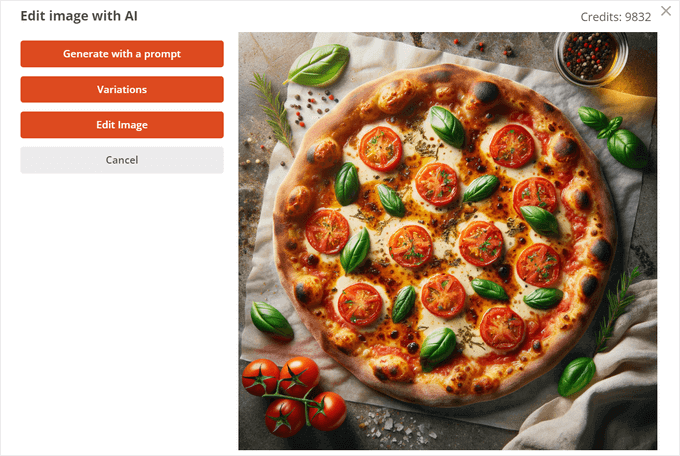
Next, you’ll see the different editing options that are available.
First, click on the ‘Variations’ button.
From there, hit the ‘Generate Variations’ button.
This will tell the AI Assistant to create multiple variations of the image.
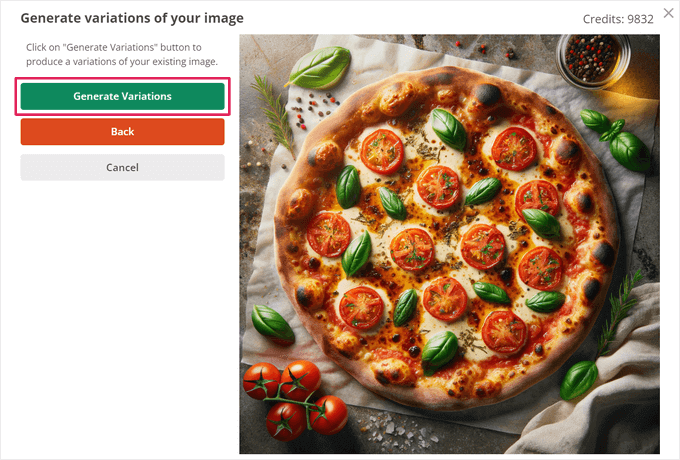
If you like one of the variations better than the original AI-generated image, you can click the ‘Insert’ button to add it to your page.
Otherwise, you can select the ‘Back’ button to keep the original image and return to the edit options screen.
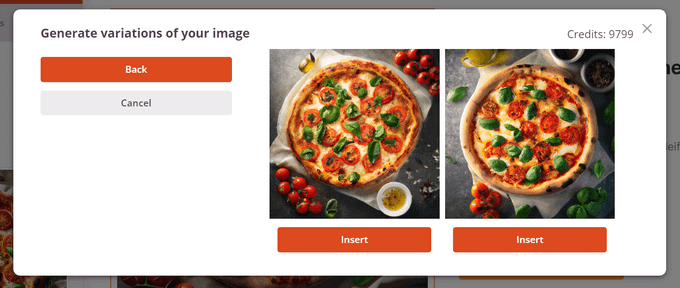
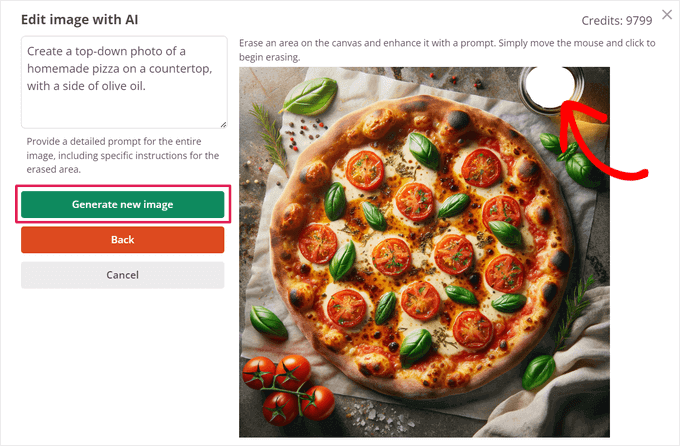
The ‘Edit Image’ option allows you to use a brush tool to edit specific areas of the image. Simply erase the area that you want to edit and alter your original prompt to describe the changes you want to make.
Then, click the ‘Generate new image’ button.
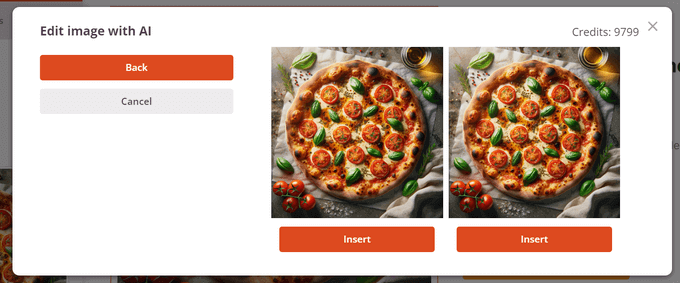
After a few seconds, SeedProd’s AI Assistant will show you two variations of the image with the changes you described.
You can click on the ‘Insert’ button underneath the variation you like the most to add it to your page.
Once you are happy with the image, just hit the ‘Save’ and ‘Publish’ buttons.
You can find them in the top right corner of the SeedProd builder.
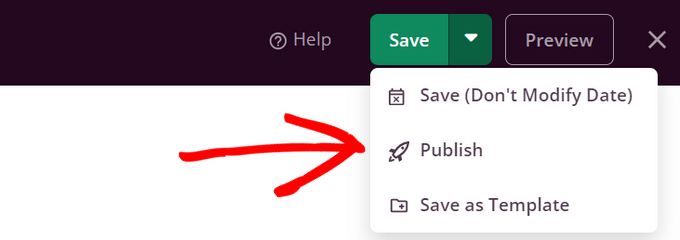
Now, your AI-generated image will be displayed on your WordPress website.
Here’s how it looked on our demo site:

What is the License Used for Images Generated by SeedProd?
You own the images you create with SeedProd’s AI Assistant.
You’re free to use the AI-generated images anywhere on your WordPress site.
3. Use Imajinn to Generate AI Images in WordPress (Free Plugin)
For this method, we will use Imajinn AI to generate images in WordPress.
Imajinn AI is similar to tools like DALL.E 2, Midjourney, and Stable Diffusion. It generates images using artificial intelligence based on the prompt you provide.
First, you need to install and activate the Imajinn plugin. For more details, see our step-by-step guide on how to install a WordPress plugin.
Note: The base plugin is free and gives you 10 credits. After that, you can buy more credits from the plugin’s website.
Upon activation, you need to visit the Media » Imajinn AI to configure plugin settings and generate images.
First, you need to sign up by providing an email address and password to create your account.
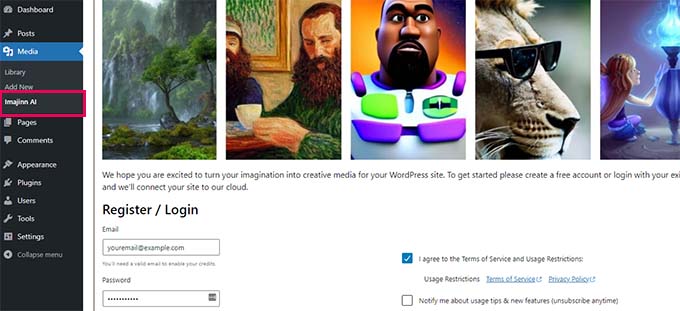
After that, you will be able to start generating images using Imajin AI.
Simply provide a detailed prompt describing the image that you want to generate.
You can also choose from a list of styles, artist style, style modifier filters, and aspect ratio to further customize your prompt.
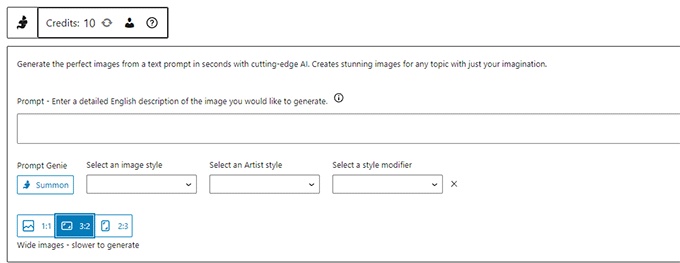
Below that you can choose to click on the ‘Summon’ button to launch the Prompt Genie tool.
The tool will suggest further prompt ideas based on the prompt description you provided to generate the best possible image.
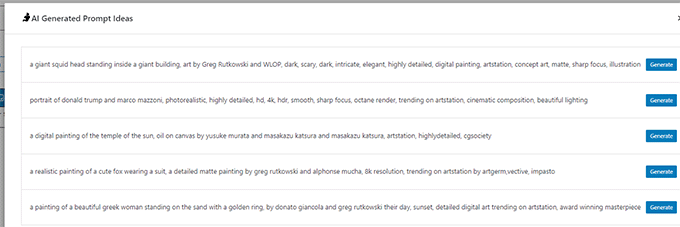
You can click on the ‘Generate’ button to use a suggested prompt, or continue writing your own prompt by copying ideas from the suggestions.
Once you are satisfied, click on the ‘Generate’ button to continue.
The plugin will now start generating images using the AI tool running on the cloud. Once finished, it will display four variations of images for you to choose from.
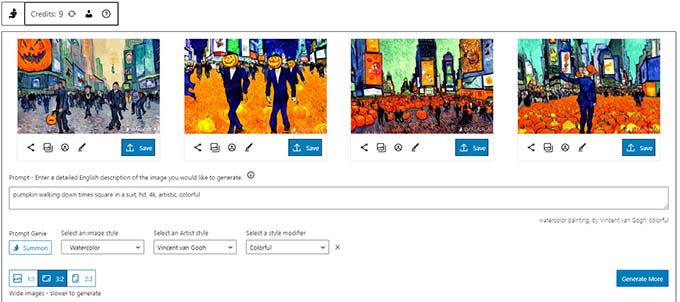
Below each image, you’ll find options to share the image, repair faces (The AI is not great at generating human faces), or touch up the image.
You can also just click on the ‘Save’ button to store an image in your WordPress media library.

To use the image in your WordPress posts and pages, simply edit the post or page where you want to add the image.
On the post-edit screen, add the Image block where you want to display the image and then click on Media Library.
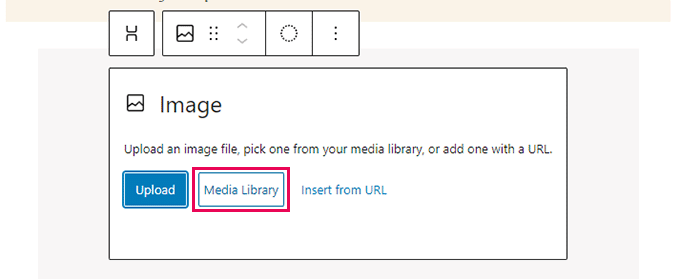
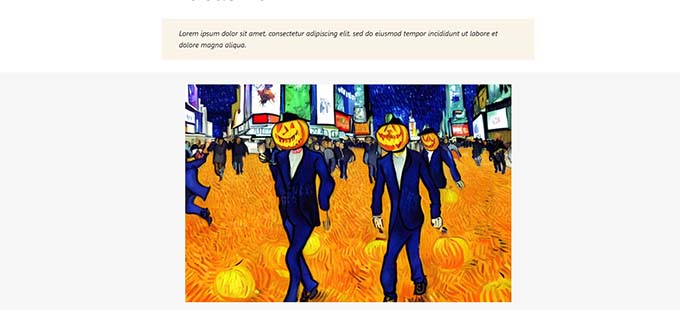
Next, you need to select the image you saved earlier from your Media Library and provide an alt text for the image.
After that, go ahead and click on the ‘Select’ button to insert the image.
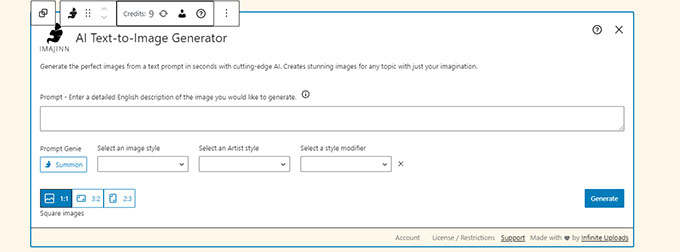
The plugin also comes with an Imajinn block that you can add to your posts or pages.
It allows you to generate an image inside the block editor.
What is the License Used for Images Generated by Imajinn AI?
All images generated by Imajinn AI are provided under the free domain or CC0 license.
You are free to use them on your website as you see fit.
Bonus Resources:
AI can be used to help you write content, create images, and more. Here are some more resources to upgrade your AI skills:
- How to use AI for SEO in WordPress
- How to use AI to boost your marketing
- How to use AI for your lead generation campaigns
- How to write content using an AI content generator
- How to write powerful headlines using AI
We hope this article helped you learn how to use Artificial Intelligence to generate images for your WordPress website. You may also want to see our ultimate image SEO guide and these easy tips to optimize images for speed.
If you liked this article, then please subscribe to our YouTube Channel for WordPress video tutorials. You can also find us on Twitter and Facebook.


Syed Balkhi says
Hey WPBeginner readers,
Did you know you can win exciting prizes by commenting on WPBeginner?
Every month, our top blog commenters will win HUGE rewards, including premium WordPress plugin licenses and cash prizes.
You can get more details about the contest from here.
Start sharing your thoughts below to stand a chance to win!
Dayo Olobayo says
Thanks for putting this educative piece together. While the potential of AI image generation is undeniable, it’s important to acknowledge that it’s still an evolving technology. There may be limitations in terms of the level of detail or creative control achievable compared to working with a human artist. Ensuring the images align perfectly with your vision might require some trial and error.
Moinuddin Waheed says
creating images through ai and using it for the websites is good and makes the final version of the website faster.
however, I feel the same about the stage of ai and how it creates pictures based on different commands. for long term and for precision and exact requirements of images, we still need himan touch.
ofcourse, no denying the impact that ai is creating in different technological spheres.
Jiří Vaněk says
I don’t directly use individual AI tools. Well, I tried MidJurney a few times, but it’s practically not functional for free now. However, what I really appreciate are the tools in the Seed Prod page builder. I’ve been using it for about two months, and the image generation tools are absolutely fantastic. It saved me a lot of time searching for images with a free license.
Dayo Olobayo says
Yes Jirí, seedProd’s AI image generation is impressive especially for beginners. But how do you find the quality of the images compared to established stock photo services? I’m curious to see how AI-generated visuals evolve and potentially become the new standard.
Moinuddin Waheed says
I think images generated by seedprod are good enough to include in the website specially while in the production mode.
This gives a sense of how the website will look like.
but once we have exact look and feel of the website, one would need to make specific details images to suit the requirements of the website which I don’t think ai is capable to produce with such precision.
Hajjalah says
Hello, thanks for this great article. I had always struggled to find unique photos to use on my blog because the royalty free photos on Unsplash and Pixabay are commonly used by many bloggers.
It was a game changer to find a guide for generating AI photos for WordPress with DALL.E 2 on this article. This has greatly saved a lot of my time which I use to spend creating and designing photos manually on my computer. I obtained a nice look for my blog posts with AI photos and saved a lot of time . Much credit to WPBeginner.
Mrteesurez says
Good, but I heard Google may not rank the generated AI Images of search page especially in image search results tab. Is this true ?
WPBeginner Comments says
If the images are relevant to the content and are not copying someone else’s work, then the ranking should not have any negative impacts.
Jiří Vaněk says
Google currently doesn’t have any tools to distinguish what was generated by AI and what was done by a person in Photoshop. Google doesn’t have such perfect technology. Additionally, as mentioned, it’s about the relevance of the content, not whether the image is from a stock photo, from AI, or if you made it yourself.
Soms says
thanks for the article.
can we olso optimize an image create by an AI before loading it into WordPress or we can load it directly after been generated by the AI?
Thanks
WPBeginner Support says
The images would be added to your site but there are plugins to optimize images after they have been uploaded to your site of the images are too large
Admin
Mrteesurez says
AI is unarguably making blogging stuffs easier and faster. That means I can just be generating images directly from my WordPress site, this is incredible.
But can we use the plugin Imajinn AI to write text over that image for SEO benefits ??
WPBeginner Support says
Unless we hear otherwise the Imajinn plugin is not currently designed for adding text to the images, you would need to manually add the text into the image with an image editor.
Admin
Moinuddin Waheed says
I think text over images doesn’t serve any purpose as such in terms of search engine optimisation.
for best seo image practices we need to add alternate text , caption and title of the image for the concerned images. this infact helps in seo for images.
However for requirements to add text on the images different image editors can be used.
Moinuddin Waheed says
it’s good to see that we can create our own image by artificial intelligence tools for our websites.
Imajinn ai plugin gives the ability to generate ai images directly inside the dashboard, how can we optimize this image right there for its size and other features?
does it come with such options or we would need to go manual way of resizing and reducing the file size and also what about different file formats? does it gives such options?
Thanks for the guide for making image options for websites easy.
WPBeginner Support says
Unless we hear otherwise, the plugin does not currently allow for you to pick specific file types or sizes, you would need to use an image optimization plugin for now.
Admin