
Your WooCommerce product pages do most of the work when it comes to turning visitors into customers.
However, if you are using the default layout, those pages often look the same as thousands of other stores, which makes it harder for individual products to stand out.
The good news is that you don’t need to hire a developer or learn how to code to create product pages that reflect your brand and guide visitors toward a purchase.
After testing several page builders, we found that SeedProd makes this process simple with its visual, drag-and-drop editor.
In this guide, we’ll walk you through how to create custom WooCommerce product pages that look professional and convert better, without touching a single line of code.
💡Quick Answer: How to Customize WooCommerce Product Pages
The no-code method for customizing WooCommerce product pages involves using the SeedProd page builder plugin. It replaces the default template with a visual, drag-and-drop design.
What Makes a Great WooCommerce Product Page? 🤔
A great WooCommerce product page turns casual browsers into buyers. While every store is different, high-converting pages usually share these five key elements:
- High-Quality Product Images: Since customers can’t touch the product, clear visuals are essential for building trust and communicating quality.
- Compelling Product Descriptions: Use persuasive copy that highlights benefits, not just features, to help users understand why they need your product.
- Clear Call to Action (CTA): Your ‘Add to Cart’ button should be the most prominent element on the page so users know exactly what to do next.
- Social Proof: Displaying reviews, star ratings, and testimonials helps reassure visitors that your product is reliable.
- Upsells and Cross-sells: Suggesting related or higher-value products keeps users browsing and can increase your average order value.
Here’s a great example from Nutribullet that shows these design principles in action.

Now, let’s look at how you can customize your WooCommerce product pages with no code. You can use these quick links to navigate through this guide:
- Step 1: Install and Activate the SeedProd Plugin
- Step 2: Choose a WooCommerce Template Kit
- Step 3: Customize the WooCommerce Product Page Template
- Step 4: Optimize Your WooCommerce Product Page
- Step 5: Publish Your Custom WooCommerce Product Page
- Bonus Tips to Boost WooCommerce Sales
- Video Tutorial
- Frequently Asked Questions About WooCommerce Product Pages
Step 1: Install and Activate the SeedProd Plugin
While WordPress offers several ways to edit WooCommerce product pages, we’ve found SeedProd to be the most effective solution for store owners. Here’s why.
Unlike the built-in WordPress site editor, this WooCommerce plugin gives you complete control over your product page design. You get advanced eCommerce-specific features that the default editor simply doesn’t offer.

Many drag-and-drop page builders overwhelm users with complicated features and confusing interfaces. SeedProd takes a different approach. Its clean, intuitive interface helps you build pages without the learning curve.
💡 Expert Tip: SeedProd also includes an AI website builder that can create a complete WooCommerce store in just a few minutes. If you want a faster setup, you can follow our tutorial on building a website with AI to get started step by step.

SeedProd also stands out with its WooCommerce-focused tools. You get access to over 300 pre-designed templates and specialized eCommerce blocks that are ready to use right away.
The drag-and-drop builder lets you customize every element of your store without creating any custom code. Whether you’re a beginner or a professional, you can create professional-looking WooCommerce pages in minutes, not hours.
SeedProd is perfect if you’re just starting your online store or are willing to switch themes for better results. While it will override your current theme’s design, the transformation is worth it if you want complete control over your store’s design.
We will use SeedProd’s paid version for this tutorial. Despite being paid, you can use our exclusive SeedProd coupon code to save even more on your purchase. Plus, the key features needed to customize product pages are only available in the premium version.
For a detailed look at all features and real-world examples, check out our comprehensive SeedProd review.
The first thing you need to do is install and activate the SeedProd plugin. For more details, see our step-by-step guide on how to install a WordPress plugin.
Upon activation, go to SeedProd » Settings and enter your license key.
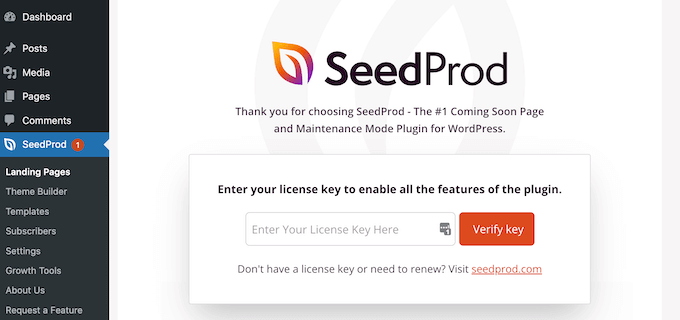
You can find this information in your account on the SeedProd website. After entering the license key, click on the ‘Verify Key’ button.
Step 2: Choose a WooCommerce Template Kit
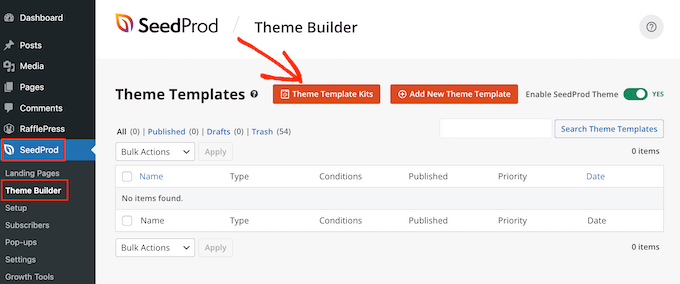
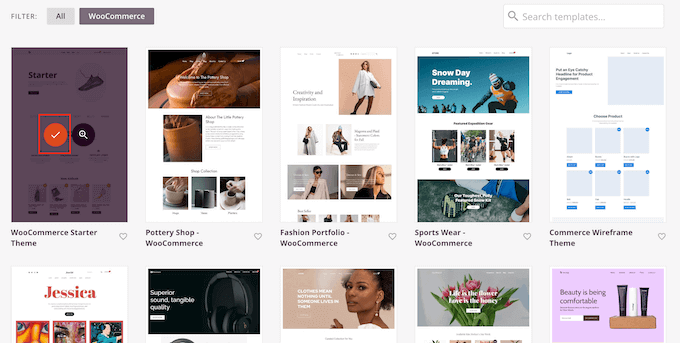
With that done, it’s time to choose the WooCommerce template kit for your online store. Simply head over to SeedProd » Theme Builder and then click the ‘Theme Template Kits’ button.
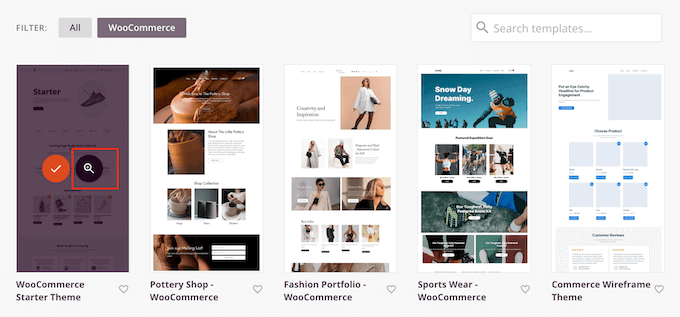
Since we’re creating a custom WooCommerce theme, click the ‘WooCommerce’ tab to view all the eCommerce kits.
To preview a design, simply hover your mouse over it, then click the magnifying glass.
This opens the template kit in a new tab.
This is a live preview, so you can see other designs in the kit by clicking links, navigating menus, using buttons, and interacting with other interactive content.

Since you are creating a custom WooCommerce product page, make sure to check out the product page layout. See if it can be a good base that you can customize later on.
When you find a template kit you want to use, hover over it, then click the checkmark when it appears. In this guide, we are using the WooCommerce Starter Theme, but you can use any template you want.
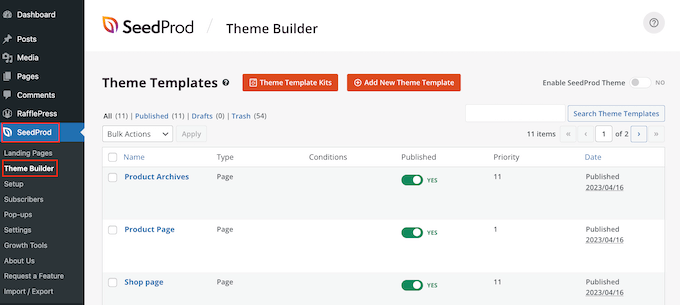
SeedProd will import the whole kit into your WordPress website, so you can use the kit to create a custom product archive, shop page, blog index, and more.
To see all these templates, head over to SeedProd » Theme Builder.
Step 3: Customize the WooCommerce Product Page Template
After installing your template, you are ready to customize the WooCommerce product page.
To get started, hover over the pre-designed Product Page template and then click on the ‘Edit Design’ link when it appears.

This will open the template in SeedProd’s drag-and-drop editor, with a preview of your WooCommerce template to the right and some block settings on the left.
SeedProd will show an example of how the product page will look using content from one of your WooCommerce products.
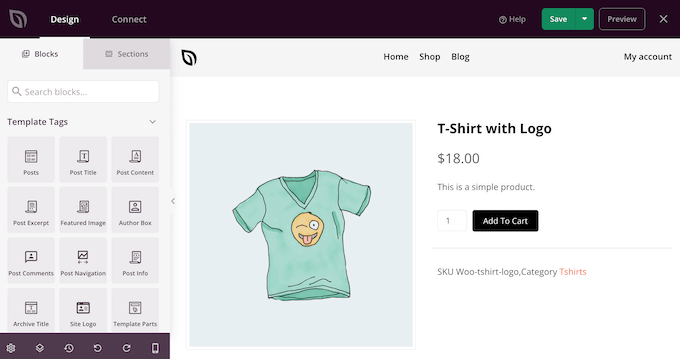
All WooCommerce templates come with built-in blocks, a core component of all SeedProd designs.
To customize a block, simply click to select it in the page preview and then make any changes in the left-hand menu.
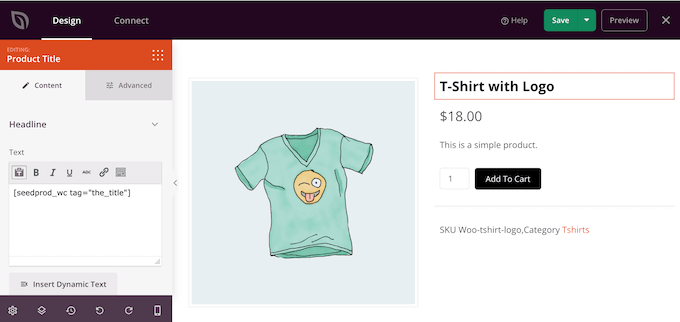
For example, the template includes a built-in Featured Product block that you can customize in several ways.
To start, you may want to adjust the block’s size and alignment in the left-hand menu.
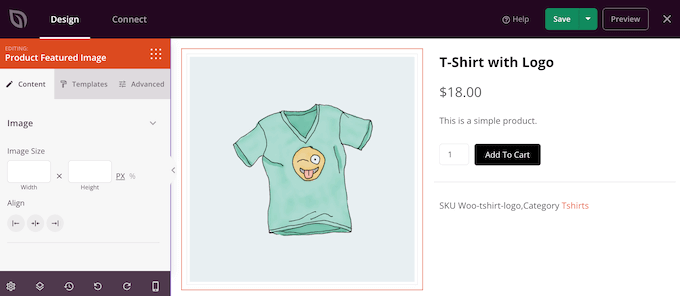
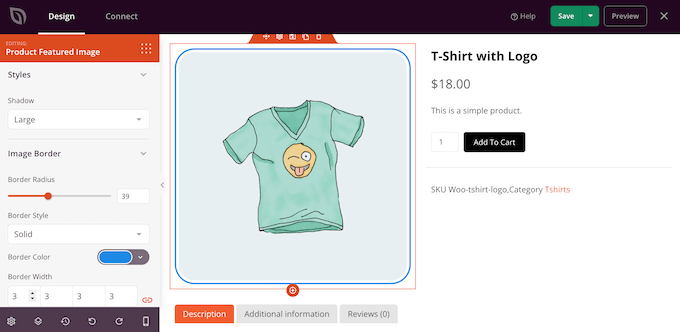
You’ll find more settings in the ‘Advanced’ tab. Here, you can make the image really stand out by adding a border or shadow, adding a CSS animation, and more.
As you make changes, the live preview will update automatically, so you can try different settings to see what looks best on your online store.
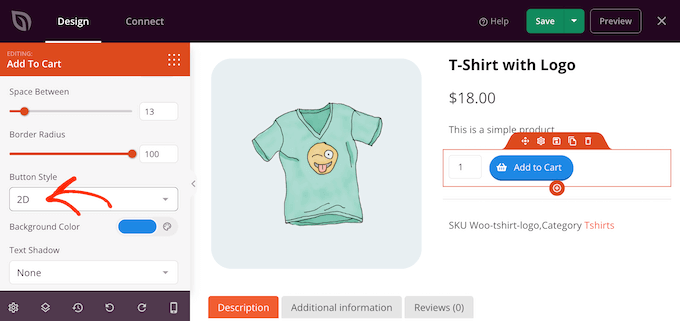
The WooCommerce template also has an Add To Cart call to action button. This allows shoppers to buy your products, so you’ll want to make the button stand out.
To start, you can replace ‘Add To Cart’ with your own custom messaging, such as ‘Buy Now‘ or ‘Get Yours Today.’
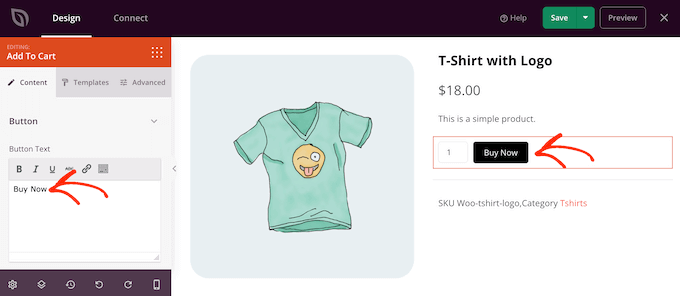
You may also want to add an icon font to the button to help visitors understand what this button does at a glance.
SeedProd includes a built-in library of more than 1,400 Font Awesome icons you can use on your product pages. In the left-hand menu, click to expand the ‘Icons’ section.
You can now choose whether to show the icon before or after the button text.
Simply make your decision and then click on the ‘Choose Icon’ button.
You’ll now see all the different Font Awesome icons that you can use. When you find an icon you like, give it a click.
When you are happy with the button’s messaging, you can change how it looks by clicking on the ‘Templates’ tab. Here, you’ll find different button templates that you can use.
To use any of these designs, simply click on the one you want.
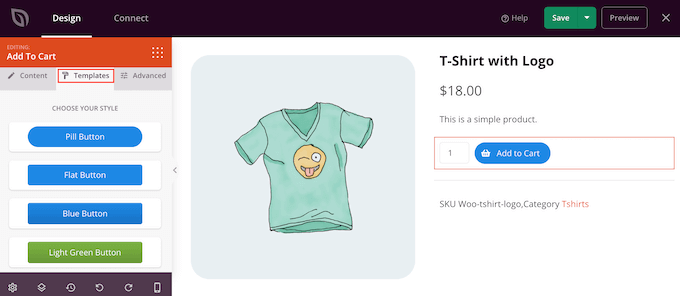
After choosing a template, you can fine-tune how the button looks by clicking on the ‘Advanced’ tab. Here, you can change the spacing between the button and the quantity box, increase the border radius to create curved corners, and more.
Another option is to open the ‘Button Style’ dropdown and choose a new style from the list.
Most of the settings are self-explanatory, so it’s worth going through them to see what different kinds of effects you can create.
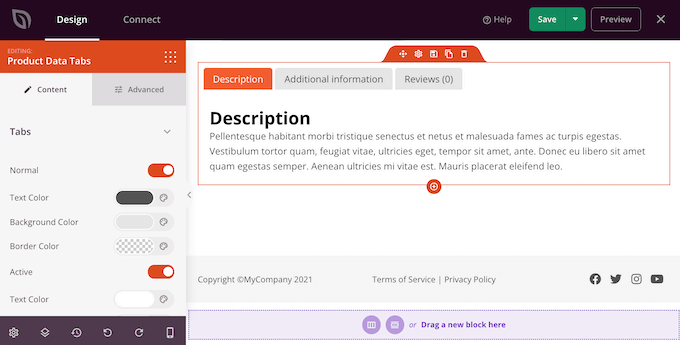
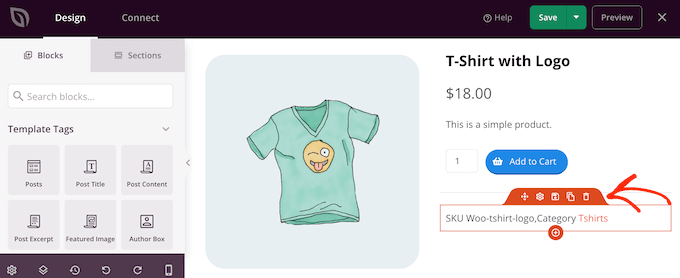
Another important section is the Product Data Tabs block. This shows shoppers detailed information, such as product tags, attributes, and categories.
With that in mind, it’s worth clicking to select the block and then seeing what changes you can make in the left-hand menu. For example, you can change the background color, text color, increase the padding, and more.
To remove any default block, simply hover your mouse over it.
Then, click on the Trash can icon when it appears.
You can also move blocks around the page using the drag-and-drop motion in the editor.
Step 4: Optimize Your WooCommerce Product Page
The template’s built-in blocks are a great start, but to ensure you get the best results out of your product pages, you need to optimize them.
SeedProd has lots of WooCommerce blocks that you can use to create a high-converting online marketplace or store. To help you out, here are some things you may want to do to your WooCommerce product page.
Use SeedProd AI to Write Product Descriptions
A good product description can be the difference between a WooCommerce sale and a missed opportunity. However, writing unique, engaging descriptions for numerous products can be time-consuming.
This is where AI tools like SeedProd’s AI content generator can be incredibly helpful. They offer a starting point that you can then refine to perfectly match your brand voice and product specifics.
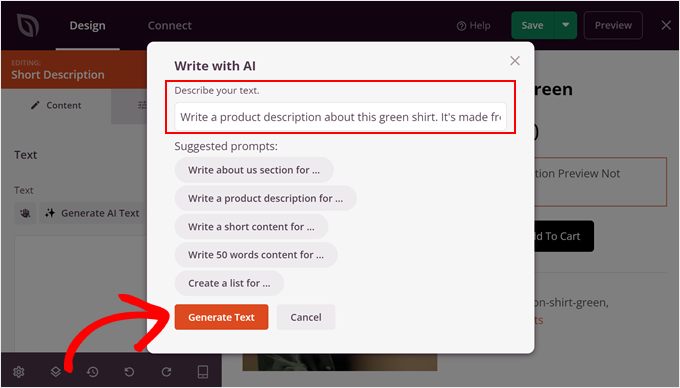
To use SeedProd AI, go ahead and click the ‘Short Description’ block anywhere on your product page template. Then, click ‘Edit with AI’ on the left sidebar panel.
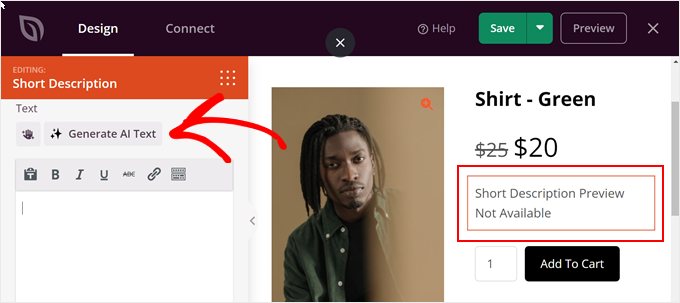
Now, simply type a prompt to tell the AI what to generate.
You can add specific details about your product (e.g., what it’s made of) so the content accurately describes what the item is like. Then, hit the ‘Generate Text’ button.
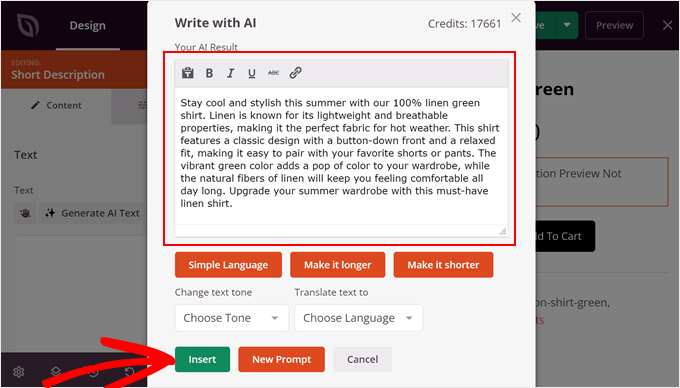
Once done, you will see the full generated content. Here, you can either keep it as it is, make the text simpler, or make it longer.
You can also change the text tone and even translate the text into multiple languages if you run a multilingual online store.
Once you are happy with how the text looks, just click ‘Insert.’
For more information about using the AI tool, you can read our guide on how to use AI to boost your marketing.
Show Related WooCommerce Products
You may be able to get more sales and increase the average order value by showing related items on your product pages. These might be products that shoppers frequently buy together or items that complement one another.
For example, if a customer buys a laptop, then they may also be interested in a laptop bag.
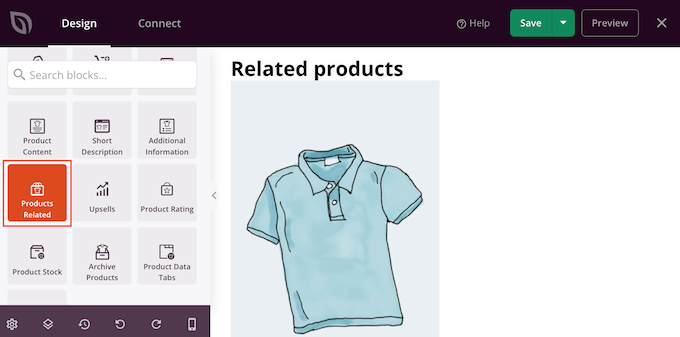
SeedProd comes with a ready-made Related Products block.
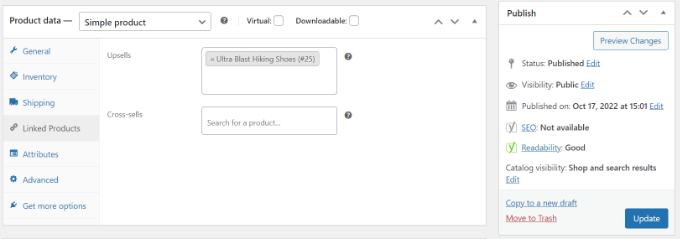
However, to get the most out of this block, you’ll need to set up linked products. You can do this by going to the ‘Product Data’ section and clicking the ‘Linked Products’ tab, as you can see in the following image.
For step-by-step instructions, please see our guide on how to add WooCommerce product recommendations.
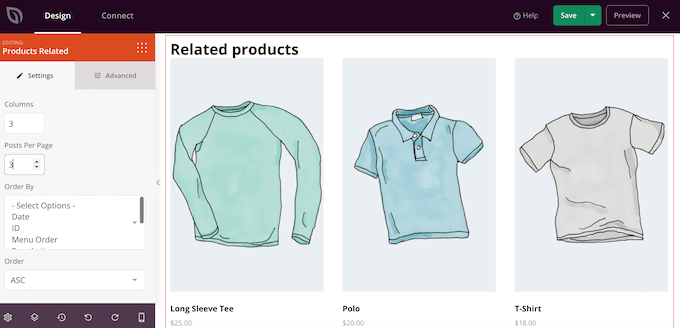
With that done, simply find the Products Related block in the SeedProd editor and then drag it onto your layout.
By default, the block shows one related product in a single column.
You can show more products by typing new numbers into the ‘Columns’ and ‘Posts Per Page’ boxes or by clicking the arrow buttons.
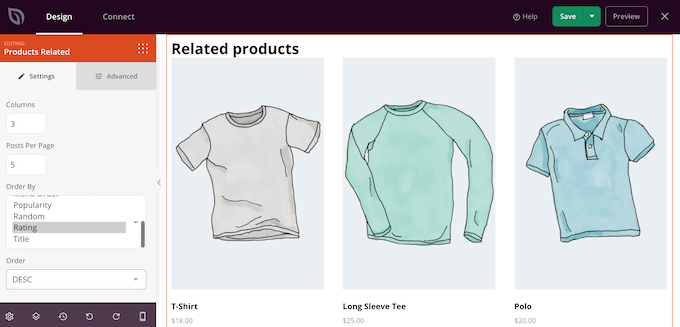
If you display multiple products, you can change how they are arranged using the ‘Order By’ box. For example, you might show the highest-rated products first, since customers seem to enjoy them most.
You can also open the ‘Order’ dropdown and choose whether to display the related items in ascending (ASC) or descending (DESC) order.
Add a Star Rating
Showing a star rating for each product can help reassure shoppers that your items are good quality. That said, you may want to drag the Star Rating block onto your design.
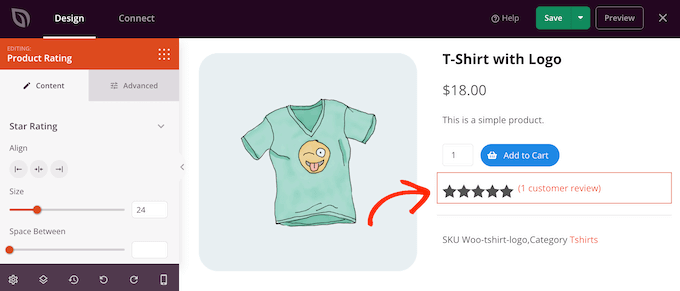
For the best results, we recommend displaying the star rating at the top of the screen, where customers can easily spot it. This can help shoppers make purchasing decisions faster since they can immediately see whether other shoppers recommend a product.
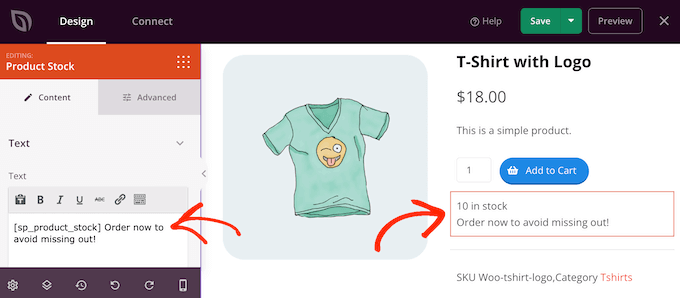
Use FOMO by Showing the Product Stock
FOMO, or ‘fear of missing out,’ encourages shoppers to take action now.
If you sell limited-edition items or regularly have a small stock, you may want to show the number of products remaining. This can convince shoppers to buy now rather than wait and risk the product selling out.
To show this information, drag the Product Stock block onto your design. Note that this block only displays data if you have enabled ‘Manage Stock’ inside the product’s inventory settings.
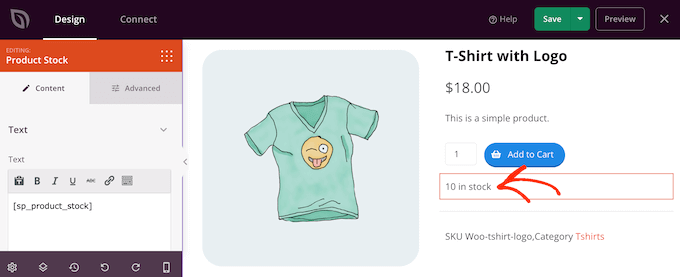
By default, the block displays the number of items remaining, followed by ‘in stock.’ You may want to add your own messaging to this default text.
To do this, simply type into the small text editor in the left-hand menu. If you do add some text, then be careful not to edit the ‘[sp_product_stock]’ tag, as this allows SeedProd to show the total number of items remaining.
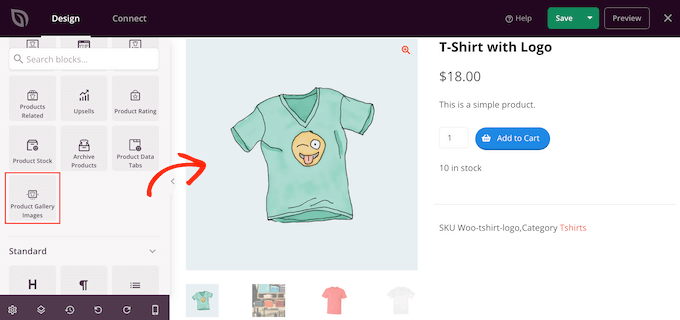
Replace the Featured Image with a Product
A featured image of a product lets shoppers see what they’re buying in an online store.
However, sometimes, you may want to replace a single featured image with a product gallery. For example, you might show the same product from different angles. Some stores even use interactive 360-degree images so shoppers can explore a product in more detail.
If you’ve added a gallery to your WooCommerce products, then it makes sense to replace the default Product Featured Image block with a gallery block.
To do this, simply hover over the Featured Product block, then click the trash can icon when it appears.

You can then find the Product Gallery Image block in the left-hand menu and drag it onto your page layout.
We recommend adding this block toward the top of the page so visitors can immediately see what they are buying.
Shoppers can zoom into the image by hovering their mouse over the product gallery.
By default, the zoom icon appears in the upper-right corner of the current featured image, but you can change this using the ‘Position Top’ and ‘Position Right’ sliders.
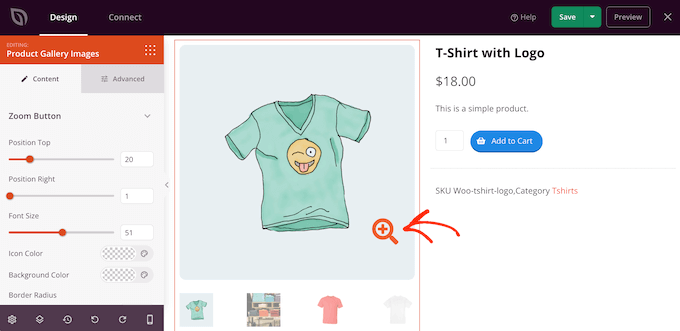
You can also make the magnifying glass icon bigger or smaller using the ‘Font Size’ slider or change its icon color and background color.
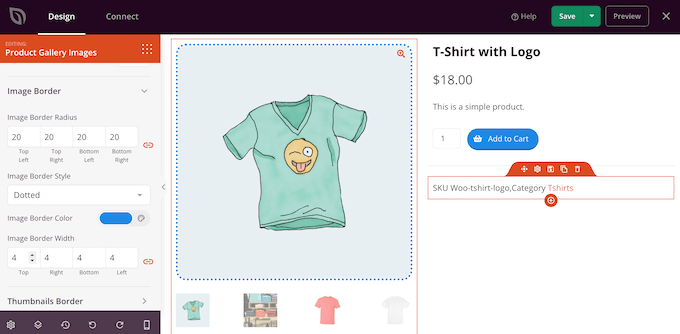
It’s also possible to add borders around the different images using the ‘Image Border’ and ‘Thumbnails’ border settings.
Pro Tip: Consider embedding a WooCommerce product video to give visitors a more detailed look at your item’s benefits and features.
Ensure Mobile-Responsiveness and SEO
It’s important that your custom WooCommerce product pages look great and function perfectly on all devices.
A significant portion of online shopping happens on smartphones and tablets, and Google prioritizes mobile-friendly websites in its search rankings.
SeedProd’s drag-and-drop editor is designed with responsiveness in mind, automatically adjusting your layouts for different screen sizes.
However, it’s always a best practice to preview your product page on mobile and tablet views within the editor. Look for the desktop, tablet, and mobile icons at the bottom of the SeedProd editor to switch views and make any necessary adjustments.

This ensures a seamless shopping experience for all your customers.
Create a Buzz on Social Media With Sharing Buttons
If a shopper shares your product on social media, then it can drive more people to your online store. With that in mind, it’s a good idea to add social share buttons to your product pages.
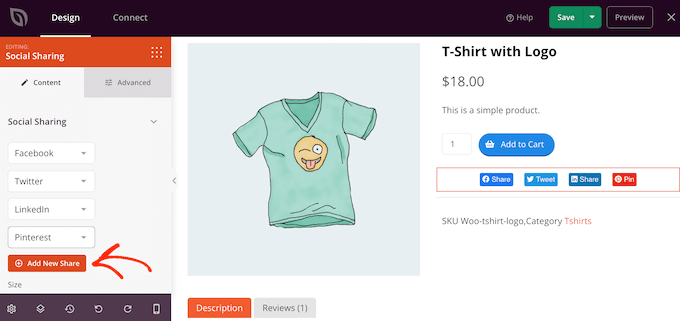
SeedProd has a Social Sharing block that supports Facebook, Twitter, LinkedIn, and Pinterest. Simply drag and drop this block onto your page, and it’ll automatically add the Facebook and Twitter sharing buttons.
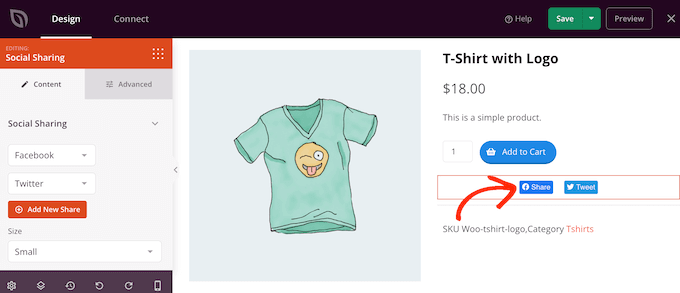
To add more social networks, simply click on the ‘Add New Share’ button.
You can then choose a social media site from the dropdown menu.
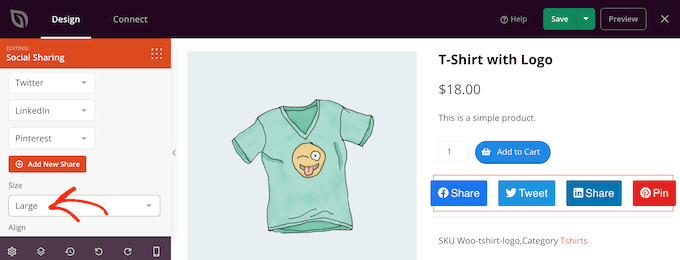
After adding all the networks you want to use, you can change the size of the sharing buttons using the ‘Size’ dropdown.
Bigger social sharing buttons will stand out more, although they may distract from the page’s other content, including the Add To Cart call to action.
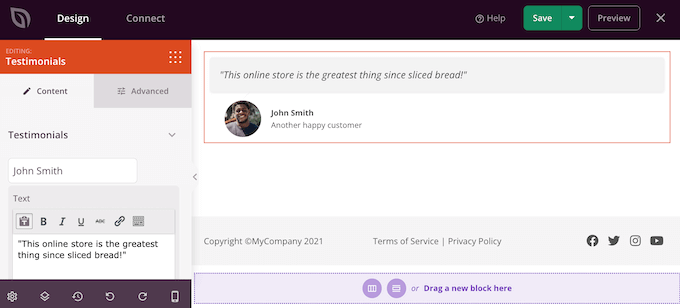
Show Customer Testimonials and Business Reviews
WooCommerce lets customers review your individual products, but you may also want to show customer testimonials. These might be quotes from your best reviews, comments about your excellent customer service, or any other content that you want to highlight.
SeedProd’s Testimonials block lets you create rotating testimonials, which is a great way to show lots of information in a small amount of space.
For more information, please see our guide on how to add rotating testimonials in WordPress.
Highlight Recently Viewed Products in WooCommerce
A ‘recently viewed’ section encourages customers to revisit products they recently saw but didn’t add to their cart. This helps customers compare products and find the item that’s right for them.
It also gives them a chance to change their mind and buy a product they recently visited but didn’t add to their shopping basket.
With that being said, you may want to add SeedProd’s Recent Products block to your design.
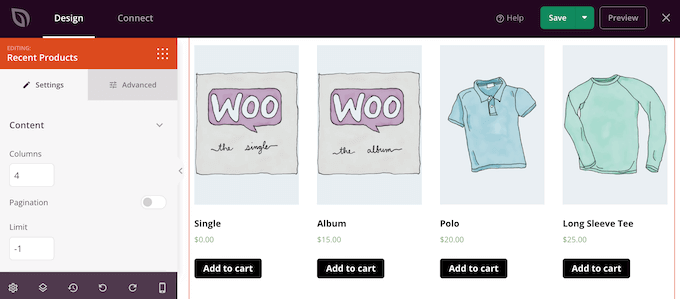
After adding the block, you can change the number of columns using the settings in the left-hand menu.
If you want to show lots of different products, then you can add pagination by activating the ‘Pagination’ toggle.
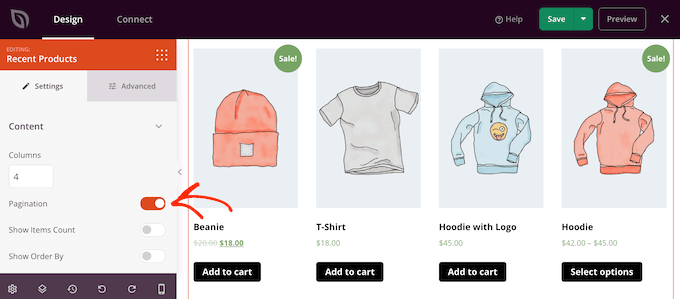
If you do enable ‘Pagination,’ then you’ll get access to some extra settings.
To start, you can show the total number of results at the top of the Recent Products block by enabling the ‘Show Items Count’ toggle.
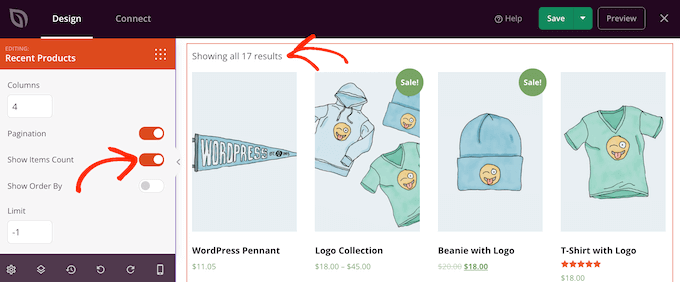
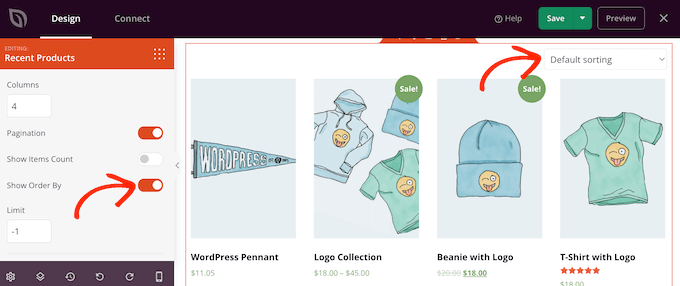
You may also want to enable the ‘Show Order By’ slider, as this allows visitors to sort through the recent products.
As you can see in the following image, this adds a ‘Default Sorting’ dropdown to the area.
Show Your Most Popular WooCommerce Products
You may want to show the best-selling or top-rated products on your product pages. Since these items are already performing well, showing them to more people can be an easy way to get more sales.
Another option is to display products currently on sale. This can motivate shoppers to buy these items now in order to get the best deal.
SeedProd has a few blocks that can fetch these products automatically. If you want to showcase your top sellers, add the Best Selling Products block to your design.

For more information, please see our guide on how to display popular products on WooCommerce product pages.
If you want to show products with the highest star rating, drag the Top Rated Products block onto the page.
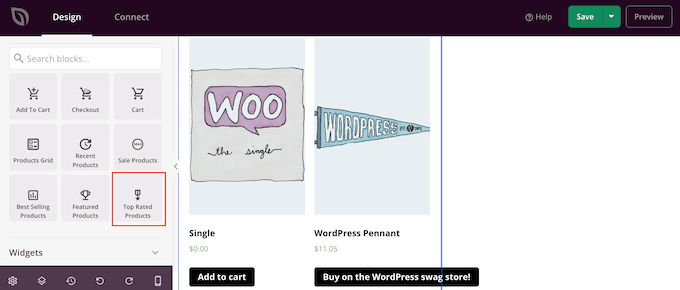
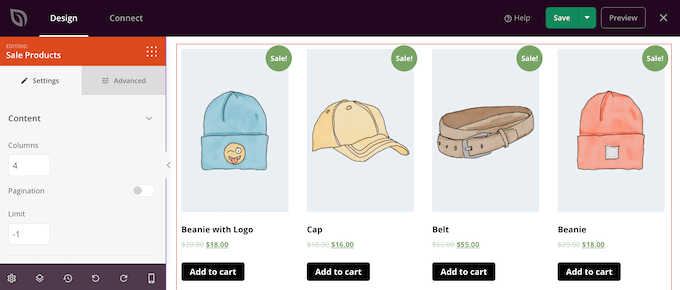
Finally, there’s a Sale Products block that displays all items currently on sale.
No matter which block you add, click it to select it, then take a look at the settings in the left-hand menu. All of these settings are straightforward, so it’s worth going through them to see what different effects you can create.
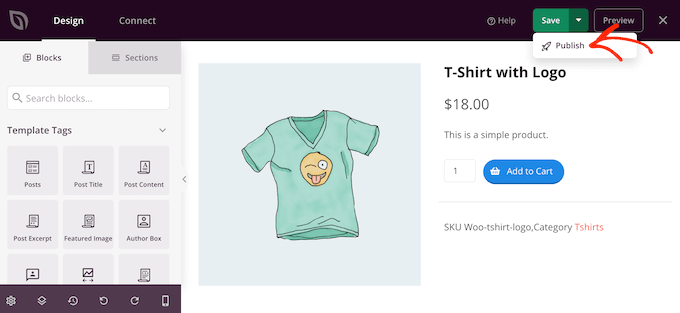
Step 5: Publish Your Custom WooCommerce Product Page
When you are happy with how the product page looks, it’s time to save your changes. Simply go ahead and click the dropdown arrow next to ‘Save’ and then select the ‘Publish’ option.
The custom product page won’t appear on your online store until you activate the entire custom WooCommerce theme. This gives you the chance to look through the other designs in your theme kit and then make any changes using SeedProd’s drag-and-drop builder.
For example, you’ll typically want to edit the header and footer templates to feature your own navigation menus, your store’s custom logo, and other content.
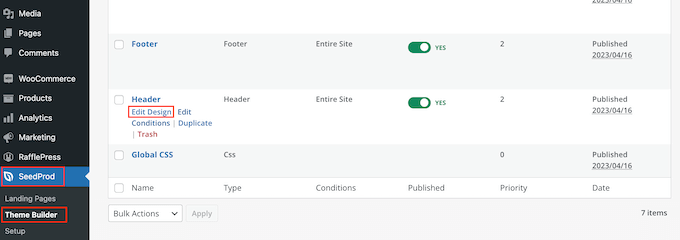
To edit any other template, head over to SeedProd » Theme Builder. Then, hover over the template you want to customize.
You can then click on the ‘Edit Design’ link when it appears.
Now, simply change the design by adding more blocks and then customizing them using the settings in the left-hand menu.
Just keep repeating these steps until you are happy with how all the templates are set up.
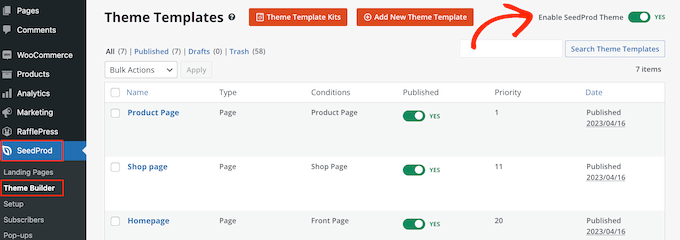
hen you are ready to make the custom WooCommerce theme live, go to SeedProd » Theme Builder. You can then click on the ‘Enable SeedProd Theme’ toggle so it shows ‘Yes.’
📍Important: Before enabling this, ensure your Header and Footer templates are customized and ready. This setting replaces your active theme’s global layout, so you could lose your site navigation if those templates aren’t set up.
Now, if you visit your online store, you’ll see the custom WooCommerce product page live.
Bonus Tips to Boost WooCommerce Sales
Want to take your WooCommerce store to the next level? Here are some expert-approved strategies to increase sales and engagement:
- Run engaging WooCommerce contests – Boost customer loyalty and engagement by creating a contest. Learn how to set up and manage effective contests that keep customers coming back.
- Master the art of upselling – Increase your average order value and conversion rates by strategically upselling products. Our guide shows you how to implement upselling techniques in WooCommerce.
- Schedule coupons to save time – Automate your promotions by scheduling coupons in WooCommerce. This time-saving technique ensures your deals go live exactly when you want them to.
- Streamline checkout with express buttons – Reduce cart abandonment by adding express checkout buttons. We’ll show you how to implement this feature for a smoother shopping experience.
- Create irresistible BOGO offers – Learn how to set up buy-one-get-one-free offers in WooCommerce to entice customers and boost sales.
- Leverage live sale notifications – Create a sense of urgency and social proof with live sale notifications. Our guide walks you through setting this up for your WooCommerce store.
- Recover abandoned carts – Don’t let potential sales slip away. Explore effective ways to recover abandoned carts and convert them into sales.
- Implement WooCommerce automations – Discover powerful WooCommerce automations that can help increase your sales and streamline your operations.
Video Tutorial
Frequently Asked Questions About WooCommerce Product Pages
Here are some questions frequently asked by our readers about customizing product pages in WooCommerce:
Can I optimize my product pages for conversions with SeedProd?
Yes, absolutely! SeedProd comes with built-in marketing tools that are designed to help you turn visitors into customers.
With its drag-and-drop builder, you can easily add conversion-focused elements like:
- Countdown timers to create urgency for flash sales or limited-time offers.
- Social proof using testimonial or review blocks to build trust.
- Email opt-in forms to grow your subscriber list directly from product pages.
- Eye-catching banners or call-to-action blocks to highlight discounts or special promotions.
All these elements can be styled to match your store’s branding, ensuring your product pages look professional while driving more sales.
Will SeedProd customizations break after WooCommerce updates?
No, they won’t. SeedProd builds independent templates using its own blocks, so your custom product page designs remain intact—even when WooCommerce or your theme updates.
You’re never touching the core WooCommerce files, which makes the changes stable and update-proof.
That said, it’s always a good idea to keep both SeedProd and WooCommerce updated to their latest versions to ensure full compatibility and access to new features.
What WooCommerce elements can I add with SeedProd?
SeedProd gives you a wide range of dedicated WooCommerce blocks to build custom product pages without any coding. You can easily add:
- Product Title, Image, and Gallery to showcase your items.
- Product Price and Add to Cart Button to make purchasing easy.
- Product Description and Short Description for clear product details.
- Product Reviews and Ratings to highlight social proof.
- Related Products and Upsells to encourage additional purchases.
Beyond WooCommerce blocks, you can improve your pages with SeedProd’s marketing tools to boost conversions while keeping your page visually appealing.
We hope this article has helped you customize your product page in WooCommerce without coding. You may also want to see our guide on how to create a WooCommerce popup to increase sales or our expert pick of the best WooCommerce plugins for your store.
If you liked this article, then please subscribe to our YouTube Channel for WordPress video tutorials. You can also find us on Twitter and Facebook.
")


")
Jiří Vaněk
I struggled a bit with customizing WooCommerce because I’m not a designer. I wanted my store to be styled the same way as the website. I built the website using SeedProd, so with the help of this article, I started customizing the product pages as well. I have to admit, SeedProd and this tutorial made the job much easier for me. Finally, thanks to it, I am getting closer to the result I envisioned. SeedProd really made my work easier.
Dayo Olobayo
I was struggling to make my WooCommerce product pages stand out but this post gave me the confidence to dive in and start customizing. The results are amazing and my customers are loving the new look. Thanks WPBeginner!
WPBeginner Support
You’re welcome!
Admin
THANKGOD JONATHAN
Thank you for the post.
But will I be able to do this with the Seedpro and Woocommerce free version? or should I upgrade first before I could be able to do that?
WPBeginner Support
We use the Pro subscription of SeedProd to achieve what we show in this tutorial.
Admin
THANKGOD JONATHAN
I have WPforms already installed on my site with my woocommerce store. Will I be able to do that with it or should I switch to Seedprod instead?
WPBeginner Support
WPForms is for creating forms on your site, for changing your site’s design you would need to use a plugin like SeedProd.
Admin
John Akpama
Lovely and insightful tutorial. I’m guessing this is relatively easier for stores with one product or a few products. If you have over a hundred products is there a way to make this a global template and apply automatically to all products without having to build one after the other? Thanks in advance
WPBeginner Support
If you wanted to create a template without needing to code then you would want to take a look at some of the other page builders from our list below:
https://www.wpbeginner.com/beginners-guide/best-drag-and-drop-page-builders-for-wordpress/
Admin