Do you want to create ‘buy one get one’ (BOGO) offers in your WooCommerce store?
BOGO deals are a great way to get more sales and win new customers. However, WooCommerce doesn’t support ‘buy one get one’ by default, so you may struggle to compete with brands who do offer these popular discounts.
In this guide, we’ll show you how to easily create a ‘buy one get one’ offer in WooCommerce.
Why and When to Offer BOGO Deals in WooCommerce?
BOGO deals offer customers a discount if they buy a particular product. They’re an a great way to get more sales on your online store and often increase the average order value.
Many online stores use BOGO deals to sell older products or inventory that they no longer want to stock. You might even recover abandoned cart sales by offering customers a BOGO discount if they complete their purchase.
Considering the cost of online advertising like PPC and social media ads, BOGO discounts can be a cheaper way to build a loyal customer base.
Just be aware that BOGO doesn’t always mean giving the customer a free product. Instead, you might offer them a big discount on the second product, such as a Buy One Get One 50% off or Buy 2 Get 1 free deal.
That being said, let’s take a look at how to easily add ‘buy one get one’ offers to your WooCommerce store.
Creating a Buy One Get One Offer in WooCommerce
The easiest way to add a ‘buy one get one’ offer in WooCommerce is by using Advanced Coupons. It is the best WooCommerce coupon code plugin on the market and allows you to easily create coupons and deals for your eCommerce store, including BOGO coupons.
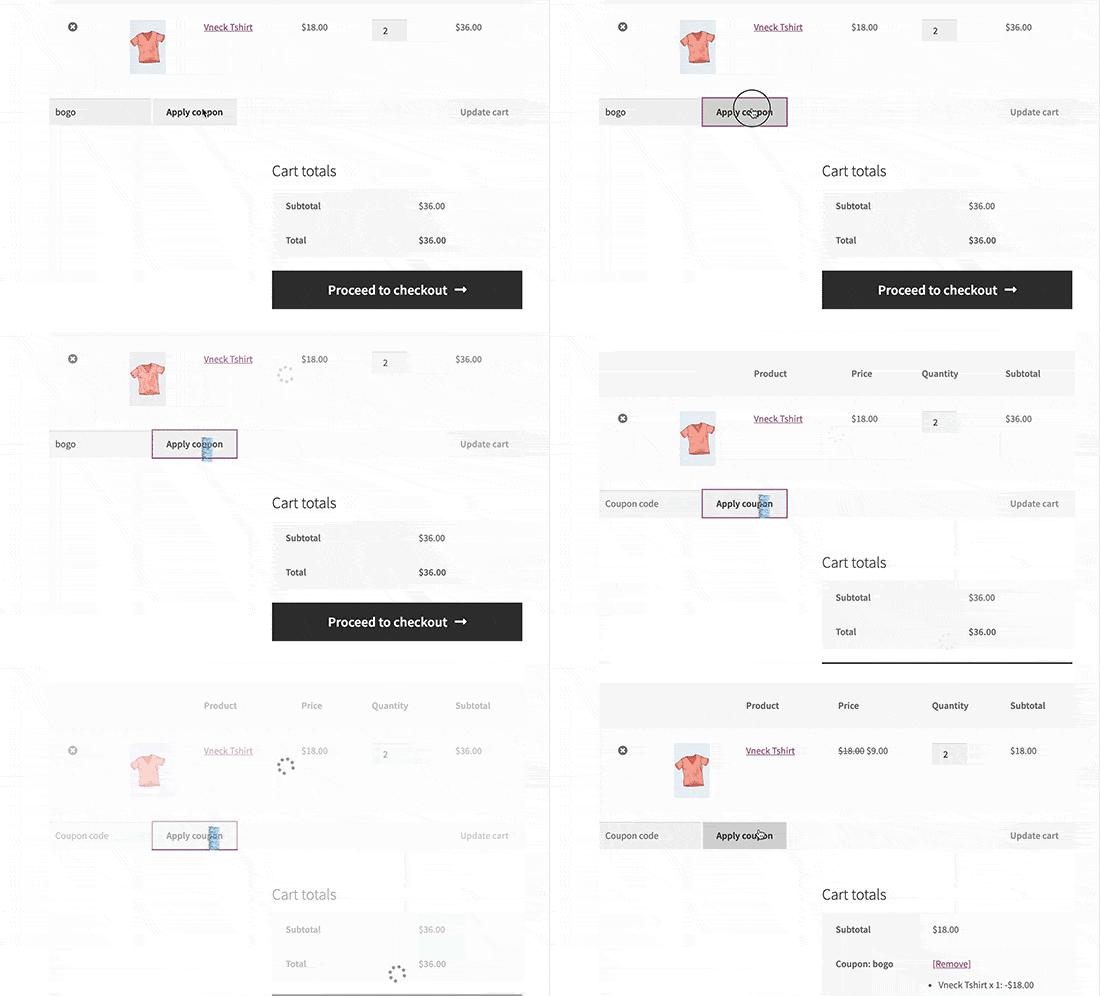
For example, here’s what a ‘buy one get one for free’ coupon looks like:
First, you’ll need to install and activate both the free Advanced Coupons plugin and the premium Advanced Coupons addon. For detailed instructions, see our guide on how to install a WordPress plugin.
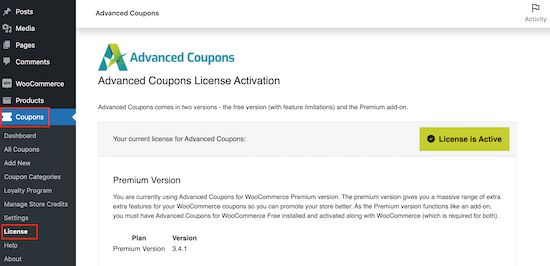
Upon activation, head over to Coupons » License.
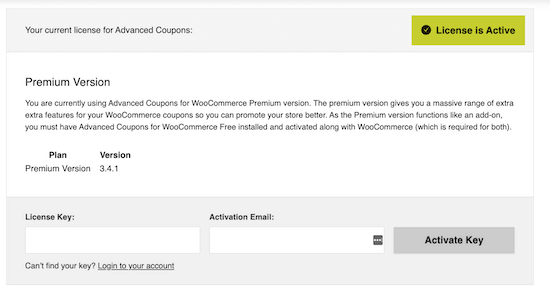
You can now enter your license key and the email address you used to purchase Advanced Coupons. You can find this information by logging into your account on the Advanced Coupons website.
Once you’ve done that, click on ‘Activate Key.’
To create a BOGO deal, go to the Marketing » Coupons page.
Here, click on the Add Coupon button.
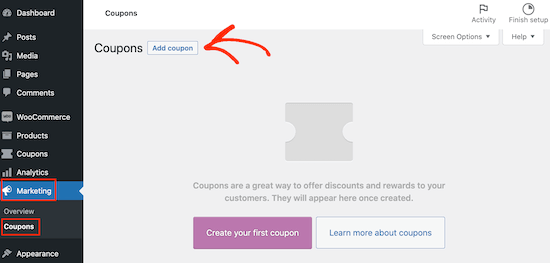
On the next screen, you need to provide a title for your WooCommerce coupon.
This will also become the actual coupon that customers will use to claim their free gift, so it’s a good idea to use something that’s easy for shoppers to remember and type. You may also want to use something that describes your offer, such as ‘BOGODEAL’ or ‘BOGO50%.’
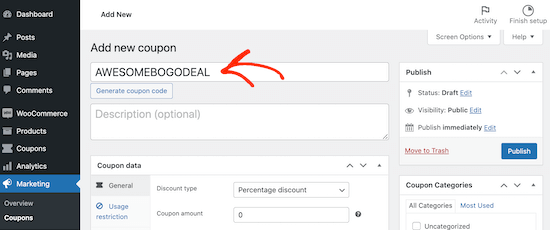
If you don’t want to create your own code, then you can click on the ‘Generate coupon code’ button. This will create a code using a random string of letters and numbers.
However, this can make the BOGO coupon harder to remember and more difficult to type. With that being said, it’s a good idea to type out your own coupon code.
Next, scroll down to the ‘Coupon Data’ section. If it isn’t already selected, then select the ‘General’ tab.
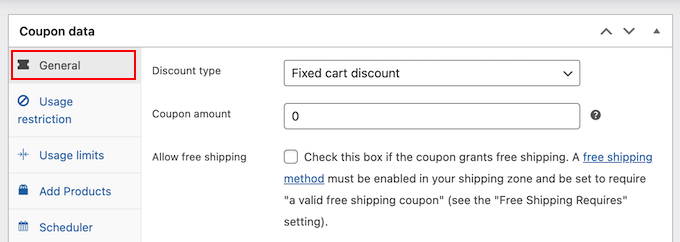
Here, you can create all kinds of coupon codes, including free gift discounts, shipping discount coupons, and more.
To create a BOGO coupon, go ahead and open the ‘Discount type’ dropdown, then choose ‘Buy X Get X Deal (BOGO).’
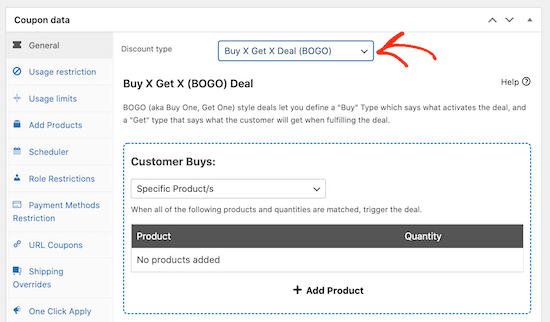
In the ‘Customer Buys’ section you can create a range of different BOGO deals by setting up specific triggers. In this way, you can trigger the deal automatically when the customer adds one or more products to their cart.
You can use any of the following triggers:
- Specific Product: This is perfect for simple, straightforward deals on a single product. For example, buy product X, get product Y for half price.
- Any Combination of Products: You can use this for products that have variations or deals that apply to multiple products. For example, ‘buy either product X or Y, and get product Z for free.’
- Product Categories: This allows you to create deals for an entire product category. For example, ‘buy any of our ebooks, and get 10% off a second ebook.’
- Any Product: The customer can claim a BOGO discount for any product. For example, ‘buy any product today, and get the second for free.’
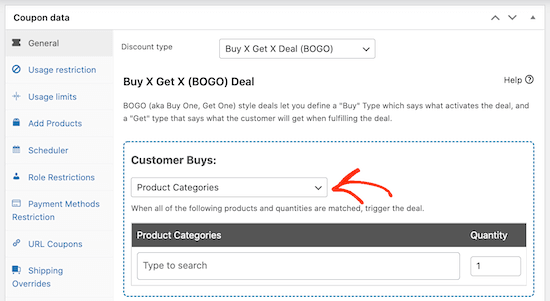
After choosing the trigger type, you’ll need to select the products that will trigger the deal.
Simply click ‘Add Product’ and then choose the product(s) that you want to use.
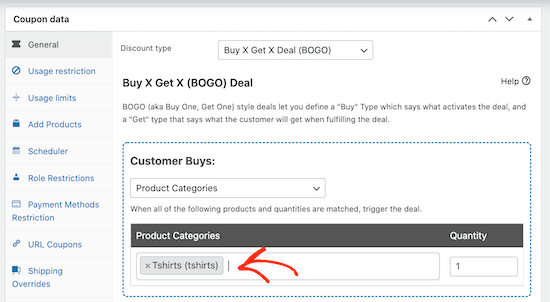
You can select more than one product or category. For example, the customer might need to buy 2 products from the ‘T-Shirts’ category, before they can get the 3rd t-shirt for free.
It’s important to note that the second product doesn’t necessarily have to be free. You could make the second t-shirt 50% off, or offer a $10 discount.
With that done, you’ll need to select which product the customer gets for free, or at a discounted price. This could be the same product as before, a different product, or even an entire product category.
In the ‘Customer Gets’ section, repeat the same steps to choose the product or products that the customer will get as part of the BOGO discount.
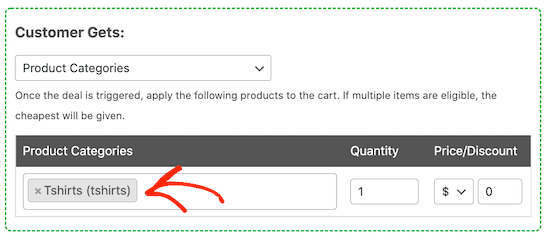
If you choose a specific product, then that product will be added to the customer’s shopping cart automatically.
If you set the dropdown to ‘Any Combination of Products,’ ‘Product Categories’ or ‘Any Products’ then the customer will need to choose an eligible product from your store and add it to their shopping cart.
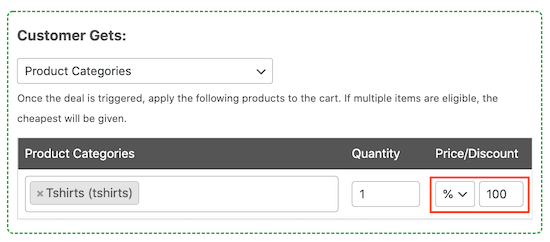
If you want to offer the BOGO item at a discount rather than for free, then you can use the dropdowns beneath the ‘Price/Discount’ heading.
Here, you can create a percentage or a fixed discount.
Under ‘Additional Settings’, choose whether the customer can only use this coupon once, or whether they can use it multiple times.
Reusable coupon codes can generate more sales but they’ll also reduce your profit margins.
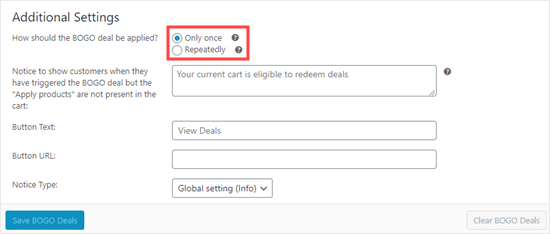
You can also type in a message that Advanced Coupons will show if a customer triggers the deal but doesn’t add the free or discounted product to their cart. In this way, you can help customers take advantage of your offers, which will improve their shopping experience.
To create a message, type some text into the ‘Notice shown when BOGO…’
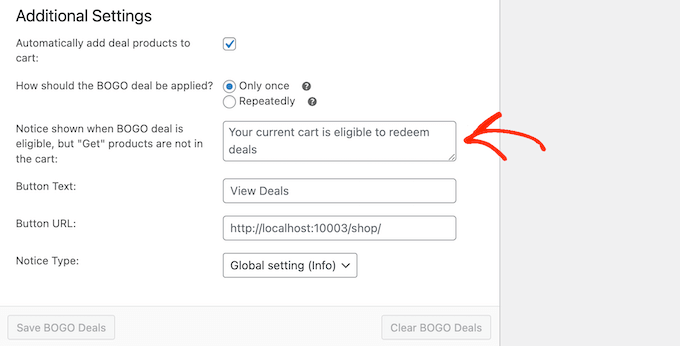
When you’re happy with how the BOGO deal is set up, don’t forget to click on the ‘Save BOGO Deals’ button.
Scheduling Your BOGO Free Coupon
You can often increase conversions using FOMO. With that being said, you may want to add a time limit to your BOGO offer, which encourages customers to act now in order to claim their ‘buy one get one’ discount.
You can schedule all your coupons using Advanced Coupons. Simply create the coupon following the same process described above.
Then, click on the ‘Scheduler’ tab and check the ‘Date Range Schedules’ box.
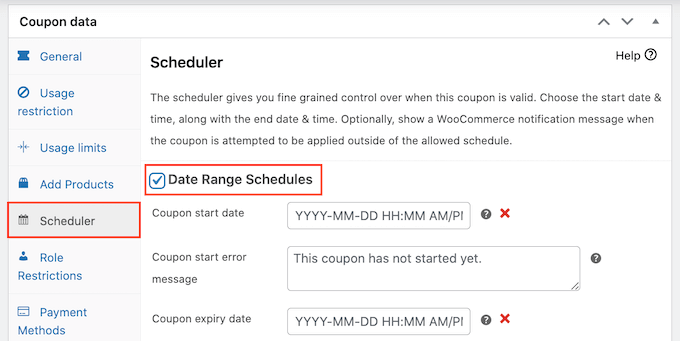
In ‘Coupon start date,’ go ahead and type in the date and time when the coupon will go live.
Then, use the ‘Coupon expiry date’ to specify the date and time when customers will no longer be able to use the BOGO coupon.
For more detailed instructions, please see our guide on how to schedule coupons.
Bonus: How to Promote Your BOGO Deal in WooCommerce
Now you’ve created a ‘buy one get one’ coupon, the next step is to promote that coupon across your online marketplace so shoppers can find it, and use it.
The easiest way to do this is by using OptinMonster. It is the best lead generation tool on the market and allows you to easily convert website visitors into paying customers.
It comes with beautiful lightbox popups where you can show your coupon codes. You can even use OptinMonster’s smart page targeting features to show the coupon on specific products only.
For example, if a customer is looking at a T-shirt then OptinMonster can open a popup with a ‘buy one get one free’ code for that product.
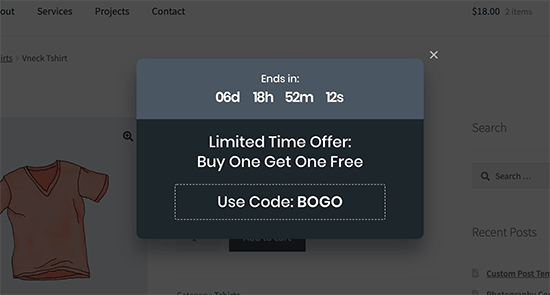
For details, please see our tutorial on how to create a coupon popup in WordPress.
Apart from popups, you can also promote your BOGO deals using OptinMonster’s floating bars, countdown timers, in-line optins, slide-in popups, and more.
No matter how you promote your BOGO offer, it’s a good idea to monitor how visitors are using your coupon codes. You can then use this insight to fine-tune all your future coupon codes and marketing, to get even better results.
For more details, see our guide on how to set up WooCommerce conversion tracking.
We hope this article helped you learn how to create a WooCommerce BOGO ‘Buy One Get One’ free offer. You can also go through our guide on the best live chat software for small businesses and how to track website visitors to your WordPress site.
If you liked this article, then please subscribe to our YouTube Channel for WordPress video tutorials. You can also find us on Twitter and Facebook.


Syed Balkhi says
Hey WPBeginner readers,
Did you know you can win exciting prizes by commenting on WPBeginner?
Every month, our top blog commenters will win HUGE rewards, including premium WordPress plugin licenses and cash prizes.
You can get more details about the contest from here.
Start sharing your thoughts below to stand a chance to win!