Do you want to learn how to add image hover effects in WordPress?
Hover effects can make your site more interactive and engaging, which will keep people on your site for longer. You can even use flipboxes and other hover effects to reveal information in an eye-catching way.
In this article, we will show you how to add image hover effects in WordPress, step by step.
Why Use Image Hover Effects in WordPress?
Image hover effects allow you to add short animations to your images, such as zooms, fades, popups, and more. This will make your images more interesting and engaging, even if a page has lots of images.
You can also use hover effects to draw the visitor’s attention to the most important content. For example, you might use CSS animations to highlight your website logo or call to action.
Some hover effects can even present information in a more interesting way. For example, you might create images that flip to reveal pricing, a star rating, or a customer testimonial.
With that being said, let’s see 5 beginner-friendly ways to add different image hover effects in WordPress. Simply use the quick links below to jump straight to the effect you want to use:
- Option 1: Add Flipbox Effects in WordPress (Quick and Easy)
- Option 2: Add Image Zoom and Magnify Effects (Best for Online Stores)
- Option 3: Fade Images on Mouseover in WordPress (Best for Performance)
- Option 4: Add Multiple Image Hover Effects to WordPress (Most Customizable)
- Option 5: Add Image Hover Popup Effects Using a Visual CSS Editor
- Learn More Ways to Add Animation Effects in WordPress
Option 1: Add Flipbox Effects in WordPress (Quick and Easy)
The easiest way to add hover effects to WordPress is to use flipboxes. A flipbox is simply a box that flips when you hover the mouse over it. This allows you to show a different image, text, or call to action on mouseover.
If you are a photographer, then you might show a photo on one side of the flipbox and information about the camera model or resolution on the other side.
If you are selling digital art or graphics online, then you might even add a button that visitors can click to buy that photo.

The easiest way to create flipboxes is by using Flipbox – Awesomes Flip Boxes Image Overlay. This free plugin comes with several different flipbox styles featuring a mix of images, text, and call-to-action buttons.
The first thing you will need to do is install and activate the Flipbox plugin. For more details, see our step-by-step guide on how to install a WordPress plugin.
Once the plugin is installed and activated, you can create your first flipbox by going to Flip Box » Create New.
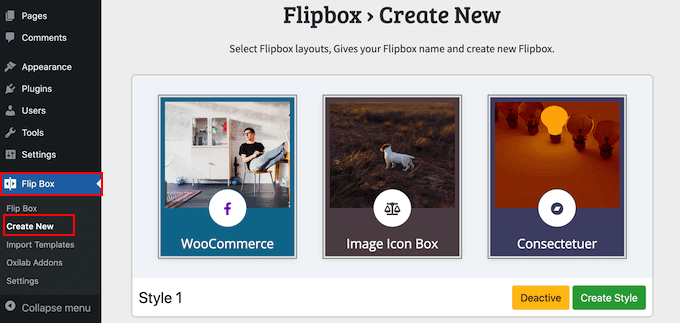
This shows all the different templates you can use.
To choose a design, go ahead and click on its ‘Create Style’ button.

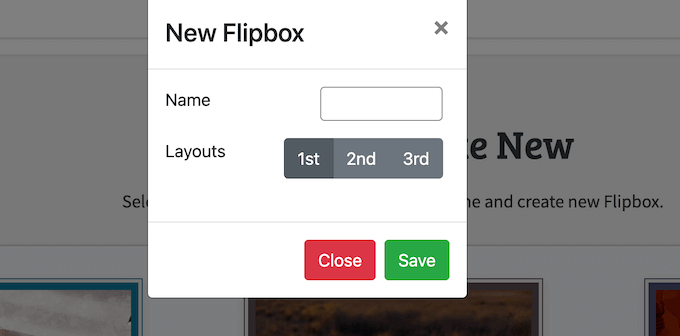
In the popup that appears, type in a name for the flipbox design. This is just for your reference, so you can use anything you want.
You can also choose which layout you want to use by clicking on either 1st, 2nd, or 3rd.
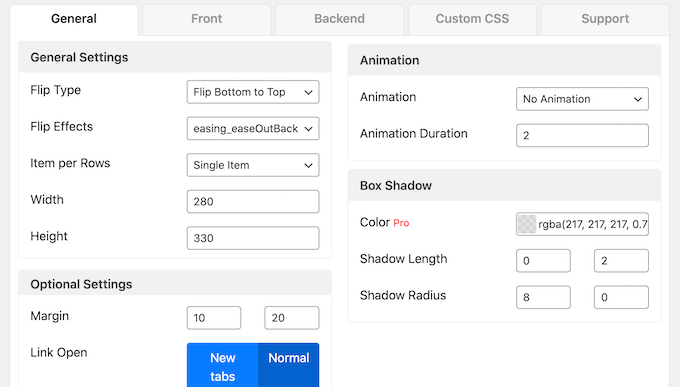
After choosing a flipbox style, you can change the fonts, padding, and margins.
You can then add text, images, and icons to both sides of the flipbox.
When you are happy with how the flipbox looks, you may want to add more boxes by clicking on the ‘+’ in the ‘Add New Flip Boxes’ section.
This allows you to create multiple flipboxes with the same style and then organize them into columns and rows.
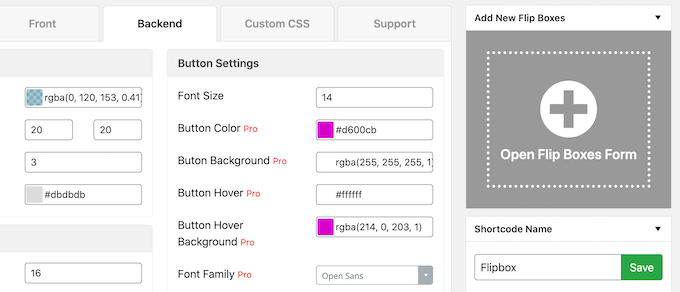
For example, you might create a flipbox for each pricing plan.
Shoppers can then hover over a plan to see the cost.

When you are happy with the hover animations, you can add it to any page, post, or widget-ready area using a shortcode that the plugin provides automatically.
For step-by-step instructions, see our guide on how to create flipbox overlays and hovers.
Option 2: Add Image Zoom and Magnify Effects (Best for Online Stores)
Zoom effects allow users to see details that wouldn’t normally be visible. If you have an eCommerce store or an online marketplace, then this allows shoppers to explore a product in more detail, which can get you more sales.
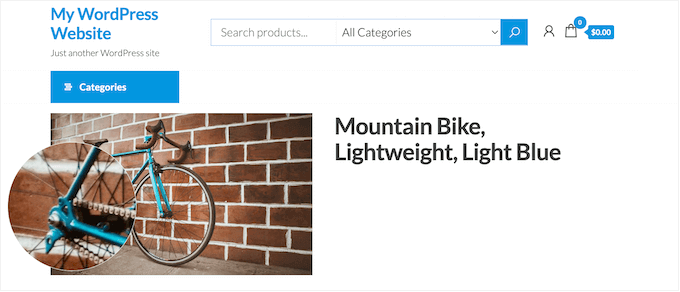
Zoom effects can also add more interaction and engagement to your site.
For example, you might create simple puzzles and games that challenge visitors to spot small details in your images. This can keep them on your site for longer, which will increase your pageviews and decrease the bounce rate.
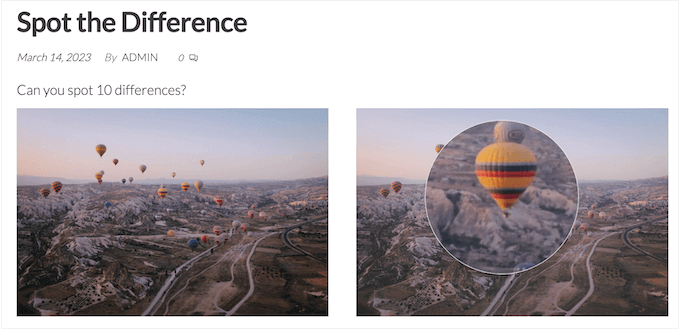
The best WordPress plugin to add image zoom and magnify effects is WP Image Zoom.
This hover effects plugin allows you to customize how the zoom effect will look and act across your entire WordPress website. You can then enable zoom for any image.
We will be using the free version in this guide, but if you want more customization options, you may want to check out WP Image Zoom Pro.
First, you need to install and activate the WP Image Zoom plugin. For more details, please see our step-by-step guide on how to install a WordPress plugin.
Upon activation, you need to head over to the WP Image Zoom » Zoom Settings page from the WordPress admin sidebar. If it isn’t already selected, then click on ‘Zoom Settings.’
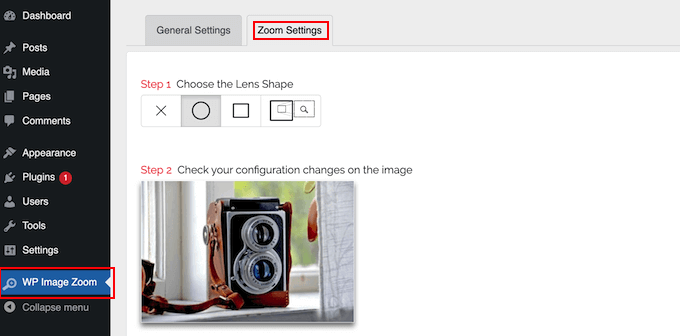
To start, you can choose between a few different lens shapes.
You can also select a cursor type, set an animation effect, enable the zoom on mouse hover or mouse click, and define a zoom level.
When you are happy with how the zoom is set up, you can add the effect to any image. In the Gutenberg block editor, click to select the image where you want to add a zoom effect.
In the right-hand menu, select the ‘with Zoom’ button.
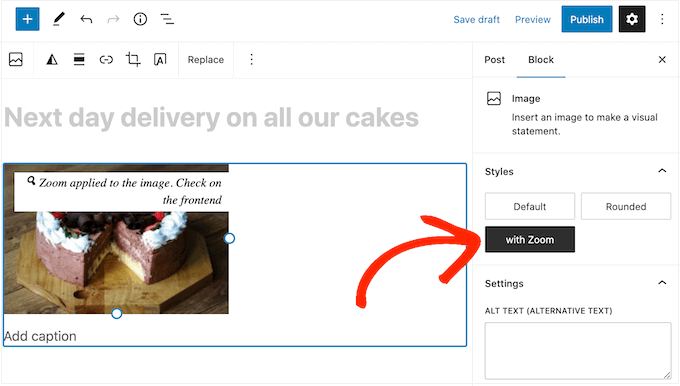
If you are using WooCommerce, then you can enable zoom on all your product images in the plugin’s settings. This is ideal if you want to enable zoom across your entire online store without having to update each product individually.
In the ‘General Settings’ tab, check the ‘Enable the zoom…’ box, and customers will be able to magnify any product image.
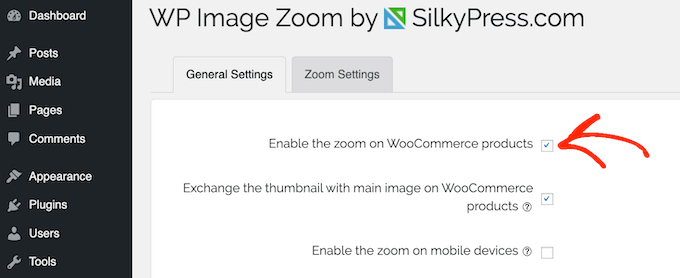
For more details, see our guide on how to add magnifying zoom for images in WordPress.
Option 3: Fade Images on Mouseover in WordPress (Best for Performance)
Another option is to add a fade animation so your images slowly appear or disappear when the visitor hovers over them.
This allows you to highlight and hide different images as the visitor moves around the page. In this way, you can guide the visitor through your content and even add a storytelling element to a page.

Unlike some other animations, the fade image on mouseover effect is subtle, so it won’t negatively impact the visitor’s reading experience or any image optimization you’ve done. This makes it a great choice for pages that have multiple images or high-resolution files.
The easiest way to add a fade effect to your images is by using WPCode. This free plugin allows you to easily add custom code in WordPress without having to edit your theme files.
For more information, see our guide on how to fade images on mouseover in WordPress.
Option 4: Add Multiple Image Hover Effects to WordPress (Most Customizable)
You may want to use multiple different image hover effects on your website. For example, if you have lots of image galleries, then you might want to animate these photos in different and interesting ways.
The best way to add multiple hover effects to WordPress is by using Image Hover Effects Ultimate. This free plugin supports a wide range of effects that you can customize to fit your needs.
The first thing you need to do is install and activate the Image Hover Effects Ultimate plugin. For more details, see our step-by-step guide on how to install a WordPress plugin.
Upon activation, select ‘Image Hover’ from the WordPress dashboard. You’ll now see all the different types of hover effects you can use.
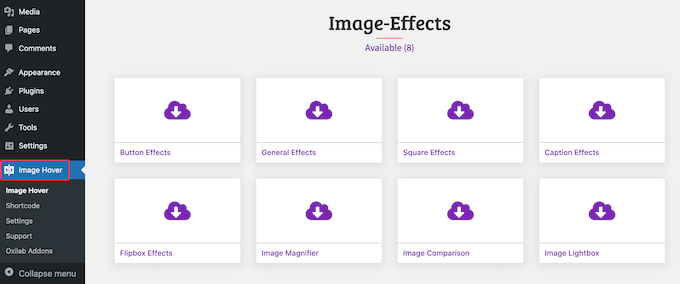
For this guide, we will be selecting ‘Caption Effects,’ which adds animated text over an image.
You can create any kind of hover effect you want, although the options you see may vary.

After clicking on ‘Caption Effects,’ you’ll see all the different styles you can use.
Simply hover over a style to see a preview of how the animation will look.
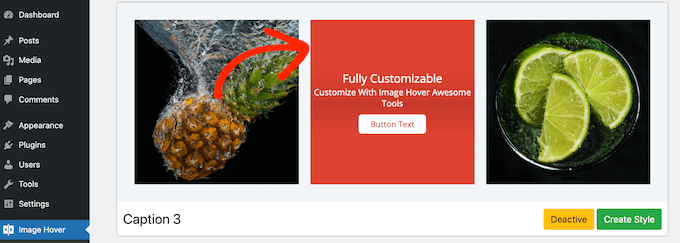
When you find a style you like, click on its ‘Create Style’ button.
This opens a popup where you can choose the exact layout you want to use. Simply go ahead and click on 1st, 2nd, or 3rd.
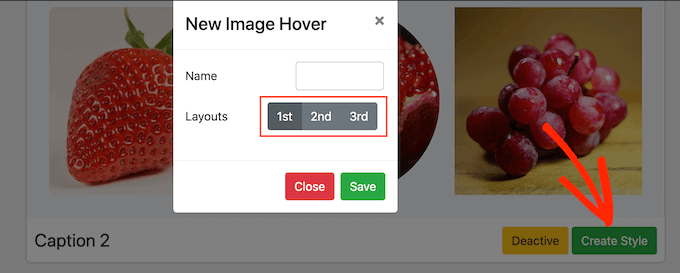
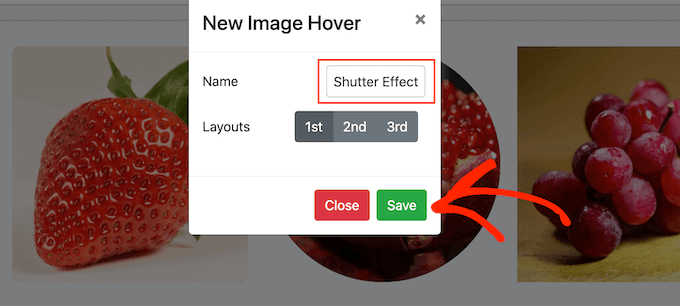
With that done, type a title into the ‘Name’ field. This is just for your reference, so you can use anything that helps you identify the animated image in your WordPress dashboard.
After that, click on ‘Save.’
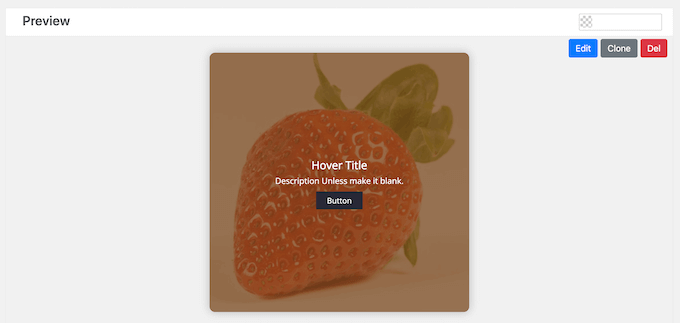
This takes you to a screen where you can customize the hover effect. This includes changing the content’s width and height, increasing the padding, and adding a box shadow.
As you make changes, the live preview will update automatically, so you can try different settings to see what looks the best.
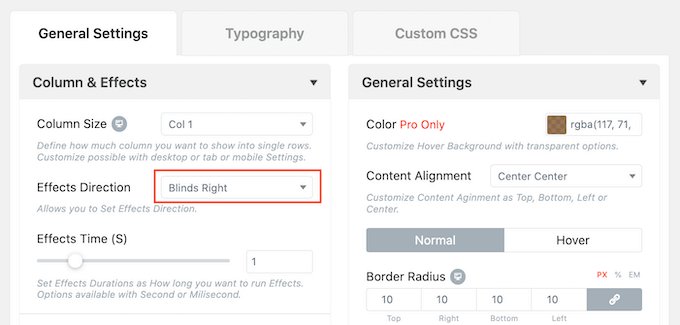
For some hover effects, you can change the effect direction.
For example, in the following image, we are changing the direction of the ‘blinds’ effect so that it goes to the right.
You can also make the effect faster or slower by dragging the ‘Effects Time’ slider. If you use a higher number, then the effect will last longer. If you make the number smaller, then the effect will be faster and shorter.
If you have a specific number in mind, then you can type it into the box next to the ‘Effects Time’ slider.
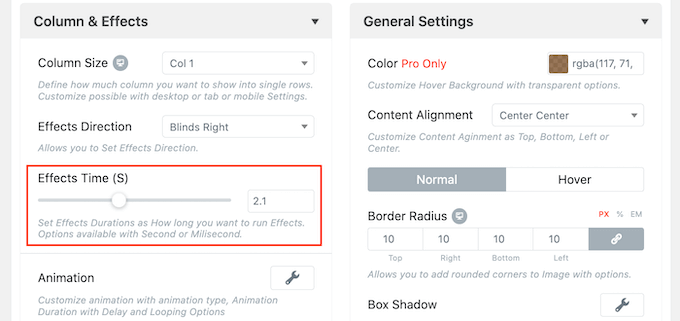
When you are happy with how the effect is set up, it’s time to add some content.
To do this, hover over the ‘Preview’ section and click on the ‘Edit’ button when it appears.
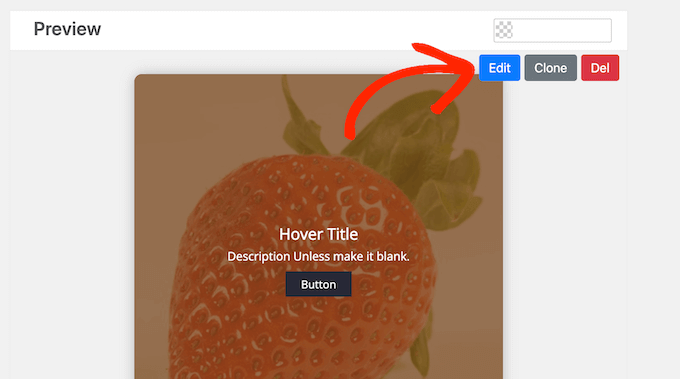
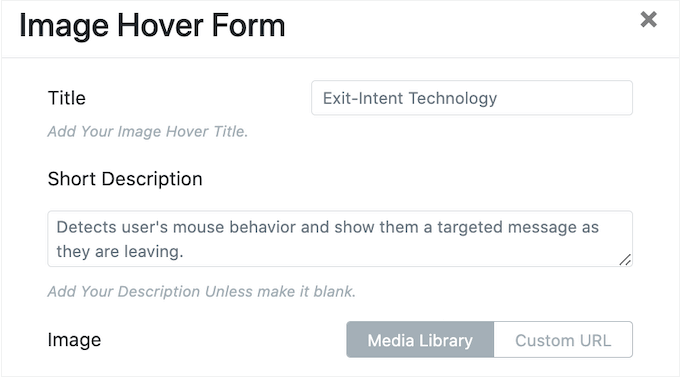
This opens a popup where you can type in a title and a short description.
This is the content that will appear when a visitor hovers over the image.
After that, you can replace the default image with your own picture.
Simply hover over the placeholder photo and then click on ‘Choose Image’ when it appears.
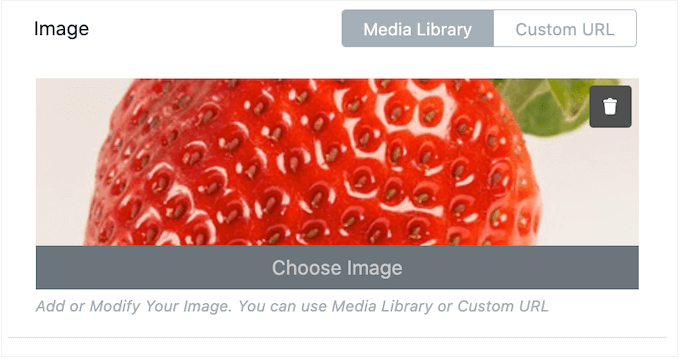
You can now either choose an image from the WordPress media library or upload a new file from your computer.
Sometimes, you may use hover effects to send people to other areas of your WordPress blog or website. For example, if you run an online boutique, then you might add a link to the product shown in the image.
You can do this by adding a CTA button, which will appear below the short description.
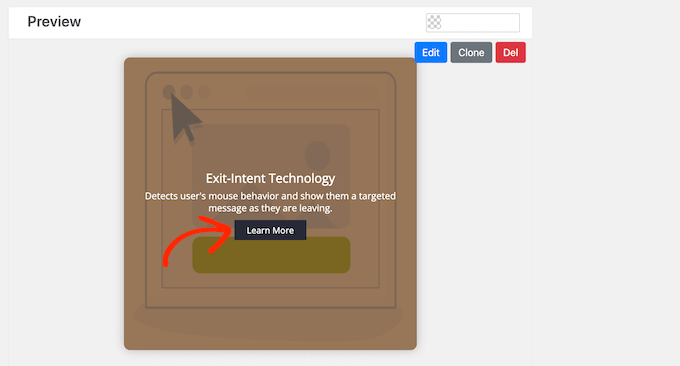
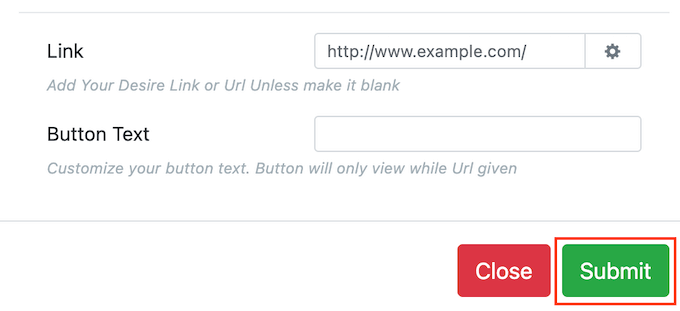
To get started, add the URL in the ‘Link’ field.
Then, add your messaging by typing in the Button Text field.
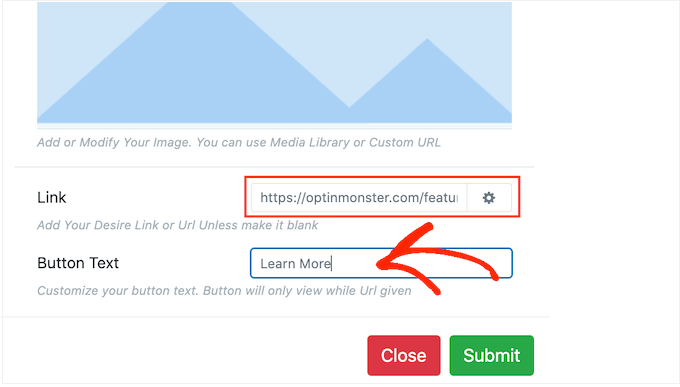
When you’re happy with the information you’ve entered, click on ‘Submit.’
Now you’ve added some text, it’s a good idea to click on the ‘Typography’ tab.
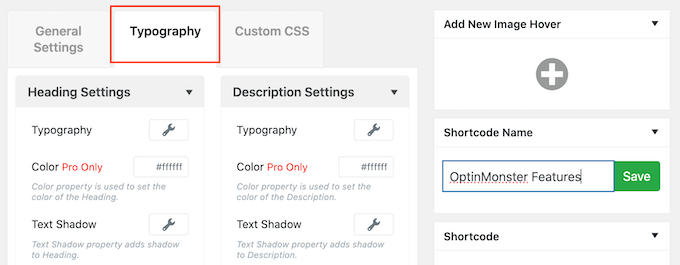
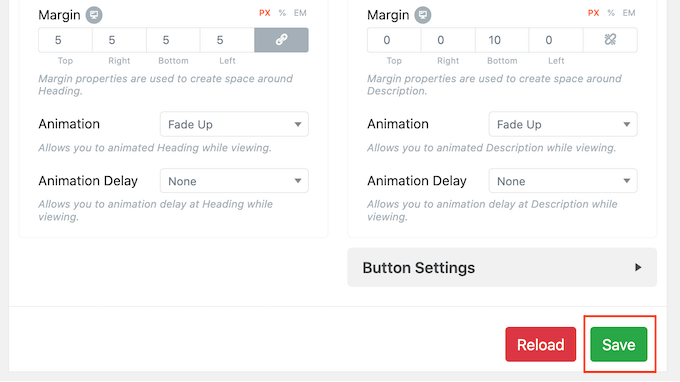
Here, you can change the font size, add a text shadow, make the margins bigger or smaller, and much more.
If you are using a CTA button, then make sure you click to expand the ‘Button Settings’ section.
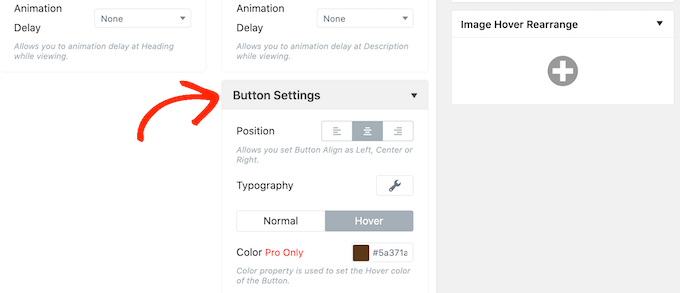
Here, you can change how the button looks in its default and ‘hover’ state, which is how it looks when the visitor hovers over it. You can also change the button’s alignment.
Most of these settings are straightforward, so it’s worth looking through them to see what different kinds of effects you can create.
When you are happy with how the preview looks, click on ‘Save’ to store your changes.
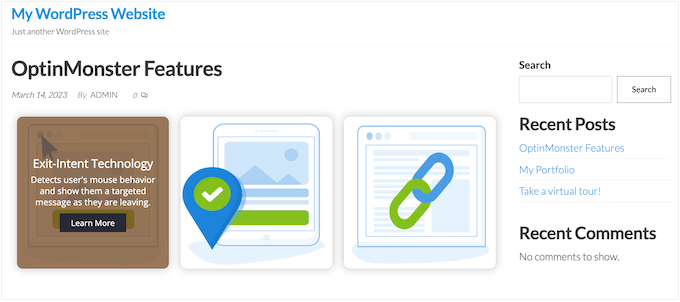
Do you want to create a row or column of animated images?
For example, you might use image hover effects to advertise your product’s best features. In the following image, the visitor can hover over each picture to read about a different feature.
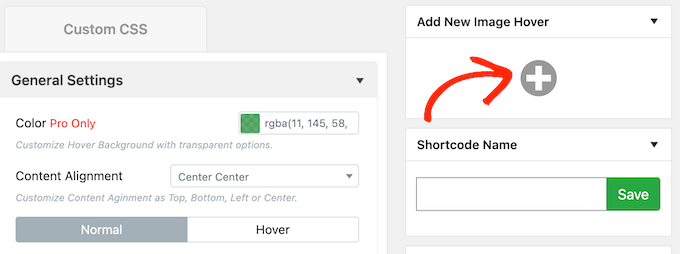
To do this, scroll to the ‘Add New Image Hover’ box towards the top of the page.
Here, click on the ‘+’ button.
This opens a popup where you can create a new image hover effect, following the same process described above.
When you’re happy with how the effect is configured, click on the ‘Submit’ button to store your changes.
To create more hover effects, simply repeat the same process described above.
When you are happy with how the effects are set up, scroll to the ‘Shortcode’ box. You can add this hover effect to any page or post by copying and pasting this code.
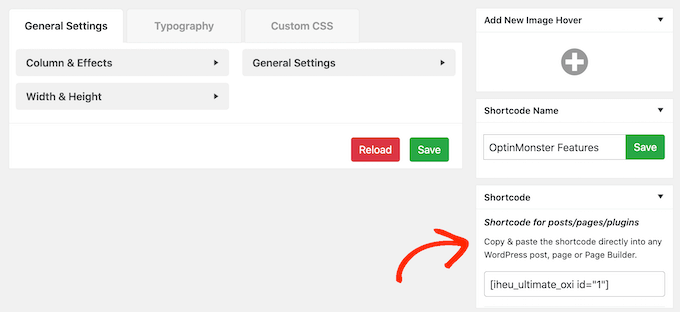
For more information on how to place the shortcode, please see our guide on how to add a shortcode in WordPress.
Option 5: Add Image Hover Popup Effects Using a Visual CSS Editor
Many of the plugins above allow you to build advanced animated images, such as flipboxes, and then place them on a page using shortcode. However, sometimes, you may want to add a hover effect to an image that’s already on the page.
In this case, you can use a WordPress custom CSS plugin. This lets you make visual changes to your images without coding, and you also don’t have to build hover effects separately in the WordPress dashboard.
Here, we recommend using CSS Hero. This plugin lets you edit almost every single CSS style on your WordPress site using a visual editor. It also comes with built-in hover effects that you can apply to images with the click of a button.
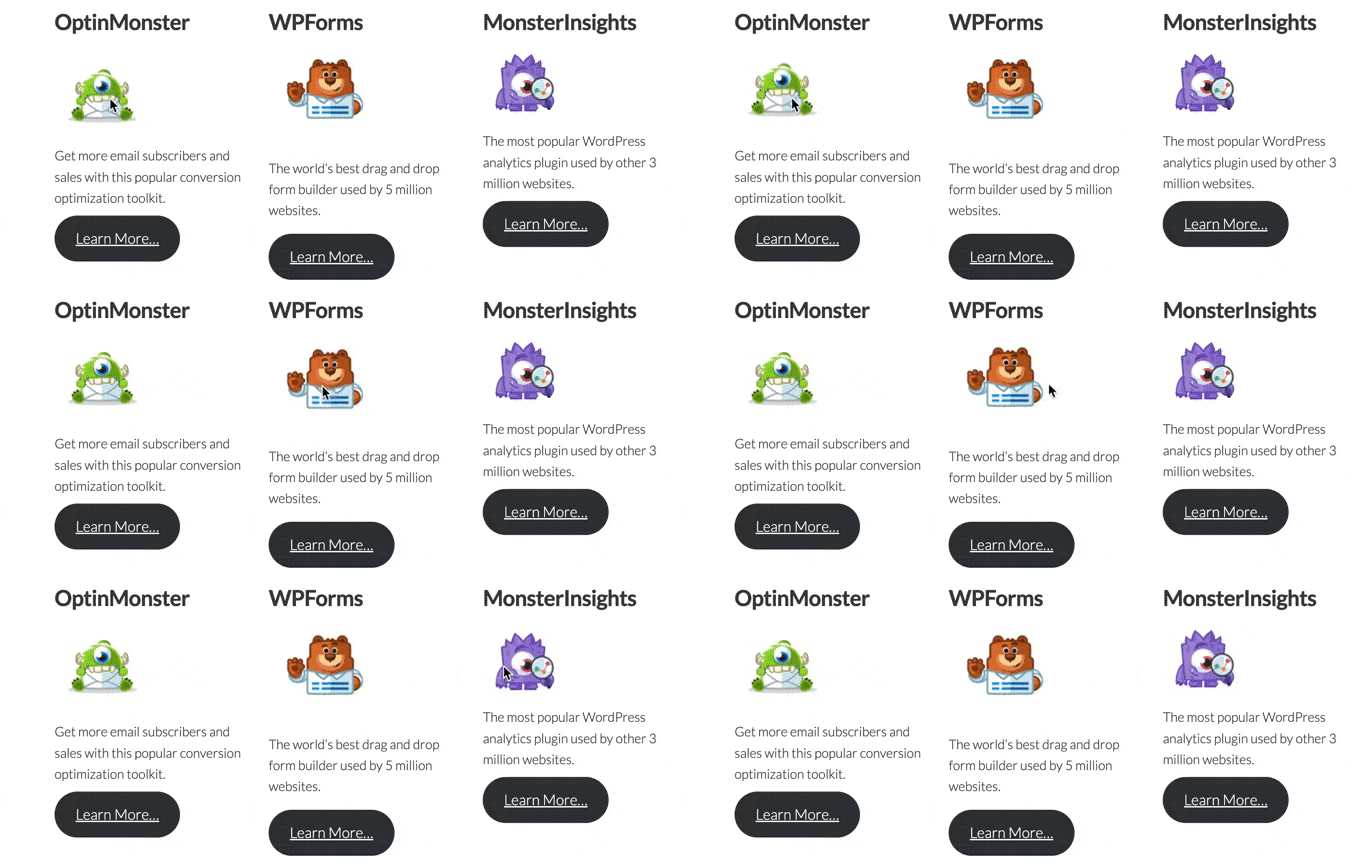
Just be aware that you can only use one CSS animation per page. CSS Hero will also apply that hover effect to every image on the page, as you can see in the following image.
The first thing you need to do is install and activate the CSS Hero plugin. For more details on installing a plugin, see our guide on how to install a WordPress plugin.
Once the plugin is installed, you’ll need to click the ‘Proceed to Product Activation’ button.
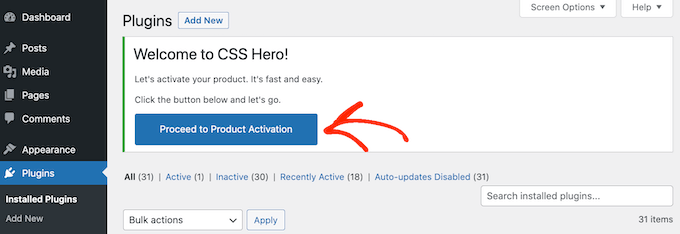
This will take you to the CSS Hero website, where you can log into your account and get a license key. Simply follow the onscreen instructions, and you’ll be redirected back to your site in a few clicks.
After that, open the page or post that has the image you want to animate. Then, click on ‘Customize with CSS Hero’ in the WordPress admin bar.
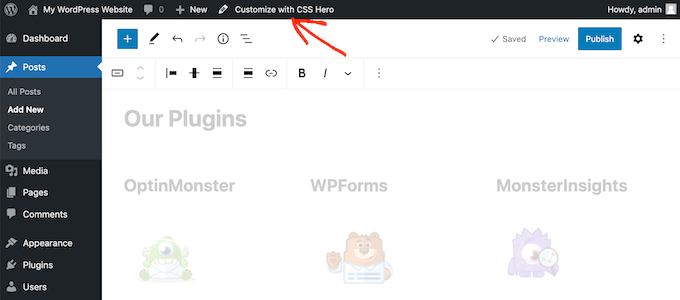
This will open that page or post in the CSS Hero editor.
Here, clicking on any piece of content will open a panel with all the settings you can use to customize that content. With that being said, simply click to select any image.
In the left-hand menu, select the ‘Snippets’ tab. Then, click on ‘Hover-Effects.’
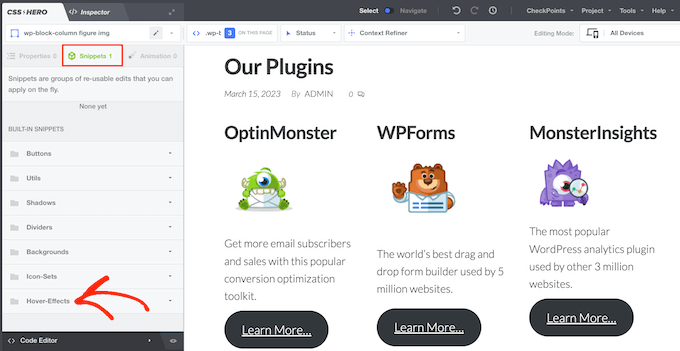
You’ll now see all the different CSS effects.
To preview an effect, simply hover over its blue button in the left-hand menu.
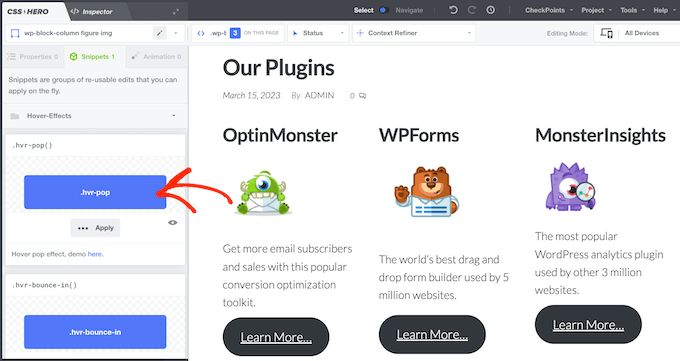
When you find an effect that you want to use, simply click on ‘Apply.’
Now, CSS Hero will apply that hover effect to every image on the page. To see this in action, simply hover your mouse over any image in the live preview.
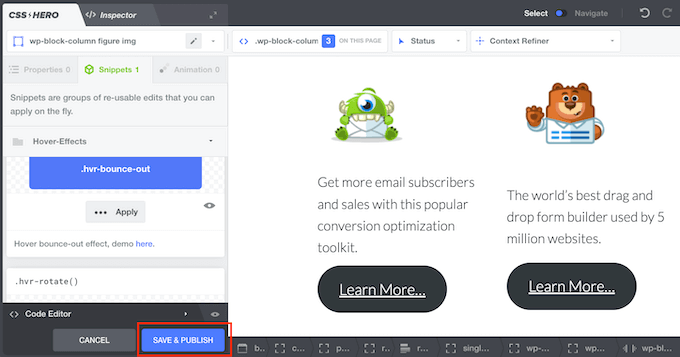
To make this change live, go ahead and click on the ‘Save & Publish’ button.
Learn More Ways to Add Animation Effects in WordPress
Image hover effects aren’t the only way to add more visual interest to your website. There are other types of animations that you can use to enhance your user experience.
For example, if you use SeedProd, you can add particle background animations to your pages. This page builder plugin makes it easy to insert this effect without knowing any code.
Additionally, you can add a preloader animation to your website. This effect gives the impression that the page is being loaded and the user can wait patiently for the loading to finish.
If you run a business website, it’s a good idea to use the number count animation to show your current sales, customers, visitors, and other types of data. This can show potential customers that your business is growing and getting popular.
We hope this article helped you learn how to add image hover effects in WordPress. You may also want to see our guide on how to create a landing page with WordPress and our expert pick of the best live chat software for small businesses.
If you liked this article, then please subscribe to our YouTube Channel for WordPress video tutorials. You can also find us on Twitter and Facebook.


Syed Balkhi says
Hey WPBeginner readers,
Did you know you can win exciting prizes by commenting on WPBeginner?
Every month, our top blog commenters will win HUGE rewards, including premium WordPress plugin licenses and cash prizes.
You can get more details about the contest from here.
Start sharing your thoughts below to stand a chance to win!
Marcin says
Why there is always too much movement in this plugins. I would like just simple, nice typography button appear while hovering over the photo. No fliping, no rotatin, no nothing. Clean and easy
WPBeginner Support says
If you have not done so already we would recommend checking with the support for the plugins to either offer that as a feature request or see if they have a workaround that you could use for your site
Admin
Louis says
Hello!
I’m looking for a swap image.
Do you have any suggestion?
WPBeginner Support says
For that, you would want to take a look at the flip box effect and you can set the animation time to 0.
Admin