Want to connect AWeber with your WordPress site?
AWeber is one of the most popular email marketing services on the web. You can use it to create signup forms and grow your email list or integrate it with other plugins to grow your business.
In this ultimate guide, we will show you how to connect AWeber to WordPress.

Why Is an Email List Important?
Have you ever wondered why all popular websites, like Facebook, Twitter, and the New York Times, want your email address?
The answer is really simple: Email is the best way to reach your customers.
Not everyone has a Facebook or Twitter account, but everyone has an email address. Most people check their email multiple times a day. Plus, with push notifications enabled on phones, people are hooked up to their email 24/7.
Email gives you much closer and more personal access to your customers than any other marketing or communication tool available today.
Learn more about why you should start building your email list right away.
Having said that, let’s see how you can get started with AWeber to build your email list.
What Is AWeber?
AWeber is an email marketing service provider. Unlike your personal email service provider (Gmail, your ISP, webmail services), AWeber specializes in sending mass emails.
You can use AWeber to send regular email updates to your blog subscribers.
It offers a free version with up to 500 subscribers. However, there are also premium plans that start from $12.50/month for unlimited subscribers. You also get the first month for free as part of the trial.
How to Set Up AWeber
First, you’ll need to visit the AWeber website and sign up for an account.

Go ahead and click the ‘Get started for free’ button.
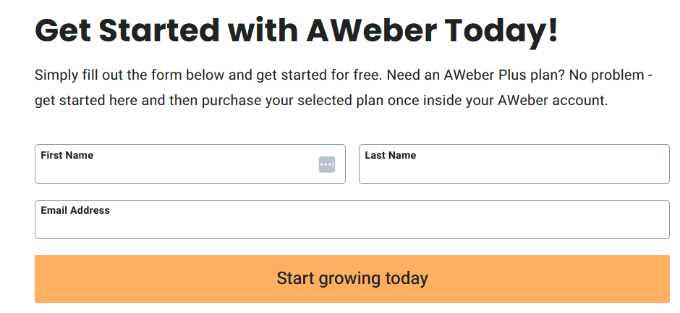
Next, you can enter your name and email address and then click the ‘Start growing today’ button.
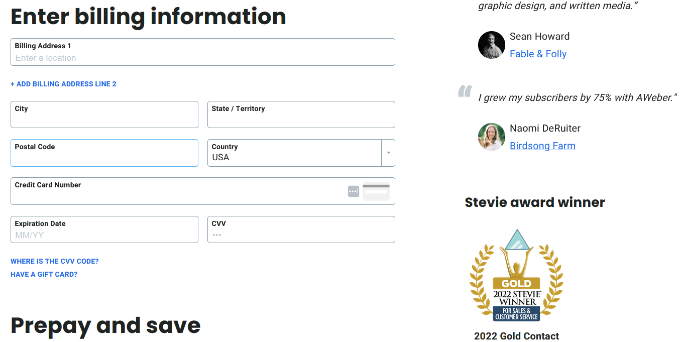
After that, you will be asked to provide personal details and credit card information and select a plan to sign up.
Remember that AWeber offers a free trial. If you cancel before the trial period, then your credit card will not be charged.
Next, you will be asked to provide your company name, website, and address. This address will appear at the bottom of your emails.
A valid postal address is required by the CAN-SPAM Act. It improves the deliverability of your emails and protects you against spam filters.
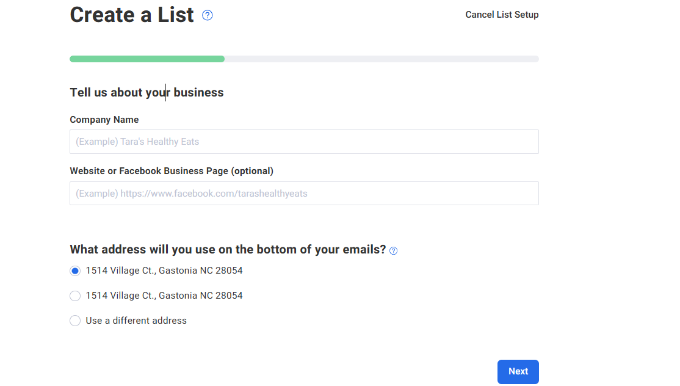
After entering the details, simply click the ‘Next’ button.
Next, you will be asked to provide a name and description for your email list. This name and description will be used internally and will help you locate your email list in the AWeber dashboard.
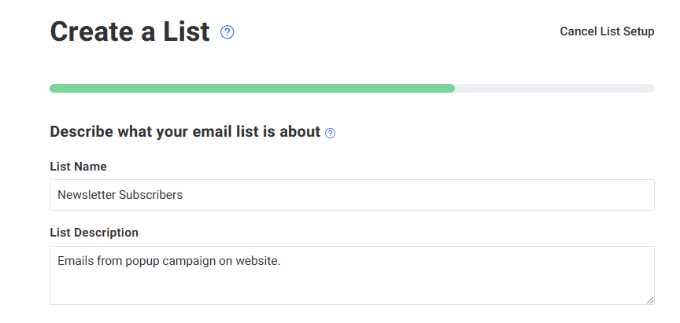
From here, simply scroll down and enter the sender’s name and email address.
This name and email address will be used in outgoing emails for your list. Please note that you’ll need to verify your email address.
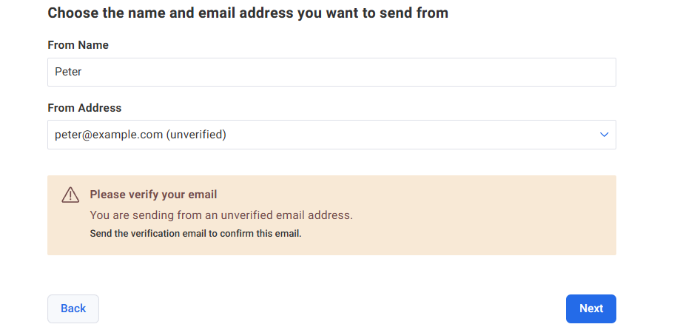
Once that’s done, click the ‘Next’ button to continue.
After that, you can select the language and subject line for your confirmation email. This email is sent to users to verify their email address when they sign up for your email list.
AWeber will give you a list of preapproved subject lines. You can choose the one that fits your needs.
You can also create your own subject line. However, an AWeber staff member must approve your custom subject line to prevent abuse and spam. This could take at least 1 business day.
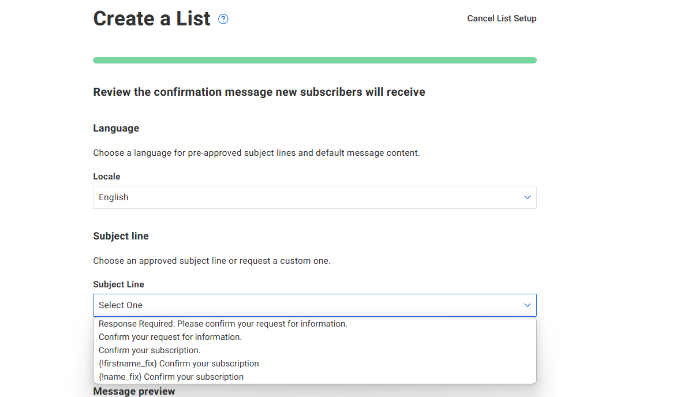
Next, you can scroll down to edit the message in the email.
Once that’s done, click the ‘Create List’ button.
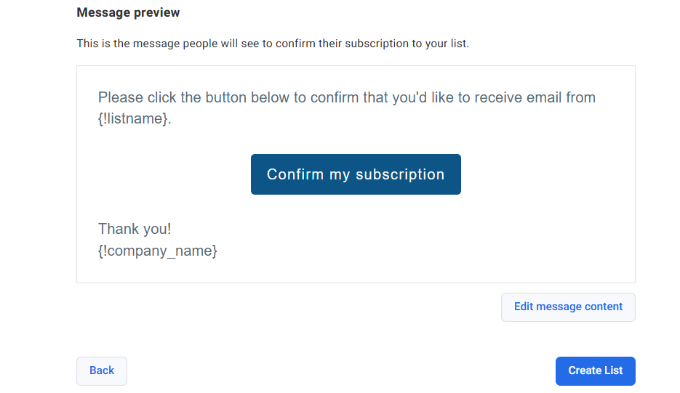
You have successfully created an AWeber account and also created your first email list.
Now, we will show you how to add AWeber email signup forms to your WordPress site.
Adding AWeber Signup Forms
There are multiple ways to add an AWeber email signup form to your WordPress site. First, there are default AWeber sign-up forms that you can copy and paste from your AWeber account.
There are also highly optimized signup forms created with OptinMonster. These signup forms will get you many more signups. See how we increased our email subscribers by 600% using OptinMonster.
You can also create custom signup forms WPForms, which is the most beginner-friendly contact form plugin for WordPress.
We will show you all these methods in this guide. You can use the quick links below to jump to the one you want to use:
Method 1: Default AWeber Signup Forms
AWeber comes with easy tools for creating signup forms and embedding them into your WordPress site.
Simply log in to your AWeber website and head to Pages & Forms » Sign UP Forms from the menu on the left.
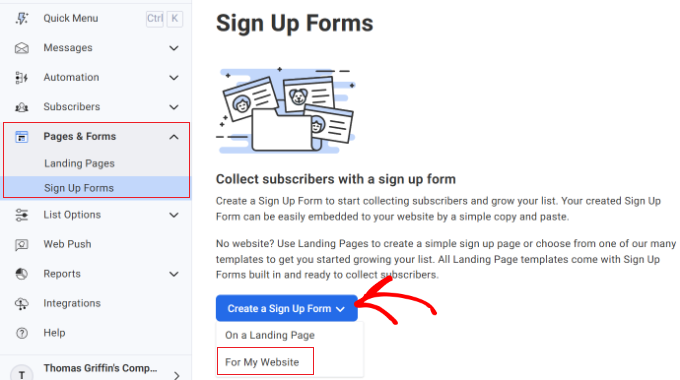
After that, you can click the ‘Create a Sign Up Form’ button and select the ‘For My Website’ option.
This will bring you to AWeber’s form builder tool. It comes with handy templates that you can choose as a starting point.
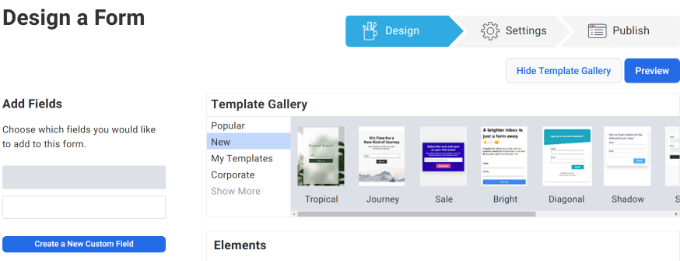
There is also an option to add custom fields to your form.
You can edit the form by clicking on an item in the live preview. For example, there are options to add a header, footer, image, divider, and more.
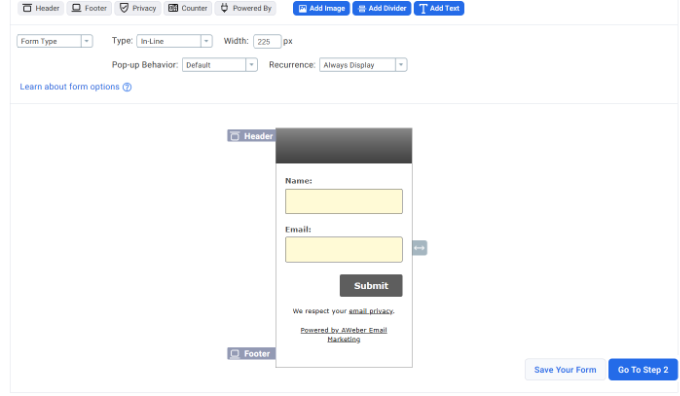
Once you are satisfied with the form design, you need to click the ‘Go To Step 2’ button.
This will bring you to form settings. You can choose what happens when users fill out the form. The best option is to redirect them to a page on your own WordPress site.
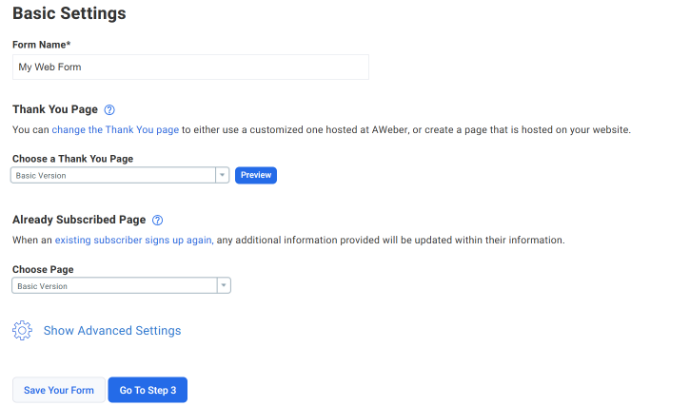
The next option is what happens if a user is already subscribed. Again, you can create a page on your WordPress site and redirect users there.
Don’t forget to save your form after making the changes. Once that’s done, simply click the ‘Go To Step 3’ button.
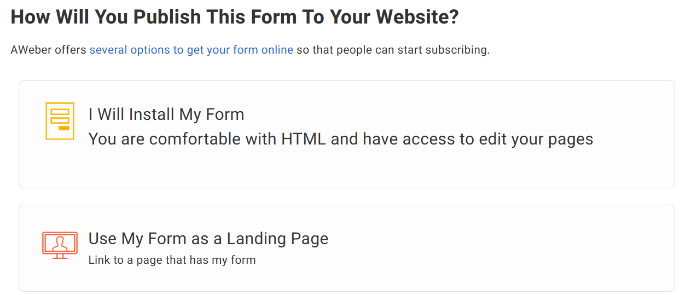
AWeber will now show you two types of code that you can add to your WordPress site to display a signup form. You can install the form using a code snippet or use your form as a landing page.
For this tutorial, we will select the ‘I Will Install My Form’ option.
Next, you’ll see an option to select Javascript Snippet or Raw HTML Version.
Go ahead and click on ‘Raw HTML Version’ and copy the code.
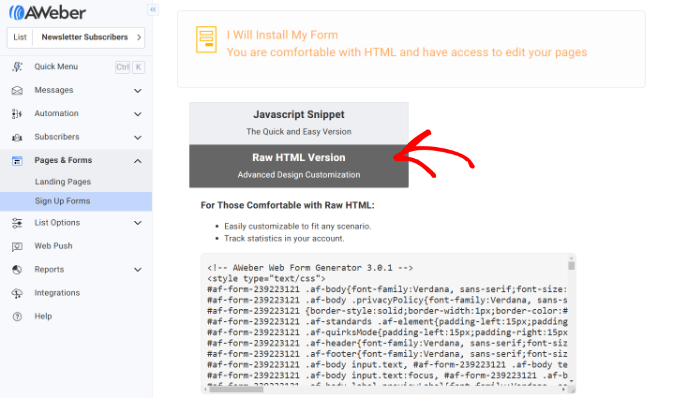
Now, you can add the AWeber form anywhere on your website. A good place to start is the sidebar, which is easily visible to users.
Depending on your WordPress theme, you can visit your WordPress admin area and click on Appearance » Widgets.
Next, add a ‘Custom HTML’ widget block and enter the code.
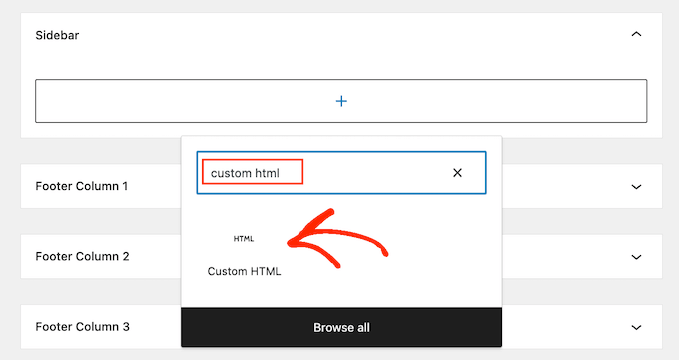
Paste the signup form code you copied from AWeber in the widget block. Once that’s done, click the ‘Update’ button to store your widget settings.
That’s all. You can now visit your website to see the signup form in action.
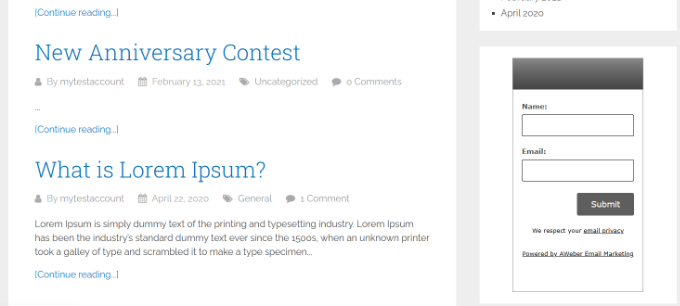
Method 2: Adding AWeber Signup Forms With OptinMonster
As you just saw, adding a basic AWeber signup form in WordPress is quite easy. However, the basic forms are not ideal for high conversions because they aren’t very eye-catching.
You need forms that get people to notice your signup form.
This is where OptinMonster comes in. It is the most popular lead generation tool on the market. It allows you to create beautiful sign up forms that are easily noticeable, highly engaging, and incredibly powerful.
OptinMonster comes with different kinds of signup forms, such as exit-intent popups, floating bars, after-post forms, sidebar forms, slide-in forms, full-screen welcome gates, and more.
It also comes with powerful features like MonsterLinks (2-step optins), scroll detection, A/B testing, page-level targeting, and more.
OptinMonster works with all popular email marketing services, including AWeber. When you’re creating a campaign, simply head to the ‘Integrations’ tab.
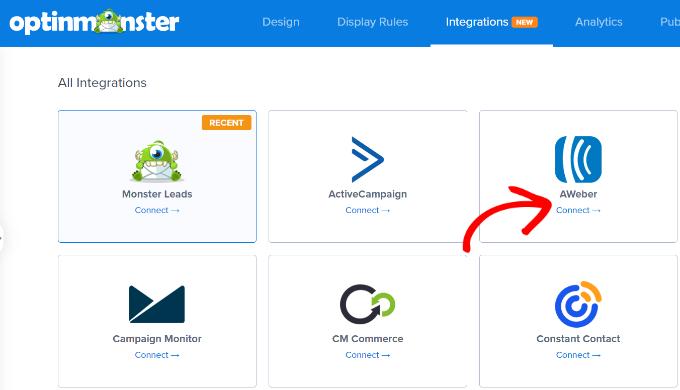
From here, navigate to AWeber and click the ‘Connect’ button.
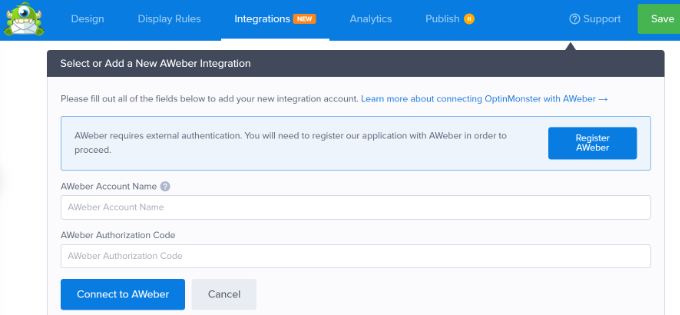
After that, you can enter an account name and authorization code. Once that’s done, simply click the ‘Connect to AWeber’ button.
The best part about using OptinMonster is that you can create different types of campaigns. To learn more, please see our guides on:
- How to Add a Contact Form Popup in WordPress
- How to Open a WordPress Popup Form On Click of Link or Image
- How to Create a WordPress Popup Based on Location (Step by Step)
- How to Create a “Sticky” Floating Footer Bar in WordPress
- How to Add Slide Out Contact Form in WordPress (Easy Tutorial)
Method 3: Adding AWeber Signup Form Using WPForms
WPForms is the most beginner-friendly contact form plugin for WordPress. It comes with an AWeber addon that allows you to add AWeber to your contact form or create custom AWeber signup forms anywhere on your WordPress site.
Step 1: Install WPForms and AWeber Addon
The first thing you need to do is install and activate the WPForms plugin. For more details, see our step-by-step guide on how to install a WordPress plugin.
Please note that you’ll need the WPForms Pro version because it includes integrations with email marketing tools. However, a WPForms Lite version is also available for free.
After installing the WPForms plugin, simply go to the WPForms » Addons page. From here, you can click the ‘Install Addon’ button next to the AWeber Addon.
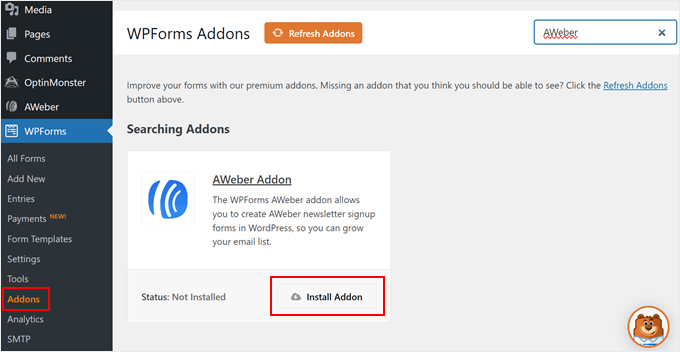
WPForms will now install and activate the addon and will show you a success message.
Step 2: Connect WPForms to Your AWeber Account
Now that you have successfully installed the AWeber addon, the next step is to connect your WordPress site to your AWeber account.
Simply visit the WPForms » Settings page from your WordPress dashboard and then click on the ‘Integrations’ tab.
You will find the AWeber integration option there. Go ahead and click the ‘+ Add New Account’ button.
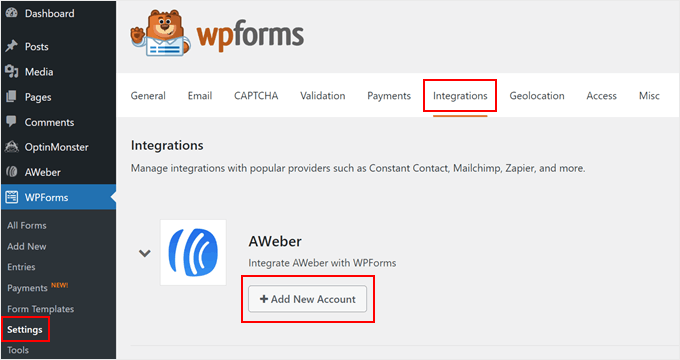
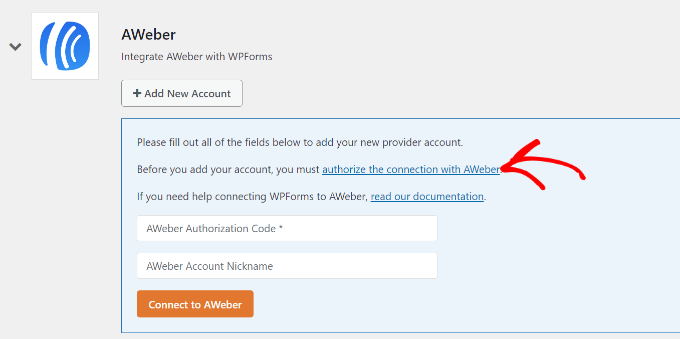
You will now see a link labeled ‘authorize the connection with AWeber’.
Clicking on the link will open a popup window or tab, where you will be asked to sign in to your AWeber account.
After entering your AWeber account username and password, click the ‘Allow Access’ button.
AWeber will now verify your credentials and will then show you an authorization code.
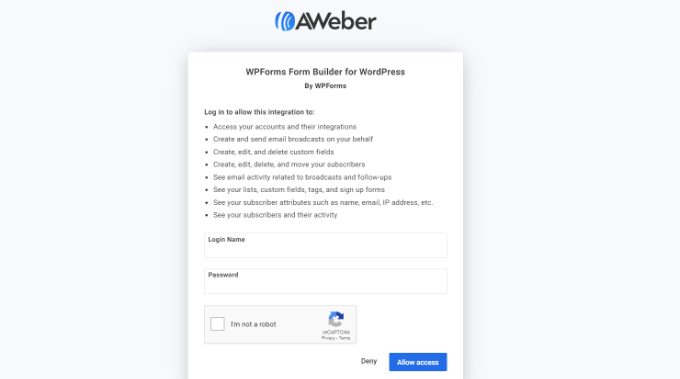
Simply copy the code and paste it into the WPForms settings page.
You can use anything in the ‘Account Nickname’ field as it’s used for internal purposes. Next, click the ‘Connect to AWeber’ button to continue.
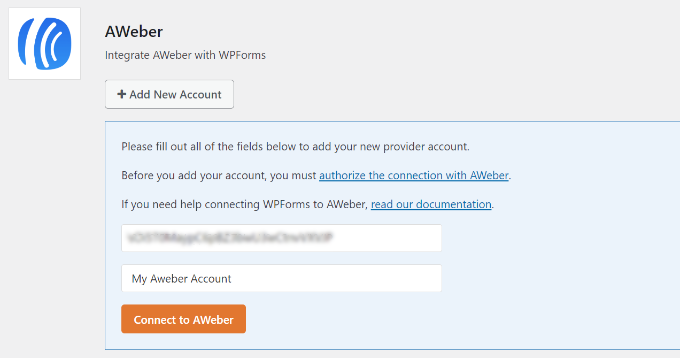
WPForms will now connect to your AWeber account. It will show ‘Connected’ status next to your AWeber integration.
Step 3: Creating AWeber Signup Forms with WPForms
Next, you can create a new signup form in WPForms. Go ahead and visit WPForms » Add New to create a new form.
WPForms comes with handy templates for creating the most common forms. One of these templates is the Newsletter Signup Form, which comes pre-populated with email signup form fields.
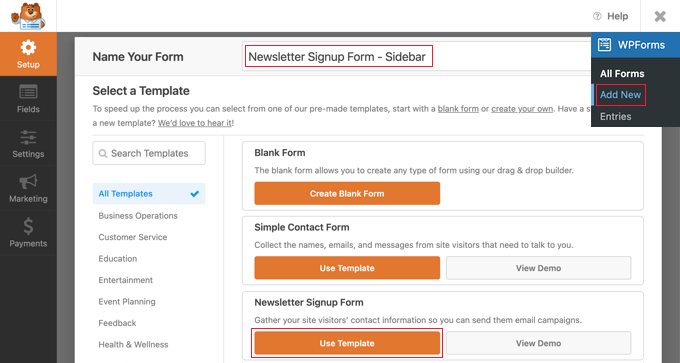
Go ahead and select the Newsletter Signup Form template by clicking the ‘Use Template’ button.
This will launch the form builder, where you can edit the form. You can add or remove fields, rearrange them, add a description, and more.
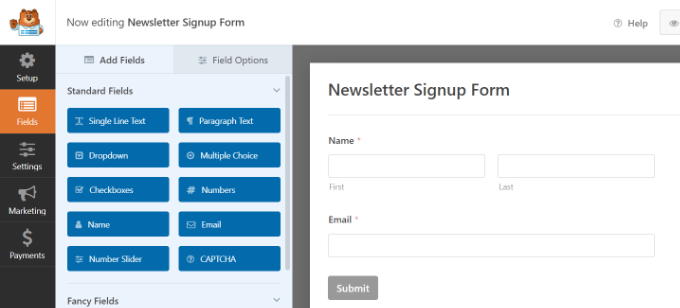
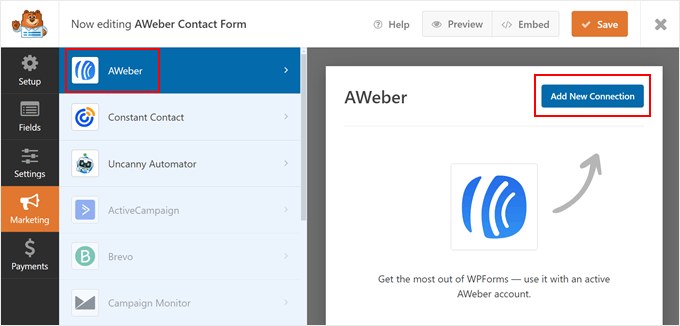
Once you are satisfied with your form, click on the ‘Marketing’ tab from the menu on the left and then select AWeber.
You will need to click the ‘Add New Connection’ button.
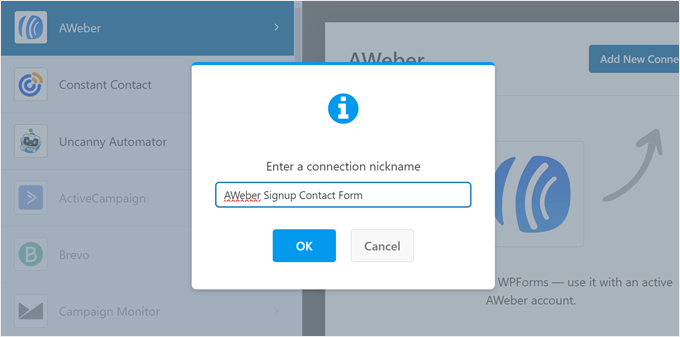
You will be asked to provide a nickname for this connection.
You can use any nickname you like.
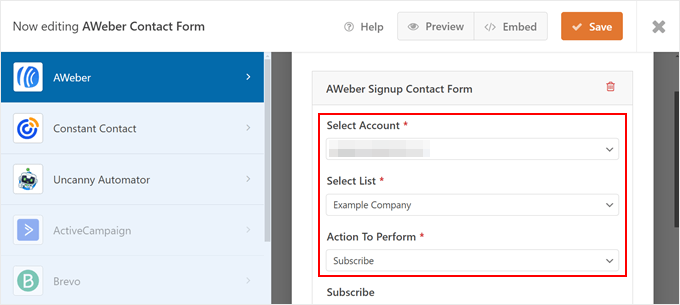
WPForms will now fetch your AWeber account information.
You will need to select your AWeber account and email list that you want to use.
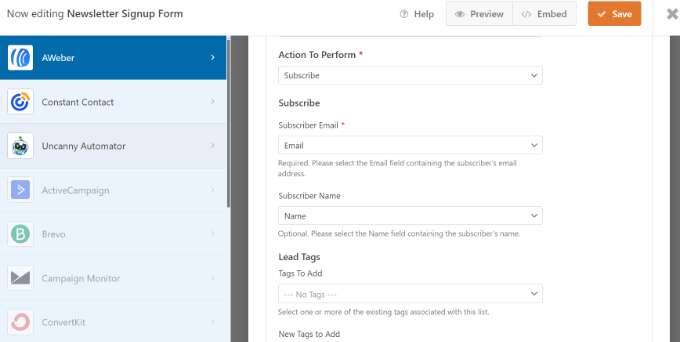
After that, you need to select the list of fields you want to add to your form fields.
For example, you will need to select an action to perform, subscriber email, lead tags, and more.
Don’t forget to click the ‘Save’ button. You can now exit the form builder.
Step 4: Embedding the Form in WordPress
There are multiple ways you can add your AWeber signup form. WPForms allows you to add forms to any WordPress post, page, or widget.
You can also use the form builder’s embed feature to add your signup form anywhere. Simply select an existing page or create a new one to display your newsletter form.
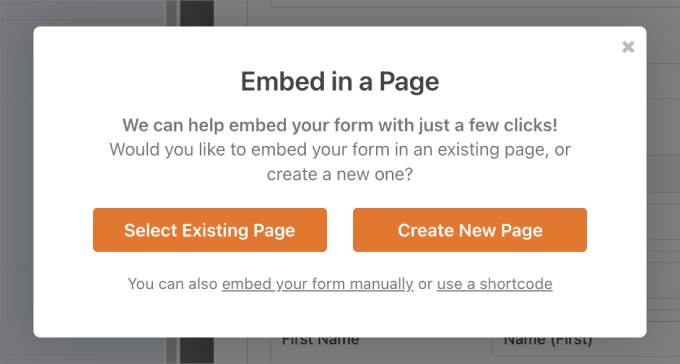
For example, if you choose the ‘Create New Page’ option, then the plugin will automatically create a page and embed your AWeber signup form.
You can view a preview in the content editor. Once everything checks out, simply publish your page.
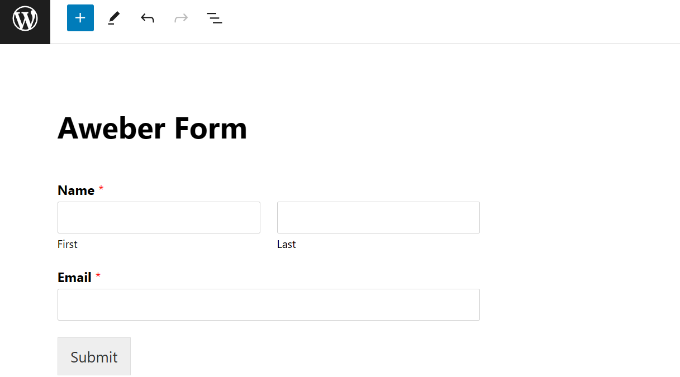
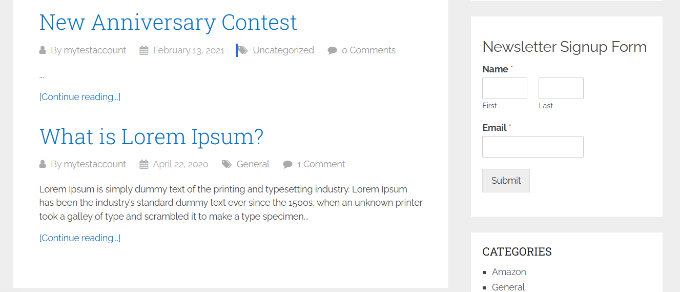
On the other hand, you can also use the WPForms widget block to embed the form in the sidebar.
Simply visit the Appearance » Widgets page from your WordPress dashboard and add the WPForms widget block.

You can then select the form you just created.
Once that’s done, simply update the widget settings and visit your site to view the AWeber form in action.
We hope this ultimate guide on how to connect WordPress to AWeber helped you build and grow your email list. You may also want to see our expert pick of useful tools to manage and grow your WordPress blog and how to create a free business email address in 5 minutes.
If you liked this article, then please subscribe to our YouTube Channel for WordPress video tutorials. You can also find us on Twitter and Facebook.


Pete
Very good but you didn’t tell us in wpforms you have to have pro to use this addon
Jinka varalakshmi
Can i use wpforms with sendy.