After years of building WordPress websites, we’ve learned how important it is to have a local WordPress setup on your computer.
Having WordPress on your personal machine lets you experiment with new features without risking your live site, dive deep into WordPress development, and even build entire websites before they go live. It’s like having a private sandbox for all your WordPress projects.
If you’re a Windows user, there are numerous ways to set up WordPress locally. But we’ve narrowed it down to the two easiest methods. In this guide, we will show you how to easily install WordPress on a Windows computer, no matter which version you’re using.
Why You Should Install WordPress on Windows?
If you’re a Windows user, then installing WordPress locally on your computer offers several benefits.
A local WordPress installation creates a testing environment that doesn’t affect your live website. This setup, often called a local server or localhost, is your personal playground for WordPress.
WordPress developers regularly use local installations for their work. For instance, they may use it to experiment with new plugins or themes or test the site before updating to the Gutenberg block editor.
But it’s not just for the pros. If you’re new to WordPress, a local setup is perfect for learning. You can explore features, test themes and plugins, and experiment freely without worrying about breaking a live site.
It’s important to note that when you install WordPress locally on Windows, only you can see the site. If you want to create a public website, then you’ll need a domain name and web hosting.
Now, technically, you can install WordPress on Windows using XAMPP, and we’ve written a tutorial on it before.
That being said, we’ve found 2 even simpler ways than XAMPP for setting up a local WordPress environment, making them great for beginners or users who need to create a local site quickly. You can click the link below to jump ahead to any method you’re interested in:
Method 1: Install WordPress on Windows Using Studio (Quick and Simple)
For the first method, we will use Studio. It’s a local WordPress software made by Automattic, the company that manages and runs WordPress.com, which is a website builder based on the WordPress software.
We will talk about this method first because it’s much quicker and simpler to follow, making it perfect for complete beginners.
First, you need to open the Studio by WordPress.com website. Then, click on the ‘Download for Windows’ button.
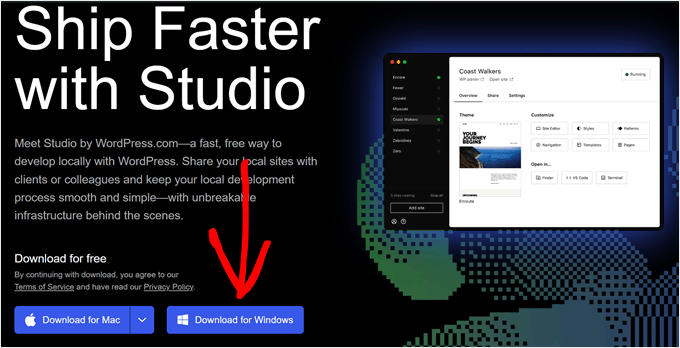
Once you’ve done that, just open the downloaded file to start the installation.
A popup window will now appear, showing you that the application is being installed.
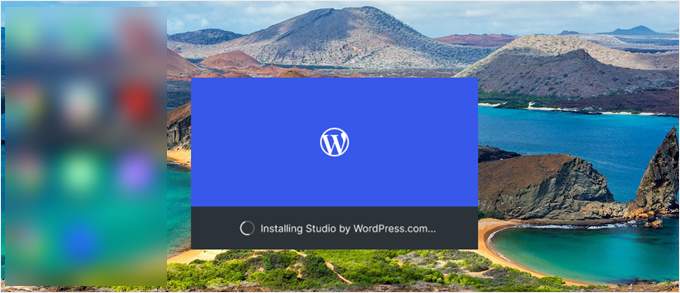
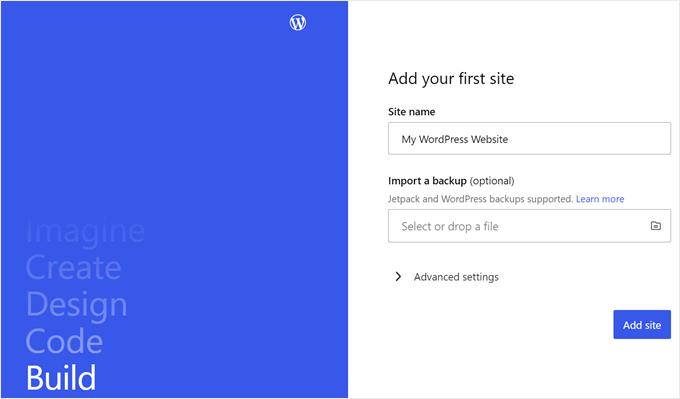
With that done, you can add your first site.
To do this, just enter your new local WordPress site name and click ‘Add site.’ You can name the site however you like so long as it helps you easily identify it.
You should now see your local WordPress site dashboard.
To access your WordPress dashboard and edit your website, just click the ‘Start’ button at the top right corner. This will make your local website accessible to you on your computer.
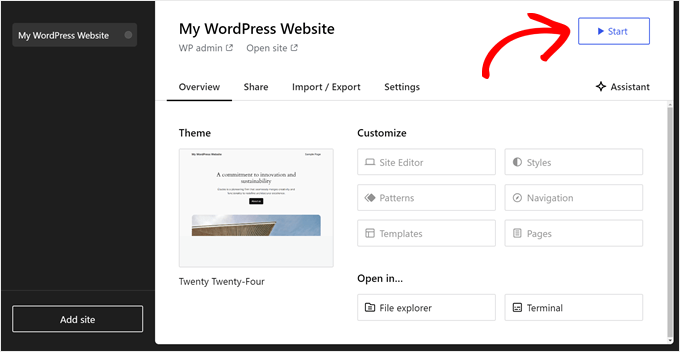
Once the ‘Start’ button changes to ‘Running,’ you can click on the ‘WP Admin’ link at the top left side of the page.
This will bring you to your local WordPress admin page.
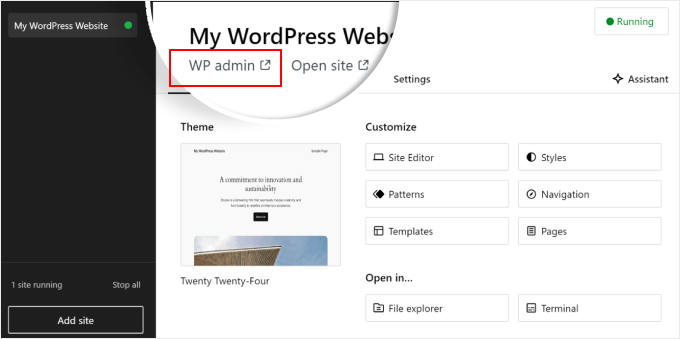
And that’s pretty much it for the setup. Let’s explore the other settings that may be necessary as you build your local website.
As you can see in the ‘Overview’ tab, you can immediately access the WordPress full-site editor menu right from the Studio dashboard. You can also click ‘File explorer’ to open your WordPress website’s folders and files and click on ‘Terminal’ to manage your website using WP-CLI.
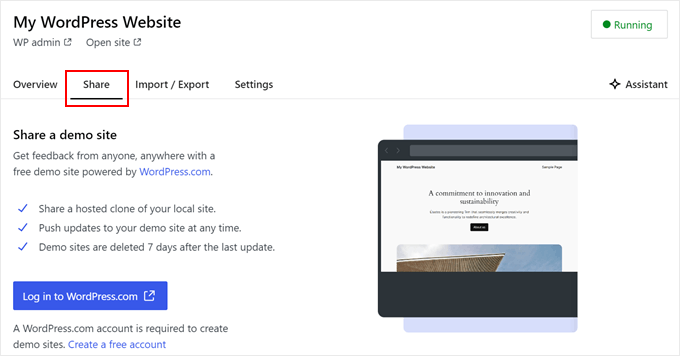
If you switch to the ‘Share’ tab, you can log in to your WordPress.com account, clone your local website, and upload it to WordPress.com’s servers. This will temporarily make the cloned site online, which is useful for sharing demo sites with your clients or team members.
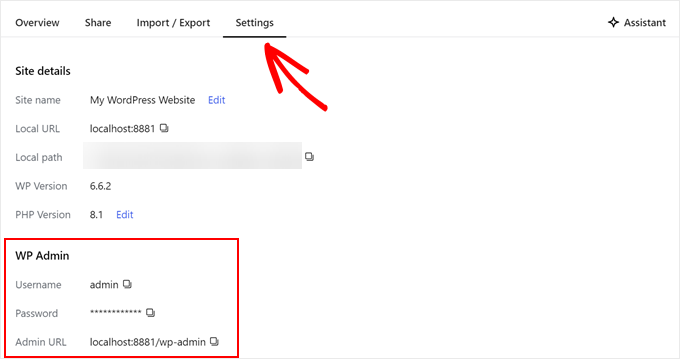
At times, you may want to log in to your local website directly through your browser instead of using Studio. In that case, you need to know your wp-admin credentials.
To find them, you can switch to the ‘Settings’ tab and find your WordPress admin username, password, and login URL there.
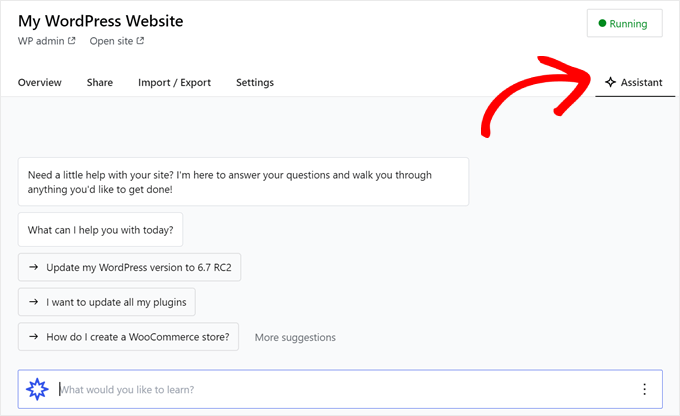
Another neat feature of Studio is its built-in AI chatbot, which you can communicate with by clicking on the ‘Assistant’ button.
Here, you can ask Studio for help with tasks like updating all your plugins at once, updating your core WordPress version, or creating code for a custom block.
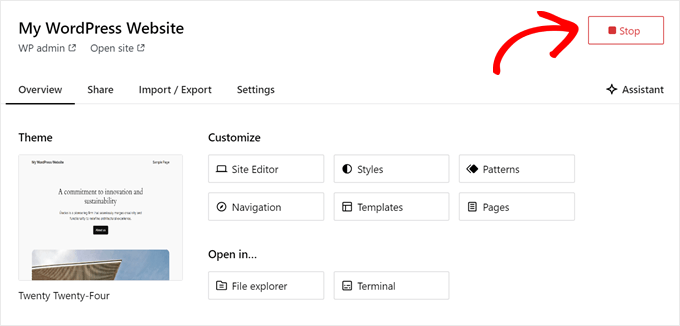
When you’re done working on your local site, just hover over the ‘Running’ button at the top right corner until it says ‘Stop.’
Then, click on the button to stop the website.
One downside of Studio is you cannot configure the WordPress environment to your liking. This means you need to use the PHP version, web server, and database that have been pre-selected for you.
This can be a drawback if you need to test your website or plugin with specific server configurations.
If you require more control over your local WordPress environment or need to match your local setup with a specific live server configuration, then you can check out the next method using Local WP.
Method 2: Install WordPress on Windows Using Local WP (More Customizable)
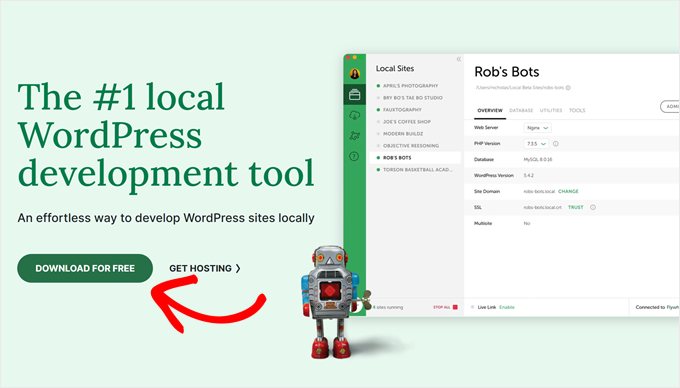
First, you need to download and install the Local WP software on your Windows computer. Simply go to the Local WP website and click the ‘Download for Free’ button.
After that, a popup window will appear where you’ll need to select your platform. Go ahead and choose ‘Windows’ from the dropdown menu.
Next, you can enter your details like first and last name, work email address, and phone number to download the software.
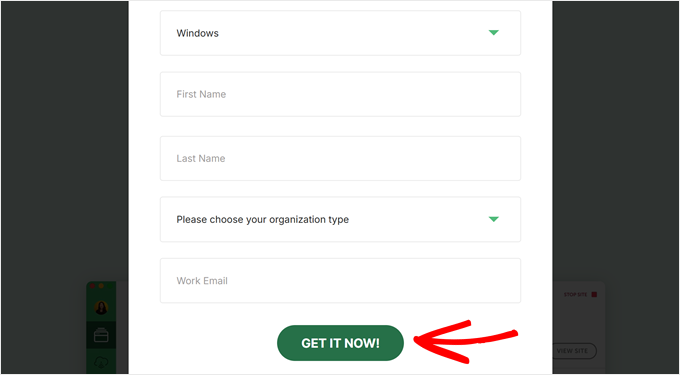
Upon entering the details, simply click the ‘Get it Now’ button.
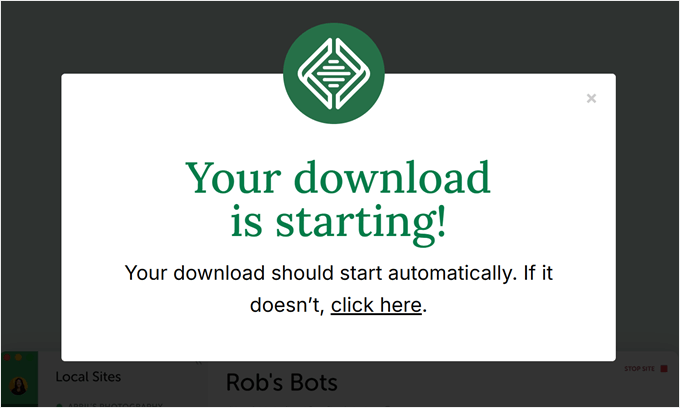
After that, the software will be automatically downloaded into your computer. Otherwise, you can click on the ‘click here’ link to start the download.
Once the file is downloaded, go ahead and launch the setup wizard.
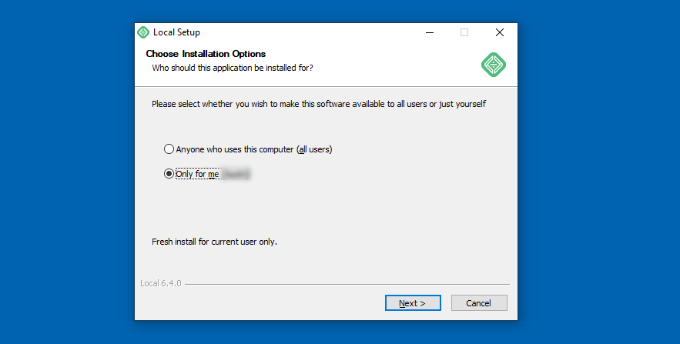
Now, you’ll need to select whether you’d like to install the software for all users or only for you.
Once you’ve selected an option, click the ‘Next’ button.
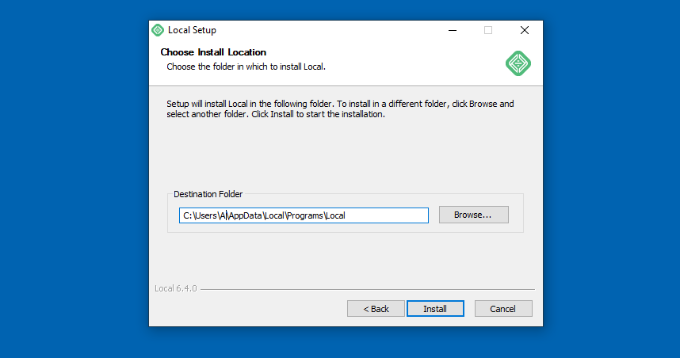
In the next step, you can select the ‘Destination Folder’ where the software will be installed.
Simply click the ‘Browse’ button to set the path and then click the ‘Install’ button.
The Local WP software will now install on your Windows computer.
Once it’s done, you can check the ‘Run Local’ checkbox and click the ‘Finish’ button in the setup wizard.
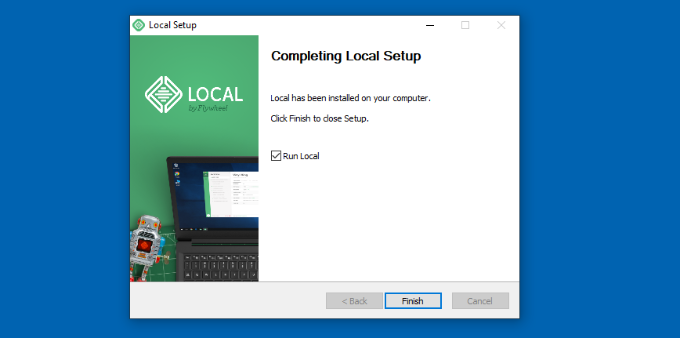
The software will now launch on your Windows device.
The next step is to add a new local website. To do that, simply click the plus ‘+’ button at the bottom.
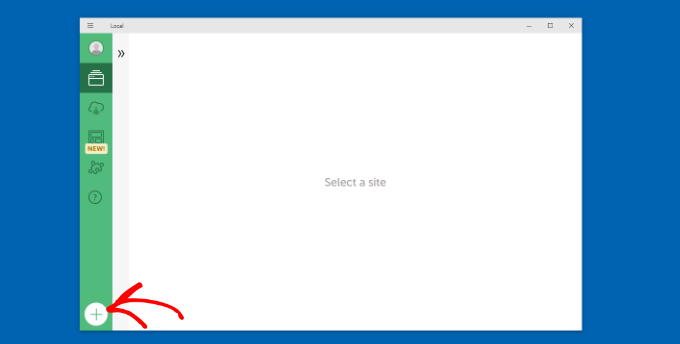
After that, you can create a site in the Local software.
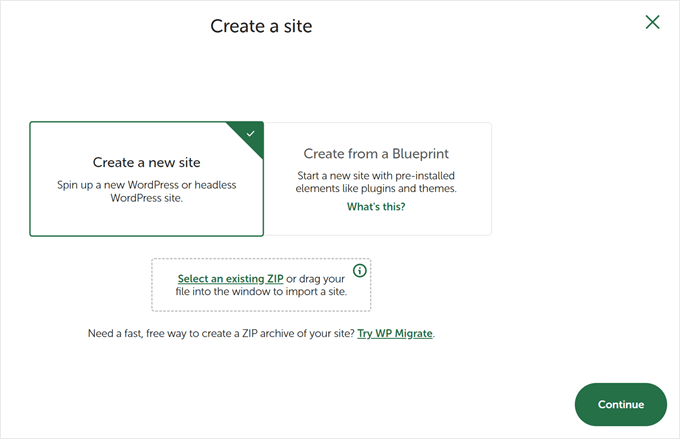
Select the ‘Create a new site’ option and click the ‘Continue’ button. There are also options to create the site from a blueprint or an existing website file, but we’ll go with the first option for the sake of demonstration.
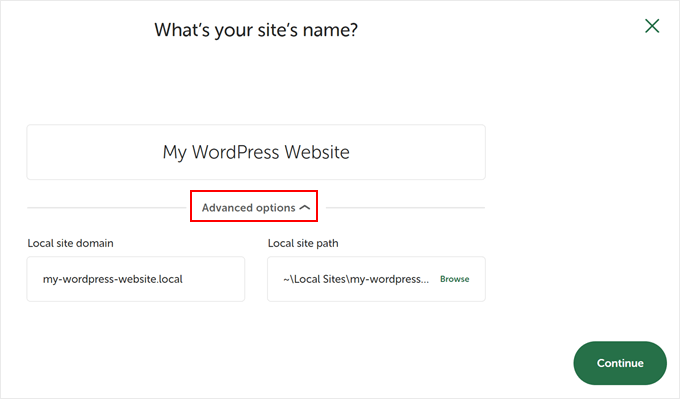
Next, you can enter a name for your local website, like ‘My WordPress Website.’
There are also advanced options where you can enter the local site domain and local site path. By default, the domain will use your website title but separated with dashes.
Once you’re done, simply click the ‘Continue’ button.
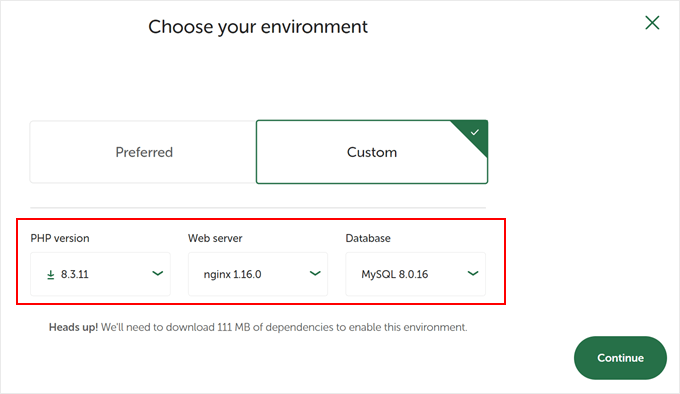
After that, you will need to choose an environment for your local website.
You can use the ‘Preferred’ environment where the software will automatically select the PHP version, web server, and MySQL version. On the other hand, you can also select ‘Custom’ and enter the environment details.
Local WP offers the latest PHP versions. As for the web server, you can choose between Nginx or Apache. You can also select between MySQL or MariaDB for the databases.
Do note that some PHP, web server, and database versions require downloading some dependencies for them to work properly.
Next, you can enter a WordPress username and password for your local website. Plus, there’s also an option to choose a WordPress email address where you’ll receive all the email notifications.
Other than that, there is an advanced option where the software will ask whether you have a WordPress multisite network. If not, just click ‘No.’
After entering these details, simply click the ‘Add Site’ button.
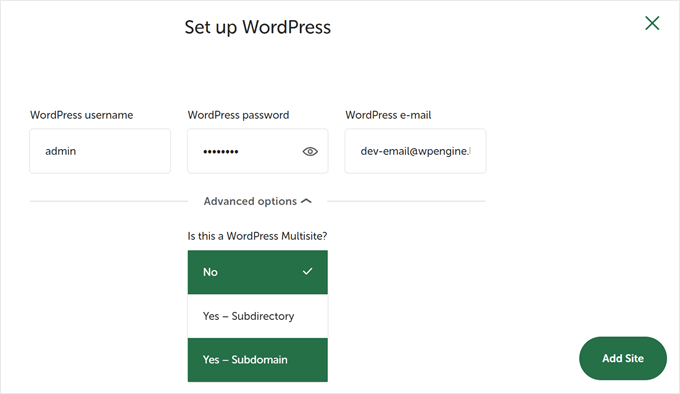
The software will now install WordPress and set up your website.
To launch the local website, go ahead and click on the ‘Start site’ button at the top right corner.
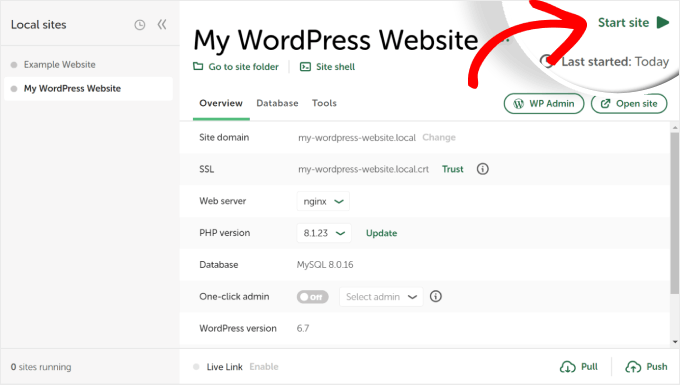
Next, click on the ‘WP Admin’ button, and you’ll see the WordPress admin login page.
Simply enter the username and password you entered earlier when setting up the local website, and then click the ‘Log In’ button.
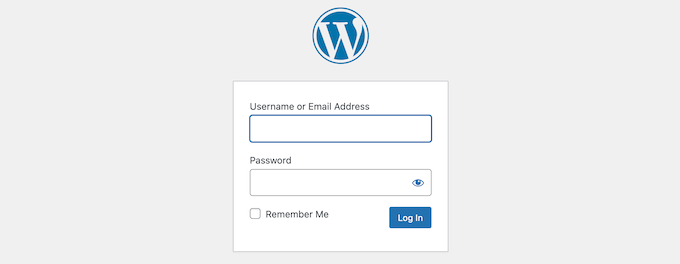
You can now edit your local website on your Windows computer.
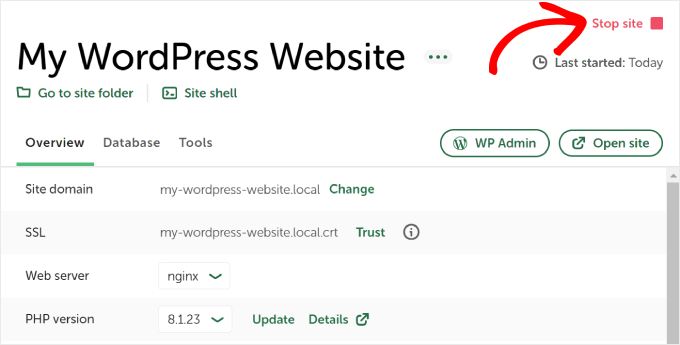
When you’re done, don’t forget to stop the website from the Local WP software by clicking the ‘Stop site’ button.
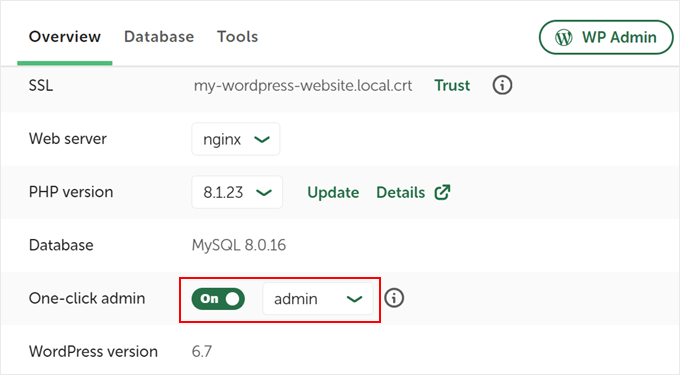
Pro Tip: If you want to skip the login process, you can enable a one-click admin login in Local WP.
To do this, just go back to the Local WP dashboard and toggle the ‘One-click admin’ button until it says ‘On.’ Then, in the dropdown menu, select the admin user that can use this one-click login feature.
Alternative: Use WordPress Playground to Test Themes, Plugins, and More
WordPress Playground is an innovative tool that lets you experiment with WordPress directly in your web browser. It’s a virtual sandbox where you can try new WordPress themes, plugins, and features without affecting any real website.
WordPress Playground differs from a local WordPress environment in several key ways.
First, it doesn’t require installation on your computer and resets after each use, unlike permanent local setups. You can access it from any device with a browser, while local installations are tied to one computer.
While WordPress Playground is ideal for quick tests and learning, a local WordPress environment on your Windows computer offers more flexibility for long-term development projects.
For a detailed walkthrough, check out our guide on how to use WordPress Playground in your browser.
I’ve Installed WordPress on My Windows Computer, What Now?
Now that you have WordPress on your computer, here are some things you can do:
- Learn basic WordPress tips and tricks to use your site better.
- Try different WordPress themes to see how your site can look.
- Install and test must-have WordPress plugins to add new features to your site.
- Learn how to fix common WordPress errors on your own.
- Try different drag-and-drop page builders to make your site look nice.
- Learn how to reset the WordPress admin password on localhost to recover access to your site.
- Set up automated workflows to make managing your site easier.
- Learn about WordPress security to keep your site safe from hackers.
- Move your local WordPress site to a live server when you’re ready to share it with everyone.
We hope this article helped you learn how to install WordPress locally on a Windows computer. You may also want to see our article on how to install WordPress locally on a Mac computer and our ultimate guide to creating a WordPress staging site.
If you liked this article, then please subscribe to our YouTube Channel for WordPress video tutorials. You can also find us on Twitter and Facebook.


mike
installed wamp Apache/2.4.9 (Win32) PHP/5.5.12, downloaded wordpress, configured wp-config nothing, absolutely nothing happens.
Any thoughts?
Villi
Hey. So everything worked great and i have been playing around practicing. Now i am going to make another website but keep the practice website also, but i need them to be completely independent from each other since i dont want my “messing around” to affect the new one Should i install wordpress again and follow the same instructions (extract the wordpress folder to C:\wamp\www etc.) and make another database ?
In short, should i follow exactly the same process as before, except i would not need to download wamp again obviously.
Thank you
WPBeginner Support
Yes, you need to follow the same instructions.
Admin
Wayne
Great article. I have managed to get everything up and running. But have not got stuck when I try to upload a Theme I have purchased. I have a personal live site using WordPress. But wanted to build one offline for my workplace, hence I am using phpAdmin. Any ideas please how I can work on purchased themes on a localhost?
WPBeginner Support
Installing a purchased theme is no different on a localhost site than on a live site. Simply go to Appearance > Themes on your localhost site. Click on the Add New button and then click on the Upload button. Click on the choose file button to locate the Theme Zip file from your computer and then upload it.
Admin
Manoj
Hi
I had installed everything as per the guide here and my site was working fine. Today, however, i tried to loginto localhost and it gives an error. It says this webpage is not available. ERR_CONNECTION_REFUSED
Kindly help
naveenraj
hi sir,
The icon says in orange colour and i getting blank pages when i go for localhost/phpmyadmin/ page, Please help t resolve this.
WPBeginner Support
Please see WAMP documentation and support forums.
Admin
bella
“Go to C:\wamp\www and paste wordpress folder there.”
I can’t seem to find anywhere that accepts my wordpress folder. Does anybody have more detailed description to do this step for me? Thank you very much for all you sharing people
Ayesha
Hi,
Once you go to wordpress.org and install wp, you will have a wordpress zip folder, extract its contents and it would create a wordpress folder, open this folder and copy the folder named wordpress. Now goto your wampserver folder and then open www folder that lies insides wampserver folder, paste the folder wordpress over there i.e. inside www folder.
You just have to copy your wordpress folder and paste it in the www folder of wampserver.
Hope that helps!
Kush Singh
Really it’s very helpful site for installing wordpress.
Nice work guys keep it up…
Satish Shihani
Superb….. I really like this
On my first attempt only, i done all installation without any error
Thank you so much for this tutorial
Amir
Smooth and fun, worked like a charm. I had only one problem which was resolved by shutting down a certain Microsoft product…
Thank you.
Paul
Great tutorial glad I found it as I am just learning how to use wamp and my local server to build wordpress sites. I would also like to copy a live wordpress site to my local server so I could modify a theme, then reload it to the remote server and was wondering if there was a tutorial on how to do that? I have found and read the tutorial on uploading a site from my local server to the remote one but nothing on copying a live site to the local server and getting it to work. Is this possible and if so, do you have a tutorial on how to achieve it successfully? Thanks in advance.
Kvaibahv01
Hey there,
I had created a Wordpress blog earlier this month and my WAMP server was uninstalled due to some reasons….I reinstalled it>did all the same steps> named the ‘wordpress’ folder to ‘site’> opened localhost/site/wp-admin which says :
Welcome to WordPress. Before getting started,………………………….before proceeding.
Database name
Database username
Database password
Database host
Table prefix (if you want to run more than one WordPress in a single database)
We’re going…………We got it.
In all …………… all ready…
I clicked ‘Let’s go’ button which opened ‘Setup config.File’ entered my DB name ‘site’> ‘username’ and ‘password’ I edited on ‘wp-config-sample.php’ and changed username to blank and same with password too> Click next and now it shows me an error “Can’t select database”:
We ………………. database.
Are you sure it exists?
Does the user have permission to use the site database?
On some systems the name of your database is prefixed with your username, so it would be like username_site. Could that be the problem?
If you don’t know how to set up a database you should contact your host. If all else fails you may find help at the WordPress Support Forums.
Please help!
WPBeginner Support
Visit localhost/phpmyadmin to confirm that the database name you entered is correct.
Admin
Geraldine
Hello. I hope you can help me with this. After I created the test site, how can I share this to my friend via online?
Rhian Williams
thank you so much for this I have been battling with localhost software all day and this worked first time for me
moneytechnicals
Ive installed WAMP in windows 7 32 bit. And want to use wordpress. But its not showing to create configuration file. Its showing an error like this-
Warning:
require(C:wampwwwwordpress-trunk/wp-blog-header.php): failed to open
stream: No such file or directory in
C:wampwwwwordpress-trunkindex.php on line 18
Please help me to get out of this. Thank you in advance.
Campbell Sinclair
Hello and to anyone who googles this error and is stuck like I was on this,
You likely downloaded the zip installer and extracted them, maybe cancelled it some point because the extraction / transfer of the folder inside was slow. I’m not sure what happened, not the point either.
This error occurs when not all the files are present. Try and hunt down wp-blog-header in your WordPress folder directory with a simple search. The index page (one that is first loaded by a browser when it opens a directory) is only asking for this file but it simply won’t be there with it in the directory. Index.php is asking for wp-blog-header and everyone else said I’m not the file you’re looking for.
I downloaded the version prior and it was complete because I had the installation page as expected. This is the quickest and certain fix. If you do this, you will should be able to upgrade to the latest once you have installed as well.
WPBeginner Staff
Yes you can.
ArtaGene
Since I didn’t see any specs listed, not sure my old computer will have enough memory…can I install on a portable drive (connects with USB) and use that way ?
WPBeginner Staff
Seems like WAMP didn’t install correctly on your computer. Try installing again or try XAMP.
jerry
I get this error right at the end of the installation.
httpd.exe – system error
The program can’t start because MSVCR110.dll is missing from your computer. Try reinstalling the program to fix this
problem
nikhil
i have install wamp server but when i am going to phpMyAdmin it is showing error like this:-
Forbidden
You don’t have permission to access /phpmyadmin/ on this server.
Roshan Bagdiya
error
#1045 – Access denied for user ‘root’@’localhost’ (using password: NO)
while accesing phpmyadmin
how to resolve it
WPBeginner Staff
Please make sure that the Wamp server icon in your taskbar turns Green before you click on phpMyAdmin. You can also try manually accessing phpMyAdmin by typing this URL in your browser’s address bar http://localhost/phpmyadmin/
Diviya
Followed your procedure step wise. Now when I try to setup database for Wordpress, when I click on phpMyadmin I get error ‘HTTP Error 404. The requested resource is not found’
Syed Balkhi
Done – thanks for the suggestion.
Carrie
FYI, the “Skype” error also happens with a similar program called Team Viewer. A similar simple fix, going in to the program and changing the checkbox regarding ports 80 and 443. I agree with others, if nothing else you should put a link to the troubleshooting info in the article right after the WAMP installation. I got frustrated that I kept getting an error, and decided to look through the comments until I found a solution.
Anand Upadhyay
Suggested edit. Please replace
C:wampwww
with
C:wampwww
Aditya Pranav
Done all thing , but when I click on phpMyadmin the an error page will open in browser and that is :-
HTTP Error 404.0 – Not Found
The resource you are looking for has been removed, had its name changed, or is temporarily unavailable.
Derick
Howe about adding a tutorial that continues from this one on how to add multiple websites to be worked on offline like the above one.
Vijay
Thanks so much for this. It worked for me.
My only complaint is that the skype error should have been right after the WAMP installation part. I spent a lot of time figuring out how to get the WAMP icon to go green instead of orange. Ultimately found out that IIS 8.5 was using port 80 and that I had to stop WWW publishing services from Services.msc and restart the Apache on WAMP to get it to work.
M♥ηyαηє Ramołło™
Great tutorial
Jim
Great tutorial. Big thanks. Only you should post the info on Skype port before in the beginning, as I did everything by myself and changed the port number in wamp folder. Then here I found out that there was easier way doing it on Skype
lobsterhands
Great tutorials. Thank you for being so clear and concise.
Lis
Fab article! I’m all installed and working. However, any additional pages I am creating over and above the home page don’t work. I am creating the page in Wordpress, but when following the ‘View’ link, I get a 404. Any idea?
pramod
Downloaded everything. when i write on web http://localhost/mysite/ but display error
The requested URL /mysite/ was not found on this server.
Monica
Very helpful thanks.
St. Buzo of C.O.B. ®
Bingo..!! this was so helpful.!! Phase one done i have installed..!!
anbu
dear sir,
this blog is very usefull to me..as per your instruction i create a website locally. but when i try to open the same site from different machine in tha same lan i can’t.please guide me.
i tried via this following method in another computer
1.http://192.168.1.88/(sitename).
2.http://localhost/(sitename)
the site is not opening
anbu
dear sir,
this blog is very usefull to me..as per your instruction i create a website locally. but when i try to open the same site from different machine in tha same lan i can’t.please guide me.
i tried via this following method in another computer
1.http://192.168.1.88/(sitename).
2.http://localhost/(sitename)
Lyle Denman
http://forum.wampserver.com/read.php?2,121118
This should answer many of your questions. Know that you will also have to update your database’s options (from localhost/phpmyadmin/). wp_options > siteurl and wp_options > home should be changed from http://localhost/database_name to http://your_local_ip_address/database_name (for example http://192.168.0.11/coolsite/).
Make sure you open c:/wamp/bin/apache/apache2.4.9/conf/httpd.conf
In that file, after the line reading: # onlineoffline tag – don’t remove, add the following 2 lines:
Require all granted
Require ip 192.168.0 (or whatever the first 3 groupings of your local ipv4 address is)
Then, in the same file, find the line reading: #Include conf/extra/httpd-vhosts.conf and remove the # from the beginning of that line.
Then, open the file c:/wamp/bin/apache/apache2.4.9/conf/extra/httpd-vhosts.conf and comment out the code that is there (just to keep defaults around) and past the following:
ServerName localhost
DocumentRoot c:/wamp/www
AllowOverride All
Save those files, restart all WAMP services and enjoy your LAN development.
Lina
This post was VERY helpful!! Thank you very much!
WPBeginner Staff
First you need to uninstall wampserver completely from your computer. Then download a fresh copy and try to reinstall. If this does not work out, then we will recommend you to use XAMPP which is an alternate software with nearly the same software (Apache, php, mysql).
Jokerman
I tried EasyPhP too but that didn’t work either. Have just installed Xampp and that appears to be working. Thanks very much for the advice.
Jokerman
I have downloaded and attempted an install. It didn’t work as I was missing a dll file. Have downloaded the necessary software from MS and this time the install appeared to have gone well…no error messages and the Wampserver icon has appeared on my desktop as requested. However when I click on the Wampserver icon it asks: Do you want to the following program from an unknown publisher to make changes to your computer? (Program name: wampmanager.exe) Clicking on Yes causes that window to close then nothing happens. Do you have any clues as to what to try next please? Thank you
cmills
The latest version of wamp uses PHP 5.5.12 which isn’t compatible with Wordpress!
WPBeginner Staff
That’r probably because your site is served at 127.0.01 which is a local loop address while the other ip address is your lan address. They are two different things.
To enable sharing you need to add this line to your httpd.conf file Listen 192.168.1.4:80 make sure your computer is using static ip and it is set to use the ip address you enter in apache configuration file.
You will also need to make sure that WordPress saves your IP address as your sites URL not localhost. To achieve this you would need to install wordpress from 192.168.1.4/mysite instead of localhost/mysite
Naresh
Thank you very much.
archetypechris
Hello, and thank you for the amazing guide! I have a small
problem. Everything worked find when I followed the guide and my site loads up
fine, but when I try to connect to it from another computer in my house with
address: 192.168.1.4/mysite, it says I don’t have permission to view the page.
Does anyone know how to fix this? Thank
you!
WPBeginner Staff
You can use the Duplicator plugin or BackupBuddy for site transfers.
Anji
It is my first time creating a website in WP and his post was easy and it worked like a charm! Thank you so much!
WPBeginner Staff
George,
The WordPress you install on your local computer is only available on that computer.
There are specialized software that allow you to install Wampserver on a USB stick which you can then carry with you to work.
George
Thanks for the speedy reply,
Today I installed Wamp on my work laptop and using phpadmin exported my sql database from my home computer and imported it to my work laptop.
I tried mirroring the process above on my work laptop and named the database the same thing. I was able to get into my site on my work laptop but is seems my plugins and theme haven’t transferred. Am I missing a step? Must I transfer another folder?
I was planning on working on a local server doing this transfer sequence between work and home and was wondering if it can even be done (I heard about url linking problems) A short check list or play by play of what I must do would be very helpful.
Thank you,
-George
rustomQ
excellent guide!!!!!! got everything up and running the first time!!! thank you oh so much!!!!
George
This Work wonderfully! I’ve been word pressing for a couple of days and have made some progress over the weekend.
One Problem:
How can I take what I have on my home computer and work on it on my work computer in the office? Can I upload this to wordpress and work on it from anywhere? (I am fine with having a http://www.website.wordpress.com url while I am developing) What are my options to working and showing my development work after following the process above.
I am a complete newbie but willing to learn, a quick tutorial on that process and options would be greatly appreciated. Great work so far and thank you for all the resources you guys provide.
Thomas
*facepalm* There is a link just above to resolve the problem. Sorry about that! Thanks again for this great tutorial!