Po latach budowania witryn WordPress nauczyliśmy się, jak ważne jest posiadanie lokalnej konfiguracji WordPress na komputerze.
Posiadanie WordPressa na osobistym komputerze pozwala eksperymentować z nowymi funkcjami bez narażania witryny na żywo, zagłębiać się w rozwój WordPressa, a nawet tworzyć całe witryny internetowe przed ich uruchomieniem. To jak prywatna piaskownica dla wszystkich projektów WordPress.
Jeśli jesteś użytkownikiem systemu Windows, istnieje wiele sposobów na skonfigurowanie WordPressa lokalnie. Zawęziliśmy je jednak do dwóch najłatwiejszych metod. W tym przewodniku pokażemy, jak łatwo zainstalować WordPress na komputerze z systemem Windows, niezależnie od używanej wersji.
Dlaczego warto zainstalować WordPress na Windows?
Jeśli jesteś użytkownikiem systemu Windows, instalacja WordPressa lokalnie na komputerze oferuje kilka korzyści.
Lokalna instalacja WordPress tworzy środowisko testowe, które nie ma wpływu na działającą witrynę. Ta konfiguracja, często nazywana serwerem lokalnym lub hostem lokalnym, jest osobistym placem zabaw dla WordPressa.
Programiści WordPress regularnie używają lokalnych instalacji do swojej pracy. Mogą na przykład używać ich do eksperymentowania z nowymi wtyczkami lub motywami lub testowania witryny przed aktualizacją do edytora bloków Gutenberg.
Ale nie jest to rozwiązanie tylko dla profesjonalistów. Jeśli dopiero zaczynasz przygodę z WordPressem, lokalna konfiguracja jest idealna do nauki. Możesz odkrywać funkcje, testować motywy i wtyczki oraz swobodnie eksperymentować bez obawy o uszkodzenie działającej witryny.
Ważne jest, aby pamiętać, że po zainstalowaniu WordPressa lokalnie w systemie Windows, tylko ty możesz zobaczyć witrynę. Jeśli chcesz utworzyć publiczną witrynę internetową, będziesz potrzebować nazwy domeny i hostingu.
Technicznie rzecz biorąc, można zainstalować WordPressa na Windowsie za pomocą XAMPP, a my napisaliśmy już o tym poradnik.
Biorąc to pod uwagę, znaleźliśmy 2 jeszcze prostsze sposoby niż XAMPP na skonfigurowanie lokalnego środowiska WordPress, dzięki czemu są one idealne dla początkujących lub użytkowników, którzy muszą szybko utworzyć lokalną witrynę. Możesz kliknąć poniższy link, aby przejść do dowolnej metody, która Cię interesuje:
Metoda 1: Zainstaluj WordPress na Windows przy użyciu Studio (szybko i prosto)
W przypadku pierwszej metody użyjemy Studio. Jest to lokalne oprogramowanie WordPress stworzone przez Automattic, firmę, która zarządza i prowadzi WordPress.com, który jest narzędziem do tworzenia stron internetowych opartym na oprogramowaniu WordPress.
Omówimy tę metodę jako pierwszą, ponieważ jest ona znacznie szybsza i prostsza do naśladowania, dzięki czemu jest idealna dla zupełnie początkujących.
Najpierw należy otworzyć stronę Studio by WordPress.com. Następnie kliknij przycisk “Pobierz dla Windows”.
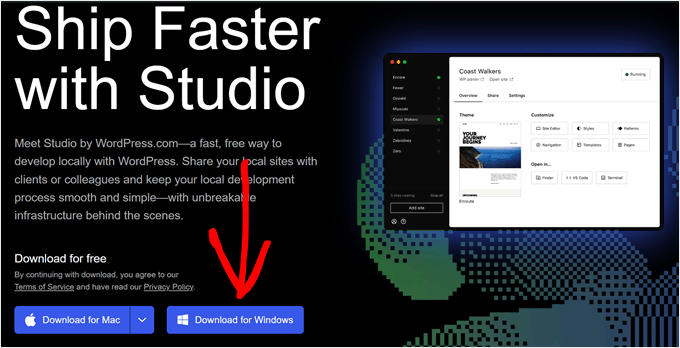
Gdy to zrobisz, po prostu otwórz pobrany plik, aby rozpocząć instalację.
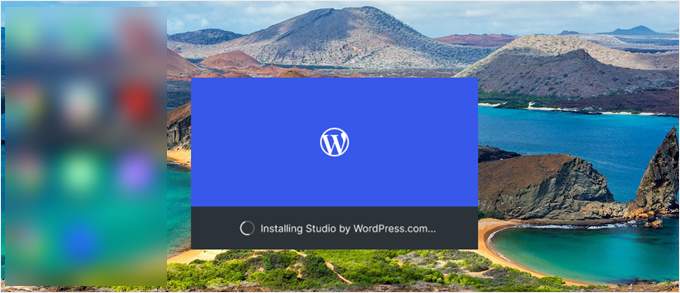
Pojawi się wyskakujące okienko z informacją, że aplikacja jest instalowana.
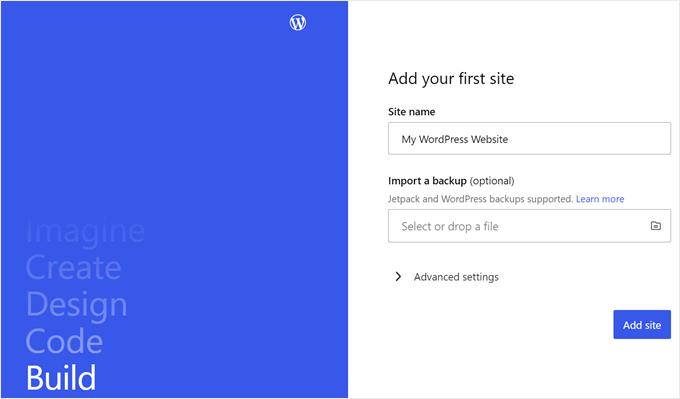
Po wykonaniu tej czynności można dodać pierwszą witrynę.
Aby to zrobić, wystarczy wpisać nazwę nowej lokalnej witryny WordPress i kliknąć “Dodaj witrynę”. Możesz nazwać witrynę w dowolny sposób, o ile pomoże ci to łatwo ją zidentyfikować.
Powinieneś teraz zobaczyć lokalny kokpit witryny WordPress.
Aby uzyskać dostęp do kokpitu WordPress i edytować swoją witrynę, wystarczy kliknąć przycisk “Start” w prawym górnym rogu. Spowoduje to udostępnienie lokalnej witryny na komputerze.
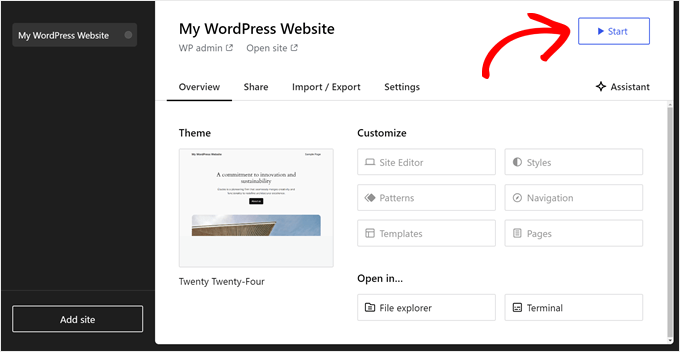
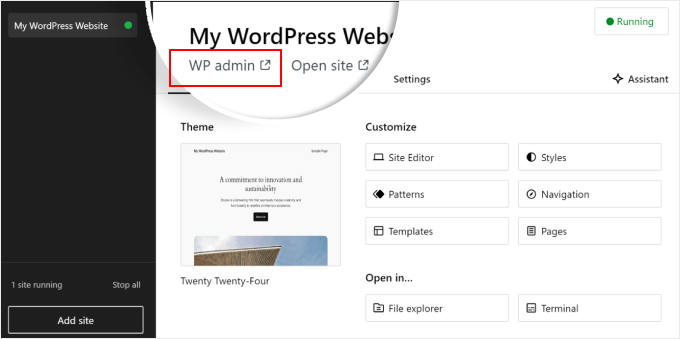
Gdy przycisk “Start” zmieni się na “Running”, możesz kliknąć link “WP Admin” w lewym górnym rogu strony.
Spowoduje to przejście do lokalnej strony administracyjnej WordPress.
I to prawie wszystko, jeśli chodzi o konfigurację. Przyjrzyjmy się innym ustawieniom, które mogą być niezbędne podczas tworzenia lokalnej witryny.
Jak widać na karcie “Przegląd”, można natychmiast uzyskać dostęp do menu edytora pełnej witryny WordPress bezpośrednio z kokpitu Studio. Możesz także kliknąć “Eksplorator plików”, aby otworzyć foldery i pliki witryny WordPress oraz kliknąć “Terminal”, aby zarządzać witryną za pomocą WP-CLI.
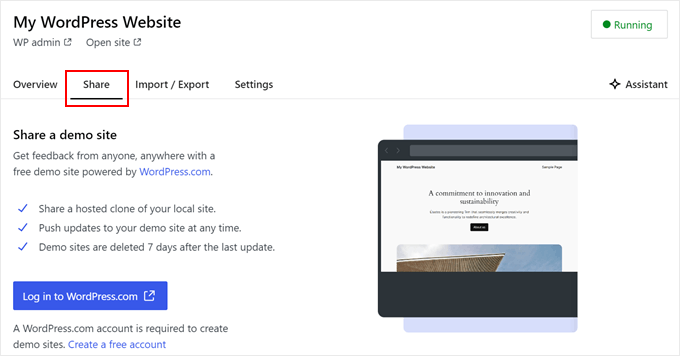
Jeśli przejdziesz do karty “Udostępnij”, możesz zalogować się na swoje konto WordPress.com, sklonować lokalną witrynę i przesłać ją na serwery WordPress.com. Spowoduje to tymczasowe udostępnienie sklonowanej witryny online, co jest przydatne do udostępniania witryn demonstracyjnych klientom lub członkom zespołu.
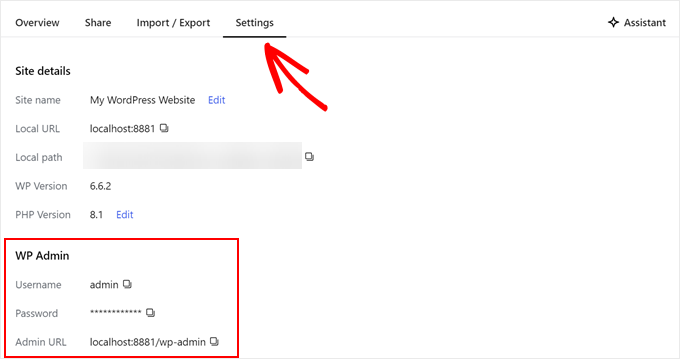
Czasami możesz chcieć zalogować się do swojej lokalnej witryny bezpośrednio przez przeglądarkę zamiast używać Studio. W takim przypadku musisz znać swoje dane uwierzytelniające wp-admin.
Aby je znaleźć, możesz przejść do karty “Ustawienia” i znaleźć tam swoją nazwę użytkownika administratora WordPress, hasło i adres URL logowania.
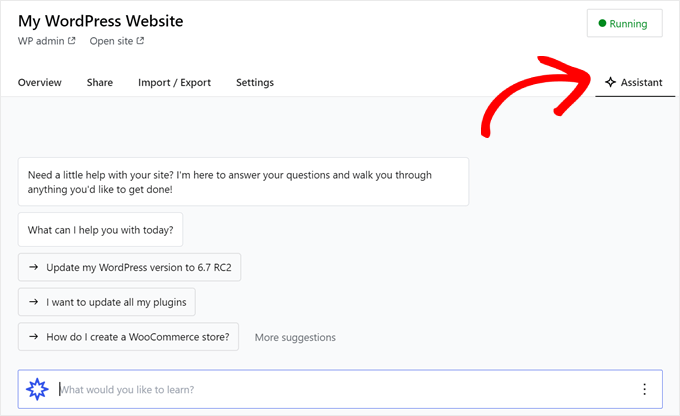
Kolejną ciekawą funkcją Studio jest wbudowany chatbot AI, z którym można się komunikować, klikając przycisk “Asystent”.
Tutaj możesz poprosić Studio o pomoc w takich zadaniach, jak aktualizacja wszystkich wtyczek jednocześnie, aktualizacja rdzeni wersji WordPress lub utworzenie kodu dla niestandardowego bloku.
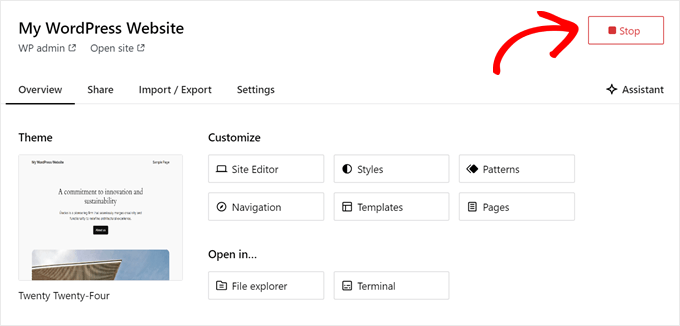
Po zakończeniu pracy nad lokalną witryną wystarczy najechać kursorem na przycisk “Running” w prawym górnym rogu, aż pojawi się napis “Stop”.
Następnie kliknij przycisk, aby zatrzymać witrynę.
Jedną z wad Studio jest to, że nie można skonfigurować środowiska WordPress według własnych upodobań. Oznacza to, że musisz korzystać z wersji PHP, serwera WWW i bazy danych, które zostały dla Ciebie wstępnie wybrane.
Może to być wadą, jeśli chcesz przetestować swoją witrynę lub wtyczkę w określonych konfiguracjach serwera.
Jeśli potrzebujesz większej kontroli nad lokalnym środowiskiem WordPress lub musisz dopasować lokalną konfigurację do określonej konfiguracji serwera na żywo, możesz sprawdzić następną metodę za pomocą Local WP.
Metoda 2: Zainstaluj WordPress w systemie Windows przy użyciu lokalnego WP (bardziej konfigurowalny)
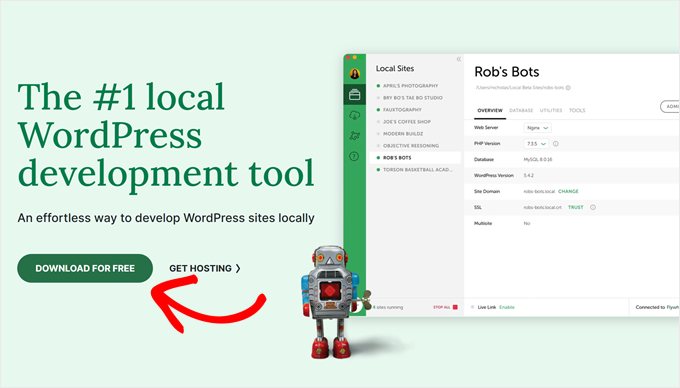
Najpierw należy pobrać i zainstalować oprogramowanie Local WP na twoim komputerze z systemem Windows. Wystarczy przejść do witryny internetowej Local WP i kliknąć przycisk “Pobierz za darmo”.
Następnie pojawi się wyskakujące okienko, w którym należy wybrać platformę. Wybierz “Windows” z rozwijanego menu.
Następnie możesz wprowadzić swoje dane, takie jak imię i nazwisko, służbowy adres e-mail i numer telefonu, aby pobrać oprogramowanie.
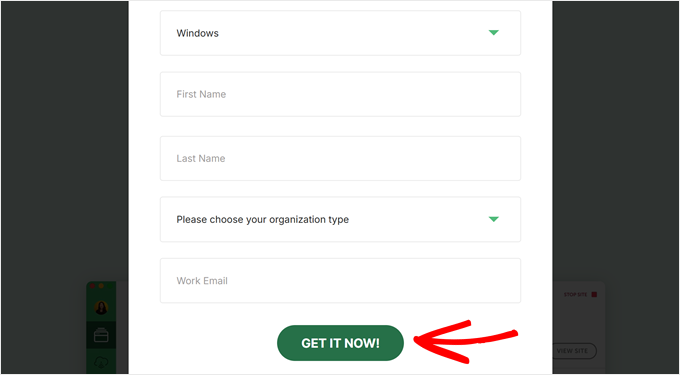
Po wpiszeniu danych wystarczy kliknąć przycisk “Pobierz teraz”.
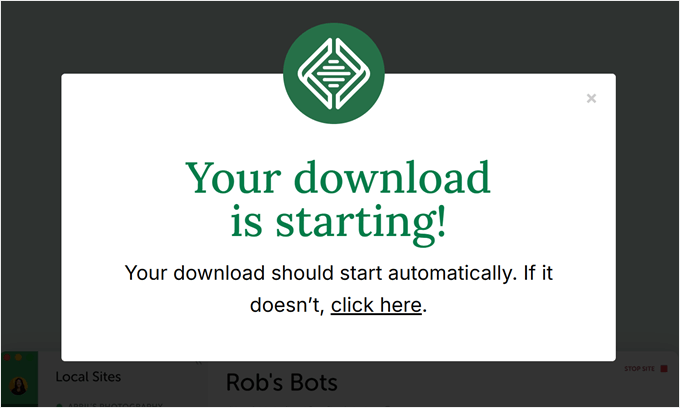
Następnie oprogramowanie zostanie automatycznie pobrane na komputer. W przeciwnym razie możesz kliknąć łącze “kliknij tutaj”, aby rozpocząć pobieranie.
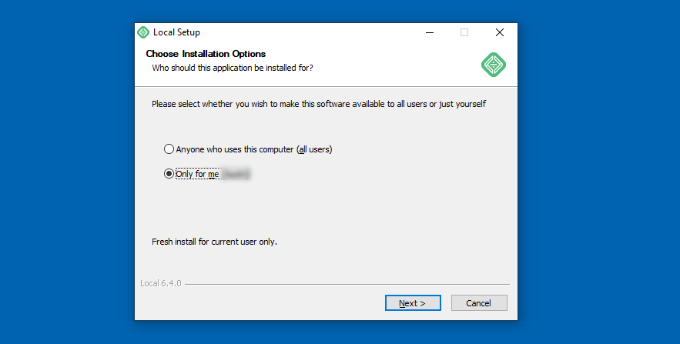
Po pobraniu pliku należy uruchomić kreator konfiguracji.
Teraz musisz wybrać, czy chcesz zainstalować oprogramowanie dla wszystkich użytkowników, czy tylko dla siebie.
Po wybraniu opcji kliknij przycisk “Dalej”.
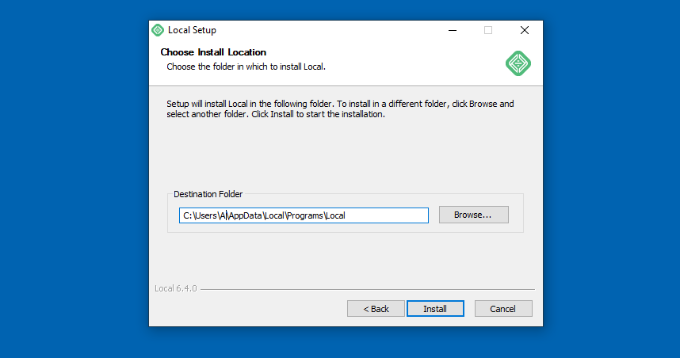
W następnym kroku można wybrać “Katalog docelowy”, w którym zostanie zainstalowane oprogramowanie.
Wystarczy kliknąć przycisk “Przeglądaj”, aby ustawić ścieżkę, a następnie kliknąć przycisk “Zainstaluj”.
Oprogramowanie WP zostanie teraz zainstalowane na twoim komputerze z systemem Windows.
Po zakończeniu można zaznaczyć pole wyboru “Uruchom lokalnie” i kliknąć przycisk “Zakończ” w kreatorze konfiguracji.
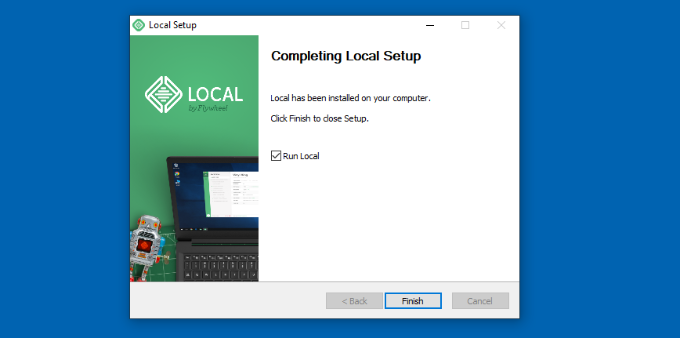
Oprogramowanie uruchomi się teraz na twoim urządzeniu z systemem Windows.
Następnym krokiem jest dodanie nowej lokalnej strony internetowej. Aby to zrobić, wystarczy kliknąć przycisk plusa “+” u dołu.
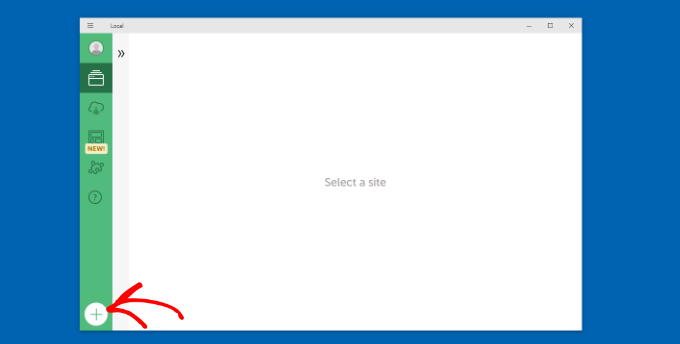
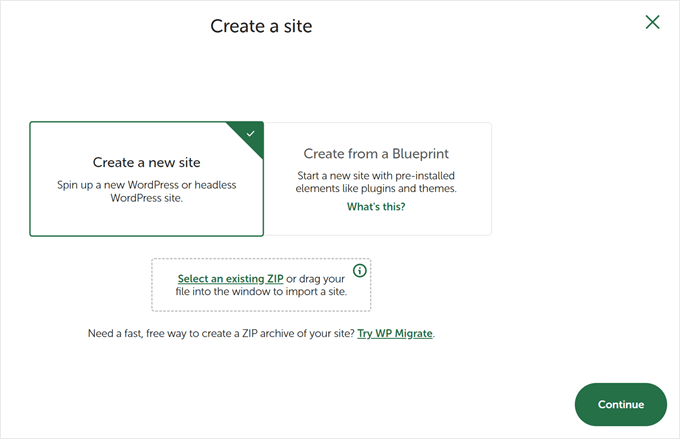
Następnie można utworzyć witrynę w oprogramowaniu Local.
Wybierz opcję “Utwórz nową witrynę” i kliknij przycisk “Kontynuuj”. Istnieją również opcje tworzenia witryny z planu lub istniejącego pliku witryny, ale dla celów demonstracyjnych wybierzemy pierwszą opcję.
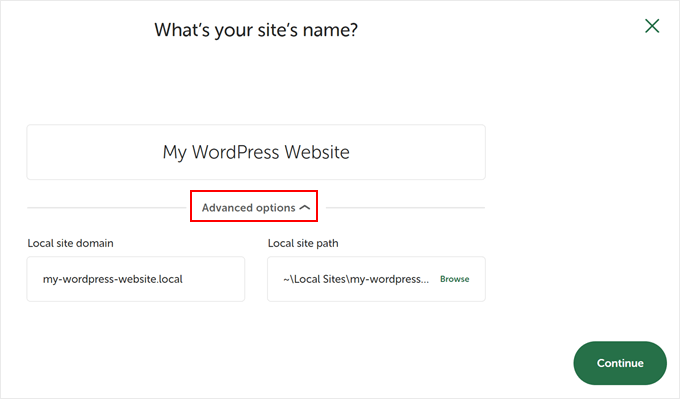
Następnie możesz wprowadzić nazwę swojej lokalnej witryny, na przykład “Moja witryna WordPress”.
Istnieją również opcje zaawansowane, w których można wprowadzić lokalną domenę witryny i lokalną ścieżkę witryny. Domyślnie domena będzie używać tytułu witryny, ale oddzielonego myślnikami.
Po zakończeniu kliknij przycisk “Kontynuuj”.
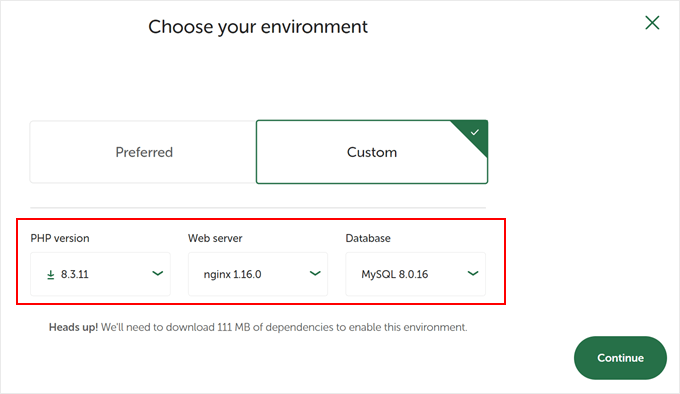
Następnie należy wybrać środowisko dla twojej lokalnej witryny internetowej.
Możesz użyć środowiska “Preferowane”, w którym oprogramowanie automatycznie wybierze wersję PHP, serwer WWW i wersję MySQL. Z drugiej strony można również wybrać opcję “Niestandardowe” i wprowadzić szczegóły środowiska.
Local WP oferuje najnowsze wersje PHP. Jeśli chodzi o serwer WWW, można wybrać między Nginx lub Apache. Możesz także wybrać MySQL lub MariaDB dla baz danych.
Należy pamiętać, że niektóre wersje PHP, serwera WWW i bazy danych wymagają pobrania pewnych zależności, aby działały poprawnie.
Następnie możesz wprowadzić nazwę użytkownika WordPress i hasło do swojej lokalnej witryny. Ponadto istnieje również opcja wyboru adresu e-mail WordPress, na który będziesz otrzymywać wszystkie powiadomienia e-mail.
Poza tym istnieje opcja zaawansowana, w której oprogramowanie zapyta, czy masz sieć WordPress multisite. Jeśli nie, wystarczy kliknąć “Nie”.
Po wpiszeniu tych danych wystarczy kliknąć przycisk “Dodaj witrynę”.
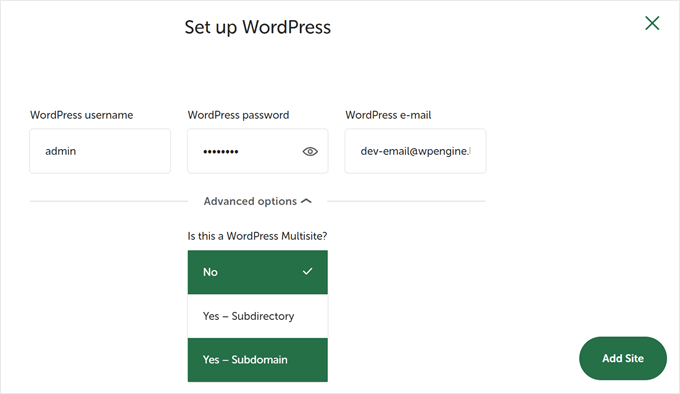
Oprogramowanie zainstaluje teraz WordPress i skonfiguruje twoją witrynę internetową.
Aby uruchomić lokalną witrynę, kliknij przycisk “Uruchom witrynę” w prawym górnym rogu.
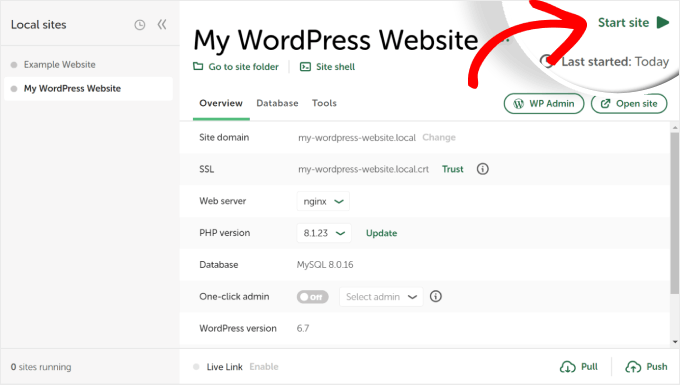
Następnie kliknij przycisk “WP Admin”, a zobaczysz stronę logowania administratora WordPress.
Wystarczy wprowadzić nazwę użytkownika i hasło wprowadzone wcześniej podczas konfigurowania lokalnej strony internetowej, a następnie kliknąć przycisk “Zaloguj się”.
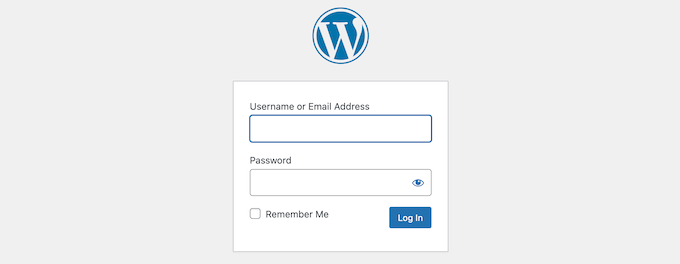
Teraz możesz edytować swoją regionalną witrynę internetową na komputerze z systemem Windows.
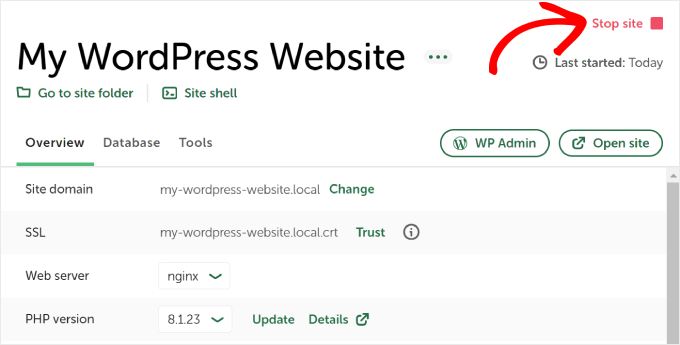
Po zakończeniu nie zapomnij zatrzymać witryny internetowej z poziomu oprogramowania WP, klikając przycisk “Zatrzymaj witrynę”.
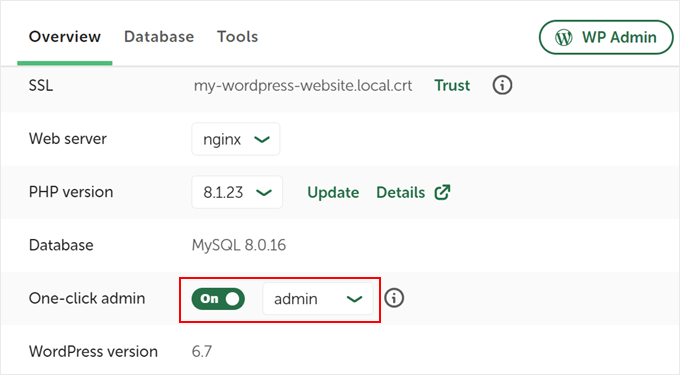
Pro Tip: Jeśli chcesz pominąć proces logowania, możesz włączyć logowanie administratora jednym kliknięciem w Local WP.
Aby to zrobić, wystarczy wrócić do lokalnego kokpitu WP i przełączyć przycisk “One-click admin”, aż pojawi się napis “On”. Następnie w rozwijanym menu wybierz użytkownika administratora, który może korzystać z tej funkcji logowania jednym kliknięciem.
Alternatywa: Użyj WordPress Playground do testowania motywów, wtyczek i nie tylko
WordPress Playground to innowacyjne narzędzie, które pozwala eksperymentować z WordPressem bezpośrednio w przeglądarce internetowej. Jest to wirtualna piaskownica, w której można wypróbować nowe motywy, wtyczki i funkcje WordPress bez wpływu na rzeczywistą witrynę.
WordPress Playground różni się od lokalnego środowiska WordPress na kilka kluczowych sposobów.
Po pierwsze, nie wymaga instalacji na komputerze i resetuje się po każdym użyciu, w przeciwieństwie do trwałych konfiguracji lokalnych. Dostęp do niej można uzyskać z dowolnego urządzenia z przeglądarką, podczas gdy instalacje lokalne są powiązane z jednym komputerem.
Podczas gdy WordPress Playground jest idealny do szybkich testów i nauki, lokalne środowisko WordPress na komputerze z systemem Windows oferuje większą elastyczność w przypadku długoterminowych projektów rozwojowych.
Aby uzyskać szczegółową instrukcję, zapoznaj się z naszym przewodnikiem na temat korzystania z WordPress Playground w przeglądarce.
Zainstalowałem WordPress na moim komputerze z systemem Windows, co teraz?
Teraz, gdy masz już WordPressa na swoim komputerze, oto kilka rzeczy, które możesz zrobić:
- Poznaj podstawowe wskazówki i triki WordPress, aby lepiej korzystać ze swojej witryny.
- Wypróbujróżne motywy WordPress, aby zobaczyć, jak może wyglądać Twoja witryna.
- Zainstaluj i przetestuj niezbędne wtyczki WordPress, aby dodać nowe funkcje do swojej witryny.
- Dowiedz się, jak samodzielnie poprawiać typowe błędy WordPressa.
- Wypróbuj różne kreatory stron typu “przeciągnij i upuść “, aby Twoja witryna wyglądała ładnie.
- Dowiedz się, jak zresetować hasło administratora WordPress na localhost, aby odzyskać dostęp do swojej witryny.
- Skonfigurujzautomatyzowane przepływy pracy, aby ułatwić zarządzanie witryną.
- Dowiedz się więcej o bezpieczeństwie WordPress, aby chronić swoją witrynę przed hakerami.
- Przenieśswoją lokalną witrynę WordPress na serwer live, gdy będziesz gotowy, aby udostępnić ją wszystkim.
Mamy nadzieję, że ten artykuł pomógł ci dowiedzieć się, jak zainstalować WordPress lokalnie na komputerze z systemem Windows. Możesz również zapoznać się z naszym artykułem o tym, jak zainstalować WordPress lokalnie na komputerze Mac i naszym przewodnikiem po tworzeniu witryny przejściowej WordPress.
If you liked this article, then please subscribe to our YouTube Channel for WordPress video tutorials. You can also find us on Twitter and Facebook.


Moinuddin Waheed
This is the best method for anyone who just want to learn and gets hands dirty before actually making a big debut in the WordPress industry.
I have used both the methods local by flywheel and wampserver for local installation of WordPress.
I have also used xampp server for wordpress installation and have experimented with many themes and plugins.
Konrad
Everything went smoothly, no issues with installation, thanks to the simple yet effective guide. Much appreciated!
WPBeginner Support
Glad to hear it worked for you
Admin
saajina
Hi. i am new to WordPress and i am trying to install WampServer. i downloaded WampServer from the link you mentioned above. and i tried to install after download , i choose english language after that i accepted the agreement. after that when i click on the next button to install a pop come by saying this installation can only work if the above vc++ package is installed ……. and please cancel the installation . i don’t know what to do next. please help me
WPBeginner Support
It would depend on which VC++ package is missing but you should be able to go to the Microsoft website and search for the Visual C++ library that WAMP needs to download and install it.
Admin
Jiří Vaněk
Thank you for the guide. Usually, I’ve always tested WordPress, for instance, on services like instawp.com, or I’ve set up everything myself in some virtualization tool on a Linux distribution. This looks quite simple.
WPBeginner Support
Glad you found this a helpful option
Admin
sieutonghop
Is Local WP website data guaranteed?
WPBeginner Support
I don’t think I understand what you’re asking, the files and your content are stored on your computer.
Admin
kiemtienspeed
If using Local WP, where will the website data be saved? Can you explain more clearly?
WPBeginner Support
The data would be stored in the database and the files would be saved in the site’s folder.
Admin
Jiří Vaněk
It’s practically the same as with WordPress on shared hosting. The database can then be exported via PHPMyAdmin, and data via an FTP client (FTP data is stored in a folder locally on the computer). Alternatively, a migration plugin can be used, just like on the server.
Koweh
Hi, please is the a video explainable for the above steps to install Install WordPress on Windows Using WampServer?
WPBeginner Support
Not at the moment but we will consider that for future videos!
Admin
M Sohail
this article is very helpful to me.
Thanks to all Team
WPBeginner Support
Glad to hear our post was helpful!
Admin
Danielle
Hi, very helpful article. How would you do this for an existing WordPress site? (I’m hosting on Hostinger and selected WordPress to construct my site). I already have a domain name and login for WordPress as well.
WPBeginner Support
To move a currently active site to a locally installed WordPress site, you would want to take a look at our guide below!
https://www.wpbeginner.com/wp-tutorials/how-to-move-live-wordpress-site-to-local-server/
Admin
Joseph Lewinski
Fabulous instruction set. I installed WAMP Server simply and without a hitch. There was only one very minor “glitch” in your instructions, which were easy enough to figure out. When the instructions explain the installation of WordPress proper, it says, “Paste the ‘wordpress’ folder into the C:\wamp64\www folder.”, but the IMAGE shows you installing it into the C:\wamp64 folder. Like I said, easy enough to figure out (I used your WORDS, NOT the IMAGE).
THANK YOU for this! I’m subscribing NOW!
WPBeginner Support
Glad our guide was helpful and thank you for pointing that out!
Admin
Duncan Philps-Tate
Hi useful article. The only thing I’m aware of not seeing is anything about when to use Local WP and when to use WAMP. Now I’ve got a choice and I don’t know which is better for me.
Local WP sounds more straightforward and with less to do – but the test doesn’t say whether it also installs Apache, PHP, MySQL (which the WAMP text does say).
On the other hand, WAMP sounds like you have to do more getting it going (just compare the number of paragraphs it needs) but apart from (possibly) adding choice over Apache, PHP, MySQL, what does it give you that Local WP doesn’t?
Hope you can answer this easily.
WPBeginner Support
WAMP has been around longer and was our original recommendation, Local WP was created to make it easier for those just starting out and both will install what is needed to run a WordPress site on your computer.
Admin
Duncan Philps-Tate
Thanks – useful
Seyi
Thanks for this… really helpful
WPBeginner Support
Glad our article was helpful!
Admin
Kylie
I have installed wampserver and have a green light. When I right click I can not find any button called phpadmin. And when I type localhost/phpadmin in my browser I am getting this message.
The requested URL was not found on this server.
Apache/2.4.51 (Win64) PHP/7.4.26 Server at localhost Port 80
WPBeginner Support
You would want to left-click on WAMP’s icon for phpmyadmin, when you go through that route it should show what your URL is set to if it is not properly set under localhost.
Admin
Layla
I’ve done this and started work on one pc but this now needs to go for repair and will be away a while. If I am to install this on a second pc, what files do I need to transfer over so I can continue working on the same website on the other pc? Feeling a bit dumb here that I can’t figure it out myself.
WPBeginner Support
We would recommend following our guide below for transferring your site to a different computer to continue working on it. While the article is for live sites, the method should still work for your local installation.
https://www.wpbeginner.com/wp-tutorials/how-to-move-live-wordpress-site-to-local-server/
Admin
Layla
Thank you so much! That worked perfectly and was so simple!
WPBeginner Support
Glad we could help!
Renata
I installed Wamp Server and C++ Redistributable 2012, 2013 and 2015 but when I try to open it it opens 4 black windows and then it shuts down. What should I do
WPBeginner Support
You would want to check in the bottom right with your hidden icons, WAMP does not have a window pop up by default but would add an icon there for your options with WAMP
Admin
Hosea
Straightforward and to the point guide. Followed it and achieved exactly what I wanted. Great and helpful write-up.
WPBeginner Support
Glad you found our guide helpful
Admin
Ibrahim Yusuff
Thanks for this invaluable guide. The issue of having is with the wamp download. The language is in French and each time i try to change it it goes back to french which i do not understand. i filled all the necessary information but to click on download it changes back to french. pls help me out on this
WPBeginner Support
They currently have a popup that is French when selecting the file to download but at the end of the first paragraph you should see a link to download directly without having to deal with the popup
Admin
prilla kobugabe
hello, i need some help. when i put this localhost/mysite/ in my web browser it responds negatively saying
“The requested URL was not found on this server.
Apache/2.4.41 (Win64) PHP/7.3.12 Server at localhost Port 80”
WPBeginner Support
If you have restarted your computer since installing WAMP you would want to ensure that WAMP is running as that is the most common cause of that specific error.
Admin
Ronnie Ferrer
You are legend guys! Thanks.
Francis Guchie
Thank you so much for this very nice article for beginners
prakoo
api-ms-win-crt-string-l1-1-0.dll is missing from your computer it shows error?
WPBeginner Support
You would want to ensure you install Visual C++ Pro for the most common solution to that error.
Admin
Melissa
Hi – I have WAMP installed locally on my Windows 10 machine running PHP version: 7.3.12. I want to upgrade to PHP 7.4 – do I need to reinstall WAMP or can I update PHP separately?
WPBeginner Support
You would want to click on the WAMP icon, and check under PHP, Version and depending on when you installed WAMP there should be the option to change versions by clicking on the version you want to use.
Admin
melissa
thanks – this was perfect advice!
Holly
Thanks for this article! It is the best and most straight-forward one I’ve come across, it’s very helpful and detailed. Keep up the great work! As a beginner, I really appreciate it.
WPBeginner Support
Glad you found our guide helpful
Admin
Jules Ivan
This is awesome! Thank you for making this article!
WPBeginner Support
Glad you found our guide helpful
Admin
Ben
While installing, I got a System error that says ”The code execution cannot proceed because MSVCR120.dll was not found. Reinstalling the program may fix this problem'”
How can I get this done please
WPBeginner Support
You need to install Visual C++ Redistributable that we link to in the article
Admin
Diya
I have installed wordpress in wamp and completed my first website. I have got another project now. So for the second website how should I start?Should I install wordpress again in a second “mysite2” folder?
WPBeginner Support
You can certainly do that for the most common method for creating a new site.
Admin
saheed
im receiving myssqld.exe- system error. how do i fix it
WPBeginner Support
You would want to ensure you installed Visual C++ Redistributable
Admin
Tom Bauer
WAMP64 will not install on a win7 64 machine.
WPBeginner Support
Unless we hear otherwise, you can install it on Windows 7 still, depending on the error you are running into, you may need to reach out to WAMP’s support.
Admin
Paul
Great instructions, thanks.
Everything installed fine, just have a problem this morning in trying to log into the browser. Every setting I have tried hasn’t worked.
I know I am being thick but could you confirm what I should be typing in the browser to access the program.
Thanks
WPBeginner Support
As we state in the article, it should be something similar to localhost/mysite. You would also want to ensure WAMP is running for the most common reason for that issue.
Admin
Peter
I was having similar issue as others. All went well until I got to the point with Apache not running. The issue was with Port 80 it was used by something else (not skype) so I went to Tools > Use other port than 80 I added the port 8080. Then it all worked however then when you want to access your website you can’t use localhost/mysite/ but localhost:8080/mysite/ since you changed the default port.
I didn’t find this in the comments. Maybe it will help someone.
WPBeginner Support
Thanks for sharing what helped you with this issue
Admin
Bas
Hi, thanks for the tutorial. I completed it, and it works like a charm. But now my question is: how do I get my “real” live website data in the local test environment? Is there some way to export that and import it into the local test environment?
WPBeginner Support
For that, you would want to take a look at our article below:
https://www.wpbeginner.com/wp-tutorials/how-to-move-live-wordpress-site-to-local-server/
Admin
Mahima Pandey
here i have downloaded the wordpress file and done everything according to the given instruction . but lastly stuck in the localhost address bar
localhost/servername in the internet explore has to be typed to get to wordpress. but what to be type for google ,firefox. pls lhelp me with this its really urgent.
WPBeginner Support
You should be able to type that same address on any internet browser to see the site on your local computer. If you wanted to have your site found online, you would want to look into a domain and hosting provider.
Admin
Konstantinos Paturas
Thank you so much.
WPBeginner Support
You’re welcome
Admin
Armel
Thanks for this useful article. I successfully installed WordPress using Wamp. But, I get this message. “Installation failed: there has been a critical error on your website. Please check your site admin email inbox for instructions. Learn more about debugging in WordPress.”
Please, how can i fix it ?
WPBeginner Support
For that error, you would want to take a look at our article below:
https://www.wpbeginner.com/wp-tutorials/how-to-fix-the-wordpress-white-screen-of-death/
Admin
Hoat Le
Dear WPBeginner Support;
I read your tut very carefully, and didn’t see you mention about VirtualHost in WampServer, so I don’t know if I have to create a Virtual Host for my test site.
WPBeginner Support
It can make URLs closer to what you would expect from a site but it is not a requirement and can be difficult for beginners to set up.
Admin
Shani
Hello,
Thank you so much for this article!
You’ve really helped me!
I’m interested to know now how to login to my site when I go on wordpress.
WPBeginner Support
If you can navigate to your WordPress site then you would add /wp-admin to the end, we cover a few more options in our article below that you can also try:
https://www.wpbeginner.com/beginners-guide/how-to-find-your-wordpress-login-url/
Admin
mimi
I followed the process accordingly but when i click on the green WAMP icon in order to create a blank MySQL database nothing pops up
WPBeginner Support
The most common reason for that would be if you didn’t install the C++ redistributable if you have not done that.
Admin
Aminat
Thanks a lot, really helpful
WPBeginner Support
You’re welcome
Admin
Dav
Hi,
I have installed as per instructions but I am getting an error trying to log into
ERROR: Failed to set session cookie. Maybe you are using HTTP instead of HTTPS to access phpMyAdmin.
What am I doing wrong?
WPBeginner Support
That is likely a hiccup with either your browser cache or a browser addon, we would recommend clearing your cache or trying to use an incognito browser to see if that helps resolve the issue.
Admin
Dav
Thanks, that works
Nathan Zindikilani
Hi, thank you for the article. when i try to open my local host site i get the following error; There has been a critical error on your website.this is after pasting ‘wordpress’ to www folder. how may i solve this
WPBeginner Support
You would want to ensure the file is unzipped, if it is you may want to try reading a fresh WordPress download to the folder to see if there was a hiccup with your download.
Admin
Spyros
Hi, i need your help please, i follow all the steps in your detailed article but i saw a message “can’t select database We were able to connect to the database server (which means your username and password is okay) but not able to select the test_db database and some other that i believe you know”.
Thanks in advance!
WPBeginner Support
You may want to ensure there are no typos in the database name you set, it looks like it is not able to find a database with the name given.
Admin
Raheel
I am getting “Error establishing a database connection”
Any help here please
WPBeginner Support
For common solutions to that error, you would want to take a look at our article below:
https://www.wpbeginner.com/wp-tutorials/how-to-fix-the-error-establishing-a-database-connection-in-wordpress/
Admin
Steve
Hi,
I have installed WAMP and created a WordPress site on my computer – thanks for your excellent guide. I used “mysite” as in your example to stay consistent with you as I built my software kingdom. Now that things are looking good, is it possible to simply rename the “mysite” folder (which is inside “www” to my preferred name, or is it more complicated than that? I’m trying to avoid starting over. Thanks
WPBeginner Support
We would recommend staying with the format you’ve set up already if possible and once you have hosting ready we would recommend taking a look at our guide below:
https://www.wpbeginner.com/wp-tutorials/how-to-move-wordpress-from-local-server-to-live-site/
Admin
Francesco
Hi,
Can I use this system to test a previous back up I did via the server control panel?
I have a zip file which is a mirror of my directory on the server, including database and WP-admin file.
I would line to test if the backup I have works fine and possible run it on a precioys version of the WP
WPBeginner Support
You would want to check with the tool you are using for the specifics but it should allow you to do what you’re wanting.
Admin
Melissa T
Installed WAMP and WordPress – thanks for the wonderfully detailed instructions! So now it’s time to create the web site — is there a guide on wpbeginner for that?
thank you!
WPBeginner Support
There are many different types of sites so there is no complete guide but for a starting point you may want to take a look at our article below. Step 3 and beyond in the guide should help.
https://www.wpbeginner.com/guides/
Admin
kwestyon
First, thank you so much for the guide! It’s working. Second, is there a way wherein after you create the website, would there a way to view the site after you clicked the published button. Sorry for the dumb question.
WPBeginner Support
If you are logged in, in the top right you should be able to open the dropdown that has your site title, and there you should find a link to view your site.
Admin
Yomi
Hello,
If I install WordPress on a localhost based on the content of this blog, will I be able to use plugins like woocommerce, elementor, astra & kadence?
Thank you.
WPBeginner Support
Yes, installing locally you would be able to use plugins and page builders like those on your site
Admin
Lisa
Hi,
I am at the point where I would put localhost/mysite/ in the browser. I am getting the “404 not found error”.
I named the copy of wordpress to wamp the same and have double checked the address to see if it’s typed in correctly. This still happens, what am I doing wrong?
Thanks!
WPBeginner Support
You would want to ensure you’re not running into the Skype error where it is trying to use port 80 while WAMP is.
Admin
WPBeginner Support
Currently, the WAMP website is down which is why we’ve added a different link and included a note above and are working on updating this article as quickly as we are able
Admin
mark
WAMP link redirects to a different site.