Feature boxes highlight a product or service’s biggest selling points. They are also a great way to present features to new customers so they can decide whether this product or service is right for them.
Over the years, many of our partner brands have used featured boxes to highlight the features of their products. For example, you’ll find them on the WPForms and MonsterInsights websites.
Based on our experience, there are 2 ways of adding them to WordPress. You can use the block editor and list features in different columns. Or, if you’re looking for something more appealing and attractive, then you can use a page builder to design pages with custom feature boxes.
In this article, we will show you how to add feature boxes with icons to your WordPress site.
What Are Feature Boxes With Icons?
Most people won’t read every single word on your WordPress website, especially if a page is very text-heavy.
Instead, visitors will scan the page to find the information they are looking for, fast. This means you need to present important information in a way that’s scannable and engaging, which is why so many websites use feature boxes.
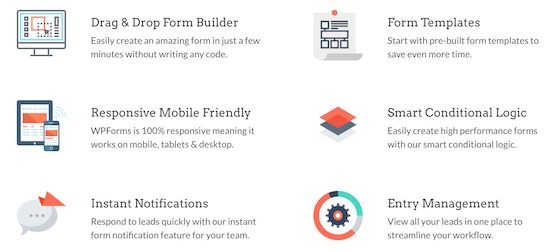
In the following image, you can see how WPForms uses feature boxes to highlight the plugin’s biggest selling points.
You can even add a call to action button so users can learn more about a particular feature.
With that said, let’s show you how to add feature boxes with icons in WordPress. Simply use the quick links below to jump straight to the method you want to use:
Method 1: Add Feature Boxes With Icons Using the WordPress Block Editor (No Plugin Required)
You can add feature boxes with icons to your WordPress site using the standard content editor and column block. This means you don’t need to install a new WordPress plugin, so it’s a quick and easy method.
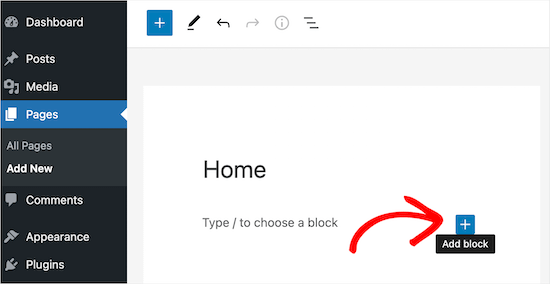
To get started, open the page where you want to add a feature box. Then, click the ‘+’ add block icon.
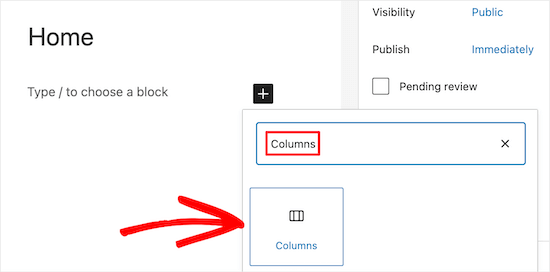
Next, type ‘Columns’ into the search box.
When the right block appears, click to add it to the page.
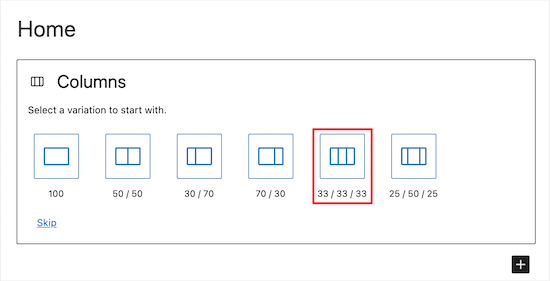
WordPress will now show all the different column blocks. The numbers are how much space each column takes up in the block. For example, ’50/50′ creates two columns that each take up 50% of the available width.
As an example, we will select the’ 33/33/33′ column block since this gives us three columns with equal width, but you can use any layout you like.
After that, you are ready to add icons to the columns.
The easiest way to do this is with featured icon fonts, which are resizable symbols that won’t slow down your website. We recommend using Font Awesome since they have one of the biggest collections of free icons.
Once you’ve added icon fonts in your WordPress theme, it’s easy to show them in your columns using shortcode.
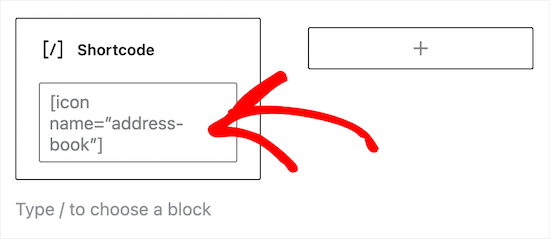
Simply click on the ‘column’s ‘+’ icon and type in ‘Shortcode.’ When the right block shows up, click to add it to your layout.
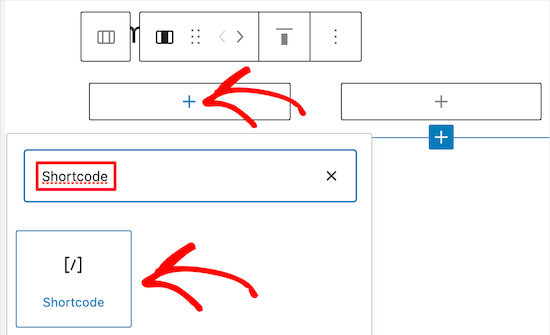
After that, you can enter the following shortcode, but make sure to replace ‘bus’ with the name of the icon that you want to use:
[icon name="bus"]
To see a complete list of available icons, simply go to the Font Awesome icon library.
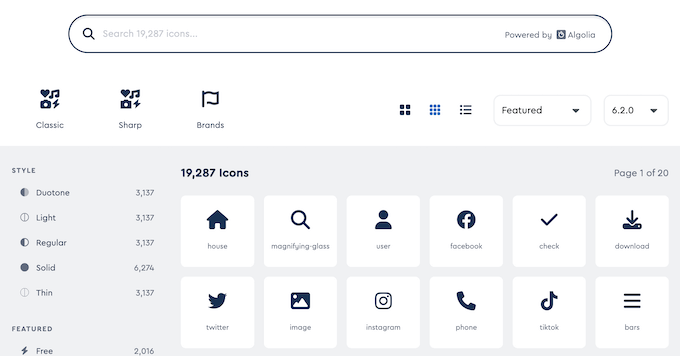
When you find an icon that you like, click it to see that icon’s name.
For example, in the following image, we are looking at an icon called ‘address-book.’
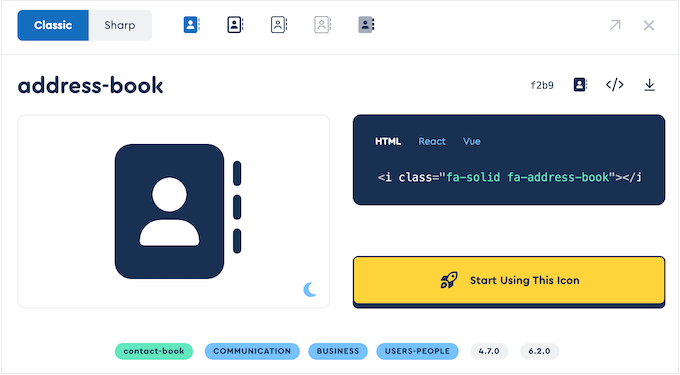
You can now add this name to the shortcode.
To learn more about working with shortcodes, please see our beginner’s guide on how to add a shortcode in WordPress.
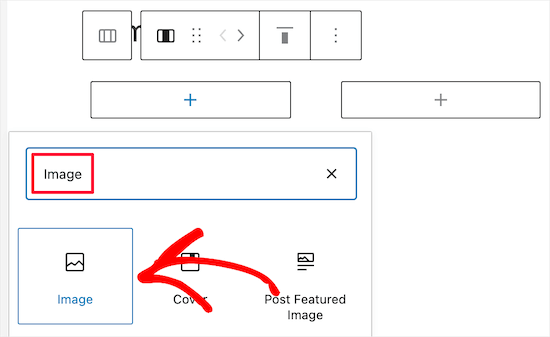
If you prefer to use an image from the WordPress media library, then you can add an image block instead of using an icon font.
To do this, simply click on ‘+’ in the first column and then add an ‘Image’ block instead of a shortcode block.
You can now choose an image from the media library or upload a new file from your computer.
Once you’ve added all your icons, the next step is adding text to the feature box.
To do this, go ahead and click on the ‘+’ button inside the Columns block. Then, add a Paragraph block.
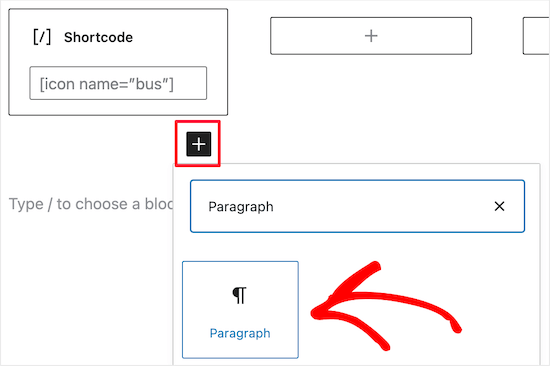
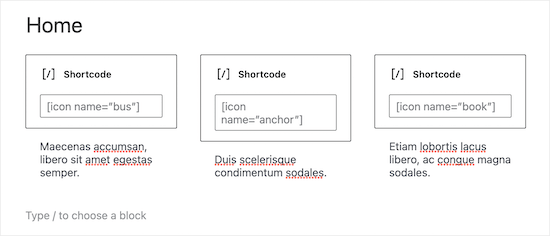
After that, simply type your text into the paragraph block.
You can add icons and text to the other columns by repeating the same process.
Do you want your feature box to have multiple rows?
Simply click the Columns block and then select the three dots in the toolbar. You can then select ‘Duplicate.’
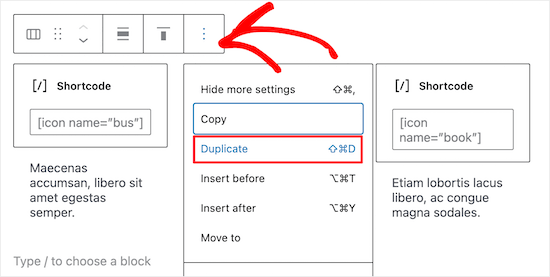
This will create a copy of the Columns block.
Now, simply follow the same process described above to add content to the second row.
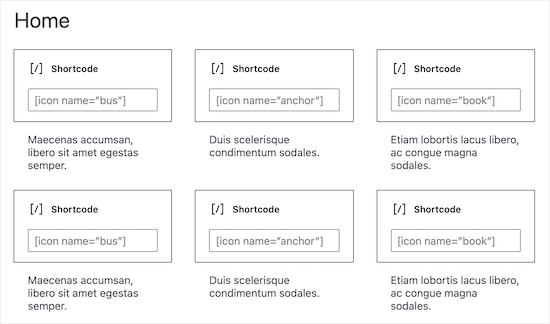
When you are happy with the feature box, you can add other content to the page, such as an image of the product or categories and tags.
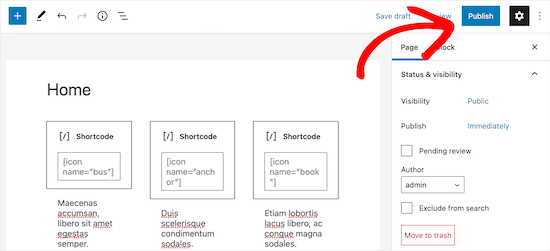
To make the feature box live, just click on the ‘Update’ or ‘Publish’ button.
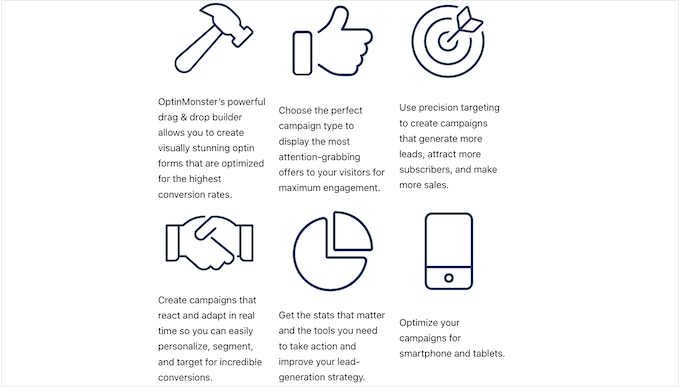
You can now visit your website, blog, or online store to see the feature icon box in action.
Here’s an example of what people will see when they visit your WordPress blog.
Method 2: Add Feature Boxes With Icons Using a Page Builder Plugin (Recommended)
If you want to create a simple feature box, then the WordPress block editor is a good choice. However, if you want to create a more advanced box with a completely custom design, then you’ll need a page builder plugin.
SeedProd is the best WordPress page builder on the market that allows you to create custom pages using a drag-and-drop editor.
SeedProd has over 300+ professionally designed templates you can use to create beautiful pages quickly. It also has an entire library of icons that you can add to your feature boxes with a single click.
Here’s an example of a feature box created using SeedProd’s ready-made blocks and icons.
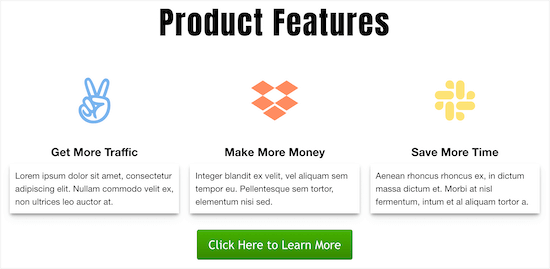
The first thing you need to do is install and activate the SeedProd plugin. For more details, see our beginner’s guide on how to install a WordPress plugin.
Note: There is a free version of SeedProd, but we will be using the Pro version since it has more features. If you use email marketing to promote your products, then SeedProd Pro also integrates with many of the best email marketing services.
Upon activation, go to SeedProd » Settings and enter your license key.
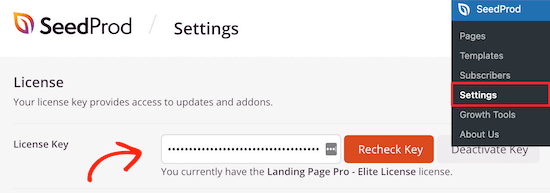
You can find this information by logging in to your SeedProd account.
Choose a Professionally-Designed Template
To get started, go to SeedProd » Landing Pages and click on ‘Add New Landing Page.’
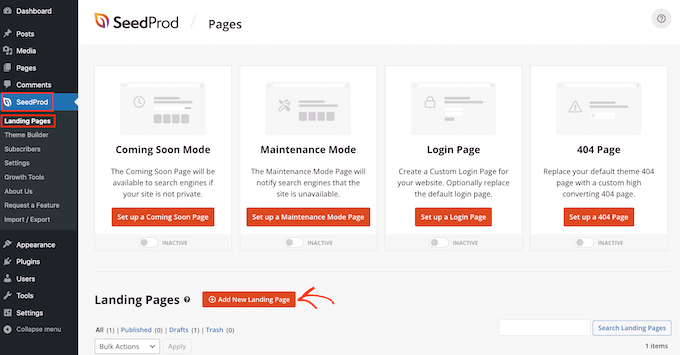
On the next screen, you can choose a template. You can customize all of these templates using SeedProd’s drag-and-drop builder, but it’s still a good idea to choose a template that matches your goals.
All of SeedProd’s templates are organized into different campaign types, such as coming soon and lead squeeze campaigns. You can even use SeedProd’s templates to improve your 404 page.
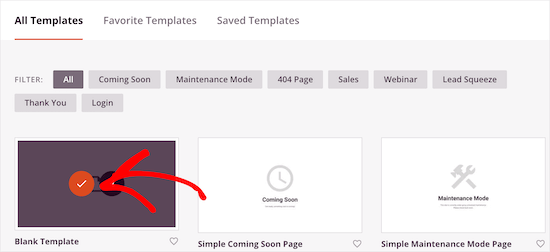
For this guide, we will use the ‘Blank Template,’ but you can use any template you want.
To choose a template, simply hover over it and then click the ‘Checkmark’ icon.
This brings up a popup where you can give the page a name. SeedProd uses the page name in the URL, but you can change this link if you want. For example, you might want to improve your WordPress SEO by including some relevant keywords.
After that, click the ‘Save and Start Editing the Page’ button.
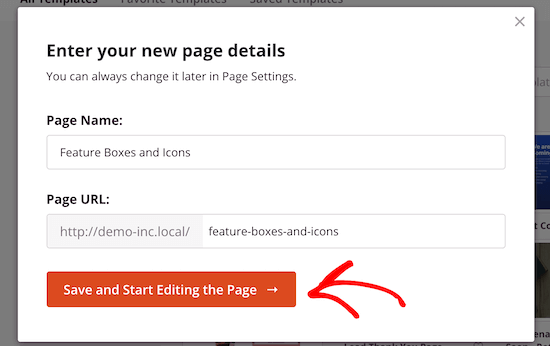
This opens the template in SeedProd’s drag-and-drop page editor.
Design Your Feature Box
Since you are using the blank template, the first step is choosing a layout. To do this, simply click on any of the column layouts.
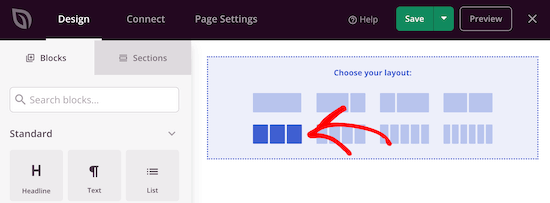
After that, find the ‘Icon’ block in the left-hand menu.
You can now drag and drop this block onto the first empty column.

This adds the Icon block to your layout, with a default icon already selected.
To change the icon, click on it and then select the ‘Choose Image’ button.
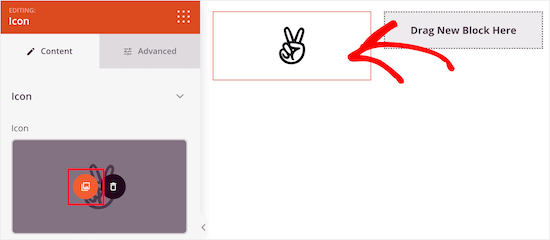
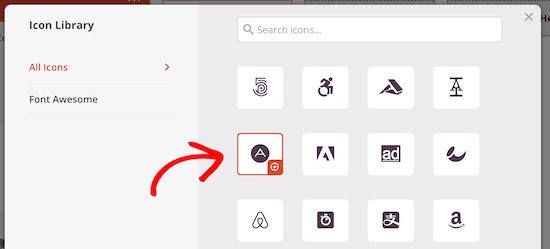
This brings up the icon library with hundreds of icons to choose from. You can use the search bar to look for a specific icon or browse through the entire list.
When you find an image you want to use, simply hover over it and then click the ‘+’ button to add it to your page.
To customize the icon, click to select it.
You can now tweak this icon using the settings in the left-hand menu, including changing its alignment, size, color, and more.
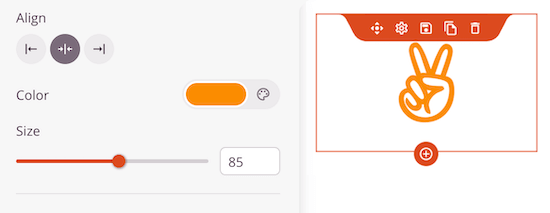
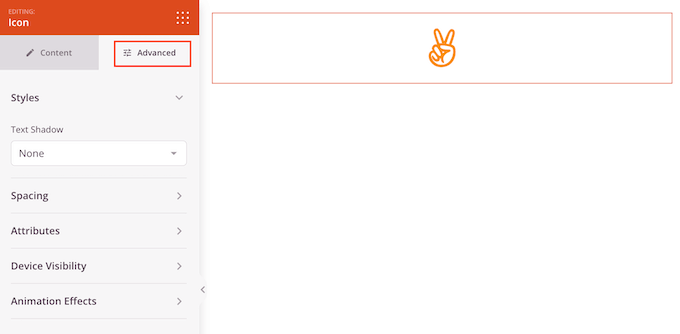
To see more options, go ahead and click on the ‘Advanced’ tab.
Here, you can change the spacing, add a border, and even add CSS animation effects.
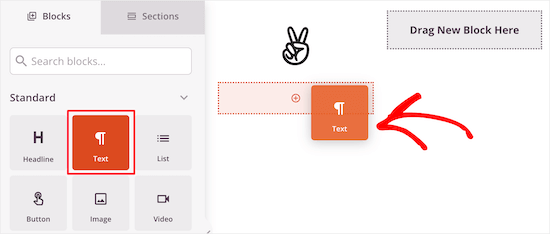
Once you’ve done that, go ahead and add a ‘Text’ block beneath the icon.
Simply find the ‘Text’ block in the left-hand menu, and then place it beneath your icon using drag and drop.
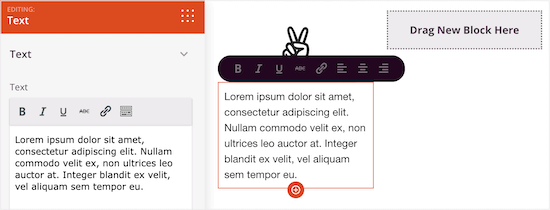
To add some text, click to select the block. You can then type into the small text editor in the left-hand menu.
Here, you can add links, change the text alignment, change the text color, and more.
To customize the other columns, simply follow the same steps as above.
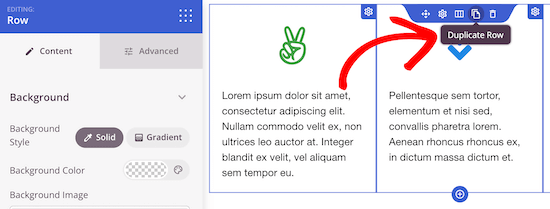
If you want to add another row of feature boxes with icons, then hover your mouse over the section and then click the ‘Duplicate Row’ button.
You can duplicate the section as many times as you want to quickly create more feature boxes with icons.
You can then add new icons and text by following the same process described above.
You can continue working on the page by adding more blocks and customizing those blocks in the left-hand menu.
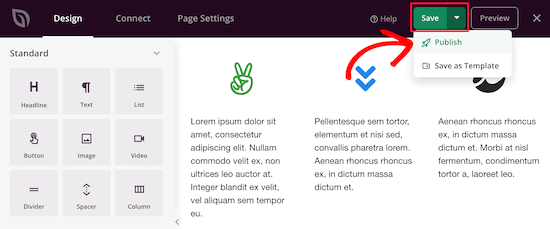
When you are happy with how the page looks, click the ‘Save’ button. You can then select ‘Publish’ to make that page live.
We hope this article helped you learn how to add feature boxes with icons in WordPress. You may also want to see our guide on how to customize colors on your WordPress site and ways to create a mobile-friendly WordPress site.
If you liked this article, then please subscribe to our YouTube Channel for WordPress video tutorials. You can also find us on Twitter and Facebook.


micahel
Really nice article and it help solve my problem. But here is my question.
-How to you create the beautiful sidebars in see in this post such as how to start a blog, website blueprint, I need help with …, useful wordpress guides, Deals & Coupons
-I really need help with creating this sidebars since am reading how to create a blog
Ashutosh Panda
It was an awesome article..
Helped me a lot
Rob
Hey. My icons won’t centre in the column itself. Is there a parameter we can add to ensure it centres? 2 of my icons centre fine, but 2 will only align left, even if I align it to center using formatting in the Wordpress formatting editor (using a plugin).
Thanks.
Hassan NAITALI
Great article, i love it,
so, i have one question, can i make changes to these icons and set them bigger by making change in the parent theme graphicaly and without touching css code ?
Thank you !!
WPBeginner Support
Hi Hassan,
You would still need some CSS.
Admin
Chris
I tried everything that was said in the tutorial but instead of it being set into columns, everything is set under one column. While the icon are set beside the words. I wanted to create three columns and everything in under one another in one column. Why is that that?
Roshni
Thank you. So useful!
Paul
Do you have a tutorial on how to do this with css, html and php without having to use a plugin? I’ve looked around but cannot seem to find anything.
john
How do I get the icon to center over the content?
Evan herman
For anyone using WP SVG Icons that isn’t comfortable writing CSS, you can actually adjust the icon size by passing in a size=”#px” parameter to the wp-svg-icons short code.
Example:
[wp-svg-icons icon=”rocket” wrap=”span” size=”100px”]
That will set the icon to 100px and avoid the step of writing custom CSS. You may still need to adjust the padding.
Andre Page
That was very helpful Evan, thank you!!
Roshni
Thanks, Evan. That worked.
Bobby
Good article about an important feature for your site. However, the plugin recommended has not been updated for 2 years. I am relatively new to WordPress and I was told to steer from plugins that have not been updated in the past year. I am guessing that it depends since you are very knowledgeable about WordPress and highlighted the plugin in this article. Let me know your thoughts.
WPBeginner Support
Bobby, the plugin works fine we tested it. We have also reached out to plugin author so that they can update the plugin.
Ideally you should install plugins that are recently updated. However, there are plenty of WordPress plugins that don’t need updates. Plugin authors feel that since a plugin is not broken and works great, then there is no need for them to update it.
Admin
Bobby
Ok, that’s good to know. Thanks again.
arun
Great post, i am also running wordpress blog. i will apply these icons on my blog thanks for sharing.
Hemang Rindani
Nice article. WordPress is a great enterprise content management solution that can cater to any complex business requirements and develop powerful websites. It contains thousands of flexible, customizable and responsive themes, modules and plugins that can be utilized to design multiple websites effortlessly. Increasing competition demands an interactive and engaging website and thus it is important to include variety of tools that encourage visitors to stay more on a page. Plugins in WordPress adds value to the web page specially by making it more interesting. Utilizing right tools like Call to action buttons and social media login and sharing buttons with on page content helps to enhance user experience. Article rightly highlighted the point that selecting a right tool and utilizing its powers allows a CMS developer to have better control over the website.