Are you looking for a ChatBot review to help you decide whether it’s the right drag and drop chatbot builder for you?
This popular service has ready-made templates covering all kinds of industries and use cases, plus a user-friendly editor. This means you can design all kinds of automated conversations, or ‘stories,’ to help you provide better support, collect leads, and more.
In this ChatBot review, we’ll see whether it’s the right chatbot builder for your WordPress website.
ChatBot Review: Why Use It in WordPress?
ChatBot is a popular automated bot that allows you to create all kinds of chatbots using a drag and drop editor.
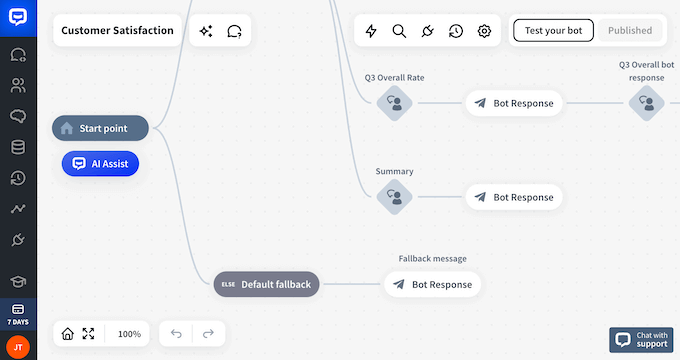
This means you don’t need to write any custom code, or hire a WordPress developer.
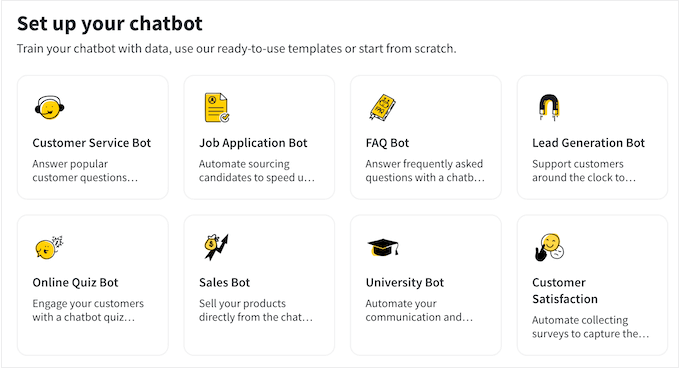
To help you get started, ChatBoth comes with ready-made templates for many popular scenarios. This includes templates that can help you sell more products, provide customer support, and accept bookings.
In this way, you can help visitors get the information they need 24/7, even when your support agents are unavailable. You can also use bots to collect leads, convert visitors into customers, and perform a ton of other important tasks.
ChatBot integrates with a few different platforms, including WordPress. In fact, there’s a a free ChatBot plugin that seamlessly connects your WordPress website to this popular chatbot service.
With that done, you can see a list of all your chatbots directly in the WordPress dashboard. You can then choose the bot you want to display, and ChatBot will automatically show this bot across all your WordPress pages and posts.
Chatbot Review: Is It the Right Chatbot Plugin for You?
By adding a chatbot to your WordPress website you can provide 24/7 customer support to visitors. You can even use chatbots to automate other important tasks like answering frequently asked questions, providing product support, and fixing common errors.
With that said, in this ChatBot review we’ll see if it’s the right automated bot builder for your WordPress website.
1. Easy to Setup
ChatBot makes it easy to add automated bots to WordPress.
To get started, you can install and activate the ChatBot for WordPress plugin. For detailed instructions, please see our step-by-step guide on how to install a WordPress plugin. Upon activation, simply click the ‘Connect account’ button.
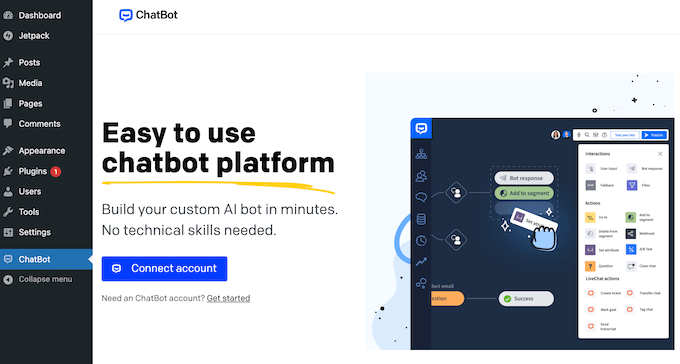
This will open the ChatBot website in a new window, ready for you to enter your login details.
Alternatively, if you don’t have an account then you can create one now.
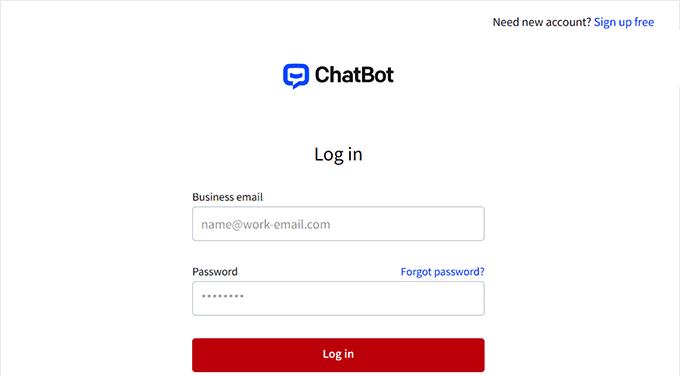
With that done, ChatBot will redirect you back to the WordPress dashboard.
After completing these simple steps, your site is now successfully connected to ChatBot.com, and you’re ready to create your first bot.
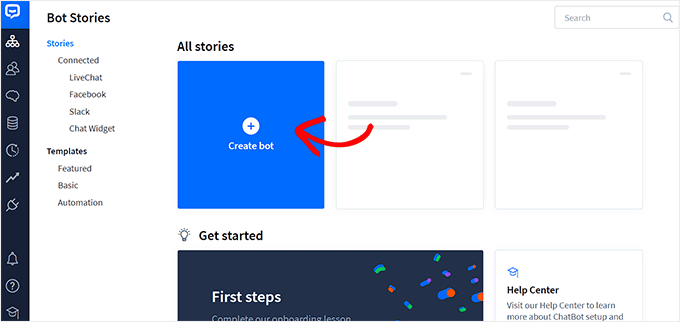
2. Built-in Templates
To help you create automated bots, fast, ChatBot comes with a selection of templates. These are ready-made chatbot stories that allow you to add task-specific bots to your WordPress blog with just a few clicks.
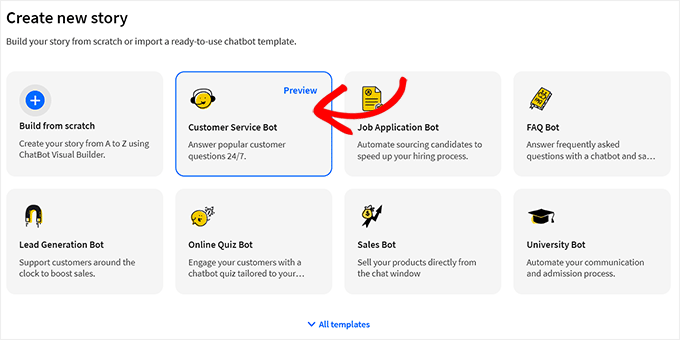
These templates cover the most popular marketing, sales, and support cases. For example, the sales template encourages customers to explore your latest deals and find the right WooCommerce product for them.
You can also use ChatBot’s lead generation template to collect a contact’s email address, business phone number, and other personal information.
ChatBot even has templates for specific industries. For example, if you run a restaurant website then ChatBot has a template that you can use to accept orders and reservations.
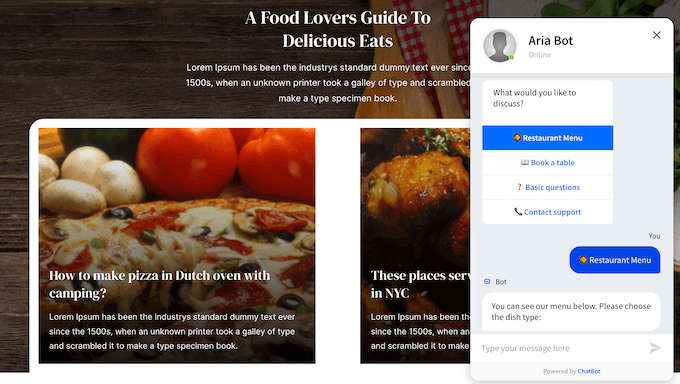
All these templates are fully customizable so you can add your own messaging, or even use them as a starting point for more complex automated stories.
3. User-Friendly Editor
No matter whether you start from scratch or use a template, ChatBot has a drag and drop editor that you can use to build your workflow.
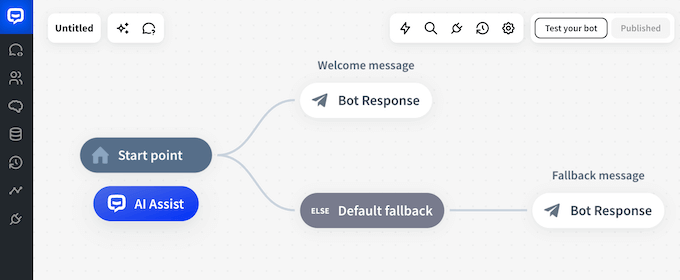
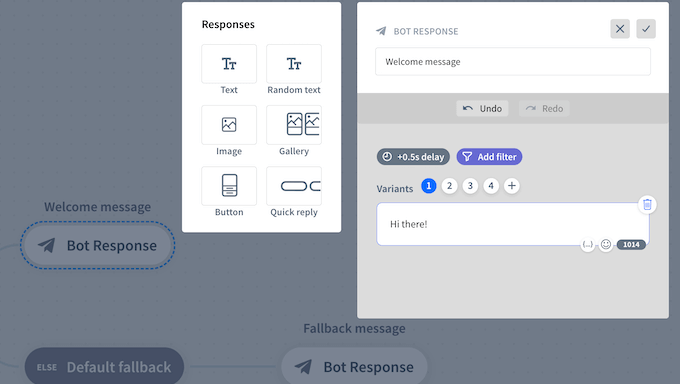
From here, you can easily create the conversational flow by clicking on the ‘Bot Response’ tabs.
This will open a popup where you can type in the chat response or add content such as text, images, and call to action buttons by dragging different blocks into the prompt.
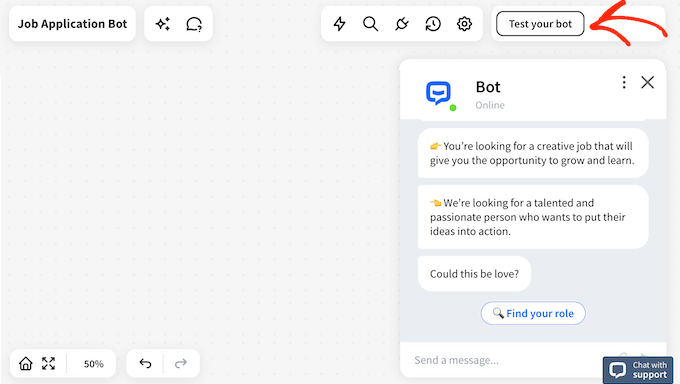
You can also test your story at any point directly in the ChatBot editor.
This makes it easy to try lots of different actions and responses, to see what works the best for your blog, website, or online store.
4. Ready-Made Chat Blocks
ChatBot has a range of blocks that you can add to your conversations.
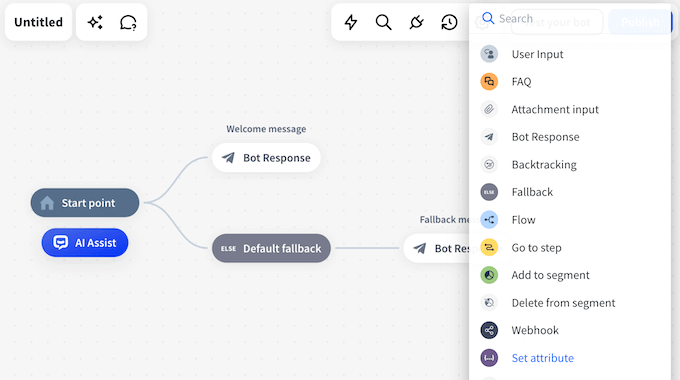
This allows you to create all kinds of automated workflows.
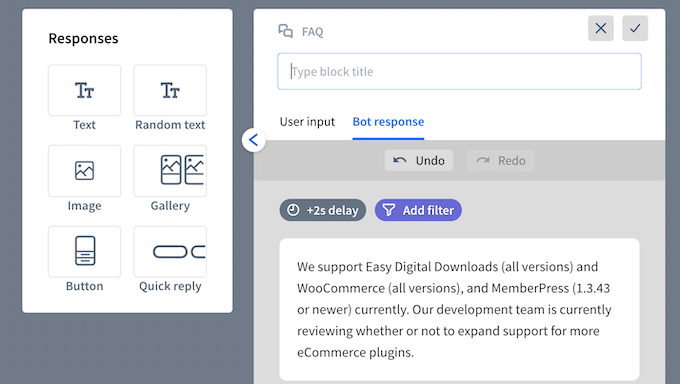
For example, if you’re adding a chatbot to your help desk, then might use the FAQ block. This allows you to type in some common questions and answers, so the chatbot can respond to these support requests automatically.
5. Create Conditional Logic with ChatBot Filters
To create more helpful and natural-sounding stories, it’s a good idea to use ChatBot’s various filters. This allows the bot to ask different follow-up questions or perform unique actions based on various conditions.
Let’s look at an example. If you’re using a bot to generate leads then ChatBot can check the data it already has access to, and then ask the visitor for any missing information. In this way, you can keep the conversation short and relevant, which will improve the user experience and help you do lead generation.
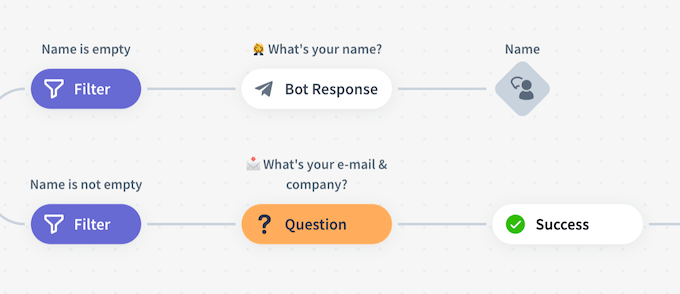
You can also use filters to tailor the bot’s response based on the user’s input. For example, you might redirect them to a different wiki knowledge base page based on their answer.
Additionally, you can create specific messages for users in different regions, countries, and timezones. This can be helpful if you have a large international audience, or run a multilingual WordPress website.
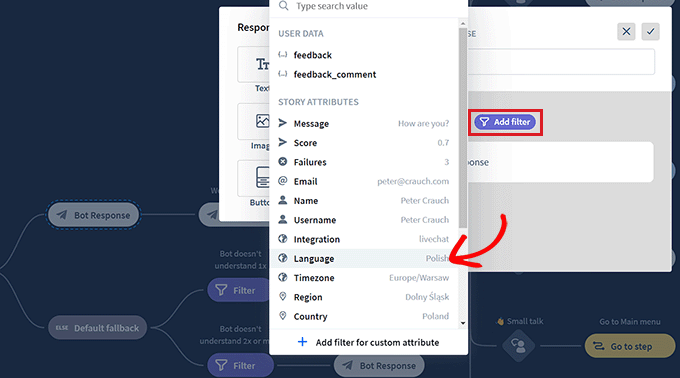
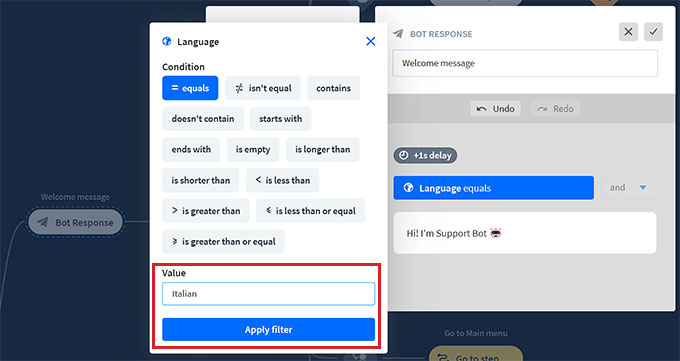
After adding a filter, you can create the response. For example, if you select the ‘Language’ filter, then you can chose ‘= equals’ as the condition and then type in the language name.
After that, you can type in the response you want to use when this condition is met.
6. Straightforward Visibility Controls
Sometimes you may only want to show the chatbot to specific users, such as registered customers on your WooCommerce store.
The good news is that you can easily hide ChatBot from guest visitors.
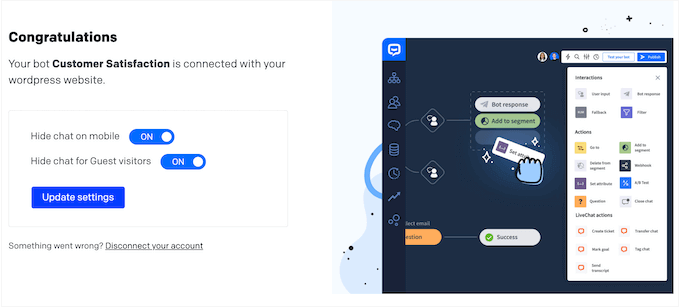
Another option is hiding the automated bot from mobile users. Since smartphones and tablets tend to have smaller screens, these users may struggle to interact with your chatbot, or they might find the chat icon distracting.
With that said, simply enable a toggle in the plugin’s settings and ChatBot will hide the chatbot from smartphone and tablet users.
7. Add Chats to WordPress
When you’re happy with how the chatbot is set up, it’s easy to add it to your WordPress website. Simply head over to the ChatBot screen in your WordPress dashboard and then select the bot you want to use.
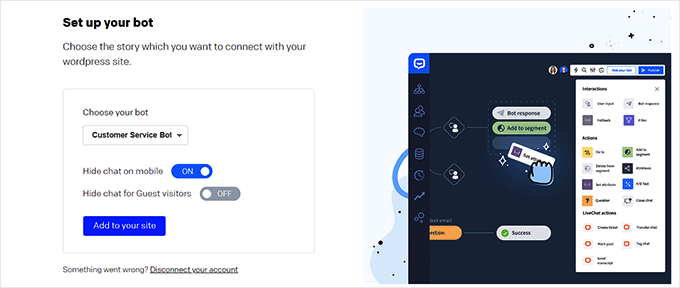
After that, just go ahead and click on the ‘Add to Site’ button.
That’s it. If you visit your WordPress website, blog, or online marketplace then you’ll see the chatbot in action.
8. Customizable Chat Widget
The ChatBot widget is fully customizable so you can fine-tune it to perfectly fit your WordPress theme and branding.
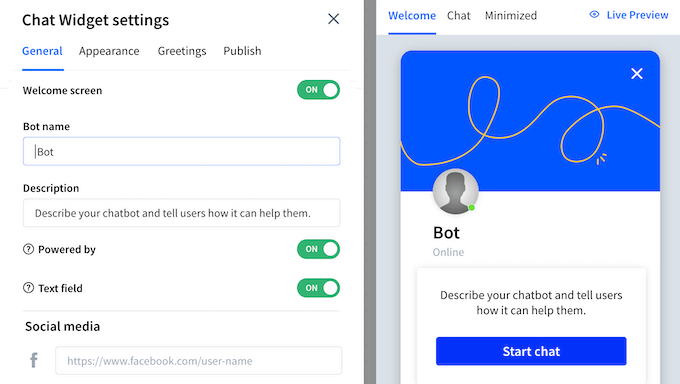
You can change everything from the background color, to the chat icons, and where the chat window appears on the screen.
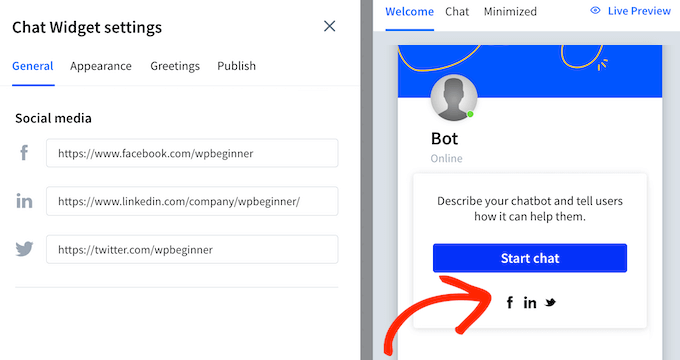
You can even give your bot more personality by uploading an avatar, changing its name, and adding a custom welcome message.
To help strengthen your company or personal branding, you can remove the ‘Powered by LiveChat’ text from the bottom of the window. You can even add links to your Facebook, LinkedIn, and Twitter profiles, which may get you some extra followers on social media.
9. Add Team Members
Do you want to collaborate on your bots with other team members? For example, your WordPress designers might need to upload custom avatars, background images, and other resources to make your bots really stand out.
Similarly, your co-workers might need to examine the chat reports and statistics.
With ChatBot, it’s easy to add more people to the dashboard, and then control the actions they can perform in your account.
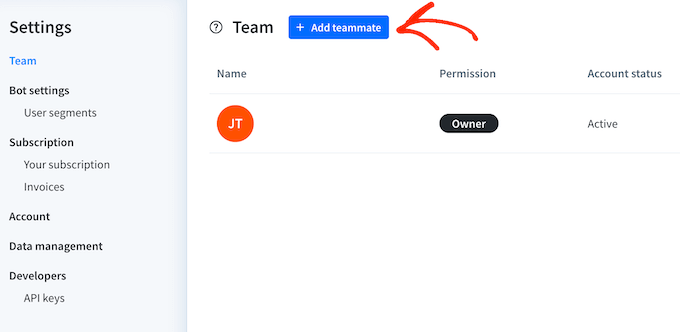
If these people need unlimited access, then you can add them as an Administrator.
Alternatively, you can give them the Editor user role. These Editors can’t access the advanced account settings, or add other users to your ChatBot account.
10. Detailed Analytics and Reports
To get the most value from your chatbots, you’ll want to identify what’s working well and any areas that need improvement.
The good news is that ChatBot comes with a built-in Reports dashboard.
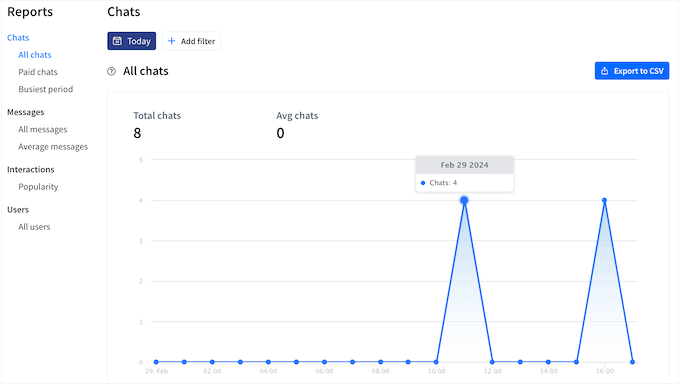
Here, you can see data such as the average chat length, the total number of sent messages, and the busiest period displayed as a heat map.
This dashboard also displays all the chatbot interactions arranged by popularity. In this way, you can quickly and easily see the stories that get the most engagement.
You can then use this insight to fine-tune your stories and chatbots to get even more interactions, and better results.
11. Generate Leads
Chatbots are a great way to generate leads and learn more about your vistors. Every time someone interacts with a bot, ChatBot will record this information and add it to the user’s record.
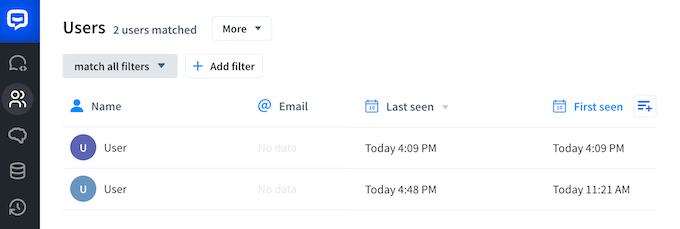
This information might include the user’s IP address, name, email address, timezone, and other useful data. If the user has a long conversation history, then you can quickly and easily see the data collected during the last conversation. In this way, you can avoid using outdated information.
You can even see a transcript of all past chats between this person and the chatbot.
To help you use this information, you can filter ChatBot’s user data based on various criteria. This is a great way to pinpoint promising leads, or people to target in your next campaigns.
Even better, you can create segments and then use them to organize your users. For example, you might create a segment for people who have already subscribed to your email newsletter, and a segment for inactive users.
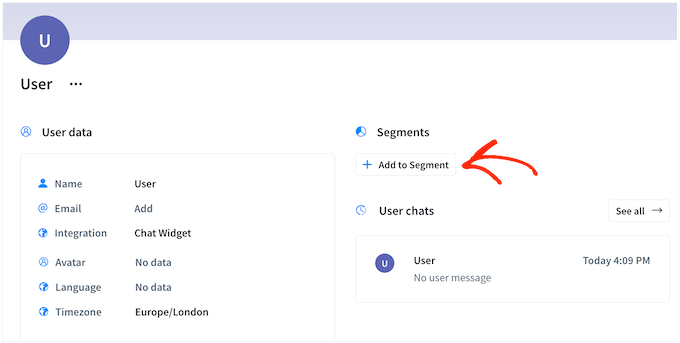
After adding users to a segment, you can export them as a CSV file. This is perfect if you need to share user data with other people, or import it into other tools such as your customer relationship management app or email marketing service.
12. Integrates with LiveChat
Do you want to unlock more powerful features? ChatBot integrates with LiveChat, which is a popular chat platform.
This is particularly useful when visitors want to communicate with a real person. When that happens, you can seamlessly forward them from ChatBot to LiveChat, and they can talk to a support agent in real time.
The integration also allows you to add LiveChat features to your bots. For example, you can automatically send chatbot transcripts to your site admin. You can also categorize and organize your chats by adding tags.
For more information, please see our in-depth LiveChat review.
13. Community and Professional Support
With its ready-made templates and code-free builder, ChatBot is designed to be easy to use. However, if you need additional help then there’s a ton of online resources.
To start, ChatBot has a dedicated help center where you’ll find a complete Getting Started guide.
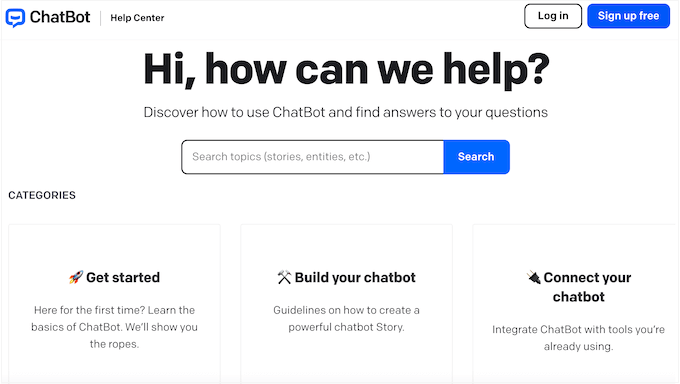
There’s also a blog where the ChatBot team share advice on a range of topics such as how to optimize the customer journey, and how to increase your click through rates.
Often, these self-help resources can answer common questions and problems you may be facing. However, sometimes you may still need to ask for support.
With that said, all the ChatBot plans include email support. If you upgrade to their Enterprise plan, then you’ll also get access to premium support and a ChatBot expert who will walk you through the entire onboarding process.
ChatBot Review: Pricing and Plans
Although you can download the WordPress plugin for free, you’ll need a subscription to start creating chatbots.
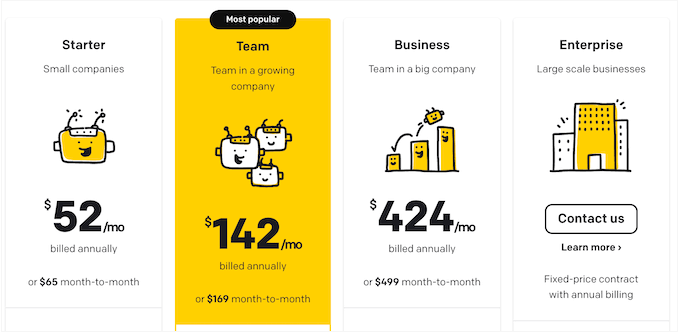
There are 4 premium plans to choose from:
- Starter. For $54 per month, you can create a single chatbot and an unlimited number of stories. You can also process 1,000 valid chats, which are chats that have at least one interaction. This plan also includes basic reporting so you can see how visitors are interacting with your chatbots.
- Team. Priced at $142 per month, you can create up to 5 chatbots and process up to 5,000 valid chats. You can also add other people to your ChatBot dashboard. With that said, the Team plan is ideal for help desks, customer service departments, sales teams, multi-author blogs, and any other scenario where multiple people need access to the same ChatBot account.
- Business. For $424 per month, you can create as many chatbots as you want and process up to 25,000 valid chats. With that said, Business is a great plan for websites that get lots of traffic.
- Enterprise. Do you run a high traffic business website? If you need to process more than 25,000 chats, then ChatBot offers a custom Enterprise plan that you can tailor to meet your exact needs. This plan also includes premium customer support, a dedicated account manager, and access to experts who will track and improve your chatbots over time.
Chatbot Review: Is It the Right Chatbot Plugin for You?
After looking at the features, support options, and pricing, we’re confident that ChatBot is a great automated bot plugin. It helps small businesses use the power of artificial intelligence to boost customer engagement and overall customer satisfaction.
If you’re running a side business, startup, or have a limited budget, then the Starter plan is a great place to start. This plan may limit you to a single chatbot, but you can create unlimited stories. This means you can write responses for all kinds of visitor questions and requests.
If multiple people need access to ChatBot, then we recommend the Team plan. With this plan, you can invite other people to the ChatBot dashboard, so you can build bots collaboratively.
Do you get a ton of traffic, or have a busy and active community such as a membership site? In that case, the Business plan can process up to 25,000 valid chats per month.
You can also add as many chatbots as you want, so it’s ideal if you want to create separate bots for your knowledge base, online store, client portal, and any other area of your website.
Finally, if you need to process more than 25,000 chats per month, then you can contact ChatBot to talk about their custom Enterprise plan.
We hope this ChatBot review helped you decide whether it’s the right automated bot for your WordPress website. You can also check out our ultimate WordPress security guide, or see our expert pick of the best analytics solution for WordPress.
If you liked this article, then please subscribe to our YouTube Channel for WordPress video tutorials. You can also find us on Twitter and Facebook.

Syed Balkhi says
Hey WPBeginner readers,
Did you know you can win exciting prizes by commenting on WPBeginner?
Every month, our top blog commenters will win HUGE rewards, including premium WordPress plugin licenses and cash prizes.
You can get more details about the contest from here.
Start sharing your thoughts below to stand a chance to win!