If you’re building WordPress websites for clients, creating a custom client dashboard is a great way to improve their experience.
With a custom dashboard in WordPress, you can provide your clients with the exact resources, shortcuts, and other important information they need to get started.
Many of us on the WPBeginner editorial team have built custom client dashboards into our own client projects, and it always makes a huge difference.
In this article, we’ll show you how to create a client dashboard in WordPress without writing any code or affecting the client’s ability to update their site.
Why Create a Client Dashboard in WordPress?
As a WordPress solutions provider, you’ll come across clients who haven’t used WordPress before, and they are not familiar with HTML, CSS, or WordPress terminology.
By creating a custom dashboard for clients, you can provide them with a lean WordPress interface and improved usability.
It will improve client satisfaction, which leads to more repeat work. Your clients will need less support, which will also save you time.
That being said, let’s take a look at how to easily create a client dashboard in WordPress.
We’ll walk you through different steps in the process. You can decide how much you want to customize, depending on your client’s requirements. Simply use the quick links below to jump to the steps you’re most interested in:
1. Hide Unnecessary Admin Menus
While building a website for your clients, you may use different WordPress plugins, custom post types, WordPress page builders, and other tools.
Many of these tools will add their own menu items in the WordPress admin bar, create custom widgets in the admin dashboard, and add links in the toolbar.
The end result looks a bit messy. For a client who has never used WordPress, these additional items make the dashboard look more complicated than it needs to.
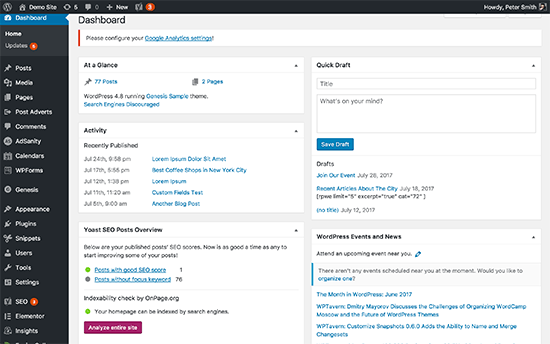
Let’s start creating a client dashboard by cleaning up the clutter.
To do that, you will need to install and activate the Adminimize plugin. For more details, see our step-by-step guide on how to install a WordPress plugin.
Upon activation, you need to visit the Settings » Adminimize page to configure the plugin.
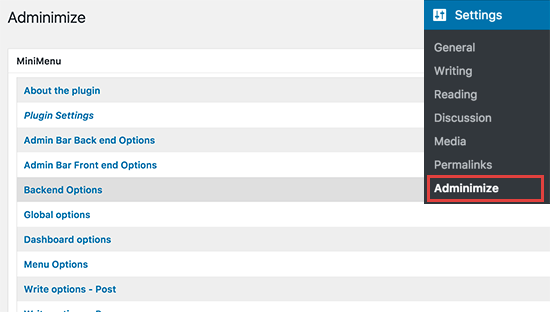
You will see different admin sections listed on the settings page. Clicking on a section will expand it, and you will see the options for that particular section.
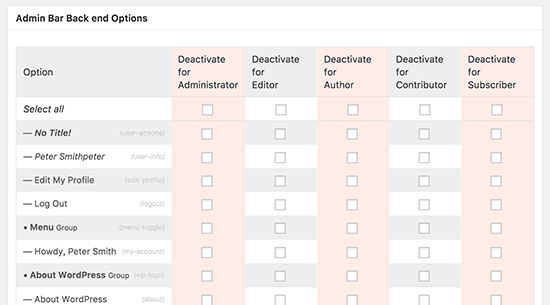
You can show or hide any item listed under a section for different user roles. Carefully review each item before hiding it, as this may affect your client’s ability to use their website.
For detailed instructions, see our guide on how to hide unnecessary menu items in WordPress.
2. White Label WordPress Dashboard
The Adminimize plugin covers a lot of options to control the appearance of your WordPress admin dashboard. However, it does not have options to hide the WordPress branding and white labeling the admin area.
White labeling includes replacing the WordPress logo with a custom logo, changing the admin area footer, show or hide items from menus, and more.
First, you need to install and activate the White Label CMS plugin. Upon activation, head over to the Settings » White Label CMS page to configure plugin settings.
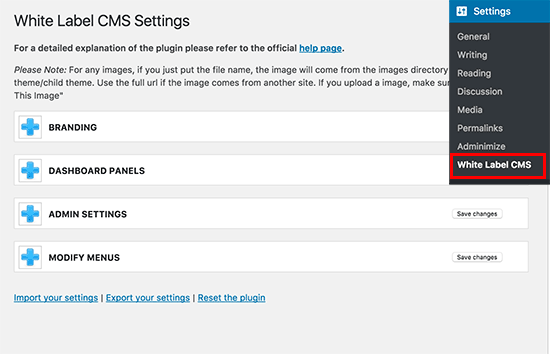
The settings page is divided into different sections. You can click on a section to expand and view its settings.
Some options in the plugin are also available in Adminimize. If you have already hidden those options, then you can skip them.
For detailed instructions about each section, take a look at our article on how to white label your WordPress admin dashboard.
3. Change The WordPress Dashboard Appearance
WordPress comes with a handful of admin color schemes that users can change from their profiles. You can set a color scheme as default for new users. You can also create a custom color scheme of your own.
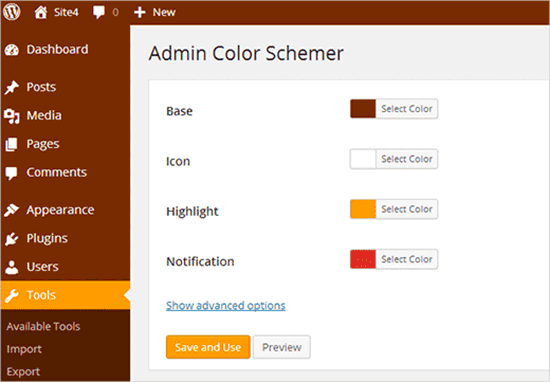
Want to take it to the next level? Try WordPress admin themes. These themes are available as plugins that you can install to change the appearance of your WordPress admin area.
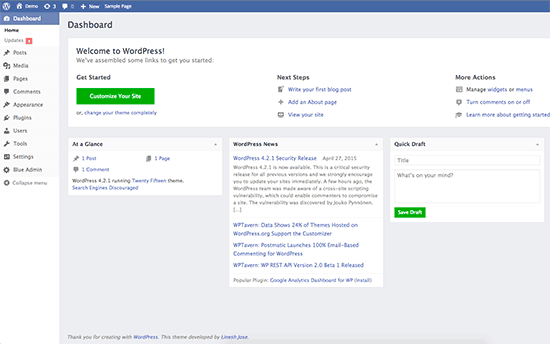
Here are some free WordPress admin themes and plugins that you can try.
4. Add Helpful Resources to Client Dashboard
When delivering projects to your clients, you will notice that many of them have similar questions. Adding a help or resource section in WordPress client dashboard can help you answer those questions and save time spent on providing support.
The best way to add a help section is by installing and activating the WP Help plugin. Upon activation, the plugin adds a new ‘Publishing Help’ menu item in your WordPress admin bar. Clicking on it will take you to the settings page.
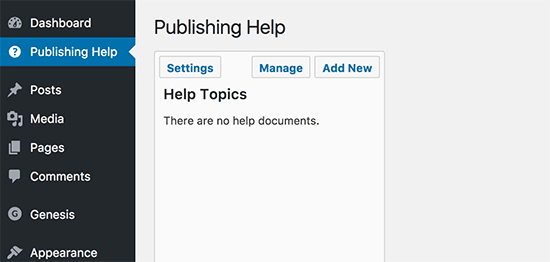
This area will be empty since you haven’t created any help resources yet. Go ahead and click on the ‘Add New’ button to create one.
On the next page, you can create your help document, just like you would create a WordPress post or page.
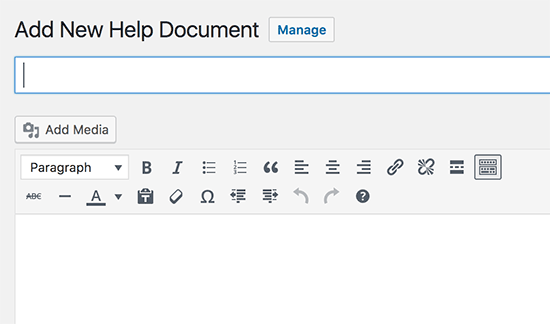
WP Help uses custom post type for documents, and they are hierarchical like pages. You can create parent and child documents to organize them.
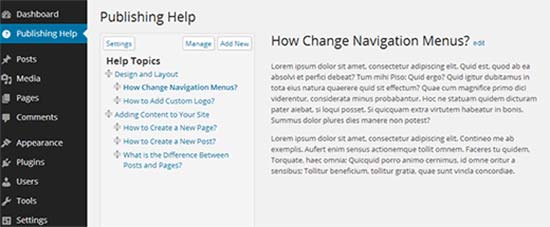
You can also sync documents from another WordPress site. This allows you to use the same documentation for all your client projects.
For detailed instructions, see our guide on how to add a help / resource section in WordPress admin.
5. Creating Custom Dashboard Widgets
Dashboard widgets are the first things user see when they log into the WordPress admin area. This is the best place to point your clients into the right direction by adding your own custom dashboard widgets.
Here is a simple dashboard widget code that you can use as a starting point.
You will need to add this code into your theme’s functions.php file, in a site-specific plugin, or in a code snippet plugin.
add_action('wp_dashboard_setup', 'my_custom_dashboard_widgets');

function my_custom_dashboard_widgets() {
global $wp_meta_boxes;

wp_add_dashboard_widget('custom_help_widget', 'Theme Support', 'custom_dashboard_help');
}

function custom_dashboard_help() {

// Content you want to show inside the widget

echo '<p>Welcome to Custom Blog Theme! Need help? Contact the developer <a href="mailto:yourusername@gmail.com">here</a>. For WordPress Tutorials visit: <a href="https://www.wpbeginner.com" target="_blank">WPBeginner</a></p>';
}
Don’t forget to change the content part with your own message. You can use plain HTML for formatting and styling.
We recommend adding this code using WPCode, the best code snippets plugin.
WPCode makes it safe and easy to add custom code in WordPress, without editing your theme’s functions.php file. So, you never need to worry about breaking your site.
To get started, you need to install and activate the free WPCode plugin. If you need help, see our guide on how to install a WordPress plugin.
Once the plugin is activated, navigate to the Code Snippets » + Add Snippet page from the WordPress dashboard.
Then, click the ‘+ Add Custom Snippet’ button under the ‘Add Your Custom Code (New Snippet)’ option.
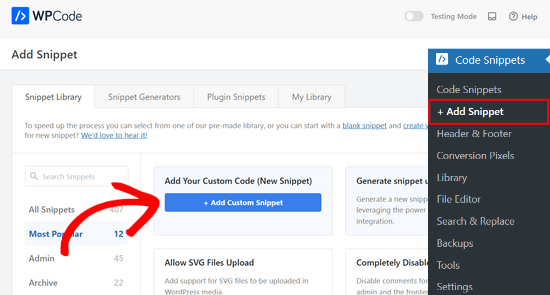
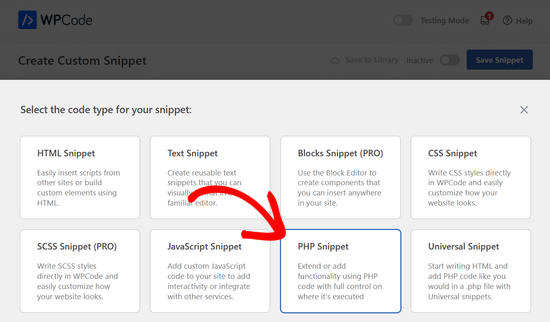
Then, you need to select ‘PHP Snippet’ from the list of code types that appear on the screen.
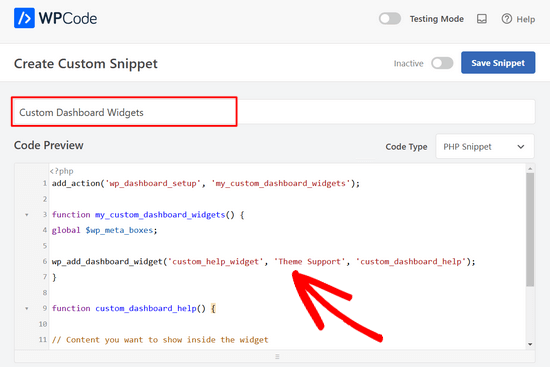
Next, add a title for the code snippet and paste the code from above into the ‘Code Preview’ box.
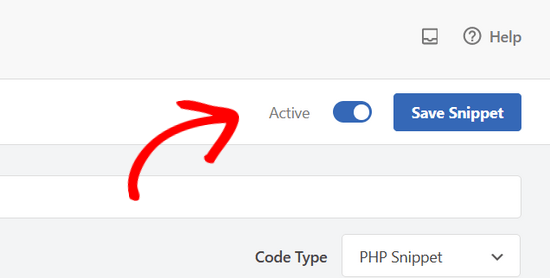
After that, simply switch the toggle from ‘Inactive’ to ‘Active’ and press the ‘Save Snippet’ button.
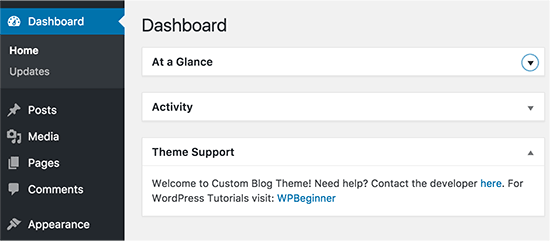
Here’s how it looked when we tested it on our demo website:
More Helpful Resources for the WordPress Admin
Once you’ve used these tips to create a custom client dashboard, you might be looking for other ways to customize the WordPress admin area. Here are some useful guides you can check out:
- How to Customize WordPress Admin Dashboard (6 Tips)
- How to Add a Notification Center in WordPress Admin
- The Hidden Secret Options Panel Within Your WordPress Admin Panel
- How to Remove the Welcome Panel in WordPress Dashboard
- How to Add Dark Mode to Your WordPress Admin Dashboard
- How to Limit Dashboard Access in WordPress
We hope this article helped you learn how to create a client dashboard in WordPress. You may also want to see our guide on how to protect your WordPress admin area and our expert picks of the best WordPress activity log and tracking plugins.
If you liked this article, then please subscribe to our YouTube Channel for WordPress video tutorials. You can also find us on Twitter and Facebook.


Olaf
I create websites for clients, and sometimes it’s a great idea to style the administration area in different colors. Such an admin interface looks more welcoming compared to the default one, as it can reflect the colors used in the company’s logo. I appreciate work that pays attention to detail, and this is one of the aspects that really caught my interest. It’s another great way to differentiate my work by creating an attractive administrative environment.
Kevin
Can I build a client dashboard using hosted WordPress site
WPBeginner Support
Unless your specific host has limitations then you should be able to.
Admin
Abdul-Warith Ajani
On what plan must I be to be able to create dashboard?
WPBeginner Support
You would want to be using a WordPress.org site, you may want to take a look at our article here: https://www.wpbeginner.com/beginners-guide/self-hosted-wordpress-org-vs-free-wordpress-com-infograph/
Admin
Reuben
Hi could you give me a sample of how to create multiple dashboard widget? from your above code i could create 1 dashboard widget. But i tried to duplicate it but it seems i’m having a little trouble. Could you provide me with a sample so i could work it out? Sorry i’m pretty new in this hope you would help.
Thanks!!
Jonny
Hi love this tutorial and your code works like a charm. But i got a slight issue. I am a noob in wordpress i would admit but by using the above code you mention..
add_action(‘wp_dashboard_setup’, ‘my_custom_dashboard_widgets’);
function my_custom_dashboard_widgets() {
global $wp_meta_boxes;
wp_add_dashboard_widget(‘custom_help_widget’, ‘Theme Support’, ‘custom_dashboard_help’);
}
function custom_dashboard_help() {
echo ‘Welcome to Custom Blog Theme! Need help? Contact the developer here. For WordPress Tutorials visit: WPBeginner‘;
}
i am able to create 1 widget which is great! How could i modify/add to add more widget to my dashbooard? can i jsut copy and paste?
WPBeginner support
You could create another widget by adding another wp_add_dashboard_widget() inside the curly brackets with a function for what you want inside the new widget.
Admin
Jared M
This seems like a lot of plugins. Wouldn’t this slow down the site considerably?
WPBeginner Support
Hi Jared,
No, the plugins run only in the WordPress admin area and are highly optimized for speed.
Admin
Jared M
That’s what I was hoping! Great solutions. Thank you.
Thabiso
Hmmmmm! Beautiful article. Just what I’ve been longing for. Thank you. I saved it on my Facebook so to keep revisiting it.