


Adding a chatbot to your WordPress site can improve user engagement by providing instant assistance to your visitors. Chatbots can handle inquiries, guide users through your site, and even help generate sales, offering an interactive user experience.
Knowing how to add a chatbot can transform the way you interact with your audience and boost the overall efficiency of your site.
Over the years, we have seen several of our partner brands add chatbots on their websites to provide customer support and guide users. Since doing so, they have noticed a significant boost in engagement, with chatbots playing a key role in converting leads into customers.
In this article, we will show you how to easily add a chatbot in WordPress, step by step.
What Is a Chatbot?
A chatbot is a computer program that uses a chat interface to talk with your website visitors. It acts just like your customer support team does when they use a live chat plugin.
However, while live chat is a real-time conversation between a customer and your support staff, chatbots are automated.
This means that they can only provide answers that you have programmed them for.
For example, a customer service chatbot can answer questions about products or services, troubleshoot problems, and make recommendations.
Similarly, a healthcare chatbot can provide instant responses to questions about health conditions, remind patients of appointments, and connect patients with doctors.
Why Should You Use a Chatbot in WordPress?
Adding a chatbot to your WordPress website will allow you to provide 24/7 customer support to your visitors, even when your support team isn’t available.
This will reduce the number of support tickets on your website and improve user experience.
Chatbots can also be used to automate other customer support tasks like answering frequently asked questions, providing product support, and fixing smaller issues.
This will save a lot of time and let your team focus on more complex issues.
If you have an online store, you can also use a chatbot to learn about customers’ interests and needs. The chatbot can then answer the customer’s queries and close the deal, boosting user engagement.
Having said that, let’s see how to easily add a chatbot in WordPress, step by step. We’ll cover two different methods, and you can use the quick links below to jump to the one you want to use:
Method 1: Add a Chatbot in WordPress Using HelpJet (Free & Easy)
If you are looking for a free and easy way to add a chatbot in WordPress, then we recommend using HelpJet. It’s a free AI customer support chatbot built by HeroThemes.
Instead of making you build a decision tree or write scripted responses, HelpJet automatically reads your existing WordPress content, including pages, posts, knowledge base docs, and even PDFs, and uses it to answer visitor questions in a natural, conversational way.
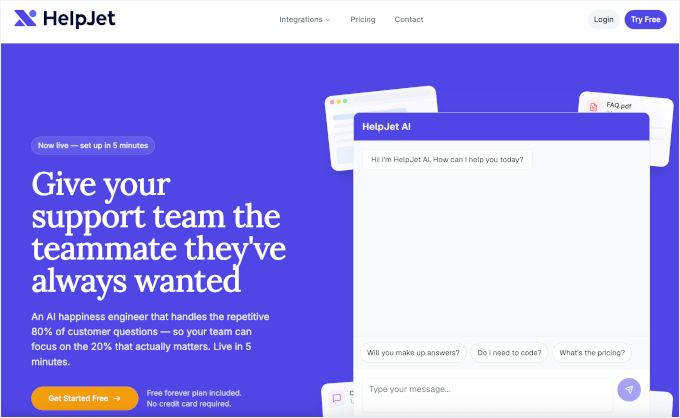
If you run a WooCommerce store, HelpJet can also read product variations, stock levels, shipping classes, and tax rules, so it can answer pre-sales and post-sales questions like “Is this available in blue?” or “Do you ship to Texas?” with real, accurate answers.
Note: HelpJet’s Free plan gives you one bot and 100 conversations a month and doesn’t require a credit card, which makes it an easy way to try an AI chatbot before paying for anything. A Pro plan is available for $29/month if you need more bots and conversations.
To get started, head over to the HelpJet website and sign up for a free account.
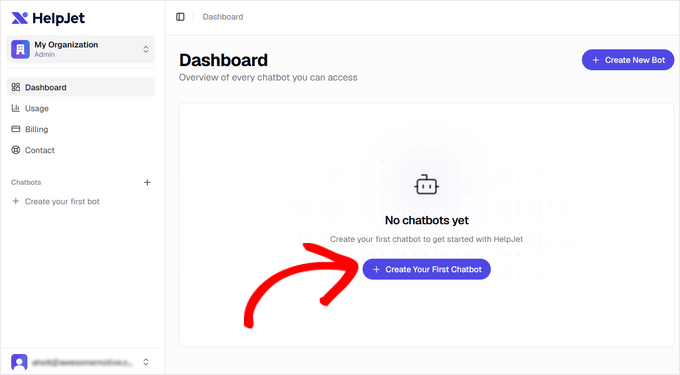
Once you’re in your dashboard, click the ‘Create Your First Chatbot’ button to launch the new-bot wizard. The wizard has four steps, and takes about 10 minutes from start to finish.
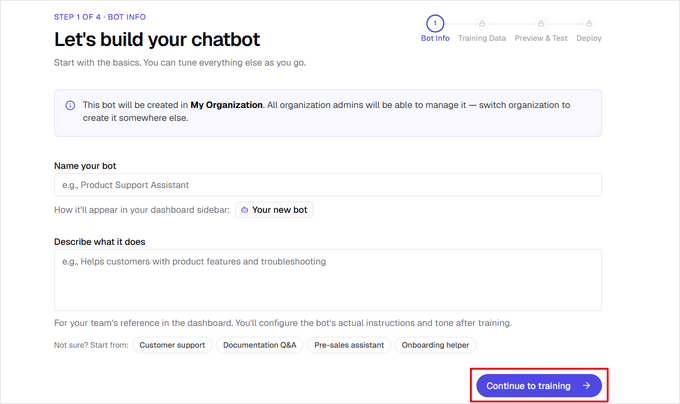
Next, give your bot a name, such as “Product Support Assistant.” You can also add a short description of what it does, which is just for your own reference in the dashboard and won’t be shown to visitors.
If you’re not sure what to write, the wizard also offers starter templates like Customer Support and Pre-sales Assistant that you can use as a starting point.
Click the ‘Continue to training’ button when you’re done.
On the following page is where you teach your bot what to answer.
Simply type or paste your WordPress site’s URL, a sitemap URL, or any single webpage into the Training URL field and click ‘Add.’
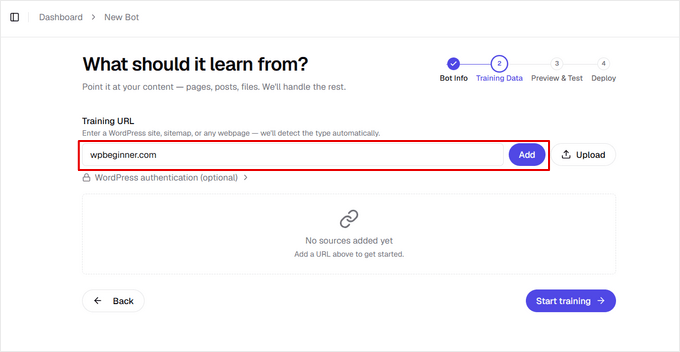
You can also upload PDF files, plain text files, or a CSV list of URLs as additional training sources, which is useful if you have documentation that doesn’t live on your website.
When you’re happy with your sources, click ‘Start training.’
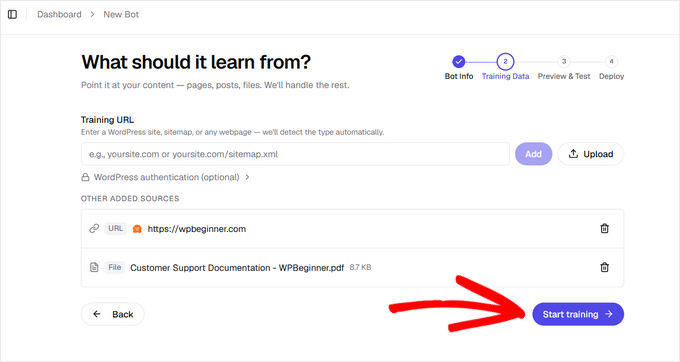
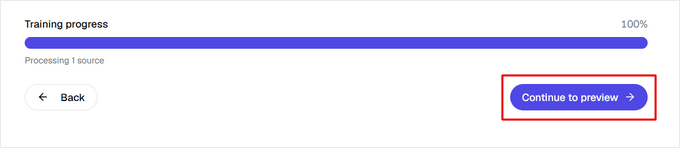
HelpJet will then read all of the content and learn from it, which could take a few minutes depending on how many sources you add.
Once it’s done, click the ‘Continue to preview’ button.
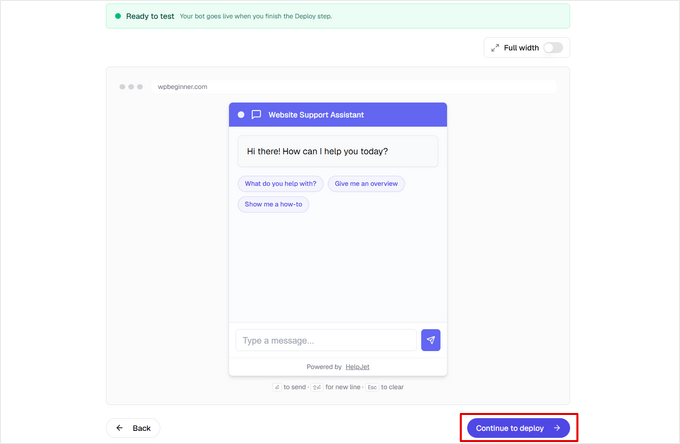
The next step shows a live preview of your chatbot, styled the way your visitors will actually see it. You can try asking it a few real questions your customers tend to ask.
Don’t worry if you want to make any changes at this point, you’ll get to customize and train it further in the steps ahead. When you’re ready, click the ‘Continue to deploy’ button.
Now, it’s time to activate the chatbot and get it onto your site.
To do that, expand the ‘Using WordPress?’ panel and click ‘Download Plugin.’ HelpJet will build a small plugin file, pre-configured with your bot’s ID that you need to install and activate. If you need help, see our guide on how to install a WordPress plugin.
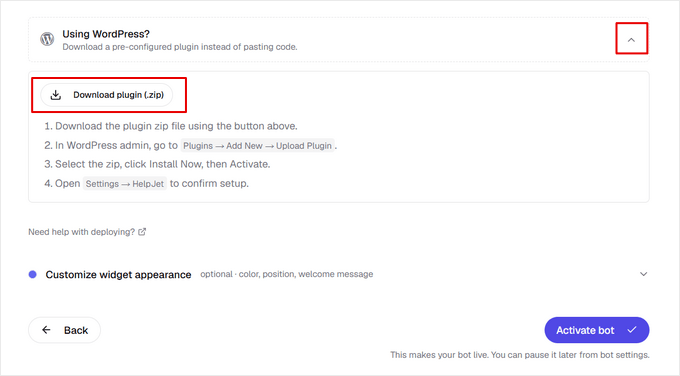
Before you leave this step, you can also expand ‘Customize widget appearance’ to set the widget’s color, whether it sits in the bottom-left or bottom-right corner, and its welcome message.
When you’re happy with your chatbot’s appearance, click ‘Activate bot’ to make it live.
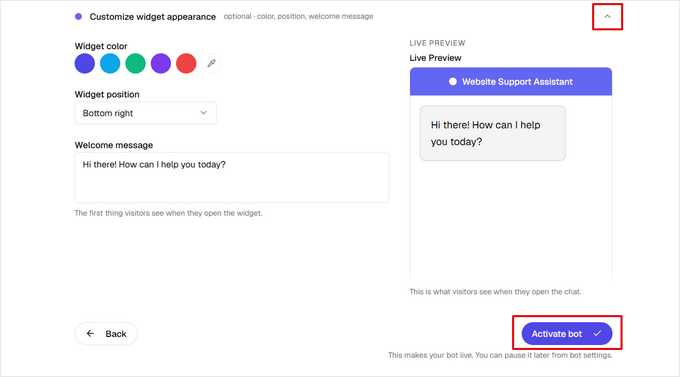
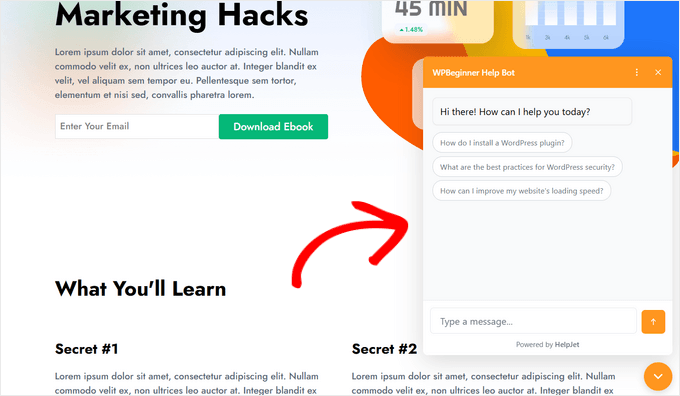
HelpJet now automatically adds the chatbot to every page of your site. There’s nothing else you need to configure to get the widget up and running.
You can visit your WordPress site to see it in action and try it out. Here’s how it looked on our demo site:
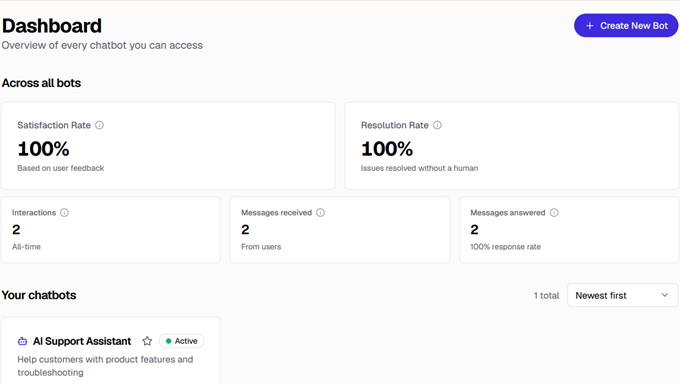
Once it’s live, you can go to the HelpJet dashboard to keep an eye on your chatbot’s total conversations, satisfaction rate, resolution rate, and your customers’ most frequently asked questions.
That way, you can see exactly how much support work it’s taking off your plate, and spot which questions keep coming up so you know where your content still has gaps.
If you find your chatbot has trouble answering some questions, you can continue to train it as well. Just click ‘Train & Test Bot’ in the HelpJet dashboard.
From here, you can ask questions, review answers, and anything you tell the bot is saved as knowledge.
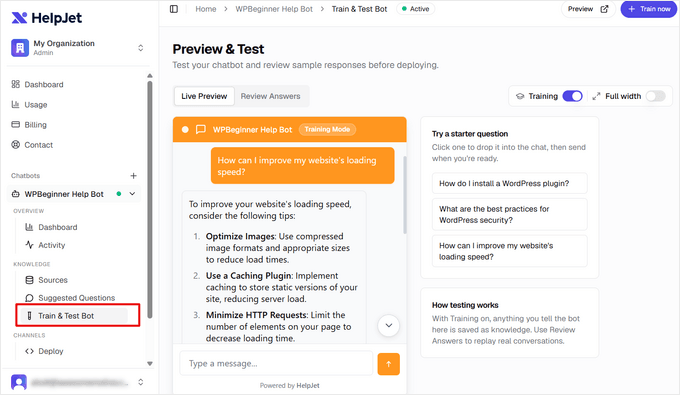
You can also add more training sources at any time, and HelpJet automatically rescans the URLs you’ve already added to keep the bot’s answers up to date as your site changes.
And that’s it! From signing up to having a trained, working chatbot live on your site, the whole process takes about 10 minutes, making HelpJet one of the easiest ways to add a chatbot to a WordPress site.
Method 2: Add a Chatbot in WordPress Using ChatBot (Advanced)
HelpJet is great if you just want a bot that answers questions from your existing content, but ChatBot is a better fit if you want more control over the conversation itself.
ChatBot is a powerful AI chatbot software that lets you make chatbots using a drag-and-drop builder.
You can custom conversation flows, add filters and conditional logic, and set up automation for lead generation, sales, and multilingual support, so this method is for you if you need that level of control. See our complete ChatBot review for more info.
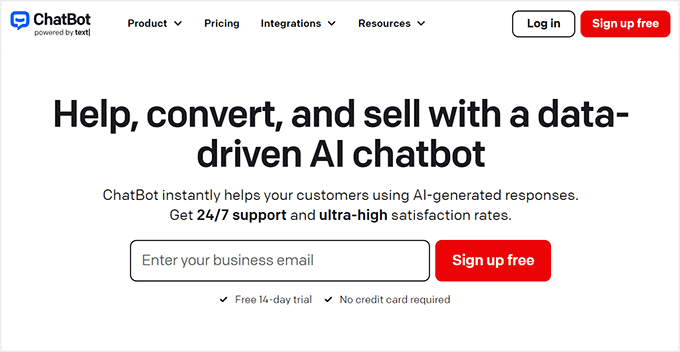
First, you will need to install and activate the free ChatBot plugin. For detailed instructions, please see our step-by-step guide on how to install a WordPress plugin.
Note: The plugin itself is free, but ChatBot.com doesn’t have a permanent free plan. You’ll need to sign up for its 14-day free trial (no credit card required), after which pricing starts at $19/user/month if you want to keep using it.
Upon activation, visit the ChatBot menu tab from the WordPress admin panel and click the ‘Connect Account’ button.
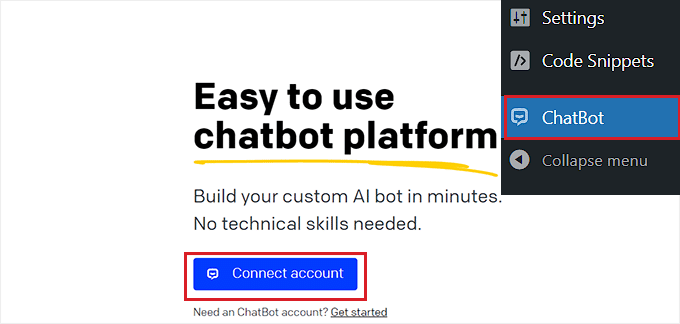
This will open the ChatBot website in a new window, where you must enter your login credentials and click the ‘Login’ button.
However, if you don’t have an account on ChatBot yet, then just click the ‘Sign up free’ link at the top.
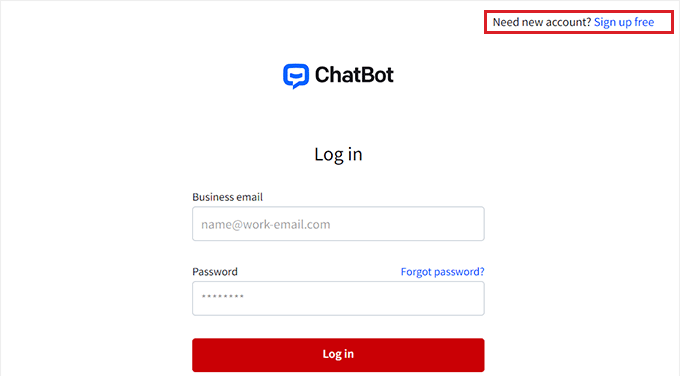
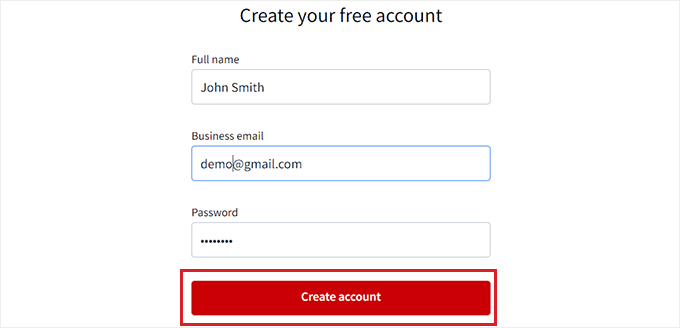
This will take you to a new page where you will need to provide your email address and enter an account name and password.
Once you are done, simply click the ‘Create account’ button.
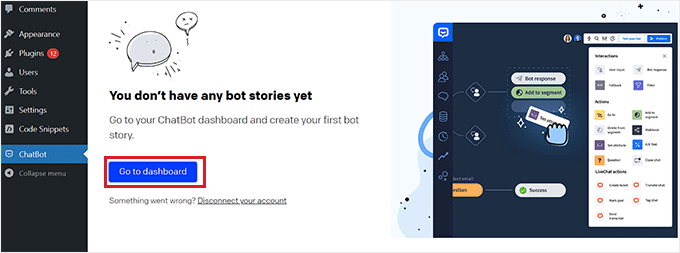
Upon account creation, you will be redirected to your WordPress dashboard. You have now successfully connected your WordPress site with ChatBot.com.
Now, to start creating a chatbot, just click the ‘Go to dashboard’ button.
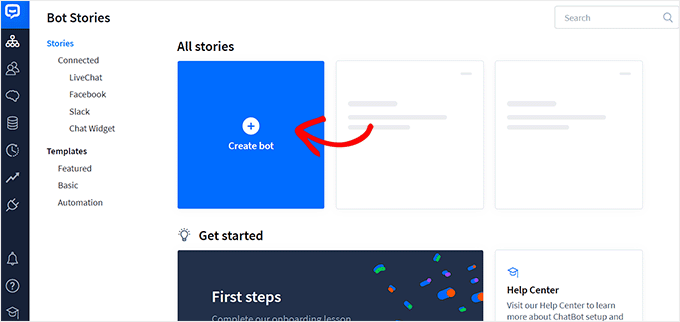
This will take you to your ChatBot account dashboard.
From here, click the ‘Create bot’ button at the top to start the process.
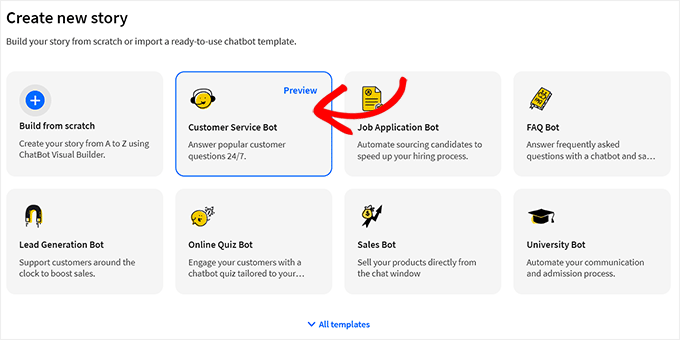
This will take you to the ‘Create new story’ page, where you must choose the type of chatbot that you want to make.
By default, ChatBot allows you to create a customer service bot, job application bot, lead generation bot, FAQ bot, sales bot, and more.
However, you can also pick the ‘Build from Scratch’ option to make a bot yourself. For this tutorial, we will be creating a customer service bot.
This will open the premade customer service bot template on your screen.
From here, you can easily create a conversation flow for your chatbot by clicking on the ‘Bot Response’ tabs in the chatflow.
A prompt will now open on the screen, where you can add chat responses and quick replies like text, images, and buttons by dragging and dropping the blocks into the prompt.
Once you have done that, just add the bot response and click the ‘Save and Close’ button at the top.
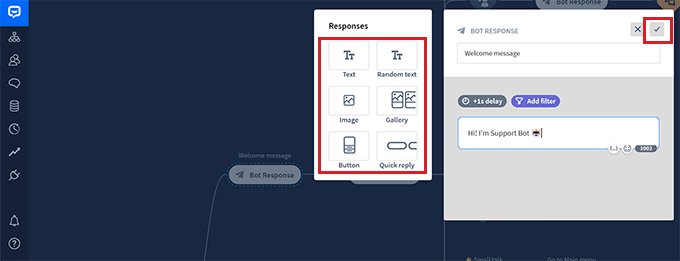
If you want, you can also add custom filters with the chatbot response by clicking on the ‘Add Filter’ button in the prompt.
This will open a dropdown menu where you can pick a filter that will be added to your chatbot’s response, including:
- Message: Personalize the conversation by tailoring the responses to the user’s message.
- Score: Prevent irrelevant conversations by filtering out messages that have a low score.
- Failures: Improve chatbot accuracy by filtering out messages that are likely to result in failure. This can prevent the chatbot from giving incorrect or misleading information.
- Email: Rule out invalid email addresses or address users by their emails.
- Name: Create a personalized experience for the user or block messages that contain certain names.
- Username: Filter out messages that contain certain usernames.
- Integration: Create specific messages for users who use a particular tool.
- Language: Write messages in specific languages for multilingual websites.
- Timezone: Filter messages according to the relevant time zone.
Additionally, you can create specific messages for users in different regions and countries. This can be helpful if you have a large international audience.
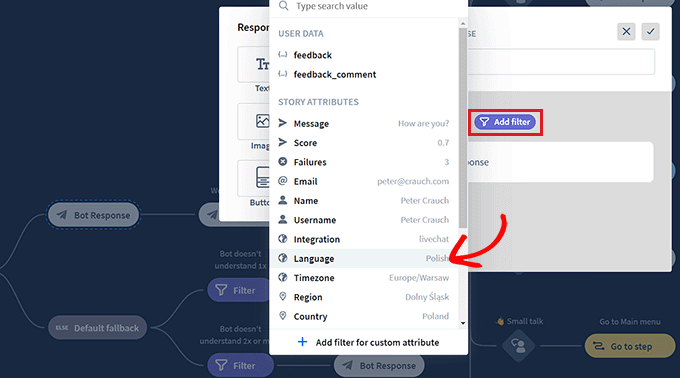
After that, you can also select conditional logic for the now-filtered response. The response that you are creating will only be used by the chatbot if the customer that it is interacting with fits the filter.
For example, if you have a multilingual website and want to create a chatbot for different languages, then you can use the ‘Language’ filter.
Once you do that, select the ‘= equals’ option as the condition and then type in the language name.
Then, you can add the response in the language that you chose. In our example, when a user types a query in the chatbot in Italian, the chatbot will show them the Italian response that we created with this filter.
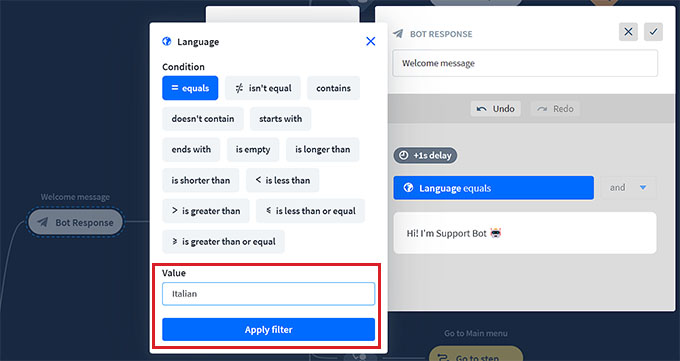
When you have finished adding your filter, just click on ‘Apply filter’.
After that, you can also use the ‘+’ button to add different blocks to your chat flow. This will open a prompt where you can select any block of your choice, including:
- User Input: Add user messages that will trigger the bot’s response.
- FAQ: Add frequently asked questions and their answers in this block.
- Attachment Input: Let users attach files in an ongoing conversation with the chatbot.
- Bot Response: Add a chatbot’s response to a question.
- Backtracking: Prevent users from viewing previously matched interactions with the bot.
- Fallback: Display a general message or trigger an action anytime your chatbot can’t match the user query with any chatbot response.
- Flow: Visually organize complex chatbot response scenarios.
- Add to segment: Segment all the users into different groups based on user data.
- Delete from segment: Delete users from a specific segment.
- Set attribute: Save information about users.
- Mark Goal: Mark a conversation as having reached its goal.
You also have the option to send a transcript of a conversation to an email address or tag different chatbot conversations with keywords and phrases.
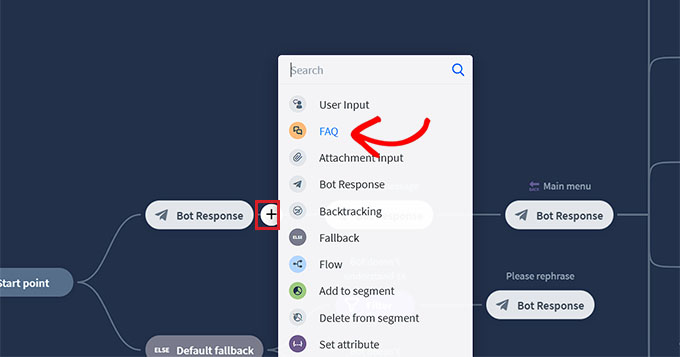
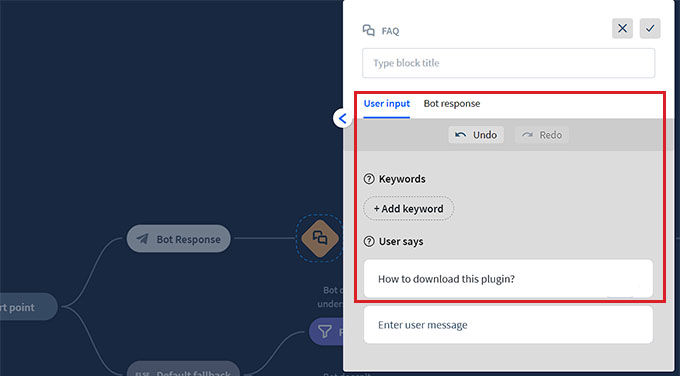
For example, if you choose the FAQ block, it will open on your screen, where you can now add common customer support questions and their answers.
Your chatbot will then use these responses to answer customer queries on your website.
Next, click on the ‘Main Menu’ bot response tab to open the block prompt. Here, you can add buttons for all the services that your chatbot can offer using the Button block.
After that, click on each Button block to open its settings and configure where you want the button to direct the users.
For example, you can allow users to be directed to the FAQs chatbot response that you created by selecting the button type as ‘Go to block’.
Next, select the ‘FAQ’ block from the ‘Go to’ dropdown menu and click the ‘Save Settings’ button.
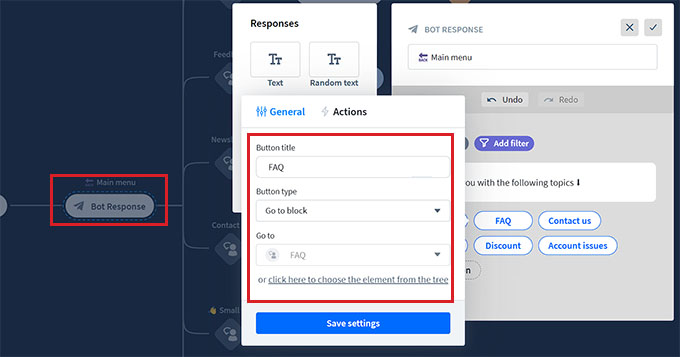
Other than FAQs, you can also create buttons to direct users to your newsletter signup, contact us page, discount offers, and more.
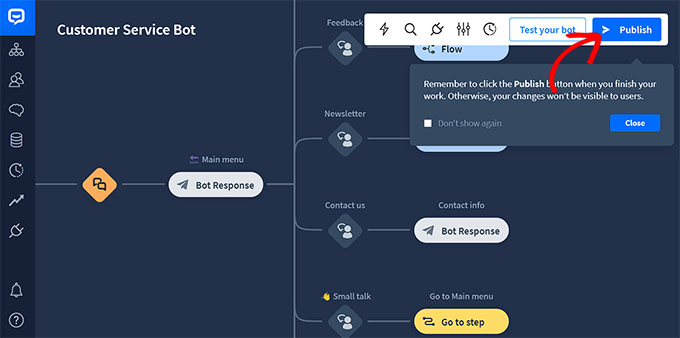
Once you are done, don’t forget to click the ‘Publish’ button at the top to store your settings.
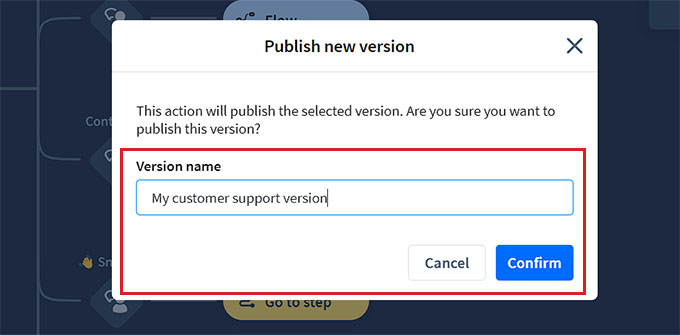
A prompt will now open on your screen, asking you to provide a name for your chatbot.
After entering the details, simply click the ‘Confirm’ button to publish your chatbot.
Next, visit your WordPress dashboard and head over to the ChatBot tab, where you will now notice that the ‘Choose your bot’ section will be visible on the screen.
Note: Keep in mind that after creating your chatbot, it may take 3-4 hours before it becomes visible in your WordPress dashboard.
Now, simply choose the bot that you just created from the dropdown menu.
After that, toggle the ‘Hide chat on mobile’ switch to ‘On’ if you don’t want people visiting your website from their phones to be able to see the chatbot.
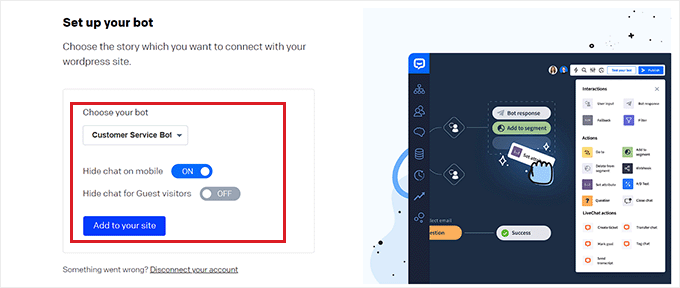
You can also toggle the ‘Hide chat for Guest visitors’ to ‘On’ if you want the chatbot to be exclusive for your members only.
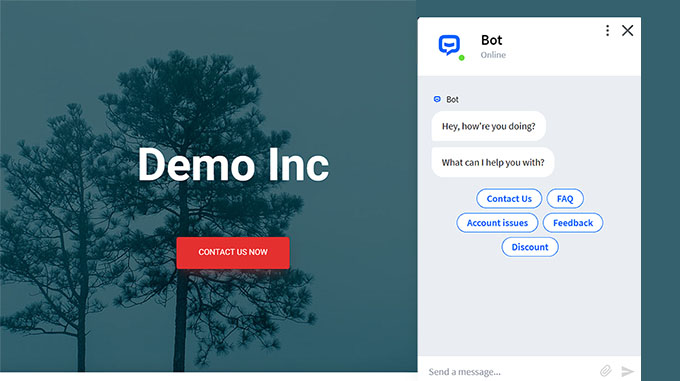
Finally, click the ‘Add to Site’ button. Now, you can visit your website to view the chatbot in action.
Bonus: Add Live Chat to Your WordPress Site
Live chat is a communication tool that allows visitors to chat with a member of your customer support team through a chat window on your website.
It is a super popular way to connect with customers and has a satisfaction level of 73%, which is much higher than email, phone, and SMS support.
Adding live chat to your WooCommerce store will allow customers to get help quickly and easily without having to wait on hold or send an email.
This reduces the bounce rate, increases sales, and even allows you to collect feedback from users.
You can easily add this feature to your website using LiveChat, which is the best live chat support software for WordPress.
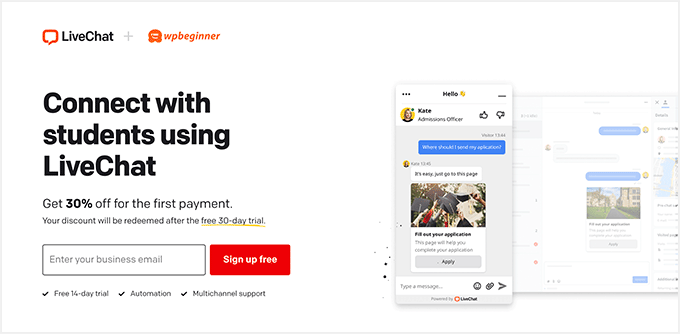
It comes with pre-made live chat templates, real-time chat, multiple support channels, canned responses, chat transcripts, chat analytics, and so much more.
Plus, it integrates with tools like WooCommerce, HubSpot, ChatBot, Constant Contact, and Mailchimp.
For detailed instructions, you can see our step-by-step tutorial on how to add free live chat in WordPress.
We hope this article helped you learn how to easily add a chatbot in WordPress. You may also want to see our guide on how to add documentation in WordPress and our top picks of the best help desk software for small businesses.
If you liked this article, then please subscribe to our YouTube Channel for WordPress video tutorials. You can also find us on Twitter and Facebook.



Dennis Muthomi
I’ve been using HubSpot’s chatbot on several client sites, and it’s been amazing. Here’s a real win: I set it up for a real estate client, and their leads jumped up 25% in just one month!
I would add that always add a backup plan for after-hours. I make sure the chatbot connects users to a contact form or email when no one’s around. This way, you won’t miss any potential leads when the bot can’t help. The HubSpot setup steps in this article are perfect, by the way. They match exactly what I did when setting it up myself.
Jiří Vaněk
I find artificial intelligence fascinating and intriguing. Many times, I’ve toyed with the idea of implementing something similar on my website. Not necessarily to replace any support, but at least for FAQs and such. I couldn’t find a properly detailed guide anywhere. Thank you, and I’ll try your guide first on a development website, and if it works well, I’ll attempt to deploy it on the production version to see if people appreciate it. Anyway, thanks for the excellently crafted guide.
WPBeginner Support
You’re welcome we hope it works well for your needs
Admin
Ralph
Thank you for this insightful guide! Tools like chatbots are crucial for fast response times which are hard to achieve when you are a solopreneur and don’t have team.
WPBeginner Support
You’re welcome, the are certainly helpful when you are solo
Admin