Do you want to add live chat to your WooCommerce store?
Live chat helps you connect with website visitors in real-time so you can offer help, generate leads, and convert them into customers. Users want quick answers to their questions, and using LiveChat can help make that possible.
In this article, we will show you how to easily add live chat to your WordPress website and WooCommerce using LiveChat.
Why Add LiveChat to Your WooCommerce Store
Live chat helps you connect with your website visitors in real-time, and it’s proven to boost satisfaction levels. According to Popupsmart, live chat has the highest satisfaction levels of any customer service channel at 73%, compared to 61% for email and 44% for phone.
This is in line with our experience as well.
With proper help desk support, customers get immediate help when they encounter issues or have questions.
However, the biggest reason for adding live chat to your eCommerce website is the huge boost in conversions it can cause.
We saw a massive increase in overall conversions when we added live chat on the OptinMonster website. A person who chats with us is 11 times more likely to convert than an average website visitor.
Now you might be thinking, isn’t adding live chat expensive? Don’t you need trained support and sales agents to run live chat successfully?
Yes, that’s actually the biggest challenge to live chat, but we solved the problem.
Solving the Biggest Challenge of Live Chat
The biggest challenge of adding live chat to your eCommerce store is managing agents. You will need to add trained support and sales agents to run live chat.
This is where LTVPlus comes in. They provide dedicated and well-trained live chat agents to manage your pre-sales live chat and simple support inquiries. These agents work with you to understand your product/business and act as an extension of your existing team.

LTVPlus was started by the co-founder of MaxCDN, the content delivery network that we use here on WPBeginner, so we decided to give them a try.
We use LTVPlus on OptinMonster and have witnessed a significant increase in our eCommerce conversions. The best part is that we don’t have to worry about hiring or training agents.
Since the entire setup is outsourced, it’s very affordable, and setting up a live chat service pays for itself within the first week.
How to Easily Add LiveChat to Your WooCommerce Site
On our eCommerce website, we use LiveChat as our chat software. You can use any of the top live chat software, but for the sake of this tutorial, we will only show the platform that we are using ourselves.
Step 1: Sign Up for LiveChat
First, you need to visit the LiveChat website and sign up for an account. Simply enter your business email and click ‘Sign up free.’
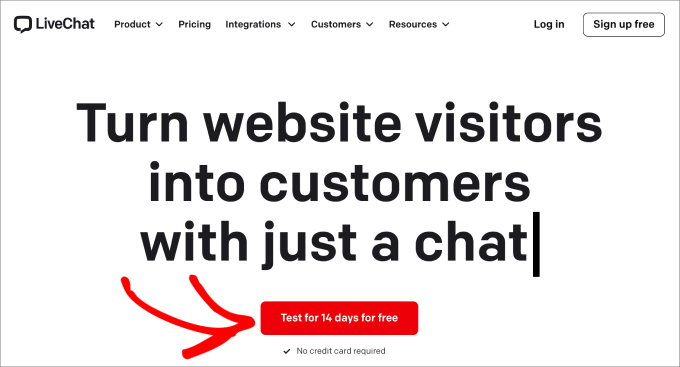
LiveChat is a paid solution (starting from $20 per agent). They also offer a free 14-day trial, allowing you to check out the features and see if it’s a good fit for your business.
The paid plans give you advanced features such as smart routing (distributing chats to the right agent) and connecting LiveChat to multiple apps such as Facebook Messenger and SMS.
Once you’ve chosen which email you’d like to use, click the ‘Start free LiveChat trial’ on the next page.
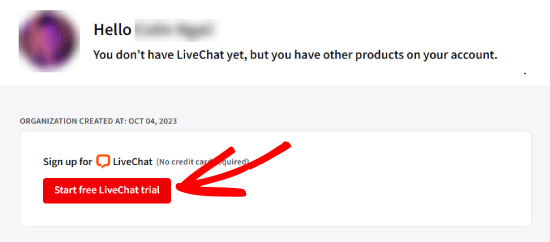
After registration, you will see the LiveChat dashboard.
Step 2: Connect LiveChat to Your Website
LiveChat makes it super easy to add a chat window and buttons to your online store.
In your WordPress site, you need to install and activate the LiveChat plugin. For more details, see our step-by-step guide on how to install a WordPress plugin.
Upon activation, the plugin will add a new menu item labeled ‘LiveChat’ to your WordPress admin.
When you install and activate the plugin, you’ll be asked to integrate your WordPress site into your LiveChat account.
Click on ‘Log in’ to connect.
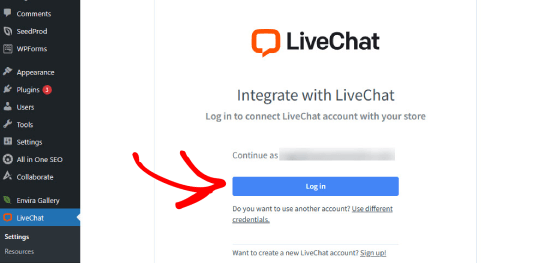
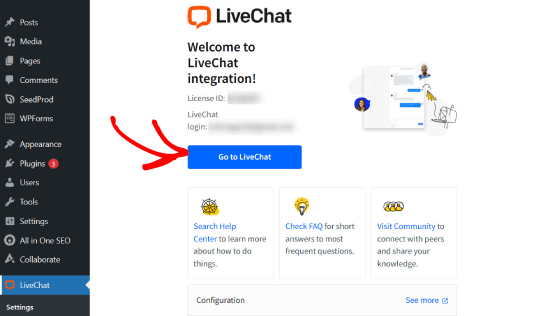
Once connected, you will see a LiveChat page on WordPress.
Click on ‘Go to LiveChat.’ This will take you to the full LiveChat builder so you can customize your LiveChat appearance and chat form, add agents, and more.
Step 3: Customize Your Live Chat.
From here, you need to click on the ‘Settings’ button.
Then, navigate to the Chat widget » Customization to customize the LiveChat window’s appearance.
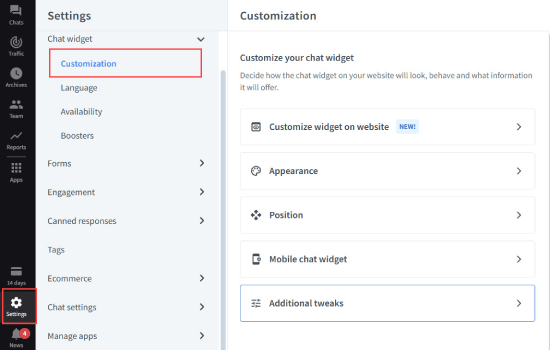
From here, you can choose the chat window colors and theme to match your website’s color scheme.
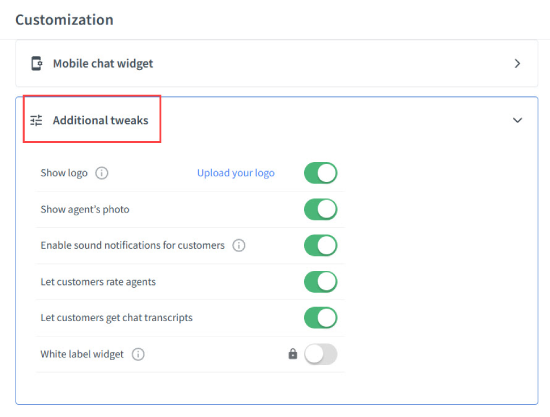
After that, click on the ‘Additional tweaks’ tab to upload your own logo and add your social media profiles.
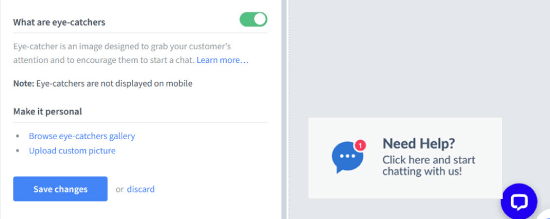
Next, you can customize what LiveChat calls an Eye-catcher. These are images that are displayed when the LiveChat window is minimized.
Head over to Engagement » Eye-catcher.
Then, next to ‘What are eye-catchers’, toggle the button on.
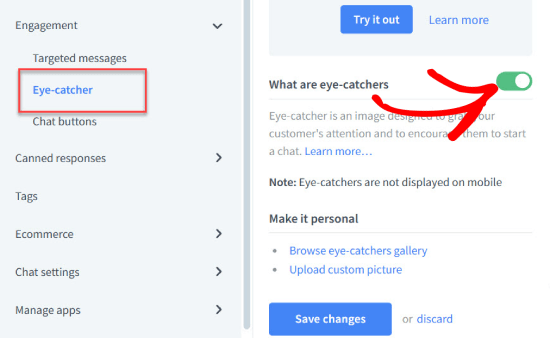
This will show a preview of what the eye-catcher looks like so you can customize it yourself.
LiveChat has several eye-catcher styles that you can use. Alternatively, you can also upload your own images and use them to catch your users’ attention.
We also recommend customizing the pre-chat form. This is where you can gather visitor’s information before the chat starts. For example, asking for their name and email address is a good place to start so you can reach out in case the chat gets disconnected.
You may also want to ask specific questions about what they’re looking for or direct them to specific departments.
In the Settings panel, go to Forms » Pre-chat form. Then, you’ll see your current pre-chat form.
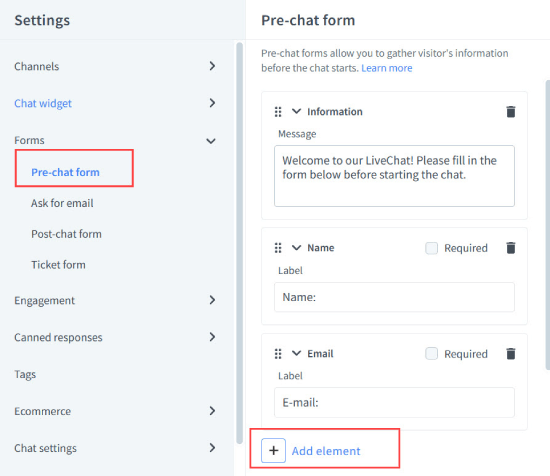
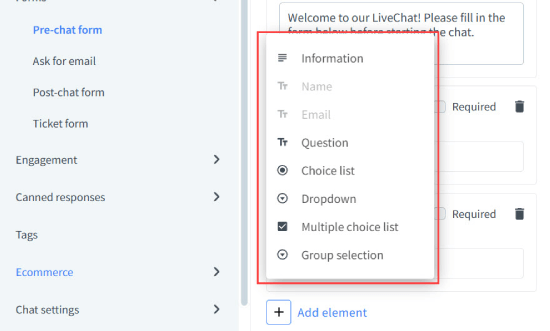
To customize it, simply go to ‘Add element.’
From there, choose any element you’d like, such as information, question, choice list, dropdown, multiple choice list, or group selection. It’s a drag-and-drop interface, so you can easily move any element around to your liking.
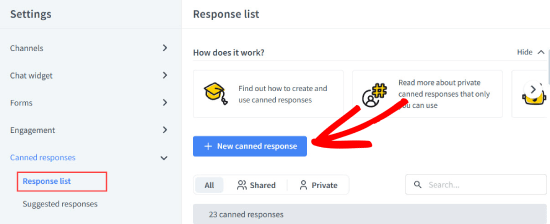
You can also update the Canned Responses to automatically provide answers to frequently asked questions.
Just go to the Canned Responses » Response List under the Settings tab. Just click on the ‘+ New canned response’ to add new ones or scroll down to choose from their existing options.
And if you want to change how chats are routed, go to Chat Settings » Chat assignment.
This is where you can automatically distribute chats to your agents or manually assign them.
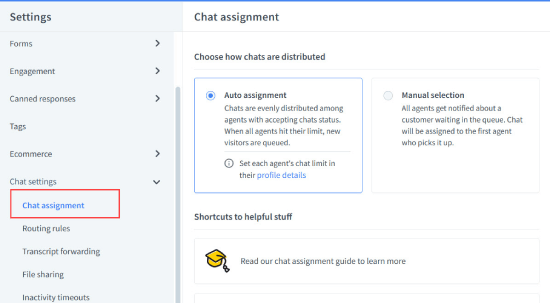
If you want to create routing rules by assigning certain types of inquiries to specific agents, you can configure that in the Routing rules tab under the Chat settings.
Step 4: Invite agents to LiveChat
When you are satisfied with the chat window’s appearance and configurations, it is time to add LiveChat agents.
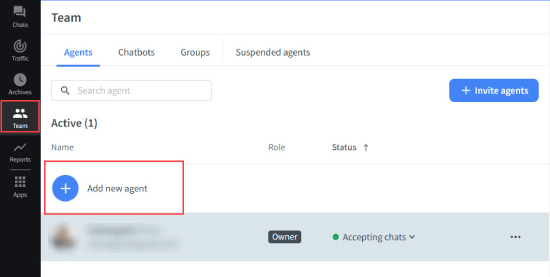
Switch to the ‘Team’ tab and then click on the ‘+’ button next to ‘Add new agent.’
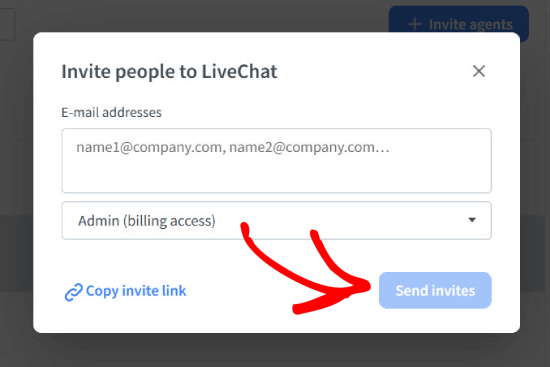
A popup will open, so you invite people to Livechat. You will need to add their email addresses and choose the type of access you want to give them.
You can add them as agents with limited control over your account or as an administrator with full access to the app. When you are done with that, click ‘Send Invites.’
Step 5: Preview your live chat.
Your LiveChat is set up and successfully installed in your WooCommerce store.
You can now visit your website to see the live chat in action on your website. Just click on the ‘Preview live’ link at the top to see how the chat looks.
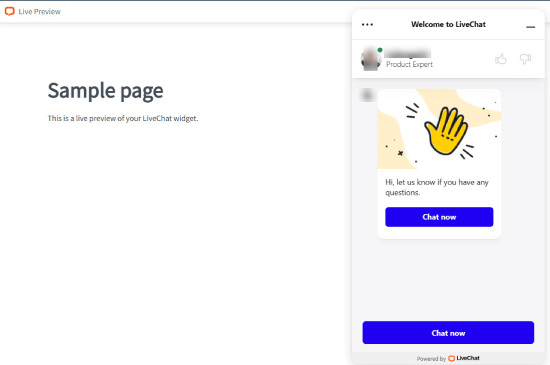
Since you’ve already connected your LiveChat to your WordPress account, LiveChat should automatically appear on your site.
Just go to your website and check that the LiveChat works smoothly.
LiveChat Plugin Settings
LiveChat doesn’t just add a chat feature to your store. It also allows you to view your customer’s cart details during your conversation.
With LiveChat, you can customize the following options:
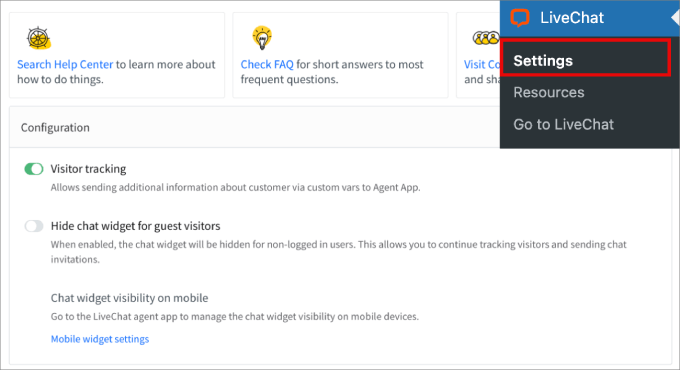
- Hide chat widget for guest visitors – This option lets you choose whether you want to display the chat widget only to users who’ve logged into your store or all web visitors.
- Visitor tracking – Here is where you can see the last order details, product information, unit count, total value, and shipping address.
To toggle these options, just head over to LiveChat » Settings in your WordPress panel. Then, under configuration, choose the option you want to enable.
Install LiveChat Manually
If you are running a non-WordPress website, then you can still easily add LiveChat to your website.
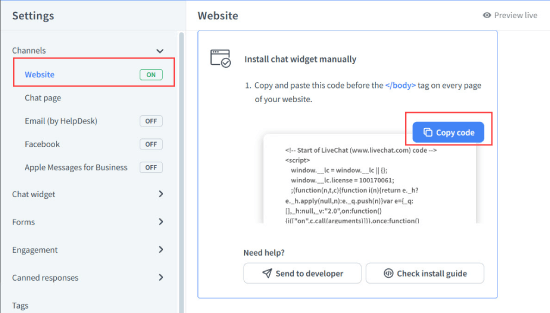
Click on Channels » Website under your LiveChat settings. Under ‘Install chat widget manually,’ you can click ‘Copy code.’ Then, simply add it to your site’s theme.
LiveChat also has apps and integrations for all popular WordPress alternatives like Shopify, Squarespace, Magento, and more. It’s also one of the best WooCommerce plugins for your store to help increase your average order value and boost conversion rates.
Using LiveChat and LTVPlus, we are seeing some really good results on our eCommerce website, and we will be adding LiveChat to more of our own websites.
We hope this article helped you add LiveChat to your WooCommerce store. You may also want to see our list of the best business phone services for small businesses or our guide on how to create a free business email in 5 minutes.
If you liked this article, then please subscribe to our YouTube Channel for WordPress video tutorials. You can also find us on Twitter and Facebook.


Syed Balkhi says
Hey WPBeginner readers,
Did you know you can win exciting prizes by commenting on WPBeginner?
Every month, our top blog commenters will win HUGE rewards, including premium WordPress plugin licenses and cash prizes.
You can get more details about the contest from here.
Start sharing your thoughts below to stand a chance to win!
Chris says
I’m a little confused about your pricing. Their website says “starting at US$ 1,750 / month Per Agent”. You say it starts at $16.99 per agent. I’m no math whiz, but those numbers are quite a ways off.
WPBeginner Support says
Hi Chris,
LiveChat pricing starts from $16.99 / agent. LTVPLus is a different service and their pricing starts at $1,750 per month per agent.
Admin
ETIENNE RUKUNDO says
This is a very good idea to add live chat on our website. i personally i am gona do it to attract users and communicate with them. also if you can could set a video on you on how to use different wordpress themes in one domain name? what i mean is when you click on one page it redirectss you to diffrerent theme. i failed with page theme plugin. plz help
Jodie says
This is probably the best step by step live chat tutorial! Helped me add it to my online marketplace in 1 day
Vladimir Djurovic says
This is really helpful tip. I’ve been looking for something similar for a while now.
Do you know if it has any impact on site performance?
WPBeginner Support says
Hi Vladimir,
LiveChat scripts load from their CDN servers and it is highly optimized for performance.
Admin