Adding title attributes to images in WordPress is a simple yet effective way to boost accessibility and provide additional context for your visuals.
Title attributes offer extra information when users hover over an image. This helps screen readers and search engines understand what the image is about, which is great for SEO.
We have been running a blog for over 16 years and have learned the importance of making posts visually engaging. To make our content stand out, we consistently add images to break up text and grab readers’ attention.
Additionally, we always include title attributes for each image. Over time, we have seen how these small details can create a polished look and improve user interaction with our content.
In this article, we will show you how to easily add title attributes to images in WordPress.

What Is the Title Attribute in Images?
Web crawlers, bots, and screen reading devices can’t actually see your images. Instead, they see HTML like:
<img src="/path/to/image/fruits.jpg" width="100" height="100" />
Most of the time, this code doesn’t help accessibility tools and search engines understand what the image is about.
That’s why we recommend adding a title tag to your images. For example:
<img src="/path/to/image/fruits.jpg" width="100" height="100" alt="A fruit basket" title="Fruit Basket" />
A helpful, relevant title tag will help search engines like Google index your images correctly and then show them to people who are searching for content just like yours. This can improve your image SEO and increase your blog traffic.
Accessibility tools such as screen readers will also read the title out loud, which is helpful for visitors who have problems with their vision.
You can also add an alternate tag attribute, which your WordPress website will display if it can’t show the actual image, for example, due to a WordPress error.
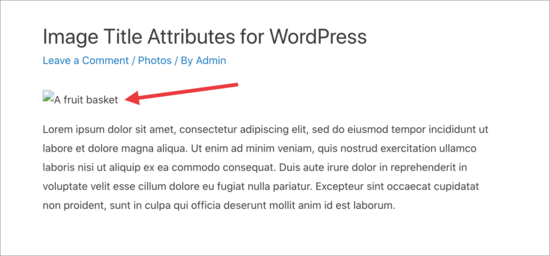
That being said, let’s see how you can add title attributes to images in your WordPress blog or website. Simply use the quick links below to jump to the method you want to use:
Method 1: Adding Title Attribute to Images Using the Block Editor
You can easily add alt text and title attributes to any image in the WordPress WordPress content editor. Simply go to Posts » Add New and create a post.
Then click on the ‘+’ icon and select the Image block to add an image to the post or page.
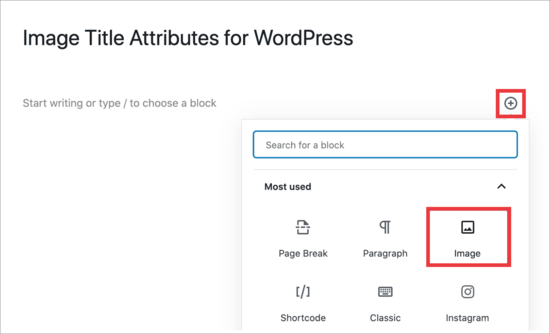
You can now either choose an image from the media library or upload an image from your computer. No matter what option you choose, make sure you click to select the image in the media library.
You can now add alternative text by typing into the ‘Title’ field.
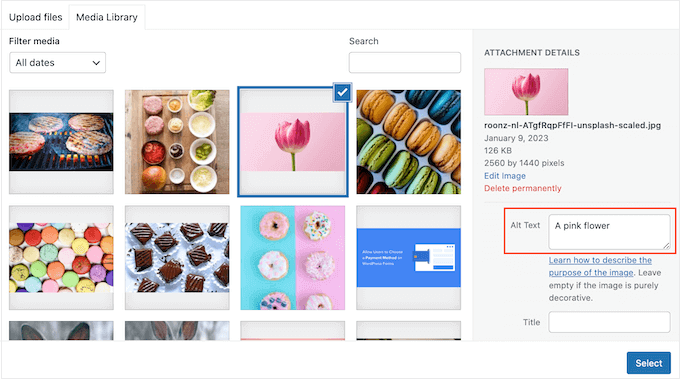
There’s also a ‘Title’ field, but this is the title that WordPress uses internally to identify media files in the Media Library. For more on this topic, please see our guide on image alt text vs. image title in WordPress – what’s the difference?
To add an HTML image title attribute, you’ll need to go ahead and add the image to your page or post, as normal. Then, click to expand the ‘Advanced’ section in the right-hand menu.
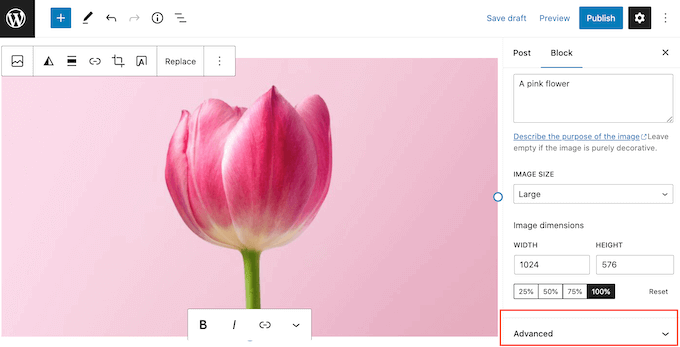
This has a ‘Title attribute’ field, which is the true HTML image title attribute.
Simply type the information you want to use into the field.
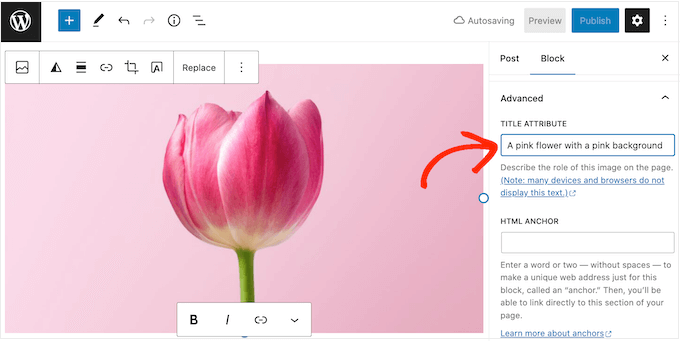
You can now go ahead and click on ‘Update’ or ‘Publish’ to make your changes live.
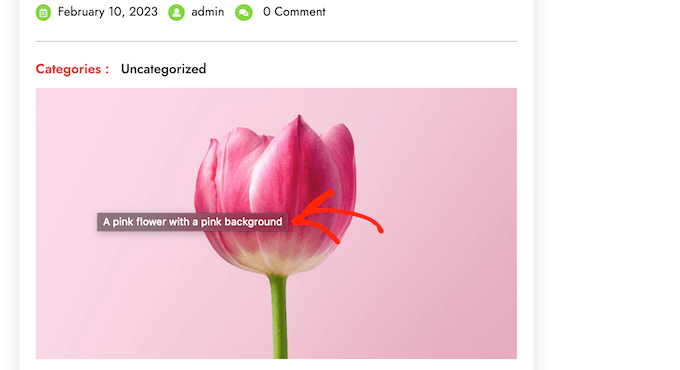
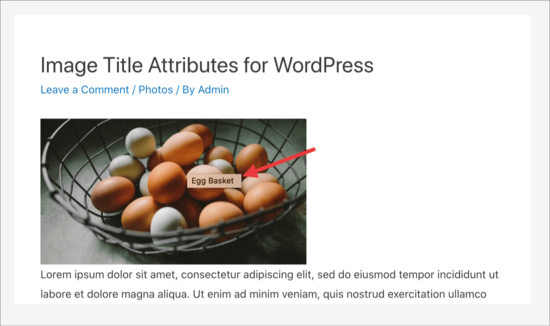
Now, simply hover your mouse over the image, and you’ll see a popup containing your title tag.
Method 2: Add Title Attribute to Images Using WordPress Classic Editor
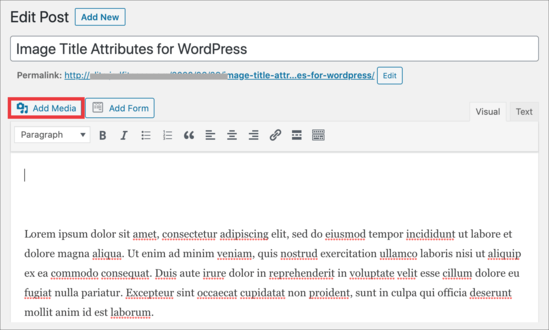
If you are using the older classic editor, then the process of adding a title attribute is slightly different. In the classic editor, click the ‘Add Media’ button and select your image.
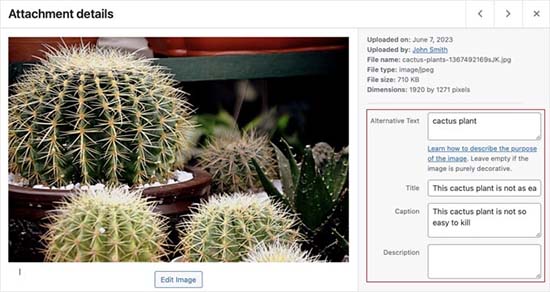
Now, either upload a new image or choose an image from the media library. You can then add the alt text and a title using the fields towards the right of the media library.
Once again, keep in mind that ‘Title’ is used internally by WordPress and is not the true image title attribute that can improve SEO and accessibility.
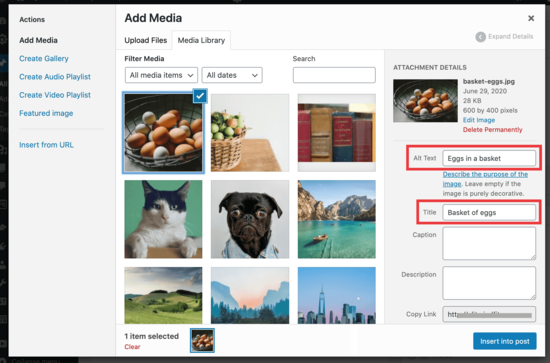
When you are ready, click the ‘Insert into post’ button.
From there, click to select your image and then select the little pencil icon. This will bring up the ‘Image Details’ popup.
Simply click to expand the ‘Advanced Options’ section and then type the title tag into the ‘Image Title Attribute’ field.
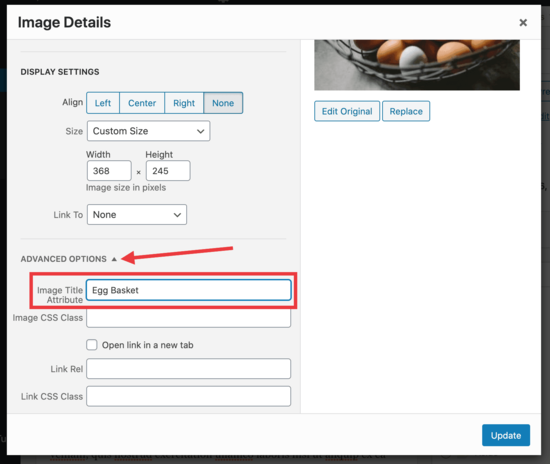
Don’t forget to click on the ‘Update’ button to save your changes.
You can now go ahead and publish the page or post to make the image alt text and title tag live.
Bonus Tips to Boost Image SEO
Once you upload your images to the media library, it is time to optimize them for search engines. This will make it easier for Google to index your images and rank them higher.
To do this, you must keep in mind to add relevant keywords in the captions, title, and alt text attributes.
You can also use All in One SEO for WordPress, which is the best SEO plugin on the market.
It comes with an amazing Image SEO addon that automatically sets your alt text, image titles, captions, and more. It will also add a proper image sitemap to improve your SEO ranking.

Plus, the plugin allows you to disable attachment pages. These pages show only a larger version of the actual image, negatively affecting your SEO.
To disable the attachment pages, visit the All in One SEO » Search Appearance page and switch to the ‘Image SEO’ tab. From here, make sure that the ‘Redirect Attachment URLs’ option is set to ‘Attachment.’
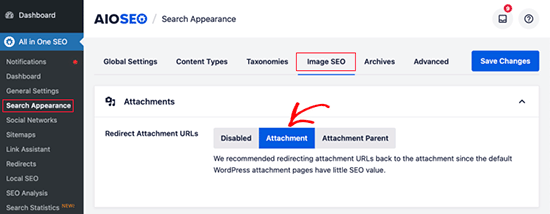
Now, the attachment pages will be redirected to the images themselves.
Other than that, you can also use descriptive text for image files, compress images, and add backlinks to boost rankings. For more tips and tricks, you can see our beginner’s guide to image SEO.
We hope this article helped you easily add the title attribute to images in WordPress. You may also want to look at our ultimate guide on how to use AI to generate images in WordPress and our expert pick of the best image compression plugins.
If you liked this article, then please subscribe to our YouTube Channel for WordPress video tutorials. You can also find us on Twitter and Facebook.


Costas Draco
How can you change attribute title for the hero image?
Thanks
BR
WPBeginner Support
If you mean the featured image then that would read the title set for the image from your media library.
Admin
Dave
How do I change the html title for existing images on the website?
WPBeginner Support
You would be able to go back and edit the title by editing the post.
Admin
Rubb
“Restore Image Title” is not available anymore
WPBeginner Support
Thank you for letting us know, we’ll be sure to look into updating this article as we are able
Admin
Rubb
Thanks, hope someone will create plugin or share the code
Roshni
Thank you for the explanation.
Message on wordpress site for this plugin “This plugin was closed on December 24, 2018 and is no longer available for download. Reason: Guideline Violation.”
Is there a substitute available?
WPBeginner Support
While we don’t have a recommendation at the moment, we will be sure to take a look for alternatives.
Admin
Ehsan
thanks for this great article !
Diana Auerhammer
Like it!! Now, I have to decide if I will go back and fix old images.
Miha
Is there a way to add tite tags to all old pics?
Daniel
This method does not appear to work images in WP galleries.
Hansjörg Leichsenring
Is there a way to add titel tags to “old” pics already in the media?