Do you want to create a WordPress form with a date picker?
A date picker field is a convenient way to capture date-related information on your WordPress forms. For example, you may need to know your users’ birthdates, or you want them to easily schedule an appointment for your services through your forms.
In this article, we will show you how to easily create a WordPress form with a date picker.

Why Create a WordPress Form With a Date Picker?
A date picker field in a WordPress form is useful when you want users to input dates. Common examples include:
- Registration forms that ask users to enter their birthdates.
- Order forms for choosing a delivery date and time for an order.
- Rental item forms for selecting a pickup or dropoff date for a rental item.
- Callback request forms to allow users to let you know when they want to be contacted about your products or services.
- Leave request forms to allow employees to enter the start and end dates for their time off.
- Appointment or booking forms for accommodation or service websites.
A date input field is a much easier way for users to insert dates compared to manually typing them out. It ensures that the date format remains consistent across all form submissions, reducing errors and improving the user experience.
Having said that, let’s see how to easily create a WordPress form with a date picker. You can use these quick links to navigate through this article:
Step 1: Install the WPForms Plugin and Choose a Template
The first step is to install WPForms. It is the best WordPress contact form plugin on the market that makes it super easy to create all sorts of forms on your WordPress site, including forms with date picker fields.
For detailed instructions, you may want to see our step-by-step guide on how to install a WordPress plugin.
Note: For this guide, you need to use a premium version of WPForms, as that’s where the date picker field is available. That being said, if you use our WPForms coupon, then you can get 50% off of the regular price.
You can see our complete WPForms review for more details.
Upon activation, head over to the WPForms » Add New page from your WordPress dashboard.
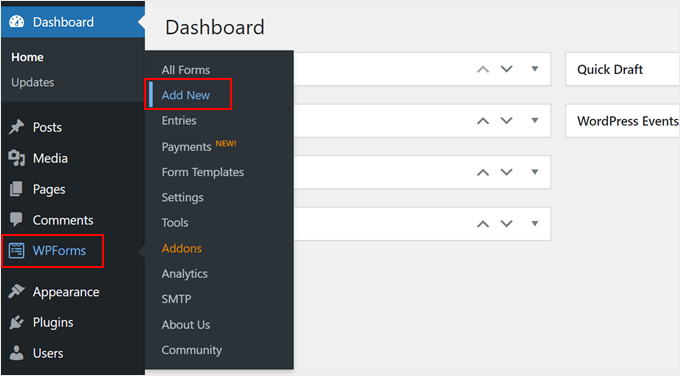
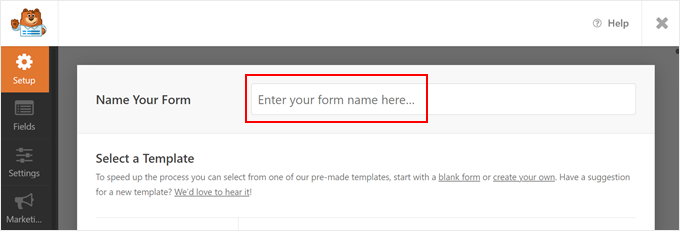
This will direct you to the ‘Select a Template’ page.
Before choosing a template, it’s a good idea to name your WordPress form so that you can easily identify it later.
Scrolling down, you will see a bunch of pre-made form templates available here, many of which already have the date range field included.
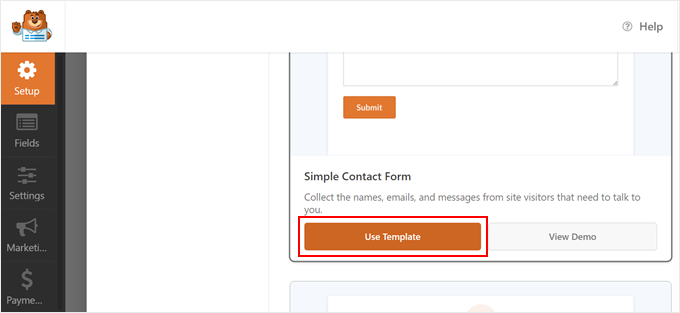
For the sake of example, we will use the Simple Contact Form template and then add the date picker field to it. But feel free to pick a template that suits you best.
Once you have made your choice, just click the ‘Use Template’ button.
Step 2: Add Date Picker Field to Your WordPress Form
Now, you will arrive at the WPForms form builder. You will notice the field options in the left column and a form preview on the right side of the screen.
By default, the Simple Contact Form template only has the name, email address, and comments field added to the form.
For demonstration purposes, we will show you how to add a date field to your WordPress form. But if your template already has it, then you can skip to the editing portion of this step.
What you need to do is scroll down to the Fancy Fields section in the left column, where you will see the ‘Date / Time’ field.
Simply drag and drop that field to where you want it on your form. In this tutorial, we’ve placed it just below the Email field.
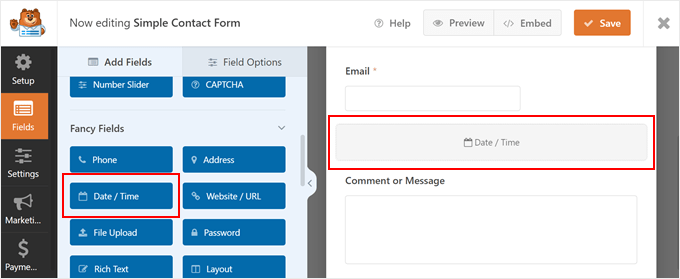
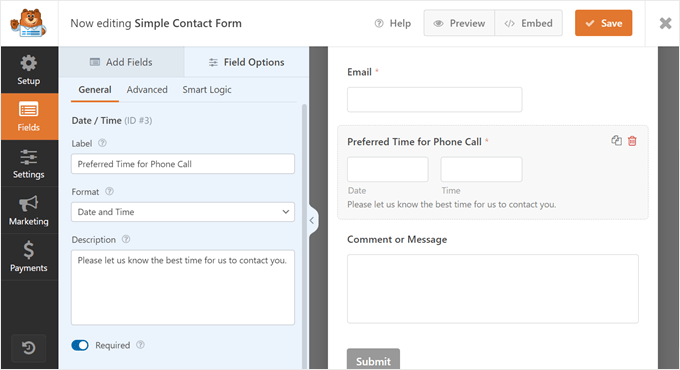
Once you’ve done that, click on the ‘Date/ Time’ field to edit it. This will open up the ‘Field Options’ tab on the left-hand side of your screen.
From here, you can change the label of the field, which defaults to ‘Date / Time.’ We are going to use ‘Preferred Time for Phone Call’ for our field.
You can also change the date format of the field using the Format dropdown menu. The options are Date and Time, Date, or Time only. This may be useful if you want to use just a date without a time field to collect users’ birthdates.
Other than that, you can fill out the description text to give more context on what the user needs to enter in the field.
Finally, you can check the ‘Required’ box if you want to make this a mandatory field. This means the user will have to select a date and time before they can submit the form.
Once you have done that, just click the ‘Save’ button at the top to store your form settings.
Pro Tip: If you run an accommodation site and want users to insert specific dates for their stay, then you can use the Hotel Reservation Form template. It includes two date picker fields: one for the arrival date and the other for the departure date.
Step 3: Configure the Advanced Options for the Date Time Picker
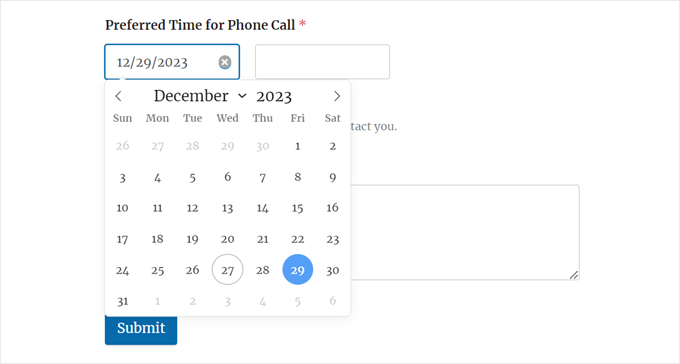
By default, the date range picker field on your WordPress form will be a calendar with a time dropdown menu next to it.
The current date will be selected, but the user can change it to choose a different date. The date format is month/day/year.
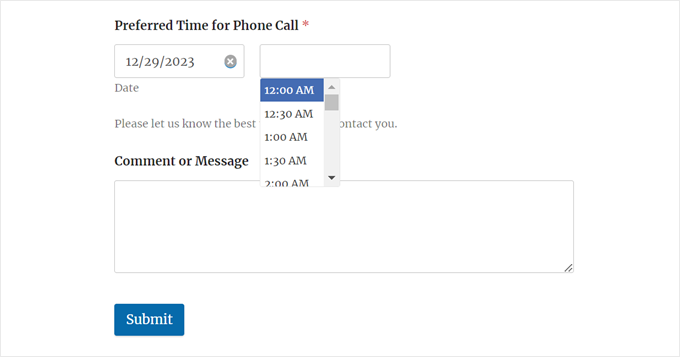
Meanwhile, the time dropdown defaults to a 12-hour clock with 30-minute intervals.
Users can then choose a time slot that works best for them.
In some cases, you may want to change the date picker settings. For example, maybe your country follows the day/month/year or 24-hour date and time formats rather than the default ones.
To do this, you will have to switch to the ‘Advanced’ tab at the top of the left-side panel.
Here, you can adjust the size of the date picker field. Then, in the Date section, you can change the date range from a calendar to a date dropdown menu.
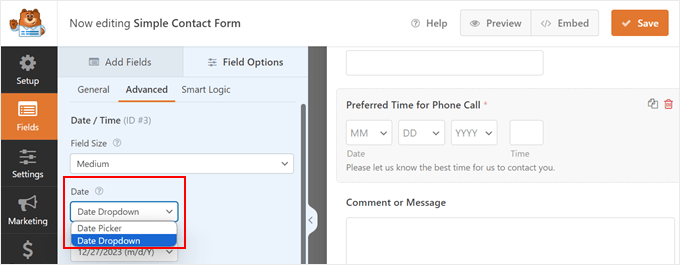
Switching the date calendar picker to a date dropdown menu is a good idea if the form has limited space and the calendar looks rather small.
Here’s what the date dropdown menu looks like:
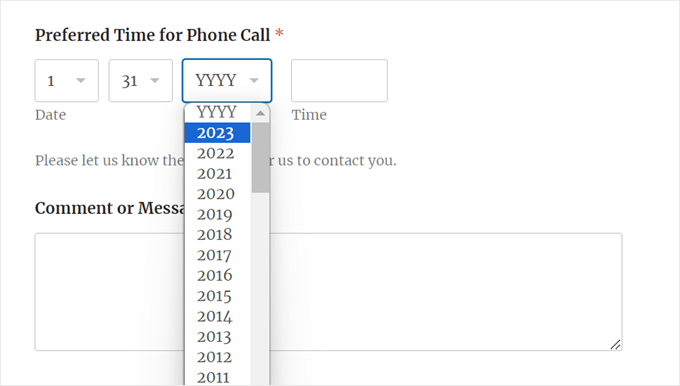
Below that, you can change the date format from month/day/year (1/31/2024) to day/month/year (31/1/2024) or Month Day, Year (January 31, 2024).
If you choose the calendar date picker, then you can also insert placeholder text in the ‘Date’ field. You can fill it with your date format to let users know what format you are using so that they don’t get confused.
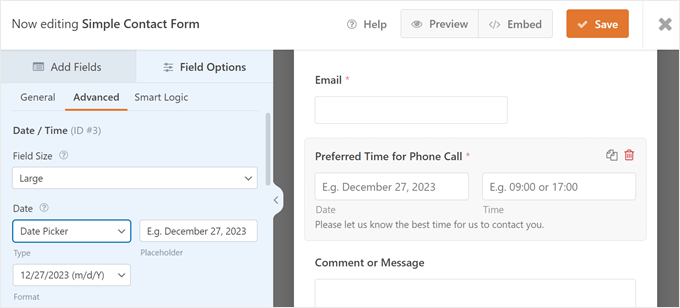
Additionally, you can enable the ‘Limit Days’ switch to adjust the date range that can be selected. This will be useful if you only run your services during the weekdays.
Feel free to also disable past dates to prevent previous dates from being selected.

Next, let’s move down to the ‘Time’ section to change the time picker.
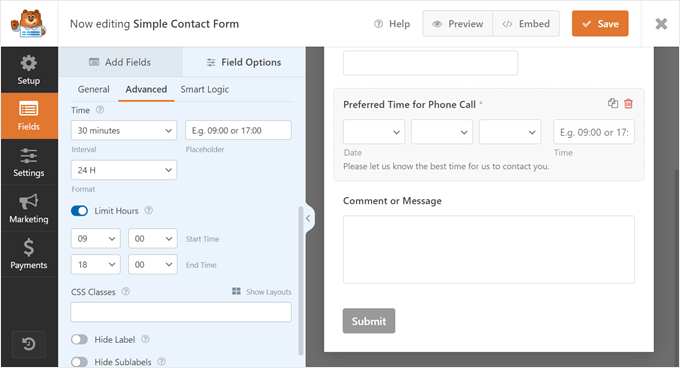
Here, you can change the interval to 15 minutes or 1 hour instead of 30 minutes. It’s also good to input placeholder text here to show what time format you are using.
The time picker defaults to a 12-hour clock, but you can switch this to a 24-hour clock if you prefer.
Also, feel free to turn on the ‘Limit Hours’ setting to specify the start and end times of your services. This way, users cannot make an appointment outside of your business hours.
Other than that, you can enter a CSS class name for the date range field. This is an advanced and optional feature, but you can use this to override the style of the form using code later.
Last but not least, you can hide the form field label and/or sublabel if necessary.
Once you are happy with your new form, you can save it by clicking the ‘Save’ button in the top right corner of the screen.
Step 4: Embed the WordPress Form on Your Website
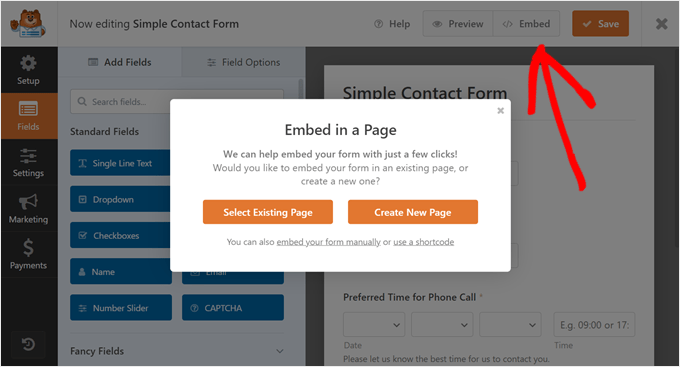
You are now ready to add your new form with the date picker to your WordPress website. To do this, simply click the ‘Embed’ button at the top part of the form builder.
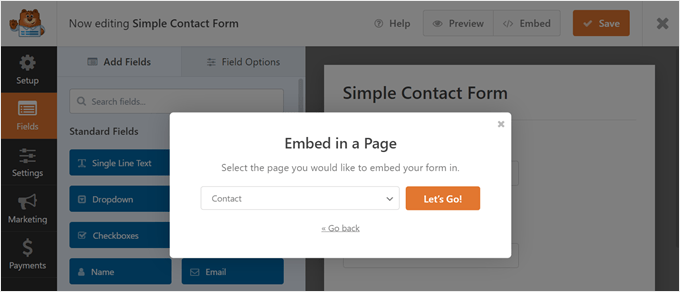
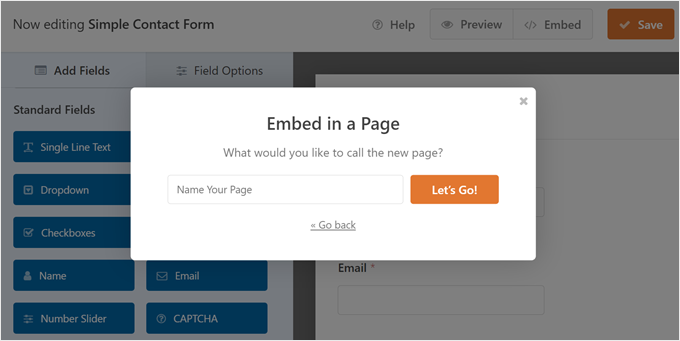
A popup will appear asking you to select an existing page to add the form to or create a new page for the form from scratch. Both options use the block editor, so the steps are pretty similar.
Add the WPForms Block to an Existing or New Page
To insert the form in an existing page, click the ‘Select Existing Page’ button. After that, select one of the pages you already have on your WordPress blog or website and click ‘Let’s Go!’
If you want to add the form to a new page, just click the ‘Create New Page’ button.
Then, give your new page a name, and click ‘Let’s Go!’
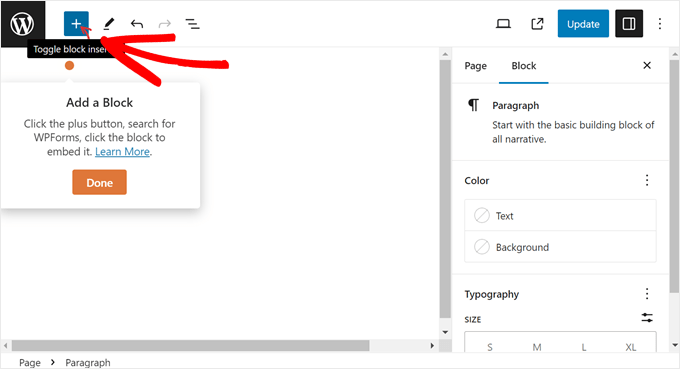
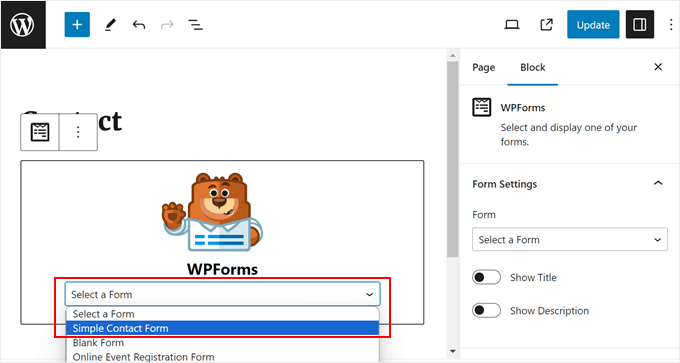
Both of these methods will bring you to the block editor, where you will see some instructions on how to add the WPForms block.
First, click the ‘+’ add block button.
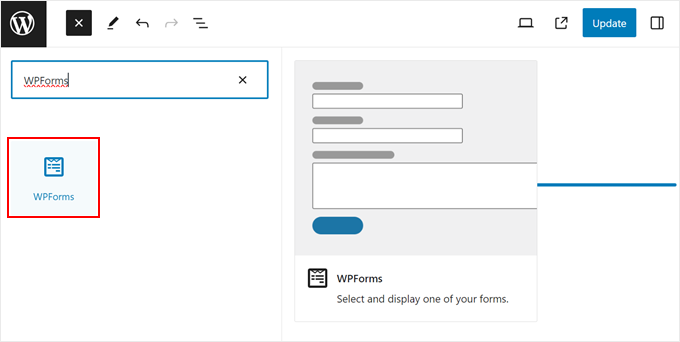
Then, type ‘WPForms’ into the block search bar.
Simply drag and drop the block wherever looks best on the page.
All you need to do now is click the dropdown menu.
Then, select the form you just created.
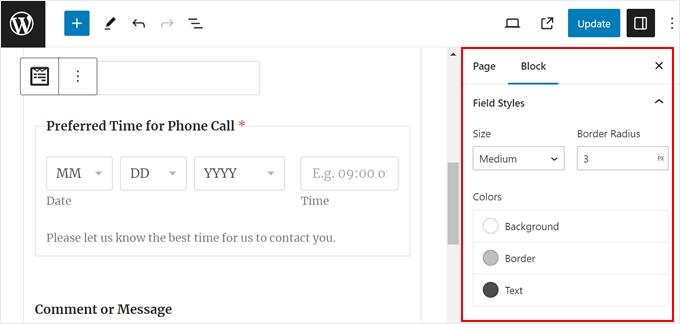
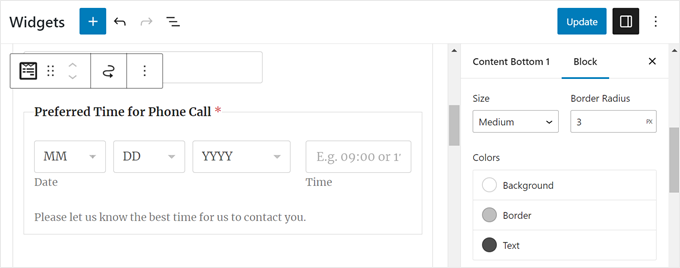
In the Block settings sidebar, you can customize the form field, label, and button styles to make them look nicer with your WordPress theme.
You can change each element’s size, border radius, and colors.
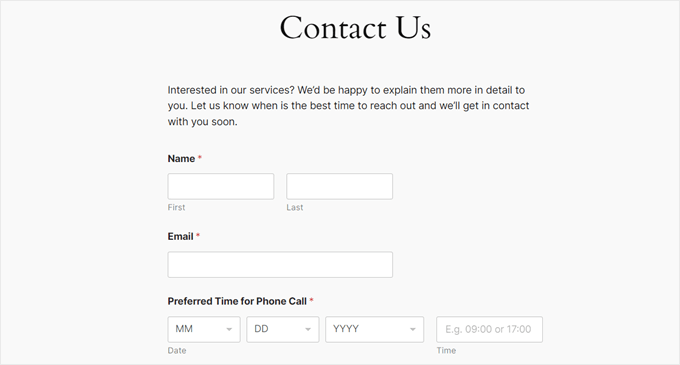
You can now click the ‘Update’ or ‘Publish’ button to make the form live on your website.
It should look something like this on your WordPress website:
If you want to insert the form widget in a post rather than a page, then you can create a new post or open an existing one in the block editor.
After that, just follow the same steps to add the WPForms block to a page like in this method.
Add the WPForms Block to a Widget-Ready Area
If you use a classic WordPress theme, then you may want to display your form in a widget-ready header, footer, or sidebar area. This may be a good idea if your form is pretty short and doesn’t take up too much space.
Note: If you are using a block theme, then this method won’t work for your website.
To do this, just go to Appearance » Widgets from the WordPress admin area. Then, navigate to your desired widget-ready area and click the white ‘+’ add block button inside it. After that, you can search for the WPForms block.
If you see two options, you can choose either one as both do the same thing.
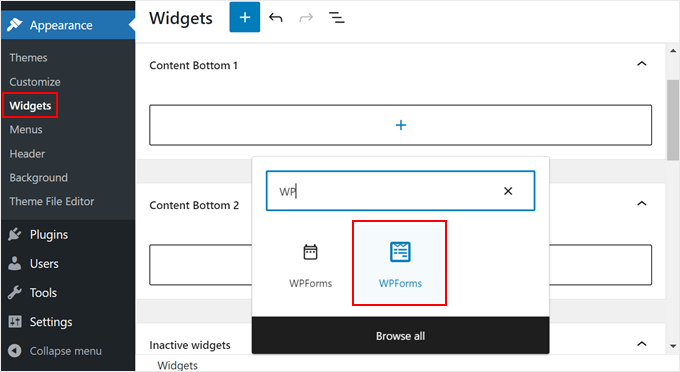
Like in the previous method, simply select the form you just created earlier. In the Block settings sidebar, you can configure the design so that it fits better with your WordPress theme.
Once you are happy with the edits, just click the ‘Update’ button.
That’s it!
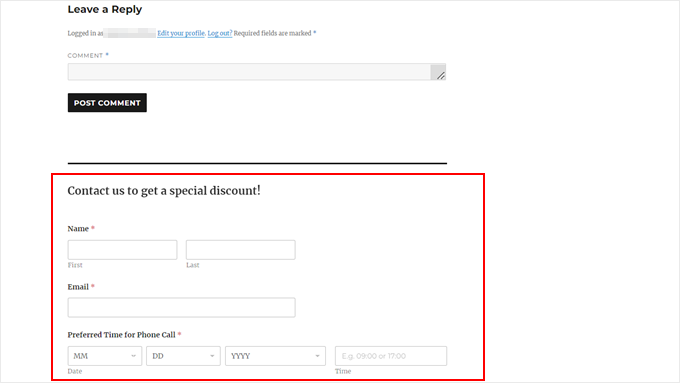
Here’s what our form looks like at the bottom of a WordPress blog post:
Embed Your WordPress Form With a Shortcode
If the WPForms block or widget doesn’t work, then you can also add your WordPress form using a shortcode.
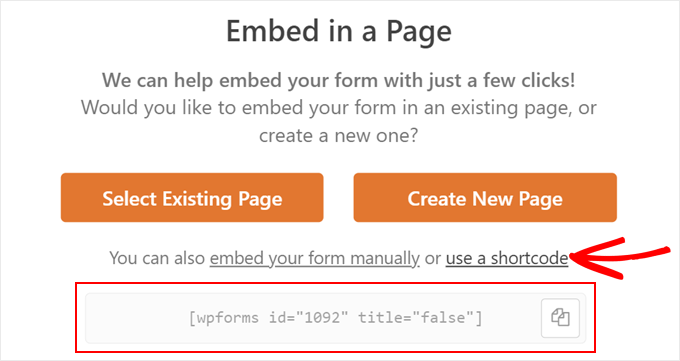
In the ‘Embed in a Page’ popup, simply click the ‘use a shortcode’ link. You will then see a shortcode that you can copy and paste to a page, post, or widget-ready area.
For more information on how to use shortcodes, read our article on how to add a shortcode in WordPress.
Ultimate Tips to Optimize Your WordPress Form
Now that you know how to add a date picker field to your forms, let’s cover the best tips to take your forms to the next level:
- Send confirmation emails to your form submitters – This way, users will get a notification that you have successfully received their entry, and they won’t forget what date or time they have chosen.
- Accept online payments in your forms – WPForms supports popular payment gateways like Stripe, PayPal, Square, and Authorize.net. You can collect one-time or recurring payments, and there are no additional transaction fees.
- Make your longer forms conversational – If you have an event or user registration form that needs to capture lots of information, then making it conversational can increase the form completion rate.
- Prevent contact form spam – You can enable WPForms’ built-in anti-spam protection and reCAPTCHA check box to filter our spammy form entries.
- Follow our list of contact form design best practices – This guide can walk you through designing the best WordPress form to convert regular visitors into leads or customers.
- Read our expert guide on creating interactive forms – WPForms co-founder Jared Atchison gives you pointers on how to make forms more engaging, from using conditional logic to adding rich media content.
We hope this article helped you learn how to create a WordPress form with a date picker. You might also want to check out our article on how to create a multi-page form in WordPress and our ultimate list of the best WordPress survey plugins.
If you liked this article, then please subscribe to our YouTube Channel for WordPress video tutorials. You can also find us on Twitter and Facebook.


Syed Balkhi says
Hey WPBeginner readers,
Did you know you can win exciting prizes by commenting on WPBeginner?
Every month, our top blog commenters will win HUGE rewards, including premium WordPress plugin licenses and cash prizes.
You can get more details about the contest from here.
Start sharing your thoughts below to stand a chance to win!
Dennis Muthomi says
Hello, could there be a way to disable specific dates, like holidays, in the date picker field.
It would be really useful for businesses that don’t operate on certain days.
THANKS
WPBeginner Support says
The plugin’s support can help you set up excluding specific holidays that you want to include.
Admin
Alessandra Del Puglia says
hi, how can i do to disable certain days of the week?
Thanks
WPBeginner Support says
Reach out to WPForms’ support for the current methods of limiting the days of the week
Admin