Do you want to allow users to submit calendar events on your WordPress website?
Adding user-submitted events is a great way to build a community and boost engagement on your website.
In this article, we will show you how to easily create a user-submitted events calendar in WordPress without giving visitors access to your admin area.
Why Create a User-Submitted Events Calendar?
Crowdsourcing events for your WordPress calendar is a great way to build a community, attract new visitors, and keep your calendar updated with the latest events.
It also helps save time since you don’t have to search the internet for upcoming events.
When your community members can add events to your calendar, they’ll get free promotions for their events. Plus, your WordPress website visitors and other community members can easily learn about events happening in their area.
For example, let’s say you are running a charity or non-profit membership website. You can allow members to add different fundraisers, seminars, charity, webinars, and other community events to your site’s calendar.
However, the problem is that WordPress doesn’t allow users to submit calendar events or upload files on the front end by default. You will have to create an account for each user and allow access to the admin area. This method is time-consuming and could be risky.
Thankfully, there’s an easier way. Let’s see how you can let people add calendar events in WordPress.
Creating a User-Submitted Events Calendar in WordPress
The best way to allow users to add calendar events without giving them access to your WordPress admin panel is by using WPForms. It’s the best contact form plugin for WordPress and is trusted by over 6 million businesses.
The plugin lets you create a file upload form and offers a Post Submissions addon that allows you to accept event listings, PDFs, articles, quotations, and other content on the front end of your website.
Note: WPForms has a free version. However, you’ll need the Pro plan of the plugin because it includes the Post Submission addon, premium integrations, and other customization features.
First, you’ll need to install and activate the WPForms plugin. If you need help, then please see our beginner’s guide on how to install a WordPress plugin.
Upon activation, head over to the WPForms » Settings page from your WordPress dashboard and enter your license key. You can find this information in the WPForms account area.
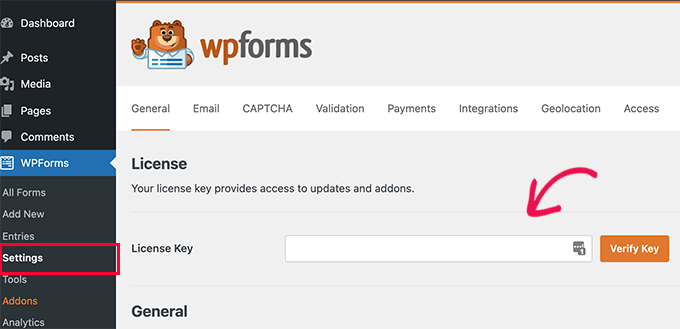
Next, click the ‘Verify Key’ button to continue.
After that, visit the WPForms » Addons page and then scroll down to the Post Submissions Addon.
Go ahead and click the ‘Install Addon’ button.
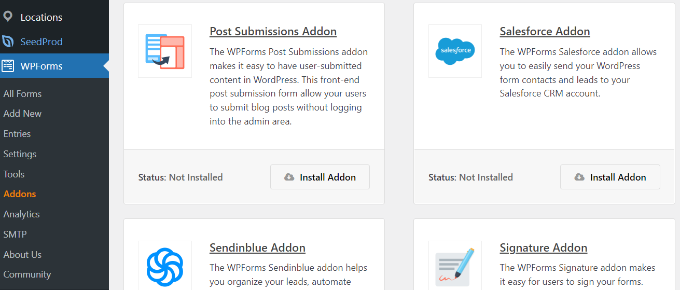
Once the addon is installed, you will notice the Status change from ‘Not Installed’ to ‘Active.’
Setting Up The Events Calendar Plugin
Next, you’ll need a WordPress events calendar plugin to create an events calendar on your WordPress site.
We will use The Events Calendar plugin for our tutorial. It is a powerful event management system for WordPress and offers lots of features. You can easily use it to add events and manage organizers and venues. See our The Events Calendar review for more details.
Plus, The Events Calendar offers a free version and easily integrates with WPForms.
First, you’ll need to install and activate The Events Calendar plugin. For more details, check out our guide on how to install a WordPress plugin.
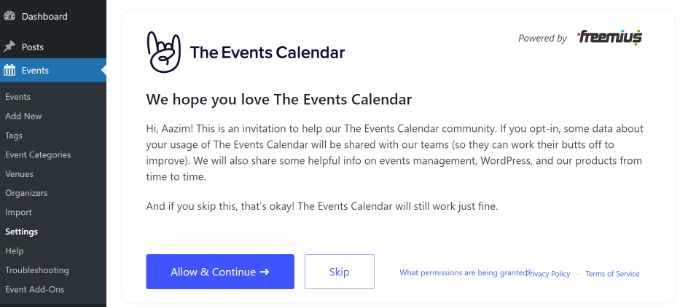
Upon activation, you will be redirected to the Events » Settings page in the WordPress admin panel, where the plugin will ask you to join its community. You can simply click the ‘Skip’ button for now.
After that, you can go through different settings for your events calendar.
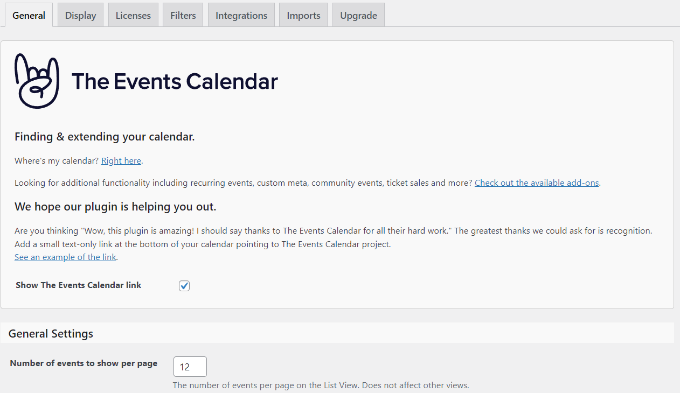
There are settings in the ‘General’ tab to change the number of events to show per page, activate the block editor for events, show comments, edit the event URL slug, and more.
You can also set the time zone settings for your events calendar if you scroll down. The plugin lets you use your site’s time zone everywhere or manually set the time zone for each event.
We suggest using the ‘Use the site-wide time zone everywhere’ option. This will help match the event times that WordPress users submit with your site’s time zone.
When you’ve made the changes, click the ‘Save Changes’ button.

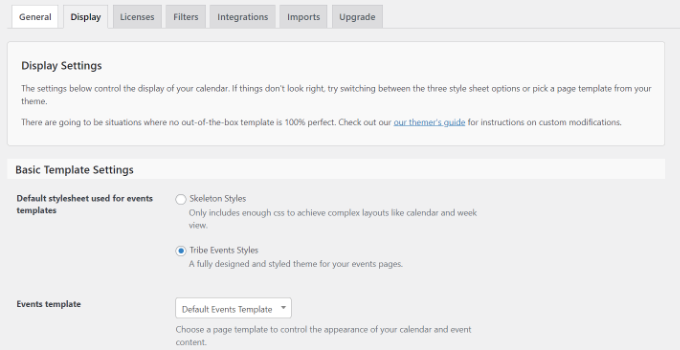
After that, you can go to the ‘Display’ tab and edit the appearance of your events calendar.
For instance, there are options to turn off the default style, choose a template, enable event views, and more.
Once you’ve made the changes, let’s see how you can create a form to accept calendar events.
Creating a User-Submitted Events Form
In the next step, you’ll need to make a form using WPForms to set up event registration on your website.
To start, you can visit the WPForms » Add New page from your WordPress dashboard. This will launch the drag-and-drop form builder.
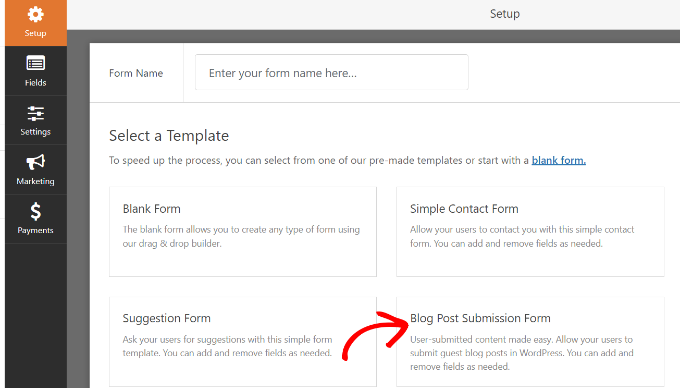
Simply enter a name for your form at the top and then select the ‘Blog Post Submission Form’ template.
We are using this template because when you use The Events Calendar plugin, each event is a custom post type. Using WPForms, you can edit the blog post submission form template to submit an event custom post type instead of a regular blog post.
Next, you can customize your post-submission form.
Using the drag-and-drop form builder, WPForms lets you add different form fields. You can add a dropdown menu, checkboxes, phone number, address, website URL, and more.
Plus, it lets you rearrange the order of each form field and remove fields you don’t need.
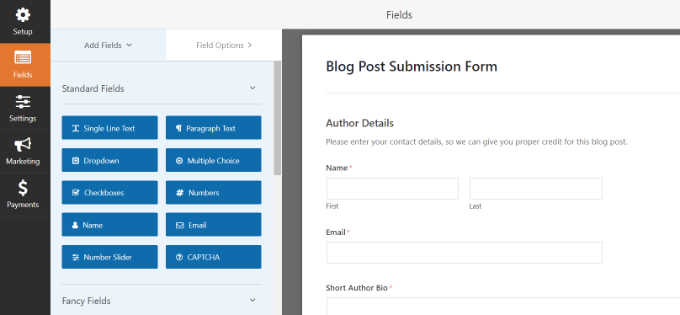
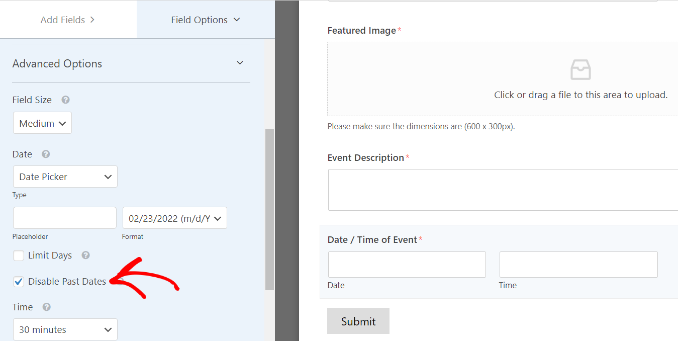
For example, we will add the ‘Date / Time’ fields to our form template to show the ‘Event Start Date / Time’ and ‘Event Finish Date / Time’.
Pro Tip: When you add the Date / Time field, make sure to click the checkbox for ‘Disable Past Dates.’ You can find this option in the Advanced Options tab.
This will ensure that all your new events have a future date. It also helps catch mistakes if someone accidentally enters the wrong year.
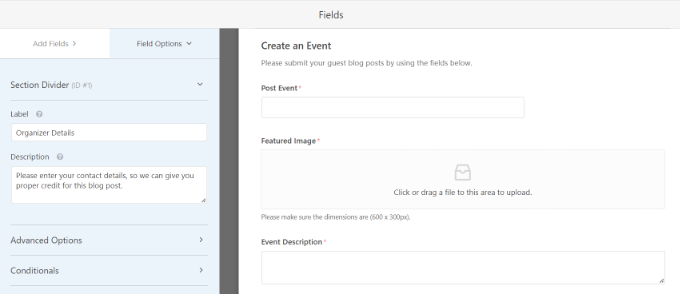
When creating your form, you can rename different form fields. To do that, simply click on them and then change the ‘Label’ under Field Options in the menu on your left.
For our tutorial, we changed the label for Post Title to Event Title and Post Excerpt to Event Description.
After that, you’ll need to go to the Settings » Post Submissions tab in the form builder.
Now, make sure that the ‘Post Submissions’ option is On.
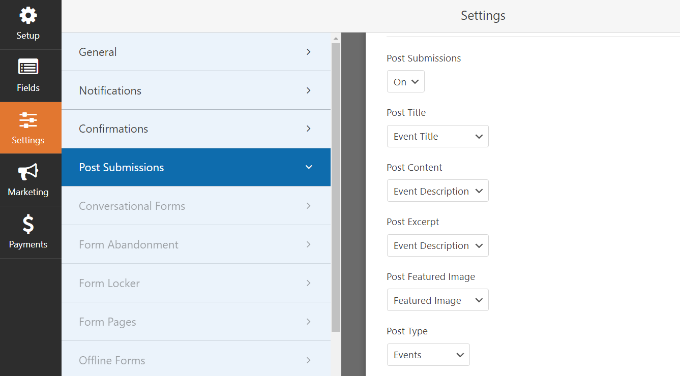
Besides that, you’ll need to match your form fields with the fields that The Events Calendar plugin will look for.
For example, this is how we mapped our demo form fields:
- Post Title to Event Title
- Post Excerpt to Event Description
- From Post Featured Image to Featured Image
- Post Type to Events
- From Post Status to Pending Review
- Post Author to Current User
The Pending Review status allows you to moderate each event submission. Plus, if you are accepting online payments, then you can check if the payments were successful before approving the event.
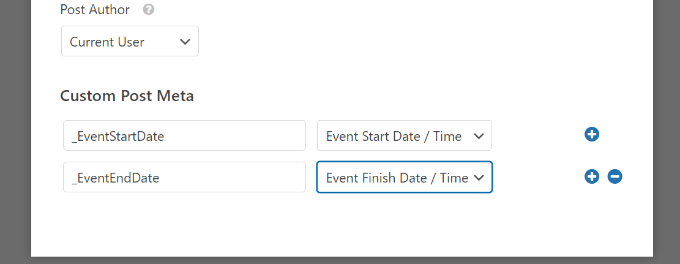
Next, you’ll also have to map the event’s start and end date/time. For that, scroll down to the ‘Custom Post Meta’ section and enter a code to map the respective fields in your form.
To start, add _EventStartDate code and select your event start time field (like Event Start Date / Time) from the dropdown menu.
Then click the ‘+’ button to add another Custom Post Meta and enter the _EventEndDate code to map the event finish form field (like Event Finish Date / Time).
Next, you can also change other settings of your form.
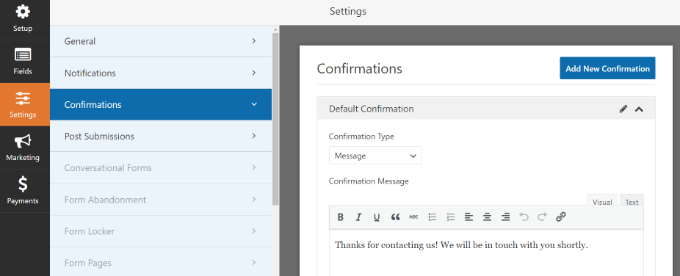
If you go to the ‘Confirmations’ tab, you will see settings for showing the thank you page that will appear when users submit a calendar event.
You can show a message on a page or redirect people to another URL when they submit the form.
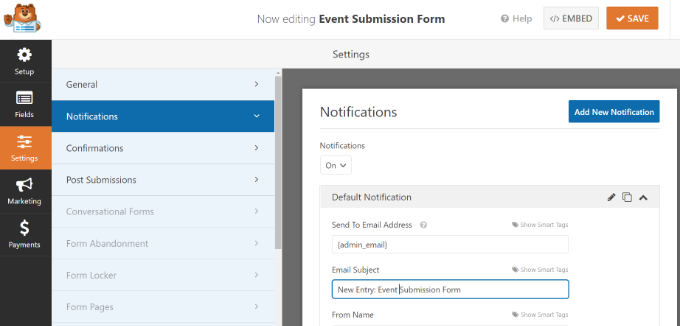
Other than that, you can also change the ‘Notifications’ settings.
The plugin lets you choose different settings for receiving an email notification when someone submits a form. For instance, you can change the send to email address, subject line, from name, and more.
Don’t forget to click the ‘Save’ button at the top to store the changes to your event submission form.
Publishing Your User-Submitted Events Form
Now that you’ve created a user-submitted events form, it’s time to publish it on your WordPress website.
WPForms offers multiple options to embed your form in WordPress. You can use the WPForms block in the block editor, use a shortcode, add a sidebar widget, and more.
For this tutorial, we will use the Embed wizard offered by WPForms.
To start, simply click the ‘Embed’ button in the top right corner.
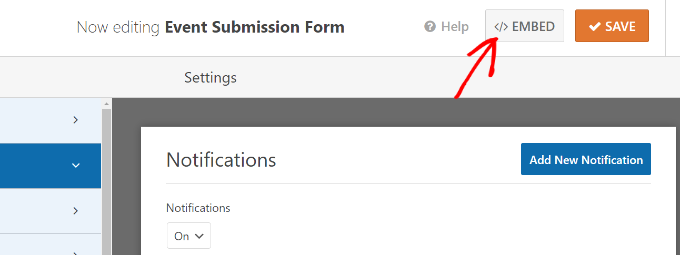
When you click the button, a popup window will appear.
Go ahead and click the ‘Create New Page’ button, and WPForms will automatically create a new page for your form.
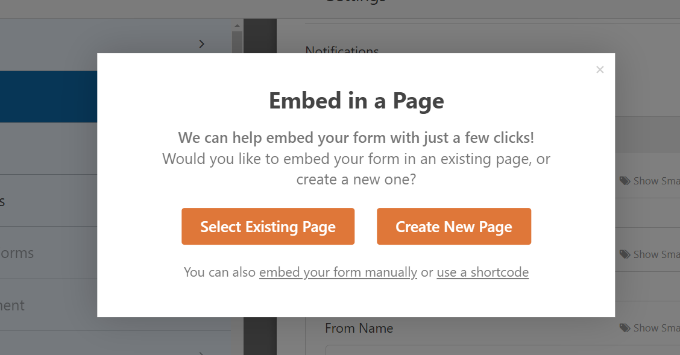
You can also click the ‘Select Existing Page’ to add the form to a published page.
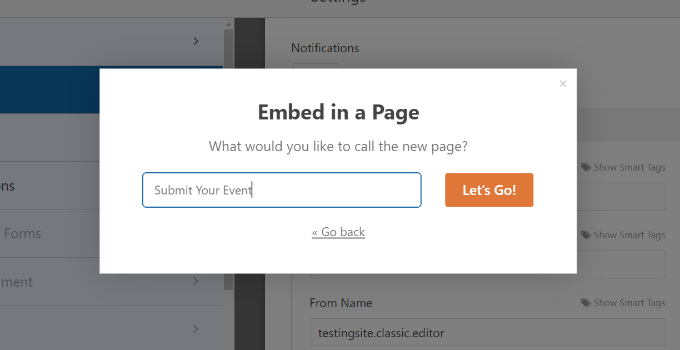
Next, you’ll need to enter a name for your page. Once that’s done, simply click the ‘Let’s Go!’ button.
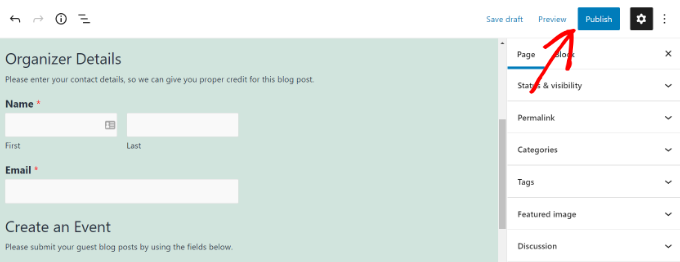
On the next screen, you can see your user-submitted events form on the new WordPress page.
Go ahead and preview the page and then click the ‘Publish’ button.
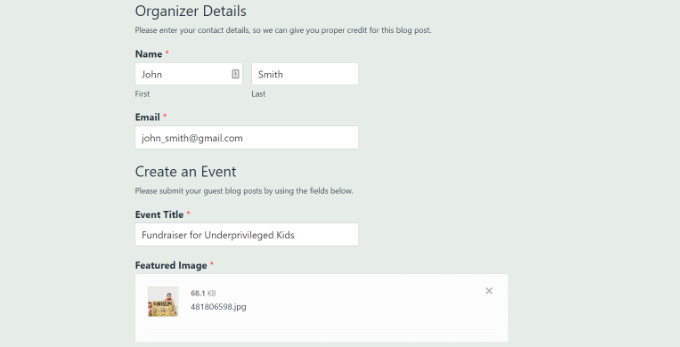
You can now visit your website to see the form in action.
Here’s what it will look like on the front end of your WordPress site.
Next, you can review the calendar events your users submit by going to the Events page from your WordPress dashboard.
All the user-submitted events will be listed here as pending. You can click the ‘Edit’ button under each event to review them.
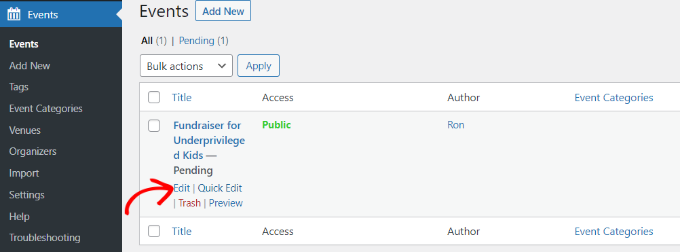
Once you do that, ensure that the user has filled out all the event details required. If any information is missing, you can add it or reject the calendar event if it doesn’t meet your website requirements.
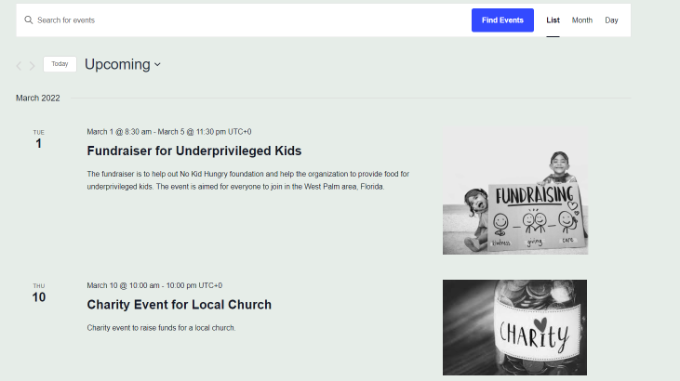
After that, simply Publish the user-submitted event. You can then view your events by visiting the URL created by The Events Calendar: https://www.example.com/events
Bonus: Create a Simple Event Calendar in WordPress
If you just want to create a calendar where only you can add events, then you can do that with Sugar Calendar.
It is the best calendar plugin on the market that lets you create multiple calendars, set start and end times for your events, sync with Google Calendar, and more.
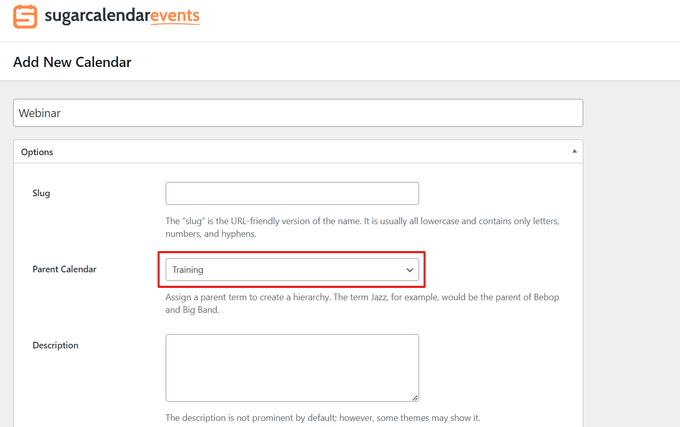
Upon plugin activation, simply visit the Calendar page from the WordPress dashboard. Here, switch to the ‘Calendar’ tab and click the ‘Add New’ button.
This will open a prompt, where you can start by adding a name for the calendar.
Once you have done that, switch to the ‘Events’ tab and click the ‘Add New Event’ button.
The content editor will now be launched on the screen where you can add all the information for your event including name, date and time, and duration.
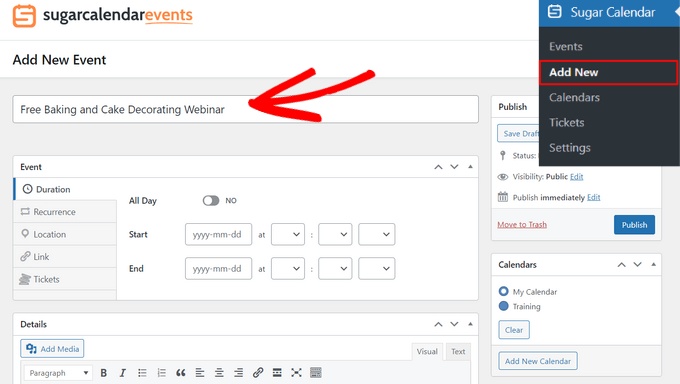
Finally, click the ‘Publish’ button to store your settings. You have now successfully added an event to your calendar. For details, see our tutorial on how to create a simple event calendar in WordPress.
We hope this article helped you learn how to create a user-submitted events calendar in WordPress. You may also want to check out our guides on how to move a website from HTTP to HTTPS and the best WordPress SEO plugins and tools to improve your website’s ranking.
If you liked this article, then please subscribe to our YouTube Channel for WordPress video tutorials. You can also find us on Twitter and Facebook.


Syed Balkhi says
Hey WPBeginner readers,
Did you know you can win exciting prizes by commenting on WPBeginner?
Every month, our top blog commenters will win HUGE rewards, including premium WordPress plugin licenses and cash prizes.
You can get more details about the contest from here.
Start sharing your thoughts below to stand a chance to win!
WPBeginner Support says
In the form settings you would change the pending review to published if you wanted all submissions to go directly live if you were not concerned with moderating the events.
Admin
Philipp Letschka says
Hello,
Thank you very much for your tutorial.
I want to publish every event as soon as it is added without having to approve the event.
Sadly, I have not found a way to achive this. When I add an event via the form it is added to the database. But the event view does not update, unless I press the update button on the event edit page. Any ideas?
Regards
Boris Kospic says
Hello,
Is it possible to submit events with published status, not pending?
So the admin doesn’t need to approve the event manually?
I know that this is not available with the default settings, but I hope that you can find some workaround to archive this
Regards
WPBeginner Support says
You can change the status to published, the main concern when you do that will be any spam submissions you receive will be published on your site.
Admin
Obed says
Great post here, congrats!
Is there any known security risk associated to this approach, like code injection or any through-web -form hacking method?
Cheers!
WPBeginner Support says
Unless we hear otherwise there is not currently a known security risk with this.
Admin