Displaying images side by side in WordPress can improve the visual appeal of your posts and pages. Whether you want to showcase products, create galleries, do a comparison, or offer a more organized layout, aligning images next to each other is a simple way to enhance your design.
At WPBeginner, we have been using WordPress to run our blog for over 16+ years. We also have a lot of experience formatting images since we make an effort to include them in all our pages and posts. That way, we can offer a more engaging user experience.
In our opinion, there are two easy ways to do this. You can use the WordPress block editor or a plugin like Envira Gallery. Keep reading to learn how to put images side by side in WordPress without writing any code.

Why Add Images Side by Side in WordPress?
Adding images side by side can enhance the visual appeal of your WordPress website by creating a more interesting layout.
Side-by-side images can also help make efficient use of your website space, allowing you to fit more visuals within a limited area.
For example, if you have a photography website, then arranging images side by side will help you make full use of your WordPress page by displaying pictures in an aesthetically pleasing way.
Additionally, sometimes, you may want users to compare two images on your WordPress blog. Placing them side by side will make it easier for people to analyze and understand the differences between the images.
Having said that, let’s see how to easily put images side by side in WordPress.
For this tutorial, we will be showing two different methods, and you can use the links below to jump to the method of your choice:
Method 1: Add Images Side by Side in WordPress Using the Block Editor
If you are looking for a simple way to add images side by side using the Gutenberg block editor, then this method is for you.
The block editor offers a Gallery block functionality that lets you easily display images in rows and columns.
First, you’ll need to create a new post/page or edit an existing one to open the content editor. Once you are there, click the ‘Add Block’ (+) button at the top left corner of the screen to open up the block menu.
From here, simply locate and add the Gallery block to the page or post.
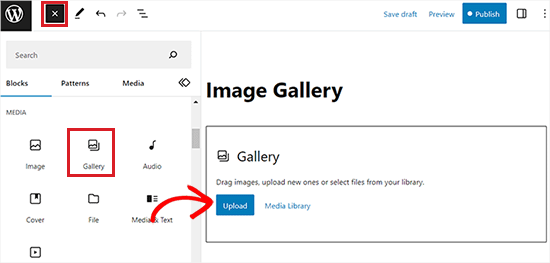
After that, you can easily add images to your gallery block from the computer by clicking the ‘Upload’ button.
You can also select images from your WordPress media library by clicking on the ‘Media Library’ button.
As you can see, we’ve added 2 images to our Gallery block, and WordPress has automatically positioned them side by side.
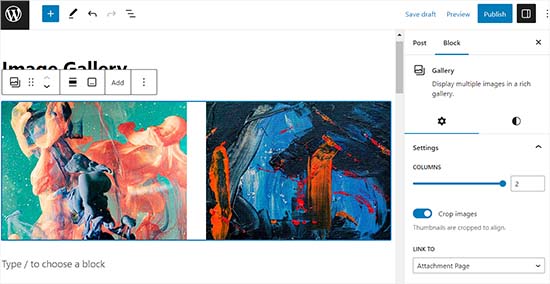
If you decide to add a third image, then you must click the ‘Add’ button from the block toolbar at the top.
This will open the media library from where you can add a third image to your Gallery block. Once you do that, you’ll see that WordPress has now simply resized the images to automatically place them side by side.
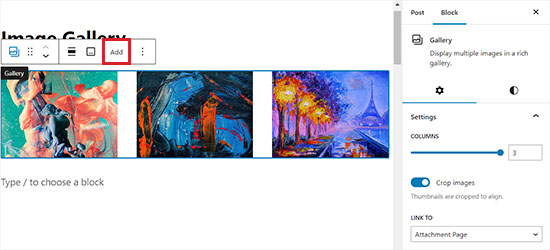
However, if you decide to place a fourth image in the Gallery block, it will be placed under the other images.
To sort this out, you can change the number of images WordPress should include side by side in a single column.
For instance, if you want two images side by side and two more beneath them, you can set the Columns to 2.
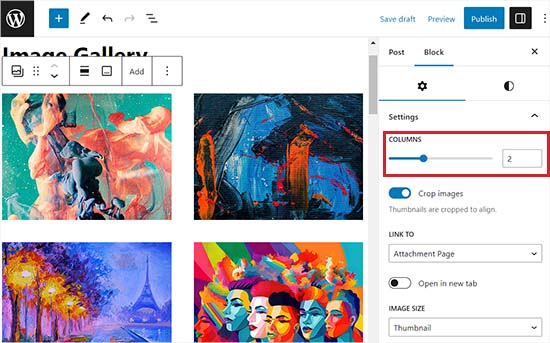
You can also crop images so that they align, adjust image sizes, link them to different pages, and change the background color from the block panel.
For detailed instructions, see our beginner’s guide on how to create an image gallery in WordPress.
Once you are done, don’t forget to click the ‘Update’ or ‘Publish’ button to store your changes.
Now, just visit your website to view the images side by side.

Method 2: Place Images Side by Side in WordPress Using a Plugin (Easy Way)
If you are using the old classic WordPress editor, or if you want to create more complex galleries than the default Gallery block, then this method is for you.
We recommend using Envira Gallery because it is the best WordPress gallery plugin.
Note: Envira Gallery also has a free version that you can use. However, we will be using the Pro plan for this tutorial.
First, you’ll need to install and activate the Envira Gallery plugin. For more details, check out our step-by-step guide on how to install a WordPress plugin.
Upon activation, head over to the Envira Gallery » Add New page from your WordPress dashboard.
Once you are there, you will have to give your new gallery a title. We’ve called ours ‘Example Gallery’.
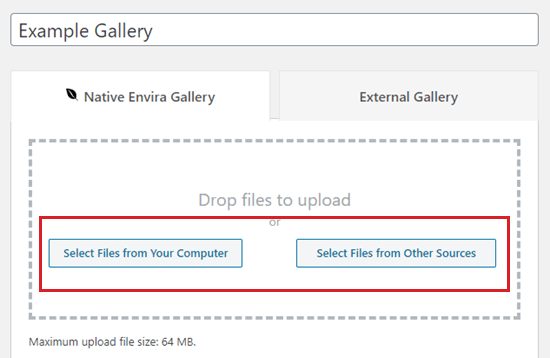
After that, upload the images you want to use from the computer by clicking the ‘Select Files From Your Computer’ button.
To upload images from the media library, click the ‘Select Files from Other Sources’ button.
Once you’ve uploaded the images, scroll down to the Gallery section to view them.
From here, you can give your images a title and alt text. The title appears below your image when the user brings their mouse cursor over it.
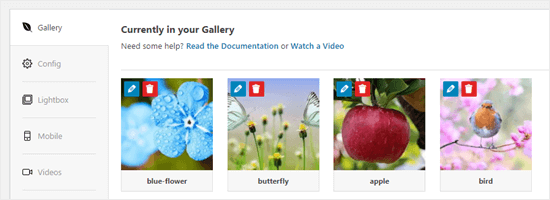
The title also appears below the image in the lightbox popup mode, which we will take a look at in a moment.
To edit the title and alt text, click the ‘Edit’ button on an image in the gallery.
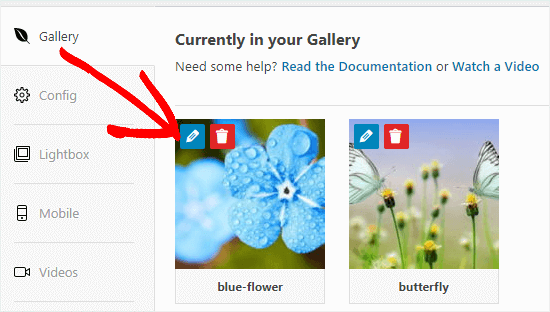
You can then change the title of your image and enter alt text, which is helpful for your WordPress site’s SEO.
If your title describes the image, then you can simply repeat it for the alt text.
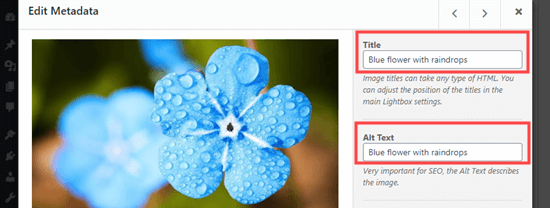
Once you are done, please make sure you click the ‘Save Metadata’ button before closing the window.
If you fail to do so, then any changes you made won’t be saved in the gallery.

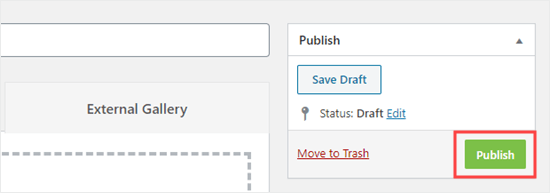
Finally, scroll back to the top of the page and click the ‘Publish’ button to save the image gallery you just created.
After that, head over to the WordPress page or post where you want to add it.
Once you are there, click the ‘Add Block’ (+) button at the top left corner of the screen to open the block menu.
From here, locate and add the Envira Gallery block to the page/post.
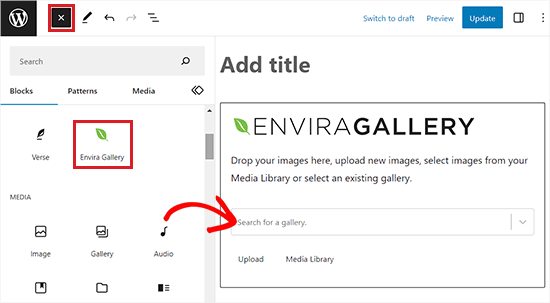
Next, you’ll have to select the gallery that you created from the dropdown menu in the block itself.
To display the images in the gallery side by side, go to the block panel at the right corner of the screen.
From here, scroll down to the ‘Select Layout’ section and choose the number of columns from the dropdown menu. Your images will now be displayed side by side on the WordPress page.
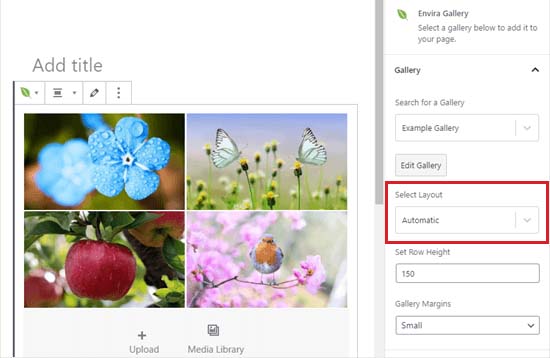
You can also change the gallery margins, enable isotope, and configure lightbox settings from the block panel.
Once you are done, don’t forget to click the ‘Publish’ or ‘Update’ button to store your settings.
Now, you can visit your website to view the images displayed side by side.
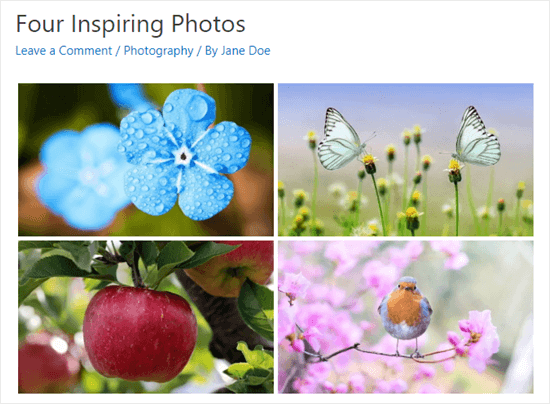
The user can now click on any image to see the full-sized version in a lightbox.
Moreover, they can scroll through the images using the lightbox, too.
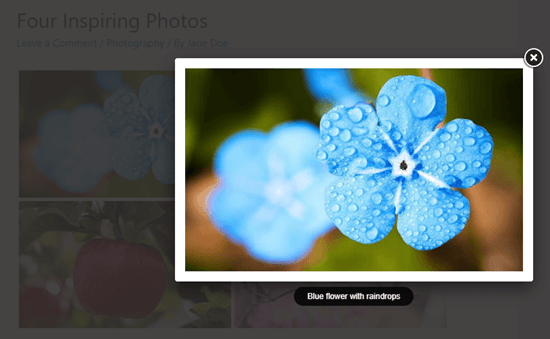
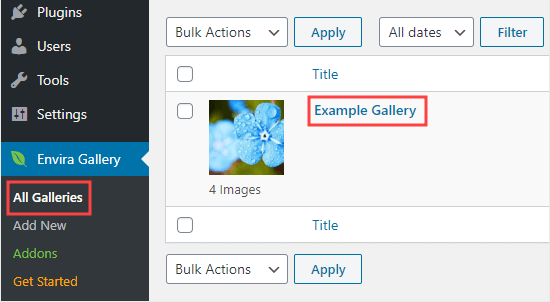
If you want to add more images to your gallery, then you can go back to it by visiting the Envira Gallery » All Galleries page in your WordPress dashboard.
Once you are there, simply click on the name of your gallery to edit it.
Any changes you make to your gallery will appear wherever you’ve placed it in your posts, pages, or sidebars. You don’t need to add it to these again.
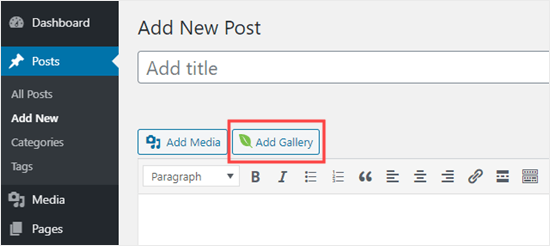
Tip: If you are using the classic editor instead of the block editor, you can still use Envira Gallery.
You’ll see an ‘Add Gallery’ button above the classic editor that you can use to add an existing gallery to your post.
Once you are done, don’t forget to click the ‘Publish’ or ‘Update’ button to store your settings.
Bonus: Align Images in WordPress
When you are adding two images side by side, they must align together to create a cohesive and visually appealing look.
Even if you are adding a single image to your WordPress blog, you will still want to align it with your content to create a visual balance.
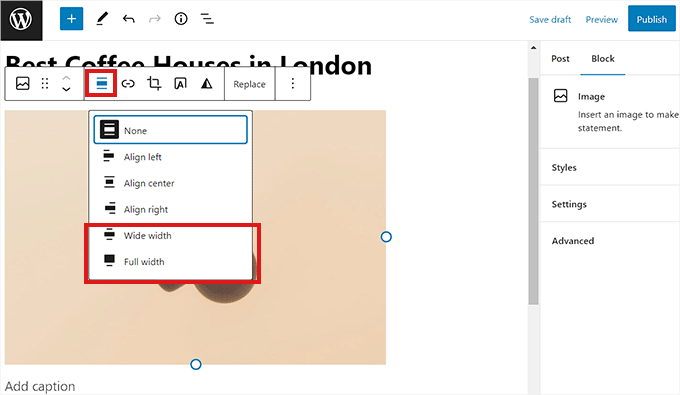
You can easily align images in the WordPress block editor by clicking the ‘Align’ button in the toolbar above the block.
This will open some options from where you can shift your image to the right or left, make it the same width as the container, or use the full-width option so that the image’s width is the same as the rest of the page.
Other than that, you can also use the Column block to align your image with the content. To do this, you will have to select the 50/50 variation.
Once you do that, you can add an image block that perfectly aligns with your content.
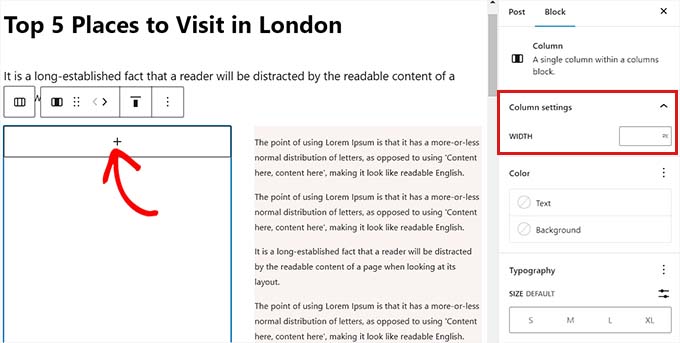
Additionally, you can also wrap text around the image, use the group block, add the cover block, or do so much more to align images together or separately.
For more information, see our beginner’s guide on how to align images in the WordPress block editor.
We hope this tutorial helped you learn how to put images side by side in WordPress. You might also want to go through our guide on how to change block height and width in WordPress and our guide on adding tables in WordPress posts and pages.
If you liked this article, then please subscribe to our YouTube Channel for WordPress video tutorials. You can also find us on Twitter and Facebook.


Jiří Vaněk
These Gutenberg tutorials are seriously great. For someone like me who learned how to make websites in Elementor, these articles are priceless. I don’t have to scramble to find a way to do such a simple thing in Gutenberg because you have tutorials for it.
WPBeginner Support
Glad our guide was helpful
Admin
Kurt
I’ve used HTML tables in the past. I’ll try this feature the next time I need to use more than one image in the same location.
WPBeginner Support
We hope our recommendation makes the process easier for you
Admin
Diana
Is there a way to have “nested” galleries? Would this be an “album”? And would Envira accomplish this? Example: I need to build an artist’s website, with a dedicated page for images. I need to have a “cover” image for separate bodies of artwork (painting, sculpture, outdoor sculptures, ceramic vessels, etc.). So that when you click on it, it opens another gallery of works within a given category (paintings, small sculptures. large sculptures, etc.) And I’d like to be open those images in a slideshow format. Is there an easy way to do this? Most of the templates only allow for single image galleries (i.e. what you see is what you get, only larger, when you click on it). The only other workaround would be to link the cover image to a hidden pager each category?
It’s frustrating to know what I want, but not how to DO IT…
WPBeginner Support
For what it sounds like you’re wanting, you would want to take a look at Envira’s albums and that should be what you are looking for.
Admin
Michael Jakubowski
This looks very promising and I’ll use it in near future. I would have tried to load a 2 column table and then import pictures into it but this looks great!
Thanks.
WPBeginner Support
You’re welcome
Admin
MR MICHAEL F TULK
Always good to get a suggestion. All that is on my blog already but it takes a kick up the pants to get me to utilise things. Thanks.
WPBeginner Support
Glad our guide could be helpful
Admin
Daniel
This article help me out because I wondering if side by side to give my blog post a different look I’ll definitely using it the blog post. For sure thanks
WPBeginner Support
Glad our article was helpful
Admin