Discord is a well-known VOIP chat application that allows you to build your own communities and enables users to communicate with each other through text, voice, and video. As of 2024, Discord has about 227 million active users.
Connecting your WordPress site with your Discord community can improve user interaction and boost engagement by providing a seamless communication channel.
Embedding a Discord widget into your website will allow visitors to join and interact with your Discord server directly, whether you are fostering a community around gaming, teaching, or creative collaboration.
In this article, we will show you how to easily embed a Discord widget into WordPress.
Why Add a Discord Widget to Your WordPress Site?
Discord chat allows users to communicate with each other over messages, voice calls, and video calls.
By embedding a Discord widget in your WordPress website, you can provide a way for your users to connect. This widget will display the total members of your Discord server and will also provide an invite link for new members to join.
By allowing WordPress users to join the Discord chat room, you can build a huge community for your website and encourage visitors to stay on your site longer.
Additionally, you can use the Discord widget to provide customer support by creating dedicated channels for support questions and providing live support to your users.
That being said, let’s see how you can add a Discord widget in WordPress.
How to Embed a Discord Widget in WordPress
To embed a Discord widget in WordPress, you must visit the official Discord website.
Here, you will have to create a Discord user account and a Discord server for your community.
Step 1: Creating a Discord Account and Server
Once you are on the Discord website, simply click the ‘Login’ button in the top right corner of the screen if you already have a Discord account.
However, if you don’t have an account, click the ‘Open Discord in your browser’ button.
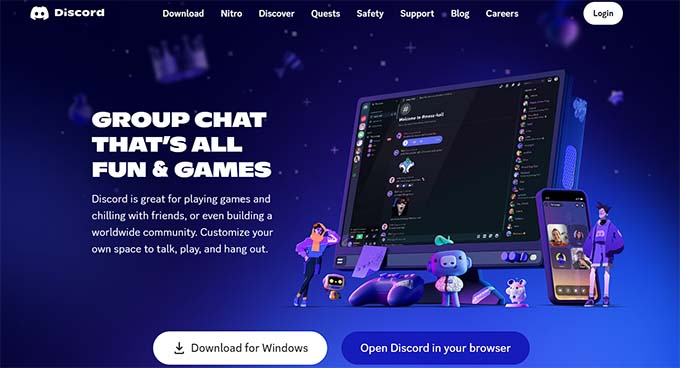
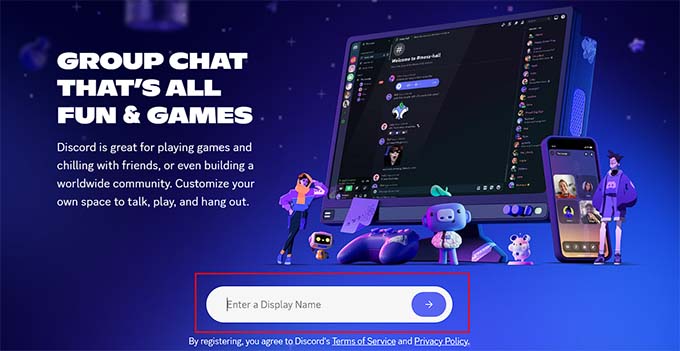
You will be then asked to choose a username for your Discord account.
This will be your handle for others to find you, but you can change your display name on a server-by-server basis.
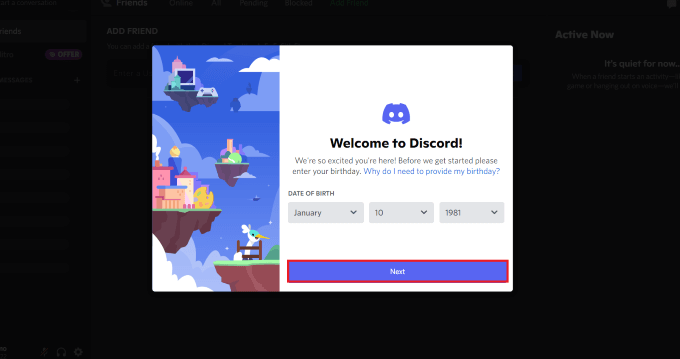
Next, Discord will take you to the ‘Channels’ page and then ask for your date of birth.
Simply enter your details and click the ‘Next’ button to continue.
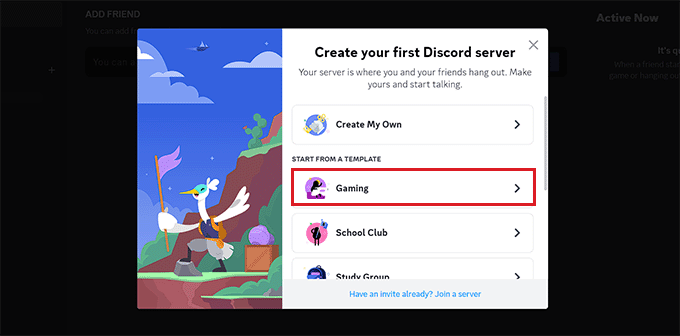
After that, you will be asked to create your first Discord server. Now, you can either create your own template or choose any of the premade ones.
For this tutorial, we will be using the ‘Gaming’ server template.
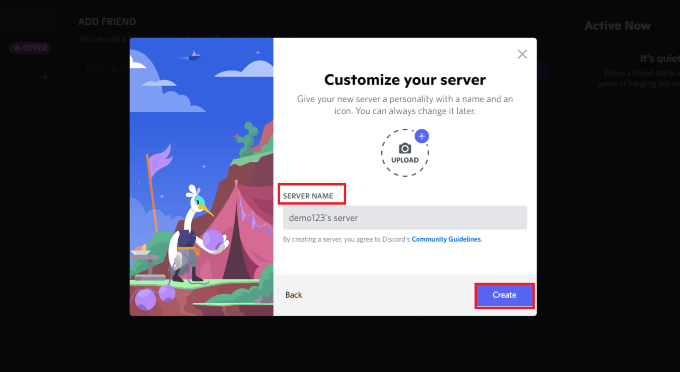
Next, you will be asked to choose a ‘Server Name’ for your chatroom. You can also upload an image for the server.
Once you’ve done that, simply click the ‘Create’ button to create your Discord server.
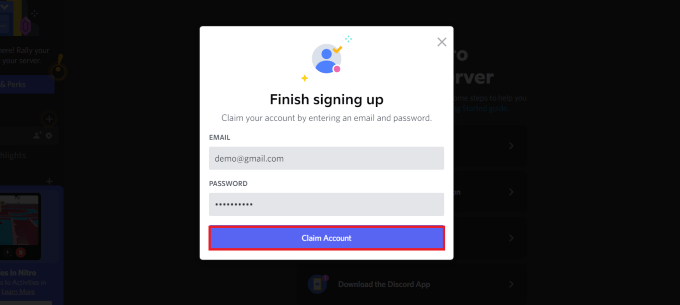
Lastly, you will be asked to provide your email address and choose a password for your Discord account.
Once you provide these details, click the ‘Claim Account’ button.
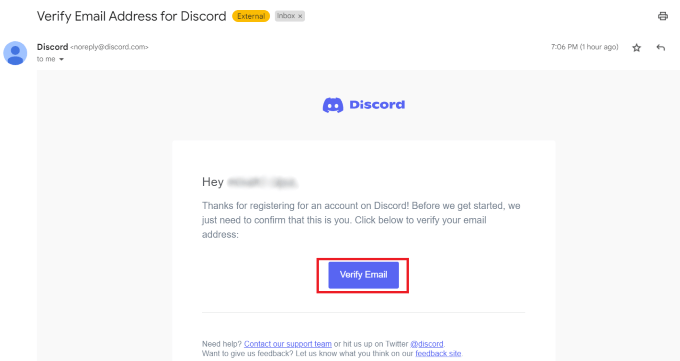
Now, Discord will send a verification email to your email address.
Once you verify your account, your server will be set up.
Now, all you have to do is embed the Discord widget in WordPress.
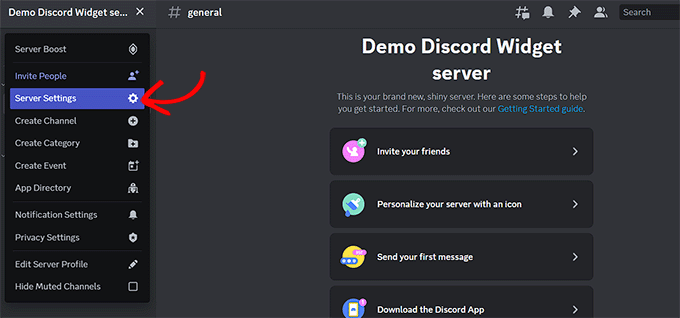
To do this, click the arrow icon next to your server name at the top of the Discord ‘Channels’ page.
This will open up a dropdown menu where you have to click the ‘Server Settings’ option.
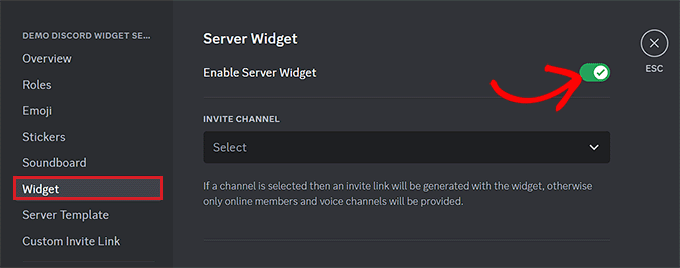
You will now be directed to the ‘Server Settings’ page. From here, click the ‘Widget’ tab from the sidebar.
This will open up the ‘Server Widget’ settings on the screen from where you must toggle the ‘Enable Server Widget’ switch.
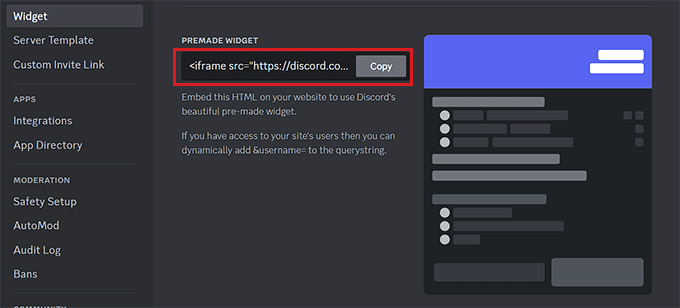
After that, scroll down to the ‘Premade Widget’ section and click the ‘Copy’ button under the ‘Premade Widget’ option.
You can now embed the Discord widget anywhere on your website by pasting this code.
Step 2: Embedding the Discord Widget in WordPress
First, go to the WordPress page or post where you want to embed the Discord widget.
Once you’re there, click the add block ‘+’ button in the top left corner of the screen to open the block menu.
From here, find and add the Custom HTML block to the page/post. Next, simply paste the HTML code for the widget into the block.
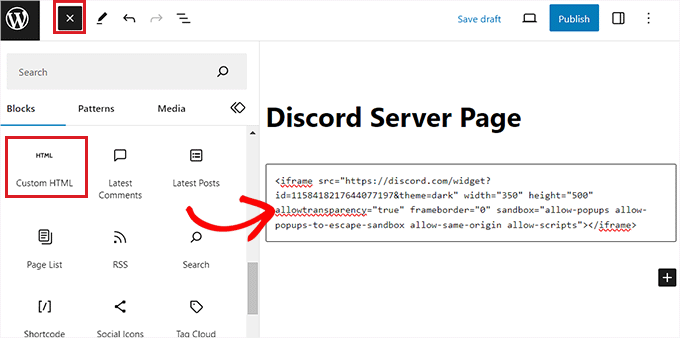
After that, click the ‘Publish’ or ‘Update’ button at the top to store your settings. The Discord widget will now be embedded in your WordPress blog or website.
This is how the Discord widget looked on our demo site.
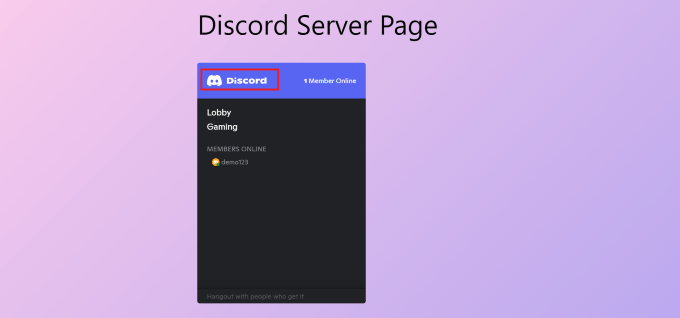
Note that you can embed the Discord widget in any block-enabled area of your themes, such as a sidebar, header, or footer.
Bonus: Create Chatrooms in WordPress
If you don’t want to use Discord, then you can create chat rooms directly on your WordPress blog. This way, an instant messaging prompt will be displayed on your site where users can leave their opinions about your posts or discuss them with other visitors.
You can easily create a chatroom with Simple Ajax Chat. This free plugin lets you add chatrooms anywhere on your WordPress site. They can be open to the public or restricted to logged-in users. To learn more, see our Simply Ajax Chat review.
First, you need to install and activate the Simple Ajax Chat plugin. For details, see our beginner’s guide on how to install a WordPress plugin.
Upon activation, visit the Settings » Simple Ajax Chat page where you can add a name and default message for the chatroom. You can also decide if you want to allow unregistered users to participate, add your custom logo, configure brand colors, and so much more.
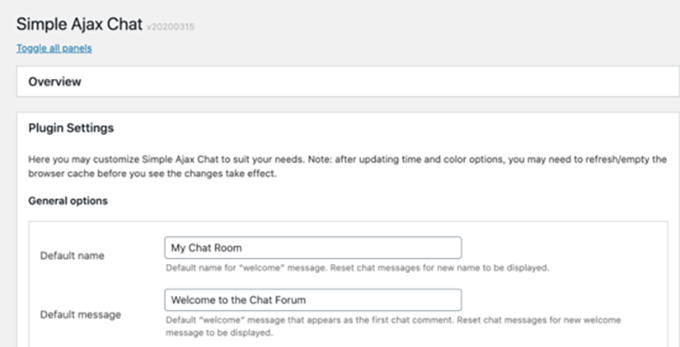
Once you are done, just click the ‘Save Settings’ button to store your settings. After that, scroll down to the Shortcode & Template Tag section and expand the tab.
From here, you can copy the shortcode and paste it anywhere on your website where you want to add a chat room.
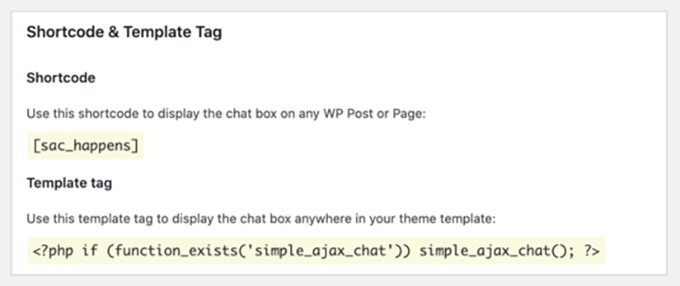
For details, you can see our tutorial on how to create a chat room in WordPress for your users.
We hope this article helped you learn how to easily embed the Discord widget in WordPress. You may also want to check our tutorial on how to add an interactive map in WordPress and our article on how to embed TikTok videos on your website.
If you liked this article, then please subscribe to our YouTube Channel for WordPress video tutorials. You can also find us on Twitter and Facebook.


Dennis Muthomi
Thank you for this comprehensive guide !
One thing I found particularly valuable was the mention of using Discord for customer support. This could be a game-changer for many WordPress site owners looking to improve their user engagement. I’ve personally used Discord for community building, and I can attest to its effectiveness in fostering real-time interactions.