
If you run a healthcare business, you’ve probably asked yourself: “Are my WordPress contact forms really HIPAA compliant?” It’s a valid concern because even a small violation can result in heavy fines and a loss of patient trust.
The tricky part is that most WordPress form plugins aren’t built for healthcare compliance. They’re fine for regular business sites, but HIPAA sets a much higher bar for data security and protection.
At WPBeginner, we’ve worked with a wide range of WordPress form plugins. That experience has shown us where their strengths and limitations lie when it comes to privacy compliance.
In this guide, we’ll walk you through how to create a HIPAA-compliant form in WordPress, so you can keep patient data secure while still making your forms user-friendly. 🙌
Disclaimer
We are not lawyers, and nothing on this website should be considered legal advice.
Why Should My WordPress Forms Be HIPAA-Compliant?
If your WordPress site is used for healthcare, your contact forms need to be HIPAA-compliant. This is because they may collect sensitive patient details — like medical history, insurance information, or appointment requests.
HIPAA, short for the Health Insurance Portability and Accountability Act, is a US law that protects people’s private medical information. It requires healthcare providers, telehealth platforms, and any WordPress website handling patient data to keep that information secure.
Using HIPAA-compliant forms helps you meet legal requirements.
They also build trust with your patients, since people feel more comfortable sharing health information when they know it’s protected. Plus, failing to comply could result in serious fines and penalties.
With that in mind, we’ll show you how to create a HIPAA-compliant form in WordPress. Here’s a quick overview of what we’ll cover in this guide:
Ready? Let’s get started.
How to Create a HIPAA-Compliant Form in WordPress
Creating a HIPAA-compliant form in WordPress might sound complicated. The main challenge is that most form plugins don’t meet HIPAA standards. They typically store form entries in your WordPress database, which isn’t secure enough for sensitive patient data.
Additionally, they often lack other essential features, such as end-to-end encryption and a Business Associate Agreement (BAA). A BAA is a required legal contract that makes sure the service provider also agrees to protect patient data under HIPAA rules.
The good news is that there are plugins built specifically for healthcare compliance.
For this tutorial, we’ll use HIPAAtizer. After thorough testing, we found it’s the best free option with comprehensive security features tailored to HIPAA requirements.
HIPAAtizer works by processing and storing all form submissions on its own secure, compliant servers instead of your WordPress database. This separation is a key part of what makes the process HIPAA-compliant.
ℹ️ Disclaimer: Please keep in mind that before you create your HIPAA-compliant form, you’ll want to check that your web hosting provider is also HIPAA-compliant.
We did some research into this, and we found that a lot of the most popular web hosting companies do not support HIPAA.
If you’re looking for a HIPAA-compliant hosting provider, you can take a look at Liquid Web.
Installing and Activating a HIPAA-Compliant WordPress Form Plugin
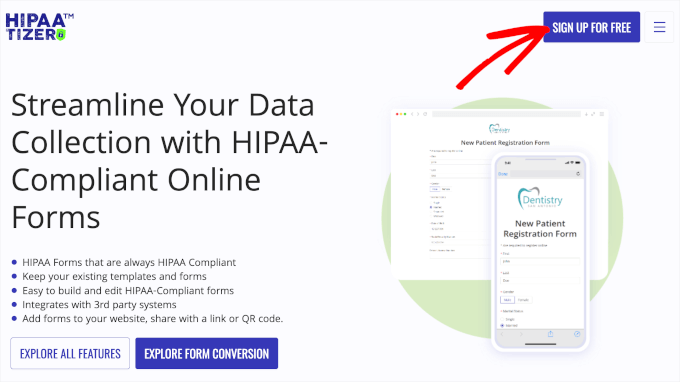
Before we get started, you’ll need a HIPAAtizer account. Simply visit the HIPAAtizer website and click the ‘Sign up for free’ button.
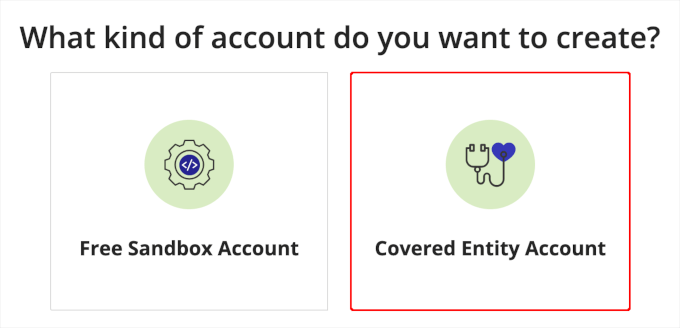
On the next screen, you’ll see 2 options for your HIPAAtizer account.
A sandbox account is a testing environment that lets you experiment without affecting real data. For actual use, you will need to choose the ‘Covered Entity Account’ option.
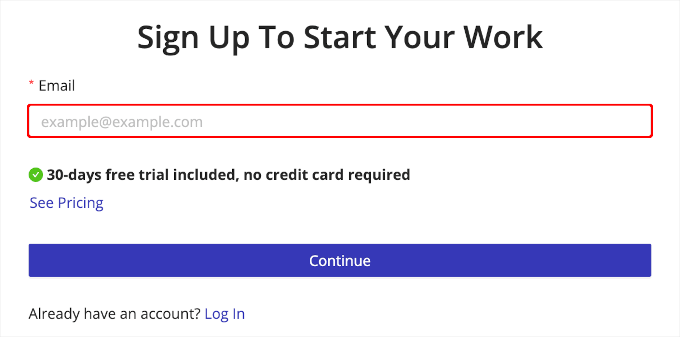
Then, HIPAAtizer will ask you to register your email address.
Simply type your email into the field and click ‘Continue.’
From here, you’ll just need to follow the prompt to finish setting up your new account.
After a successful sign-up, you’ll need to install the HIPAAtizer plugin. If you need help with this step, you can read our guide on how to install a WordPress plugin.
Upon activation, you’ll have to connect the WordPress plugin to your account. To do this, simply click on the ‘HIPAAtizer’ tab in the left-hand menu of your WordPress dashboard.
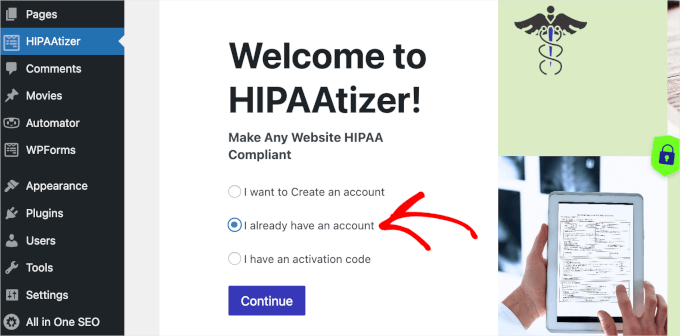
Once inside, you can select ‘I already have an account’ and click ‘Continue.’
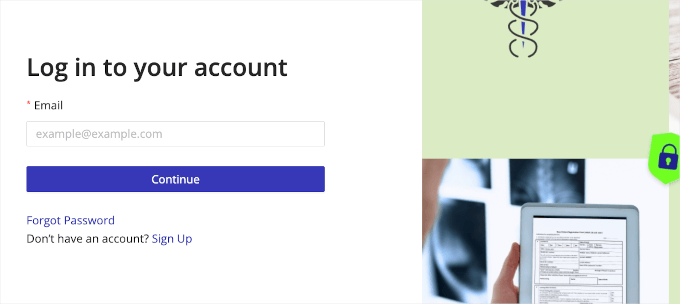
HIPAAtizer will then load the login form for you. Simply enter your credentials and click the ‘Continue’ button.
Once connected, you’ll be redirected to the HIPAAtizer panel, where you can access all the forms you create using the plugin.
Building a HIPAA-Compliant Form Using the Plugin
Now, you’re ready to create your first HIPAA-compliant form.
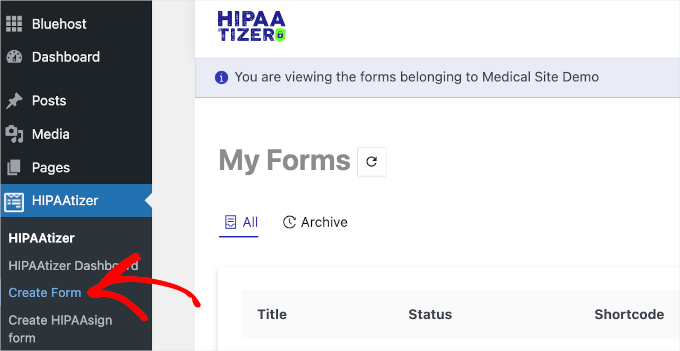
First, you’ll want to head over to HIPAAtizer » Create Form from your WordPress admin area.
A new tab will open, as HIPAAtizer allows you to create forms using its own builder outside the admin area.
On this tab, you’ll see options for creating the form.
Normally, we’d recommend using a template. However, you’ll need to install the HIPAAtizer desktop app to use its templates, which we found to be a bit time-consuming.

For a simpler process, select ‘Start from Scratch’ and then click ‘Continue.’
Don’t worry, it’s not as complicated as it sounds, and we’ll guide you through the process.

HIPAAtizer uses a drag-and-drop editor. This makes it easier to build forms, even when you do it from scratch.
Here’s what the editor looks like – customization options on the left and preview on the right:
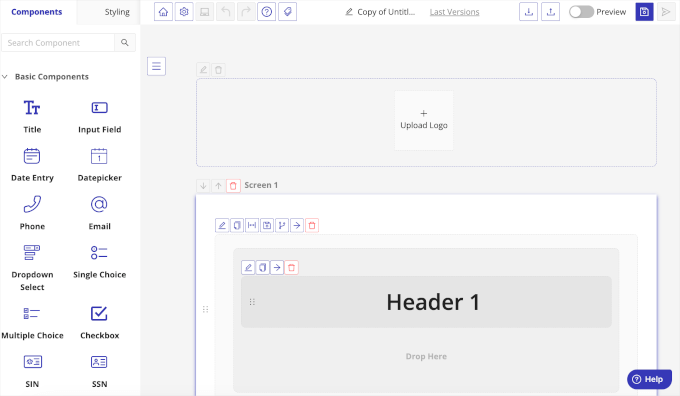
You can start by clicking on ‘Header 1’ to change the form’s title. For example, we used the title ‘HIPAA Authorization Form’.
Then, you can drag ‘Input Field’ from the left panel and drop it into the preview on the right panel to add a text box.
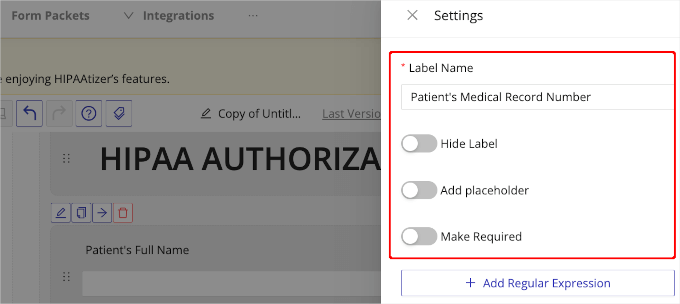
Once you’ve done so, you’ll be prompted to label the field. You can use this text box to ask for the patient’s name, medical record number, telephone number, date of birth, and more. You can also toggle on the switches to make the field required or configure other customizations.
After that, you’ll want to scroll down the customization panel and click ‘Save Changes’ to store your settings.
Now, you can repeat this step as many times as you need to add all the required fields for your form.
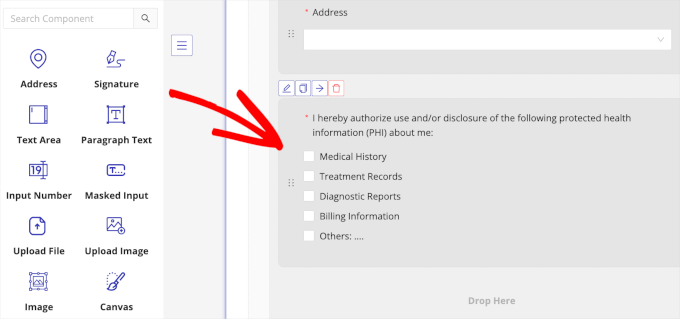
After that, you might want to add a disclosure of protected health information. You can add different ‘Displayed Options’ to create a multiple-choice field.
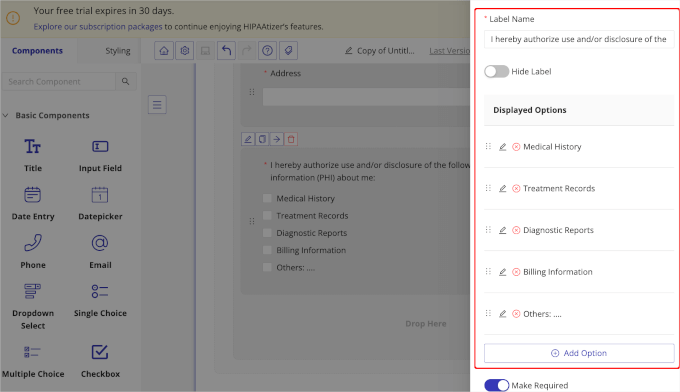
In the customization panel that appears, you can edit the label name, adjust the choices, and make the field required.
You can also add more choices by clicking the ‘+ Add Option’ button. Then, simply fill out the necessary details for the choice.
Don’t forget to scroll down and click ‘Save Changes’ when you’re ready.
The next step is to add the ‘Signature’ field to your HIPAA form. This field is important because it allows you to obtain patient consent and authorization. That way, you can make sure your WordPress form is compliant with HIPAA regulations.
Simply drag and drop ‘Signature’ to the right-hand side of the builder and adjust the necessary information. Here’s an example:
That’s it!
Our sample HIPAA form only includes the basics, but you can add more fields to fit your specific needs. We encourage you to explore the other available fields to customize the form for your practice.
Customizing the HIPAA-Compliant Form
Once you’ve created your WordPress HIPAA-compliant form, you might want to add a personal touch.
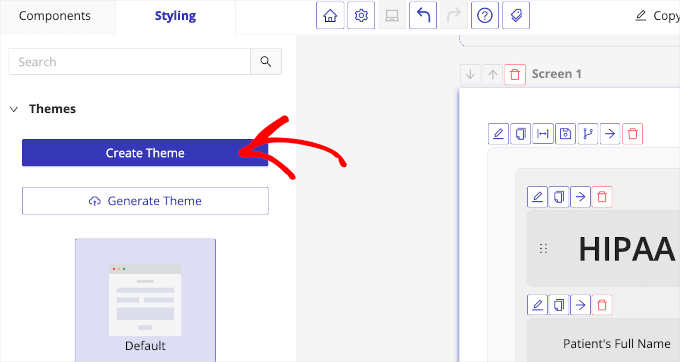
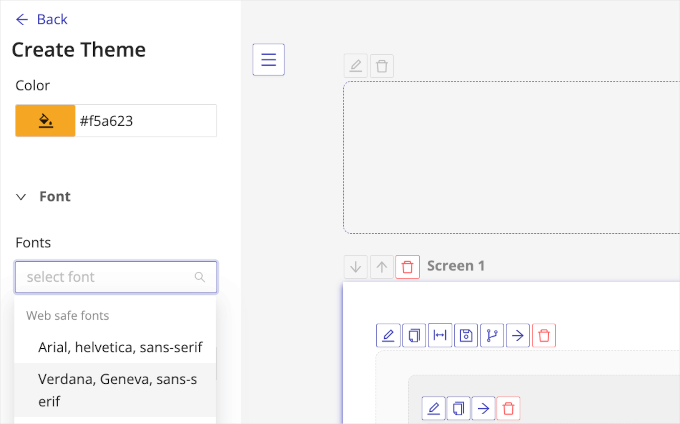
To do this, you can head over to the ‘Styling’ tab to customize it. In this tab, you’ll see options to adjust your form’s theme.
Go ahead and click the ‘Create theme’ button to open the customization options.
You should now see options to change the form’s screen size, background color, font, submit button, and more.
For example, if you expand the ‘Background’ menu, you’ll see a color picker that lets you change the form’s default background color. Then, in the ‘Fonts’ section, you can find font combination options for your HIPAA form.
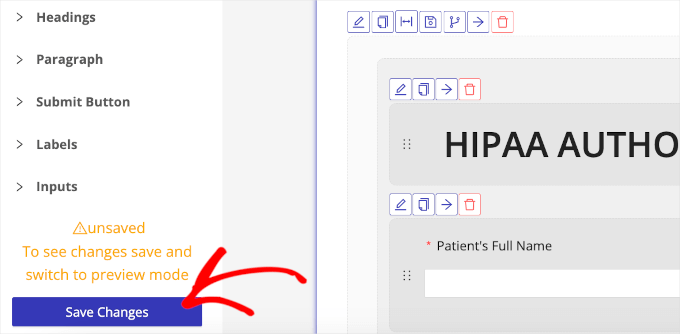
Under ‘Submit Button,’ you’ll find more comprehensive styling options. You can edit your submit button’s font size, border style, hover color, and much more.
The same goes for the ‘Labels’ settings.
When you’re done customizing the form, go ahead and click the ‘Save Changes’ button.
You should then see a small notification message that says ‘Successfully Updated.’
Now, all you have to do is click the save icon in the top right corner, name the form, and hit the ‘Save’ button.

Embedding the HIPAA-Compliant Form Into Your WordPress Website
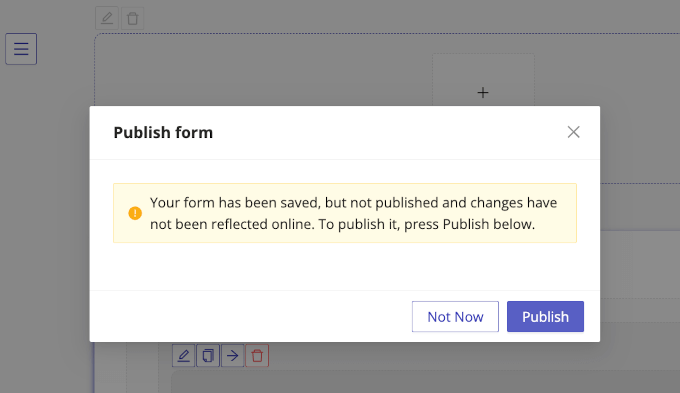
Once you’ve saved your form, another popup window will appear. In this popup, you’ll see a message that says the form is saved but has not yet gone online.
Simply follow the prompt to make it live and hit the ‘Publish’ button.
With that done, you’ll get a new message that says your form has been published.
Now, you’ll want to switch to the ‘Integrate or Embed Form’ tab.
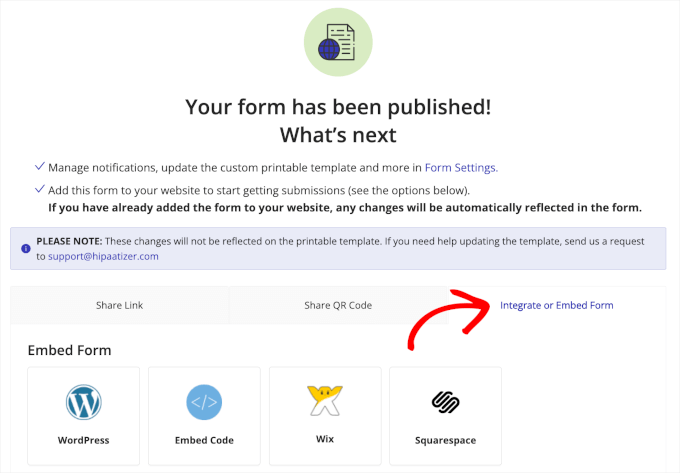
From there, you’ll want to click on ‘WordPress.’
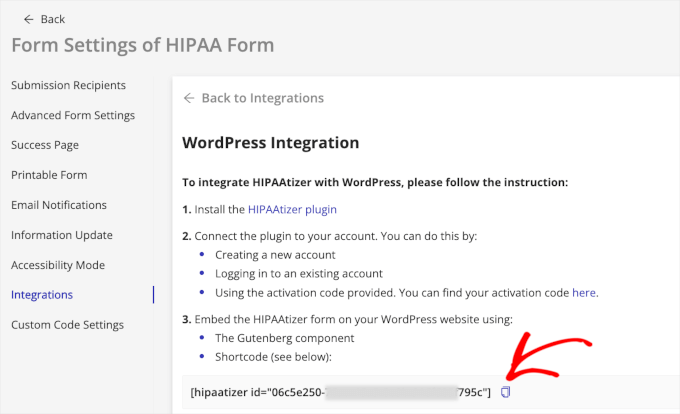
HIPAAtizer will then show instructions on embedding the form into WordPress websites. At the very bottom, you’ll see a shortcode. Simply click the copy button.
Now, you can go back to your WordPress admin dashboard.
Then, you can create a new post or page or open an existing post or page to embed the form. For this tutorial, we’ll navigate to Pages » Add New Page to create a new page.
In the content editor, click the ‘+’ button and search for the ‘Shortcode’ block.
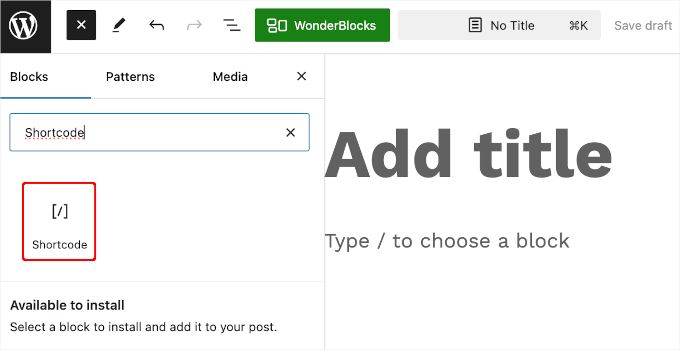
After that, select the ‘Shortcode’ block in the search result to add it to the web page.
Then, you can paste the HIPAAtizer form’s shortcode into the area that says ‘Write shortcode here….’
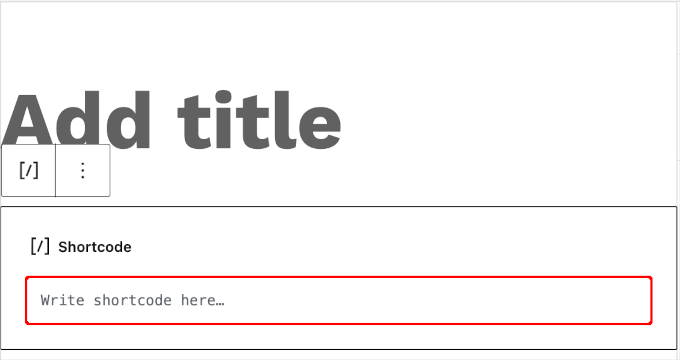
Don’t worry if the HIPAAtizer form doesn’t appear right away. Since it’s added with a shortcode, it will only show once the post or page is published.
You can use the preview feature to check it, and when you’re happy with the setup, click ‘Update’ or ‘Publish.’
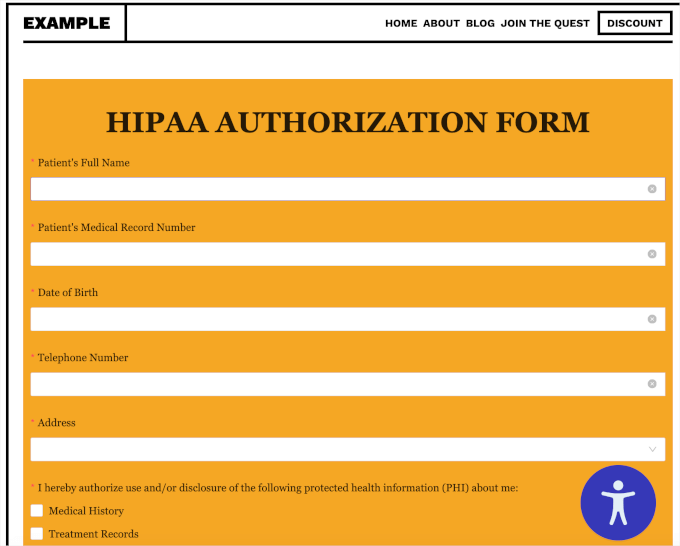
After that, visit your post or page to see the HIPAA-compliant form live in action.
Bonus Tip: How to Create a Secure Form in WordPress
With all that said, not everyone needs a WordPress HIPAA-compliant form.
HIPAA-compliant forms are typically necessary for healthcare providers, therapists, and others who handle sensitive patient information. If you’re not dealing with this type of data, then a secure form may be sufficient for your needs.
To make your WordPress contact forms secure, you need two main things: a secure contact form plugin and a secure web hosting environment. These 2 elements work together to keep your data safe from hackers and other threats.
A secure contact form plugin helps you save entries safely on your website and allows for secure email notifications.
We recommend WPForms, which is the best contact form plugin and is trusted by over 6 million websites, including us!
At WPBeginner, we use WPForms for all our contact forms, annual reader surveys, and lead generation. For more information about the tool, you can check out our full WPForms review.
Now, WPForms has tons of features to protect your site from spam, hacking, and data theft.
There’s even a free version, WPForms Lite, that is just as secure, though it has fewer features.
For detailed instructions, you can refer to our guide on how to create a secure contact form in WordPress.
FAQs About Creating a HIPAA-Compliant Form in WordPress
In this section, we’ll answer some of the most frequently asked questions about creating HIPAA-compliant forms in WordPress.
Is it possible to make a WordPress site HIPAA-compliant?
Yes, it’s possible. But you’ll need the right HIPAA-compliant plugins (like HIPAAtizer), a HIPAA-compliant hosting (like Liquid Web), and strict procedures to protect patient information.
Do I need HIPAA-compliant web hosting?
Yes. If your website handles any Protected Health Information (PHI), you’ll need HIPAA-compliant web hosting.
A secure form is only part of the picture. Your hosting server, where all your site’s files and data live, must follow HIPAA’s strict security and privacy rules to keep patient information fully protected.
What is the best WordPress plugin for medical forms?
For medical forms, HIPAAtizer is an excellent choice because it’s designed specifically with the security features needed to meet HIPAA standards. This includes end-to-end encryption and secure off-site data storage.
More Guides to Using WordPress Forms
We hope this article helped you learn how to create a HIPAA-compliant form in WordPress. Next, you might want to see our guides on:
- Ways to Use Conditional Logic in WordPress Forms
- How to Password-Protect Your WordPress Forms
- How I Blocked 18,000 Spam Lead Attacks in My WordPress Form
- How to Redirect Users After Form Submission in WordPress
- How to Send Confirmation Emails After WordPress Form Submission
- How to Track and Reduce Form Abandonment in WordPress
If you liked this article, then please subscribe to our YouTube Channel for WordPress video tutorials. You can also find us on Twitter and Facebook.


 in 2026")
Lijo Abraham
Very helpful and great information . I was struggling since last few days on this . Thanks a lot
WPBeginner Support
You’re welcome, glad our guide was helpful
Admin
Dennis Muthomi
This really helps clarify when HIPAA-compliant forms are necessary versus when regular secure forms will suffice.
I’ve found this distinction particularly valuable when advising clients – many initially request HIPAA compliance without actually handling protected health information.
Your bonus tip about secure forms is especially useful, as it provides a more appropriate solution for most business websites.
Zia Khan
This guide on HIPAA-compliant forms in WordPress is super helpful, especially for those of us new to handling sensitive data online. Living in Pakistan, I had no idea about such U.S. requirements! As a web designer working with U.S. clients, understanding HIPAA is a big priority, and tools like HIPAAtizer make it feel achievable. Thanks you!
Jiří Vaněk
I studied HIPAA in Google cybersecurity courses, and it’s a very interesting section. It’s quite complicated if you want to understand it more in-depth. Any tool that simplifies this process is great because I understand how challenging it can be to grasp, let alone implement. It’s wonderful that you tackle such relatively complex topics like this and that your tutorials make this process much easier for people. Just understanding the entire subject and implementing it into WordPress can be quite difficult. Bravo!
Moinuddin Waheed
i completely agree with you Mr. Jiri Vanek regarding wpbeginner dedication for creating user first contents and products.
Making a form that is Hipaa compliant can be a legally challenging task and involves lots of study and hardwork.
But wpbeginner team led by Mr. Syed Balkhi deserves much appreciation for making such awesome plugins reducing the users efforts.
Mrteesurez
This is an incredible feature to make website HIPAA compliant. Thanks for making me understand what HIPPA means and what it is stands for, this is really necessary for websites that handle users health data and records to ensure their information is safe and secure.
I will be sharing this with my friends in health niche, thanks for this article.