
If you want to give customers a smoother experience in your WooCommerce store, then creating a custom login page is a great place to start.
The default WordPress login page looks plain and doesn’t match your store’s branding. By customizing it, you can make the login process feel more professional and on-brand.
At WPBeginner, we’ve helped many users set up custom login pages, and the easiest way is by using a page builder like SeedProd or a form plugin like WPForms.
In this tutorial, I’ll show you how to design a completely custom WooCommerce login page and share a powerful tool you can also use to customize the checkout login page.
💡Quick Answer: How to Create a Custom WooCommerce Login Page
Here are the easiest ways to build a custom WooCommerce login page:
- Method 1: SeedProd – Best for creating a completely custom, standalone login page with a unique design that matches your brand.
- Method 2: WPForms – Ideal if you want to add a flexible login form to any page, post, or sidebar on your website.
- Bonus Method: Customize the Checkout Login With FunnelKit – The best choice for improving the login form on the WooCommerce checkout page to help returning customers.
Why Create a Custom WooCommerce Customer Login Page?
Customizing the WooCommerce login pages lets you add your logo and change the design to match your website. This makes your site look more professional and provides a better user experience.
It also allows you to add more form fields, and it even allows you to promote specific products or show special offers to customers.
Otherwise, when customers log in to your WooCommerce store, they’ll see the default WordPress login page with only the WordPress logo and branding.
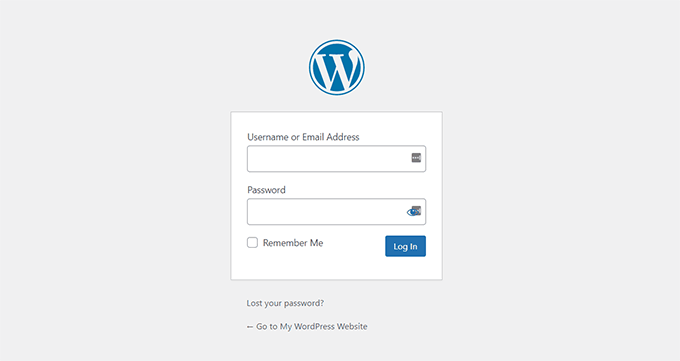
This page is fine if you just want to access your site’s dashboard. However, customers may be put off by the plain design and find it suspicious that the login page doesn’t match your website’s appearance.
That being said, let’s see how you can create a custom customer login page in WooCommerce.
Which Method Should You Choose?
This article covers three different ways to customize your login page. Here’s a quick summary to help you pick the best one for your store:
| Method | Best For | Key Features/Flexibility |
|---|---|---|
| SeedProd | Creating a completely custom, standalone login page with a design that matches your brand. | Drag-and-drop builder, full page customization, WooCommerce blocks (products, offers). |
| WPForms | Adding a flexible login form to any page, post, or sidebar on your website. | Drag-and-drop form builder, easily embeddable forms, user registration addon, customizable fields. |
| FunnelKit (Checkout Login) | Improving the login form on the WooCommerce checkout page to help returning customers. | Professionally designed checkout templates, seamless login experience during checkout, A/B testing, analytics. |
You can use the quick links below to jump to different methods in our tutorial:
Method 1: Create a Completely Custom WooCommerce Login Page Using SeedProd
The best way to create a completely custom login page is by using SeedProd. It’s the best WordPress landing page builder that replaces the default WordPress login for your WooCommerce store with a custom design
You can use SeedProd’s drag-and-drop builder to customize the design and layout of a page or your WordPress theme without touching a single line of code.
To learn more, see our detailed SeedProd review.
Step 1: Install and Activate SeedProd
First, you’ll need to install and activate the SeedProd plugin. If you need help, then please see our guide on how to install a WordPress plugin.
📌 Note: For this tutorial, we will use the SeedProd Pro license because it includes the Login Page template and other advanced customization options. There is also a SeedProd Lite version you can use for free.
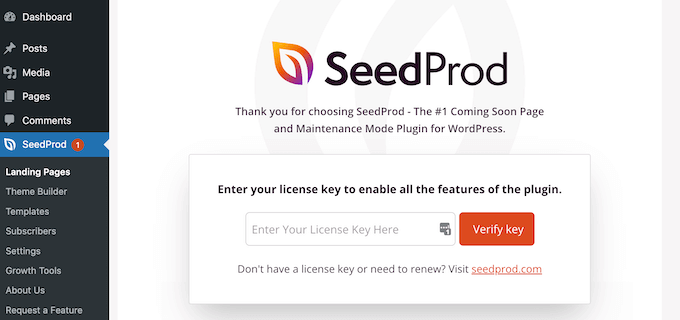
Upon activation, you will see the SeedProd welcome screen.
Go ahead and enter your license key and click the ‘Verify key’ button. You can find the license key in the SeedProd account area.
Step 2: Set Up a New Login Page
Next, you can create a custom login page for your WooCommerce store.
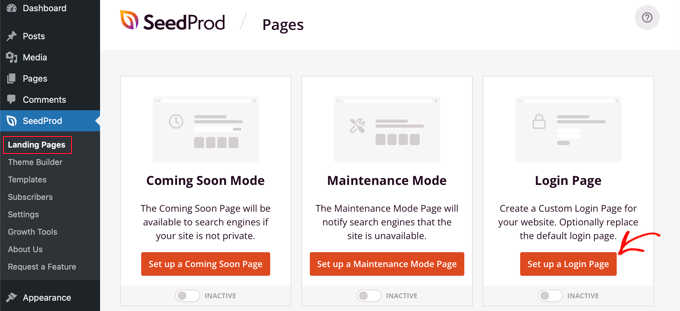
Simply head to SeedProd » Landing Pages from your WordPress dashboard and click the ‘Set up a Login Page’ button.
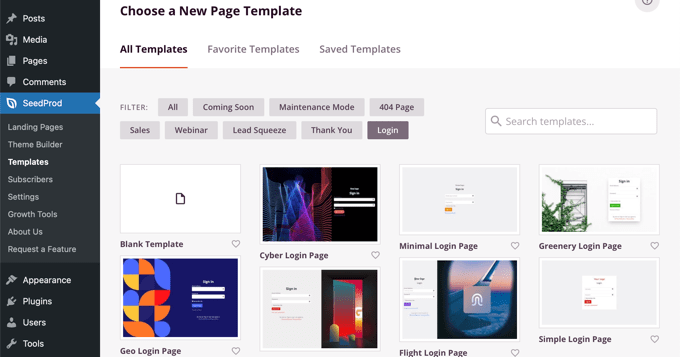
After that, SeedProd will show you multiple templates. You can quickly select one and customize it according to your needs. This helps save time, and you can use an existing design to create your own WooCommerce login page.
The plugin also lets you create a login page from scratch using a blank template.
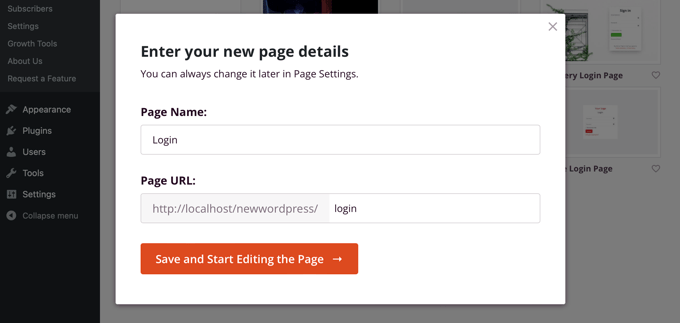
Once you select a template, a popup window will open.
Go ahead and enter a name for your page and click the ‘Save and Start Editing the Page’ button.
Step 3: Customize the Login Page Design
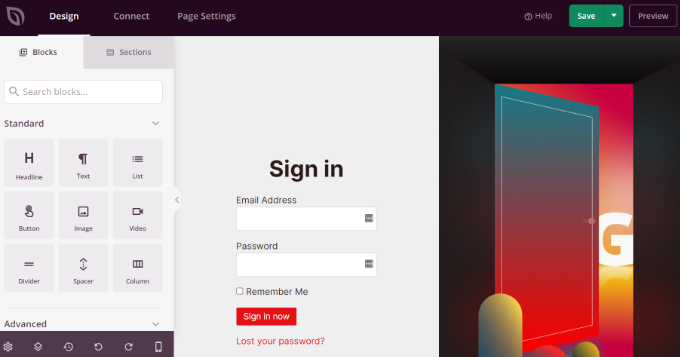
Next, you’ll see the drag-and-drop page builder.
You can now customize the login page by adding new blocks to the template from the menu on your left.
SeedProd offers standard blocks for headlines, texts, images, buttons, and more.
Besides those, you can add advanced blocks like a giveaway, contact form, social sharing buttons, optin form, and more.
There are also WooCommerce blocks like recent products, featured products, and best-selling products that you can add to your login page template.
Using the WooCommerce blocks, you can easily recommend your top products and promote discount offers to get more conversions.
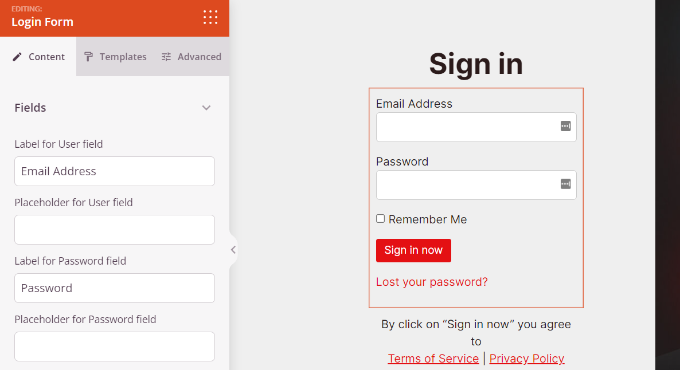
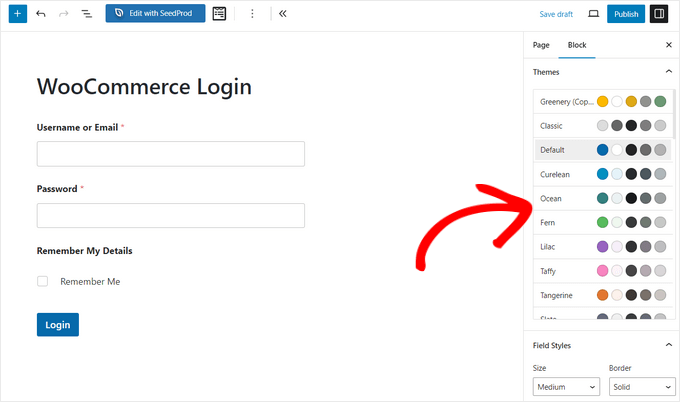
Beyond these blocks, SeedProd also lets you further customize any section on the login page. Simply click on the section, and you’ll see more options like editing the label, color, font, and spacing.
Step 4: Publish Your Custom Login Page
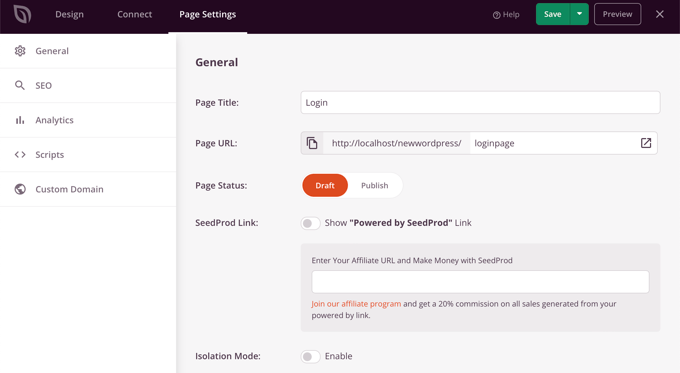
Once you are done customizing the WooCommerce login page, don’t forget to click the ‘Save’ button at the top.
After that, you can head to the ‘Page Settings’ tab and click the ‘Page Status’ toggle to change it from Draft to Publish. Then, you can go ahead and click the ‘Save’ button and close the page builder.
Step 5: Activate the New Login Page
From here, all that’s left is to make your new custom WooCommerce login page show up for users. To do this, go to SeedProd » Landing Pages in your WordPress dashboard.
Simply click the switch under ‘Login Page’ so that it’s green and says ‘Active.’
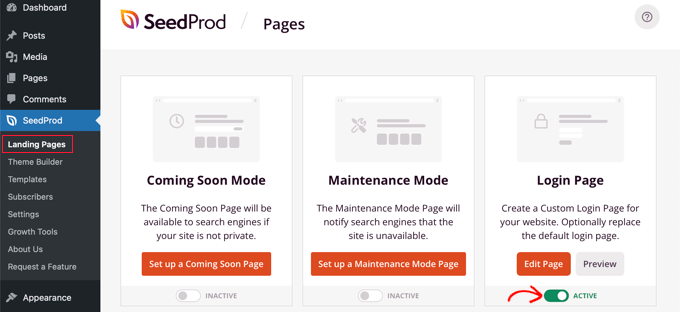
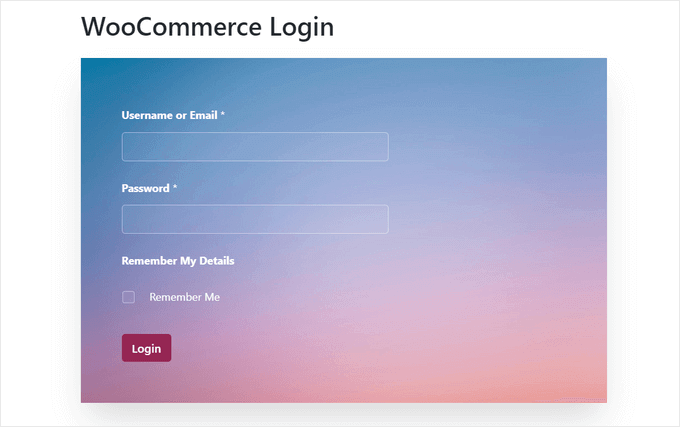
Once that’s toggled on, your new login page will appear on your WordPress website!
You can visit your eCommerce store to see it in action.

Method 2: Customize WooCommerce Customer Login Form Using WPForms
Do you want to create a login form that also matches your website theme and offers more form fields?
The default WordPress login form only allows users to enter their email address or username along with a password.
The main benefit of using a form plugin is flexibility. It allows you to place your login form anywhere on your online store, like in a sidebar or on a product page, making it convenient for customers.
The best way to do that is by using WPForms. It’s the best WordPress form builder that’s beginner-friendly to use. Over 6 million websites use WPForms to build smarter forms.
At WPBeginner, we have used it to build contact forms and annual surveys, and we love it. To learn more, see our complete WPForms review.
You can easily create a custom WooCommerce login form and display it anywhere on your online store, like the sidebar or product page.
Step 1: Install and Activate WPForms
First, you’ll need to install and activate the WPForms plugin. If you need help, then please see our guide on how to install a WordPress plugin.
📌 Note: For this tutorial, we will use the WPForms Pro plan because it includes the User Registration addon. You can also try the free version of WPForms to get started.
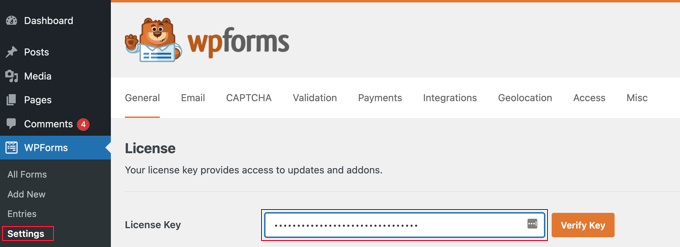
Upon activation, you can go to WPForms » Settings from your WordPress dashboard and enter the license key. You can find the license key in the WPForms account area.
Step 2: Install the User Registration Addon
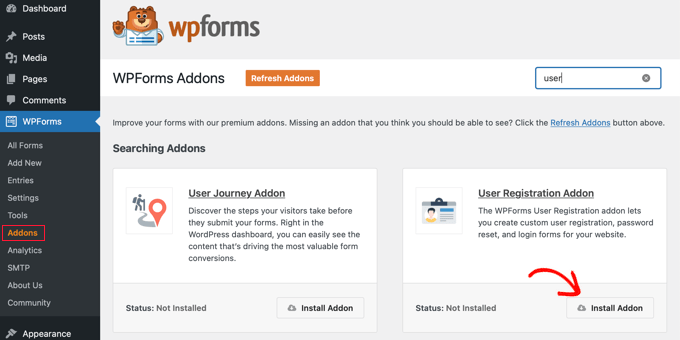
Next, you will need to head over to WPForms » Addons in the WordPress admin panel.
After that, scroll down to the ‘User Registration Addon’ and then click the ‘Install Addon’ button.
Step 3: Create a New User Login Form
Now, you are ready to create a custom login form for WooCommerce. Simply go to WPForms » Add New to launch the form builder.
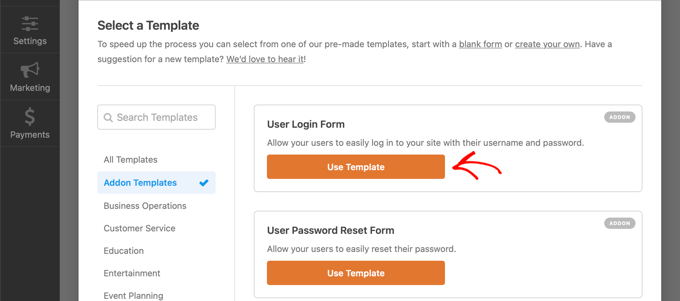
On the next screen, you can enter a name for your form at the top. Then, search for the ‘User Login Form’ template and click the ‘Use Template’ button.
Step 4: Customize Your Login Form Fields
After that, you can customize your user login form template using the drag-and-drop builder. WPForms makes it very easy to add different fields to the form or rearrange the existing fields on the template.
You can add additional fields if you want to combine login with other actions, or simply rearrange the existing fields on the template.

You can further customize each form field in the template. Simply click on any field and edit its label, add a description, and make it a required field in the form.
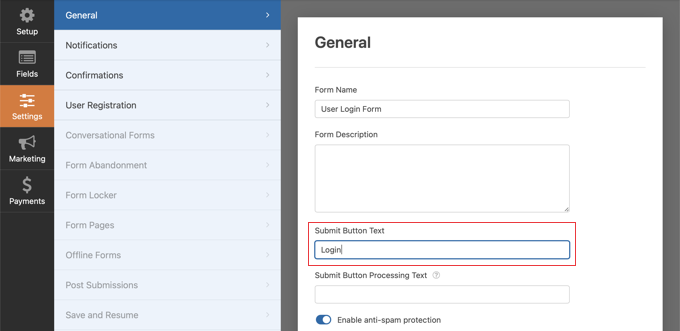
Step 5: Configure Form Settings and Confirmations
After that, you can head to the ‘Settings’ tab in the form builder. Under the General settings, you can change the ‘Submit Button Text’ to ‘Login.’
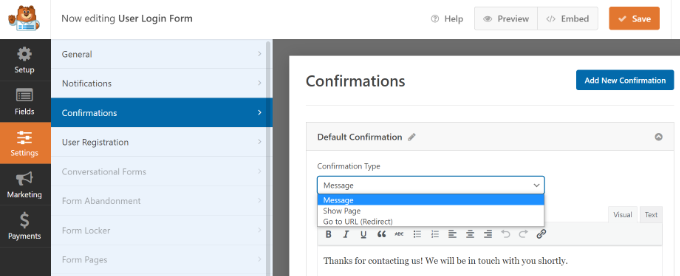
Next, you can go to the ‘Confirmations’ tab to change what will happen when a user successfully logs in.
Simply click the ‘Confirmation Type’ dropdown menu and select an option. You can show customers a message, display a page, or redirect them to a specific URL.
For instance, you can add your WooCommerce login form to a product page and allow customers to quickly sign in to purchase your product.
When you are done, simply click the ‘Save’ button at the top.
Step 6: Embed and Publish the Login Form
Next, you’ll need to add the WooCommerce customer login form to a page on your site.
Simply click the ‘Embed’ button at the top of the builder. You can then choose whether you will put the form on an existing page or create a new one for it.

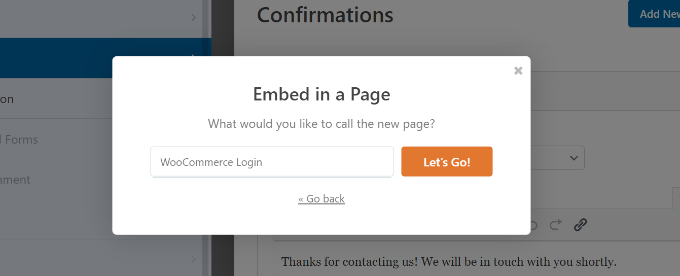
Let’s choose the ‘Create New Page’ option for now.
Next, you’ll need to enter a name for your page and click the ‘Let’s Go!’ button.
After that, you’ll see the WPForms login form inside the WordPress content area.
From here, you can customize and style your login form by opening the block panel on the right side of the screen. In the ‘Themes’ section, you can choose from 40+ pre-made themes to give your login form a unique look.
You can also change the style and size of the form fields, labels, buttons, and more.
Once you’re happy with the design, you can preview your form, publish the new page, and display the custom WooCommerce login for your customers.
Step 7: (Optional) Add Form to Sidebar
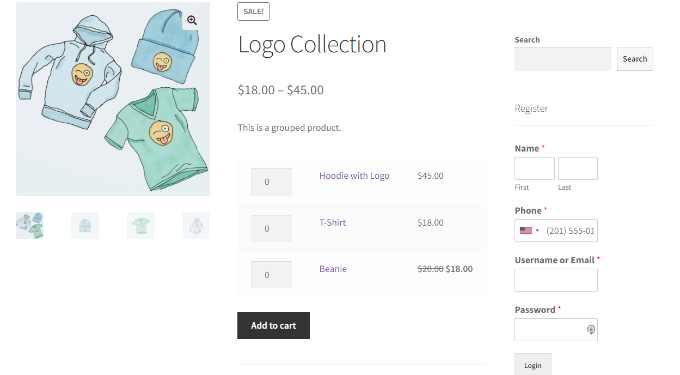
You can also add your WooCommerce login form to your store’s sidebar. This way, your form will appear on every product page and allow customers to sign in quickly.
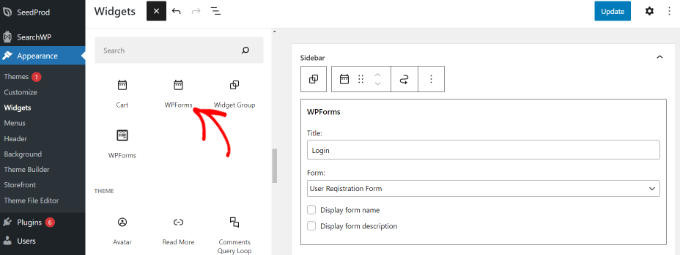
Simply head to Appearance » Widgets from your WordPress dashboard. Next, click the ‘+’ button and add a WPForms widget block.
After that, you can choose your login form from the dropdown menu and enter a title.
When you are done, click the ‘Update’ button.
You can now visit your online store to see the login form in the sidebar.
For more ways to create a customized WooCommerce customer login page, you may want to see our guide on how to create a custom WordPress login page.
Plus, you can also see our tutorial on how to add a navigation menu in WordPress so that you can add your WooCommerce login page to your website navigation.
Bonus Method: Customize the WooCommerce Checkout Login Page
WooCommerce allows returning visitors to log in during the checkout page. However, a generic or clunky login form on the checkout page can interrupt the buying process and lead to lost sales.
By creating a seamless, branded login experience at this critical step, you can reduce cart abandonment and build more trust with your customers.
The best way to do that is by using a powerful funnel builder plugin like FunnelKit.
It comes with professionally designed templates that replace the default checkout page, giving returning customers a much better and easier login experience. This helps reduce friction and makes it more likely they will complete their purchases.
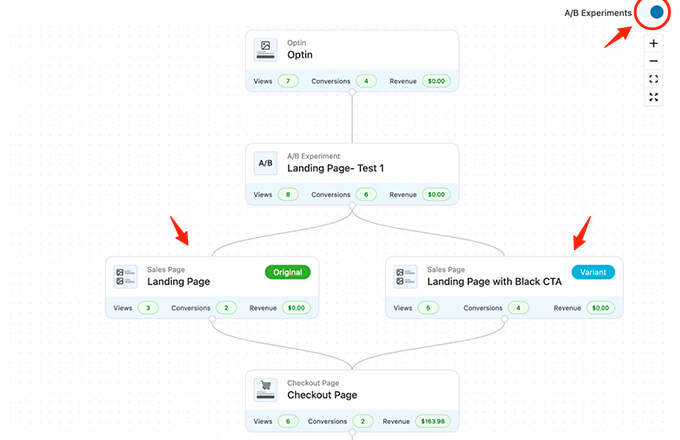
You also have the option to A/B test the multiple funnels, sales pages, and upsell offers.
FunnelKit gives you detailed analytics on each step of your WooCommerce funnel.
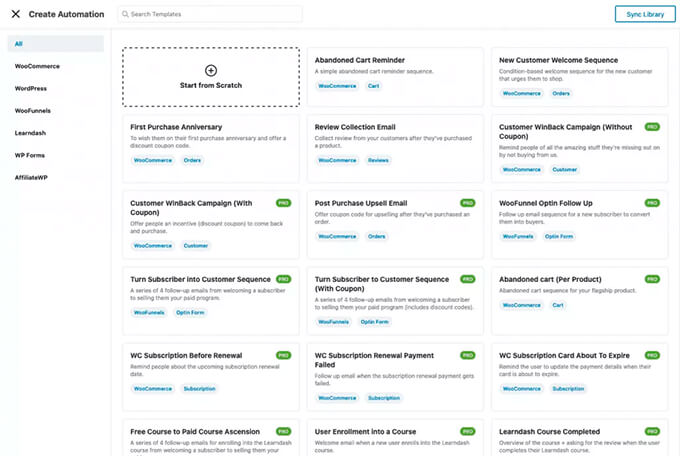
It also comes with a powerful marketing automation addon, FunnelKit Automations.
It lets you customize WooCommerce emails, send drip email notifications in WooCommerce for cart abandonment, welcome series, and more.
If you’re serious about growing your WooCommerce store, then this is one of the must-have tools that we recommend.
Frequently Asked Questions About WooCommerce Login Pages
Here are some questions that our readers frequently ask about creating WooCommerce login pages in WordPress:
Can I use these custom login pages for regular WordPress users, too?
Yes, absolutely. The method using SeedProd replaces the default WordPress login page for all users, including administrators and editors. The WPForms method allows you to place a login form anywhere, which can also be used by any user role.
Do I need to know how to code to customize my login page?
Not at all. Both SeedProd and WPForms are designed to be user-friendly with drag-and-drop builders. You can create a professional-looking login page without touching a single line of code.
Is it free to create a custom WooCommerce login page?
Both plugins offer free versions to get started. However, to access the specific login page templates and advanced features shown in this tutorial, you will need the Pro versions of either SeedProd or WPForms.
Which method is better for my store, SeedProd or WPForms?
It depends on your specific needs. SeedProd is ideal if you want to create a completely separate, fully designed login page that perfectly matches your brand.
On the other hand, WPForms is better if you want a flexible login form that you can add to various places on your site, like a sidebar or a checkout page.
We hope this article helped you learn how to create a custom WooCommerce customer login page. You can also see our expert pick of the best WooCommerce plugins and our guide on how to limit login attempts in WordPress.
If you liked this article, then please subscribe to our YouTube Channel for WordPress video tutorials. You can also find us on Twitter and Facebook.


 in 2026")
Jiří Vaněk
I’ve always adhered to the rule that great websites are made up of details. Yes, the default WooCommerce login page works perfectly, but it’s unattractive and, I’d say, quite dull. SeedProd adds a whole new dimension, and it’s incredibly easy to use with such a detailed guide at hand. As I mentioned, it’s these details, like a custom login page, that turn an ordinary store into a good one and a good one into a great one. Thanks for the advice.
Dennis Muthomi
Thank you for showing the SeedProd method I like how SeedProd allows adding custom blocks and sections to match my branding.
I have one clarifying question – when I use SeedProd to create the custom customer login page, will it also replace the default admin login, or will the admin login page remain unchanged?
WPBeginner Support
Yes, it would replace your normal login as well as your store login.
Admin