
Adding social logins to your WordPress website makes the sign-up process easier for your visitors. It allows users to create an account using their existing social media profiles.
So, instead of setting up a new username and password, they can log in with platforms like Facebook or Google.
This saves time and reduces hassle for your visitors. Plus, with their permission, you can get access to their name and email address.
This can be a great way to build an email list so that you can keep reaching your visitors and bring them back to your website.
We’ve spent some time investigating the best way to set this up. And in this guide, we’ll show you how to add social logins to WordPress.

💡Quick Answer: How to Add Social Login to WordPress
You can easily add social login to WordPress using a free plugin like Nextend Social Login and Register.
This lets users sign up or log in with social accounts like Facebook or Google. Simply install the plugin, connect it to your chosen social apps, and display the buttons on your site.
Why Add Social Login to WordPress?
There are many reasons why you may want to allow user registration on your WordPress website.
If you run an online store, user registration allows shoppers to save their payment and delivery information. This makes it easier for them to buy again in the future.
User registration is also an important part of creating a WordPress membership site. It allows you to build a community of engaged users who have access to exclusive content.
However, most people don’t like filling out long user registration forms and remembering yet another username-password combination.
Social logins let visitors create an account with your website with just a single click. They can use the username and password from their existing social media accounts, such as their Facebook login details.
Since it’s so convenient, social login can encourage more people to register with your website. With that in mind, let’s see how you can add a social login to WordPress.
- How to Add Social Login to WordPress
- Step 1: Install and Activate Nextend Social Login
- Step 2: Create Your Facebook Developer App
- Step 3: Connect Your Website to the Facebook App
- Step 4: Configure App Policies and Details
- Step 5: Go Live and Check App Permissions
- Step 6: Add App ID and Secret to WordPress
- Step 7: Customize Your Social Login Buttons
- Step 8: Display the Social Login Button on Your Site
- Video Tutorial
- Frequently Answered Questions About Social Login
How to Add Social Login to WordPress
The easiest way to add a front-end login to your WordPress website is to use the Nextend Social Login and Register plugin.
This free plugin lets visitors log in using Facebook, Twitter, or Google.
Note: Want to add a social login for a site other than Facebook, Twitter, or Google? There is also a Nextend Social Login pro version that adds social login for lots of different sites, including PayPal, Slack, and TikTok.
Step 1: Install and Activate Nextend Social Login
First, you’ll need to install and activate the Nextend plugin. For more details, please see our beginner’s guide on how to install a WordPress plugin.
Upon activation, you’ll want to go to Settings » Nextend Social Login from the WordPress admin area. On this screen, you’ll see all the different social login options that you can add to your WordPress site.
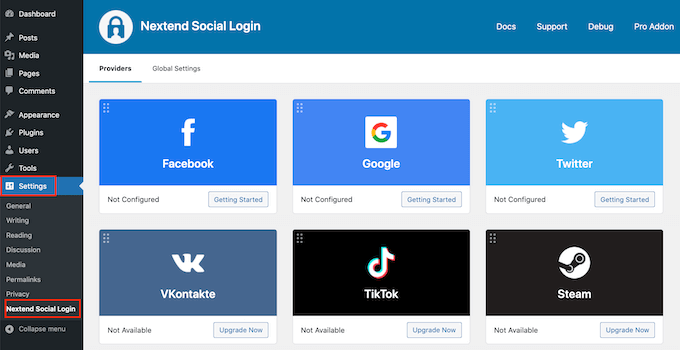
The process of adding a social login to your site will vary depending on whether you’re adding Facebook, Twitter, or Google login.
Let’s look at Facebook as an example.
To add a Facebook login to your WordPress website, let’s click the ‘Getting Started’ button under the Facebook logo.
At this point, you may get a warning from Facebook. This is because Facebook requires a secure connection to work, which is a standard security requirement.
This means your site must be using HTTPS before you can add a Facebook login to WordPress. To set it up, see our guide on switching HTTP to HTTPS in WordPress.
Step 2: Create Your Facebook Developer App
Once you’re using HTTPS, your next task is creating a Facebook app. This allows you to create an App ID and App Secret, which you’ll add to the Nextend plugin.
Creating a ‘Facebook app’ sounds technical, but don’t worry. This doesn’t mean you’re building a mobile app. It’s just a process to register your website with Facebook, which lets you securely connect their login system to your site.
You don’t need to know any code, and we’ll walk you through all the steps.
To create this app, you must switch between your WordPress dashboard and the Meta for Developers website. With that in mind, it’s a good idea to leave your WordPress dashboard open in the current tab and visit the Meta for Developers in a new tab.
💡Pro Tip: The Meta for Developers website changes its layout often, so it might look a little different from our screenshots. Don’t worry, the main steps are the same.
Just focus on finding the key terms like ‘App ID,’ ‘App Secret,’ and ‘Valid OAuth redirect URIs’ in their settings.
In your Meta for Developers tab, simply click the ‘Create App’ button.
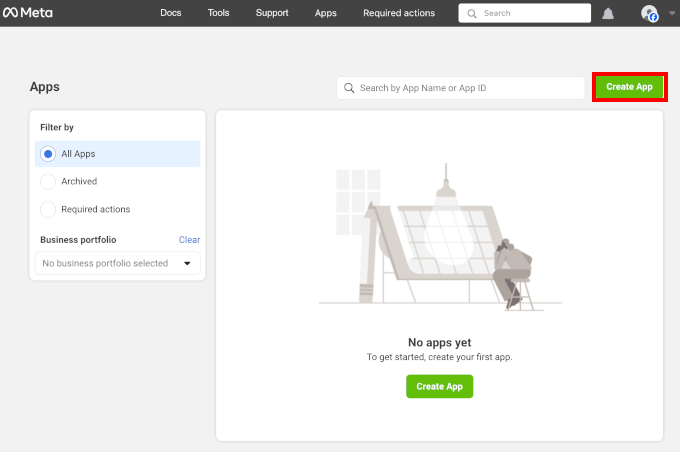
You’ll then land in the setup process.
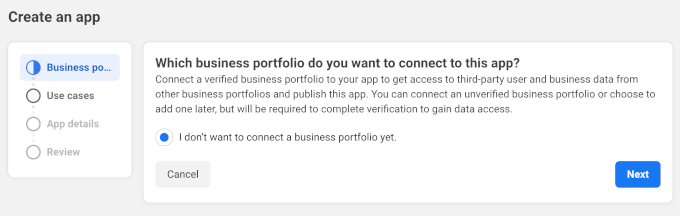
The first thing you’ll need to do is to choose a business portfolio you want to connect to the new app. The default setting is enabled for ‘I don’t want to connect a business portfolio yet.’ You can leave this as is and click ‘Next.’
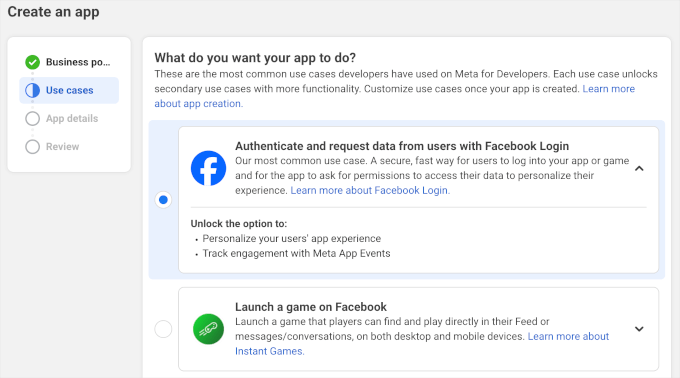
In the ‘Use cases’ stage, you’ll choose what your app should do.
Since we want to add social login to WordPress, go ahead and select the ‘Authenticate and request data from users with Facebook Login’ option.
After that, you’ll want to click the ‘Next’ button.
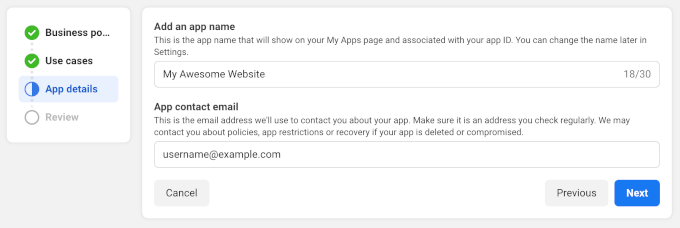
Next, in the ‘Display name’ field, let’s type in the name that you want to use for the Facebook app. This name will be shown to visitors, so you’ll want to use something they’ll recognize, such as your WordPress website’s title.
After naming your app, you can type your email address into the ‘App contact email’ field. This is the address that Facebook will use to warn you about potential policy violations and app restrictions or share information about how you can recover a deleted account.
With that in mind, you’ll want to type in an email address that you check regularly. Go ahead and click ‘Next’ to continue.
You’ll then see a review page. On this page, Meta for Developers will show you all the settings you’ve configured for the new app.
If everything looks good, simply click the ‘Create App’ button.

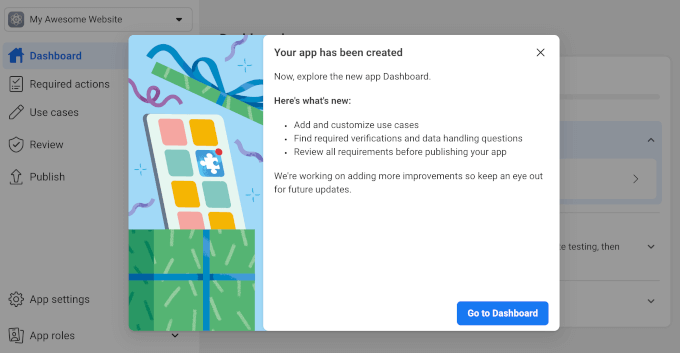
You should now see a notification pop-up with a ‘Go to Dashboard’ button.
Let’s click on it.
Step 3: Connect Your Website to the Facebook App
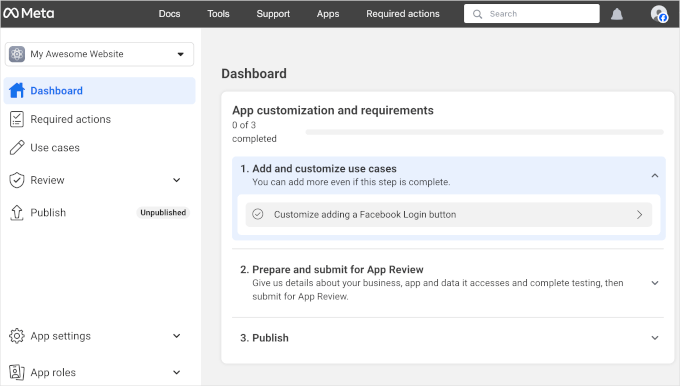
You’re now ready to add products to the Facebook app.
From here, you’ll want to find the ‘Facebook Login’ product and click the ‘Set up’ button next to it.
Next, you’ll want to head over to ‘Quickstart’ from the ‘Facebook Login’ menu.
From here, you can choose the ‘Web’ option.
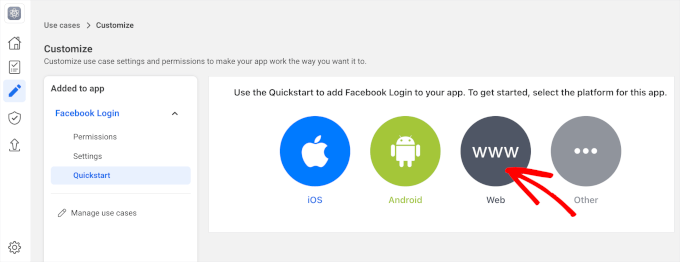
This will open the customization section.
In the ‘Site URL’ field, simply type in your website’s URL.
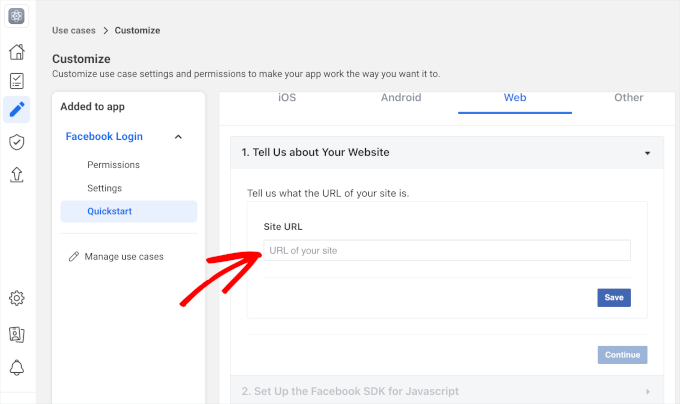
Make sure to get the right URL. Even a small typo will cause the connection to fail, and you will likely see an error message like ‘invalid redirect URL’.
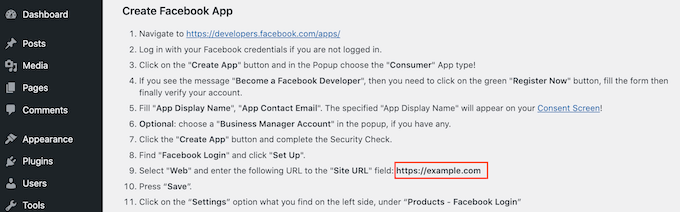
To do this, simply switch back to the tab that’s showing your WordPress dashboard. This screen provides detailed instructions on how to link Nextend to Facebook, including the exact URL that you should use.
After typing your site’s URL into the ‘Site URL’ field, let’s make sure you click on the ‘Save’ button to save your changes.
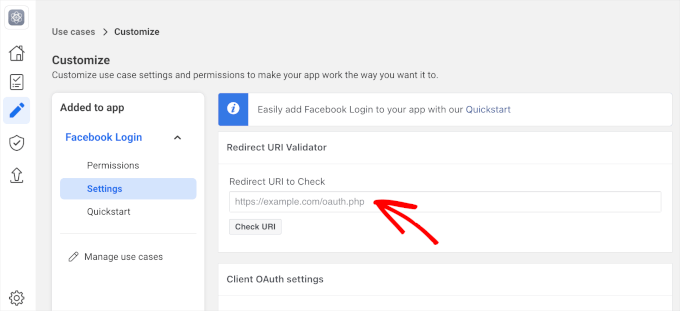
Then, let’s move to the ‘Settings’ section.
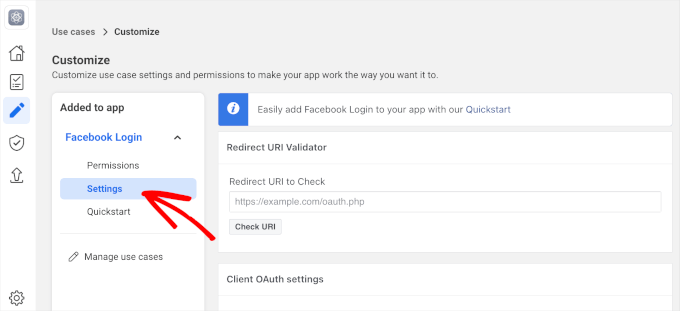
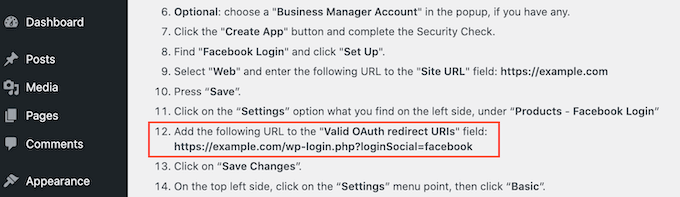
On this screen, you’ll need to paste a valid oAuth redirect. To get this value, just switch back to your WordPress tab.
These instructions include a URL labeled ‘Valid OAuth redirect URIs.’ You can copy this URL.
Next, let’s switch back to the Meta for Developers website and paste the URL into the ‘Redirect URL to Check’ field.
After that, you’re ready to click on the ‘Save changes’ button at the bottom.
Step 4: Configure App Policies and Details
Once done, let’s go to Settings » Basic in the left-hand menu.
In ‘App domain,’ simply type in your site’s domain name.
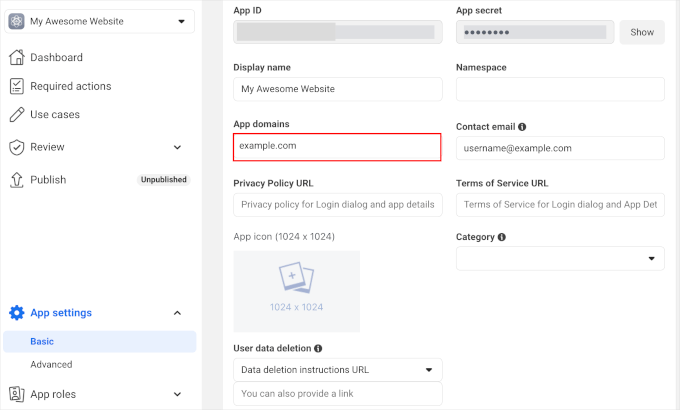
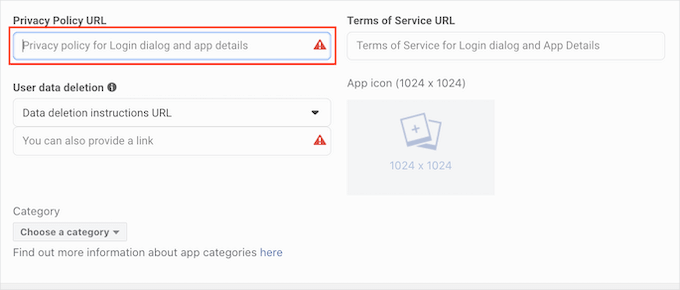
In the ‘Privacy Policy URL’ field, you’ll need to type in the address of your website’s privacy policy.
This privacy policy should disclose the information you collect from visitors and how you plan to use that data, including any information you get from social logins.
If you need help creating this important page, then please see our guide on how to add a privacy policy in WordPress.
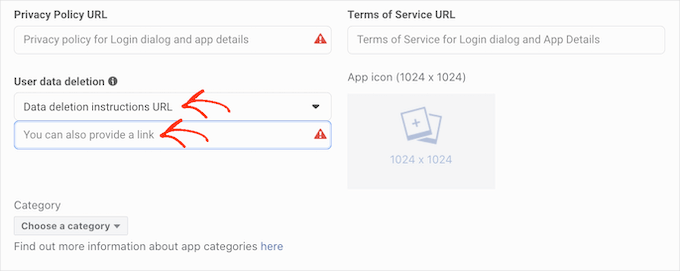
To comply with GDPR, you must allow users to delete their accounts on your website.
There are lots of ways that you can allow users to delete their WordPress accounts, but you should always share these instructions with your visitors.
To help users find this information, click on the ‘User Data Deletion’ section and then choose ‘Data Deletion Instructions URL’ from the dropdown menu.
You can then type in or copy/paste the URL where visitors can find information on how to delete their account. For example, you might add the instructions to your privacy policy or FAQ page.
Once you’ve done that, you’ll want to open the ‘Category’ dropdown menu and choose the category that best represents how you plan to use social login on your WordPress website.
For example, if you’re adding a Facebook login to your WooCommerce store, then you’ll typically want to click on the ‘Shopping’ category.
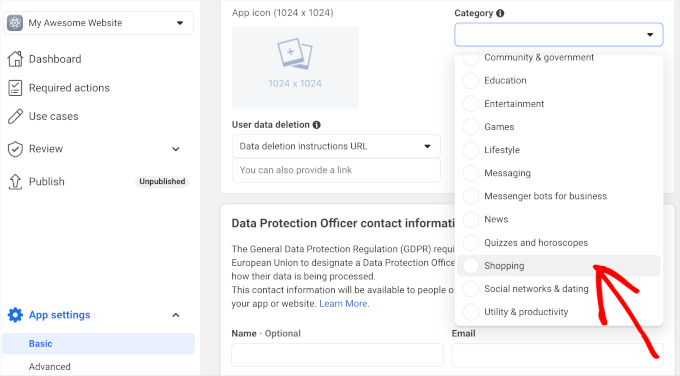
Once you’ve done that, the next step is choosing an app icon. This icon will represent your app in the ‘App Center,’ which is an area of Facebook where users can find new applications.
This isn’t particularly important for our app, but it’s a requirement, so you’ll still need to create an app icon.
Your app icon must have a transparent background and be between 512 x 512 and 1024 x 1024 pixels. When creating this icon, you can’t use any variations of Facebook’s logos, trademarks, or icons, including its WhatsApp, Oculus, and Instagram brands.
You also can’t include any ‘Facebook’ or ‘FB’ text.
If you don’t already have one, then you can easily create a professional-looking Facebook app icon using a logo maker.
Once you’ve created an app icon, go ahead and click on the ‘App Icon’ section and select the image file you want to use.
After all that, you can click the ‘Save Changes’ button.
Step 5: Go Live and Check App Permissions
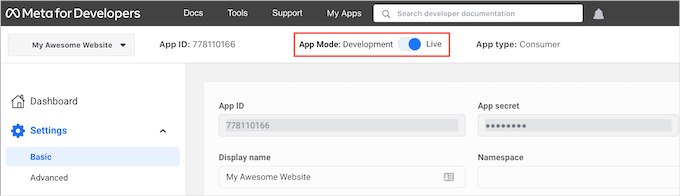
Your Facebook app is set to ‘Development’ mode by default. This means only users with specific app roles (like Developers or Testers) can log in using Facebook.
Before your visitors can create an account using Facebook, you’ll need to make your app live. To do this, find the ‘App Mode: Development’ slider and click on it to make it live.
Facebook applications can either have ‘Standard access’ or ‘Advanced access’ to the user’s information.
For your social login to work for all visitors, your app will need ‘Advanced access’ for key permissions like email and public profile.
In the past, Facebook changed its default permission settings, so it’s always worth checking that your app has the right permissions to support social login.
In the left-hand menu, let’s navigate to ‘App Review’.
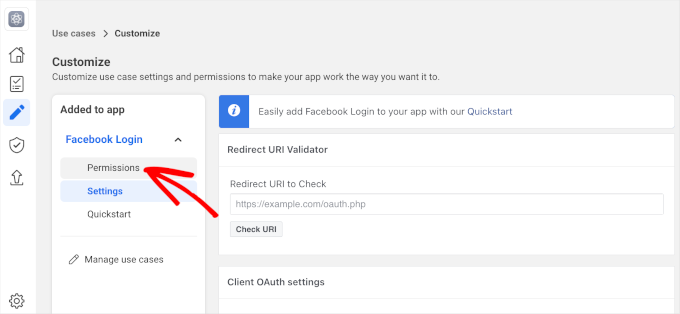
Now, you’ll want to look at the ‘email’ and ‘public_profile’ permissions.
To support social login, both of these permissions must be marked as ‘Advanced Access’ and ‘Ready to Use,’ as you can see in the following image.
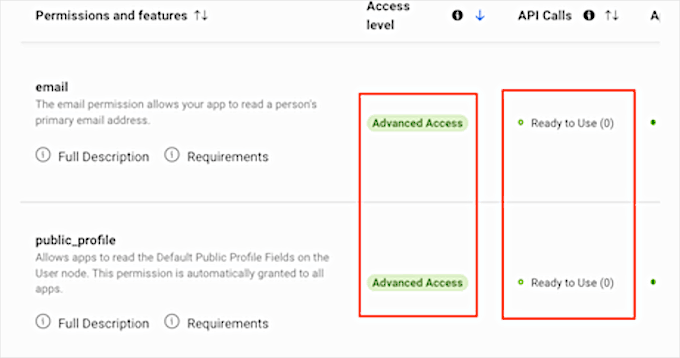
Do you see the ‘Get Advanced Access’ buttons instead? This means that your app currently doesn’t have the right permissions to log in to social media.
In this case, you’ll need to click on the ‘Get Advanced Access’ button and then follow the onscreen instructions.
Once you have the ‘Advanced Access’ permissions, go ahead and navigate to App setting » Basic from the left-hand menu.
At the top of the page, you’ll see an ‘App ID’ and ‘App secret.’
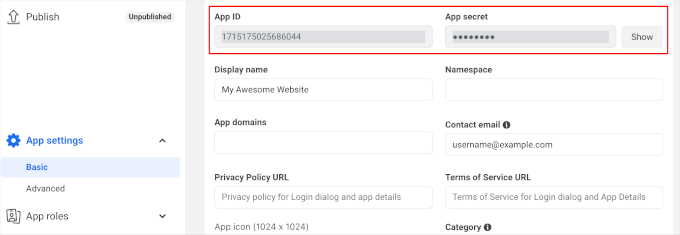
To reveal the ‘App secret,’ just click on the ‘Show’ button. Then, you can type in the password for your Facebook account. The Meta for Developers website will now update to show your ‘App secret.’
Step 6: Add App ID and Secret to WordPress
The next step is adding the ‘App secret’ and ‘App ID’ to your Nextend plugin. To do this, let’s switch back to the WordPress dashboard.
From here, go back to Settings » Nextend Social Login in your WordPress dashboard. Then, switch to the ‘Settings’ tab and paste the ID and secret into the ‘App ID’ and ‘App secret’ fields.
Once you’ve done that, go ahead and click the ‘Save Changes’ button.
Before you go any further, it’s a good idea to test that your social login is set up correctly. To do this, simply click on the ‘Verify Settings’ button.
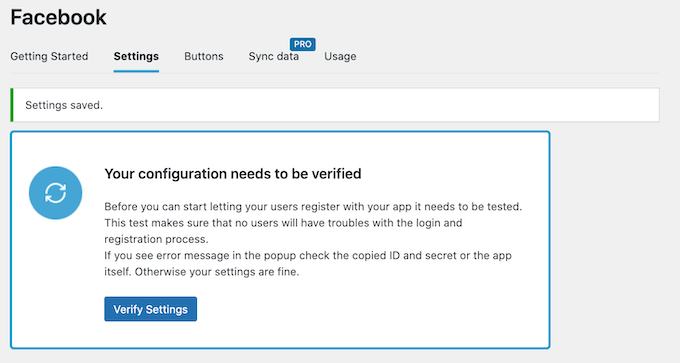
This will open a popup where you can type in your Facebook username and password. If you’ve set up the social login correctly, then you should now be logged into your WordPress blog.
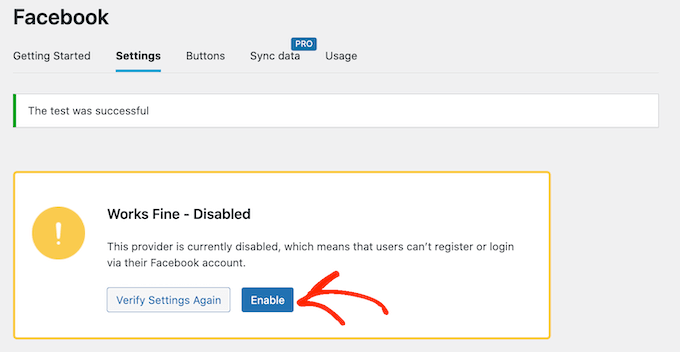
Even if your social login is working, Nextend may still warn you that the provider is currently disabled. If you do see this warning, then simply click on the ‘Enable’ button.
Congratulations, you’ve done the hard part and successfully added a social login to your WordPress website!
Step 7: Customize Your Social Login Buttons
Now for the fun part: let’s customize how the login button looks and acts on your site.
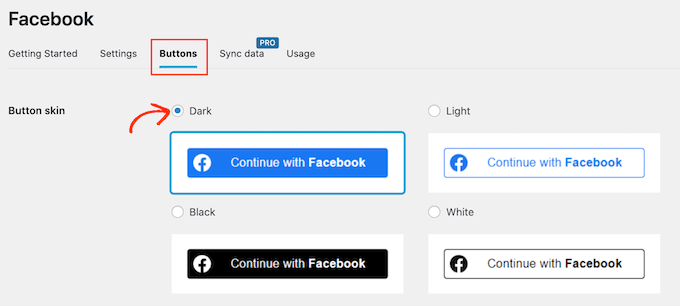
To style the social login button, simply click the ‘Buttons’ tab. You will then see all the different styles that you can use.
To use a different style, you can click to select its radio button.
Once you’ve done that, you can edit this button’s ‘Login label’ text to change the text that Nextend shows.
You can also apply some basic formatting to the login label. For example, in the following image, we’re applying a bold effect by using and HTML tags.
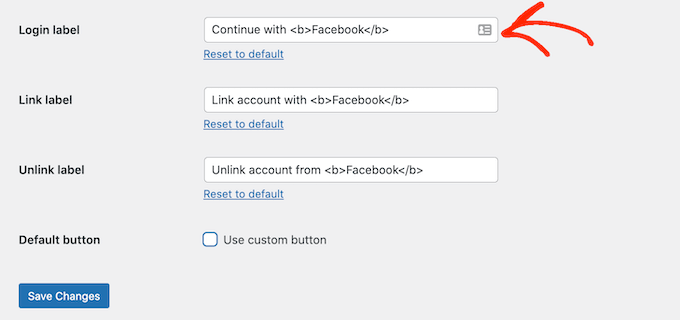
You also have the option to change the text this button uses for its ‘Link label.’ This is the text that Nextend shows when a visitor has created an account on your website but hasn’t linked that account to Facebook.
You can use the link label to encourage logged-in users to connect their accounts to various social media profiles.
To change this text, simply type into the ‘Link label’ field. Once again, you can use HTML to apply some basic formatting to the label text.
You should also make it easy for visitors to disconnect their social media profiles from your WordPress website.
This is where the ‘Unlink label’ field comes in.
In this field, you can type in the text that your site will show to logged-in users who have already connected their social accounts to your website.
By clicking on this link, users can disconnect the connection between your WordPress website and their social media accounts.
These settings should be enough for most websites.
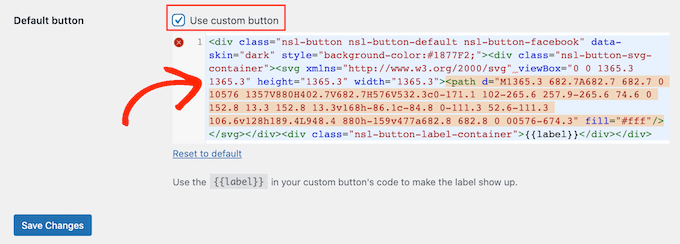
However, if you prefer to create a completely custom button, then you can always check the ‘Use custom button’ box. This adds a new section where you can create your own social login button using code.
When you’re happy with how you’ve styled your button, you can go ahead and click the ‘Save Changes’ button.
Step 8: Display the Social Login Button on Your Site
Next, you’ll want to switch to the ‘Usage’ tab.
Nextend will now show all the shortcodes that you can use to add the social login button to your WordPress website.
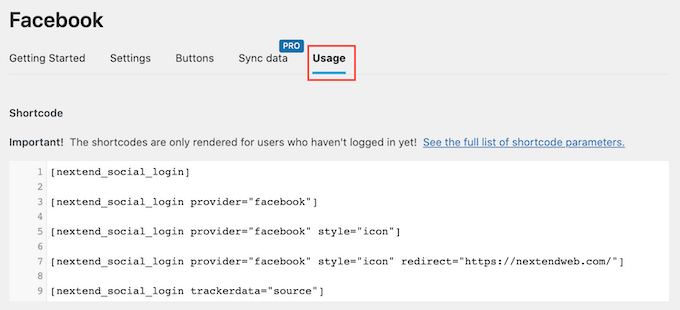
These shortcodes can create a range of login buttons. To create a basic login button for Facebook, you would use the following shortcode:
[nextend_social_login provider=”facebook”]
The following image shows an example of how this social login button will look on your site.
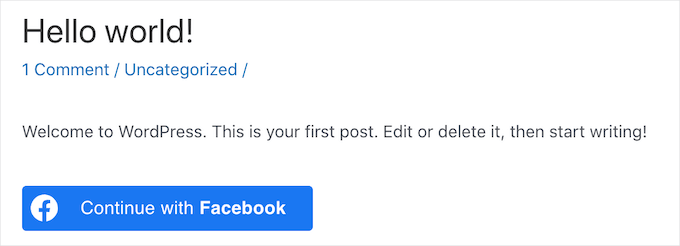
As you can see in the ‘Usage’ tab, there are a few extra parameters that you can add to your shortcode. This will change how the button looks or acts.
If you want to create a social login button that doesn’t have a text label, then you can add the ‘icon’ parameter, for example [nextend_social_login provider=”facebook” style=”icon”]
Here is an example of how this button will look on your WordPress website.
When a visitor logs into your site using a social account, you can automatically redirect them to a page. This screen has an example shortcode that will redirect users to the Nextend site.
You can easily customize this shortcode to redirect visitors to a page on your WordPress website.
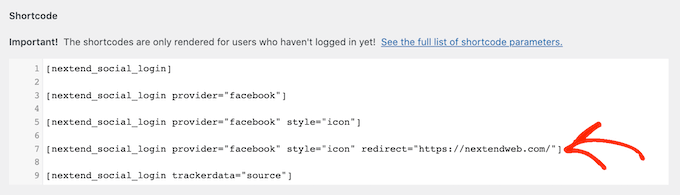
You can add a few other parameters to your shortcode. To see the full list of parameters, you can click the link to the plugin’s documentation.
After deciding what shortcode to use, you can add the code to any page, post, or widget-ready area. For step-by-step instructions, see our beginner’s guide on adding a shortcode in WordPress.
Video Tutorial
If you’re not a fan of written instructions, then just watch our video tutorial on how to add social login to WordPress:
Frequently Answered Questions About Social Login
Here are some questions that are frequently asked by our readers about adding social login to your WordPress site:
Can I choose which social networks users can log in with?
Yes, most social login plugins, including Nextend Social Login & Register, let you pick which networks to offer.
You can enable only the ones your audience prefers, like Google and Facebook, and hide others. For example, if you’re targeting a professional audience, you might enable LinkedIn, while Google and Facebook are more popular for general users.
Do I need a developer to set up social login?
No, you can do it yourself without writing code. Most social login plugins for WordPress are beginner-friendly and offer detailed documentation.
Some plugins even come with built-in setup wizards to guide you through creating app keys from platforms like Google or Facebook. It takes a few extra steps but everything is usually copy-paste.
Will adding social login slow down my website?
Adding social login won’t slow down your website if you’re using a well-coded plugin.
Popular tools like the Nextend Social Login & Register are optimized for performance and only load scripts when needed.
Still, it’s a good idea to monitor your site’s speed after installation. If you notice any delay, consider using performance plugins or a caching solution to keep your site fast.
Is social login safe for my WordPress site?
Yes, social login is secure if you use trusted plugins and keep them updated.
Since login is handled by big platforms like Google or Facebook, your site doesn’t need to store or manage user passwords.
However, we would still recommend using HTTPS and following best practices for WordPress security to keep everything safe.
Can I allow social login on WooCommerce or membership sites?
Absolutely! Social login works great with WooCommerce, BuddyPress, MemberPress, and more.
It helps customers and members log in quickly and reduces cart abandonment or signup friction. Many social login plugins even offer built-in integration with popular plugins so you don’t need any extra configuration.
What happens if a user logs in with social login and then later uses email login?
In most cases, the plugin will automatically link their accounts.
For example, if a user signs up with a Google account using the email ‘jane.doe@example.com’ and they already have a WordPress user account with that same email, the plugin will recognize the match and link the two.
This prevents duplicate accounts. However, it’s always a good idea to test this feature to see exactly how your plugin handles it before going live.
We hope this article helped you learn how to add a social login to your WordPress website. You can also check out our guide on the best social media plugins for WordPress or tutorial on how to add CAPTCHA in WordPress login and registration form.
If you liked this article, then please subscribe to our YouTube Channel for WordPress video tutorials. You can also find us on Twitter and Facebook.
 in 2026")


")
Hajjalah
I had always came across social login buttons on many websites an thought it required many documents for authorization to implement and not applicable for small websites.
But this article made the entire imagination so practical and surprisingly, I did not face any challenges when adding Facebook and Google login to my website using the Nextend Social Login and Register plugin. You guys are the best, Thanks ideed.
WPBeginner Support
You’re welcome, glad our guide was helpful!
Admin
Moinuddin Waheed
I have thought many times to have a social login for my websites but have not been able to do so.
with the help of this plugin , it seems I can easily have one now.
Having said that , where and what credentials are saved in the database if registering and login through social media?
and is it stored the same way as gets stored through the normal login and registration?
WPBeginner Support
Unless the process has changed, an access token is the information saved on your site.
Admin
Jiří Vaněk
I struggled with logging into the site using social media and honestly never really got around to finishing it. It’s quite a complicated process. Thanks for one of the few tutorials that are simply explained. At least now I can try again.
WPBeginner Support
We hope you are able to set it up with this guide’s assistance
Admin
Norman
Thanks for the information! Nice and details guide!
WPBeginner Support
Glad you found it helpful!
Admin