LiveJournal is an online platform for running personal blogs, journals, and diaries. It offers a sense of community through journals, a popular commenting system, and basic privacy controls.
However, as their blogs grow, many users find themselves looking for the greater flexibility and advanced features that WordPress offers.
At WPBeginner, we understand the difficulty of transferring content from one platform to another. That is why we have written easy-to-follow guides to help users export their content from different platforms to WordPress.
In this article, we will show you how to easily move from LiveJournal to WordPress, ensuring that your transition is seamless and your content remains intact.
📒 Note: Keep in mind that we will be talking about switching from LiveJournal to WordPress.org, which is a self-hosted platform. There is also WordPress.com, which is a blog hosting platform. To compare the two, you can see our guide on the difference between WordPress.com vs. WordPress.org.
Why Move From LiveJournal to WordPress?
LiveJournal is a popular choice for bloggers because it comes with features like protected posts, friends, communities, and more.
However, it is very limited in terms of how you display or control your journal, with the free plan only offering some basic features.

That is why it is a good idea to move your blog to WordPress. Doing this will allow you to use a vast range of themes and plugins, letting you customize your site to match your brand aesthetic.
Plus, you can create password-protected posts and add nested comments just like LiveJournal. It does not have a community feature, but you can connect your WordPress site to other online communities and even run your own community using a WordPress forum plugin.
With its intuitive interface and powerful functionalities, WordPress offers a smoother and more enjoyable user experience. It is built with SEO in mind and can result in increased traffic, which will be harder to achieve on LiveJournal.
Overall, WordPress is completely secure, free, and scalable, making it the better blogging option. For more information, see our beginner’s guide on why you should use WordPress.
Issues with Moving LiveJournal to WordPress
While moving from LiveJournal to WordPress offers many advantages, there are several challenges and potential issues you should be aware of to ensure a smooth transition.
For instance, you might face issues with formatting. Text and multimedia elements may not transfer perfectly, requiring manual adjustments.
Similarly, internal links within your content may break during the transfer, requiring you to review and update all the links.
Other than that, LiveJournal does not allow you to set up redirects. This means that users visiting your old LiveJournal site will not be automatically redirected to your self-hosted WordPress.org site. This can impact your site’s SEO negatively.
Another issue is that the built-in WordPress importer will not import your images. You can either download your images from LiveJournal and upload them manually or use a plugin to do it.
You must also remember that the migration can result in site downtime, which could temporarily impact your users’ access to content.
Things to Do Before You Switch From LiveJournal to WordPress
Before you switch from LiveJournal, you will need to set up your WordPress site. To do that, you must first purchase a hosting plan and your own domain name. Hosting is where your website stores all its data, while a domain name is your site’s name on the internet.
This is where your costs will start adding up: a domain name costs $14.99/year, while hosting costs start at $7.99/month.
We recommend choosing Bluehost, which is a WordPress-recommended hosting company. Plus, they are offering a generous discount to WPBeginner readers along with a free SSL certificate and domain name.

To get this offer, just click the button below:
Once you have done that, the next step is to install WordPress on your hosting account. For detailed instructions, see our tutorial on how to install WordPress.
💡 Expert Tip: If it feels like too much work to set up a WordPress site, then you can opt for WPBeginner’s Website Design Services.
We handle everything from hosting and domain setup to installing WordPress. We will design your site with your visitors in mind, making sure it fits your needs.
Plus, we optimize your site for SEO, so it starts driving traffic as soon as it goes live. To get started, see our WPBeginner Pro Services page.
Then, you will be ready to start moving from LiveJournal to WordPress.
How to Move From LiveJournal to WordPress
WordPress comes with a built-in import tool that automatically imports your LiveJournal entries, comments, and tags into WordPress.
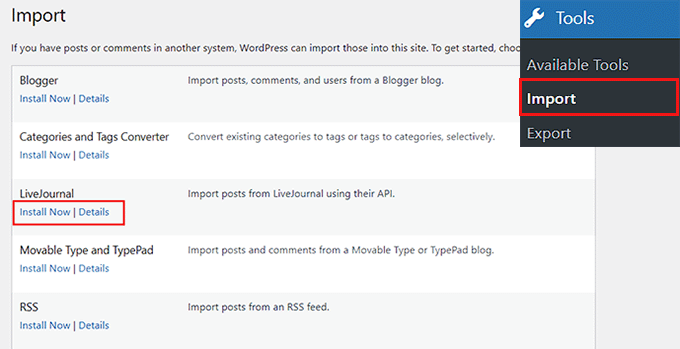
To do that, visit the Tools » Import page from the WordPress dashboard and click the ‘Install Now’ button under the ‘LiveJournal’ option.
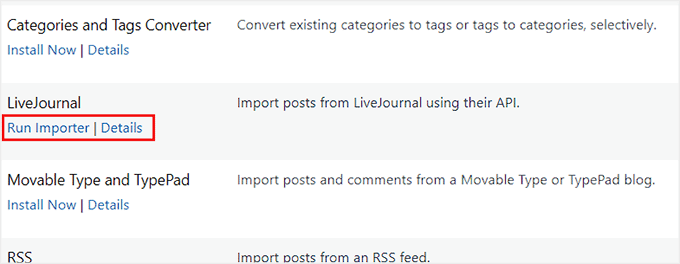
Once the importer plugin has been installed, you must click the ‘Run Importer’ link.
This will direct you to the LiveJournal Importer page.
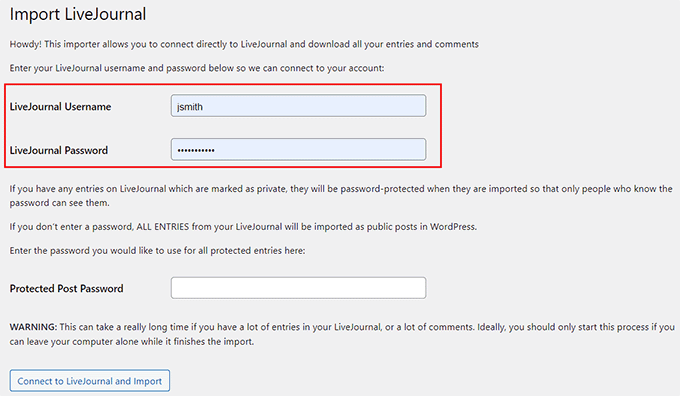
Here, you will need to enter the username and password for your LiveJournal account.
If you have password-protected posts on the platform, then you must add the password for that content as well. This will allow the WordPress importer to access that content.
Once that is done, go ahead and click the ‘Connect to LiveJournal and Import’ button.
WordPress will now start importing your content. The process is divided into different steps and may take a long time if you have many entries and comments.
If it fails suddenly during the import, then you can safely retry again, as the importer won’t duplicate entries.
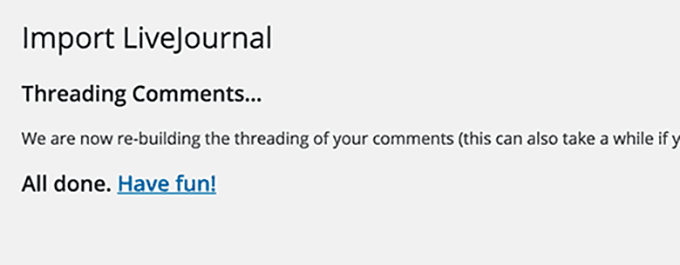
You will see a success message when the importer has finished its job.
What to Do After Migration to WordPress
Once you have imported your LiveJournal content to WordPress, you need to check all the internal links on your site to see if they are broken.
This can be a time-consuming process. That is why, we recommend the Broken Link Checker plugin which will regularly scan for broken links on your website, including internal and external links that result in a 404 error.
Upon plugin activation, it will automatically start working in the background to find links in your posts, pages, and custom post types.
You can then go to the Broken tab to view the full report. The links are categorized into broken, redirects, and dismissed. Here, you can fix a link by clicking the ‘Edit URL’ option under a broken URL.
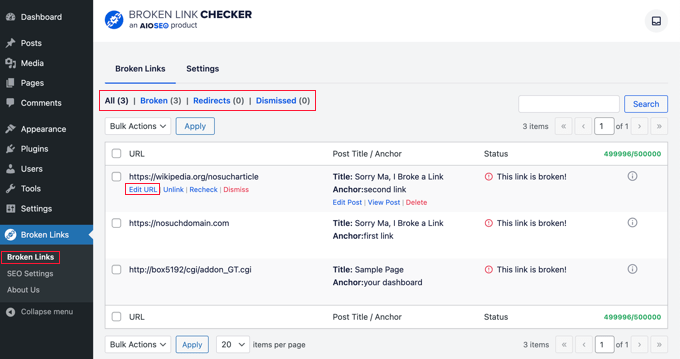
For details, see our tutorial on how to find and fix broken links in WordPress.
Similarly, you may want to set up redirect links so that users visiting your LiveJournal site will automatically be taken to your new WordPress site. You can do that with the help of All in One SEO.
It comes with a powerful redirection manager addon that makes it very easy to find broken links on your website and set up 301 redirections to fix them.
To learn more about its features, see our AIOSEO review.
Upon activation, all you need to do is visit the All in One SEO » Redirects page and click the ‘Activate Redirects’ button. Then, enter the link you’d like to redirect in the ‘Source URL’ field and the new destination for the link in the ‘Target URL’ field.
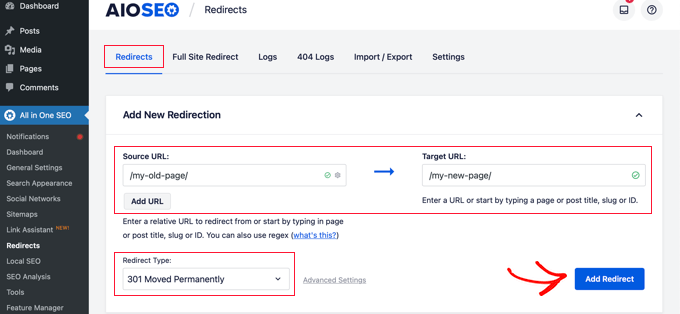
Finally, click the ‘Add Redirect’ button to make the changes. For more information, you can see our beginner’s guide to creating 301 redirects in WordPress.
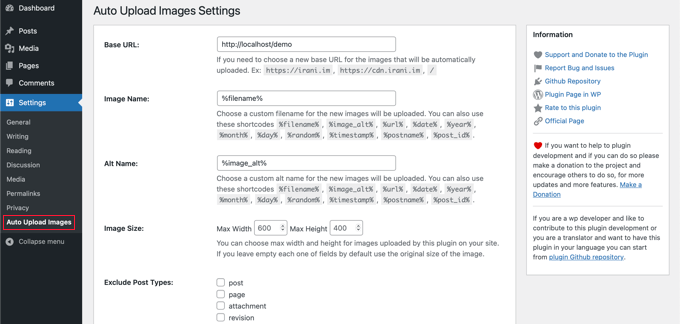
Once that issue is resolved, it’s time to bulk upload your images because the import tool doesn’t do that automatically. For this, we recommend the Auto Upload Images plugin.
Keep in mind that this process will take some time, but it will ensure that your images are added to all your posts immediately. For detailed instructions, see our tutorial on how to import external images in WordPress.
Finally, while all these changes are happening on your website, you should set up a maintenance page using SeedProd. This will ensure users visiting during the maintenance period that your site will be online after some changes.
SeedProd comes with amazing premade templates for maintenance pages, so setting up a pleasing page while working on your site in the backend will take a little time.
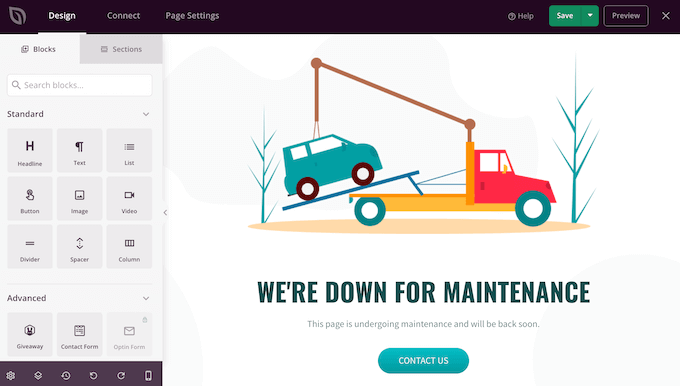
For step by step instructions, please refer to our guide on how to put your WordPress site in maintenance mode.
Bonus: Customize Your WordPress Site
Now that your site has been completely set up, it is time to customize it to match your brand.
To do this, you can start by choosing a WordPress theme. There are thousands of free and paid options that you can install on your website.
For details, see our guide on selecting the perfect theme for WordPress.
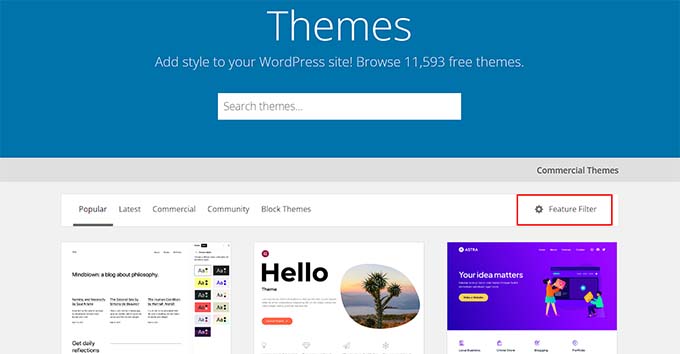
You can also opt for a theme builder like SeedProd to customize your theme from scratch.
It is a great choice because it offers prebuilt templates, a visual builder, and integration with email marketing services. Several of our partner brands have used it to create their websites.
For details, see our tutorial on how to create a custom theme in WordPress.

Once that is done, you can use different WordPress plugins to add all kinds of functionality to your website.
For instance, you could use WPForms to add a contact form, BuddyBoss to build a community, OptinMonster to create popups, and so much more.
To see our top picks, you can browse through our list of the must have WordPress plugins.
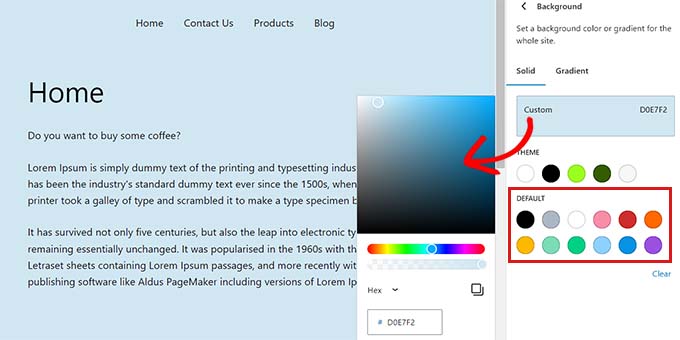
Unlike LiveJournal, you can even change the background color, text selection color, text color, link color, or header color right from the full site editor or theme customizer.
All you have to do is visit the Appearance » Editor screen from the admin sidebar and click on the ‘Styles’ icon in the top-right corner of the screen to open the ‘Colors’ panel.
To learn more, see our complete guide on how to customize colors on your WordPress website.
We hope this article helped you learn how to move from LiveJournal to WordPress. You may also want to see our ultimate WordPress migration guide for beginners and our tutorial on how to move WordPress to a new host or server.
If you liked this article, then please subscribe to our YouTube Channel for WordPress video tutorials. You can also find us on Twitter and Facebook.


Nadia
Doesn’t work. Plugin can’t login to Livejournal, so there is no way importing posts to Wordpress.
WPBeginner Support
Thanks for letting us know, we’ll certainly take a look at alternative methods.
Admin