Are you seeing a 401 error on your WordPress site?
The 401 HTTP status code is one of the most confusing WordPress errors out there, as it can lock you out of your WordPress website. It is sometimes accompanied by a message ‘Access is denied due to invalid credentials’ or ‘Authorization required.’
In this article, we will show you different solutions to easily fix the 401 error in WordPress. We will also discuss what causes it and how to avoid it in the future.
What Is the 401 Error in WordPress?
The 401 error in WordPress is caused by improper authentication while communicating with the WordPress web hosting server.
For example, if you have password-protected your WordPress admin folder, then not entering a password will show an HTTP 401 error page on the WordPress login and admin pages.
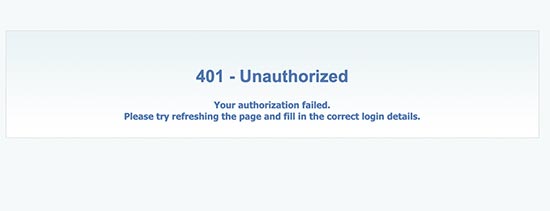
However, in some cases, you may see this error even without adding any special password protection to your website.
For example, WordPress security plugins can lock down your admin area during a brute-force attack.
Security measures taken by hosting companies to protect your WordPress website can also cause this error. They can trigger the 401 error code when your WordPress login web pages are accessed excessively.
Mostly, 401 errors appear on WordPress admin and login pages. That said, it could also appear on all pages of your website. You will need to troubleshoot exactly what’s causing the error and then fix it.
Here’s a list of the most common 401 error variations:
- HTTP 401 Error (or variations like HTTP Error 401, Error 401, etc.)
- Unauthorized
- Authorization Required
- Access Denied
- 401: Unauthorized
- 401 Authorization Required
- This site is experiencing technical difficulties (401)
Now, let’s take a look at different solutions to quickly fix the 401 error in WordPress. Feel free to use the quick links below to jump to a specific method:
Locate the Right WordPress Login URL
Before anything else, you may want to check if you are logging in to the wrong URL in the first place. You may be seeing the error because you’ve mistyped or misremembered the full login address.
If this is the case, we recommend reading our beginner’s guide on how to find your WordPress login URL.
Reset WordPress Password
WordPress hosting companies can sometimes block access to wp-admin and wp-login pages because of failed login attempts.
In that case, your access will be temporarily blocked, and you can try after a few minutes.
However, instead of guessing your login credentials, it is best to recover your forgotten WordPress password.
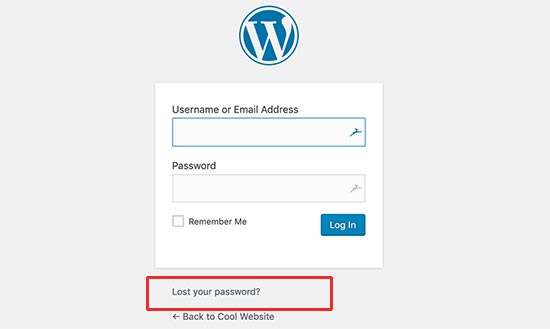
WordPress will send you an email with a link to change your password. The problem with this method is that sometimes WordPress may fail to send emails.
If you don’t get the email, then don’t worry. You can also reset the WordPress password using phpMyAdmin.
Temporarily Remove Password Protection on WordPress Admin
If you have password-protected your WordPress admin directory, then this could be the solution you need.
You may have forgotten your admin directory password or your server configuration might have changed.
To fix this, you need to log in to your WordPress hosting control panel. Then, click a setting that says ‘Directory Privacy’ or ‘Password Protected Directories.’
Our screenshot shows our Bluehost hosting account, but most hosting panels will have this option.
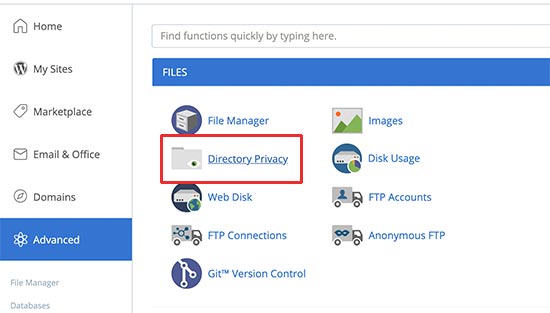
Once you open it, you will see all the files and folders on your hosting account. Browse to your wp-admin directory and select it by clicking on the name.
The control panel will now display its password protection settings. Simply uncheck the box next to the ‘Password protect this directory’ option and click on the ‘Save’ button.
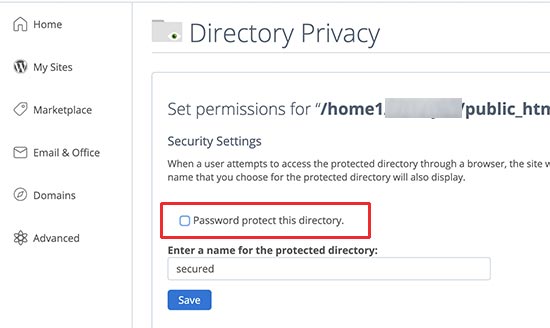
After that, click on the ‘Go Back’ button and scroll down to the bottom of the page. From here, you need to delete the username you use to log in to your password-protected directory.
You have now successfully disabled password protection for your WordPress admin directory. You can now try to log in to your WordPress site.
If everything works normally, then you can go ahead and enable password protection for your WordPress admin area by creating a new user and password.
Clear Firewall Cache to Solve the 401 Error in WordPress
If you are using a cloud-based WordPress firewall service like Cloudflare or Sucuri, then the 401 error may be triggered when the firewall fails to communicate with your website.
In this tutorial, we will show you how to purge the firewall cache in Sucuri and Cloudflare.
Purge Cache in Cloudflare
For those using Cloudflare, you need to log in to the Cloudflare dashboard and go to the ‘Caching’ section. Now, just click on the ‘Purge everything’ button to clear the cache.
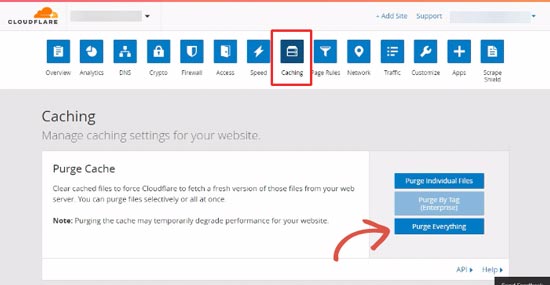
After clearing your firewall cache, go ahead and clear your web browser cache or WordPress cache as well. You can see our complete guide on how to clear your cache in WordPress for more details.
Purge Cache in Sucuri Firewall
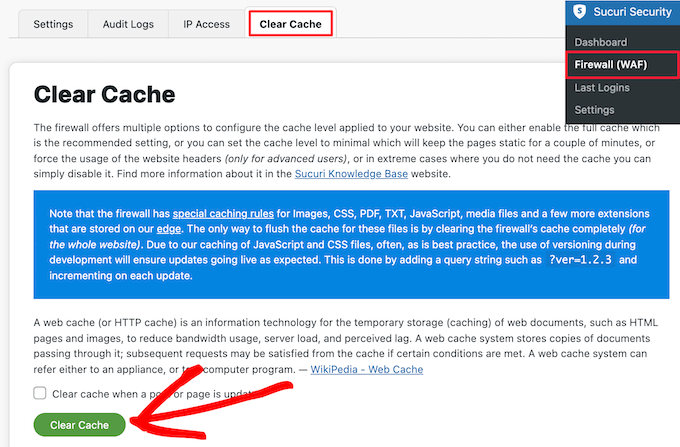
If you are using Sucuri, then you need to log in to your Sucuri dashboard and visit the ‘Firewall (WAF)’ page. From here, simply switch to the ‘Clear Cache’ tab and then click on the ‘Clear cache’ button.
Switch to a Default WordPress Theme
Sometimes, a function inside your WordPress theme may trigger the 401 error on your website. To find out if this is true, you need to temporarily switch to a default WordPress theme.
Default themes are made by the WordPress team and are shipped with the default WordPress install. These themes include Twenty Twenty-Three, Twenty Twenty-Two, Twenty Twenty, Twenty Nineteen, and more.
First, go to the Appearance » Themes page. If you have a default WordPress theme installed, then you can go ahead and activate it.
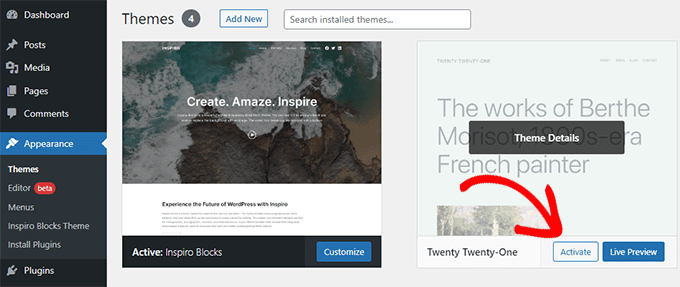
If you don’t have a default theme installed on your site, then you need to install and activate it. See our guide on how to install a WordPress theme for instructions.
After switching the theme, you can test your website. If everything works okay now, then this means your theme was causing the 401 error.
You can report the issue to the theme developer, and they may be able to help you fix it. If that doesn’t work, then you can permanently change your WordPress theme.
Deactivate All WordPress Plugins
A misbehaving or poorly configured WordPress plugin can also trigger the 401 error. You will need to temporarily deactivate all WordPress plugins to find out if the error is caused by one of them.
You can simply deactivate all installed WordPress plugins from inside the admin area by visiting the Plugins page. Check the box in the top left to select all the plugins, choose ‘Deactivate’ from the ‘Bulk actions’ dropdown menu, and then click ‘Apply’.
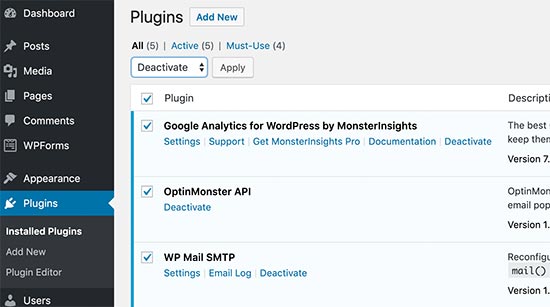
However, if you cannot access the WordPress admin area, then you will need to use FTP to deactivate all WordPress plugins.
All you need to do is connect to your WordPress site using an FTP client. Once connected, go to the /wp-content/ folder and rename the plugins folder to ‘plugins.deactivated’.
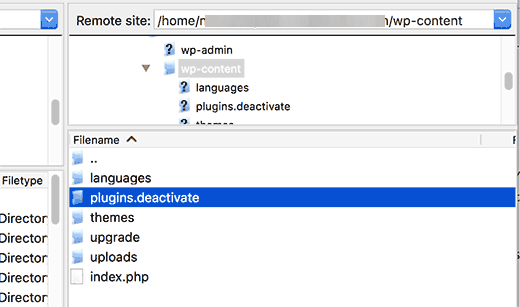
Renaming the plugins folder will deactivate all WordPress plugins.
You can now visit your WordPress website’s admin area and try to log in. If everything works fine, then this means that one of the plugins was causing the issue.
Now, you need to switch back to the FTP client and once again rename the plugin’s folder to just ‘plugins’.
Next, return to the WordPress admin area and go to the Plugins page. You can now activate each plugin one at a time until you start seeing the 401 error again.
This will help you find the plugin causing the issue. Once you have found the plugin, you can contact their support or find an alternative plugin.
Contact Your WordPress Hosting Provider
Many WordPress hosting companies automatically detect suspicious activity on a WordPress website and block access to prevent attacks.
These security precautions sometimes only affect the WordPress admin area, and your login page may become inaccessible for a while.
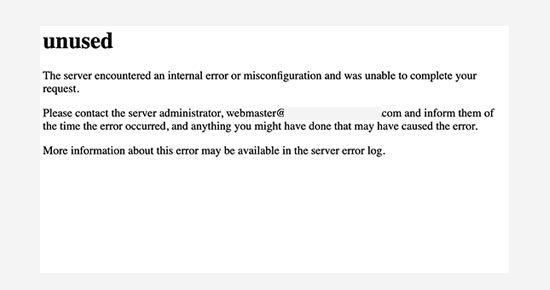
However, if it does not return to a normal state, or you are seeing a 401 error on all your site pages, then you will need to contact your WordPress hosting provider immediately. Their staff can check the access and error logs to fix the issue for you.
For more information, check out our guide on how to properly ask for WordPress support and get it.
How to Prevent 401 Errors in WordPress
Those 401 errors can be a pain, but there are ways to make them less likely to happen:
- Use strong passwords: Pick tough passwords you won’t forget, and don’t use the same one for everything. You can read our guide on how to manage passwords in WordPress for more information.
- Regularly update WordPress, themes, and plugins: This fixes security holes hackers might try to exploit. Turn on automatic updates if you can.
- Limit login attempts: Some security plugins can limit how many times someone can try to guess your password. This stops hackers from trying over and over again.
- Implement two-factor authentication (2FA): This adds an extra step to logging in, like a code sent to your phone. Even if someone gets your password, they can’t get in without the code.
- Use the correct file permissions: These control who can access your files. Messing with them can cause problems, so it’s best to leave them alone unless you know what you’re doing.
- Use a security firewall: A web application firewall (WAF) is like a security guard for your website. It can block bad traffic that might cause 401 errors. Some hosting companies offer these, or you can find them in our expert pick of the best WordPress firewall plugins.
- Back up your website regularly: Even if a security issue leads to a 401 error, a backup can help you get your site back up and running quickly.
You can also follow our complete WordPress security guide for more tips and tricks.
We hope this guide has helped you fix the 401 error in WordPress. You may also want to see our complete WordPress troubleshooting guide and check out our expert picks for the best WordPress plugins to grow your website.
If you liked this article, then please subscribe to our YouTube Channel for WordPress video tutorials. You can also find us on Twitter and Facebook.


Syed Balkhi says
Hey WPBeginner readers,
Did you know you can win exciting prizes by commenting on WPBeginner?
Every month, our top blog commenters will win HUGE rewards, including premium WordPress plugin licenses and cash prizes.
You can get more details about the contest from here.
Start sharing your thoughts below to stand a chance to win!
Jiří Vaněk says
A VPN can also cause the 401 problem. Watch out for that. Some providers have Geo-IP blocks set on their servers, and if you are on a VPN, you have an IP address of a foreign country from which you may not be able to access WordPress. The same applies if you have a security plugin on your website that monitors your location.
Mrteesurez says
Thanks for sharing your experience and the possible cause of 401 error. You are absolutely correct. I have once visited my websites and was denied of aceess, then when I off VPN it works normal. Mine was from security plugins or somehow.
dimiter kirov says
Thank you for this article and off topic : as a regular mobile user I think it will be more comfortable at least for me you to implement “Back to top” button!
Once again: The content is great but UX not so much
WPBeginner Support says
Thank you for your recommendation, we will take a look into that as an option
Admin