If you are running a multi-author WordPress blog, then you’ll want to make sure that each author adds a featured image for their posts before publishing it.
This will boost the user engagement and overall aesthetic consistency of your content.
For example, at WPBeginner, we use featured images for all our articles. That’s why we understand the importance of maintaining a visually appealing and well-organized site.
In this article, we will show you how to easily require featured images for posts in WordPress.
Why Require WordPress Featured Images for Posts?
Featured images, also known as thumbnails, are the primary images for a blog post. They usually appear next to the post title on your WordPress blog or social media platforms.
These thumbnails make your blog look more professional and boost user engagement on your website.
WordPress makes it easy to add featured images to your posts. You can even set a default featured image, which can be used if no featured image is added for a post.
Ideally, you will want to create and use featured images for each article on your WordPress website. However, sometimes you or other authors on your website may accidentally publish an article without a featured image.
This mistake can make the post look incomplete and unprofessional.
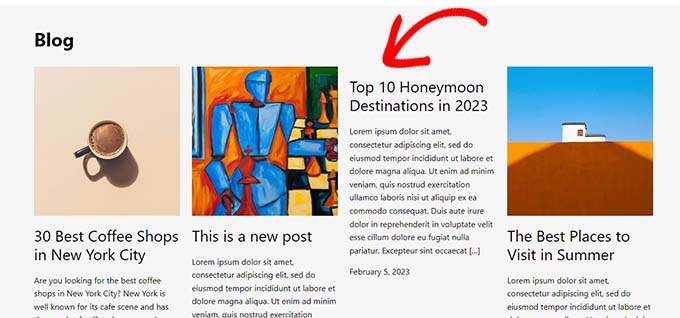
You can easily prevent this from happening by requiring a featured image for your posts before they can be published.
This way, whenever an author tries to publish a post without a featured image, they will see an error asking them to add a featured image.
That being said, let’s see how you can easily require a featured image for posts on your WordPress site.
How to Require Featured Images for Posts in WordPress
First, you need to install and activate the PublishPress Checklists plugin. For more instructions, please see our beginner’s guide on how to install a WordPress plugin.
🚨 Note: To unlock the more advanced features, you can also upgrade to the PublishPress Pro plan. This will give you access to amazing features like creating custom checklists, setting conditions, tracking progress, and more.
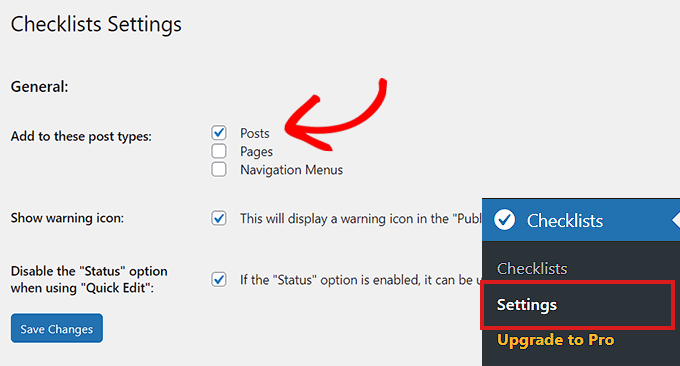
Upon activation, head over to the Checklists » Settings page from the WordPress admin sidebar.
From here, check the ‘Posts’ option to add a checklist to your post editor.
Once you are done, don’t forget to click on the ‘Save Changes’ button to store your settings.
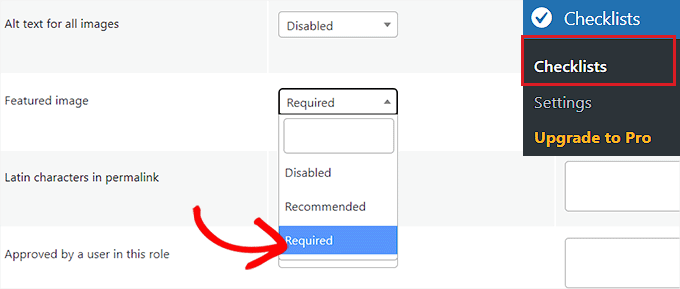
After that, visit the Checklists » Checklists page from the WordPress admin dashboard.
Next, scroll down to the Featured Image section and select the ‘Required’ option from the dropdown next to it.
Optionally, you can also allow certain user roles to publish the post without a thumbnail.
For instance, if you don’t want to disable the publish functionality for users with the Administrator user role, then you can easily do that.
Simply select the ‘Administrator’ user role from the ‘Who can ignore this task?” dropdown menu in the ‘Featured Image’ row.

PublishPress Checklist also offers a bunch of other useful options that you can add to your checklist. Feel free to review and use them on your website if needed.
For instance, you can set a word count limit for content, the number of categories that can be selected, the number of internal links, and more.
Once you are done, click the ‘Save Changes’ button to store your settings.
Next, open up the post you want to edit, or you can create a new post by going to the Posts » Add New screen from the WordPress admin area.
Here you will see the ‘Publish’ button disabled along with a red exclamation mark (!) asking you to add a featured image.
A ‘Checklist’ tab will also be added to the column on the right corner of the screen. This tab will also notify you to add a featured image.
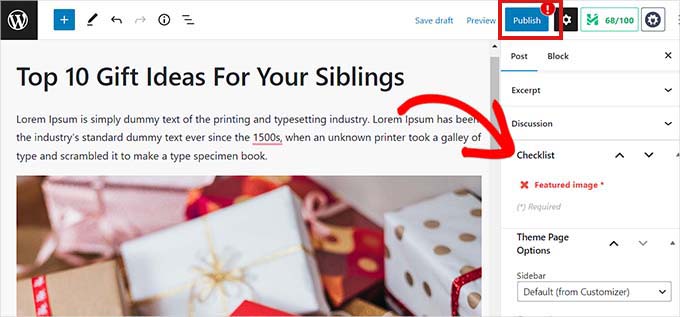
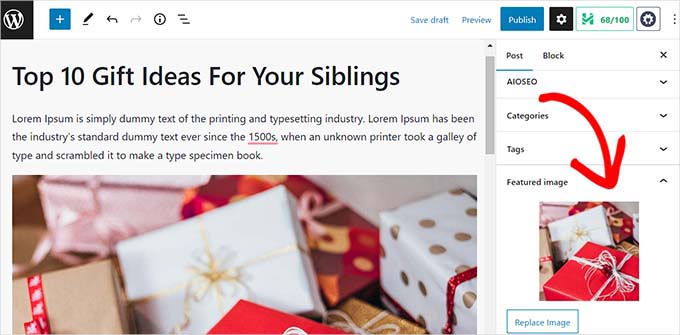
Now go ahead and upload a featured image to the WordPress post.
As soon as you do that, the notice will disappear, and the ‘Publish’ or ‘Update’ button will be enabled again.
Bonus: Use AIOSEO to Set a Default Featured Image for Social Sharing
Many blogs use their featured image as the Open Graph image for social media websites like Twitter and Facebook.
This means when someone shares one of your articles, the featured image is added to the link card.
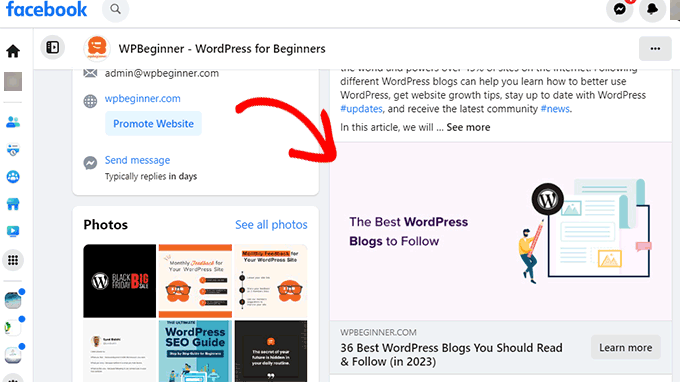
WordPress doesn’t automatically make the featured image the Open Graph image for your blog post. This means that sometimes social media websites may end up showing a totally irrelevant image when someone shares your link.
This is where All in One SEO for WordPress comes in. It allows you to easily set your featured images as your social media image as well.
All in One SEO is the best WordPress SEO plugin on the market that lets you optimize your website for search engines.
We started using it on the WPBeginner site and have since noticed a spike in our article rankings. To learn more, see our full AIOSEO review.
First, you need to install and activate the All in One SEO for WordPress plugin. For details, please see our step-by-step guide on how to install a WordPress plugin.
☝ Note: All in One SEO also has a free version that you can give a try. However, we recommend upgrading to the paid plan to unlock the most-wanted All in One SEO features.
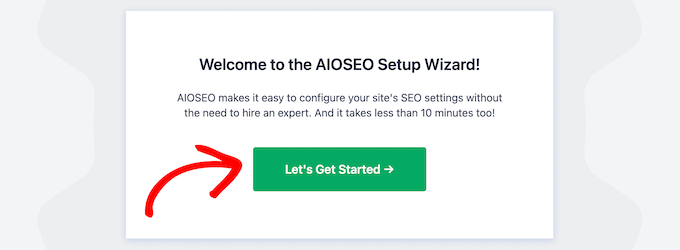
Upon activation, the plugin will launch the setup wizard.
Simply follow the on-screen instructions to set up the plugin or see our guide on how to properly set up All in One SEO for WordPress.
Once finished, visit the All in One SEO » Social Networks page from the WordPress dashboard and switch to the Facebook tab.
From here, you can select ‘Featured Image’ next to the Default Post Image Source option.
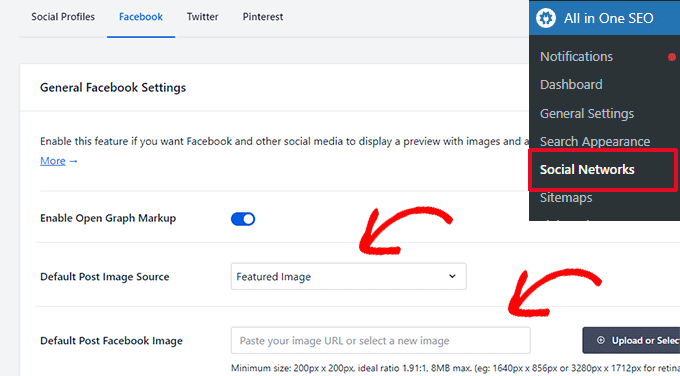
You can also set a default image under the ‘Default Post Facebook Image’ option. This image will be used for posts and pages that don’t have a featured image.
Next, you need to switch to the Twitter tab and do the same for the ‘Default Image Source’ and ‘Default Post Twitter Image’ options.
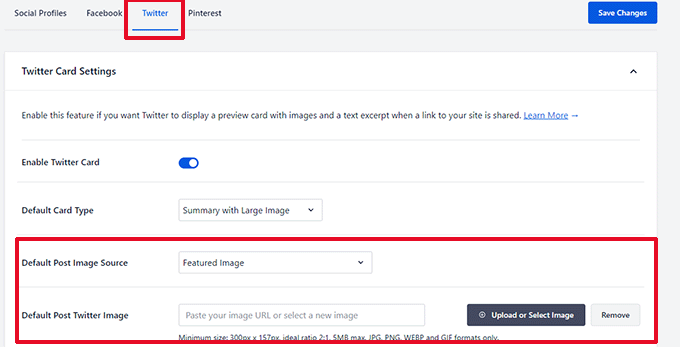
Don’t forget to click on the ‘Save Changes’ button to store your settings.
All in One SEO will now automatically set the featured image to be used as a social media image.
However, what happens if you want to use a different image for social sharing instead of using the post’s featured image?
No worries; you can also override it for any post or page. Simply edit the post or page and scroll down to the AIOSEO Settings section at the bottom.
Here, you must switch to the ‘Social’ tab.
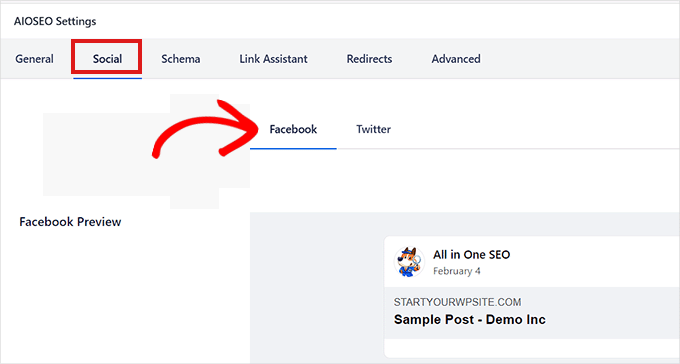
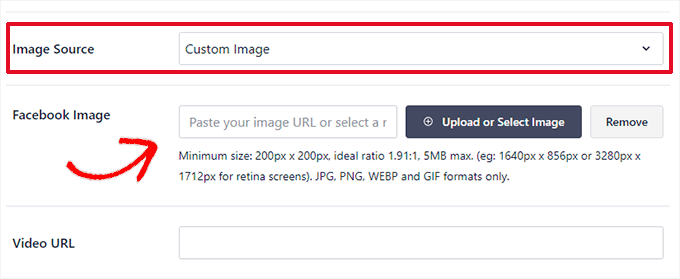
Next, scroll down the ‘Image Source’ section and select the ‘Custom Image’ option from the dropdown menu.
After that, add the address of the image that you want to use as the Facebook image.
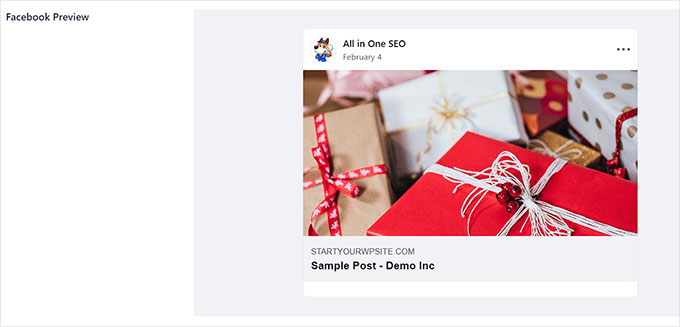
You can now check how your content will look on Facebook using the ‘Facebook Preview’ tab at the top.
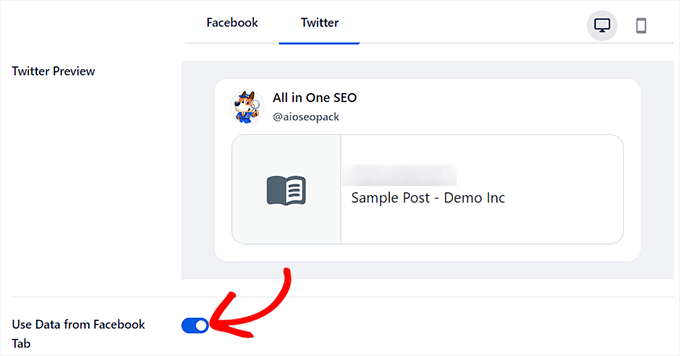
Once you’ve done that, you can also switch to the ‘Twitter’ tab at the top to configure the Twitter image settings.
From here, you can now simply toggle the ‘Use Data from Facebook Tab’ switch to ‘Active’.
Your featured image for Twitter will now be automatically set the same as the Facebook image.
For more details, see our tutorial on how to set a default featured image in WordPress.
Once you are done, don’t forget to click the ‘Publish’ or ‘Update’ button at the top to store your settings.
We hope this article helped you learn how to require a featured image for posts in WordPress. You may also want to see our tutorial on how to fix image color and saturation loss in WordPress and our top sources for free public domain and CC0 licensed images.
If you liked this article, then please subscribe to our YouTube Channel for WordPress video tutorials. You can also find us on Twitter and Facebook.


Dave Navarro
I really wish there was a plugin that set the default featured image by category/taxonomy.
WPBeginner Support
Take a look at our guide on how to add a default featured image in WordPress. You can modify the code by adding conditional tags, like
is_tax()oris_category(). An untested example code:<?php if ( is_tax() ) :
if ( has_post_thumbnail() ) {
the_post_thumbnail();
} else { ?>
<?php }
endif;
?>
Admin
Joy Baker
I’d like to set this feature for creating pages instead of posts. Is there a plugin for that?
Rajesh
Thanks for such nice and easy solutions. But can you suggest some of the best FREE resources to grab and use images for blog post, which we can publish or reuse. Thank you!
WPBeginner Support
Check out our guide on how to find royalty free images to use in your blog posts.
Admin
Zimbrul
My question might sound stupid but here I go: does the WordPress scale down the image when inserting it as a featured image if the image is larger than the required featured image?
I mean, when you insert a featured image you have the option to choose from the pre-set images sizes. Does that mean the featured image is automatically scaled down when displayed as “featured image”?
Never digged into this one until now.
Paul
Just wanted to say thanks, clever plug idea, it helps with a single person blog as well Enjoy your info quite a bit, thanks for the effort.