Do you want to add image icons to your WordPress navigation menus?
Images can help visitors understand your site’s navigation at a glance. You can even use icons to highlight the menu’s most important content or call to action.
In this article, we will show you how to easily add image icons to navigation menus in WordPress.
Why Add Image Icons With Navigation Menus in WordPress?
Usually, WordPress navigation menus are plain text links. These links work well for most websites, but they don’t always look interesting or engaging.
By adding image icons to the navigation menu, you can encourage visitors to pay attention to the menu and explore more of your site.
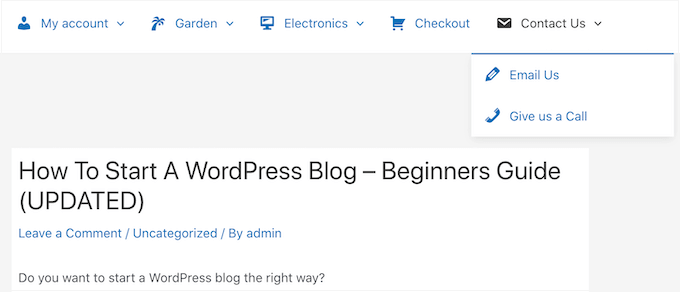
If your menu has lots of different options, then image icons can make it easier for visitors to scan the content and find what they are looking for. This can be an easy way to increase pageviews and reduce the bounce rate in WordPress.
You might even use an image icon to highlight the most important menu item, such as the Checkout link in your online marketplace.

By highlighting a call to action in the menu, you can often get more signups, sales, members, and other conversions.
That being said, let’s see how you can add image icons to your WordPress navigation menu. Simply use the quick links below to jump straight to the method you want to use:
Method 1: Add Image Icons to Navigation Menus Using a Plugin (Quick and Easy)
The easiest way to add icons to your WordPress menus is by using Menu Image. This plugin comes with dashIcon icons that you can add with just a few clicks.
If you’ve set up Font Awesome on your website, then you can easily add these icons to your navigation menu using Menu Image. For more information on how to install Font Awesome, see our guide on how to easily add icon fonts to your WordPress theme.
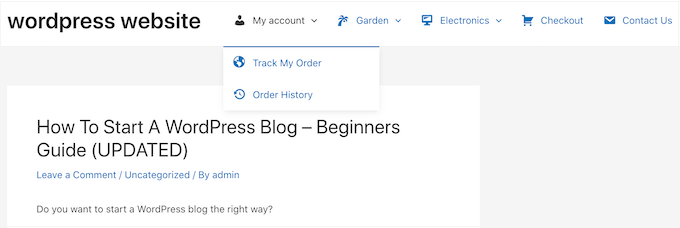
Another option is to use images or icons from the WordPress media library.
The first thing you need to do is to install and activate the Menu Image plugin. For more details, see our step-by-step guide on how to install a WordPress plugin.
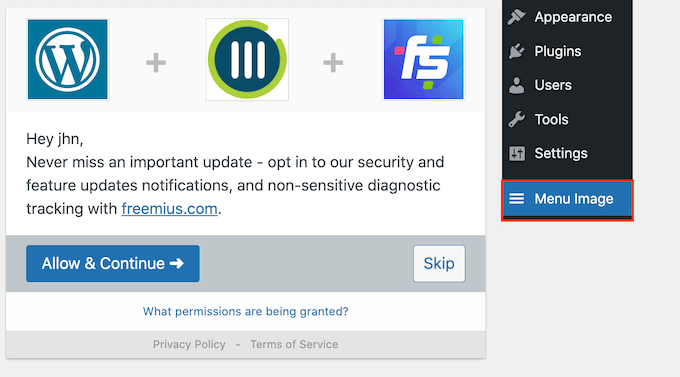
Upon activation, click on Menu Image in the WordPress dashboard. On this screen, you can choose whether to get security and feature notifications or click on the ‘Skip’ button.
This will take you to a screen where you can configure the plugin’s settings. To start, you will see all the different sizes you can use for the image icons.
If you plan to use icons from Font Awesome or dashicons, then Menu Image will resize them automatically. However, if you use images from the media library, then you will need to select the size manually.
The plugin supports the default WordPress image sizes, such as thumbnails, images, and large. It also adds three unique sizes that are set to 24×24, 36×36, and 48×48 pixels by default.
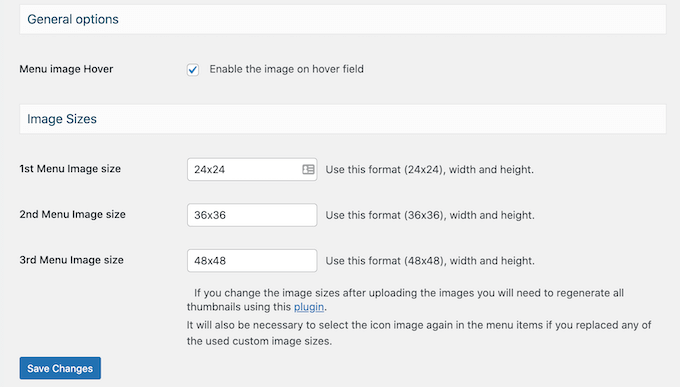
These settings should work well for most websites, but you can make the icons bigger or smaller by typing in different numbers for the 1st, 2nd, or 3rd Menu Image size.
When you are adding icons to your menu, you will see an ‘image on hover’ field by default. This allows you to show a different icon when the visitor hovers over that menu item.
Just be aware this setting is only available when you are using your own images. You don’t need to worry about the ‘image on hover’ feature if you plan to use dashIcons or Font Awesome icons.
Showing a different icon can help visitors see where they are in the navigation menu. This is particularly useful if your menu has lots of different items. For example, you might use different colors or icon sizes to highlight the currently selected item.
If you want to create different hover effects, then make sure you check ‘Enable the image on hover field.’
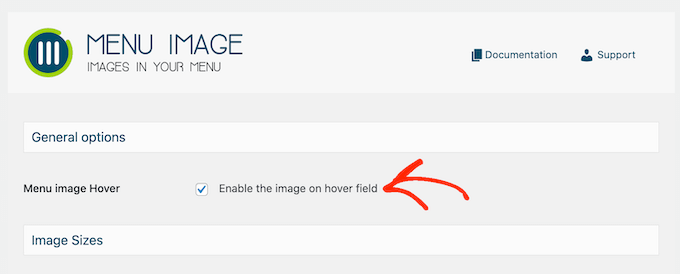
With that done, click on ‘Save Changes’ to store your settings.
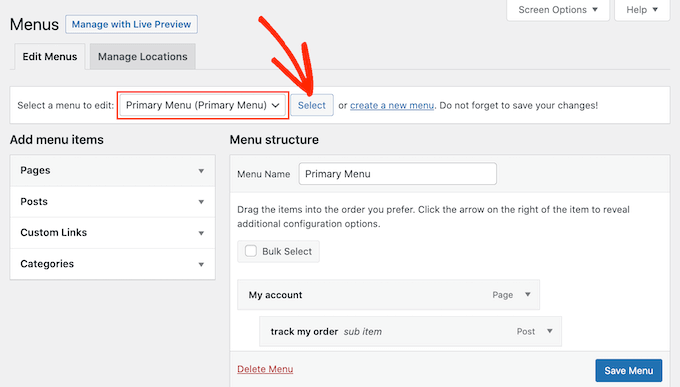
To add icons to the navigation menu, head over to the Appearance » Menus page. By default, WordPress will show your site’s primary menu.
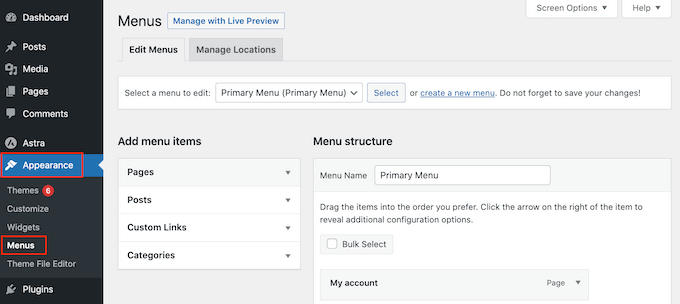
If you want to edit a different menu, then simply open the ‘Select a menu to edit’ dropdown and choose a menu from the list. After that, click on ‘Select.’
Now, hover over the first menu item where you want to add an icon. When ‘Menu Image’ appears, give it a click.
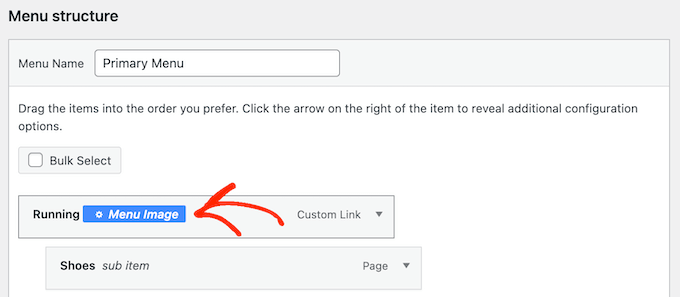
You can now decide whether to use your own image or choose a ready-made icon, such as a Font Awesome icon.
To use a ready-made icon, click on the radio button next to ‘Icons.’
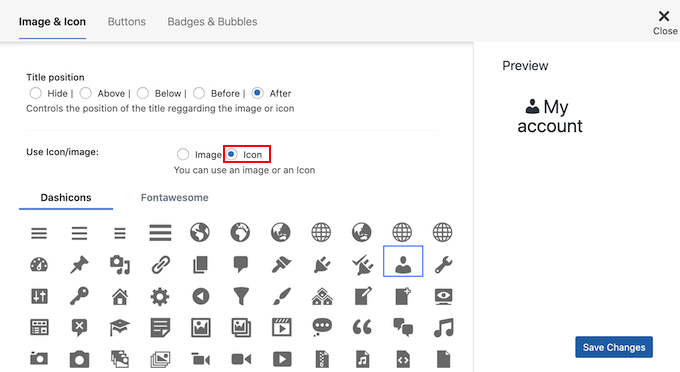
You can then click to select any dashIcon or Font Awesome icon.
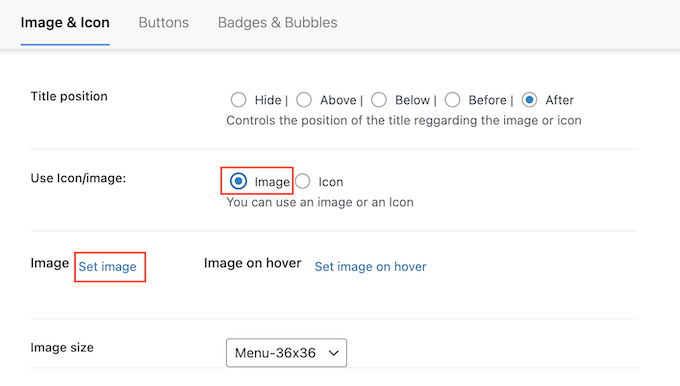
If you want to use your own image, then select the radio button next to ‘Image’ and click the ‘Set Image’ link.
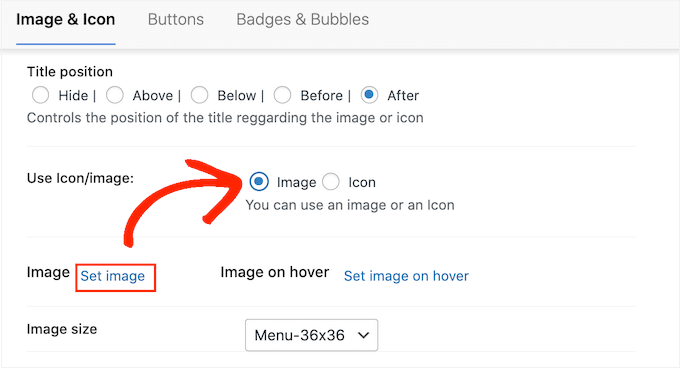
You can now either choose an image from the WordPress media library or upload a new file from your computer.
If you checked ‘Enable the image on hover field’ in the plugin’s settings, then you’ll also need to click on ‘Set image on hover.’
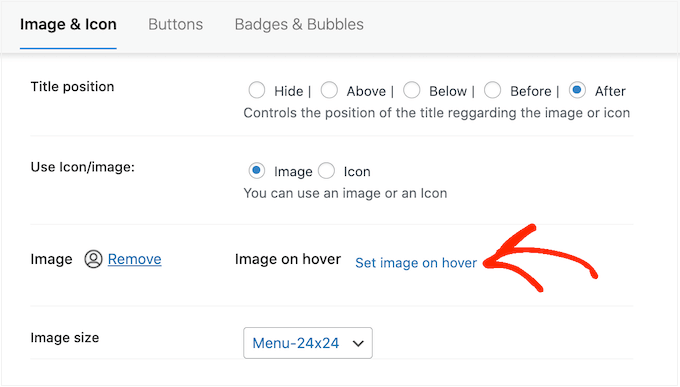
Now, choose an image to show when the user hovers over this menu item.
Sometimes, you may want to ignore this setting and show the same icon no matter what. To do this, click on ‘Set image on hover’ and then choose the exact same icon.
If you don’t select an image, then the icon will completely disappear when the visitor hovers over it.
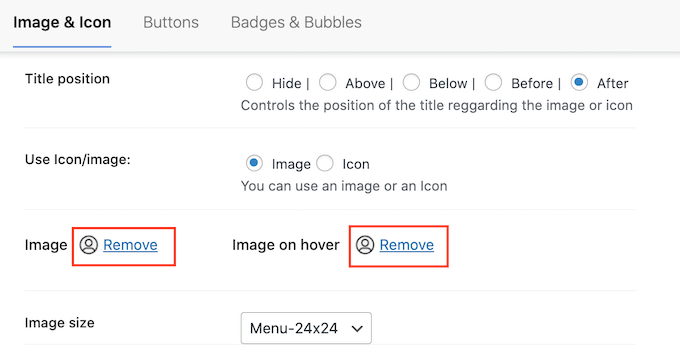
After that, open the Image Size dropdown and choose a size from the list.
Using the same size for all icons tends to make the menu look more organized. However, sometimes it’s a good idea to use a bigger icon for the most important item.
For example, if you have created an online store using a plugin like WooCommerce, then you might use a bigger icon for ‘Checkout’ so it stands out.
When you are happy with the icon, it’s time to look at the menu item’s label. By default, the plugin shows the title label after the icon.
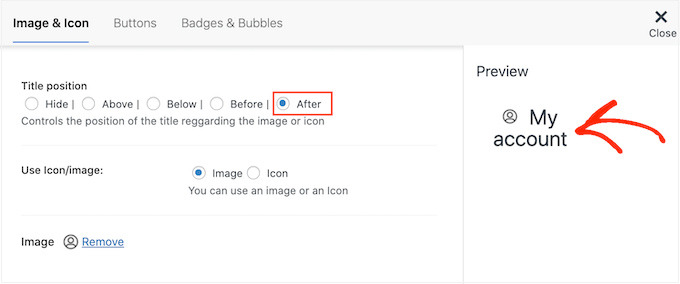
To change this, select any of the radio buttons in the ‘Title position’ section.
Another option is to remove the navigation label completely and create an icon-only menu. If your menu has lots of items, then this can make it look less cluttered.
However, you should only hide the labels if it’s obvious what each icon means. If it’s unclear, then visitors will struggle to navigate your WordPress blog or website.
To go ahead and hide the label, select the radio button next to ‘None.’
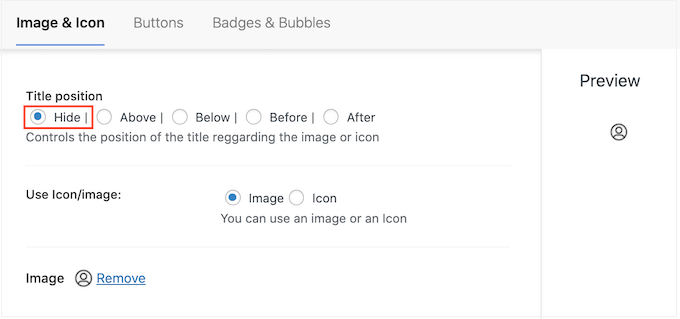
When you are happy with how the menu item is set up, click on ‘Save Changes.’
To add an icon to other menu items, simply follow the same process described above.
When you’ve finished, don’t forget to click on the ‘Save Menu’ button. Now, if you visit your WordPress website, you’ll see the updated navigation menu live.
Method 2: Add Icons to WordPress Menus Using Code (More Customizable)
You can also add image icons to your navigation menus using CSS.
In this way, you can control exactly where the icons appear in your menus. You can also use any image as an icon, so it’s a great way to add your own branding.

Before you start, go ahead and upload all the image files you want to use as your icons. These might be stock photos, royalty-free images you found online, or custom graphics created using an app such as Canva.
After adding each image to the WordPress media library, make sure you copy its URL and paste it into a text editor like Notepad. You’ll need all these links in the next step.
To find an image’s URL, simply select it in the WordPress media library and then look at the ‘File URL’ field.
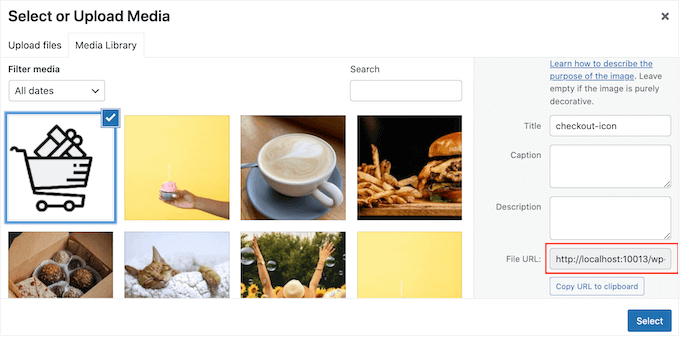
For more detailed instructions, please see our guide on how to get the URL of images you upload in WordPress.
After that, you need to visit the Appearance » Menus page from the WordPress dashboard.
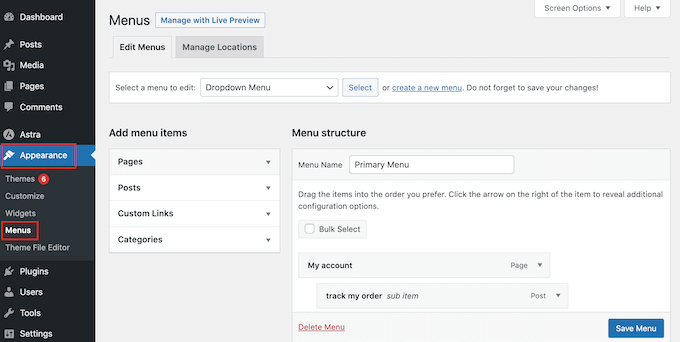
Next, open the ‘Select a menu to edit’ dropdown and choose the menu where you want to add the image icons.
After that, go ahead and click on ‘Select.’
Next, you need to enable custom CSS classes by clicking on ‘Screen Options.’
In the panel that appears, check the box next to ‘CSS Classes.’
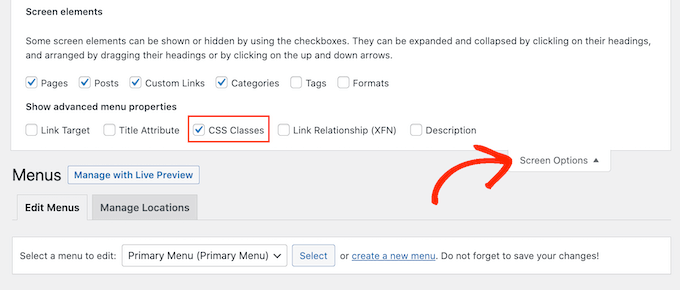
With that done, you can add custom CSS classes to any item in the navigation menu. This is how you will link each menu item to an image in the WordPress media library.
You can call these classes anything you want, but it’s a good idea to use something that helps you identify the menu item.
To get started, simply click on the first item you want to add an image icon to. In the ‘CSS Classes (optional)’ field, type in the class name you want to use.
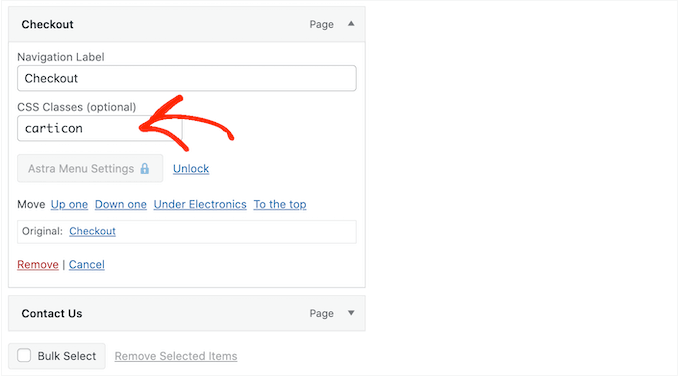
You’ll use these custom CSS classes in the next step, so make a note of them in your Notepad or similar app.
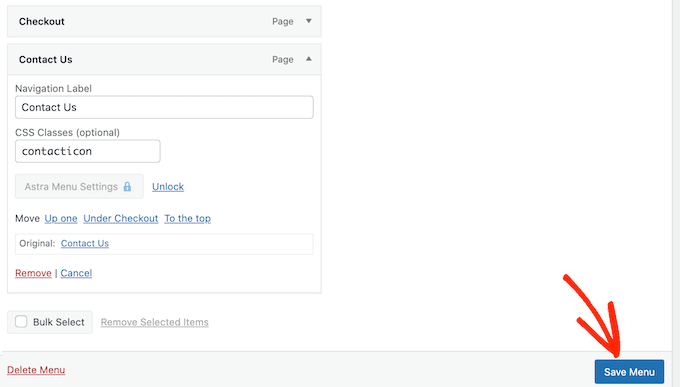
Simply follow the same process to add a separate class to all your menu items. After that, click on ‘Save Menu’ to store your settings.
Now you are ready to add image icons to your WordPress navigation menus using CSS.
Often, WordPress tutorials will tell you to add code snippets to your WordPress theme files. However, doing so may cause common WordPress errors and isn’t very beginner-friendly.
That’s why we recommend WPCode.
It is the best WordPress code snippets plugin used by over 1 million websites and allows you to add custom code without editing your theme’s functions.php file.
The first thing you need to do is install and activate the free WPCode plugin. For more details, see our step-by-step guide on how to install a WordPress plugin.
Upon activation, head over to Code Snippets » Add Snippet.
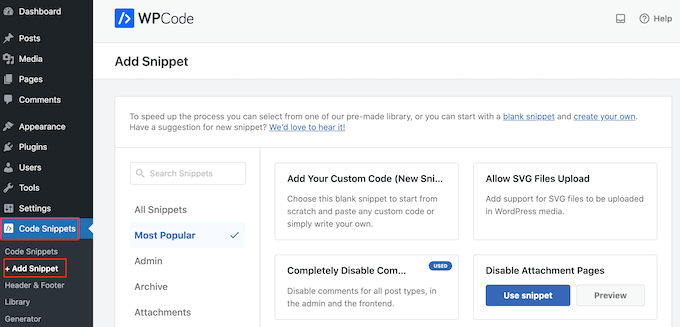
This will bring you to the ‘Add Snippet’ page, where you can see WPCode’s library of ready-made snippets. These include snippets that allow you to improve your WordPress security by disabling XML-RPC, upload file types that WordPress doesn’t support by default, and more.
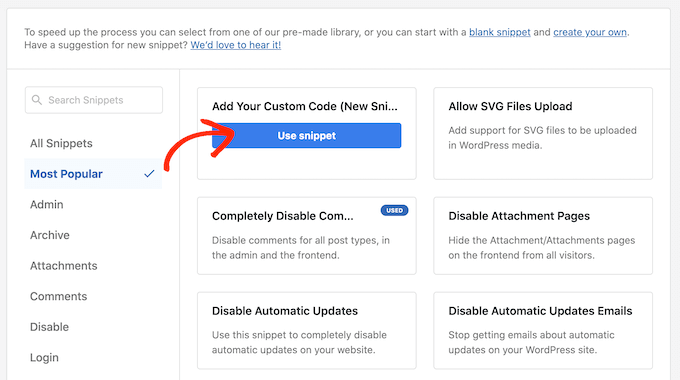
Simply hover your mouse over ‘Add Your Custom Code’ and then click on ‘Use snippet’ when it appears.
To start, type in a title for the custom code snippet. This can be anything that helps you identify the snippet in the WordPress dashboard.
With that done, open the ‘Code Type’ dropdown and select ‘CSS Snippet.’
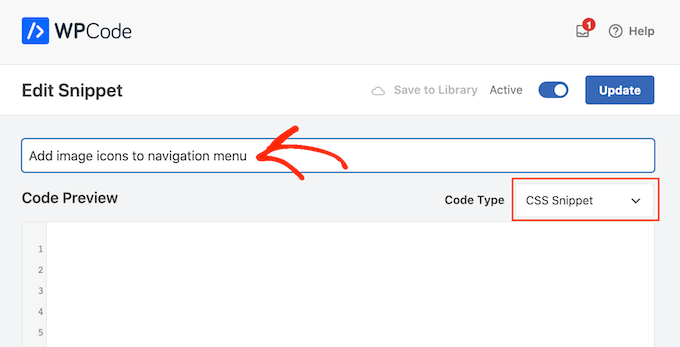
In the code editor, you’ll need to add some code for every icon you want to show.
To help you out, we’ve created a sample snippet below. You can go ahead and change ‘.carticon’ to the custom CSS class you created in the previous step. You’ll also need to replace the URL with a link to the image in your WordPress media library:
.carticon {
background-image: url('http://localhost:10013/wp-content/my-media/cartcheckout.png');
background-repeat: no-repeat;
background-position: left;
padding-left: 5px;
}
Note: You will need to keep the dot ‘.’ in front of the CSS class in the code snippet. That’s what tells WordPress that it’s a class and not another kind of CSS selector.
You will need to adjust the snippet above for each individual menu item you created above.
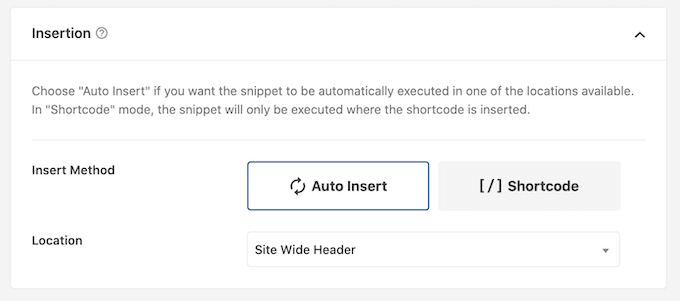
When you are happy with your code, scroll to the ‘Insertion’ section. WPCode can add code to different locations, such as after every post, frontend only, or admin only.
To use the custom CSS code across your entire WordPress blog or website, click on ‘Auto Insert’ if it isn’t already selected.
Then, open the ‘Location’ dropdown menu and choose ‘Site Wide Header.’
After that, you are ready to scroll to the top of the screen and click on the ‘Inactive’ toggle so it changes to ‘Active.’
Finally, click on ‘Save Snippet’ to make the custom CSS live.
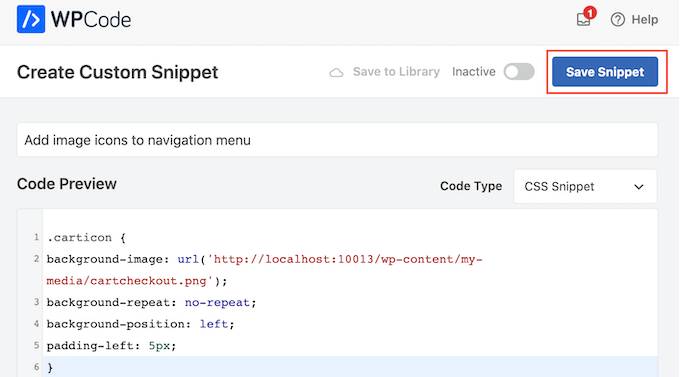
Now, if you visit your website, you’ll see all the image icons in your navigation menu.
Depending on your WordPress theme, you may need to tweak the CSS so it shows the image icons in exactly the right spot. If this is the case, then head to Code Snippets » Code Snippets in the WordPress dashboard.
Then, simply hover over the snippet and click on the ‘Edit’ link when it appears.
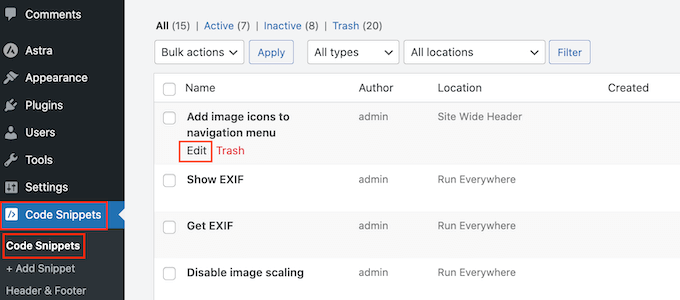
This opens the code editor, which is ready for you to make some changes.
Bonus: Add Social Media Icons to WordPress Menus
Apart from menu icons, you can also add social media icons to your WordPress navigation menu. Doing this will help promote your social media profiles in a visually appealing way without taking up too much space on your site.
To do this, you can use the Menu Image plugin. Upon activation, simply visit the Appearance » Menus page from the WordPress dashboard and expand the ‘Custom Links’ tab in the left column.
Then, add the URL for your social media ID and type the name of the platform. Next, click the ‘Add to Menu’ button.
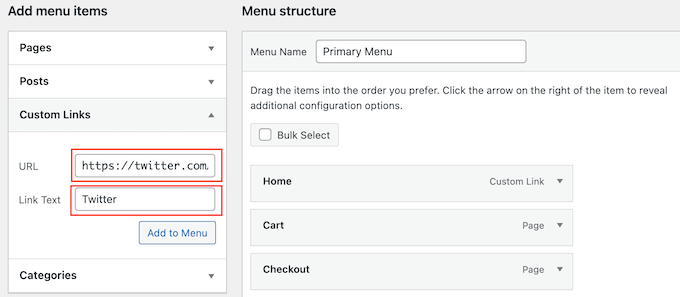
Once the social media profile has been added as a menu item, it will be displayed on the right side of the screen.
Here, you must expand the items’ tab again and click the ‘Menu Image’ button.
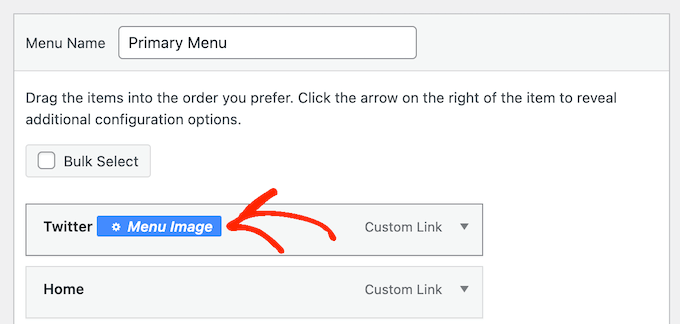
This will open a new prompt on the screen where you can click the ‘Set Image’ link to upload a social media icon from your media library.
If you want to add a premade icon, then you can select the ‘Icon’ option and add your social media icon from FontAwesome.
Finally, click the ‘Save Changes’ button to store your settings.
You have now successfully added a social media icon to your navigation menu. For more information, see our tutorial on how to add social media icons in WordPress menus.
We hope this article helped you learn how to add image icons to your WordPress navigation menu. You can also go through our guide on the best drag-and-drop WordPress page builders and how to make money online blogging with WordPress.
If you liked this article, then please subscribe to our YouTube Channel for WordPress video tutorials. You can also find us on Twitter and Facebook.


Syed Balkhi says
Hey WPBeginner readers,
Did you know you can win exciting prizes by commenting on WPBeginner?
Every month, our top blog commenters will win HUGE rewards, including premium WordPress plugin licenses and cash prizes.
You can get more details about the contest from here.
Start sharing your thoughts below to stand a chance to win!
Jiří Vaněk says
I also use Menu Image, and I can’t praise it enough. It’s a fantastic choice when you’re a beginner and need to get icons into the menu. Previously, I struggled with implementing Font Awesome, but this is a much cleaner and better option.
JT says
hi with CSS method how do have the icons placed above the menu items instead of to the side?
WPBeginner Support says
It would depend on your specific theme for what would need to be added for that, for the time being we would recommend using the plugin method for what you are wanting to do.
Admin
Linsey Retcofsky says
Hi, how could I modify the code to hide the menu link and only show the icon? Thanks for your help.
WPBeginner Support says
You would want to use the plugin and that would allow you to do what you are wanting.
Admin
Kyle says
Hi,
Im wondering if you can help me.
Using Css how would i make the posts in my menu show their respective featured image.
Thanks
WPBeginner Support says
That would require more than CSS, we would recommend reaching out to your theme’s support and they should be able to assist with your featured image display
Admin
Nick says
I try this plugin but facing issue while creating sub-menu. All things I set it up as per guidelines. but those menu have have sub-menu there i’m unable to see the image.
please help me out.
WPBeginner Support says
We would first recommend reaching out to the plugin’s support and they should be able to assist.
Admin
Quy says
thanks for useful article.
WPBeginner Support says
You’re welcome
Admin
Carlos Reddy says
You guys are awesome!
Thank you very much for this!
WPBeginner Support says
Glad you like our content
Admin
Sotir says
Hey thanks a lot for this advise
WPBeginner Support says
You’re welcome
Admin
Richmond Sagoe says
I used Method 2 and it worked. However, I see ‘home’ besides the icon
WPBeginner Support says
This tutorial is for placing the icon next to the word in your menu. If the positioning isn’t correct, you can use inspect element to test CSS changes that you can do to the site: https://www.wpbeginner.com/wp-tutorials/basics-of-inspect-element-with-your-wordpress-site/
Admin
Jo Lee says
I have done all of the above and within the menu I can see the image that I have uploaded so looks like it’s all worked but when I go to the front page of the website the images are not showing, can’t understand why it’s not working
WPBeginner Support says
If you’re using the plugin you may want to reach out to the plugin’s support otherwise, you would want to reach out to your theme’s support in case it is being overridden by your theme’s settings
Admin
Saviour Ukpong says
Nice one, but how do we do it with font awesome??
Christina says
Love you guys!!!! You always have what I need. This is perfect!!!! Thank you!
zviryatko says
Hello, I’m author of Menu Image plugin, and first of all thanks for great article and video manual! May I use link for this tutorial in plugin official description?
And feel free to contact me in case if it misses some useful features, I can add it in new releases.
Btw, there is new version with new title positions: below and above the image.
WPBeginner Support says
Hi zviryatko,
Yes, please feel free to add the link and we appreciate it. However, we do not allow full copy of an article. Thank you for letting us know about the new version.
Admin
Steph Reed says
Hey, I’ve been trying to get the newest version of this to work (totally breaks the menu for me, links included) and it looks like all support is dead air. @zviryatko do you intend on maintaining your plugin? I really like it when it works but I’m considering ditching it for a custom coded solution.
zviryatko says
Hello Steph,
I’m doing some small steps, usually helping people with some custom css to fix their theme. But still, have some plan for fixing supports of old themes and providing a version with better support per user.
Ivan says
Thanks!
hamied hassan says
i would like icon to other menu i can do it by this way
NenaRahin says
I can’t edit files . I want to add custom image sizes but when I try to save , it shows
“Unable to save file: Permission denied ‘/var/www/html/wp-content/plugins/menu-image/menu-image.php’ ”
The message also displays whenever I try to edit any files [by atom editor]. Can you please help. Thanks in advance
Jenna says
I was wondering if there was a way to have the image line up evenly with the title? That way the image doesn’t fall in the middle but aligns on the bottom.
David says
I’m sure this is going to be helpful. Especially that font-awesome will always not have enough icons.
Catalin says
The plugin is not available. Please upload a new link, or change the plugin refeer.
CC says
Hi There! I’ve been using Menu-Icons but there is no way to place icon ABOVE the Menu Text with that plugin. Does the Menu Image plugin allow this option? If not, how would I tweek either plugin to make this work. PS: Not a developer so the simpler/more detailed the instructions the better! Thanks much!
YJ says
Hi, i added a shortcode in the description textbox there :[glt language=”English” Label=”English”],
after using this plugin, this shortcode no function and display icon only on my page,anyone can help?
Chris says
that worked really well, thanks!
Geoff Cox says
Hello
‘have just tried the “Menu Image” plugin and have added the Facebook and the Youtube pics form my own Media Library.
But !! I am using the Twenty Sixteen Theme which uses genericons for the social media menu and they are still there!
I want to replace them with my own images. How do I remove the genericons?
Cheers
Geoff
Amanda says
This plugin isn’t working. But I do have an option for icons … but I don’t have the Font Awesome Menu Icons installed … is it possible that maybe it’s built into the theme and it’ conflicting with this plugin?
Sean Vandenberg says
Sheesh, thanks. This saved me lots of time I would have spent coding otherwise. Typically, I use ionicons or font awesome for menus – but the customer is always right!
Again, super thanks!
Jay says
I basically added this to the Menu label
………………………..
It basically turns the text white and my background is white.
A proper solution would be ideal.
Evik says
Hi, this plugin would be perfect, if the hide of the original text would work. I prefer just having my image instead of the text and even if I set “hide”, the text is still showing, on the left of the image. Any ideas why?
Thanks for help.
Madeline says
This all works great, except that each image is stuck behind the text in the navigation bar instead of sitting to the side of it. I think the problem is that each section of the nav bar menu is the exact size of the text so it’s pushing the images inwards to fit into the space. I’ve tried various things with padding, image size etc but can’t get it to work. Thanks for any help with fixing this!
Madeline says
Hi guys, does anyone have any thoughts on this please? I’m really stuck and I feel like there should be a straightforward way of fixing it! Thanks,
Madeline says
I found a solution so am posting in case this is of use to others. I set a ‘min-width’ element for each item in the navigation menu, and reduced padding, margins and text-size to make sure there is enough room for all the items to fit on one line. It’s not a 100% ideal solution because it will look slightly different depending on screen size, but this is the best I could come up with.
Kristine says
Thank you for this! I looked all over before I found this as the solution to my client’s problem. Love that I could replace ONE BUTTON instead of EVERYTHING.
Mahilet says
if you have no Navigation Label. then it deletes your menu item. for example I have a youtube icon and i don’t want any text, just a link so i have to a ‘.’ inthere
Tim Dehring says
One I use heavily and recommend is Menu Icons (https://wordpress.org/plugins/menu-icons/). Allows you to choose from Font Awesome, Genericons, and many other free icon fonts for menu icons.
Mike Hale says
Tim – I use Font Awesome 4 Menus https://wordpress.org/plugins/font-awesome-4-menus/ on a site, but I’ll have to check that one out. Thanks for the tip.
Tim Dehring says
No problem, happy to share!