Building an email list is very important for maintaining strong communication with your audience and boosting engagement on your WordPress site. But creating effective opt-in forms and convincing visitors to subscribe can be challenging, especially for beginners.
At WPBeginner, we understand these challenges and are here to help. With years of experience in helping WordPress users optimize their websites, we recommend OptinMonster. This is a leading popup and lead generation plugin that simplifies the process of growing your email list and converting website visitors into subscribers.
In this comprehensive guide, we will walk you through the steps to build your email list in WordPress using OptinMonster.
Note: OptinMonster is the plugin we use to grow our email list on WPBeginner. It was created by Syed Balkhi, the founder of WPBeginner, to help us attract and get more email subscribers.
What Is OptinMonster and Why Use It to Build Your Email List?
More than 70% of the people visiting your website will never return again. That’s why it’s important to build an email list so you can stay in touch with visitors and bring them back to your website.
But getting website visitors to sign up for your email list can be a challenge.
This is where OptinMonster comes in for help.
OptinMonster is one of the best email capture plugins for WordPress used by over 1.2 million websites. It’s equipped with everything you need to turn website visitors into email subscribers.
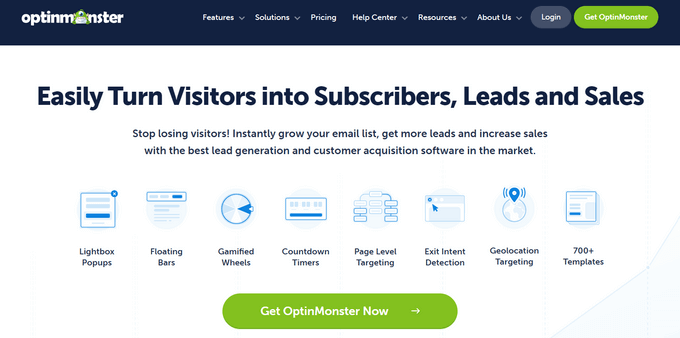
OptinMonster lets website owners create email signup forms, including popups, floating bars, full-screen welcome mats, slide-in scroll boxes, inline personalized lead forms, gamified spin-to-win optins, and more.
It includes a template library of 400+ high-converting templates you can fully customize with the drag-and-drop builder.

There are a lot of useful features like the Exit-Intent technology, which lets you show a popup at the exact moment when someone is about to leave your site. This helps convert your abandoning website visitors into email subscribers.
Plus, it’s incredibly beginner-friendly, so you can create high-converting optin forms to grow your email newsletter without writing any code.
Now, we have tested just about every WordPress popup and lead generation plugin over the years. And we continue to use OptinMonster for a good reason.
Most other WordPress lead-generation plugins have two major flaws:
- Powerful features like A/B testing and page-level targeting do not work properly with WordPress caching plugins. But you can’t use caching on your site because that will significantly slow down your site.
- They slow down your website because, by design, they have to store analytics data in your website’s database. This is really resource-intensive and may get your WordPress hosting account suspended.
This sounds crazy, but unfortunately, most WordPress lead generation plugins don’t work properly when caching plugins are active. As a website owner, you’re forced to choose between a faster website or more subscribers. With OptinMonster, you don’t.
That said, OptinMonster also started out as a standard WordPress plugin. It had these issues in the early days, too, but the team adapted and converted the plugin into a proper SaaS application in 2015.
Now, OptinMonster can work independently of WordPress, which means you can use it on any website builder. But more importantly, it has a robust code architecture that overcomes the above issues, which no other WordPress plugin has been able to do thus far.
OptinMonster also comes with powerful features like:
- Geo-Location Targeting – Personalize optin forms based on your visitors’ locations.
- MonsterLinks 2-Step Optins – Convert any image or link into an optin form.
- OnSite Retargeting – Create special offers and promotions for returning visitors.
- Lead Verification – Easily verify email addresses to make sure your list is filled with quality leads.
With that in mind, let’s take a look at how you can build your email list in WordPress using OptinMonster, step-by-step.
Building Your Email List in WordPress with OptinMonster
The first thing you need to do is head over to the OptinMonster website and click the ‘Get OptinMonster Now’ button.
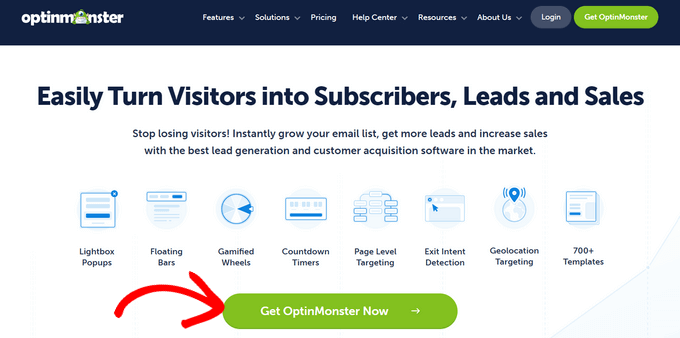
This brings you to the pricing page, where you need to click the ‘Get Started’ button under the plan that’s best for your needs.
We recommend the Pro plan, which is the most popular and includes the ‘Exit Intent’ feature. As a WPBeginner reader, you can get an additional 10% off with our exclusive OptinMonster coupon code.
After that, you need to enter your payment details and complete your purchase.
Next, you need to install and activate the OptinMonster WordPress plugin. For more details, see our step-by-step guide on how to install a WordPress plugin.
This plugin connects your WordPress website to the OptinMonster software.
So, upon activation, you’ll connect your account first and foremost. You can head over to OptinMonster » Settings from your WordPress admin panel. Then, you can click the ‘Connect an Existing Account’ button.

If you want to create a free account to test out the software, then simply click the ‘Create a Free Account to Get Started’ button.
After that, you’ll see a popup asking you to enter your email address. Simply enter the email address you used to create your account and click the ‘Connect to WordPress’ button.

Next, there will be a series of on-screen prompts to finish connecting your website with OptinMonster.
Once you complete the steps, your WordPress site and OptinMonster will be connected, and you can create your first campaign.
Creating an Optin Form in WordPress With OptinMonster
To create your first campaign, you’ll want to go to OptinMonster » Campaigns from your WordPress dashboard. Then, click the ‘Create Your First Campaign’ button.

The next step is to choose your campaign type. There are various kinds of campaigns to choose from, including popups, full-screen welcome mats, inline optins, and more.
For this tutorial, we’ll select the ‘Popup’ campaign type, which allows you to display a high-converting popup on your site. To choose a campaign type, simply click on it.

You’ll then see a list of templates that will form the foundation for your popup campaign. You can choose any template you’d like.
To choose a template, simply hover over it and click the ‘Use Template’ button.

Next, you’ll need to enter a name for your campaign. This won’t appear on your website but is to help you remember what the campaign is for.
Once you’ve entered the campaign name, go ahead and click the ’Start Building’ button.

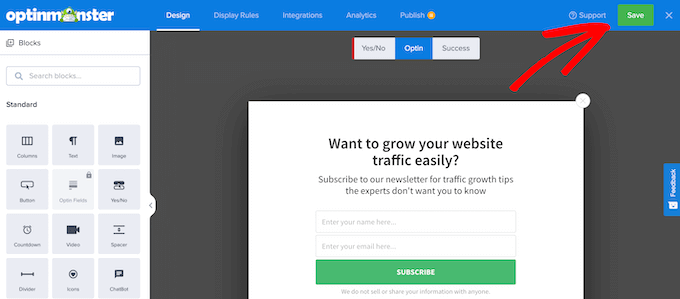
This will launch the OptinMonster campaign builder that shows a live preview of your campaign in the right panel.
You can simply point and click on any item in the preview section to make changes, move it, or delete it.
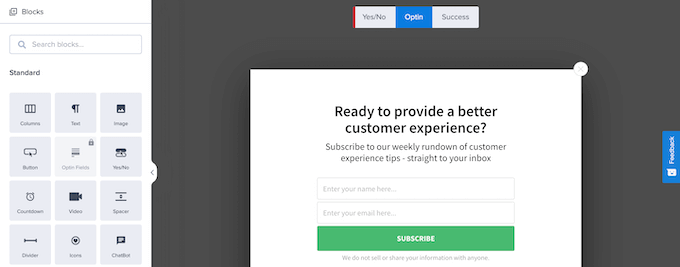
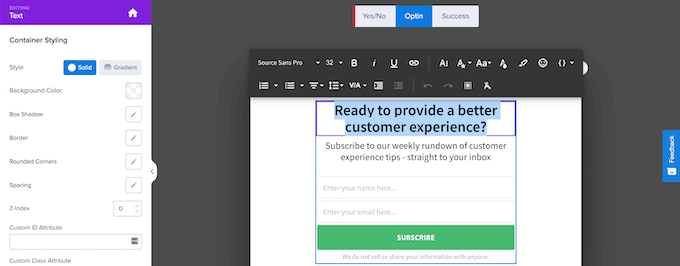
For this tutorial, we’ll keep the default design but change the text. So, let’s click on any existing text and then make changes directly in the popup preview.
The left-hand menu controls the font colors, spacing, and more. Don’t hesitate to take advantage of these features if needed.
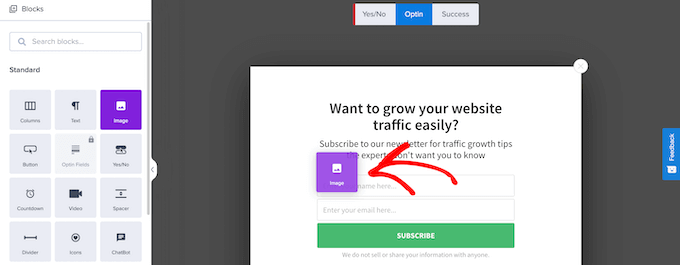
You can also add new features to your popup with the included blocks.
Simply drag blocks from the left-hand ‘Blocks’ menu to your popup to add new features.
Once you’re finished customizing your popup, you might want to set the rules for how it will display.
If so, you can click the ‘Display Rules’ tab at the top of the screen. Here, you can set the conditions for when the popup will appear. You can completely customize these display rules to show the right message to the right person at the right time.
For this tutorial, we’ll create a simple display rule so that the popup appears after the user spends a certain amount of time on your site. To do this, you’ll need to select ‘time on page’ and set the number of seconds you want to pass before the popup displays.

Then, to display your popup on every page, you should make sure the ‘current URL path’ is set to ‘is any page’.
After that, you can click the ‘Next Step’ button.

This will bring you to the ‘Actions’ screen, where you can set what happens after the time has passed.
First, you’ll want to make sure ‘Optin’ is selected in the ‘show the campaign view’ box. Then, you can add effects and sound effects if you’d like.
Once you do that, go ahead and click the ‘Next’ button.

On the next screen, you can review your display rules to make sure they’re correct.
When you’re done, simply click the ‘Save’ button to save your campaign.

Connecting Your WordPress Popup to an Email Marketing Service
Next, you can connect your popup to an email marketing service. That way, when a visitor enters their email address, it will automatically get added to your email list.
OptinMonster also includes a feature called ‘Monster Leads.’ This feature independently stores your leads, so you can always import them to your email marketing provider later.
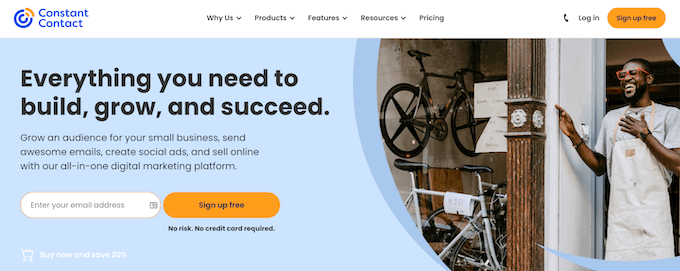
If you don’t have an email marketing service yet, then we recommend using Constant Contact. It’s one of the world’s most popular email marketing services and offers great support for those just getting started.
Some other great choices include Brevo, Drip, and ConvertKit.
To connect your email marketing provider to your popup, simply click the ‘Integrations’ tab at the top of the page.
Then, go ahead and choose ‘Add New Integration.’

Next, you’ll want to scroll down the screen until you find your email marketing provider. Once found, you can just give it a click.
OptinMonster will then walk you through the steps of connecting the two together. For most email marketing providers, all you need to do is copy over your API key.

Once that’s done, you’re ready to launch your campaign.
Launching Your OptinMonster Popup Campaign in WordPress
To start setting your campaign live, you’ll first need to click the ‘Publish’ button at the top of the page.
This brings you to a screen where you can review your campaign before making it live.

If you’re satisfied with how your campaign looks, you can switch the status in the ‘Publish Status’ box from ‘Draft’ to ‘Publish.’
Now, your campaign is running and live on your website. Just make sure you click the ‘Save’ button before leaving the page.

Next, you may also want to verify that your campaign is active by going to OptinMonster » Campaigns in your WordPress admin panel.
All you need to do is make sure your campaign is switched to ‘Publish’ in the ‘Status’ column.

This screen also shows all of the campaigns you’ve created and which ones are active or paused on your website. So, give it a run through if needed.
A/B Split Testing For Optins in WordPress
Once your campaign has been running for a while and you’re growing your email list, you might want to improve it by doing A/B split testing.
A/B split testing involves making slight changes to the appearance, text, and even colors of your popup campaigns. These small tweaks can lead to huge improvements in conversions.
OptinMonster has an easy-to-use A/B split testing feature that eliminates the guesswork for you.
Note: You’ll need to use the Plus or higher plan to use OptinMonster’s split testing feature.
To start, you can go to OptinMonster » Campaigns, then click on the ‘Create Test’ link to create a new split test.

You’ll then see a popup window where you can add notes about the campaign.
Go ahead and click the ‘Create Split Test’ button.
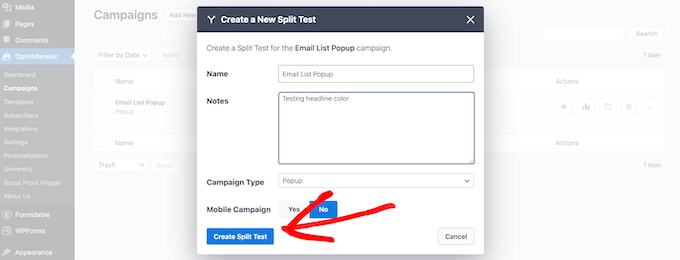
This will open the same campaign builder screen, where you can make changes.
Once you’re finished editing, you can click the ‘Save’ button. Then, OptinMonster will automatically run the split test for you.
Over time, you’ll be able to see which campaign leads to a better conversion rate.
To view your campaign data, simply navigate back to OptinMonster » Campaigns. Then, locate the ‘Stats’ column to see your results over time.

There you have it! You’ve learned everything you need to know about building an email list using OptinMonster. Next, you might want to experiment with adding content upgrades or a simple yes/no campaign to increase your conversions and get even more email subscribers.
If you liked this article, then please subscribe to our YouTube Channel for WordPress video tutorials. You can also find us on Twitter and Facebook.


Jiří Vaněk
I had my newsletter vaguely placed within articles for a long time, and it didn’t achieve much success. But after installing OptinMonster and launching my first campaign with a cleverly chosen trigger and a yes/no method, I couldn’t believe my eyes at how quickly the newsletter came to life. What used to take me four months to collect, I managed to achieve in just half a month with OptinMonster. I particularly appreciate the well-designed predefined templates. With OptinMonster, campaigns are really simple to create, and I can immediately measure conversions and see results. If I want to get really creative, I can even run A/B testing. This plugin truly works and is unmatched.
kzain
The post effectively emphasizes the importance of email marketing and how OptinMonster can be a valuable tool. I appreciate the breakdown of different opt-in form types and targeting options. The ability to create visually appealing forms with the drag-and-drop builder and A/B test different variations is fantastic for optimizing your email capture strategy. Thanks for sharing this informative post
Jon
I’ve been using OptInMonster and I like it, but I’m confused because it says that my forms have captured several “leads” but none of those have been added to my MailChimp list. Why is that? The integrations have been set up.
WPBeginner Support
Hey Jon,
Please contact OptinMonster support, they will be able to help you better.
Admin
Mohsin Alam
Can it use in page, post, sidebar, header, footer instead of poup? Thanks
Alexey
Hi! Do you have localized versions? (I am interested in russian and german)
WPBeginner Support
OptinMonster is translation ready but currently it does not come with any language files.
Admin
Ecoinomist
Hi,
I was looking at your OptinMonster and was wondering if it is responsive? On your case study page you did mention that it will not show unless the browser is at least 700px wide, does this mean that it is not responsible design? I mean in a mobile device, will the optin text be easy readable?
Cheers
WPBeginner Support
On smaller screens OptinMonster disables itself.
Admin
Oggy
Do you have any plans to make it responsive in the future?
WPBeginner Support
Yes we do have plans for that.
Deyson
Will this be able to work with MyMail in the future?
Matt Halfhill
I wanted to know this too. HUGE key if it can.
Holly Van Hart
Using OptInMonster, can you show pop-ups only to people who are not already subscribed to your email list?
WPBeginner Support
No, sorry this feature is not currently available.
Admin
David Vick
I have Adsense on my WP Blog Correct me if I’m wrong but they don’t allow you to have pop-ups or pop-overs & this is kind of what I read above with the exit pop-up technology?
WPBeginner Support
Adsense disapproves putting their ads in lightbox popups … not lightbox popups altogether. OptinMonster is completely compatible with Adsense. OptinMonster lightbox popup comes with user controls so that users can turn it off. It does not affect user experience. You can even delay the popup to further improve user experience on your site.
Admin
Ryan
Do you review any products that you do not get paid for, i.e. affiliate links?
WPBeginner Support
We don’t review products. We show how to use them. and to answer your question, yes.
Admin
Jakub
Why don’t you support GetResponse?
WPBeginner Support
OptinMonster is very new, you should expect to see support for more services very soon.
Admin
Thomas Griffin
OptinMonster now supports GetResponse as well as iContact, Infusionsoft and MailPoet (Wysija): http://optinmonster.com/optinmonster-adds-support-for-infusionsoft-getresponse-and-icontact/
Samantha King
I was really sure about this…until I went to leave the page and the email opt-in popped up!
Daniel Decker
Sounds great! Going to give it a try. Thank you.
Rahul Kuntala
Only ONE word: awesome!
And only one question.
Can I integrate it with GetResponse?
Editorial Staff
GetResponse integration will be coming soon.
Admin
Thomas Griffin
OptinMonster now works with GetResponse as well as some other providers!
http://optinmonster.com/optinmonster-adds-support-for-infusionsoft-getresponse-and-icontact/
David
Page level targeting? Sold. Sounds like an excellent plug-in. Will be interesting to see how this works.
Also, doesn’t this plug-in now render Pippity.. useless? Definitely seems more powerful.
Editorial Staff
Yes it does.
Admin