Do you want to make a landing page for your Google Ads campaign in WordPress?
When someone clicks on an ad, they expect to see a page that’s relevant to that advertisement. Instead of sending visitors to a generic page on your website, you can create a dedicated Google Ads landing page and get more conversions.
In this article, we will show you how to easily make a Google Ad landing page in WordPress.

Why Make a Google Ad Landing Page in WordPress?
When someone clicks on your Google Ad, you can redirect them to any page on your WordPress website. However, sending them to a generic page such as your homepage or product page isn’t the best user experience.
If the page isn’t closely related to the ad, then visitors will likely leave your site, and you will miss out on a ton of sales.
That’s why we recommend creating a customized landing page for your Google Ads.
You can then fine-tune every part of the page to help reach your Google Ad campaign goals. For example, you can add a (CTA) call to action button, a form that accepts credit card payments, or powerful social proof such as customer reviews and testimonials to get more sales.
No matter whether you want to generate leads, increase conversions, or reach some other goal, an effective Google Ad landing page will help you succeed.
With that in mind, let’s see how you can easily make a Google Ad landing page in WordPress.
How to Make a Google Ad Landing Page in WordPress
The easiest way to make a Google Ad landing page is by using SeedProd. It is the best WordPress landing page builder that lets you create beautiful landing pages to show to users who click on your Google Ads.
The SeedProd plugin also works with popular third-party tools that you may already be using to capture leads. This includes top email marketing services, Google Analytics, and more.
To learn more, see our detailed SeedProd review.
Step 1: How to Set Up the Page Builder Plugin
First, you need to install and activate the SeedProd plugin. For more details, see our step-by-step guide on how to install a WordPress plugin.
Note: There is a free version of SeedProd. However, we will be using the Pro version since it integrates with the top email marketing services. If you’re using Google Ads to promote your products, then SeedProd Pro also integrates with WooCommerce.
After activating the plugin, SeedProd will ask for your license key.

You can find this information in your account on the SeedProd website.
Step 2: Choose a Professionally-Designed Template
After entering your key, go to SeedProd » Landing Pages in your WordPress dashboard.
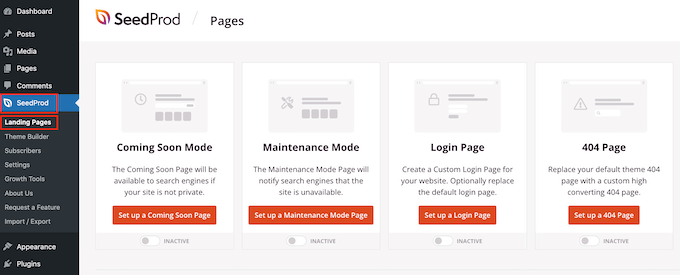
The tool comes with more than 320+ professionally designed templates that are grouped into categories. Here, you will see categories that let you create coming soon pages, maintenance mode, login pages, and 404 error pages.
To design a Google Ad landing page, go ahead and click on the ‘Add New Landing Page’ button.
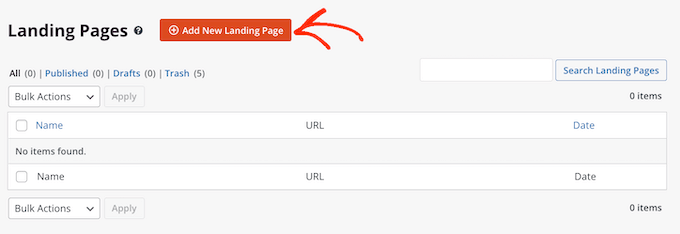
All of the SeedProd templates are easy to customize, so you can use any of them for your Google Ad landing page.
However, many WordPress blog owners use Google Ads to get sales, so you can click the ‘Sales’ tab.
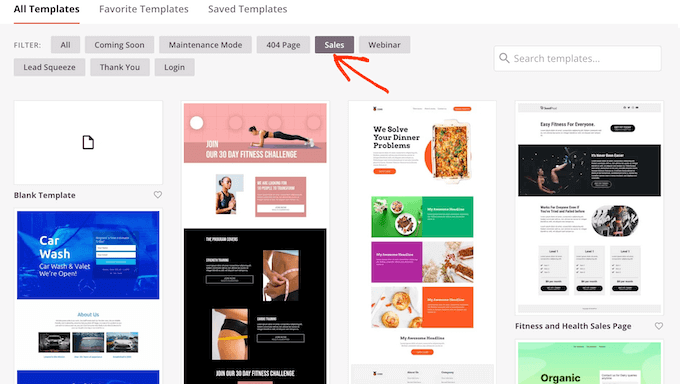
SeedProd will now show all the templates that are designed to help you sell more products and services.
To take a closer look at any design, simply hover your mouse over that template. Then, click on the magnifying glass icon.
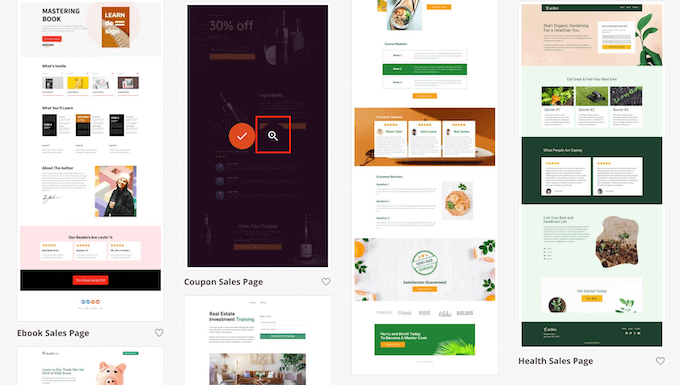
This will open the template in a new tab.
When you find a design that you want to use for your Google Ad landing page, simply click on ‘Choose This Template.’
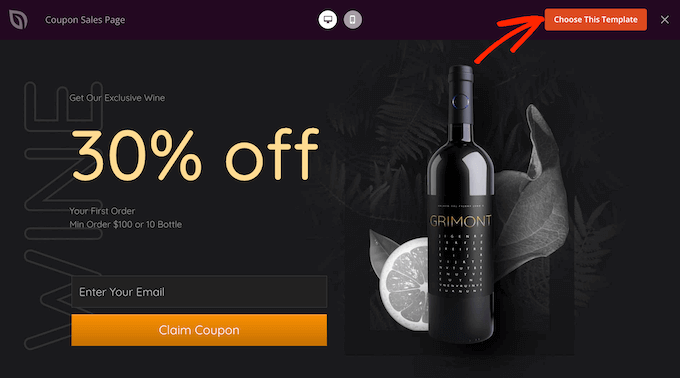
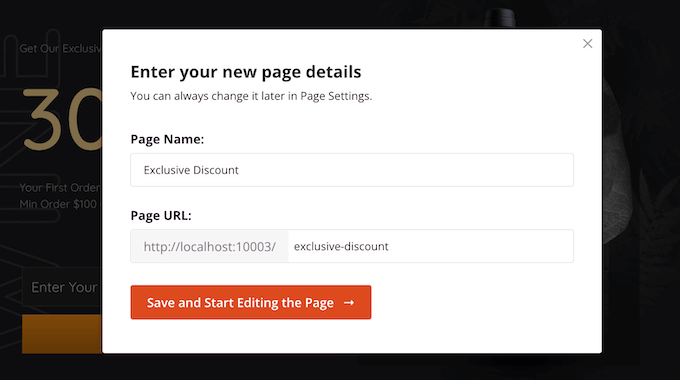
You can now type in a name for your landing page into the ‘Page Name’ field.
SeedProd will automatically create a ‘Page URL’ using the page name. This is the web address where your Google Ad landing page will appear.
Even though we are making a landing page for a Google Ad campaign, it’s still a good idea to fine-tune this page for the search engines.
By optimizing your landing page for SEO, you may get some extra visitors from relevant search engine result pages. To learn more, see our ultimate WordPress SEO guide.
With that said, it’s a good idea to include relevant keywords in your URL wherever possible. You can change the page’s automatically-generated URL by typing into the ‘Page URL’ field.
When you’re happy with the information you’ve typed in, click on ‘Save and Start Editing the Page.’ This will load the SeedProd page builder interface.
Step 3: Customize Your Google Ads Landing Page
SeedProd’s simple drag-and-drop builder shows a live preview of your landing page to the right.
On the left is a menu that shows the different blocks and sections that you can add to your Google Ad landing page.
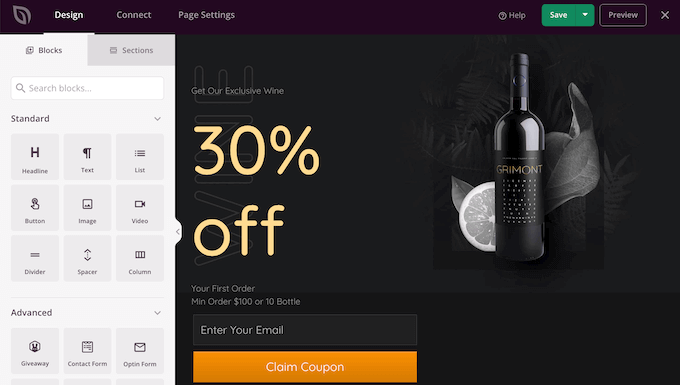
The plugin comes with over 90 ready-made blocks that can help you get more conversions, including pricing tables, contact forms, countdowns, and customer testimonials. You can build an entire Google Ad landing page within minutes using these ready-made blocks.
You can also use blocks like spacers, columns, and dividers to help organize and structure your Google Ad landing page. This can help visitors navigate your landing page and find the information they want.
When you find a block that you want to add to the Google Ad landing page, simply drag and drop it onto your template.
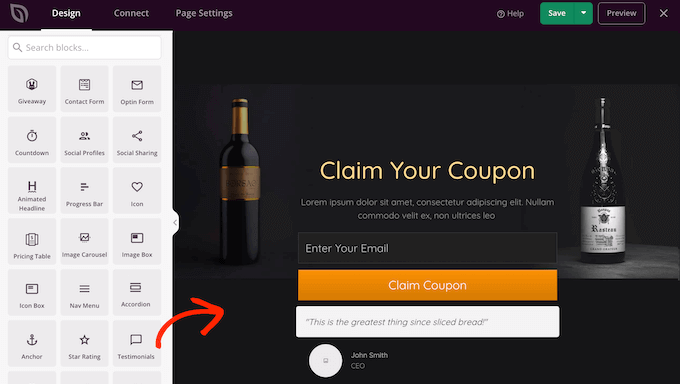
To customize a block, go ahead and click to select the block in the SeedProd editor. The left-hand menu will now update to show all the settings that you can use to customize the block.
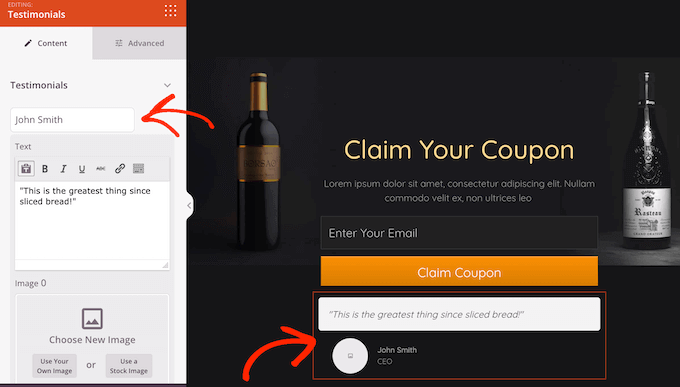
For example, if you click on a Testimonials block you will be able to change the name of the person quoted and add some new testimonial text.
Images are a great way to catch the visitor’s attention and communicate more of information. For this reason, many of SeedProd’s landing page templates come with placeholder images.
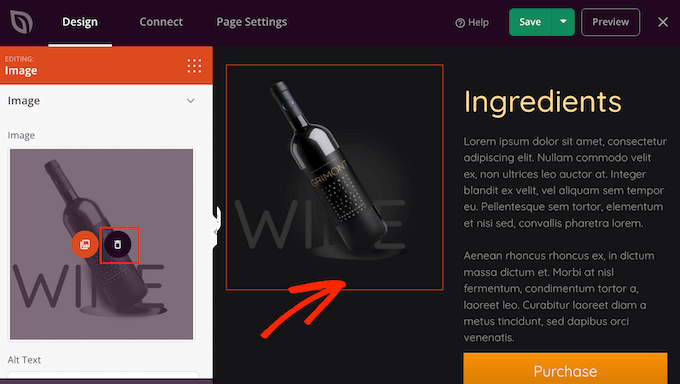
To replace the placeholder content with your own image, simply click on the Image block.
Next, in the left-hand menu hover your mouse over the image and then click on the Trashcan icon to delete it.
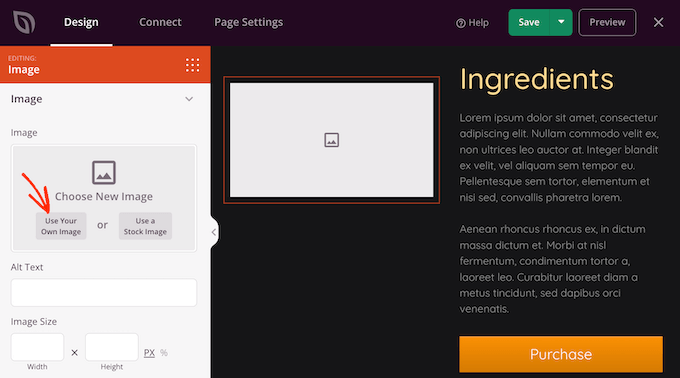
Once you’ve done that, there are a few different ways to add a new image to your Google Ad landing page.
One option is to click on ‘Use Your Own Image.’ You can then either choose an image from the WordPress media library or upload a new file from your computer.
Don’t have an image that you want to use? SeedProd comes with a built-in library of thousands of royalty free stock images that you can add to your Google Ad landing pages.
To see SeedProd’s stock image library, simply click on ‘Use a Stock Image.’
Next, just type in a word or phrase that describes the image you’re looking for and then click on the ‘Search’ button.
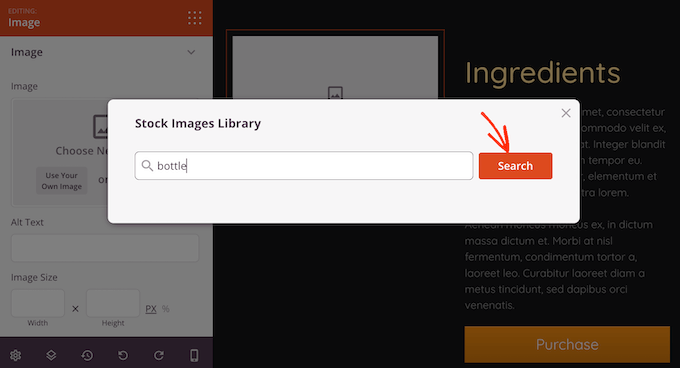
SeedProd will now show all the stock images that match your search term.
When you find an image that you want to use, simply give it a click to add the image to your Google Ad landing page.
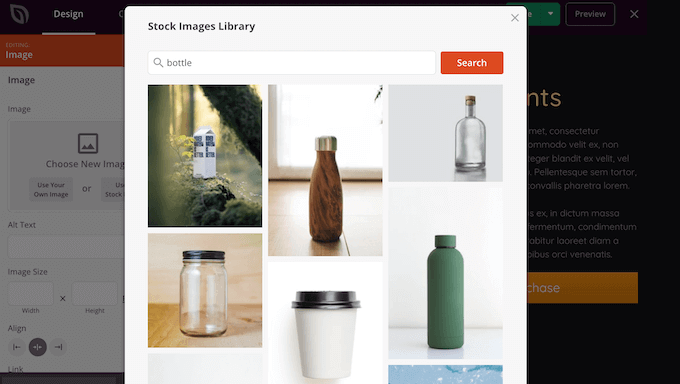
Many people use Google Ad campaigns to advertise their products and services.
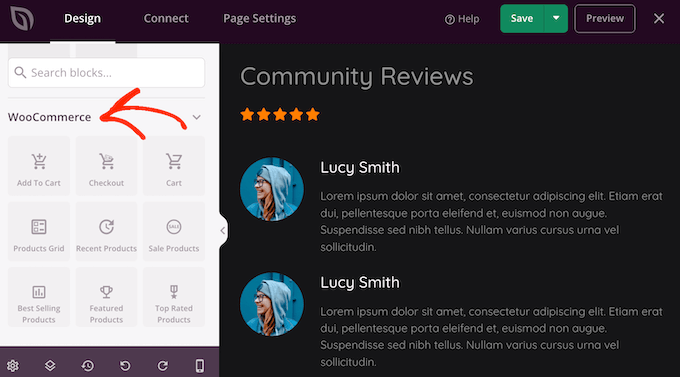
If you created an online store using WooCommerce, then SeedProd has special WooCommerce blocks that you can add to your landing page, including Checkout and Add To Cart blocks.
These blocks make it easier for customers to buy your products, which is great for your conversion rates. It also lets you design a Google Ad landing page without being restricted by your WooCommerce theme.
To take a look at these eCommerce blocks, scroll to the ‘WooCommerce’ section in SeedProd’s left-hand menu.
You can now add any of these blocks to your Google Ad landing page, and get more sales for your online marketplace.
As you’re building your landing page, you can move blocks around your layout by dragging and dropping them. This makes it easy to create a Google Ad landing page with a totally custom layout.
SeedProd comes with ‘Sections’ too. These are rows and block templates that can help you quickly create a nicely organized Google Ad landing page.
You can see all these sections by clicking on the ‘Sections’ tab.
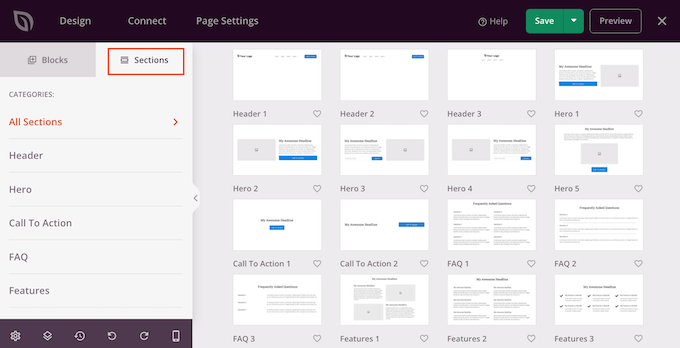
From here, you can preview any section by hovering over it. When the magnifying glass icon appears, give it a click. To get more sales, you may want to take a look at sections such as Hero, Call To Action, Features, and Testimonial.
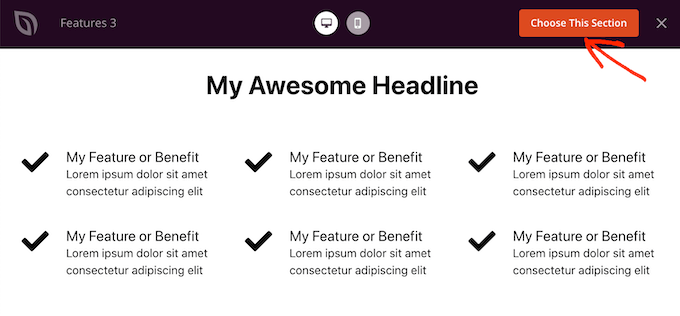
To add a section to your page, click on ‘Choose This Section.’ SeedProd will now add the section to the very end of your Google Ad landing page.
Color can be a great way to catch the visitor’s attention, and help reinforce your WordPress website’s branding. For more on this topic, please see our guide on how to choose a perfect color scheme for your WordPress website.
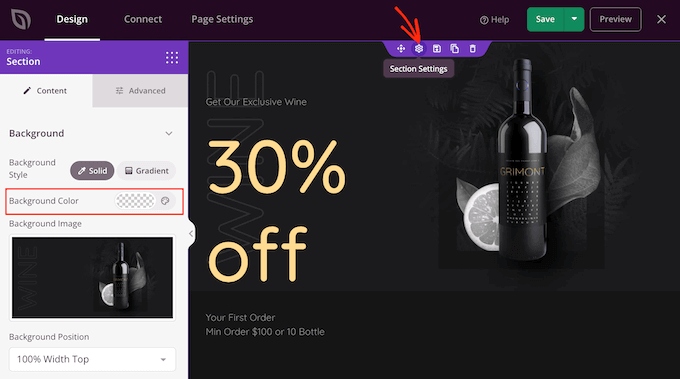
To change the background color of any section, simply click to select that section. Then, click on the little cog icon that appears.
Once you’ve done that, click on the Background Color field and choose a new background color using the popup settings.
Step 4: Add Personalized Content
People typically pay more attention to personalized content. With that in mind, you may get more sales by showing personalized content on your landing page or sales page.
SeedProd has full support for dynamic text replacement, which shows different content to visitors based on the search terms they used to find your ad. For example, if you’re targeting the keywords ‘summer offers’ or ‘Black Friday’ with your ad campaign, then you might dynamically change your heading to include those terms.
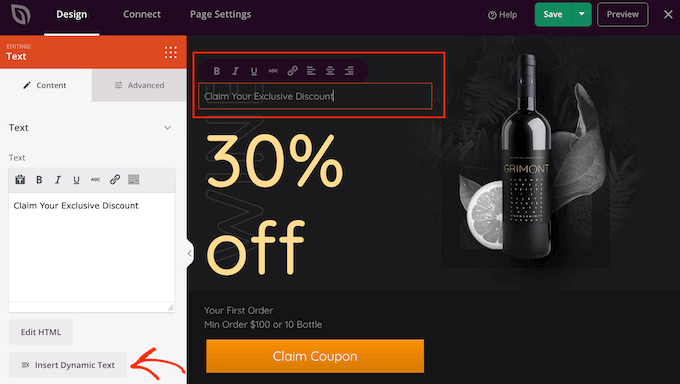
To add dynamic text to your Google Ad landing page, simply click on any Heading or Text block. Then, go ahead and click on the Insert Dynamic Text button.
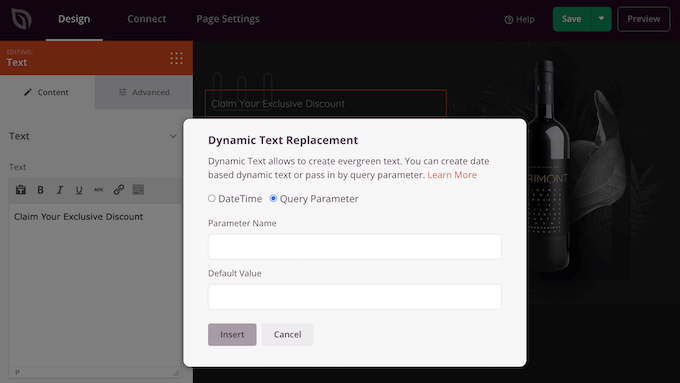
In the popup that appears, click on ‘Query Parameter.’
This lets you pass data via the query parameter on your page. For example, you might pass in the phrase ‘Black Friday’ and then show that text in your headline.
To learn more, please see SeedProd’s guide to dynamic text.
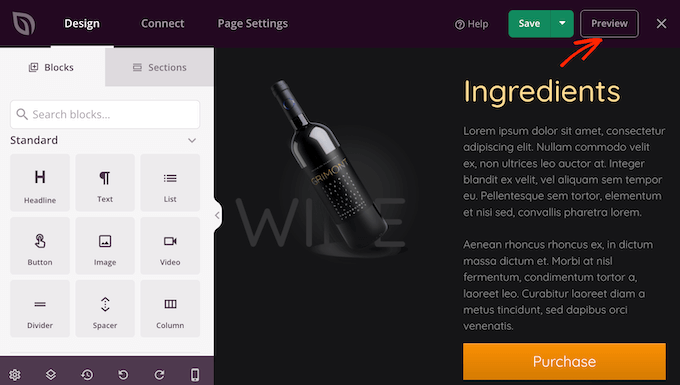
As you’re working on your Google Ad landing page, you can preview your design by clicking on the Preview button. This launches your landing page in a new tab.
When you are happy with how your landing page looks, it’s a good idea to optimize the page’s settings, as this can get you more conversions.
Step 5: Connect to Your Email Marketing Provider
SeedProd integrates with all the top email marketing services including Constant Contact, Drip, and Brevo (formerly Sendinblue). This allows you to get signups and subscribers directly from your Google Ad landing page.
To connect your landing page to your email marketing service, simply click on the ‘Connect’ tab. You can then hover your mouse over the email marketing service that you use on your website, and click on the ‘Connect’ button when it shows up.
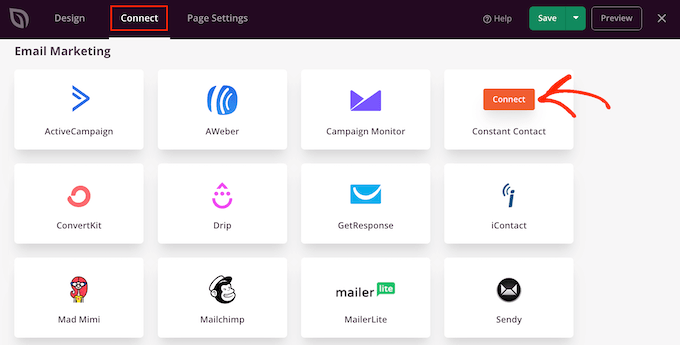
SeedProd will now walk you through the process of connecting your Google Ad landing page to your email marketing service.
With that done, anyone who subscribes to your landing page will be added to your email list.
Now that you are satisfied, simply click the ‘Save’ button and then choose ‘Publish’ to make your landing page live.
Now, you simply need to open the ad campaign inside your Google Ads account and add the URL for the landing page you just created.
After that, anyone who clicks on your Google Ad will be redirected to the landing page on your WordPress site.
How to Get More Google Ad Conversions
A beautiful, professionally-designed Google Ad landing page can help you reach your campaign goals. However, there is always room to improve your conversion rates.
With that in mind, it’s a good idea to monitor your landing page’s stats to see what’s working and not working. You can then use SeedProd to tweak your landing page’s design and fine-tune it to get even more conversions.
The easiest way to measure important metrics in WordPress is using MonsterInsights. It’s the best WordPress analytics plugin and allows you to see your Google Analytics data directly in the WordPress dashboard.
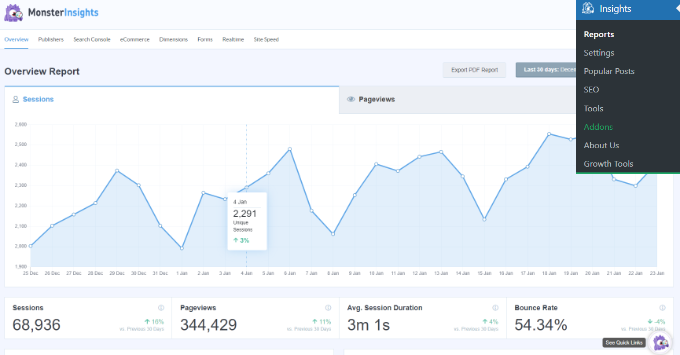
To learn more, please see our step-by-step guide on how to install Google Analytics.
We hope this article helped you learn how to make a Google Ad landing page in WordPress. You can also go through our guide on advanced landing page tips to skyrocket conversions, or our expert picks of the must-have WordPress plugins for business websites.
If you liked this article, then please subscribe to our YouTube Channel for WordPress video tutorials. You can also find us on Twitter and Facebook.


Syed Balkhi says
Hey WPBeginner readers,
Did you know you can win exciting prizes by commenting on WPBeginner?
Every month, our top blog commenters will win HUGE rewards, including premium WordPress plugin licenses and cash prizes.
You can get more details about the contest from here.
Start sharing your thoughts below to stand a chance to win!
Randy Martin says
From reading this, it’s apparent that simply has become the new actually.
WPBeginner Support says
Thanks for your feedback
Admin
Chidera NwaEze says
Wow! Nice pls, can I use the main site url like domain.com then adding domain.com/ads? To create the landing page
WPBeginner Support says
SeedProd does allow you to set up your URL so you can create a URL like that for your ad page if you wanted.
Admin