Do you want to install WordPress locally on Mac?
Installing WordPress on your computer gives you the chance to try out WordPress before starting your blog or website. It’s also a great way to experiment with themes and plugins before publishing your site online.
In this article, we will show you two ways to install easily WordPress locally on Mac.
Tip: Not using Mac? We also have a tutorial on how to install WordPress locally on Windows.
Why Install WordPress Locally on Mac?
Normally, you need a web hosting account and a domain name to make a WordPress website.
However, the core WordPress software is free to download and can be run locally on your computer.
This local WordPress site is not generally available on the internet, and it can only be viewed on your computer.
The advantage of this approach is that you can privately practice using WordPress, try it out, and see what type of websites you can make.
You can also use this local installation to test different WordPress themes and plugins before installing them on your live website.
What Do You Need to Install WordPress Locally on Mac?
WordPress is written mainly in PHP, which is a server side programming language. To run PHP, you’ll need a web server software. You’ll also need MySQL database management system installed for your web server software.
Now, installing all these software independently and making them work with each other sounds like a daunting task.
Luckily, there are free development tools that make it super easy to install them as one package even for non-techy users. We’ll show two of them in this article.
That being said, let’s take a look at how to easily install WordPress locally on Mac without any special server administration skills.
- Method 1. Install WordPress Locally on Mac using Local WP
- Method 2. Install WordPress Locally on Mac using MAMP
- How to Move WordPress from Local Mac to Live Site
1. Install WordPress Locally on Mac using Local WP (Recommended)
Local WP is a WordPress development tool that allows you to easily set up local server on your Mac computer. You can also use Local on Windows and Linux as well for setting up WordPress.
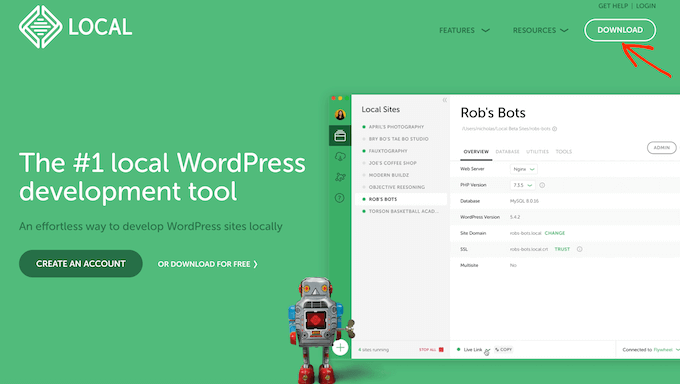
First, you need to visit the Local website and click on the Download button at the top right corner of the screen.
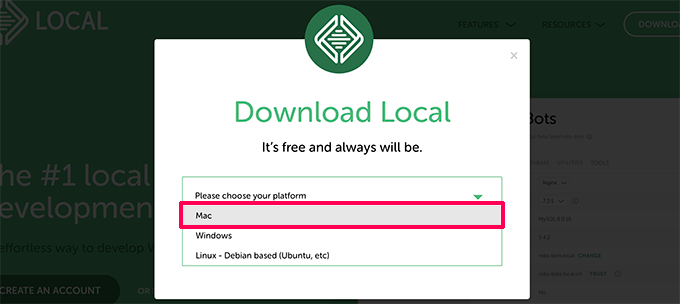
This will bring up a popup where you need to choose Mac as your platform.
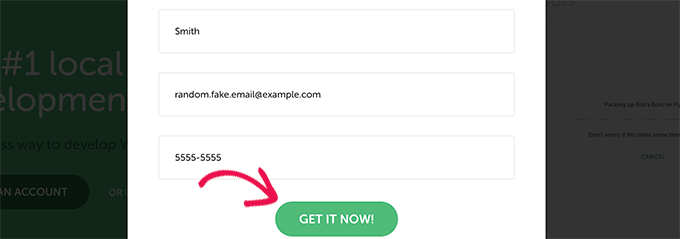
Local will now ask you to complete a short form.
After typing in your name, email address, and phone number, you can go ahead and click on the Get it Now button.
This will download the Local installation file to your computer. As soon as it’s finished downloading, you can double-click to open the downloaded file.
This will launch a setup wizard, which will guide you through the process of installing Local on your computer.
Mac users simply need to drag the Local app into their Applications folder.
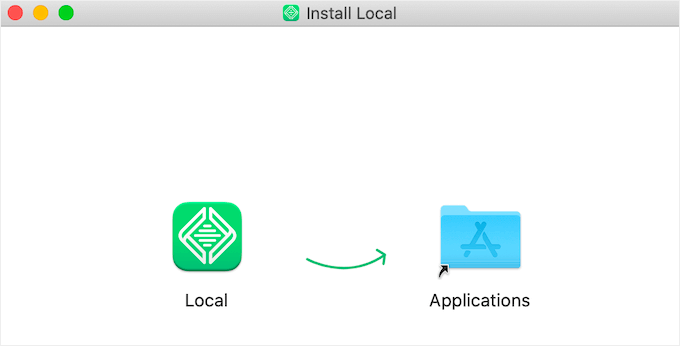
Once the installation is finished, you’ll be able to launch the Local app from the Applications folder.
Upon first launch, you may be asked a few questions and create a free Local account. These steps are optional, and you can skip them if you want.
Creating a WordPress Website in Local
Local makes it very easy to quickly create a local website and install WordPress.
Simply click on the Create site button to continue.

On the next screen, you’ll need to enter Site name and click on the Continue button.

Next, you’ll be asked to choose your platform. Local allows you to choose which version of PHP, Apache, and MySQL you want to use.
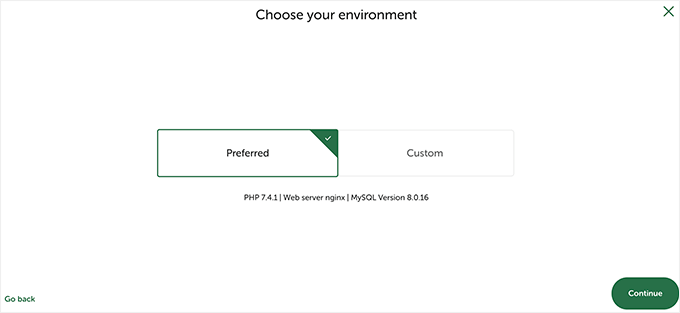
If you are unsure, then choose the Preferred settings and click on the continue button.
Finally, you will need to enter WordPress username and password, and then click on the Add Site button.
Local will now download and install WordPress to create your website. You may be prompted to enter your Mac username and password to make changes.
Once finished, you’ll see information about your newly created website with buttons to visit the WordPress admin area or view your local site.
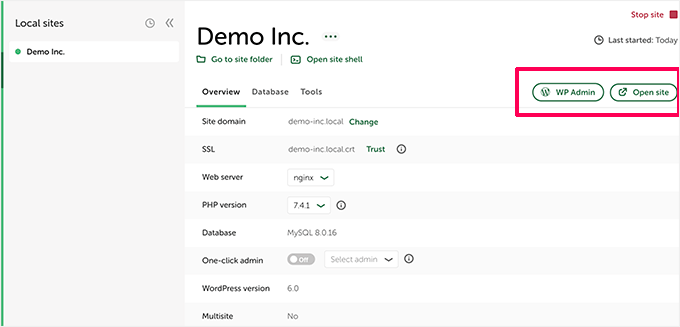
You can now visit your website or login to WordPress admin area.
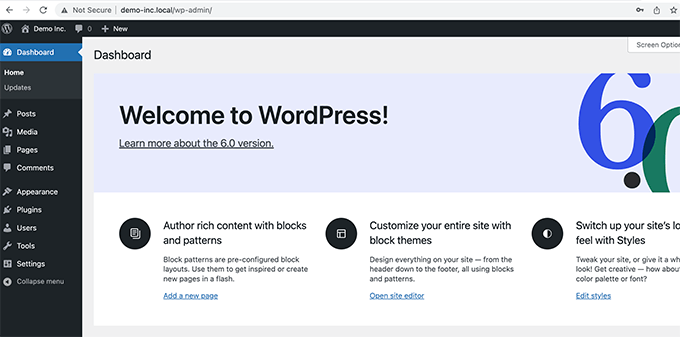
After that, you can use your WordPress site just like you would manage a live website. You can install plugins and themes and design your website as you see fit.
2. Install WordPress Locally on Mac using MAMP
MAMP is a popular program that allows you to run WordPress on your Mac computer.
First, you need to visit the MAMP website. Here you should see the latest version of MAMP & MAMP Pro.
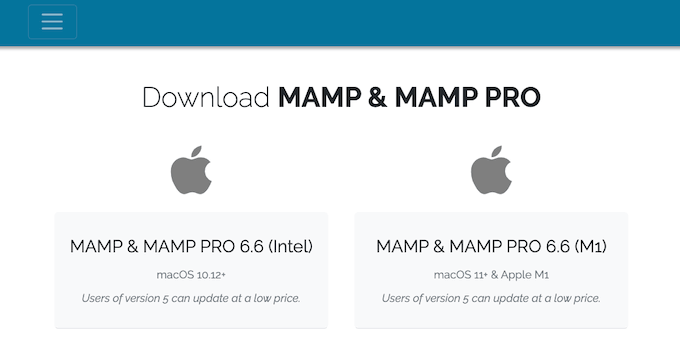
MAMP has separate downloads for different versions of the macOS operating system.
Not sure which version of macOS is installed on your computer? To find out simply click on the Apple icon in your computer’s toolbar.
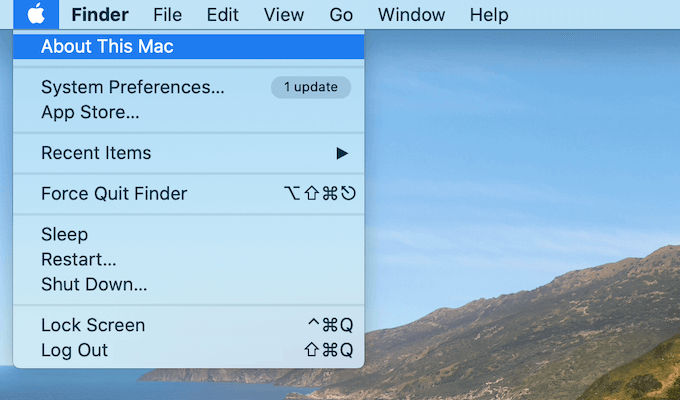
You can then click on About This Mac.
This will open a popup that shows lots of information about your computer. This includes your version of macOS.
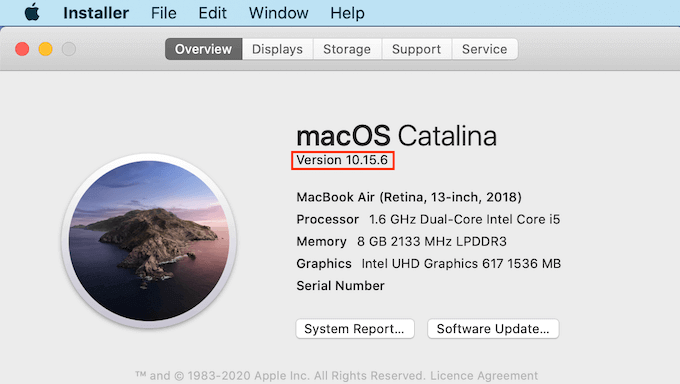
You can now download the correct version of MAMP for your operating system.
Once your download is finished, double-click on the MAMP .pkg file. This will launch the MAMP installer.

Now simply follow the onscreen instructions to install MAMP.
After installing this program, you can go ahead and launch MAMP by opening your computer’s Applications folder.
Here you’ll find two versions of MAMP. MAMP Pro is the paid version, so make sure you select the free version.
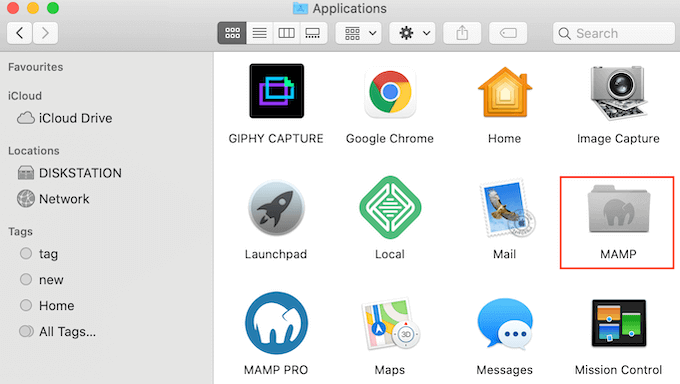
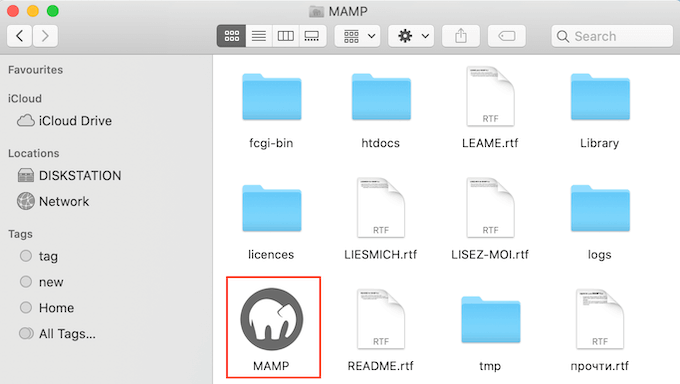
Inside this MAMP folder you’ll find various files, plus a MAMP application.
Double-click to launch the MAMP app.
Before you get started, we recommend configuring a few settings to make your MAMP experience better.
To make these changes, just click on ‘MAMP’ in your toolbar. You can then select ‘Preferences…’
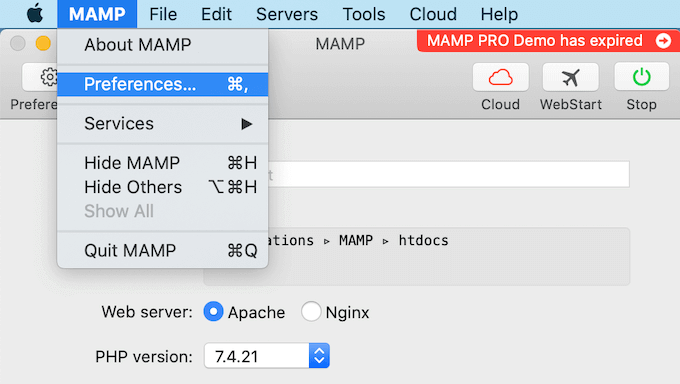
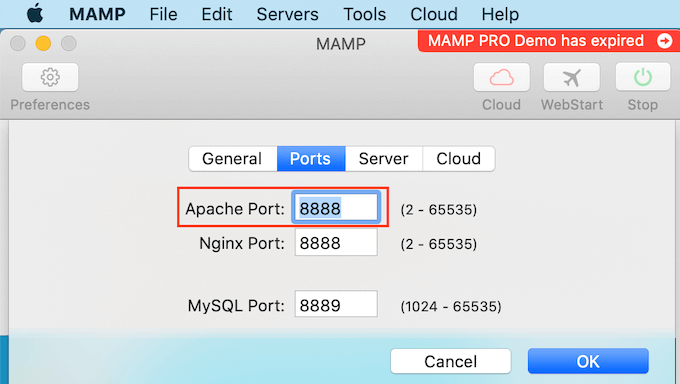
In the popup, select the Ports tab.
You can now check which Apache Port MAMP is using. We recommend switching to Apache Port 8888 if MAMP isn’t already using this port.
The next step is setting your document root folder. This is the folder where you will create and store all of your local WordPress websites.
By default MAMP uses the /Applications/MAMP/htdocs/ folder, but you can change this to any other location.
In the ‘Preferences…’ dialog box, click on the Server tab. You should now see your document root.
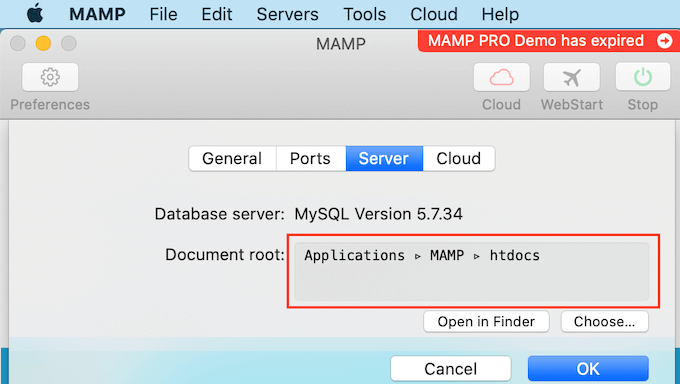
To store your sites in any other folder, click on the ‘Choose…’ button.
This will open a popup where you can choose a new location. You may also want to create a new folder where you’ll store all your WordPress websites.
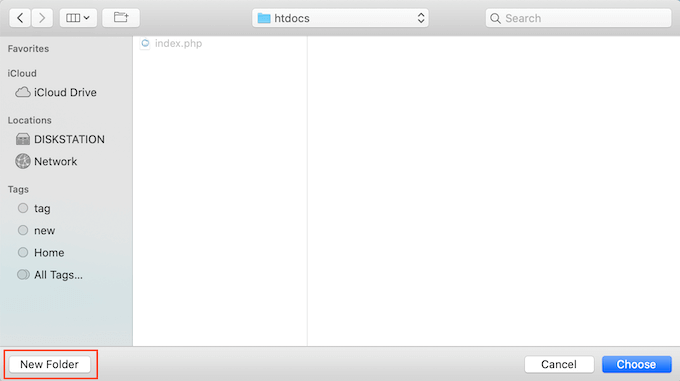
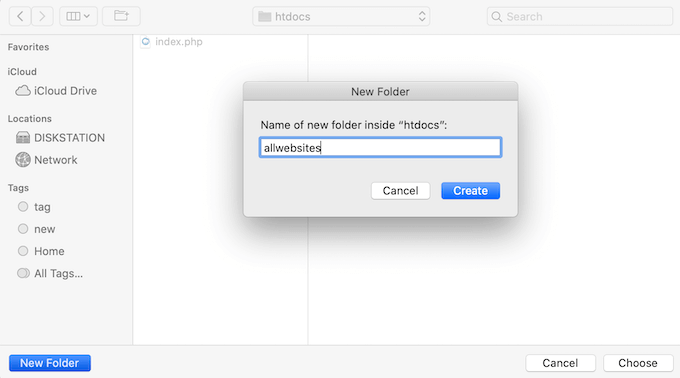
You can name this folder anything you want.
For the sake of this article, we will be storing our websites in a folder called ‘allwebsites.’
Installing WordPress on MAMP
Now you’ve set up MAMP, let’s go ahead and install WordPress on your Mac computer.
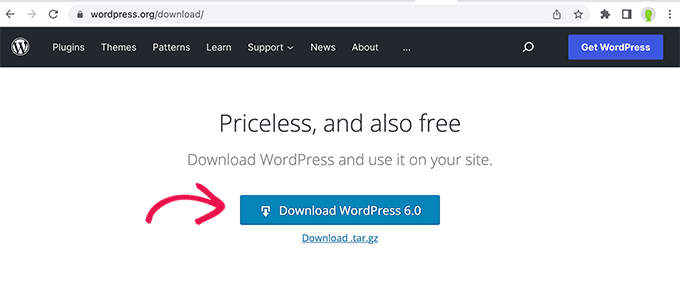
First you need to visit the WordPress.org website and download the latest version of WordPress core.
NOTE: There are two versions of WordPress. For more details, see our comparison between WordPress.com vs WordPress.org.
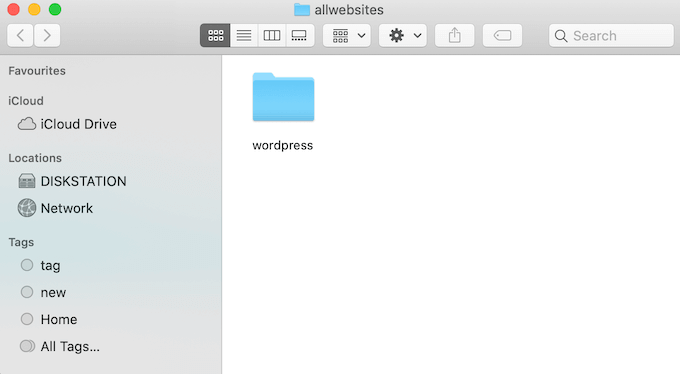
After downloading the file from WordPress.org, you just need to unzip it. This will create an unzipped ‘wordpress’ folder.
Now simply copy this folder into your MAMP document root folder.
Since we changed the document root folder, we need to copy ‘wordpress’ into applications/MAMP/htdocs/allwebsites.
WordPress needs a database to store all of its content and data. You’ll need to create this database before you can create a local website.
Don’t worry, it’s not as hard as it sounds!
In the MAMP ‘Preferences…’ window, simply click on the OK button. This should launch the MAMP application in a new browser tab.
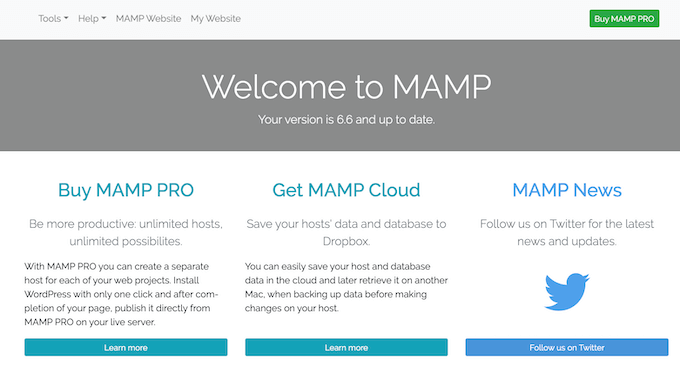
Our next task is launching phpMyAdmin. This is a web-based application that you can use to manage your website’s MySQL database.
In the toolbar, click on Tools » phpMyAdmin.
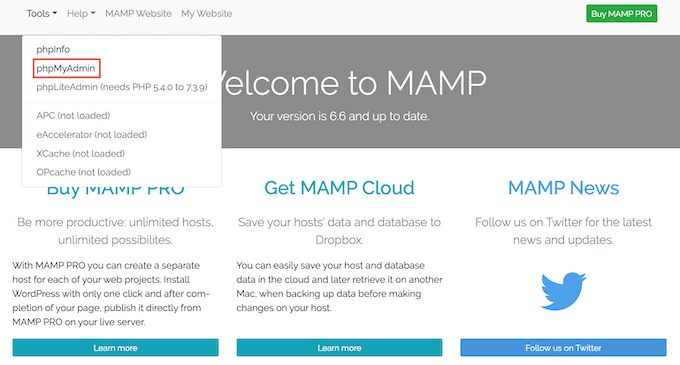
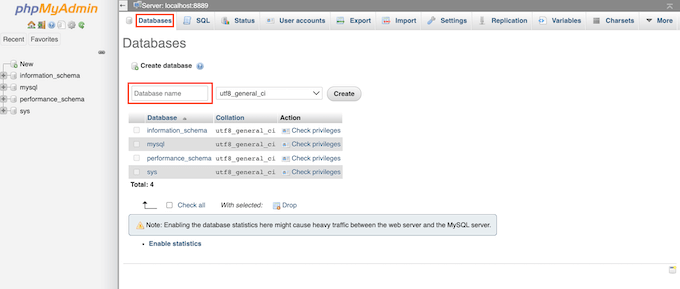
This will open phpMyAdmin in a new tab. In the phpMyAdmin dashboard, click on the Databases tab.
You can now type a name for your database into the ‘Database name’ field. You can name your database anything you want. Just be sure make a note of the name, as we’ll be using it in the next step.
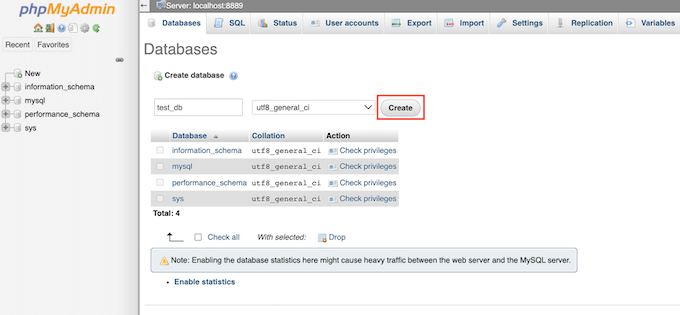
For this tutorial, we will call our database test_db.
After typing your database name, click on the Create button.
PhpMyAdmin will now go ahead and create your database.
Now it’s time to install WordPress.
In a new browser tab, simply go to http://localhost:8888/ If you’re using any port other than 8888, don’t forget to change this URL to mention your port.
You should now see a link to the ‘wordpress’ folder you copied into your root document folder.
You can now go ahead and click this link. This will open the WordPress installation wizard.
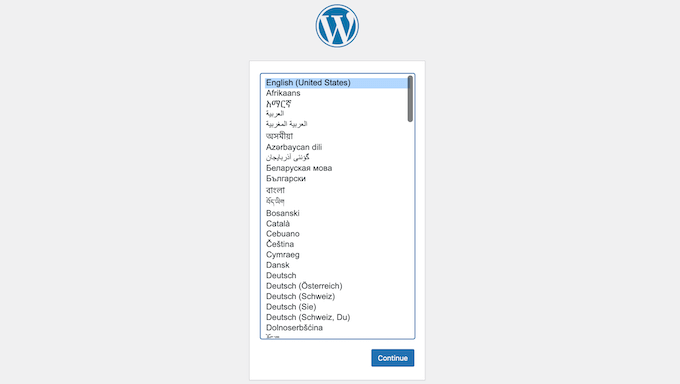
The WordPress installation wizard starts by asking you to choose a language. Go ahead and make your choice, and then click on the Continue button.
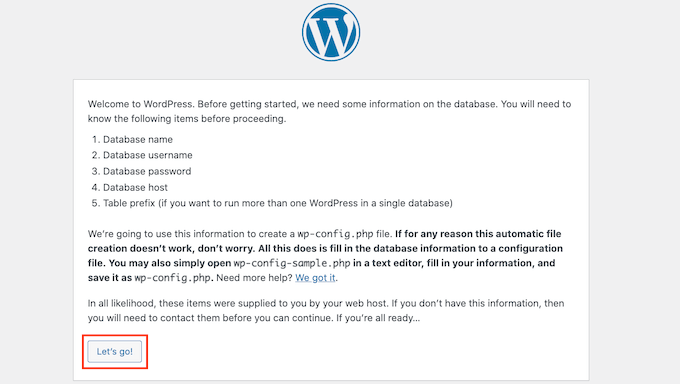
On the next screen, WordPress lists all of the information it needs to complete the installation.
After reading this screen, click on the ‘Let’s go’ button to move forward.
The setup wizard will now ask for your WordPress database information. For database name, simply type the name you created in the previous step.
For Username and Password, type ‘root.’ You can then type ‘localhost’ into the ‘Database Host’ field.
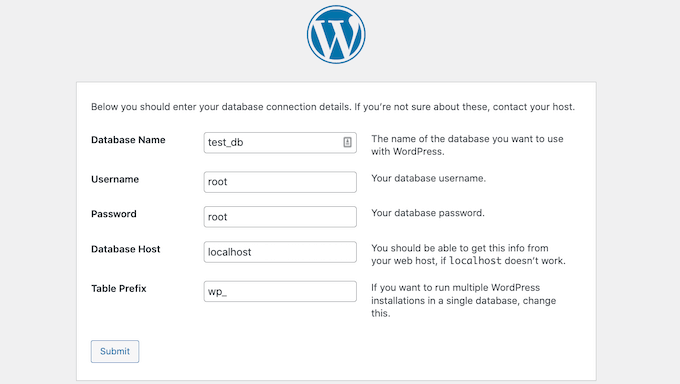
Localhost just means that the database and website are hosted on the same server. In this case, the server is your Mac computer.
After typing all this information, just click on the Submit button.
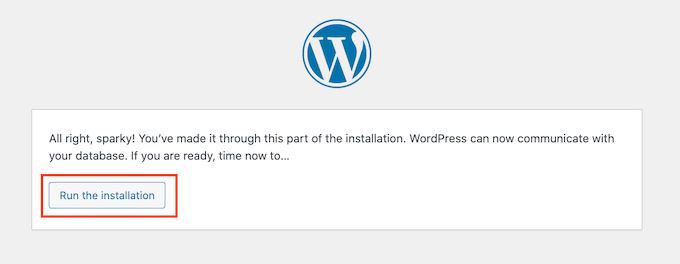
WordPress will now connect to your database and create a configuration file for you. Once it’s finished, you’ll see a success message.
To move onto the next step, click on the ‘Run the installation’ button.
On the next screen, WordPress will ask you to add a site title. Most WordPress themes show this title at the very top of your website. For example, you might use your business name.
You can also change the title in your WordPress dashboard at any point.
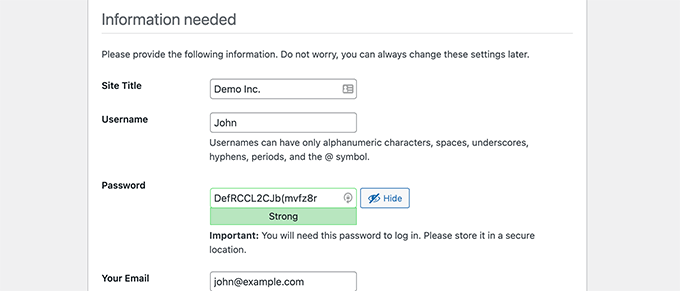
You’ll also need to create a username and password. This is the login information you’ll use to access your WordPress dashboard.
You can also type your email address into the Your Email field. This is the address where WordPress will send all of its admin emails.
After completing this form, click on the Install WordPress button.

WordPress will now run the installation.
After a few moments, you should see a ‘Success!’ message.

To jump straight to your WordPress login screen, click on the ‘Log In’ button.
You can also log into your local WordPress website using the following URL: http://localhost:8888/wordpress/wp-login.php
NOTE: If you’re using a different Apache Port, you’ll need to change the ‘8888’ part of this URL.
You can now go ahead and log into your WordPress site by entering the username and password you created in the previous step.
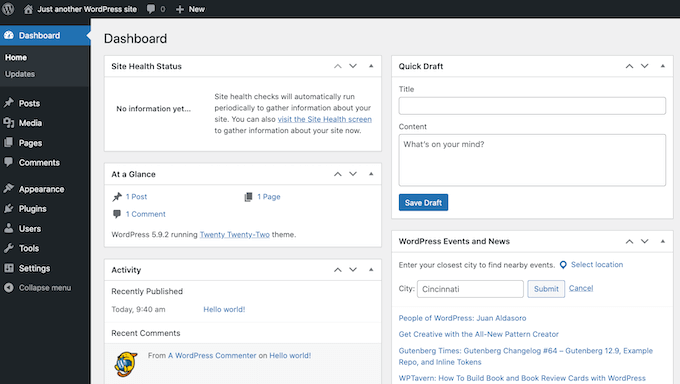
This will take you to the WordPress dashboard.
Trying WordPress Locally on Mac
A local install is perfect for testing out WordPress or developing websites on your computer. Now you have WordPress running locally on your Mac, here are a few things you may want to try.
- Experiment with the best WordPress themes.
- Try to find your perfect WordPress theme.
- Test out essential WordPress plugins locally.
- Learn WordPress programming by creating your own plugins and custom themes.
Moving Your Local WordPress Install to Live Website
Once you’ve played with WordPress locally, you may want to move your WordPress install to a live website. This is the only way others will be able to see your website.
To do that you’ll need to buy a domain name and web hosting. A domain name is your website’s address on the internet, and web hosting is where your website files are stored. You can think of web hosting as your website’s home on the internet.
For web hosting we recommend using Bluehost. They are one of the biggest hosting companies in the world. They’re also officially recommended by WordPress.org.
Luckily, Bluehost is offering WPBeginner users a discount on hosting, free SSL certificate, and a free domain name. Basically, you can turn your local WordPress installation into a live website for $2.75 per month.
Once you have purchased hosting, see our article on how to make a website with WordPress.
Have you already built a complete website on your local computer? Then you may want to check out guide on how to move WordPress from a local server to a live website.
We hope this article helped you learn how to install WordPress locally on Mac. You may also want to see our guide on how to customize your WordPress header, or see our comparison of the best managed WordPress hosting companies.
If you liked this article, then please subscribe to our YouTube Channel for WordPress video tutorials. You can also find us on Twitter and Facebook.


Syed Balkhi says
Hey WPBeginner readers,
Did you know you can win exciting prizes by commenting on WPBeginner?
Every month, our top blog commenters will win HUGE rewards, including premium WordPress plugin licenses and cash prizes.
You can get more details about the contest from here.
Start sharing your thoughts below to stand a chance to win!
Jiří Vaněk says
Is it possible to change PHP versions in MAMP or modify the PHP.ini so that it is already optimized for the server from the first launch, to which the website will eventually be moved?
WPBeginner Support says
MAMP does have options in its settings to change your PHP version if you wanted a different version
Admin
Jiří Vaněk says
This sounds great, because sometimes one needs to test a website on different versions of PHP to find out the best behavior for a certain version. Great and thanks for the advice.
Denis Gradel says
Thanks a lot! Localwp is much much easier than MAMP, I’ve tried both.
WPBeginner Support says
Glad you found our recommendation helpful!
Admin
Kate says
I get to
“WordPress needs a database to store all of its content and data. You’ll need to create this database before you can create a local website.
Don’t worry, it’s not as hard as it sounds!
In the MAMP ‘Preferences…’ window, simply click on the OK button. This should launch the MAMP application in a new browser tab.”
Then I don’t have an OK button and I can’t launch MAMP!
WPBeginner Support says
You would want to ensure you have the latest version of MAMP installed and you have not disabled the Webstart page in the preferences section of MAMP for the most common reasons.
Admin
Mari says
Hi there,
First, thank you for creating this guide, it was quite helpful. In fact, Ive been using my local site since march. But a few days ago when I went to log in to work on it I received this message on blank white screen,
“There has been a critical error on this website. Please check your site admin email inbox for instructions.
Learn more about troubleshooting WordPress.”
Im not quite sure what this means or where to actually go to rectify the error. Any instruction or an arrow on which way to turn would be humbly accepted. Thank you.
WPBeginner Support says
For troubleshooting errors in general you would want to take a look at our guide below:
https://www.wpbeginner.com/beginners-guide/beginners-guide-to-troubleshooting-wordpress-errors-step-by-step/
Admin
RG says
I’ve tried to install the wp locally.
But I’m stuck when I have to go to localhost/mywebsite
When I type this in the browser, I get an empty white page and when I click on the MAMP webstart / my website I get ‘forbidden you don’t have permission to access this ressource…
WPBeginner Support says
You would want to ensure you are an admin on your mac and for the mywebsite URL you would want to ensure that is the name of the folder your WordPress site is installed in.
Admin