Protecting your WordPress site from advertising fraud is crucial, but it doesn’t have to be complicated. The ads.txt file is a simple yet powerful tool that can safeguard your ad revenue and reputation.
While we don’t display ads on WPBeginner, several members of our team have extensive experience managing ad-supported websites. What’s more, many of our users rely on advertising revenue to support their online businesses, so we know how important it is to get this right.
In this guide, we’ll walk you through two straightforward methods to create and manage an ads.txt file in WordPress.

Why Create and Manage Ads.txt Files in WordPress?
Ads.txt is short for ‘Authorized Digital Seller.’ It’s a file that shows which companies are approved to sell ads on your WordPress website and helps stop fake ads from appearing.
If you make money blogging from ads (like with Google AdSense), it’s a good idea to add an ads.txt file to your website.
The reason is that some unauthorized parties may pretend to have your permission to sell ads on your WordPress blog. This could lead to showing bad or misleading ads, which can be dangerous for your reputation and your users’ safety.
The ads.txt file is like a guard. It stops anyone not on your approved list from selling ads on your WordPress blog. This way, you’ll be securing your website and making sure only the ads of trusted partners actually appear.
With that in mind, let’s see how you can create and manage an ads.txt file in WordPress. We will walk you through two different methods. You can use these quick links to skip to a specific one:
Method 1: Create an Ads.txt File in WordPress Using WPCode (Recommended)
Creating and managing an ads.txt file requires a little bit of coding. If you are not comfortable with adding custom code on your own, then this process may seem overwhelming.
That’s why we recommend using WPCode, which is the best code snippet plugin on the market. With this, you won’t have to directly tinker with your WordPress code and worry about breaking your website.
This plugin acts as a user-friendly interface where you can easily and safely insert custom code into your WordPress website. You can view all of the codes you’ve added in one place so that you can keep track of your customizations.

For this guide, we will use the WPCode Pro version. While there is a free WPCode plugin, the feature we need for managing ads.txt files is in the Pro version.
First things first, go ahead and install WPCode in your WordPress dashboard. You can follow our step-by-step guide on how to install a WordPress plugin if you need some guidance.
Next, make sure to activate the WPCode Pro license key. Simply go to Code Snippets » Settings and insert your license key where appropriate. Then, select the ‘Activate Key’ button.
You can tell the activation is successful when the button text changes to ‘Deactivate Key.’
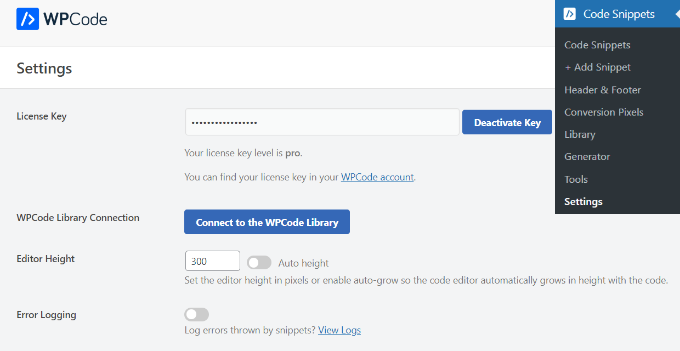
Now, let’s go to Code Snippets » File Editor. Here, you will see that the plugin already has a built-in ads.txt manager feature.
What you have to do now is write the following information in this format: domain, published ID, relationship type, and advertising platform ID (optional).
For example, here we are adding Google AdSense as an approved advertising platform:
google.com, pub-0000000000000000, DIRECT, f08c47fec0942fa0
The first field is the domain of the company that is allowed to sell or resell your ad inventory. In the above example, that’s google.com.
After that, you’ll add the publisher ID, which is unique to your account. Here, it is pub-0000000000000000. If you are not sure where to find this ID, then you can check the network or platform’s online documentation for more information.
Make sure to get the ID right. Otherwise, you may face the ‘Earnings at risk’ error.
The third section declares the relationship type, which is either DIRECT or RESELLER. Direct means the publisher works directly with the AdTech vendor.
Meanwhile, reseller means the publisher has authorized a third party to resell on their behalf, such as an ad network or ad management solution.
The last field is the ID of the advertising platform, which is optional.
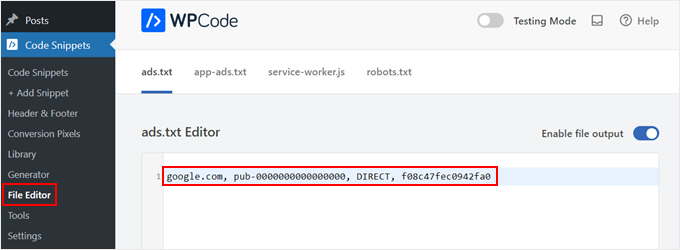
You can now add as many platforms and resellers as you want. Just make sure to add each organization on its own line.
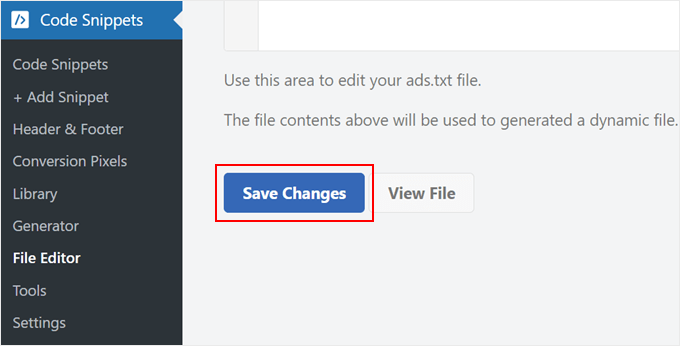
Once you are done, simply scroll down and click ‘Save Changes.’
Now, anyone can read your site’s ads.txt file.
To see the file in action, simply add ads.txt to the end of your domain name, such as www.example.com/ads.txt.

Method 2: Create an Ads.txt File in WordPress Using Ads.txt Manager (Free)
Another way to create an ads.text file is by using Ads.txt Manager. This free plugin adds a simple code editor where you can type in all your authorized platforms and networks.
The first thing you need to do is install and activate the Ads.txt Manager for WordPress plugin. For more details, see our step-by-step guide on how to install a WordPress plugin.
Upon activation, head over to the Settings » Ads.txt page.
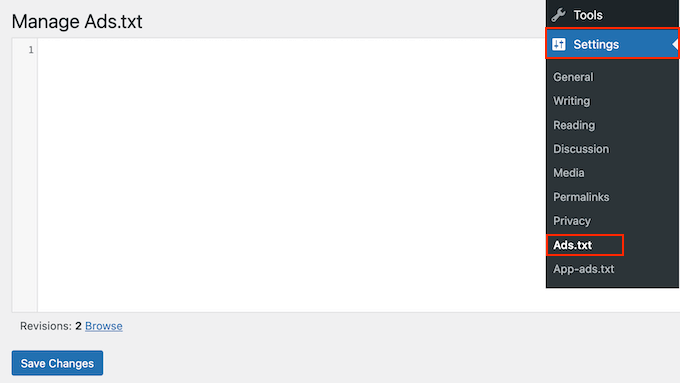
This opens a simple code editor where you can add each platform or reseller details on its own line, just like before.
When you are happy with the information you’ve entered, click on the ‘Save Changes’ button.

How to Fix the Earnings at Risk Error in Google AdSense
If you use Google AdSense, there is a chance you may see the following error in your AdSense account:
Earnings at risk – One or more of your ads.txt files doesn’t contain your AdSense publisher ID. Fix this now to avoid severe impact to your revenue.
This just means your ads.txt file doesn’t have the right publisher ID.
To fix this issue, log into your AdSense page using your Google email address and password. You’ll find the ID next to the following field: ‘This email is associated with the AdSense account.’
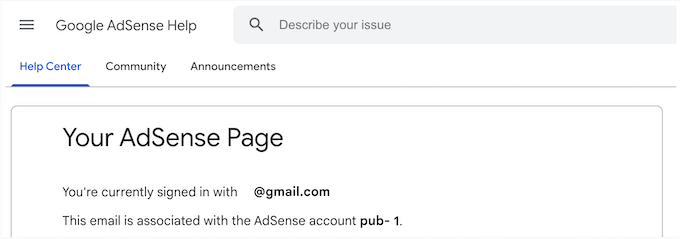
Now, simply go to WPCode’s File Editor or Ads.txt manager and find the line that adds Google AdSense as an authorized provider. Then, change the text so that it uses the right ID.
After that, save your change to store your settings. Now, if you visit your Google AdSense account again, the error message should have disappeared.
Maximize Your WordPress Advertising Potential
Want to take your WordPress advertising strategy to the next level? Check out these helpful resources:
- How to Insert Ads Within Your Post Content in WordPress – Learn how to strategically place ads within your content for maximum visibility and engagement.
- How to Make a Classified Ads Website with WordPress – Discover how to create a thriving classified ads platform using WordPress.
- How to Display Ads Only to Search Engine Visitors in WordPress – Target your ads more effectively by showing them exclusively to visitors from search engines.
- How to Increase Ad Impressions in WordPress with Ad Refresh – Boost your ad revenue by implementing ad refresh techniques in WordPress.
- How to Display Ad Blocks in Specific Posts in WordPress – Learn how to customize your ad placements by displaying specific ad blocks on selected posts.
We hope this tutorial helped you learn how to create and manage ads.txt files in WordPress. You may also want to learn how to manage ads in WordPress with AdSanity plugin and our list of highest-performing Google AdSense banner sizes.
If you liked this article, then please subscribe to our YouTube Channel for WordPress video tutorials. You can also find us on Twitter and Facebook.


Suman Sourabh
Can we also add the ads.txt file with our hosting provider? Or something like cPanel?
WPBeginner Support
If you are comfortable using your hosting provider’s file manager you could add the ads.txt to your site’s folder using that. We recommend the plugin method for most users as that makes editing it in the future easier
Admin
Jiří Vaněk
I was also initially alerted that I didn’t have an ads.txt file. However, I eventually chose the path of manually creating and uploading it via FTP to save WordPress from additional plugins. Therefore, I recommend the same. Alternatively, if anyone has a file manager in WordPress in the form of a plugin, they can simply create a text file named ads.txt with the code and upload it to the root directory of WordPress via FTP.
Ahmed Omar
I just received this message few days ago “Earnings at risk – You need to fix some ads.txt file issues to avoid severe impact to your revenue.”
This post solved my issue
Thank you
WPBeginner Support
Glad our recommended solution helped
Admin