
Everyone hates missing out on a great deal or a popular trend. That psychological trigger is called FOMO, and it is a powerful way to turn casual visitors into paying customers.
We use FOMO tactics across our own online stores to boost sales and keep users engaged. It works effectively because it helps hesitant buyers make a decision before time runs out.
In this guide, we will share how to properly use FOMO on your WordPress site to increase conversions.
What Is FOMO and How Does It Help With Conversions?
FOMO, or ‘fear of missing out,’ is a psychological term for anxiety about missing out on something exciting and trendy.
As a WordPress website owner, you can use this human behavior in your marketing strategy to improve your conversions.
The concept of FOMO is not new. It has actually been used by marketers even before the arrival of the internet. However, with online marketing, FOMO has become far easier to implement and much more effective.
For example, if you run an online store, then you can create anticipation about an upcoming sale and limited-time offers by adding social proof to your landing pages.
You can also use it to build your email list, run affiliate marketing campaigns, boost app downloads, and more.
With that said, let’s take a look at how to easily add FOMO to your WordPress site. We will show you two techniques that we have successfully used on our own websites with incredible results:
Method 1: Adding FOMO With Social Proof Using TrustPulse
People feel more comfortable with their buying decisions when they know others have also bought the same product or service and had a good experience with it.
This is why smart business owners use social proof in their marketing.
The best way to add social proof to your website is by using TrustPulse. It is one of the best social proof plugins for WordPress on the market.
TrustPulse allows you to display real-time user activity notifications on your website, such as products purchased, forms submitted, and more.
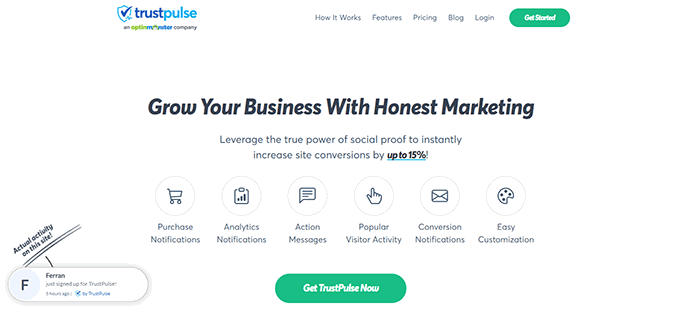
Our partner brand, OptinMonster, uses it to display real-time user purchases on their website. We’ve seen how this strategy helps convince other visitors to buy their products. To learn more, see our complete TrustPulse review.
To get started, you will need to install and activate the TrustPulse plugin on your website. For more details, see our step-by-step guide on how to install a WordPress plugin.
The plugin helps you connect your WordPress site to the TrustPulse app.
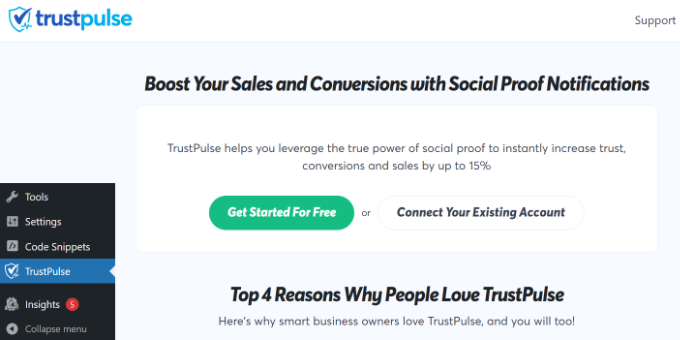
Upon activation, click on the TrustPulse menu from the WordPress admin sidebar and then click the ‘Get started for free’ button to continue.
This will take you to the TrustPulse website, where you can sign up for a free account.
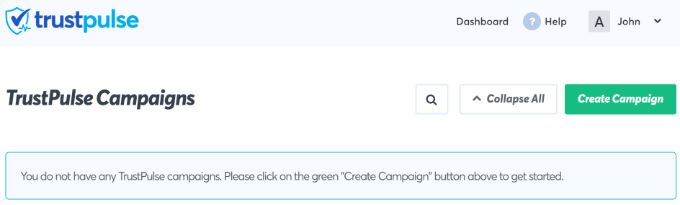
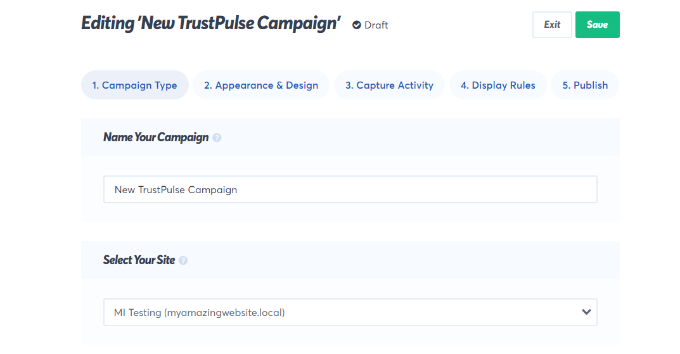
Once you have signed up, you are ready to create your first campaign. Simply click on the ‘Create Campaign’ button to start your first FOMO campaign.
Next, you will need to provide a title for your campaign and select your website.
If you scroll down, then you can choose a campaign type.
TrustPulse offers 4 different campaign types to choose from.
These include showing recent activities, the number of people taking action, visitor analytics, or a static notification with helpful information.
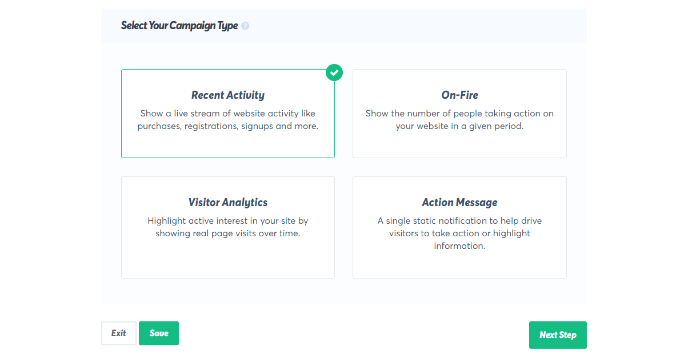
After selecting a campaign type, don’t forget to click the ‘Next Step’ button.
You can now head to the ‘Appearance & Design’ tab and choose language and appearance options for your campaign. You can change the position, badge image, style, and more.
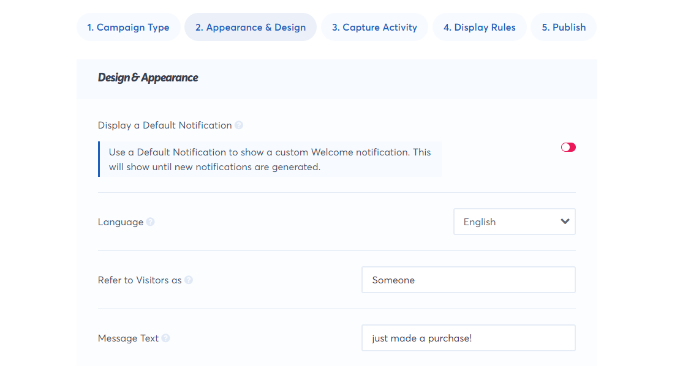
Once you are done, click on the next step to continue.
Next, you need to choose how you want to capture the activity. We recommend using ‘AutoMagic.’ This smart feature automatically detects activity on your site, such as when someone makes a purchase, without you needing to write any code.
For example, you can select your checkout page to automatically capture eCommerce activity.
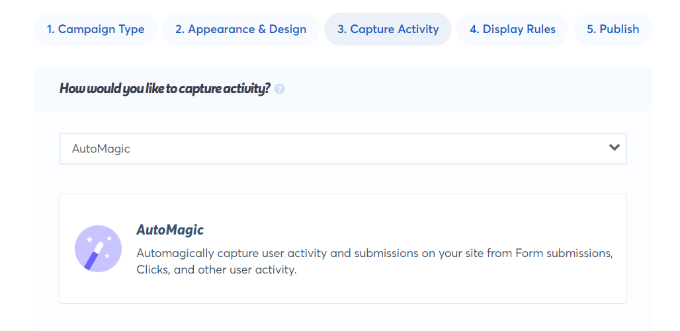
You can also use Zapier to capture activities from 1000+ integrations.
Once you are done, click on the next step button to continue.
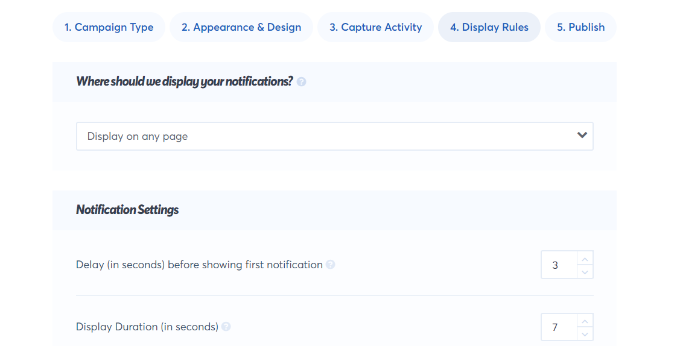
Next, you need to set up the display rules. You can display the badge on all pages or specific pages on your site. You can also choose the delay between notifications, run them as a loop, and enable mobile notifications.
After that, click on the ‘Publish’ tab at the top.
In the next step, simply click the ‘Launch your TrustPulse campaigns’ button.
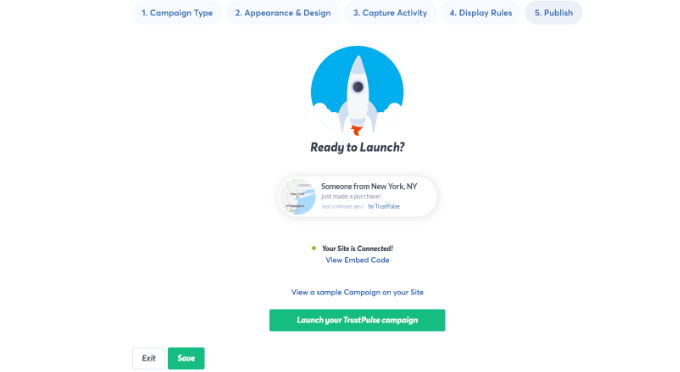
Don’t forget to click the ‘Save’ button to store your changes and then exit the campaign builder.
You can now visit your website to see your FOMO campaign in action.

Method 2: Adding FOMO Countdown Timers With OptinMonster
We have all seen marketers using “urgency” to get customers’ attention. Whether it is your local grocery store or a big name-brand website, urgency is one of the oldest marketing techniques. Plus, it works just as effectively online.
Basically, you show users an offer with a sense of urgency. This triggers the fear of missing out on a valuable deal and helps users make a purchasing decision.
Urgency strategies can be used with limited-time offers, seasonal sale campaigns, one-time discounts, and more. To learn more, see this article on using urgency to hack conversion rates with proven methods.
The best way to add urgency timers in WordPress or WooCommerce is by using OptinMonster. It is the most popular conversion optimization and lead generation software that helps businesses turn potentially abandoning website visitors into subscribers and customers.
We have also used it at WPBeginner to promote our pro services. For more details, see our complete OptinMonster review.
First, you will need to sign up for an OptinMonster account. It is a paid tool, and you will need at least the ‘Basic’ plan to use their Floating bar campaigns.

After signing up for an account, you will need to install and activate the OptinMonster plugin. For more details, see our step-by-step guide on how to install a WordPress plugin.
This plugin acts as a connector between your WordPress site and the OptinMonster application, allowing your campaigns to display properly.
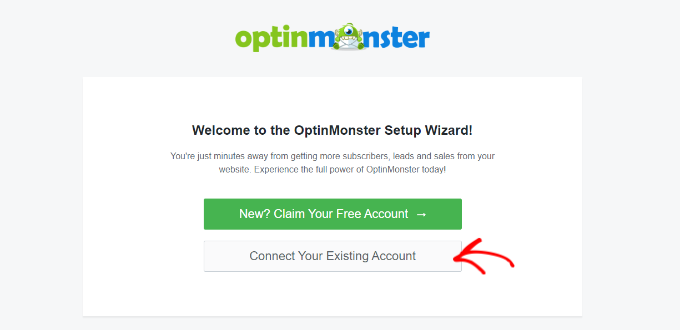
Upon activation, click on the ‘Connect Your Existing Account’ button on the OptinMonster welcome screen.
Next, you should see a new window open where you will be asked to connect your website.
Go ahead and click the ‘Connect to WordPress’ button.

After connecting your website, you will need to go to OptinMonster » Campaigns from your WordPress dashboard.
From here, click on the ‘Create Your First Campaign’ button to continue.

This will launch the OptinMonster campaign builder.
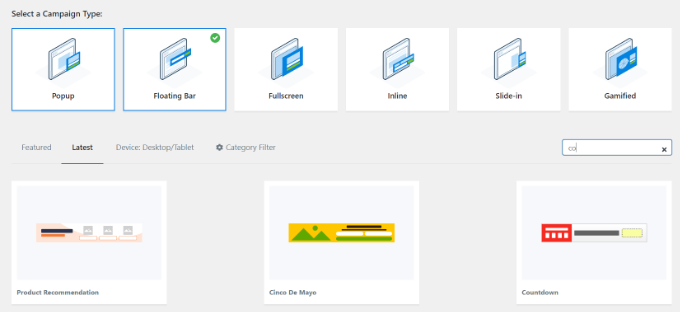
First, you will need to select an optin type and then select a theme. We will use a ‘Floating bar’ campaign with the ‘Countdown’ theme.
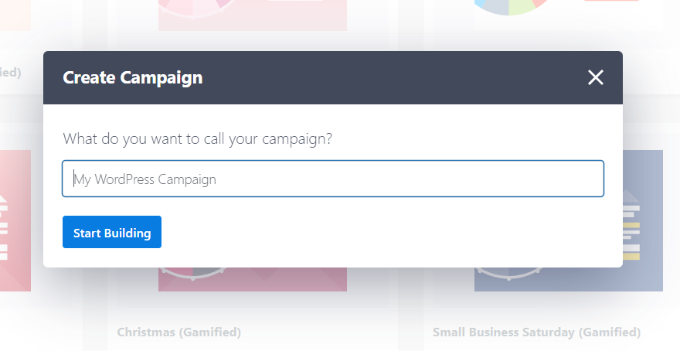
Next, you will be asked to choose a name for your campaign.
Once that is done, simply click the ‘Start Building’ button.
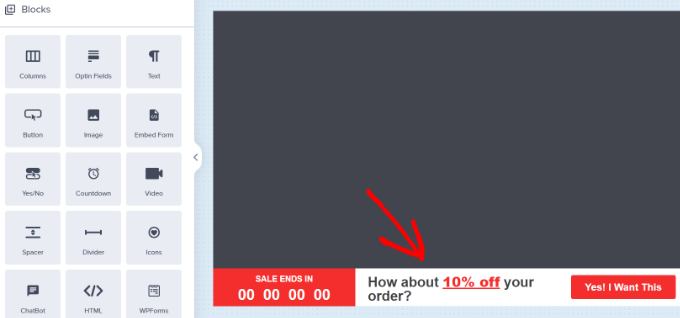
On the next screen, you will see the drag-and-drop tool, where you can simply point and click to design your campaign.
You will see a live preview of your campaign in the right panel and a bunch of customization blocks and options in the left panel.
With the floating bar countdown campaign, the preview will appear near the bottom of the screen for you, just as it does for the users.
Go ahead and click on the countdown timer in the live preview to set the countdown style and end date. You can use two types of countdown timers: Static and Dynamic.
A Static timer counts down to a specific date (like New Year’s Eve) for everyone. A Dynamic timer is ‘evergreen,’ meaning it starts a unique countdown for each individual visitor precisely when they arrive on your site.
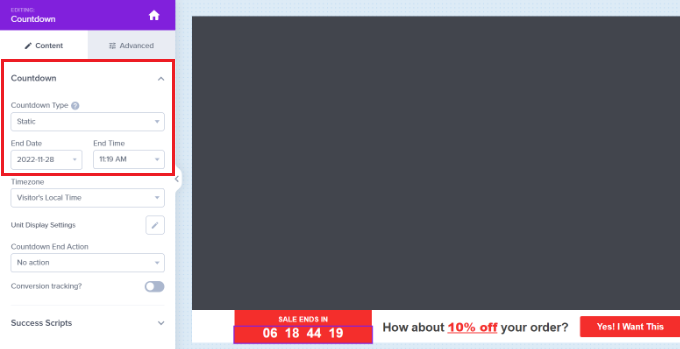
For this tutorial, we will use a Static timer. This is perfect for running a specific holiday sale or a launch that ends on a fixed date.
Since we are using a floating bar with a countdown theme, we can move the floating bar to the bottom or the top.
You can just point and click to edit the text in your floating bar. You can add a coupon code, add links to special offers, and style it any way you want.
Next, simply go to the ‘Display Rule’ tab at the top. Here, you will see different options for showing your campaign.

For instance, you can select the ‘Time on Page’ option and show the floating bar after a user spends at least 5 seconds on your website.
Below that, you can also select the location for your campaign. We will use the default setting, which means the countdown timer floating bar will appear on all the pages on your website.

Once you are satisfied, don’t forget to click on the ‘Save’ button at the top.
After that, head to the ‘Publish’ tab. Now, change the Publish Status from Draft to Publish.
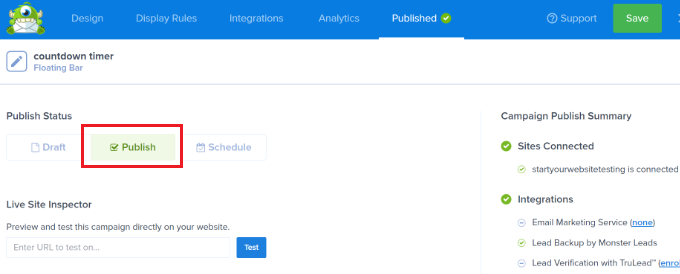
Don’t forget to click the ‘Save’ button and close the campaign builder.
You will now see the WordPress Output Settings for your recently created campaign.
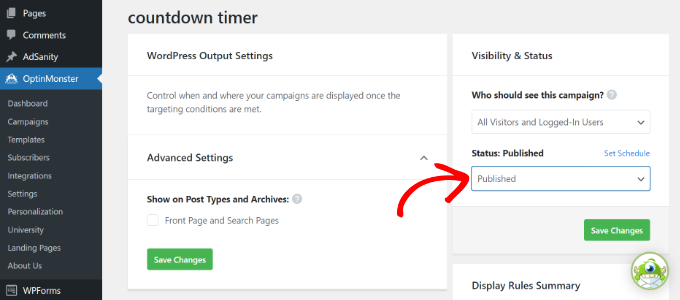
By default, your campaign will be disabled, and you just have to click on the Status dropdown menu to change it from Pending to Published.
Once that’s done, click the ‘Save Changes’ button.
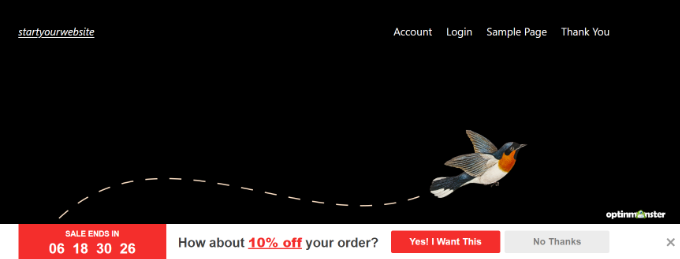
You can now visit your website to see your countdown timer FOMO campaign in action.
Bonus: Tracking Your Conversions in WordPress
FOMO techniques work really well for conversions, but how do you keep track of their performance? Without tracking, you wouldn’t know how many sales or leads were generated because of these campaigns.
All expert marketers use Google Analytics. It not only helps you see where your users are coming from but also allows you to track user engagement on your website.
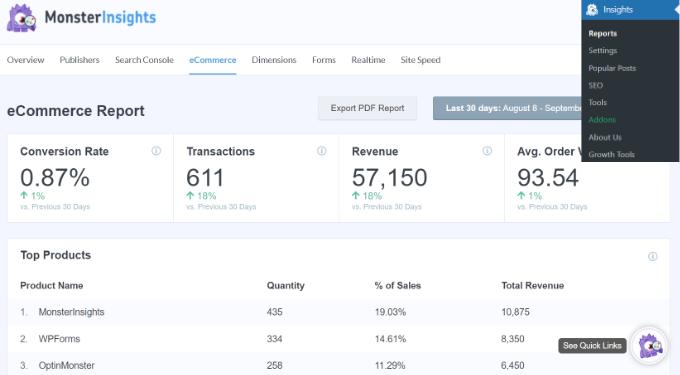
The easiest way to use Google Analytics in WordPress is through MonsterInsights. It is the best Google Analytics plugin for WordPress and makes it super easy to track conversions on your website.
For instance, it has an eCommerce addon, which helps you track your eCommerce performance without leaving the WordPress dashboard. Plus, you can also track form conversions, link clicks, and more with MonsterInsights.
For more details, please see our guide on WordPress conversion tracking make simple.
Frequently Asked Questions About FOMO Marketing
Here are some of the most common questions we receive from our readers about using FOMO strategies to boost website conversions.
1. What are the best FOMO plugins for WordPress?
The best FOMO plugins for WordPress are TrustPulse and OptinMonster.
TrustPulse is ideal for showing social proof notifications, such as recent sales or signups. OptinMonster is the best choice for creating urgency with countdown timers and limited-time offer popups.
2. Is using FOMO on a website manipulative?
FOMO marketing is not manipulative if you are honest with your data. Using a tool like TrustPulse to display real recent purchases helps build genuine trust.
However, using fake countdown timers that reset every time a user refreshes the page is dishonest. We always recommend using real data and actual deadlines to maintain credibility with your audience.
3. Can I use FOMO if I don’t run an online store?
Yes, you can use FOMO effectively on blogs, news sites, and business portfolios. For example, you can use OptinMonster to add a countdown timer for a webinar registration or a limited-time ebook download.
You can also use TrustPulse to show notifications when someone joins your email newsletter. This encourages other visitors to subscribe so they do not miss out on your content.
4. Will FOMO plugins slow down my WordPress site?
High-quality plugins like TrustPulse and OptinMonster are designed to load asynchronously. This means they run in the background and do not delay your website’s initial page load speed.
5. How do I know if my FOMO campaigns are working?
You should track your results using Google Analytics to see if your conversion rates are improving. The easiest way to do this in WordPress is by using MonsterInsights.
MonsterInsights allows you to track clicks, form submissions, and eCommerce sales directly from your dashboard. This helps you confirm exactly how much revenue your TrustPulse or OptinMonster campaigns are generating.
Additional Resources
Now that you know how to use FOMO to increase conversions, you may want to see some of our other guides on improving your website strategy:
- Best Social Proof Plugins for WordPress & WooCommerce
- How to Add a Countdown Timer Widget in WordPress
- Ways to Recover WooCommerce Abandoned Cart Sales
- How to Build an Email List in WordPress (Ultimate Guide)
- WordPress Conversion Tracking Made Simple: A Step-by-Step Guide
If you liked this article, then please subscribe to our YouTube Channel for WordPress video tutorials. You can also find us on Twitter and Facebook.


")
Jiří Vaněk
I first encountered the term FOMO with stocks, where I fully realized how this psychology works, even on myself. Applying this psychological phenomenon to my website and maximizing its positive effects is a great technique that I also learned here. I use OptinMonster for campaigns, and the various tips here on how to improve campaigns, for example, by using this effect, have increased my conversions by dozens of percent. Thank you.
Moinuddin Waheed
using psychological tricks and tactics to increase the sales has proven benefits.
seeing count down timers gives a sense of urgency to make a purchase decision.
This method can be employed many ways depending on the type of business running online.
One thing is to make sure that I think has repercussions on the effectiveness on fomo is time and how long it runs.
If we don’t decide timing and strategies, it may backfire to use fomo.
Mrteesurez
Thanks. I am just learning about FOMO and what is really entails, I used to see count down on so many websites especially ecommerce site, it’s tempting to buy for the fear of losing the discount offered.
This is the real benefits of using FOMO. I am implementing on my ebook store.
Dayo Olobayo
It’s great you’re exploring FOMO. It’s a powerful tool but be sure it aligns with your brand. For ebooks, you might want to consider highlighting early access to new releases or special discounts for newsletter subscribers to create a sense of exclusivity.
Mrteesurez
I appreciate your reply, Mr. Dayo.
I like the idea you shared as an ebook store to highlight early access to new releases or special discounts for newsletter subscribers, this can definitely helps me grow my email list.
Hope I can still use count down while implementing early access idea for users to keep up with that period of time.
Moinuddin Waheed
Creating fomo is a sure shot to have increased sales and subscriptions.
fomo creates a sense of missing out and anxiety which in turn make a compulsive buying decision.
I myself have purchased many such things even when I was not need.
TrustPulse even the free version comes with many options to create fomo campaign.
It is really helpful in creating fomo on certain occassion specially the festivities.
Thanks for the guide. I will utilise it to my websites.
Chris
Trustpulse WordPress API has not been updated for 12 months. Is it advisable to still use it?
WPBeginner Support
Yes, the plugin is still safe to use
Admin
ebun
GREAT WORK. GOD BLESS YOU.
WPBeginner Support
Thank you for your kind words
Admin
Nishant sanghrjka
Your articles are very clear explanation
One question how can i apply to my personal blog
WPBeginner Support
Hey Nishant,
It depends on what you are trying to do on your personal blog. For example, if you are trying to build an email list, then you can connect it to your MailChimp account.
Admin