Do you want to restrict certain pages on your website by user role?
Many WordPress businesses need to control which users can access certain pages on their websites.
In this article, we will show you how to easily restrict access to certain WordPress pages by user role.
Why Restrict WordPress Pages by User Role?
When you start a WordPress site, you might want to restrict certain areas and pages based on user role. For instance, if you have a multi-author site, then you can limit access to specific pages for writers and editors.
Restricting pages based on user roles is a common use case for membership sites. You can limit pages on your site based on the user’s membership level. For example, only subscribers can view the video page or the online course page.
By default, WordPress comes with a limited set of tools to restrict content on your website. You can create private and password-protected posts, but these features don’t allow you to limit access by user role.
Luckily, there are several WordPress plugins that allow you to do just that. You can choose one of them to restrict pages to certain users, user groups, or user roles.
Using these plugins, you can create a membership website, pay-per-view websites, or even family blogs. You can also monetize your content by adding paid subscriptions.
That being said, let’s take a look at how to properly restrict WordPress pages by user role. We will show you different plugins, so you can choose the one that best suits your needs.
1. Restrict Pages by Membership using MemberPress
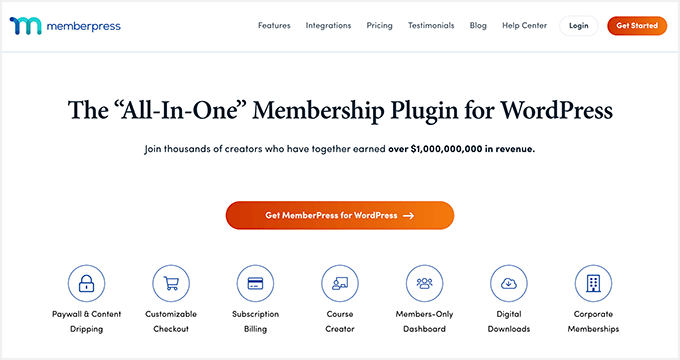
MemberPress is one of the best WordPress membership plugins in the market. It allows you to easily create membership websites with paid subscriptions. You can set up content restrictions and only allow specific user roles to access it.
MemberPress is a premium plugin, and you’ll need to sign up for an account. Simply visit the website and click the ‘Get MemberPress for WordPress’ button.
Next, you will need to install and activate the MemberPress plugin. For more details, see our step-by-step guide on how to install a WordPress plugin.
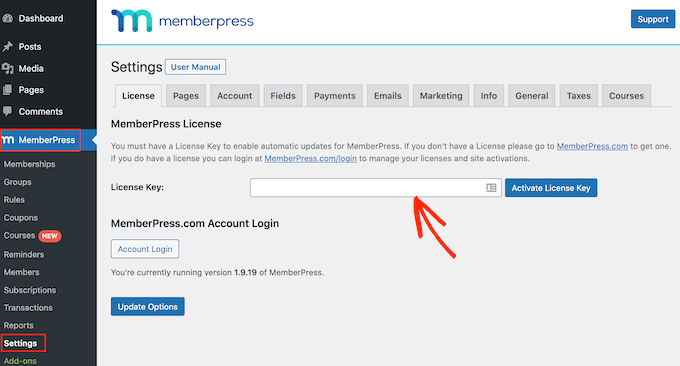
Upon activation, head over to the MemberPress » Settings page to enter your license key. You can find the key in your account area on the MemberPress website.
Next, you need to head over to the ‘Payments’ tab to set up payments.
Simply click the ‘+ Add Payment Method’ option to get started.
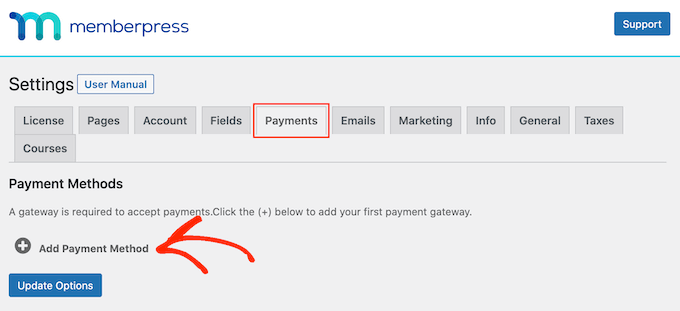
MemberPress supports PayPal (Standard, Express, and Pro), Stripe, Authorize.net, and more out of the box. You can select the payment methods you want to use and provide the required credentials.
Next, you need to visit the MemberPress » Memberships page from the WordPress dashboard and click on the ‘Add New’ button to create a membership plan.
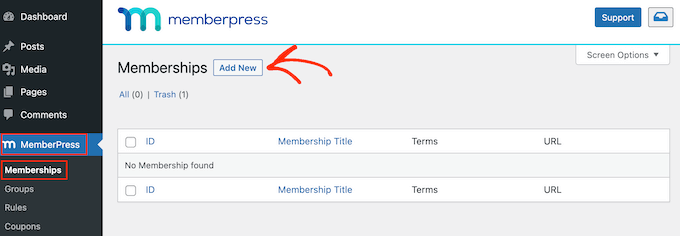
You will start by providing a title for this membership plan and setting pricing, billing type, and expiration settings.
After that, scroll down to the ‘Membership Options’ meta box below the post editor. This is where you can set up different options for this particular membership plan.
Go ahead and click on the ‘Advanced’ tab under membership options and click the ‘User Roles for this Membership’ checkbox.
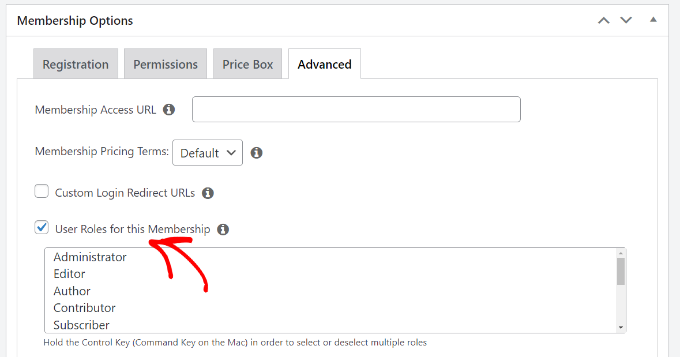
After that, you can simply choose a user role from the given list.
Be careful when choosing a user role, as each user role in WordPress comes with its own permissions. If you need, you can also create a custom user role for the membership plans on your website.
You can now publish your membership plan.
If you want to add more membership plans, then you can repeat the process to add them.
Once you have created a membership plan, it is time to set up rules to restrict access to the content.
Head over to the MemberPress » Rules page from the WordPress dashboard and click on the ‘Add New’ button at the top.
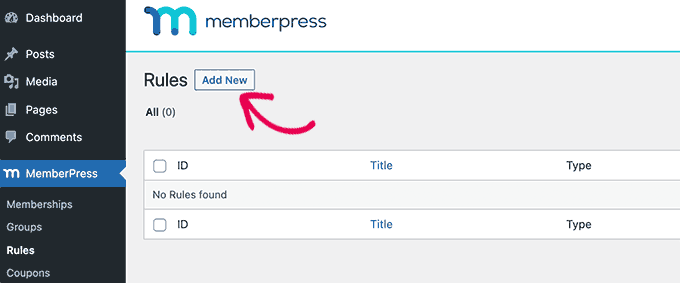
This will bring you to the rules edit page, where you can select different conditions and choose which pages to restrict.
You can click the dropdown menu under ‘Protect Content’ and choose a rule.
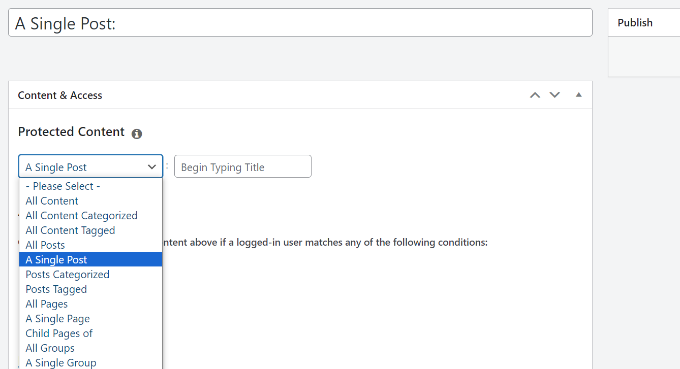
For example, you can select all content that matches a particular tag or category to be available only to members with a membership plan you created earlier. Or you can select a single page to restrict access.
If you’re choosing a category or tag to block access, then you’ll need to ensure that the content is added to that particular category or tag.
You can see our guide on how to add categories and tags in WordPress.
That’s all. You have successfully restricted pages in WordPress by user role and membership using MemberPress.
2. Limit Page Access by User Role using Restrict Content Pro
Restrict Content Pro is a great option to control who has access to your website content. It also allows you to add paid subscriptions and make money online from your membership website.
To start, you’ll need to visit the Restricted Content Pro website and click the ‘Get Started’ button.
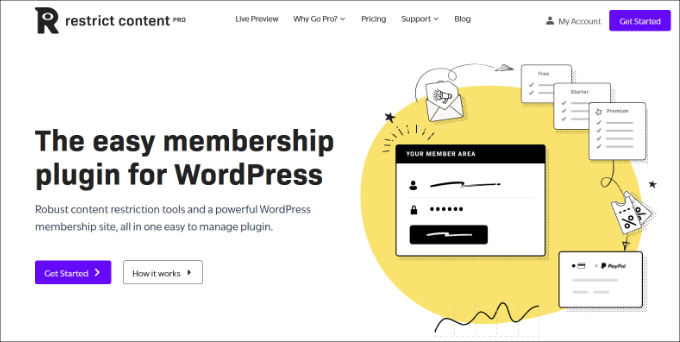
Next, you’ll need to sign up for an account.
To set up page restrictions based on user roles, you can use the free plan. Simply click the ‘Get Started’ button under the Free plan.
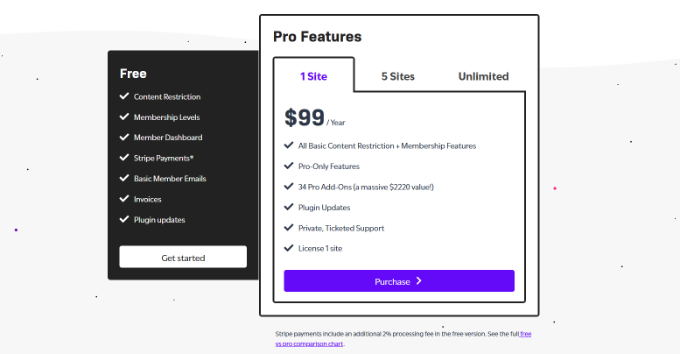
After that, a popup window will open.
You can enter an email address and click the ‘Get Your Free Plugin’ button.
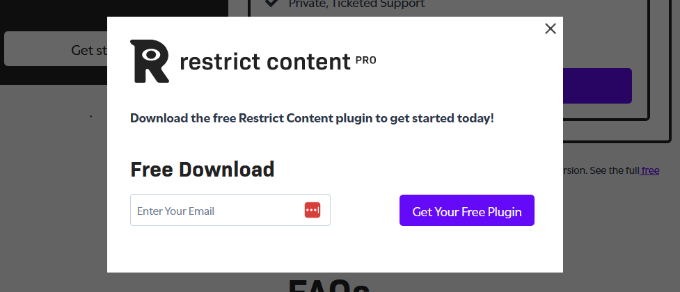
Next, you’ll receive an email from Restrict Content Pro with the download link for the free plugin.
Go ahead and download the plugin onto your computer.
From here, you will need to install and activate the Restrict Content Pro free plugin. For more details, see our step-by-step guide on how to install a WordPress plugin.
Upon activation, you can visit the Restrict » Settings page from your WordPress dashboard and go to the ‘General’ tab.
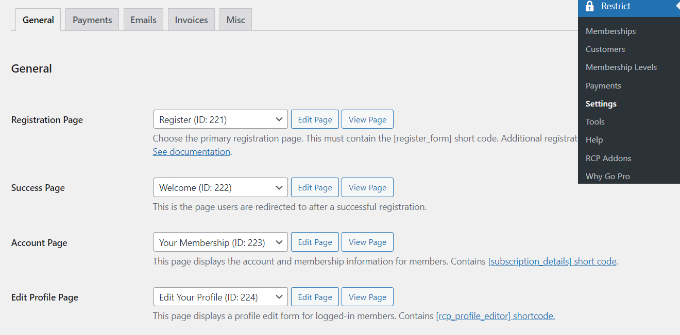
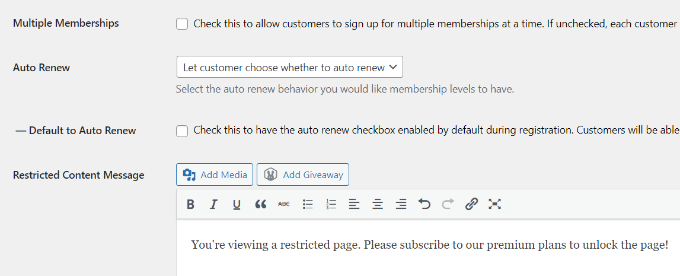
Here, you can edit different pages that the plugin will automatically set up for your website.
Next, you’ll need to scroll down to the ‘Restricted Content Message’ section and add text that users will see if they’re unauthorized to view a page.
After that, you need to switch to the ‘Payments’ tab to select a payment gateway.
Restrict Content Pro allows you to accept payments through PayPal, Stripe, Braintree, and Authorize.net.
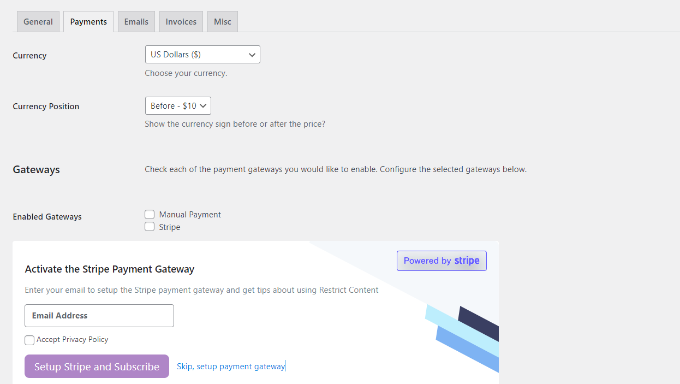
After selecting a payment method, you will be able to add credentials for each Payment method.
Don’t forget to save your settings when you’re done.
Now, you need to edit the pages or posts you want to be restricted by user roles.
Once you’re in the WordPress content editor, simply scroll down to the ‘Restrict this content’ meta box.
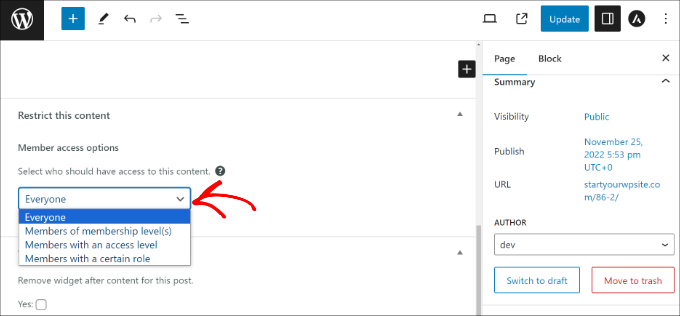
From here, click the dropdown menu under the Member access options section and select the ‘Members with a certain role’ option.
Next, you can choose the user role you want to allow to view the page.
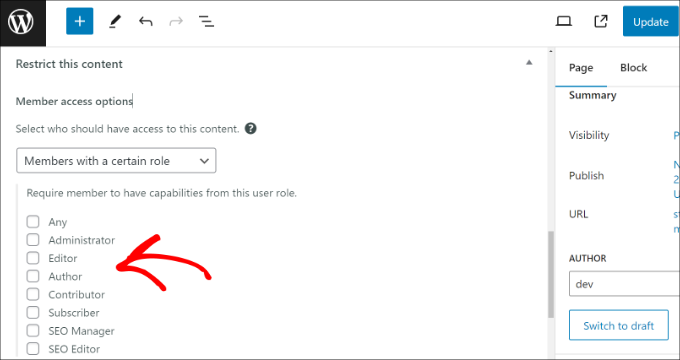
When you’re done, simply update or publish your content.
Restrict Content Pro also allows you to create subscription levels. For more detailed instructions, see our guide on how to restrict content to registered users in WordPress.
3. Block Access to Course Pages using LearnDash
LearnDash is the best WordPress LMS plugin. It allows you to create and sell courses online. You can use its drag-and-drop course builder to create lessons, quizzes, and more.
It comes with built-in subscriptions, allowing users to enroll in a course before they can see its contents. This enables you to restrict access to course pages and monetize your website.
First, you’ll need to visit the LearnDash website and sign up for an account.

Next, you need to install and activate the LearnDash plugin. For more details, see our step-by-step guide on how to install a WordPress plugin.
Upon activation, you need to visit the LearnDash LMS » Settings page from the WordPress dashboard.
Next, you need to switch to the ‘Payments’ tab and select you’re preferred payment gateway.
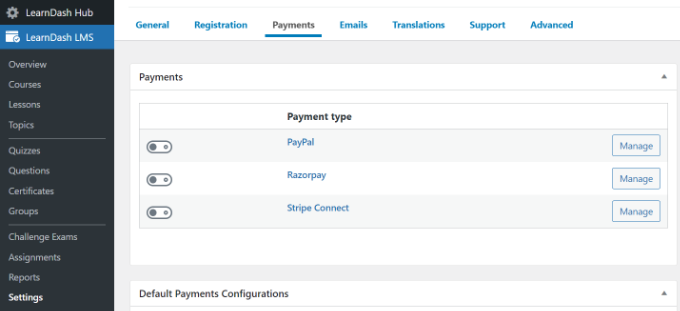
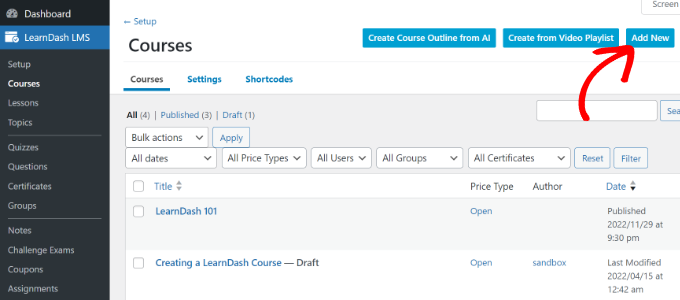
Now, you can go to the LearnDash LMS » Courses page from your WordPress admin panel.
From here, click on the ‘Add New’ button to add your first course.
Enter a title and description for your course.
The description part will be visible to all users to explain what this course is about.
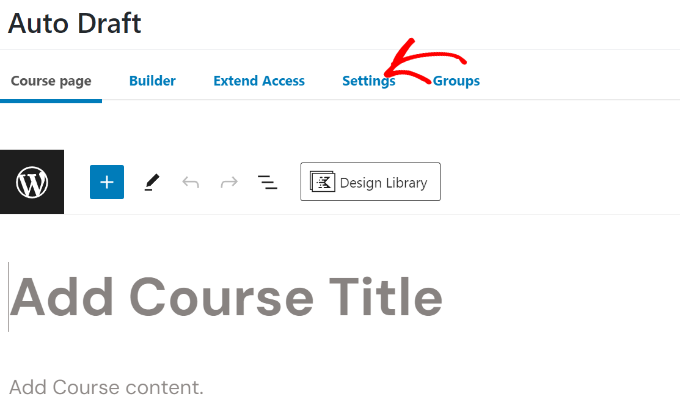
After that, you need to switch to the ‘Settings ‘tab in the course builder.
From here, simply scroll to the ‘Access Mode’ section. The plugin allows you to create open (public), free, buy now, recurring, and closed course types.
If you select the ‘Buy now’ option, then you’ll need to enter a course price. Only users that subscribe will be able to access your course pages.
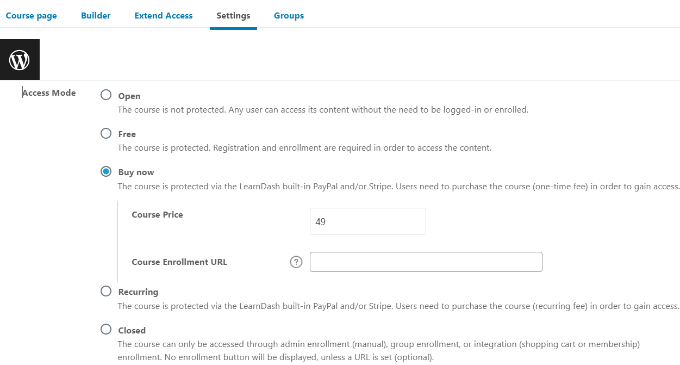
For free courses, your users will still need to enroll in the course by creating an account.
You can now save or publish your course and preview it on your website.
Now that you have created a course, it is still empty. To fill it out, you will need to add the course contents, such as lessons, quizzes, and assignments.
LearnDash is a powerful tool for selling online courses while restricting access to content. It works really well with MemberPress to create subscription plans that automatically give users access to different courses.
That’s all for now. We hope this article helped you learn how to easily restrict WordPress pages by user role. You may also want to see our ultimate step-by-step WordPress security guide for beginners and must have WordPress plugins for business websites.
If you liked this article, then please subscribe to our YouTube Channel for WordPress video tutorials. You can also find us on Twitter and Facebook.


Syed Balkhi says
Hey WPBeginner readers,
Did you know you can win exciting prizes by commenting on WPBeginner?
Every month, our top blog commenters will win HUGE rewards, including premium WordPress plugin licenses and cash prizes.
You can get more details about the contest from here.
Start sharing your thoughts below to stand a chance to win!
Mrteesurez says
While restrict contents pro offer this feature but based on what I have read about Memberpress, it’s more suitable for this kind of function as it comes with a full membership features. Thanks.
Jiří Vaněk says
Thank you for the tutorial. I have a blog that also deals with technical guides, and I’m considering how to set up a paid section. Today, many people go the route of Patreon or HeroHero, but I would like to have everything completely under the control of my website. It’s great what WordPress can do now with the help of plugins.
WPBeginner Support says
We would recommend taking a look at membership plugins for what it sounds like you’re wanting to do. Our list below should help find one that works for you
https://www.wpbeginner.com/plugins/5-best-wordpress-membership-plugins-compared/
Admin
Jiří Vaněk says
Thanks for the reply, I looked at the article, but also at the other member press topics you write about and it looks like exactly what I need. Thanks again.
Konrad says
using a plugin like those mentioned is definitely the easiest and safest way to do this
Remember, always back up your site before making any changes!
Ralph says
This is really good tutorial for membership sites. I plan on doing website with mix of free and paid articles and this is great way of doing that. Free basic articles for everybody and more advanced are only for paying members. Didn’t think this could be so easy.
WPBeginner Support says
Happy to hear we could simplify the process for you
Admin
Moinuddin Waheed says
Memberpress is the best choice when it comes to making a website where you can restrict the content based on certain users criteria.
it is specially good when it comes to making courses to sell and at the same time having some of them as free resources.
it has all the features that is required to make a good course selling website and restricting the content to the paid subscribers only.
subscription based website can easily made with this plugin.
Mike Shannon says
I am setting up a webpage for a club. I want to develop a blog page in which only I and the club president can post to but which all users can see. How can I do this? Or can I?
WPBeginner Support says
From what it sounds like, you would want your users to be admins or editors and unless others need to post on your site, they shouldn’t need more than an author role. You can see more about users and roles in our article below:
https://www.wpbeginner.com/beginners-guide/wordpress-user-roles-and-permissions/
Admin