Do you want to make a link in bio page using a WordPress site?
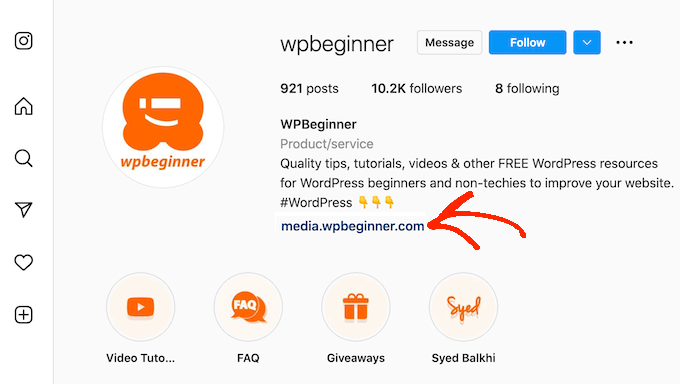
A link in bio page is a popular way to send people from social media to multiple pages on your own website. In fact, many Instagram influencers, social media celebrities, and big brands use link in bio pages to get more visitors.
In this article, we’ll show you how to easily make a link in bio page in WordPress.
Why Create a Link in Bio Page in WordPress?
Social media platforms like Instagram, Twitter, and Facebook only allow a single link in your profile. This can make it difficult to promote all your pages, sales, most popular products, and other important content.
Instead of sending users to a single page, you can create a link in bio page that sends traffic to multiple pages on your WordPress website.
There are many services that can help you create link in bio pages such as LinkTree, ContactInBio, and Bio.FM. However, by using a WordPress plugin, you can create a link in bio page without having to use a third party service.
You can even use the same plugin to create a landing page, which gives you complete control over how that page looks. For example, you can use your unique branding or color scheme.
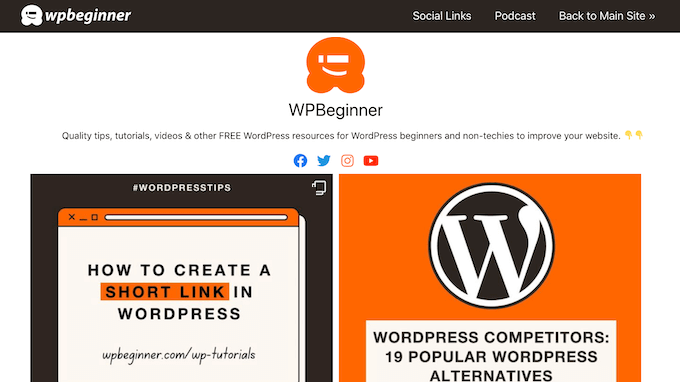
In the following image, you can see the custom link in bio page we use for WPBeginner.
You can also add Google Analytics and track the page’s conversion rates, so you can see exactly what’s working and what isn’t. You can then fine-tune the landing page to get even better results.
With that said, let’s take a look at how you can create a link in bio landing page in WordPress.
Video Tutorial
If you’d prefer written instructions, just keep reading. You can use the quick links below to navigate through the tutorial:
Step 1: Install and Set Up SeedProd
The easiest way to create a link in bio page is by using SeedProd.
SeedProd is the best drag-and-drop page builder that allows you to create custom pages in WordPress without having to write any code.
SeedProd has 90 ready-made blocks and over 180 professionally-designed templates. This includes a ‘Personal Links’ template that’s perfect for creating a WordPress link in bio page.
For this guide, we’re going to focus on making an Instagram bio link page. However, you can use the same page design for any social media network.
First thing you need to do is install the SeedProd plugin. For more details, see our step-by-step guide on how to install a WordPress plugin.
Note: There is also a free version of SeedProd that you can use, but we’ll be using the Pro version since it has more features and templates. Plus, if you sell products online then SeedProd pro also integrates with WooCommerce.
Upon activation, go to SeedProd » Settings and enter your license key.
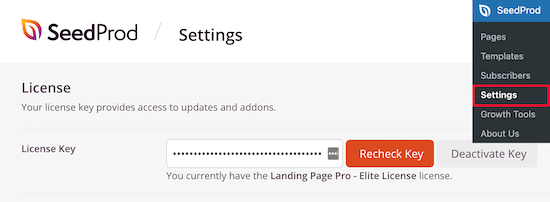
You can find this information under your account on the SeedProd website. After entering your license, click on the ‘Verify Key’ button.
Step 2: Choose a Professionally-Designed Template
To create a landing page, head over to SeedProd » Landing Pages and then click the ‘Add New Landing Page’ button.
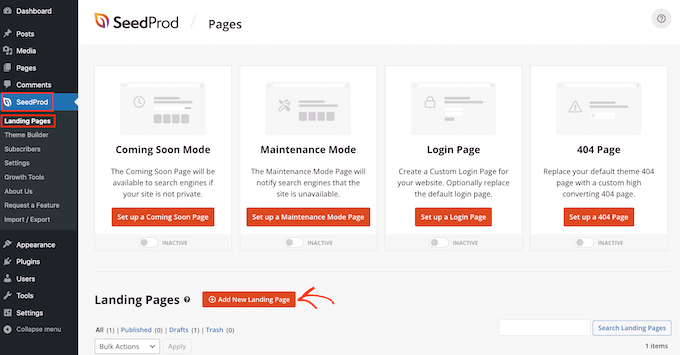
You can now choose a template for your new page.
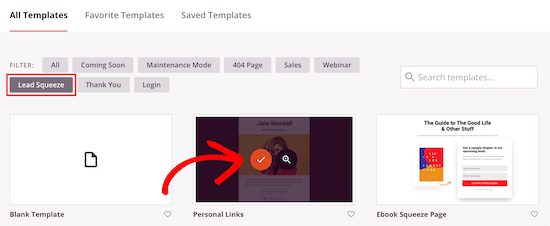
SeedProd’s templates are organized into different campaign types such as coming soon, thank you, and sales pages. You can click on the tabs at the top of the screen to look at the templates for the different campaign types.
To create a link in bio page, click on the ‘Lead Squeeze’ tab and then hover your mouse over the ‘Personal Links’ template. When it appears, click on the orange ‘Checkmark.’
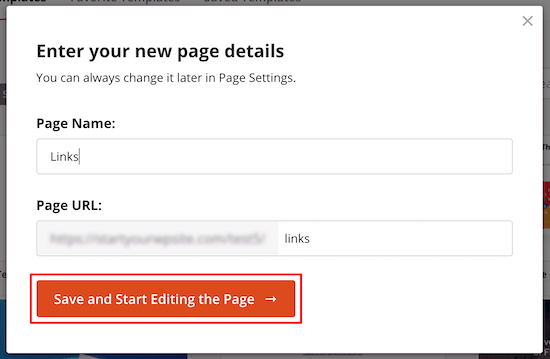
Next, go ahead and type in a name for the link in bio page. SeedProd will automatically create a URL based on the title you type in, but you can change this URL to anything you want.
A descriptive URL will help search engines understand what the page is about, so they can show it to the right users. With that in mind, you may want to change the web address.
For example, you might include some relevant keywords or phrases that you want your link in bio page to rank for, as this can improve your WordPress SEO.
After that, click the ‘Save and Start Editing the Page’ button.
Step 3: Customize the Link In Bio Template
After choosing a template, SeedProd will open that design in its drag-and-drop editor.
You’ll see a live preview of your page on the right, and some settings on the left.
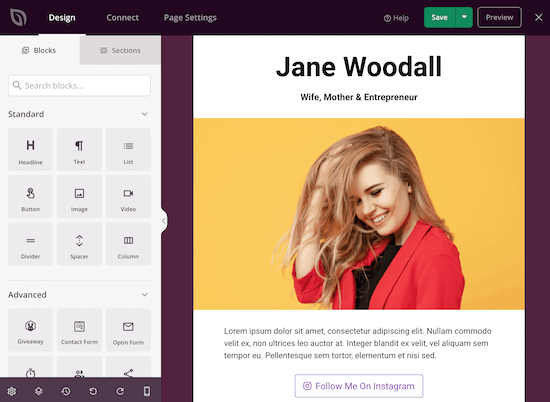
The Personal Links template already comes with some blocks, which are a core part of all SeedProd designs.
To customize any of these ready-made blocks, simply click to select the block in your layout. You can then customize the block using the settings in the left-hand menu. For example, in the following image, we’re changing the text in the ‘Headline’ block.
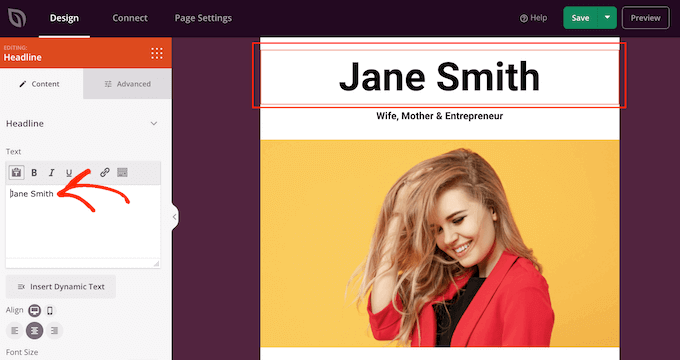
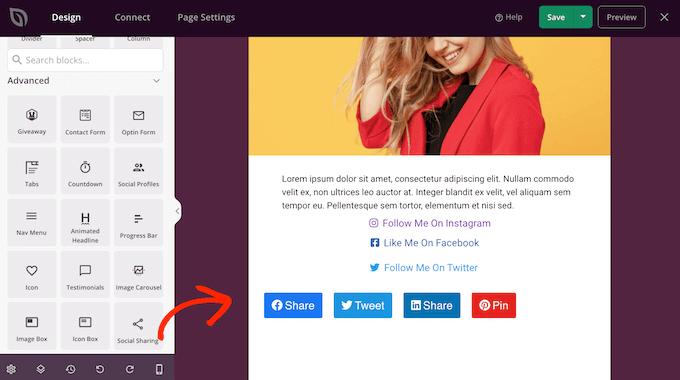
To add a new block to your design, simply find the block in the left-hand menu. Then, drag it onto your layout.
You can now customize the block following the same process described above.
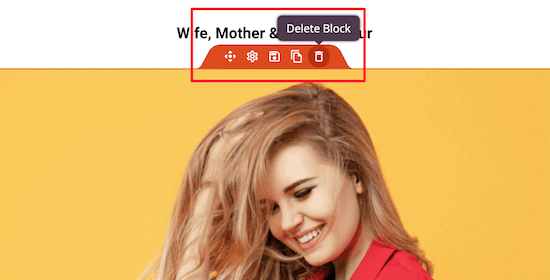
Since you’re creating an Instagram bio link page, start by deleting the main image and the placeholder text.
To do this, just hover your mouse over the image. Then, click on the ‘Trash Can’ icon and select ‘Yes, delete it!’
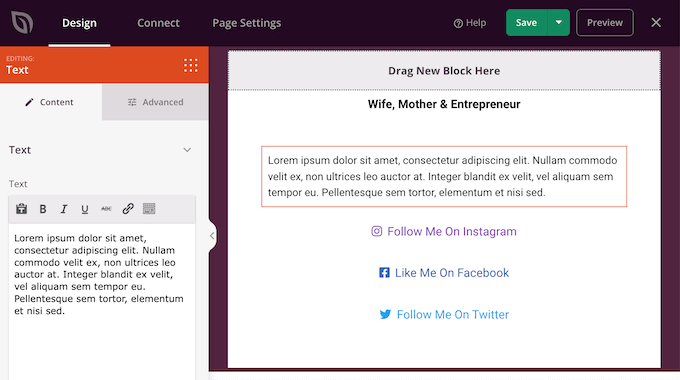
After that, follow the same steps to delete the placeholder text.
This gives you a very simple page layout, which is perfect for creating a link in bio page.
Next, you can replace the header with your name, business name, or even upload your own custom logo.
Step 4: Add Your Company Logo
To add a logo to the top of the page, drag an Image block from the left-hand menu and drop it onto your layout.

Once you’ve done that, click to select the ‘Image’ block in your layout.
Then, select ‘Use Your Own Image’ from the left-hand menu and either choose an image from the media library or upload a new file from your computer. The process is exactly the same as adding an image in WordPress.
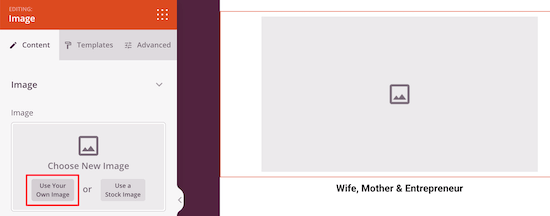
After adding an image, you can use the settings on the left to change the image’s size, alignment, and more.
You can even add a link that goes to your homepage, or any other page on your WordPress blog. To do this, simply type an address into the ‘Link’ field.
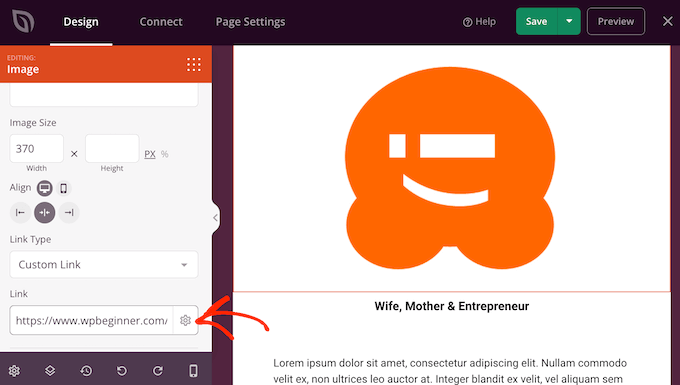
To really make the image stand out, you can add a CSS animation or use a box shadow.
Step 5: Add Links to Your Bio Page
By default, the template has three links. You’ll want to replace these with links to your own content, such as your custom home page, latest sales page, or any other important content.
To start, click to select each placeholder URL. Then, type a new URL into the ‘Link’ field.
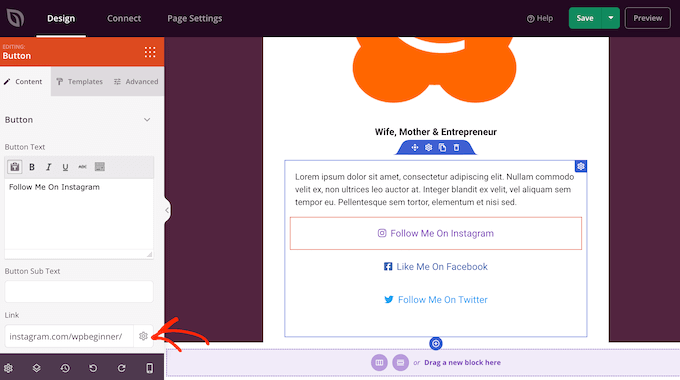
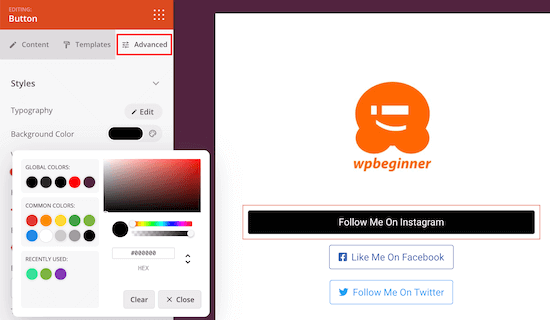
You can also use these settings to change the button text, size, alignment and more. If you want to change the button’s overall design, then go ahead and click on ‘Templates.’
Here, you’ll find lots of different button designs to choose from.
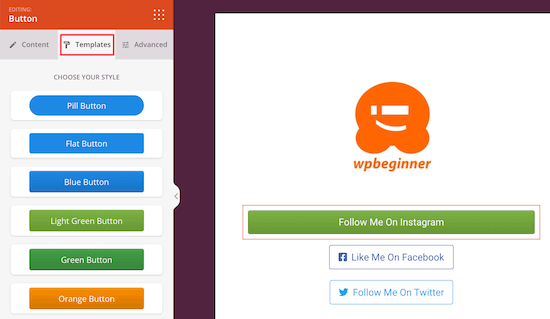
If you want to further customize the button, then click on the ‘Advanced’ tab.
Here you can change the size of the button, use a different background color, and more.
Step 6: Test the Mobile Version of Your Design
According to our internet usage statistics, over 90% of the global internet population uses a mobile device to go online. With that in mind, it’s important to design for smartphones and tablets, and not just desktop computers.
The good news is that SeedProd is fully mobile-responsive, so all the pages you create will look great on mobile devices.
To preview how the link in bio page will look on mobile devices, simply click on the ‘Mobile Preview’ button at the bottom of the left-hand menu.
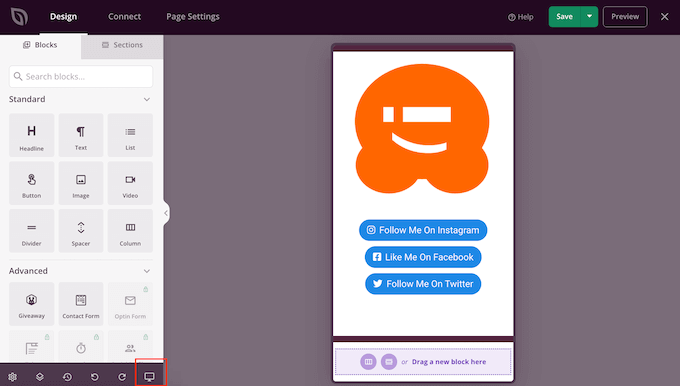
When you’re happy with how the bio page looks, click ’Save.’
To make your page live, click the arrow next to ‘Save’ and select the ‘Publish’ option.
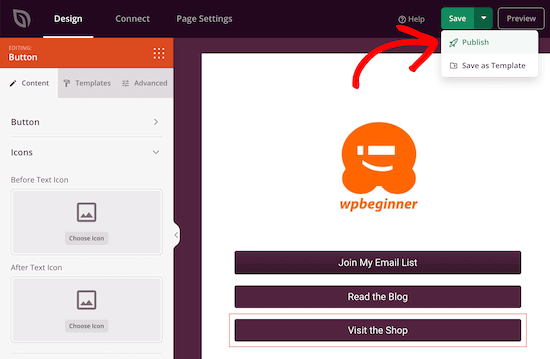
Your link in bio page is now live, and you can add the link to all your social media profiles.
Bonus: Add Analytics to Your Link in Bio Page
Services like LinkTree also offer page analytics to help you figure out what’s working, and spot any areas where you can improve.
This might mean fine-tuning your link in bio page or changing other activities, such as how you promote that page. In this way, you can increase pageviews and reduce bounce rate.
When you create your own link in bio page, you’ll need to add your own analytics.
MonsterInsights is the best Google analytics plugin for WordPress and shows your WordPress site’s stats directly in the WordPress dashboard. This allows you to see how your link in bio page is performing at a glance.
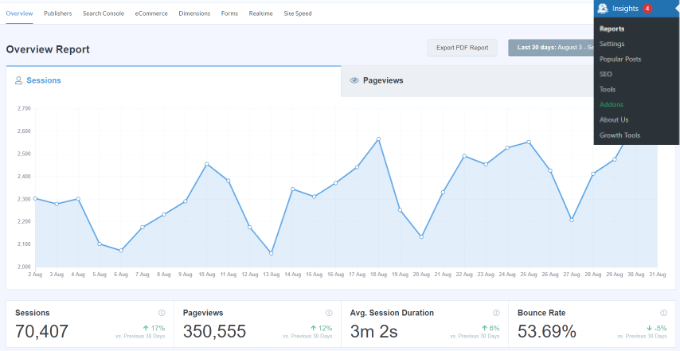
You can even track link clicks and button clicks on your link in bio page.
Note: There is a free version of MonsterInsights, but we’ll be using the pro version since it has more reports and shows your analytics in real-time. It also has the Page Insights addon, which allows you to see how a specific page is performing.
For more details, see our step-by-step guide on how to install Google Analytics in WordPress.
Once you’ve set up MonsterInsights and Google Analytics, you’ll need to install the Page Insights addon, as this allows you to see how the link in bio page is performing. Simply go to Insights » Addons in your WordPress dashboard.
Then find ‘Page Insights’ and install and activate the addon.

After that, go to Page » All Pages and find the link in bio page you created.
Here, click on ‘Insights,’ which is the icon that looks like a graph.

This will bring up the page’s statistics including the bounce rate, number of entrances, time spent on page, and more.
You can use this insight to increase the traffic to your link in bio page.
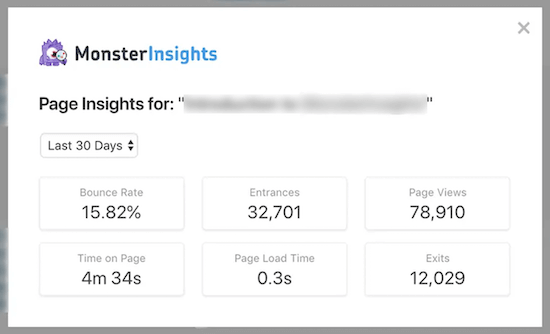
If you’ve only just launched your link in bio page, then MonsterInsights may not show your data straight away so don’t panic if this page is blank at first.
We hope this article helped you make a link in bio page in WordPress. You may also want to see our guide on how to add social media feeds to WordPress and our expert picks of the best email marketing services for small businesses.
If you liked this article, then please subscribe to our YouTube Channel for WordPress video tutorials. You can also find us on Twitter and Facebook.


Syed Balkhi says
Hey WPBeginner readers,
Did you know you can win exciting prizes by commenting on WPBeginner?
Every month, our top blog commenters will win HUGE rewards, including premium WordPress plugin licenses and cash prizes.
You can get more details about the contest from here.
Start sharing your thoughts below to stand a chance to win!
Dennis Muthomi says
QUESTION…is there a way to track how many clicks each individual link/button on the link in bio page is getting?
being able to see that analytics data would be super useful for optimizing which links to feature more prominently.
awesome tutorial btw
WPBeginner Support says
For tracking link clicks we have our guide below!
https://www.wpbeginner.com/wp-tutorials/how-to-track-link-clicks-and-button-clicks-in-wordpress/
Admin
NaNa says
Thank you, it was really helpful. I have already made the link page for two of my sites.
WPBeginner Support says
Glad our guide was helpful
Admin
Amit chopra says
This is very useful information for those who do not want to use third-party platforms including me as well.
Jonny says
Nice..it was helpful