Do you want to add an event registration page on your WordPress site?
Offering event registration allows users to sign up and buy tickets online for their events. You can create a distraction-free landing page for your event and get more conversions.
In this article, we will show you how to easily create an event registration page in WordPress and sell tickets online.
Why Create an Event Registration Page in WordPress?
There are plenty of third-party event registration and ticketing tools available in the market. You can also add Facebook events to your WordPress site.
However, many third-party event registration and ticketing services will charge a small fee for each ticket you sell. This quickly adds up, and you could end up paying a lot more than expected.
You will have limited options to promote your event on social media and even on your own website. Some WordPress event signup services will insist on displaying their branding in your event emails, widgets, and tickets.
You can avoid some of these issues by creating your own event registration page in WordPress. This will allow you to collect online payments directly, store attendee information on your website, and use your own brand name when promoting the event.
That being said, let’s take a look at how to easily create an event registration page in WordPress.
Creating an Event Registration Form in WordPress
To start, you’ll need to create an event registration form to add to your page. The best way to do that is by using WPForms. It is the best WordPress contact form plugin that is beginner-friendly.
Using the WordPress event signup plugin, you can also create all types of forms without editing code.
The first thing you need to do is install and activate the WPForms plugin. For more details, see our step-by-step guide on how to install a WordPress plugin.
Do note that you’ll need at least their Pro plan to access the premium addons, additional form templates, and more customization features. There is also a WPForms Lite version you can use for free.
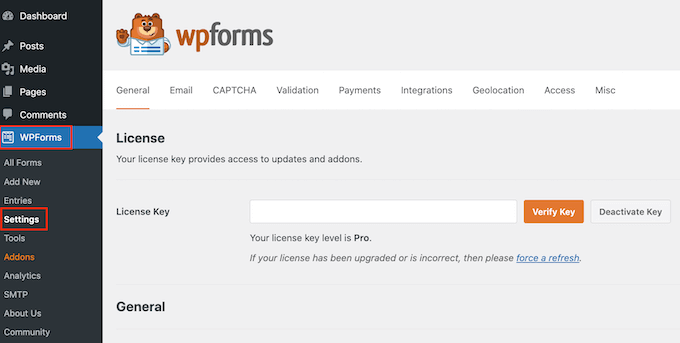
Upon activation, you can head to WPForms » Settings from your WordPress dashboard and enter your license key. You can find the key in the WPForms account area.
Next, you’ll need to activate a payment service addon in WPForms to accept payments.
Simply head over to WPForms » Addons from your WordPress dashboard and navigate to the PayPal addon. Go ahead and click the ‘Install Addon’ button.
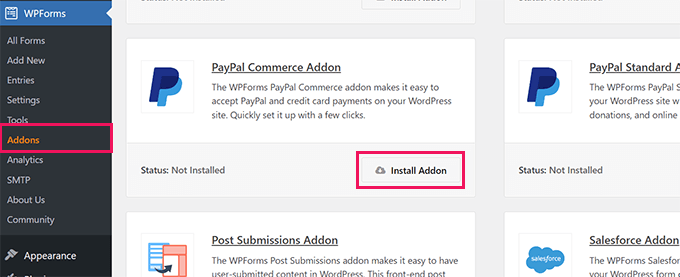
The addon will now automatically install and activate. You can repeat this step for other payment addons like Stripe and Authorize.Net.
Next, you can head to WPForms » Settings from your WordPress dashboard and click on the ‘Payments’ tab. From here, you can connect your PayPal and Stripe accounts.

Simply follow the onscreen instructions to connect your payment gateway.
Now, you are ready to create a new form in WPForms.
You can visit the WPForms page in your WordPress admin area and click on the ‘Add New’ button.

Next, you will need to enter a title for your event registration form and pick a template.
WPForms offers lots of prebuilt form templates. You can choose a template for event registration and easily customize it.
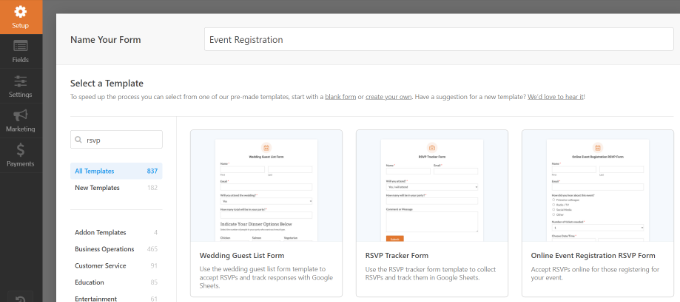
For this tutorial, we will use the Online Event Registration Form template.
After that, you can use the drag-and-drop form builder to edit the form. You can add new form fields from the column on your left.

You can also point and click on any field to edit or delete it.
For instance, if you click the ‘Number of tickets needed’ form field, then you will see more options in the left menu. You can change the choice and label of the form field.

After that, you can add a form field to collect online payments.
We will add the Stripe Credit Card field to the form template for this tutorial.

Next, you can head to the ‘Payments’ tab in the WPForms form builder and select your payment service.
For instance, we will select Stripe and then click the ‘Enable Stripe payments’ toggle. You can do the same for other services like PayPal, Authorize.Net, and Square.

After setting up payments, let’s set up notification emails for both you and your users.
Simply go to Settings » Notifications and click on the ‘Add New Notification’ button.

A popup window will now open.
Go ahead and enter a name for your new notification and click the ‘OK’ button.

In the ‘Send To Email Address’ section, you need to select the user’s email from Smart Tags to send the ticket receipt.
From the dropdown options, simply select Email.

Now, you need to scroll down to view more options.
For instance, you can go to the Message section and add your custom message with the fields that you created for registration.

Next, WPForms also lets you change the confirmation settings for your form. Simply head to Settings » Confirmations from the form builder.
You can show a message or a page, or you can redirect users to a specific URL when they submit an event registration form. You can display this form on any page on your WordPress website.
Let’s create a new event registration page in WordPress to display the form.
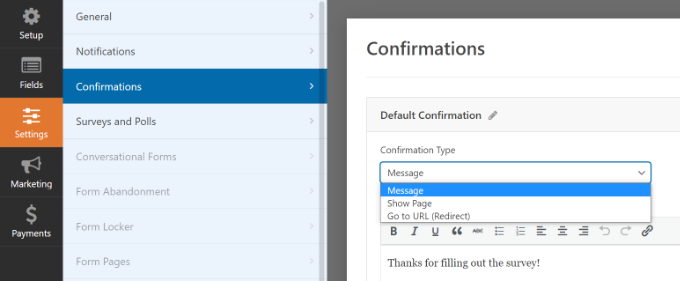
Once you are done, don’t forget to save your changes.
Now, let’s add the registration form to a page in WordPress.
Creating Event Registration Page in WordPress
WPForms offers multiple ways to embed forms on your WordPress blog. It even lets you create a distraction-free landing page or embed your form anywhere on your website.
We will show you both methods.
Create a Distraction Free Event Registration Page
WPForms offers ‘Form Pages’ that allow you to create a custom landing page for your event registration form.
First, you’ll need to go to WPForms » Addons from your WordPress admin area and install the Form Pages Addon.

Once the addon is active, you can go WPForms » All Forms from your dashboard.
From here, simply edit your event registration form.

Next, you can go to Settings » Form Pages in the form builder.
After that, simply click the ‘Enable Form Page Mode’ toggle.

Here, you can enter a page title that will appear at the top. There is also an option to add a description for your form.
If you scroll down, you’ll see more options to customize the event registration page. For instance, you can edit the page URL, upload a logo, add footer text, select a background color for the page, and choose a style.

When you are done, you can preview the page and simply click the ‘Save’ button.
Now, just visit your event registration page URL to see the form in action.

Embed the Event Registration Form on any WordPress Page
WPForms also lets you easily embed the form on any page on your site.
You can click the ‘Embed’ button in the form builder to get started.
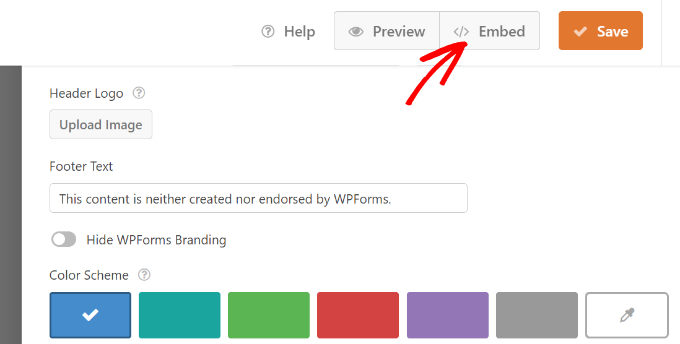
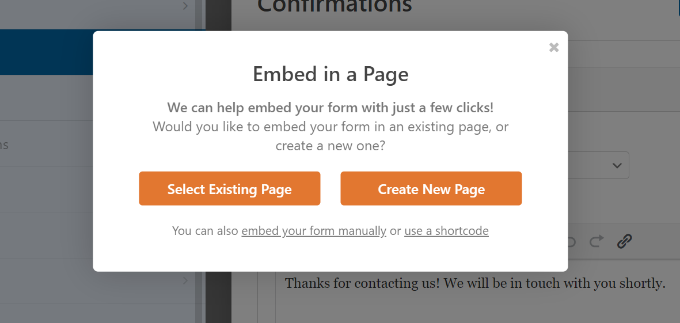
After that, a popup window will open where you can select an existing page or create a new page to add your event registration form.
For this tutorial, we will select the ‘Create New Page’ option.
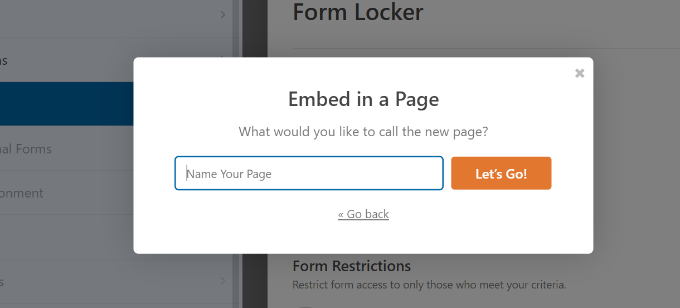
Next, you will need to enter a name for your page.
Once that’s done, simply click the ‘Let’s Go’ button.
You should now see a preview of your form in the WordPress content editor.
Another way of adding the form is by using the WPForms block. Simply click the ‘+’ button to add the WPForms block.
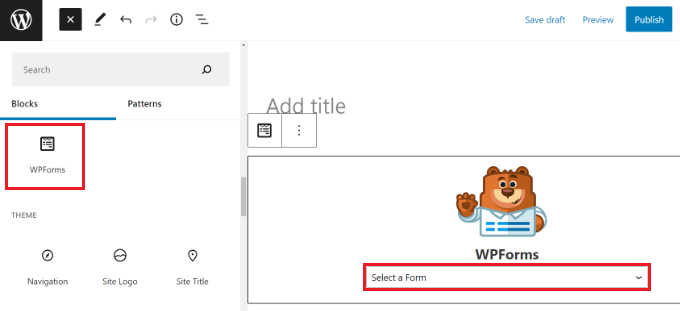
After that, you can click the dropdown menu in the WPForms block and select the event registration form.
Your form will load in the WordPress content editor.

Once you are satisfied with the look and feel of the page, go ahead and publish your page.
You can now visit your website to see the event registration page in action.

We hope this article helped you learn how to create an event registration page in WordPress. You may also want to see our list of best email marketing services and the ultimate guide to boosting WordPress speed & performance.
If you liked this article, then please subscribe to our YouTube Channel for WordPress video tutorials. You can also find us on Twitter and Facebook.


Syed Balkhi says
Hey WPBeginner readers,
Did you know you can win exciting prizes by commenting on WPBeginner?
Every month, our top blog commenters will win HUGE rewards, including premium WordPress plugin licenses and cash prizes.
You can get more details about the contest from here.
Start sharing your thoughts below to stand a chance to win!
Raghu Koorthy says
Hi, Thanks for the info on Event Registration Page, which helped me. I request you to create a tutorial if there is any way we can generate unique tickets for the people who registered and purchased tickets in wordpress.