Do you want to automatically tweet when you publish a new post in WordPress?
Twitter is one of the best platforms to let your followers know when you publish a new blog. By tweeting new WordPress posts automatically, you can save time while growing your followers and getting more people to visit your website.
In this article, we will show you how to automatically send a tweet when you publish a new post in WordPress.

Why Automatically Tweet New Blog Posts on Twitter?
With more than 217 million monthly active users, Twitter is a great place to engage with your audience and build a following.
In fact, according to our marketing statistics research, users spend around 2 hours and 29 minutes on social media every single day. That’s a huge opportunity to promote your blog posts.
However, it can be time-consuming to manually tweet every time you publish a new post on your WordPress blog.
By using a tool that automatically shares new posts for you, you can keep your Twitter feed active and interesting, no matter how busy you get.
That said, let’s look at how you can automatically post tweets when there are new blog posts on your WordPress website.
Video Tutorial
If you’d prefer written instructions, just keep reading. You can use these quick links to navigate through the steps:
Step 1: Set Up the Uncanny Automator Plugin
The easiest and most reliable way to add a Twitter autoshare feature in WordPress is by using Uncanny Automator. It’s the best WordPress automation plugin that helps you create automated workflows without having to write code.

Think of Uncanny Automator like Zapier but for WordPress websites. It seamlessly integrates with all the must-have WordPress plugins and third-party tools.
For this guide, we will be using the Pro version of Uncanny Automator, as it includes the X/Twitter integration. However, feel free to check out the free version to explore what the plugin is like.
To automatically tweet new WordPress posts, you need to install and activate the Uncanny Automator plugin. For more details, follow our tutorial on how to install a WordPress plugin.
Upon activation, you must first activate your Uncanny Automator Pro license key, which you will get after purchasing a Pro plan.
Simply go to Automator » Settings and insert the license key in the appropriate field.
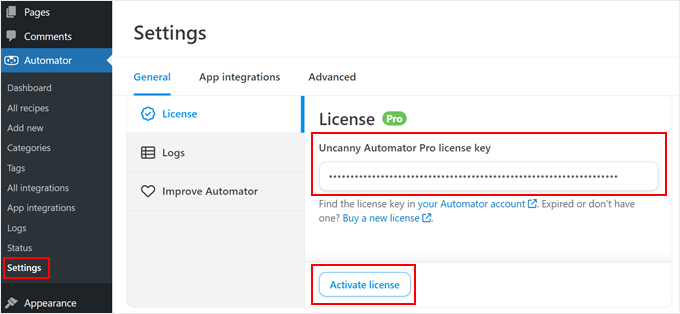
After that, just click ‘Activate License.’
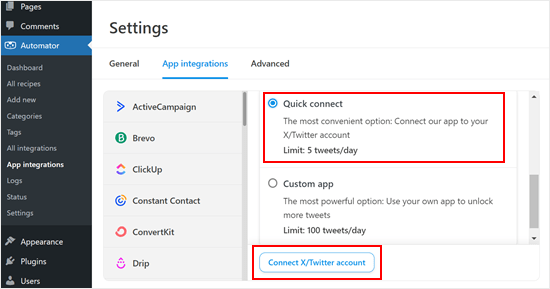
Next, click on the ‘App Integrations’ tab and select ‘X/Twitter.’
You will now select one of the connection methods: Quick connect or Custom app. With Quick connect, you will simply connect Automator to your Twitter app account and get a limit of 5 tweets per day to post.
The Custom app lets you use your own developer app to connect Automator to your Twitter account. You will get a limit of 100 tweets per day. However, we only recommend this option if you have some API knowledge.
For this tutorial, we’ll use Quick connect. Once you’ve selected that, go ahead and click ‘Connect X/Twitter account.’
This opens a popup where you can type in the username or email address that’s linked to your Twitter account, along with your Twitter password.
After that, click on the ‘Authorise app’ button.
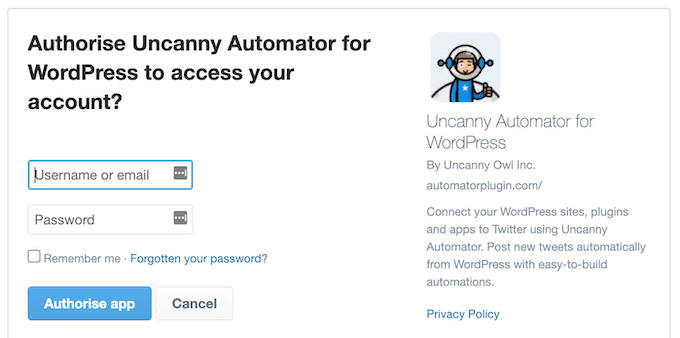
You will be redirected back to the Uncanny Automator settings page.
Step 2: Create an Automated Workflow
Now, you are ready to create a recipe that will automatically send tweets when you publish a new blog post.
To start, simply head over to Automator » Add New. You’ll be asked to select whether you want to create a recipe for logged-in users or everyone.
You can go ahead and select ‘Logged-in users’ and then click the ‘Confirm’ button.
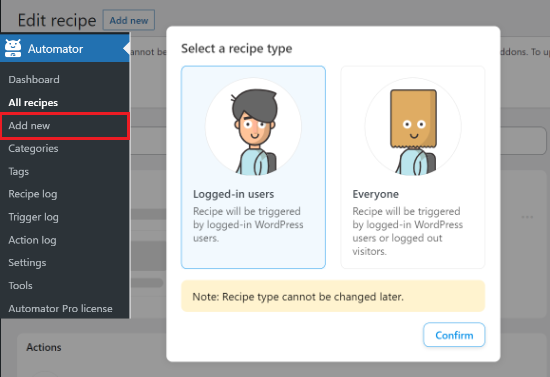
Next, you can give the recipe a name by typing it into the ‘Title’ field. This is just for your reference, so you can use anything you want.
Uncanny Automator recipes are made up of actions and triggers. To start, you will need to choose a trigger, which is anything that kickstarts the recipe.
In the ‘Triggers’ section, select ‘WordPress.’
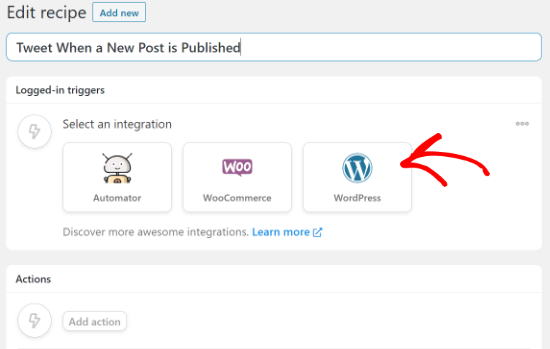
You will now see all the different WordPress triggers.
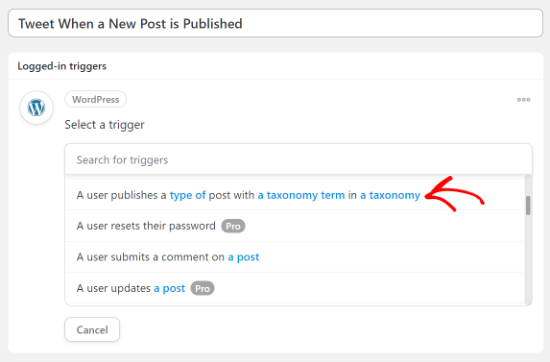
In the dropdown, select ‘A user published a type of post with a taxonomy term in a taxonomy.’ This option allows you to send a tweet whenever someone publishes a blog post in a specific category.
Next, open the ‘Post type’ dropdown and choose the content you want to share on Twitter.
For example, if you want to share all blog posts, then simply choose ‘Post.’ You can then decide if you are going to share posts from a particular category or tag by changing the ‘Taxonomy’ settings.
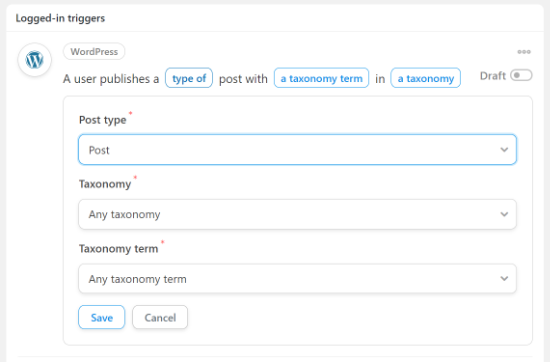
When you are done, click on the ‘Save’ button.
Next, you will need to choose the action, which is the task Uncanny Automator will perform when the recipe is triggered. In our case, that’s sharing the post on Twitter.
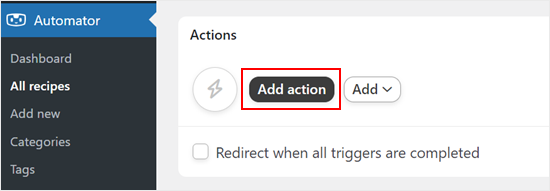
To start, click on the ‘Add action’ button.
You will now see all of Uncanny Automator’s integrations. For example, there’s a Twilio integration that lets you send SMS notifications from WooCommerce.
Simply go ahead and select ‘X/Twitter’ as your integration.
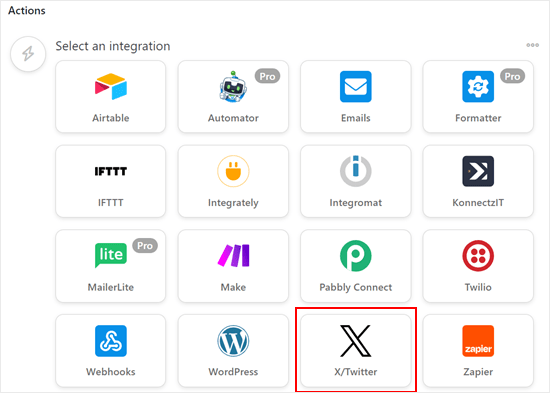
By default, you can only select the ‘Post a tweet to X/Twitter’ action.
Once you’ve chosen that, go ahead and write a template message for your automatic tweets in the Status box.
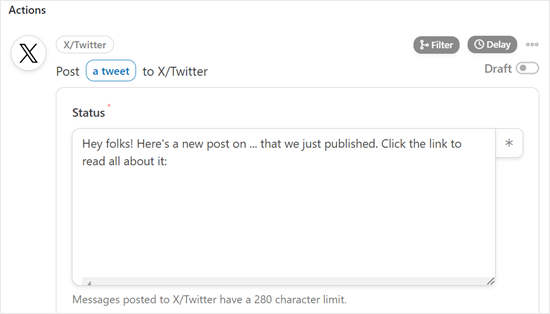
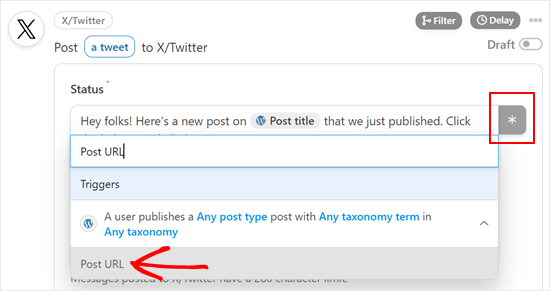
You can type plain text, or you can use placeholder tokens for the Status. Uncanny Automator will automatically replace placeholder tokens with unique text, such as the post’s title.
To add a token to your Twitter status, simply click on the ‘*’ and then search for the information you want to add, such as ‘Post title’ and ‘Post URL.’
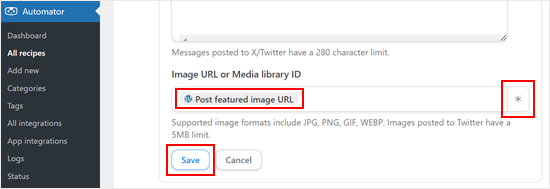
If you want to add the same image to every tweet, then you can simply paste that picture’s URL into the ‘Image URL’ field. For example, you may want to add your website’s custom logo to every tweet.
Another option is to show the post’s featured image. To do this, click on the ‘*’ button next to the ‘Image URL or Media library ID’ field and select ‘Post featured image URL.’
When you are happy with how the recipe is set up, don’t forget to click the ‘Save’ button.
Step 3: Publish and Preview Your Automated Workflow
At this point, you are ready to publish the recipe.
In the ‘Recipe’ box, click the ‘Draft’ switch so that it shows ‘Live’ instead.
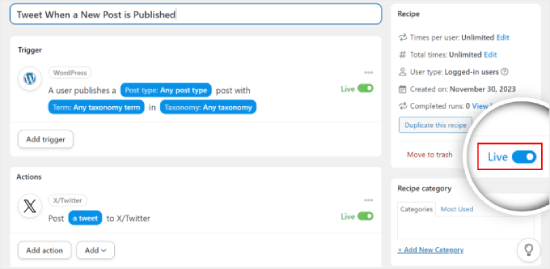
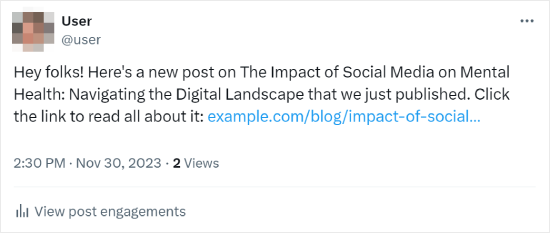
That’s it! Now, Uncanny Automator will automatically tweet every time you publish a new blog post on your WordPress website.
You can test it out by publishing a test blog post and see if Twitter actually sends a new tweet automatically.
For more tips and tricks on using Uncanny Automator, you can check our other complete guides:
- How to Create Automated Workflows in WordPress
- How to Automatically Publish from WordPress to Instagram
- How to Use AI to Boost Your Marketing (Expert Tips)
- How to Automatically Post to Facebook From WordPress
Bonus Tip: Display a Twitter Feed on Your WordPress Website
So, you’ve learned how to tweet your new posts automatically. Now, you might be thinking about showing your Twitter feed on your website. It’s a fantastic idea to keep your visitors hooked and informed about your latest tweets.
The easiest way to do this on WordPress is with the Smash Balloon plugin. It has a lot of cool features, like being able to match the look and feel of your Twitter feed to your website’s design.
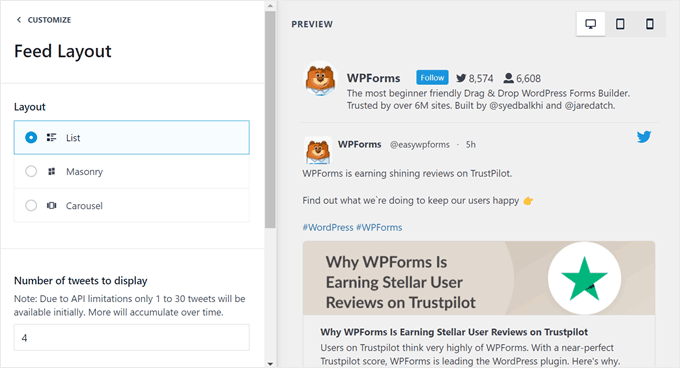
Plus, Smash Balloon offers responsive feed layouts, so your Twitter feed will look great on all devices.
For more information, check out our Smash Balloon review.
We hope this article has helped you send automatic tweets when you publish new posts in WordPress. You may also want to look at our ultimate guide on how to add web push notifications to your WordPress website and our expert picks for the best social media plugins.
If you liked this article, then please subscribe to our YouTube Channel for WordPress video tutorials. You can also find us on Twitter and Facebook.


Syed Balkhi says
Hey WPBeginner readers,
Did you know you can win exciting prizes by commenting on WPBeginner?
Every month, our top blog commenters will win HUGE rewards, including premium WordPress plugin licenses and cash prizes.
You can get more details about the contest from here.
Start sharing your thoughts below to stand a chance to win!
Jiří Vaněk says
Thanks for the tutorial. Until now, I have been manually uploading every article to the Twitter site. This saves me quite a bit of time on some sites.
WPBeginner Support says
Glad our guide could help
Admin
Rubie Maxon says
I have been following your website for a long time now… I find you ideas brilliant. Keep it up!
WPBeginner Support says
Thank you, glad you’ve been following our content
Admin
Nick says
Hi,
I have a WordPress events listing website and I have set up an auto poster to tweet the event.
is there a way to send a retweet that eventorganizer or venue to let them know about the WordPress post
Is there a standard shortcode that is used?
Thanks in advance
(I have already been able to use shotcode to set up event title and URL in the auto tweet)
Olaf Rowas says
Thank you very much for your post with the step-by-step manual. With the hints in your manual it was really easy to connect my blog with twitter.
Sushant Kumar says
Can we get event if new posts has been published on wordpress to call some function or api.
Dr. Diana Hardy says
Thanks a lot for help
Anirban Pathak says
This is a great article . I really like this post and the simplicity of it’s implementation. Personally, I use IFTTT to query a handful of feeds from my site to update Twitter.
T Nichols says
What’s the benefit of using this versus the Publicize feature in WP that also allows you to automatically share your posts on Twitter?
WPBeginner Support says
Publicize feature is only available to users on WordPress.com or those using JetPack plugin.
Admin
Taylor McRae says
I really like this post and the simplicity of it’s implementation. Personally, I use IFTTT to query a handful of feeds from my site to update Twitter.
Karen McCamy says
While Tweeting your latest post is a common request among “bloggers” and web site owners, something many web site owners don’t think about is the impact if you have your own email newsletter (and you should be collecting email names and building your own in-house list)!
IF you Tweet every new post, no one needs to subscribe to your newsletter!
If you are both Tweeting and asking for NL subscribes, you could be hurting your own goals, so it would be best to carefully evaluate which option is better for you. Which route you go also depends upon your site goals and purpose, of course.
All I’m saying is to carefully evaluate IF Tweeting every post is the best process for YOU!
WPBeginner Support says
Karen we do agree that may be not every post needs to be tweeted. However, we do not agree with the assumption that tweeting the same posts which you are going to include in your newsletter is in any way less effective. Twitter streams give your tweet a very limited exposure time. As soon as a user’s timeline gets new tweets from other people they follow, your tweet will most likely get buried, reducing your chances of getting noticed or clicked. On the other hand, repetition of your brand name, post title, and your updates, help you build brand recognition, trust, and authority. For more exposure we recommend building an email list.
Admin
Vinh says
A Good tut! thanks you so much!