Do you want to display your Facebook page reviews in WordPress?
Reviews and ratings can help you gain the trust of potential customers and encourage them to buy from your website. If you have a Facebook page, then you may already have lots of reviews that you can easily embed in your WordPress website.
In this article, we will show how to easily display Facebook page reviews and ratings on your WordPress website.

Why Display Facebook Page Reviews in WordPress?
Reviews can help you build social proof and gain the website visitors’ trust, which means more sales for your business.
There are lots of ways to collect customer feedback, including using the best customer review plugins for WordPress or the best customer testimonial plugins.
However, Facebook has its own built-in review system. If you already have a Facebook page, then followers can review your products and services on that platform.
It’s also a good idea to show these reviews on your WordPress website. That way, people can see all your positive reviews, even if they don’t visit your Facebook page.
With that in mind, let’s see how to display your Facebook page reviews in WordPress.
How to Display Your Facebook Page Reviews in WordPress
The best way to add Facebook reviews to your WordPress website is by using Smash Balloon’s Reviews Feed Pro.
It is the best customer review plugin for WordPress and lets you show reviews from Facebook, Google, Yelp, and TripAdvisor without having to install an extra WordPress plugin or needing an API.
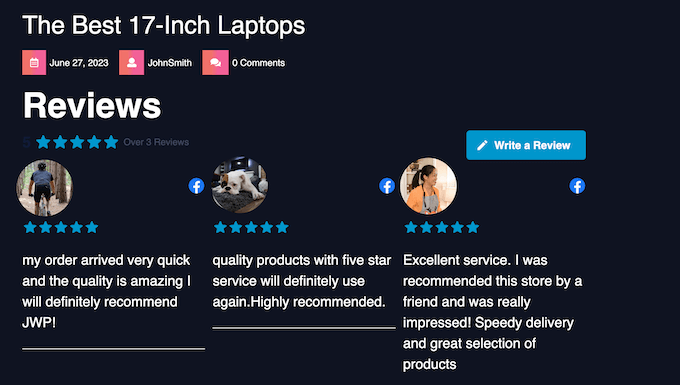
Even better, the feed will update automatically as customers post new reviews to your Facebook page. This means potential customers will always see the latest reviews without you needing to add them manually.
Reviews Feed Pro also copies your site’s design and WordPress theme, so the Facebook reviews look like a natural part of your website rather than content embedded from an external social media platform.
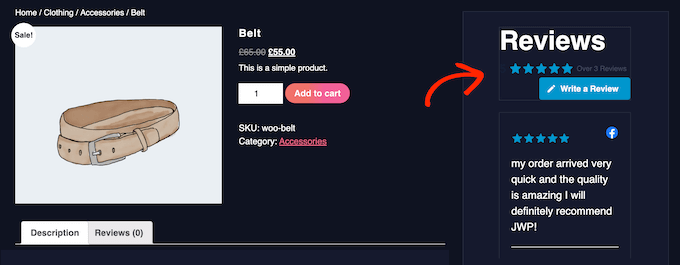
There’s also a free version of Reviews Feed that allows you to display reviews from Google and Yelp. However, you need to upgrade to the Pro version to access Facebook reviews.
Set Up the Reviews Feed Pro Plugin
First, you will need to install and activate the Reviews Feed Pro plugin. If you need help, then please see our step-by-step guide on how to install a WordPress plugin.
Upon activation, click on Reviews Feed in the left-hand menu. You can now add the plugin license key and click on the ‘Activate’ button.
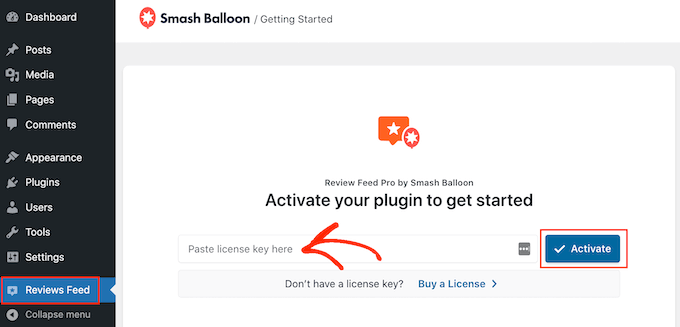
You will find the license key in your account on the Smash Balloon website.
Connect Smash Balloon to Your Facebook Page
Now, you are ready to connect your Facebook page to your WordPress blog. This may sound complicated, but Reviews Feed Pro will walk you through the process.
To get started, visit the Reviews Feed » All Feeds page from the WordPress dashboard and click on ‘Add New’.
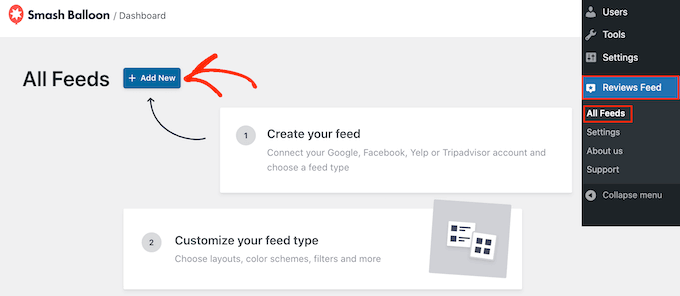
Reviews Feed Pro is an advanced plugin that can show Facebook, Yelp, and Google reviews easily.
To display your Facebook page reviews, go ahead and click on ‘Facebook’. Then, select ‘Connect with Facebook’.
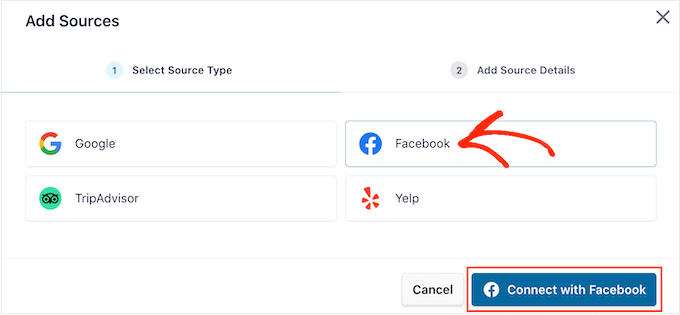
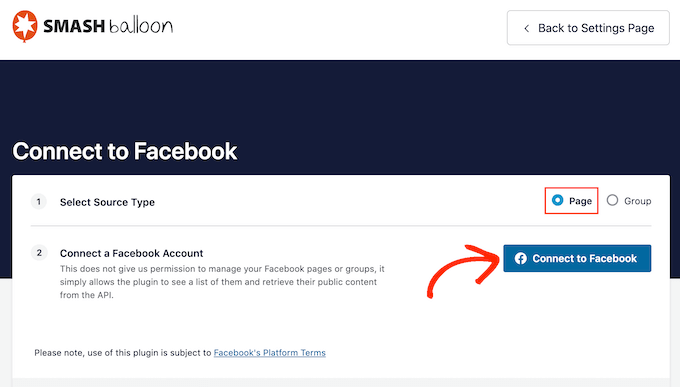
With that done, select the radio button next to ‘Page’.
Then, just click ‘Connect to Facebook’.
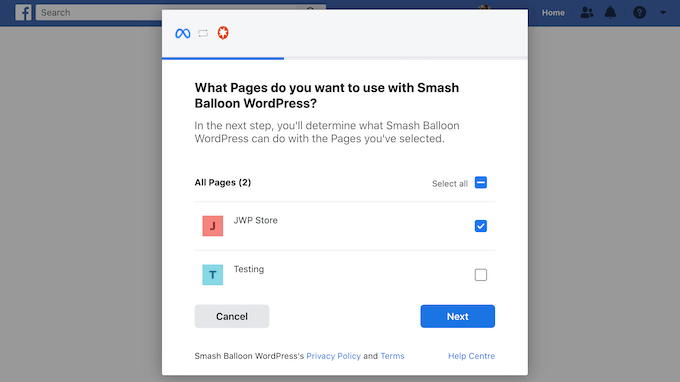
This opens a popup where you can log in to your Facebook account and choose one or more pages which you will get the reviews from.
After that, simply click on ‘Next’.
Facebook will now show all the information that Smash Balloon will have access to and the actions it can perform.
To restrict Smash Balloon’s access to your Facebook page, just click any switch to turn it from ‘Yes’ to ‘No’.
Just be aware this may affect the reviews that appear on your WordPress website. That said, it’s a good idea to leave all the switches enabled.
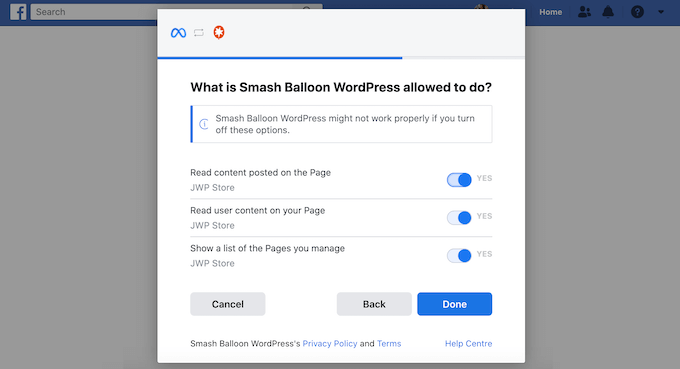
When you are happy with how the Facebook permissions are set up, select ‘Done’.
After a few moments, you will see a message confirming that you have connected your WordPress blog to your Facebook page.
When that’s done, just click on the ‘OK’ button.
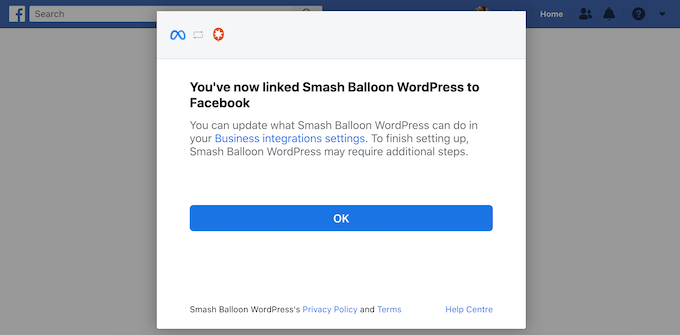
Reviews Feed Pro will now take you back to the WordPress dashboard automatically.
Create a Facebook Review Feed for WordPress
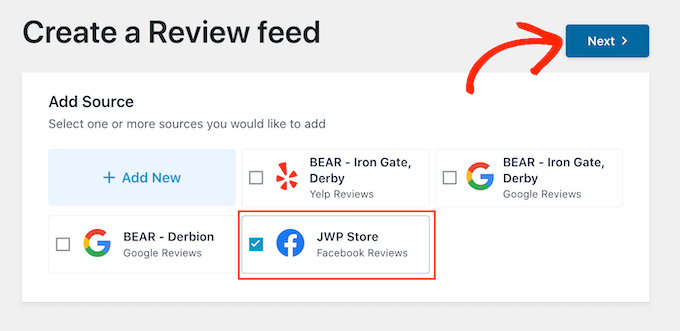
You are now ready to create a feed showing all the reviews from your Facebook page.
To do this, simply check the box next to your Facebook page and then click ‘Next’.
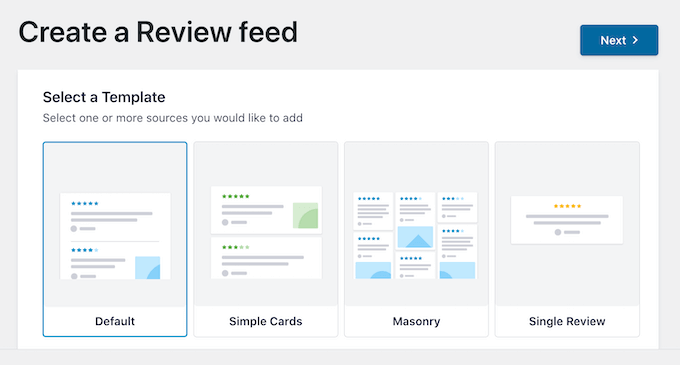
You can now choose the template you want to use for your page reviews. For example, you may want to highlight a single review or show multiple reviews in a masonry layout.
After making a decision, click on ‘Next’.
Smash Balloon will now go ahead and create the feed and then open it in the editor, ready for you to customize.
Customizing Your Facebook Review Feed
Smash Balloon automatically copies your site’s design, so the feed should already fit perfectly with your WordPress theme. However, you can fine-tune every part of the feed to get exactly the design you want.
The editor shows a live preview of your review feed to the right. On the left is a menu that shows the different settings you can use to change how the Facebook reviews look.
Most of these settings are self-explanatory, but we will quickly look at the major areas. To get started, click on ‘Layout’ in the left-hand menu.
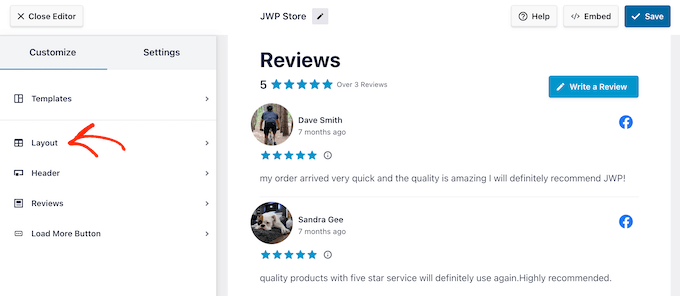
Here, you can choose from a Grid, Masonry, or Carousel layout.
As you click on the different options, the live preview will automatically update to show the new layout. In this way, you can try different layouts to see what looks the best.
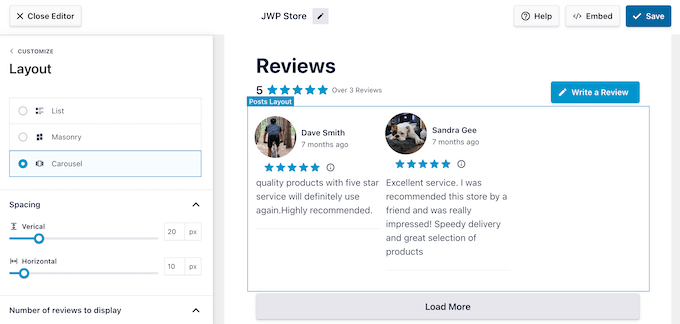
You can also change the spacing, how many Facebook reviews to display in the feed, and the number of characters WordPress shows from each review.
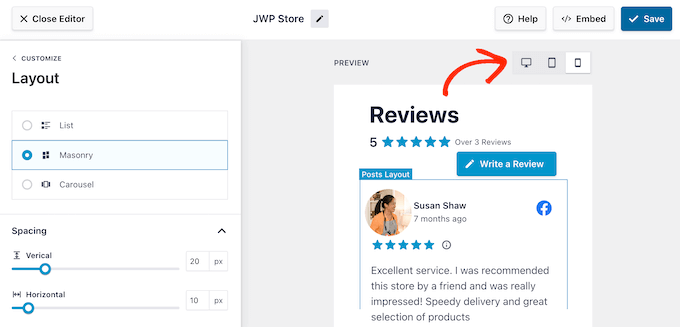
As you make changes, remember the feed may look different on smartphones and tablets compared to desktop computers.
With that in mind, it’s a good idea to test the mobile version of your review feed using the row of buttons in the right-hand corner. In this way, you can create a Facebook review feed that looks just as good on smartphones and tablets as it does on desktop computers.
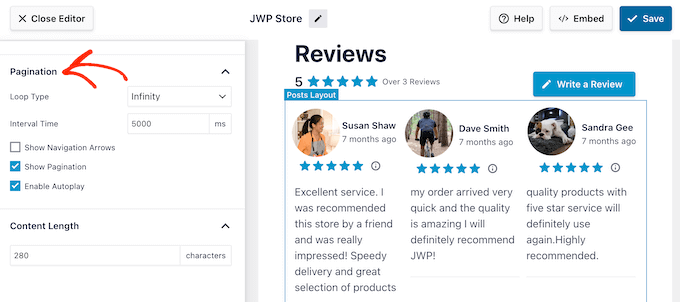
If you use the Carousel layout to create a responsive slider, then you can change how the reviews scroll using the ‘Pagination’ settings.
For example, you can enable autoplay so that the reviews scroll automatically or make the interval longer so that customers have more time to read each Facebook review.
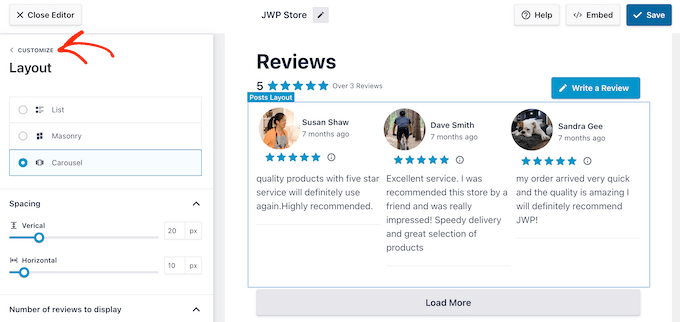
When you are happy with these changes, just click on the small arrow next to ‘Customize’.
This takes you back to the main settings screen.
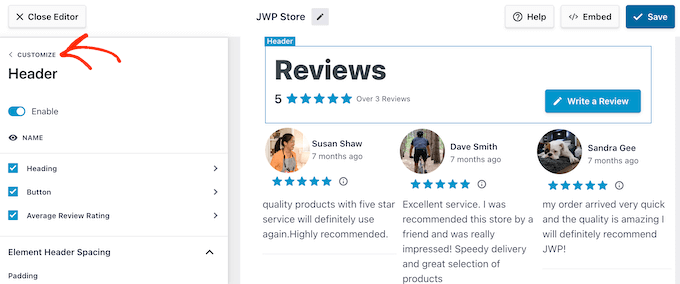
The next option is ‘Header’, which controls the text that appears at the top of your Facebook review feed.
By default, Smash Balloon shows a ‘Review’ headline, your average star rating, the total number of reviews, and a ‘Write a review’ button.
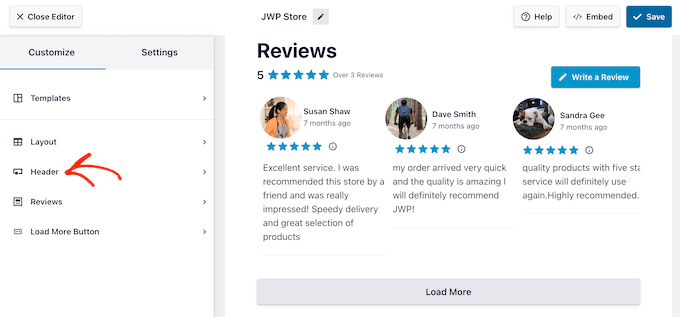
To remove a piece of content, simply uncheck any of the Heading, Button, or Average Review Rating boxes.
Another option is to change the padding and margins using the settings under ‘Element Header Spacing’.
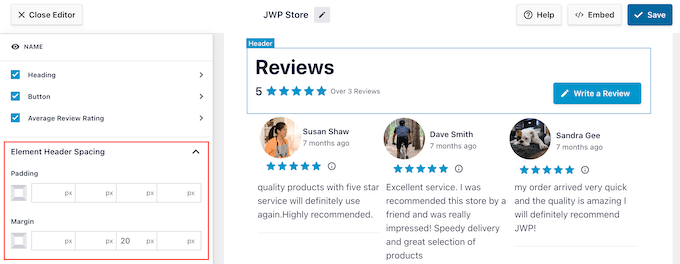
Do you want to customize the header text? Then simply click on Heading, Button, or Average Review Rating, depending on the content you want to change.
This takes you to a screen where you can change the text color, size, and more.
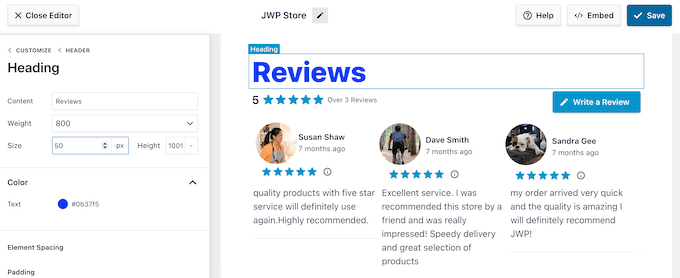
You can also replace the default text with your custom messaging by typing into the ‘Content’ field.
After making these changes, simply click on the ‘Header’ link to return to the previous screen.
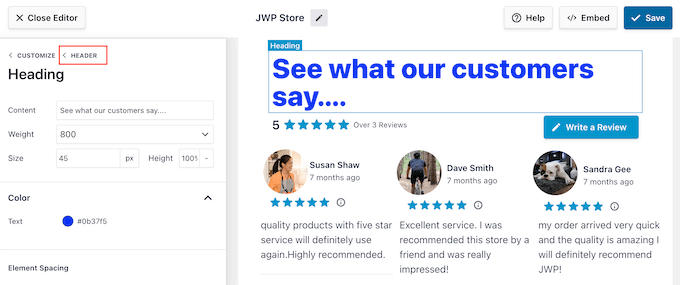
The default Facebook header provides some useful context while also encouraging visitors to write their own reviews.
For that reason, we recommend leaving the header enabled. However, if you prefer, then you can remove the header by clicking the ‘Enable’ toggle.
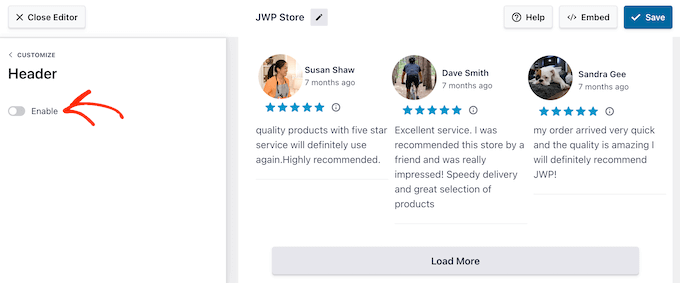
Ready to return to the main editor screen?
Then simply click on the ‘Customize’ link.
The next setting is ‘Reviews’, so give this option a click.
Here, you can choose between ‘Post Style’ and ‘Edit Individual Elements’.
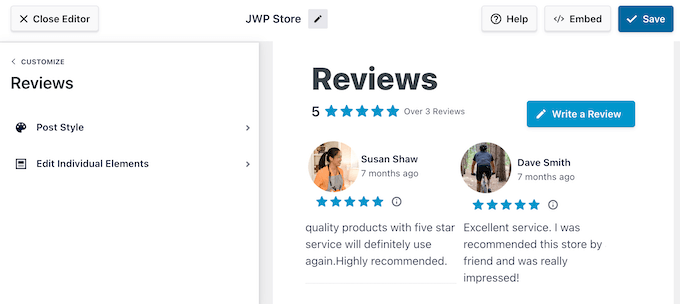
If you select ‘Post Style’, then you can change how the individual reviews look inside the feed.
For example, you can switch to a boxed layout, add a box shadow, and change the corner radius to create curved edges.
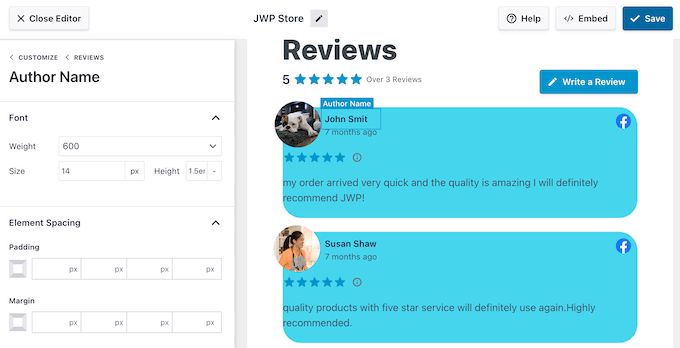
As always, the preview will update automatically, so you can try different settings to see what looks the best.
When you are happy with how the feed looks, simply click on the ‘Reviews’ link to return to the previous screen.
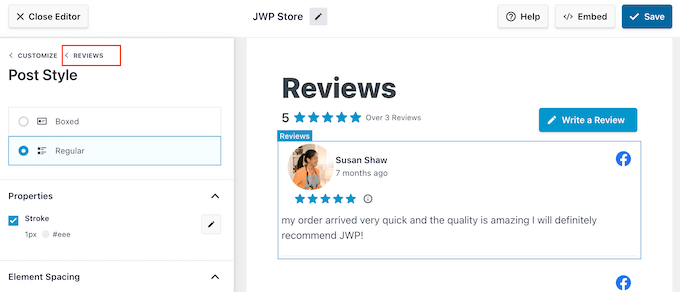
This time, select ‘Edit Individual Elements’. You will now see all the different content that Reviews Feed Pro includes in each review, such as the rating, author and date, images, and review text.
You can add and remove this content to show exactly the information that visitors need to see. To do this, simply check and uncheck the different boxes.
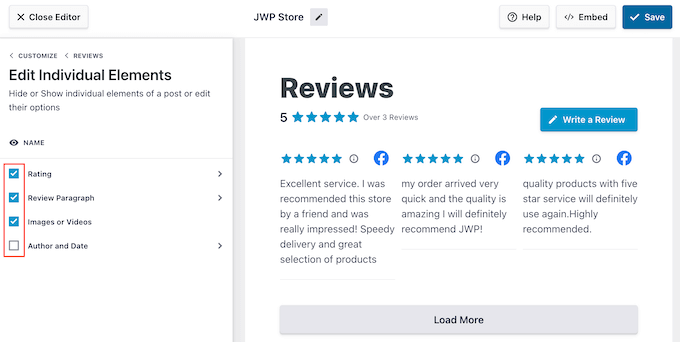
You can also customize the different content by clicking on it.
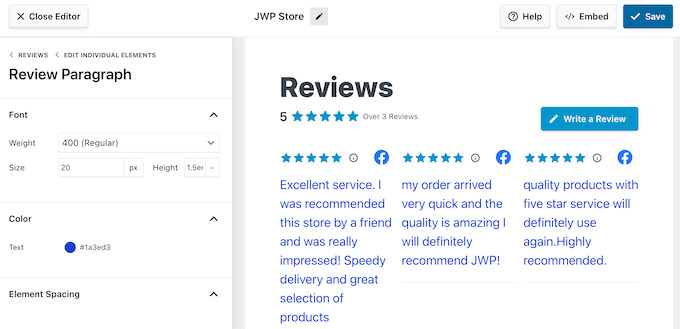
For example, in the following image, we have changed the color and size of the review content, known as the ‘Review Paragraph’. In this way, you can draw the visitor’s attention toward the most important information.
When you are happy with how the feed looks, click on ‘Customize’ to return to the main Smash Balloon editor.
You can now select the ‘Load More Button’.
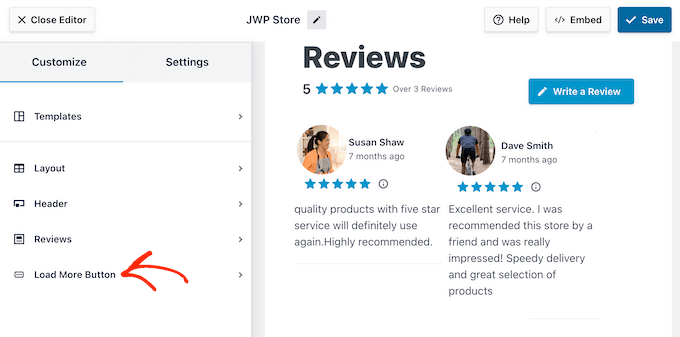
This button allows visitors to see more reviews, and Smash Balloon adds it to your feed by default. Since it’s such an important button, you may want to make it stand out by changing the background color, hover state, label, margins, and more.
You can also replace the default ‘Load More’ text with your own messaging by typing into the ‘Text’ field.
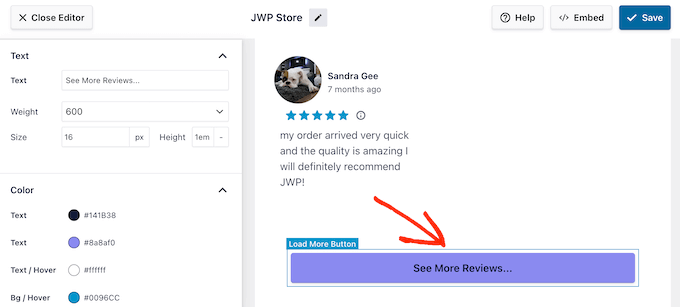
If you prefer, then you can remove the button by clicking the ‘Enable’ toggle. In this way, you can encourage people to visit your Facebook page to read more reviews.
Customize the Facebook Page Review Settings
When you are happy with how the Facebook review feed looks, you may want to change its settings.
They allow you to reorganize the reviews that appear on your site and moderate the content using filters. You can even pick individual reviews to show in the Facebook feed.
To see the available options, select the ‘Settings’ tab.
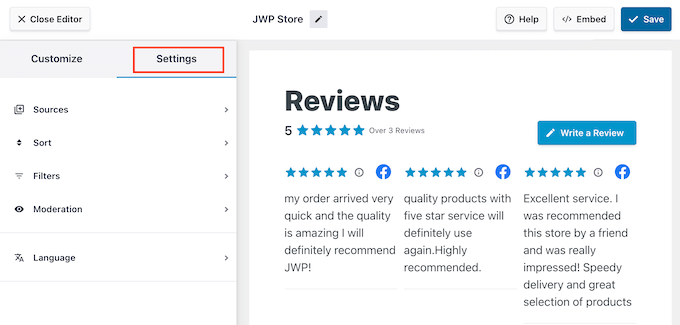
First, you may want to reorganize the reviews by selecting ‘Sort’.
Here, you can organize reviews based on date or rating.
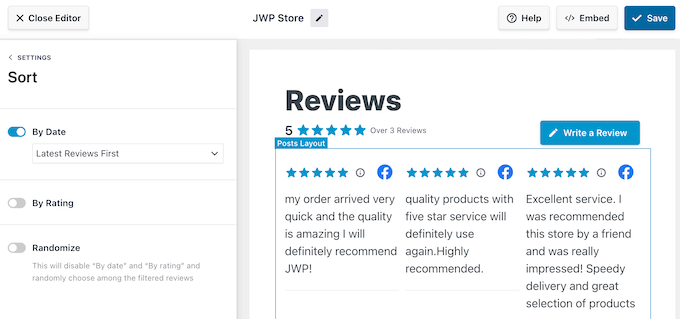
After choosing one of these options, you will get access to some additional settings.
For example, if you enable the ‘By Rating’ slider, then you can choose whether to show the highest or lowest-rated reviews first.
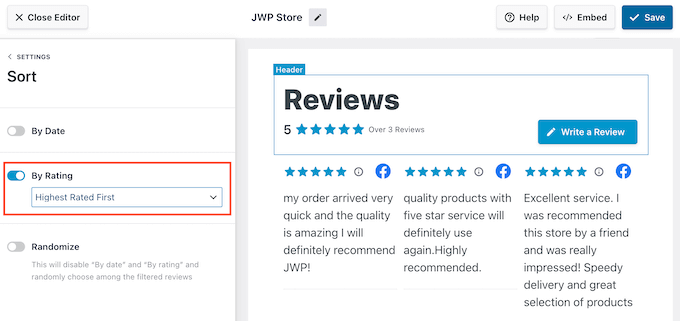
Another option is to show your Facebook reviews at random by clicking the ‘Randomize’ slider.
This can be a way to keep the feed interesting, even for regular visitors.
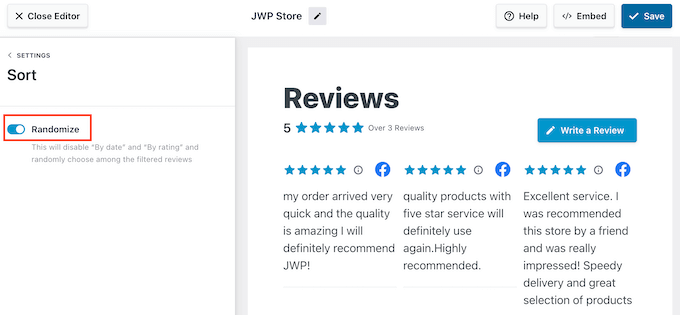
When you are happy with the order, click on the ‘Settings’ link.
This takes you back to the main ‘Settings’ tab.
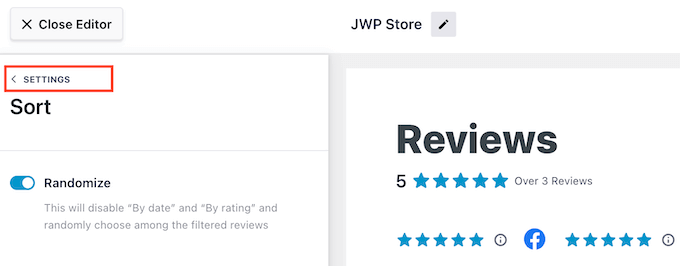
Next, you may want to filter the reviews that appear on your WordPress site by selecting ‘Filters’.
To start, you can choose whether to show reviews that have a certain star rating.
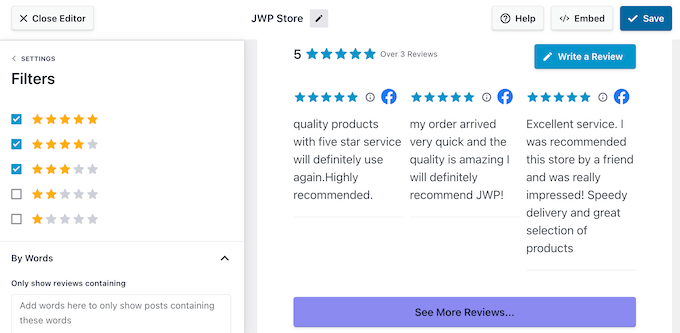
In this way, you can show the best reviews to potential customers and get more sales. However, if you only display positive reviews, then some visitors may see you as less trustworthy, which can damage your conversion rates.
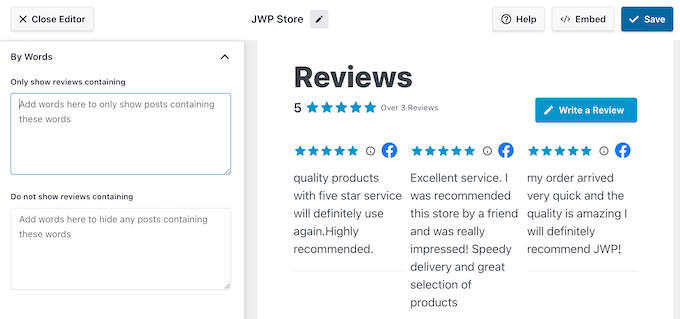
You can also filter reviews based on their content. For example, you may want to hide all reviews that include the name of your biggest competitor or offensive language.
Another option is to only show reviews that feature a specific word or phrase. For instance, if you are creating a landing page for a particular WooCommerce product, then you might only show reviews that mention the product.
To set up either of these filters, simply type the blacklisted or whitelisted words into the ‘By Words’ section.
With that done, click on the ‘Settings’ link.
The final option is ‘Moderation’, which allows you to pick the individual reviews you want to show to visitors. This gives you complete control over the Facebook review feed.
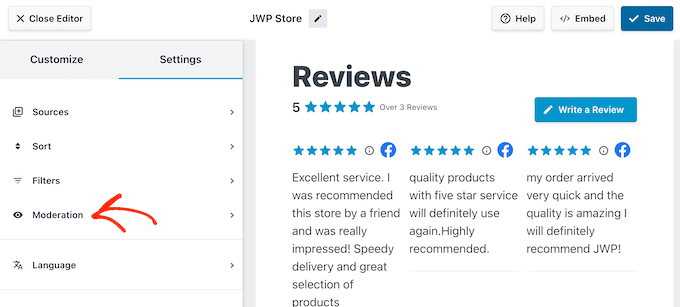
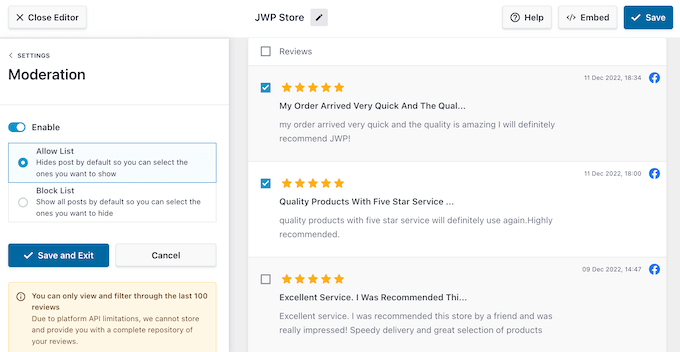
After selecting ‘Moderation’, you can choose between ‘Allow List’ or ‘Block List’.
If you select ‘Allow List,’ then you can check the box next to each review you want to show. If you choose ‘Block List’ instead, then you can check the box for every review you want to hide.
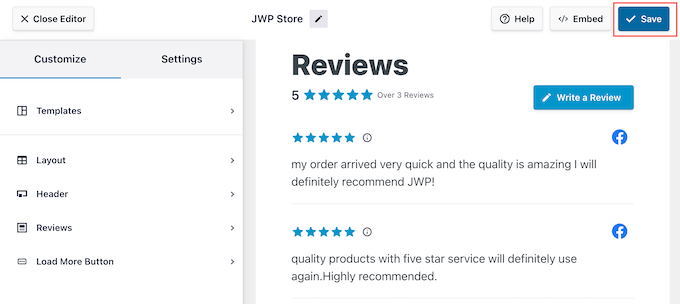
Are you happy with how the review feed is set up?
Then go ahead and click on ‘Save’ to store your changes.
With that done, you are ready to add the reviews to your WordPress website.
How to Add Facebook Page Reviews in WordPress
You can now add the review feed to your online store, blog, or website using either a block, widget, or shortcode.
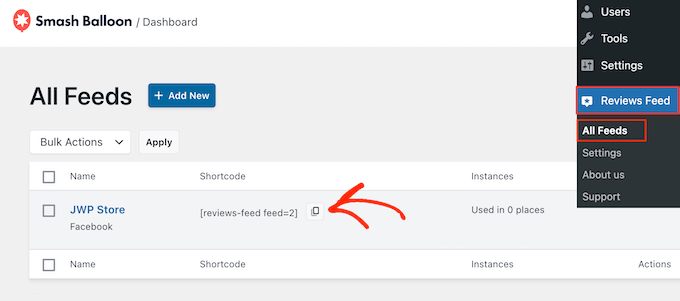
If you have created more than one feed using Reviews Feed Pro, then you will need to know the feed’s shortcode before you can use the widget or block.
To get this information, head over to Reviews Feed » All Feeds and then look at the value under ‘Shortcode’. You will need to add this code to the block or widget, so make a note of it.
If you want to embed the feed in a post or page, then we recommend using the Smash Balloon Reviews Feed block.
Just open the page or post where you want to show your Facebook page reviews. Then, click on the ‘+’ icon to add a new block and start typing ‘Reviews Feed’.
When the right block appears, click to add it to the WordPress block editor.
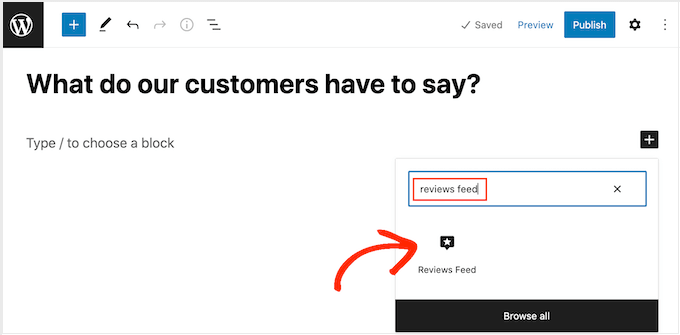
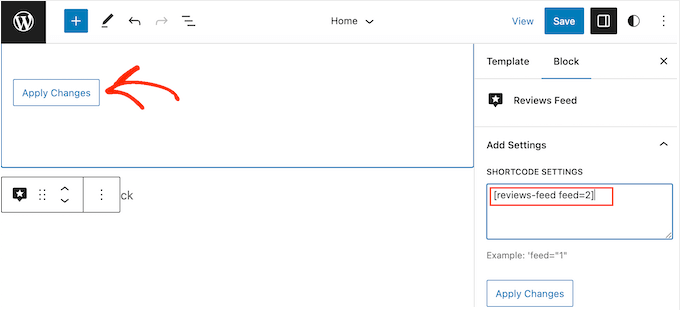
The block will show one of your review feeds by default. If you want to show a different feed, then find the ‘Shortcode Settings’ in the right-hand menu.
Here, simply add the shortcode you got earlier, and then click on ‘Apply Changes’.
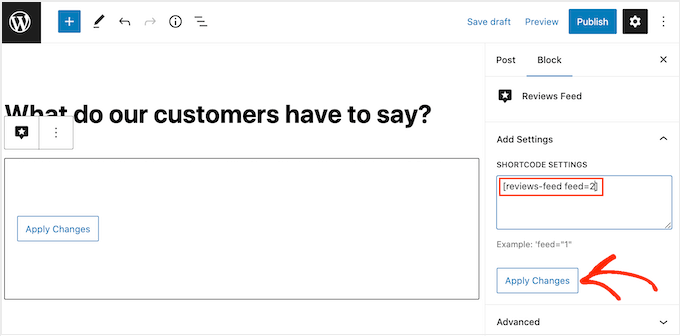
If you are happy with how the review feed looks, then you can go ahead and publish or update the page.
Another option is to add the Reviews Feed widget to your website. This is a great way to show positive customer reviews on every page and post. For example, you might add the widget to the sidebar or WordPress footer.
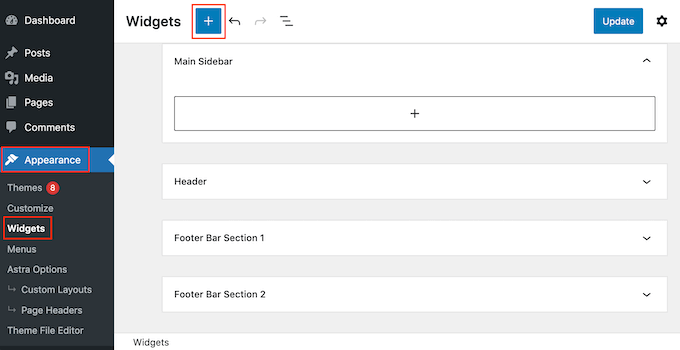
To display reviews on your site, head over to Appearance » Widgets. You can then click on the blue ‘+’ icon towards the top of the screen.
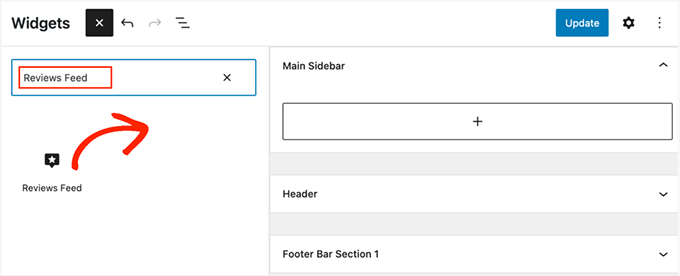
In the panel that appears, type in ‘Reviews Feed’ to find the right widget.
Then, simply drag the widget onto the area where you want to show the reviews, such as the sidebar or similar section.
The widget will automatically show one of the feeds you created using the Reviews Feed plugin. If this isn’t the feed you want to display, then type the feed’s shortcode into the ‘Shortcode Settings’ box.
After that, click on ‘Apply Changes.’
You can now make the widget live by clicking on the ‘Update’ button. For more information, please see our guide on how to add and use widgets in WordPress.
Another option is adding the Facebook review feed to any page, post, or widget-ready area using the shortcode.
For help placing the shortcode, please see our guide on how to add a shortcode.
Are you using a block theme? Then, you can use the full site editor to add the Reviews Feed block anywhere on your website. This includes areas you can’t edit using the standard WordPress content editor, such as your site’s 404 page template.
In the WordPress dashboard, go to Appearance » Editor.
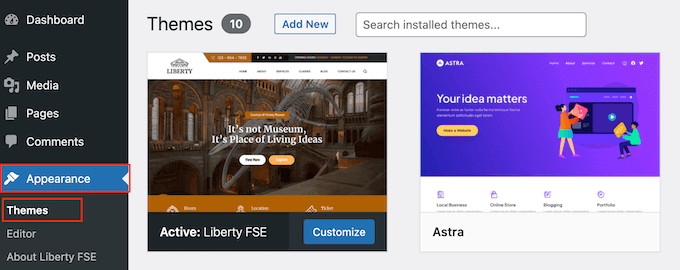
By default, the full site editor shows your theme’s home template, but you can add the review feed to any template or template part, such as the footer.
To see all the available options, select either ‘Templates’ or ‘Template Parts’.
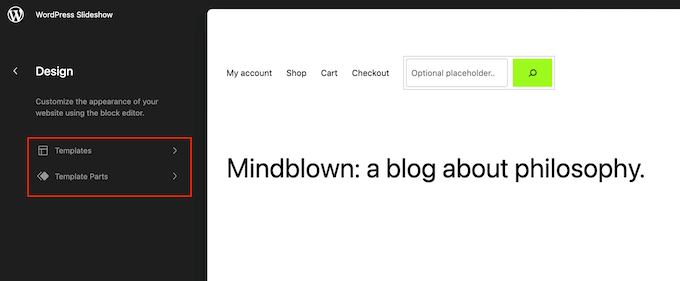
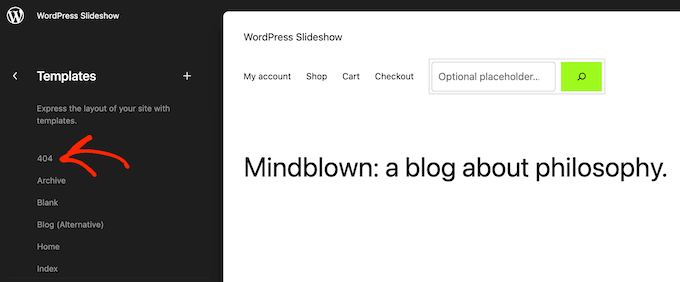
You can now click on the template or template part you want to edit.
As an example, we will add the review feed to a 404 page template, but the steps will be exactly the same no matter which template you choose.
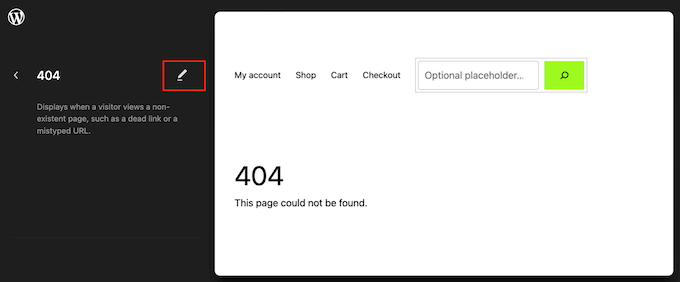
After selecting a template, WordPress will show a preview of the template or template part.
To add your Facebook page reviews to this template, click on the small pencil icon.
With that done, click on the blue ‘+’ icon in the top left corner.
In the search bar, type in ‘Reviews Feed’.
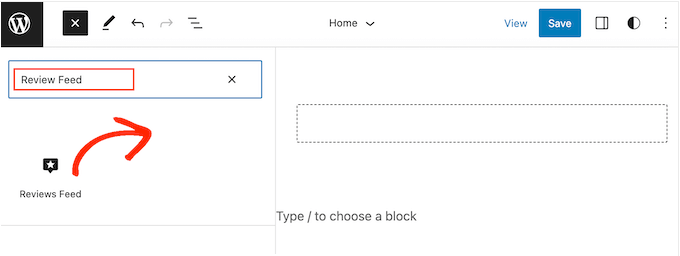
When the right block appears, drag and drop it onto the theme template.
As always, Reviews Feed will show a feed by default. To change this feed, simply add the shortcode following the same process described above.
Bonus: How to Add Google, Yelp, and TripAdvisor Reviews
Displaying your Facebook page reviews in WordPress is a great start. However, there are many different places where customers may review your business online.
Depending on your industry, you may get more reviews on other platforms besides Facebook. For example, if you have a restaurant website or run a bed and breakfast, then it often makes sense to show reviews from TripAdvisor.
With Smash Balloon Reviews Feed Pro, you can show reviews from TripAdvisor, Google, and more without installing any extra plugins.
Simply create a new feed following the process described above. When you get to the ‘Create a Review Feed’ screen, select ‘Add New’.

In the popup that appears, simply select the platform from where you want to fetch reviews, such as Google or TripAdvisor.
Then, select the ‘Next’ button.
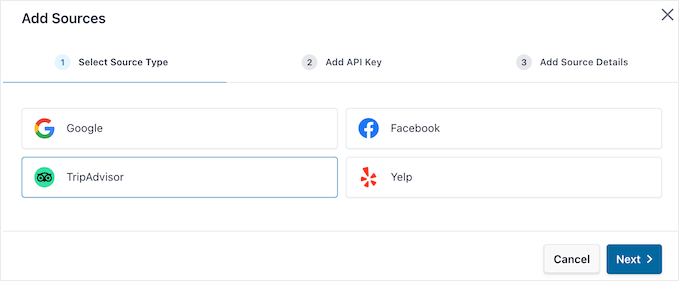
After that, Smash Balloon Reviews Feed Pro will guide you through the process of connecting WordPress to your chosen platform. For more details, see our guide on how to show Google, Facebook, and Yelp reviews in WordPress.
We hope this article helped you learn how to display your Facebook page reviews in WordPress. You may also want to see our beginner’s guide on how to create a custom Instagram photo feed and our expert picks for the best Facebook plugins for your blog.
If you liked this article, then please subscribe to our YouTube Channel for WordPress video tutorials. You can also find us on Twitter and Facebook.


Syed Balkhi says
Hey WPBeginner readers,
Did you know you can win exciting prizes by commenting on WPBeginner?
Every month, our top blog commenters will win HUGE rewards, including premium WordPress plugin licenses and cash prizes.
You can get more details about the contest from here.
Start sharing your thoughts below to stand a chance to win!
Ralph says
I would love to do that but I’m afraid they will all disappear. I have heard a rumor (for months) that facebook is going to ditch all reviews so this will be useless. Is there any confirmation about this?
WPBeginner Support says
We do not have any confirmations at the moment, Facebook would be the ones to check with for any active plans.
Admin
Kelly says
I have installed and activated the plug-in, put it in the side bar and logged in to FB (choosing my nominated page) however none of the Review & Slider Options came up, only the Facebook details, Title, Pagination, Characters before ‘ read more’ link, Widget Width etc.
WPBeginner Support says
You would want to reach out to the plugin’s support and they should be able to help check that the connection was set up correctly.
Admin
ashika gowde says
Today I learned new technic from this Blog.
Thanks