¿Desea instalar WordPress en su ordenador Windows de forma local?
Trabajar con WordPress en su ordenador le permite probar nuevas características de WordPress, aprender a desarrollar con WordPress y crear sitios web antes de migrarlos al servidor real.
En este artículo, le mostraremos cómo instalar correctamente WordPress en un ordenador con Windows utilizando dos métodos diferentes. Esto funcionará en Windows 8, Windows 10 y otras versiones de Windows también.
¿Por qué debería instalar WordPress en Windows?
La instalación local de WordPress en su ordenador le ofrece un entorno de pruebas que no afecta a su sitio web o blog. Una instalación de WordPress en su ordenador también se conoce como servidor local o localhost.
Normalmente, los desarrolladores de WordPress utilizan la instalación local de WordPress para desarrollar sus plugins y temas de WordPress.
Los usuarios principiantes también pueden instalar WordPress en sus ordenadores para aprenderlo, probar nuevos temas y plugins y experimentar sin afectar a un sitio web activo.
Nota: Si instala WordPress localmente en Windows, la única persona que puede ver ese sitio es usted.
Si quieres hacer un sitio web que esté disponible para el público, entonces necesitas tener un nombre de dominio y alojamiento web. Te recomendamos que sigas esta guía sobre cómo crear un blog en WordPress.
Dicho esto, veamos cómo instalar correctamente WordPress en un ordenador con Windows. Te mostraremos 2 formas sencillas, así que puedes enlazar abajo para saltar a cualquier sección que te interese:
- Método 1: Instalar WordPress en Windows usando WP Local
- Método 2: Instalar WordPress en Windows usando WampServer
Instalar WordPress en Windows usando WP local
Local WP, antes conocido como Local by Flywheel, es un software de alojamiento web local que le permite alojar un sitio web en su ordenador en lugar de en un servidor de ensayo o en vivo.
En primer lugar, debe descargar e instalar el software Local WP en su ordenador Windows. Simplemente vaya al sitio web de Local WP y haga clic en el botón “Descargar gratis”.
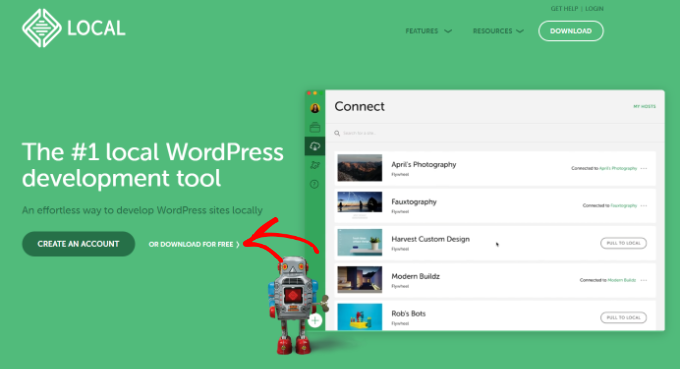
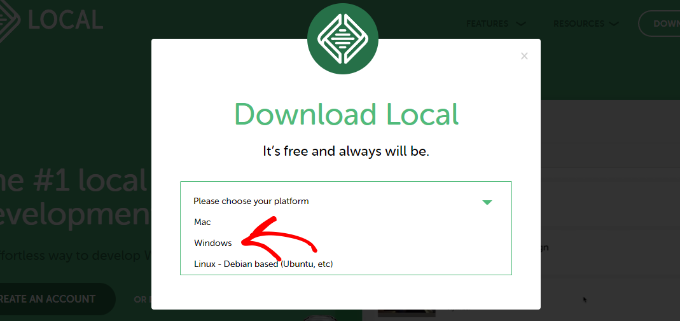
A continuación, aparecerá una ventana emergente en la que tendrás que seleccionar tu plataforma.
Elige “Windows” en el menú desplegable.
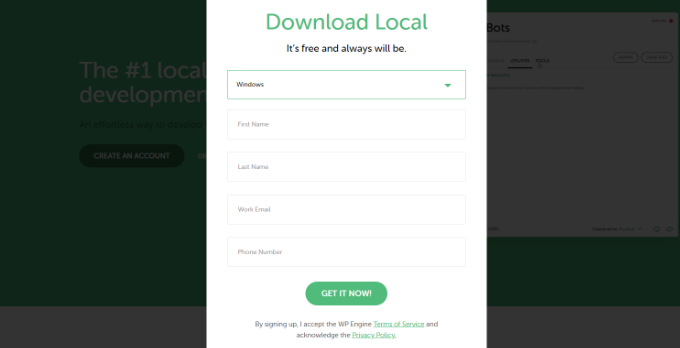
A continuación, puede introducir sus datos, como nombre y apellidos, dirección de correo electrónico del trabajo y número de teléfono, para descargar el software.
Una vez introducidos los datos, basta con hacer clic en el botón “Consíguelo ahora”.
Después, puedes descargar el software en tu ordenador. Una vez descargado, inicia el asistente de instalación.
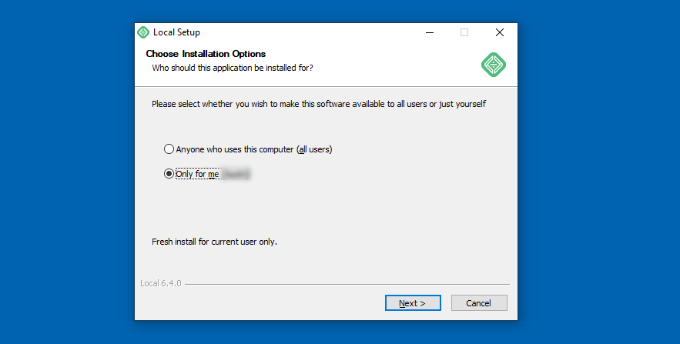
Ahora tendrás que seleccionar si quieres instalar el software para todos los usuarios o solo para ti. Cuando hayas seleccionado una opción, haz clic en el botón “Siguiente”.
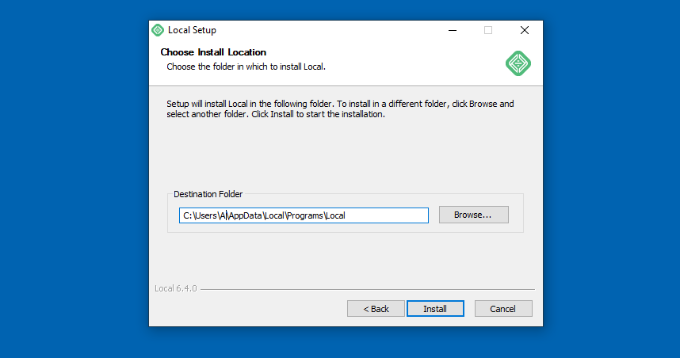
En el siguiente paso, puede seleccionar la “Carpeta de destino” donde se instalará el software.
Basta con hacer clic en el botón “Examinar” para establecer la ruta y, a continuación, hacer clic en el botón “Instalar”.
El software Local WP se instalará en tu ordenador Windows.
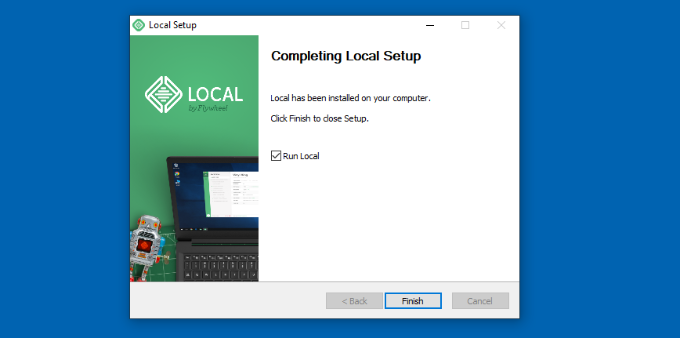
Una vez hecho esto, puede marcar / comprobar la casilla de verificación “Ejecutar localmente” y hacer clic en el botón “Finalizar” del asistente de configuración.
El software se iniciará ahora en su dispositivo Windows.
El siguiente paso es añadir un nuevo sitio web regional. Para ello, basta con hacer clic en el botón más (+) de la parte inferior.
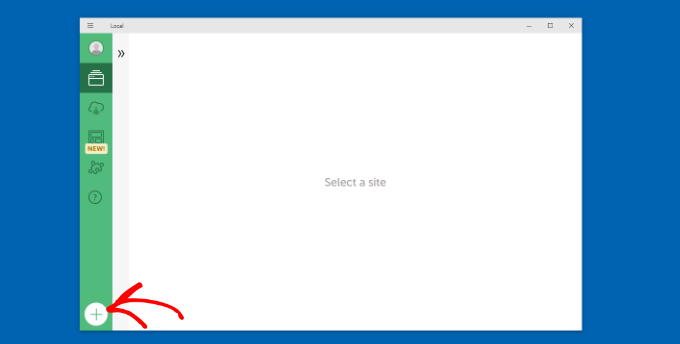
Después, puede crear un sitio en el software Local.
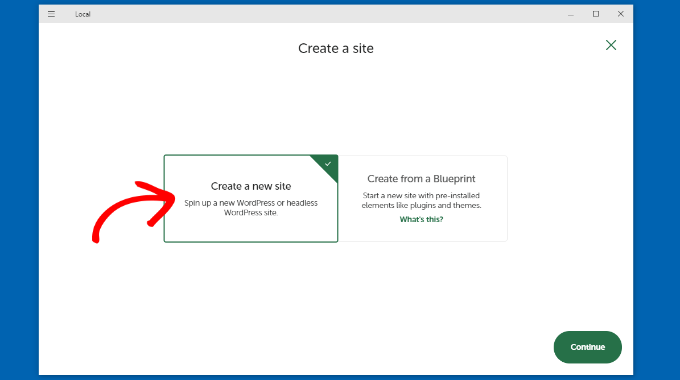
Seleccione la opción “Crear un sitio nuevo” y haga clic en el botón “Continuar”.
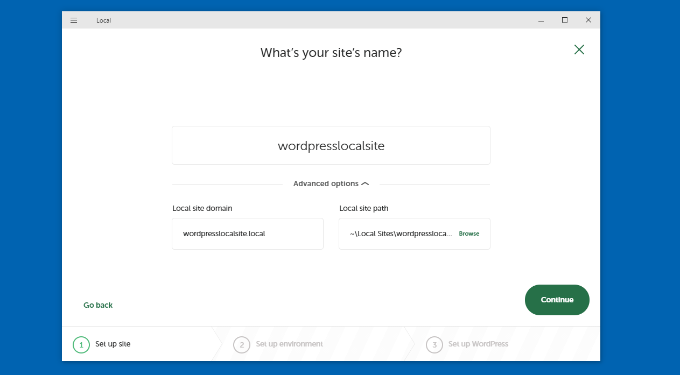
A continuación, puede introducir un nombre para su sitio web local, como wordpresslocalsite.
También hay opciones avanzadas en las que puede introducir el dominio del sitio local y la ruta del sitio local. Si está empezando, le recomendamos que mantenga los ajustes por defecto.
Una vez que haya terminado, simplemente haga clic en el botón “Continuar”.
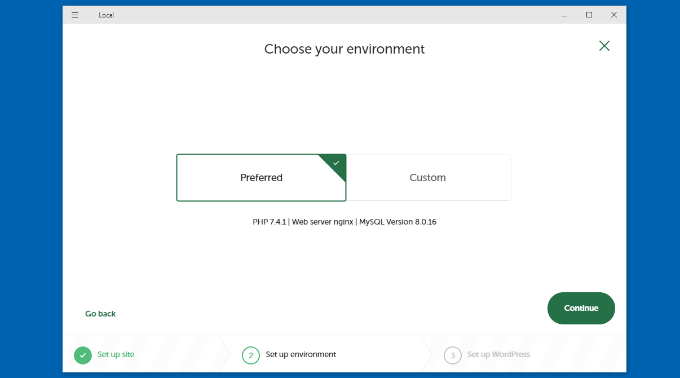
Después, tendrá que elegir un entorno para su sitio web local.
Puede utilizar el entorno ‘Preferido’, en el que el software seleccionará automáticamente la versión de PHP, el servidor web y la versión de MySQL. Por otro lado, también puede seleccionar ‘Personalizado’ e introducir los detalles del entorno.
Para este tutorial, utilizaremos los ajustes preferidos y haremos clic en el botón “Continuar”.
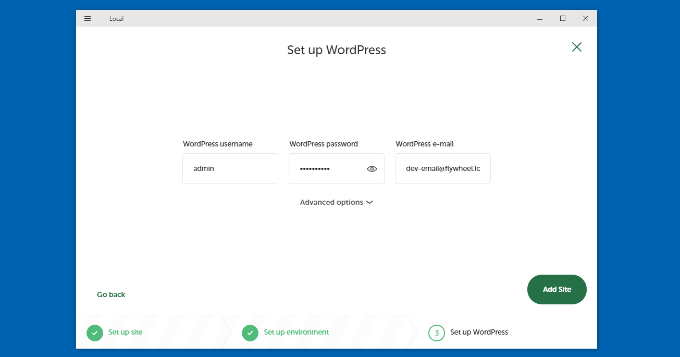
A continuación, puedes introducir un nombre de usuario y una contraseña de WordPress para tu sitio web local. Además, también tienes la opción de elegir una dirección de correo electrónico de WordPress en la que recibirás todos los avisos por correo electrónico.
También hay una opción avanzada en la que el programa le preguntará si tiene una red multisitio de WordPress.
Tras introducir estos datos, basta con hacer clic en el botón “Añadir sitio”.
El programa instalará WordPress y establecerá su sitio web.
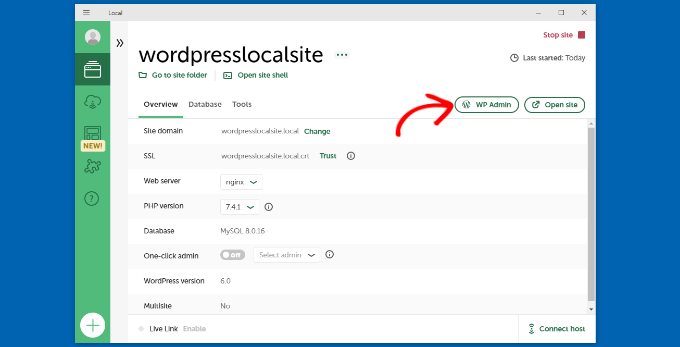
Para iniciar el sitio web regional, siga adelante y haga clic en el botón “WP Admin” en el software.
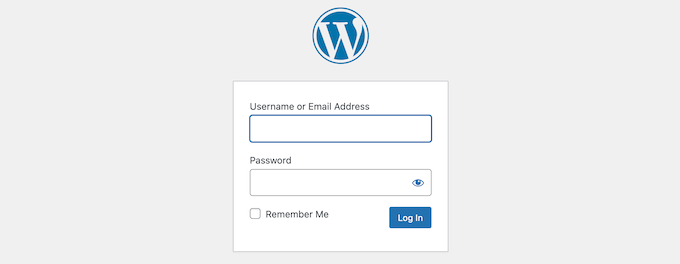
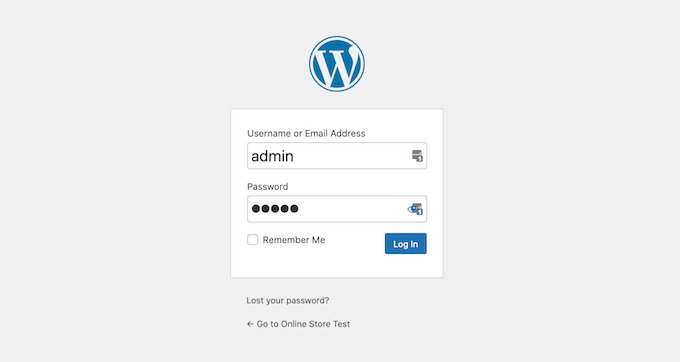
A continuación, verá la página de acceso / acceso del administrador de WordPress.
Sólo tiene que introducir el nombre de usuario y la contraseña que introdujo anteriormente al establecer el sitio web local y, a continuación, hacer clic en el botón “Acceder”.
Ahora puede editar su sitio web local en su ordenador Windows.
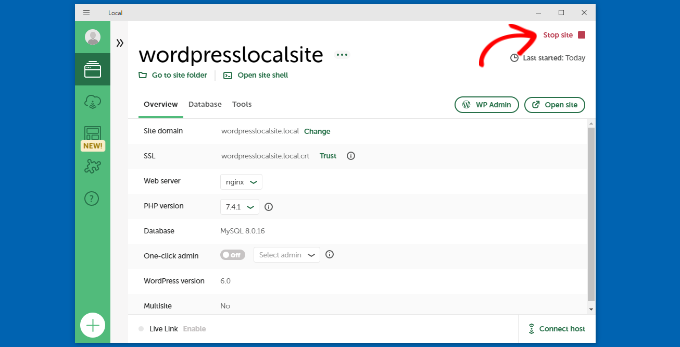
Cuando haya terminado, no olvide detener el sitio web desde el software WP local al hacer clic en el botón “Detener sitio”.
Instalar WordPress en Windows con WampServer
WampServer o WAMP es una compilación de servidor web Apache, PHP y MySQL en un lote para ordenadores Windows.
Todos ellos son programas independientes de código abierto. Sin embargo, instalarlos por separado no es del todo fácil incluso para usuarios experimentados. Software como WampServer le permite instalarlos fácilmente y tener un entorno local de trabajo en cuestión de minutos.
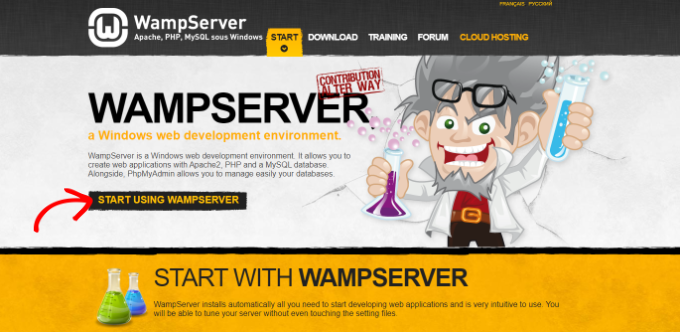
En primer lugar, debes descargar el software WAMP e instalarlo en tu ordenador. Sólo tienes que ir al sitio web de WampServer y hacer clic en el botón ‘Start Using WampServer’.
Te llevará a la sección de descargas. Aquí verás dos versiones: WampServer 32 bits y WampServer 64 bits.
Debe seleccionar la versión de WampServer que coincida con el tipo de sistema operativo de su ordenador Windows.
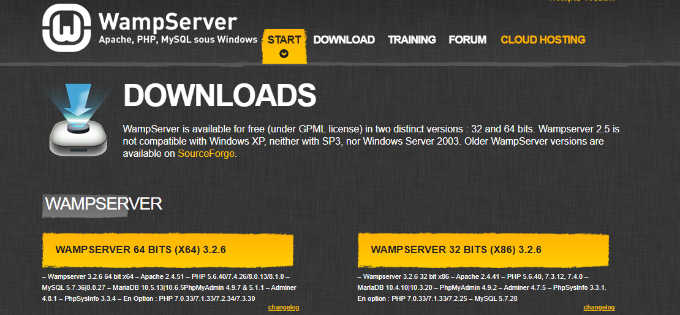
Para saber si utiliza un sistema operativo de 32 o 64 bits, busque “Panel de control” en la barra de búsqueda de la barra de tareas Inicio.
Después de eso, puede ir a Sistema y Seguridad ” Sistema en su ordenador. Allí usted será capaz de ver su tipo de sistema.
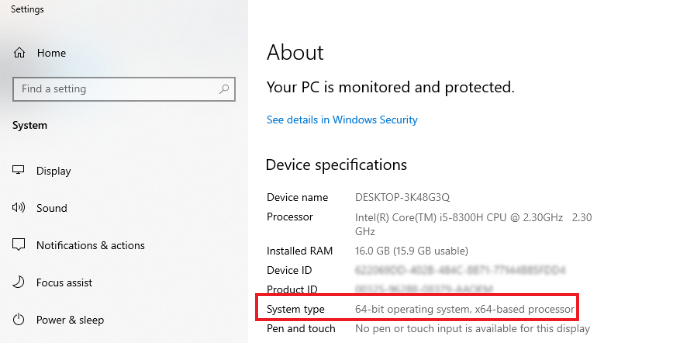
Ahora que conoce su tipo de sistema operativo Windows, sólo tiene que seleccionar la versión correcta del software WampServer.
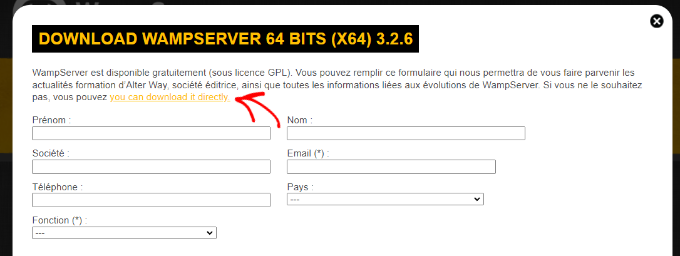
Al hacer clic en el botón de descarga, se abrirá un formulario en el que se le pedirán sus datos personales. Si no desea facilitarlos, haga clic en el enlace “Puede descargarlo directamente”.
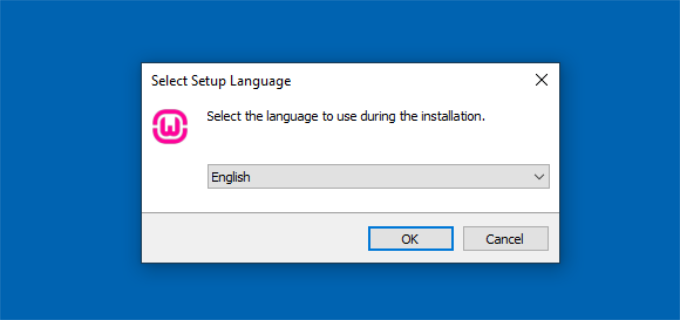
Una vez descargado, puedes hacer clic en el archivo de ejecución de WampServer para ejecutar la instalación.
Seleccione ahora un idioma en el menú desplegable y haga clic en el botón “Aceptar”.
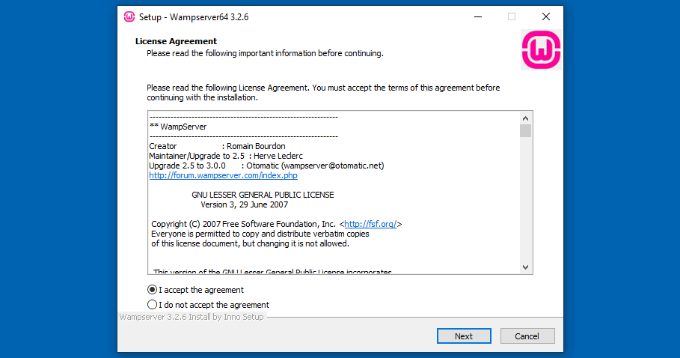
En el siguiente paso, verá el Acuerdo de licencia.
Seleccione la opción “Acepto el acuerdo” y haga clic en el botón “Siguiente”.
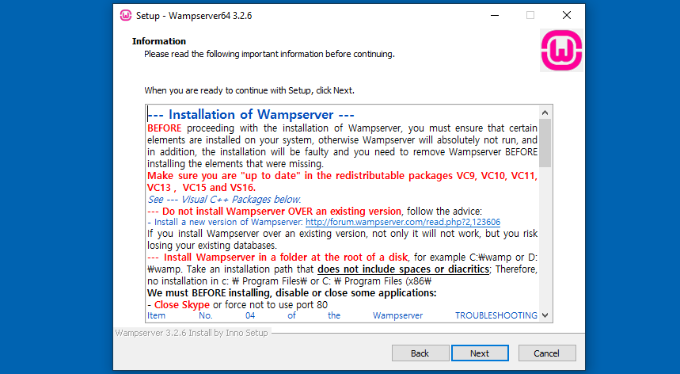
A continuación, el asistente de instalación mostrará información acerca de la instalación de WampServer.
Sólo tiene que hacer clic en el botón “Siguiente” para continuar.
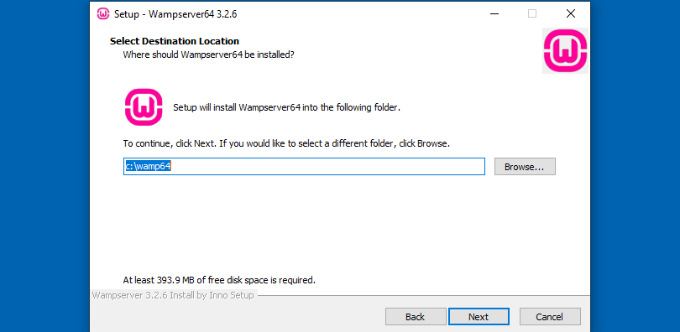
A continuación, puede seleccionar la ubicación de destino donde se instalará el software.
Para cambiar la ubicación por defecto, haz clic en el botón “Examinar” y elige la carpeta que prefieras. Cuando hayas terminado, haz clic en el botón “Siguiente”.
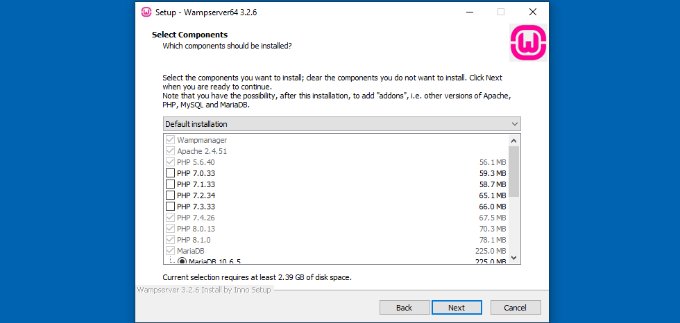
El asistente de instalación le pedirá que seleccione los diferentes componentes que desea instalar. Entre ellos se incluyen las versiones de PHP, MySQL, etc.
También puede mantener las opciones por defecto y hacer clic en el botón “Siguiente” para avanzar.
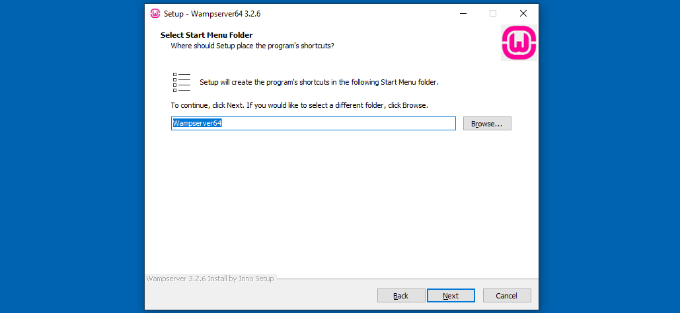
A continuación, puedes seleccionar una carpeta del menú de inicio. Adelante, haz clic en el botón “Examinar” para elegir otra carpeta.
Cuando haya seleccionado una carpeta, haga clic en el botón “Siguiente” para continuar.
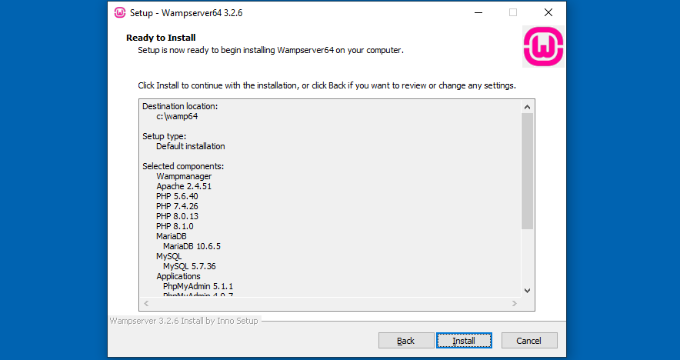
Ahora el software estará listo para instalarse. Podrá ver un resumen de la ubicación de destino, el tipo de instalación, los componentes seleccionados, etc.
Sigue adelante y haz clic en el botón “Instalar”.
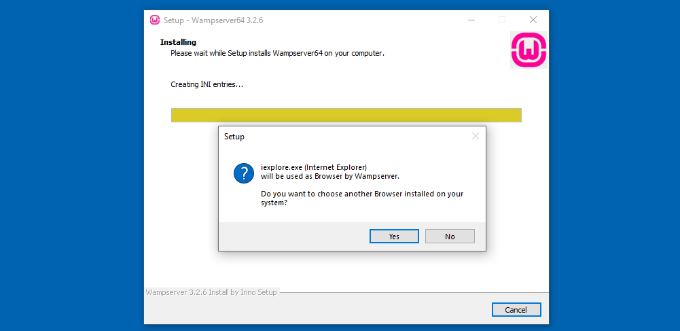
Durante el proceso de instalación, debe definir la ubicación del navegador / explorador web. Por defecto, será Internet Explorer.
Puedes cambiarlo por Google Chrome o cualquier otro explorador web localizándolo en los Archivos de programa de tu ordenador.
Del mismo modo, también le preguntará si desea utilizar el Bloc de notas cuando utilice WampServer.
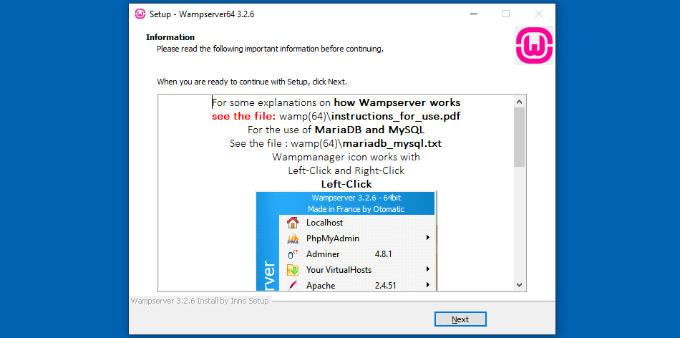
A continuación, el asistente de instalación mostrará información acerca de cómo funciona WampServer.
Siga adelante y haga clic en el botón “Siguiente”.
Ha instalado correctamente WampServer en su dispositivo Windows.
Basta con hacer clic en el botón “Finalizar” para salir del asistente de configuración.
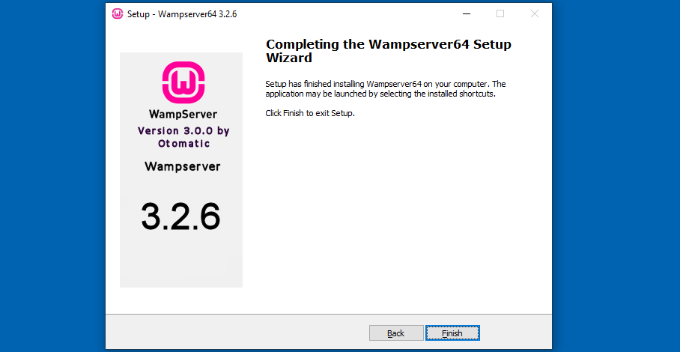
Una vez instalado, puedes iniciar el WampServer desde el atajo de tu escritorio o desde la ubicación de destino donde instalaste el software.
Lo siguiente que tienes que hacer es crear una base de datos MySQL en blanco.
Al iniciar WampServer, verás un icono verde en la esquina inferior derecha de tu pantalla junto con otros iconos. Simplemente haz clic con el botón izquierdo del ratón sobre él y, a continuación, haz clic en phpMyAdmin (una aplicación basada en web para gestionar bases de datos MySQL).
Nota: Si el icono de WampServer está rojo o amarillo, significa que los servicios (Apache, MySQL, PHP) no se están ejecutando. Debe iniciar los servicios al hacer clic en el icono antes de establecer la base de datos.
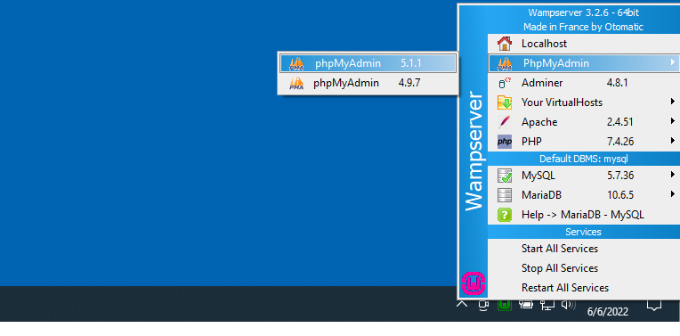
Le llevará a la pantalla de acceso a phpMyAdmin en su navegador / explorador.
Simplemente introduzca el nombre de usuario: root y deje el campo de contraseña en blanco. Estas son las credenciales por defecto para acceder / acceder a su localhost phpMyAdmin.
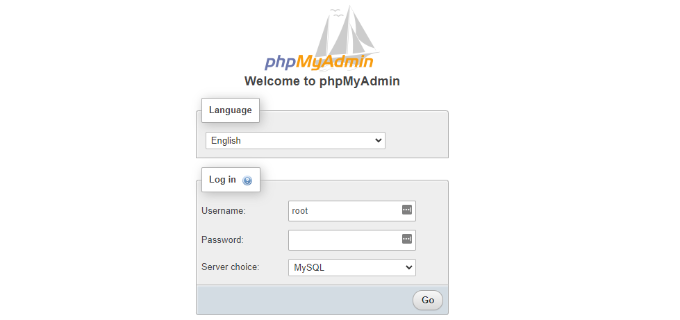
Haga clic en el botón “Ir” para continuar.
Una vez conectado, debe hacer clic en Bases de datos en phpmMyAdmin para crear una nueva base de datos para WordPress.
Te pedirá que elijas un nombre para tu nueva base de datos (nosotros la llamamos test_db). A continuación, haz clic en el botón “Crear”.
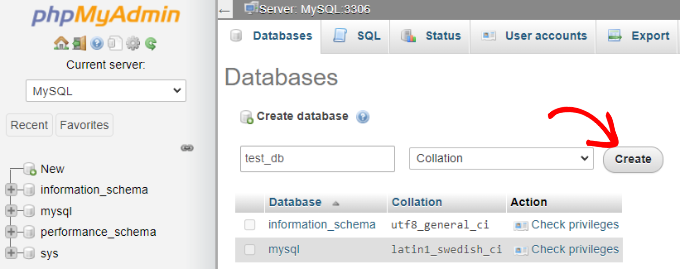
Su base de datos está lista, lo que significa que ya puede instalar WordPress en localhost.
Lo siguiente que tienes que hacer es descargar la última versión de WordPress desde el sitio web WordPress.org. Se descargará como un archivo zip.
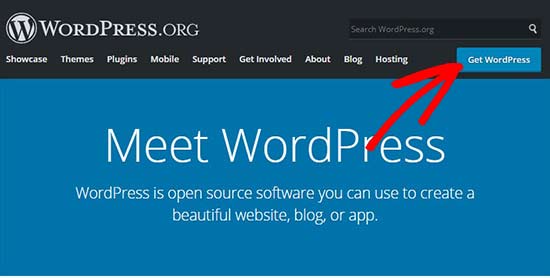
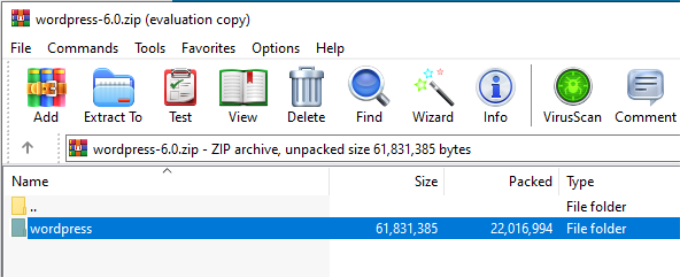
A continuación, debe extraer el archivo zip y copiar la carpeta ‘wordpress’.
Para este tutorial, vamos a utilizar WinRAR para descomprimir el archivo. Simplemente haga clic en la opción ‘Extraer a’ en la parte superior.
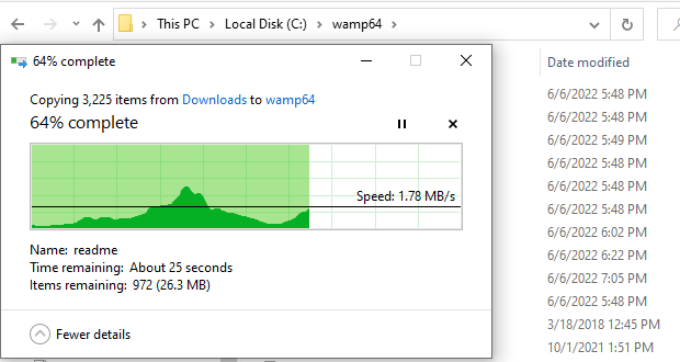
Ahora necesitas navegar a la carpeta donde instalaste WAMP.
En este tutorial, instalamos WAMP en C:\wamp64, así que nos referiremos a esa carpeta en adelante. Sin embargo, ten en cuenta que puede ser diferente para ti dependiendo de donde hayas instalado el programa.
Pega la carpeta ‘wordpress’ en la carpeta C:\wamp64\www.
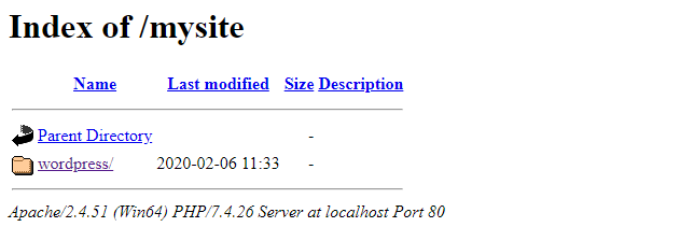
Puedes cambiar el nombre de la carpeta ‘wordpress’ por el que quieras, como mysite, testsite, etc. Esta será la URL de tu sitio local de WordPress, así que asegúrate de elegir algo que recuerdes fácilmente.
Por el bien de este tutorial, hemos cambiado el nombre de la carpeta de wordpress a mysite.
A continuación, puede abrir el navegador / explorador web e ir a http://localhost/mysite/ y hacer clic en la carpeta ‘wordpress’.
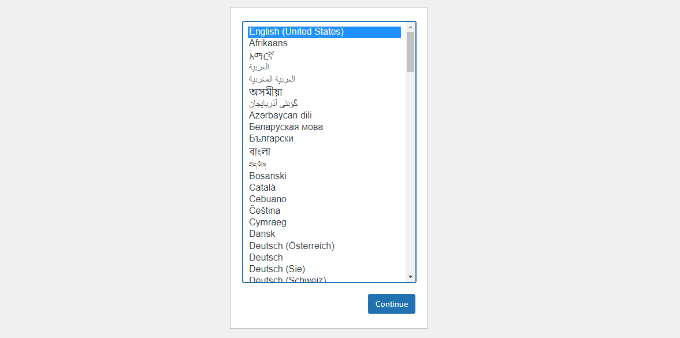
En primer lugar, te pedirá que selecciones un idioma y, a continuación, te mostrará la información de configuración de la base de datos.
Tras seleccionar un idioma, haga clic en el botón “Continuar”.
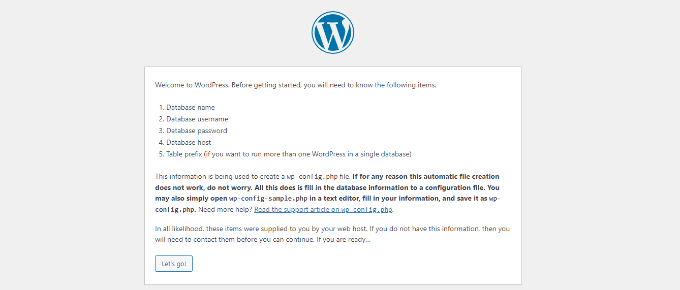
A continuación, verás un aviso de bienvenida a WordPress.
Una vez que lo haya leído detenidamente, siga adelante y haga clic en el botón “Vamos” para continuar.
A continuación, deberá introducir los datos de la base de datos, como el nombre de la base de datos, el nombre de usuario, la contraseña, el alojamiento y el prefijo de la tabla.
El nombre de la base de datos será el que introdujiste en el paso anterior. En nuestro caso, la hemos llamado ‘test_db’. El nombre de usuario será ‘root’, y puedes dejar el campo de contraseña en blanco. También puedes dejar como están el alojamiento de la base de datos y el prefijo de la tabla.
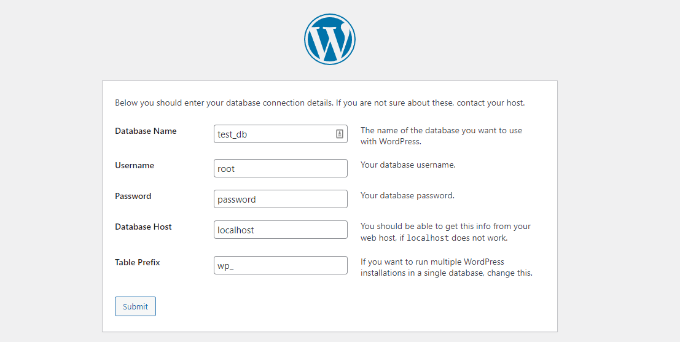
A continuación, haga clic en el botón “Enviar” y WordPress creará un archivo de configuración para usted en la administración / escritorio.
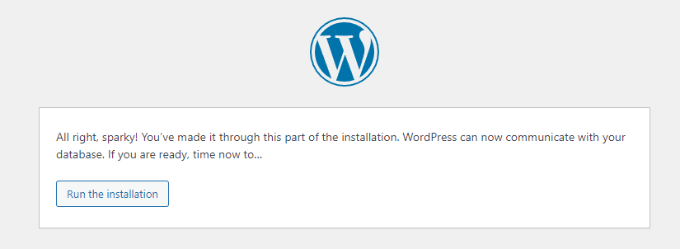
En la siguiente pantalla, verá un mensaje de correcto indicando que WordPress está conectado a su base de datos, y puede proceder con la instalación.
Sigue adelante y haz clic en el botón “Ejecutar la instalación” para continuar.
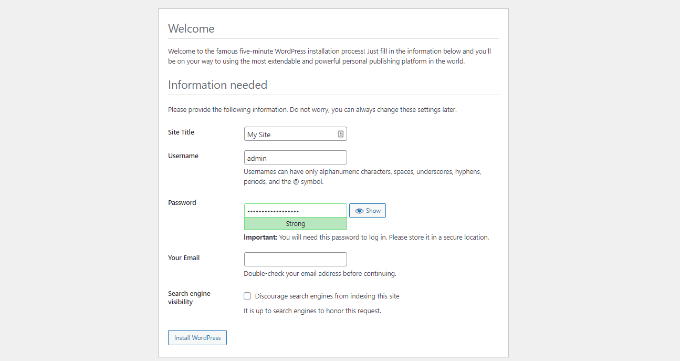
Te llevará a la pantalla de bienvenida de WordPress. Deberá añadir un título para su nuevo sitio web de WordPress, elegir un nombre de usuario de administrador, introducir una contraseña segura y proporcionar una dirección de correo electrónico de administrador.
Cuando estés listo, haz clic en el botón “Instalar WordPress”.
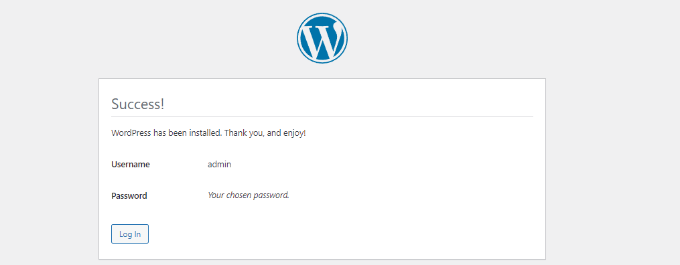
Una vez finalizado el proceso de instalación, verá un mensaje de correcto. En segundo plano, WordPress ha creado nuevas tablas en su base de datos y está listo para usar.
A continuación, puede acceder a su escritorio de WordPress haciendo clic en el botón “Iniciar sesión”.
Enhorabuena, has instalado correctamente WordPress en un ordenador Windows utilizando WampServer.
Sólo tiene que acceder / acceder a su panel de administrador de WordPress y empezar a editar su sitio en un entorno regional.
Activando Enlaces permanentes bonitos en WAMP
La nueva versión de WordPress no rompe su sitio local cambiando la configuración de los enlaces permanentes.
Sin embargo, si todavía ve el error ‘página no encontrada’ en sus páginas después de cambiar los enlaces permanentes desde Ajustes ” Enlaces permanentes en WordPress, entonces simplemente siga nuestra guía sobre cómo activar enlaces permanentes personalizados en WAMP.
Bonificación: Migración de WordPress local a WordPress activo
También hemos escrito una guía independiente sobre cómo trasladar WordPress de un servidor local a un sitio en producción. Esperamos que te resulte útil cuando estés listo para desplegar tu sitio local a producción.
Disponer de un entorno de servidor local es estupendo para aprender y realizar pruebas. Sin embargo, si desea iniciar un blog de WordPress para que otras personas lo vean, entonces no necesita instalar WordPress en su ordenador. Necesitas instalar WordPress en un proveedor de alojamiento WordPress.
Esperamos que este artículo te haya ayudado a aprender cómo instalar WordPress en un ordenador con Windows. Puede que también quieras ver nuestra guía sobre WordPress SEO y cómo crear una tienda online.
If you liked this article, then please subscribe to our YouTube Channel for WordPress video tutorials. You can also find us on Twitter and Facebook.


Syed Balkhi says
Hey WPBeginner readers,
Did you know you can win exciting prizes by commenting on WPBeginner?
Every month, our top blog commenters will win HUGE rewards, including premium WordPress plugin licenses and cash prizes.
You can get more details about the contest from here.
Start sharing your thoughts below to stand a chance to win!
Bidyut Kumar Mondal says
Thanks a lot for such a wonderful post.
Ali says
Just to say Thank you very much.
sreenu says
thank you…thank you soooooooooooo much ..
Nissim says
Thank you so much. this was sterling
adriana says
OMG i made it through. lol. thank you for your time writing this, it helped me through the panic stage lol
mahendra says
Who help of peoples, They are God
Kenneth Ekeh says
Help please! I have followed the article and installed wamp, created the wp database but culd not be able to run complete configuration of wp. Its telling me “can’t select database”. Try Again. Please help me to fix this. Thanks.
WPBeginner Support says
During the installation when it asks for your database details, please make sure that you are entering the same name for the database which you used when creating database in phpmyadmin. For username, use root and leave password blank.
Administrador
Tom says
Upon opening mysql workbench, choose your connection, then write the code without quotes “create database nameofyourdatabase;” this will be the name of your database and what you will use in the wordpress setup when it asks for the name of your 1)database(use nameofyourdatabase) 2)username 3)password 4)database host(im using “localhost”)
Hope this helps.
Tammi L. Coles says
Just a quick note of thanks for this very simple-to-follow tutorial. It worked like a charm (including the Apache rewrite for permalinks follow-up).
ogunmakinwa dayohanks. says
Your tutorials as been good for me so far, but please which stable wordpress can i download? can i download the latest version? i am just thinking that some plugins might not be available for the latest version.. so for now which version do you recommend for me? thanks
WPBeginner Support says
We always recommend using the latest stable version of WordPress.
Administrador
Mohamed Ishag says
Hi there,
Would you please answer the question posted on 12/11/13 I still need help
as I am unable to run the WAMP Server on Windos 8. Please read question posted on 12/11/13.
Thank you in advance.
Regards,
Mohamed
Orestes says
I was able to install WP, but I’d like to know how to manage different web logs within my local server. Thank you for the instructions and tutorials here.
WPBeginner Support says
you can install different weblogs (blogs or websites) on the same server by installing wordpress in different sub-directories inside your
/wamp/wwwfolder. For example:C:\wamp\www\site-1 will open in http://localhost/site-1
C:\wamp\www\site-2 will open in http://localhost/site-2
Administrador
GinoDC says
After entering details for Site Title, Username, Password and Email I press Install WordPress and my computer hangs. Please help.
WPBeginner Support says
This could happen for a number of reasons. Try to uninstall wampserver and then download and reinstall again. If the problem presists, then you can try XAMPP.
Administrador
Mohamed Ishag says
Hello,
I have installed WAMP on Windows 8 but I am having a problem creating a data base due to the following error (You don’t have permission to access /phpmyadmin/ on this server). I have edited the htpd.conf file as follows
Open file httpd.conf through wamp tray icon
Find:
# onlineoffline tag – don’t remove
Order Deny,Allow
Deny from all
Allow from 127.0.0.1
Change to:
# onlineoffline tag – don’t remove
Order Deny,Allow
Allow from all
Then saved but still get the same error, why!? Norton 360 is installed on the PC
and no other conflicting apps. I need some help to fix this issue. Any ideas? Thank you in advance.
Best Regards,
Mohamed
Mohamed Ishag says
Dear Syed and the team,
Thank you very much for this site. I am new to WordPress and found your tutorials and explanation very good and straight forward. I feel that you are a busy man but still have time to dedicate this site to new WP beginners. God bless your parents.
Salam,
Mohamed
adam says
Hello,
I have installed everything and am finally at my wordpress dashboard on my localhost machine. everytime i click on visit my site to view what I have changed the page simple directs to the WAMP server configuration screen that shows apache version, php version, loaded extensions, etc… It seems that something simple needs to be changed but I dont know…Can anyone please help? Thanks in advance…
WPBeginner Support says
You have probably installed WordPress in www directory. You need to install it in a subdirectory like www/testsite1/
Administrador
Nuno says
Hey i have the same problem, so if i just copy all the files to a subdirectory it will work or do i have to reinstall it all over? Thanks.
Matthew says
Thank you, than you, thank you. I am a technophobe and your clear instructions helped me all the way.
Arthur says
Hi,
After installing WAMP in accordance with your instructions, I could not open phpmyadmin; explorer kept waiting for localhost. I’m not a pc techie so I desperately need instructions how to proceed furter in the same easy way as your manual above. I have a 64 bit W7 machine, and installed the 64 bit version of WAMP first, but since that did not work as described , I installed the 32 bit, but with the same result. Thanks for your help in advance ! (No Skype, port 80 OK, as far as I can see)
WPBeginner Support says
Try restarting all services make sure that WAMPServer icon is green also make sure that Skype is not running in the background. Also look at this support thread for more possible solutions.
Administrador
Arthur says
Thanks a lot: I followed your recommended thread and I removed a double line in the Host file (‘127.0.0.1 Localhost’) that seemed too much and now I can get to a log-in page of phpMyAdmin, which is great, but I have not yet even entered an ID and password during initial installation of WAMP. Did I miss something ?
Thanks for your patience again…
WPBeginner Support says
To log in to phpMyAdmin, enter username root and leave password blank.
Trudy Ritsema says
Can I run more than 1 test site on WAMP? and any ideas of how I would go about this please?
I already I have localhost site running – and I don’t want to get rid of that yet as I am still developing it…
Thanks in advance.
WPBeginner Support says
in your www directory create new directories for each website. That way you can run multiple sites on localhost.
Administrador
viki says
i can’t create new database, bcause it is showing ” * No Privileges” in red colour letters. please help me
WPBeginner Support says
you are probably entering wrong credentials to connect to your mysql database.
Administrador
nick mav says
you should login using the following credentials:
username: root
password: [empty] –> that is, no password
Shawn Morrissey says
Thanks Nick,
I had the same issue and couldn’t find this out anywhere I had looked previously…
SanketP says
Hi. I am a new-bee to this world of eb designing. Wanted Joomla but that didnot go thru too well. WP instal was as good for me. Thank you. XOXOXO.
Everett says
Hello. I want to be able to develop my wordpress site locally and not have to be connected to the web when I make changes and do save or update inside wordpress. Before I go through all the installation of WAMP and WP locally, can anyone tell me if I will have to have internet access to make updates to a wordpress running locally in WAMP? Sure I realize if I wanted a new Theme or Plugin, I would have to be online, but if I am just making adjustments to text and adding pictures that are already on my laptop, etc. will I have to have internet access to do so? I ask because I do a lot of travel where I am on an airplane and could be working on a new version of a website if I don’t have to be online. Also, I can’t afford a wireless account for my laptop, so I only have internet when I am at home with my own wifi or when I am somewhere that has a free wifi. Thanks.
WPBeginner Support says
no you do not need an internet connection to work locally on your website.
Administrador
Ian says
I followed the instructions to the letter, installed WAMP and the required SP1 Visual C++ on a brand new laptop running Windows 8 64bit. The installation refuses to launch, brings up a screen asking if I’m sure I want to let this programme make changes to the computer, then does nothing when ‘Yes’ is clicked. What is going wrong?
WPBeginner Support says
Does the wampserver icon appear in your windows taskbar? If it does, then you need to click it and launch wampserver.
Administrador
Brynn says
Please help. I installed WAMP but when I went to open phphMyAdmin, nothing happens. I tried uninstalling and reinstalling, but still getting the same problem. I’m not even getting any sort of popup block notification in my browser. Just nothing.
I wonder if this might have something to do with the WARNING window that popped up on the WAMP website before I downloaded it… It said something in French, and then something about needing to install C++ which I know nothing about, and which was not mentioned in this tutorial.
Do I need to install C++ and if so, do I need to learn how to use the programming language before I can finish this tutorial on installing WordPress? I am a designer, not a programmer, so I hope to god I don’t need to stop everything and go learn C++ before I can do a simple WordPress install.
WPBeginner Support says
Brynn you can always check whether or not Microsoft Visual C++ is installed on your computer from Control Panel -> Programs and Features. Do you see wampserver page when you visit http://localhost? If you do, then you have already successfully installed WAMP.
John Victor says
Can I hug you now or later?
Anudeep says
Awesome tutorial
guru says
I install wordpress to my localhost. But i dont know to use it to develop a site. I’m new to wordpress. Please anyone help me.
WPBeginner Support says
Take a look at our beginner’s guide section. For theme development you may want to take a look at our WordPress theme cheat sheet for beginners.
Administrador
Scott Cho says
Got WAMP installed, but when I try to create a new databse by clicking on the phpMyAdmin button in WAMP the chrome browser window that opens up says:
Forbidden
You don’t have permission to access /phpmyadmin/ on this server.
Can anyone point me in the right direction as to what this is and how to fix it? I don’t know if this makes a difference but I have it installed on my secondary hard drive, not my C drive (the c drive just has my operating system).
Asad Riaz says
Here is how you edit the htpd.conf file
Open file httpd.conf through wamp tray icon
Find:
# onlineoffline tag – don’t remove
Order Deny,Allow
Deny from all
Allow from 127.0.0.1
Change to:
# onlineoffline tag – don’t remove
Order Deny,Allow
Allow from all
Plus resolution to some other conflicts
Make sure no other program conflict wamp such as Xampp, phpEasy, IIS, Skype, Zonealarm, firewall/antivirus, NOD32, Eset, any web and/or Remote Desktop related program, such as Teamviewer …
IIS and Apache/Wamp are both web server and might conflict in some way, so you have to disable IIS in order for Wamp to work
Disable IIS in Vista/W7:
Control Panel, Uninstall Programs, Turn Widows Features On or Off, uncheck Internet Information Services
Disable IIS in XP:
Control Panel, Add/Remove Programs, Add/Remove Windows Components, uncheck Internet Information Services (IIS)
Restart computer, then restart Wamp
Also, in folder C:\WINDOWS\System32\drivers\etc, open file hosts and delete anything in this file and have only this line below and nothing else
127.0.0.1 localhost
If using Skype, go to Tools->Options->Advanced->Connection and uncheck the box “Use 80 and 443 as alternatives for incoming connections”. Restart Skype after WAMP. Now you will be able to use both programs at the same time w/o problems.
I hope it helps, found it on net
Asad Riaz says
Howdy,
Well i have managed to install it using the article. Some info was missing in this article like
1. Once you click on phpMyAdmin, it asks for login details, so here they are:
username: root
pass: (leave it blank)
2. WAMP sometimes gets offline and it wont open the phpMyAdmin page, so you guys need to edit the htpd.conf file in C:wamp/bin/apache4.2/conf/htpd
Lets see now how much it helps me.
I m here for all the support that i can extend.
Thanks to the author of this page.
Cesar M. says
thanks for the user info I was getting crazy, but I finally got in to phpmyadmin
Colin Teasdale says
Hiya,
Problem solved – I had needed to install the Visual C# redistributable, and did that after installing Winamp. Uninstalled Winamp, rebooted and then re-installed – everything fine. That’ll be user error then ! ! !
Colin T.
Scott Cho says
I’m getting the same error you just described below, where is this redistributable you speak of?
Colin Teasdale says
Hi guys,
I’ve just downloaded and installed WAMP and have got to the “set up a database” stage. When I select ‘phpMyAdmin’ I get a ‘Firefox Problem Loading Page’ page with “Unable to connect – Firefox can’t establish a connection to the server at localhost”.
I’ve tried the fix suggested by Imran on June 17th, but this doesn’t seem to have fixed resolved the problem.
Any thoughts on how I fix this, please??
Peter says
Hi Editorial Staff,
Do you have a tutorial that is the reverse process also using WAMP? I have a functioning website that I would like to duplicate on my home computer for experimenting and learning css, and php programming without risking my functional website.
Thanks.
EL says
That is exactly what I need!
Denzil says
Hi, a very useful article, thanks. Is it easy to migrate a test WP site on WAMP to a hosted site elsewhere? Do you have a tutorial article to help?
Thanks
Editorial Staff says
Yes, it is fairly easy to do that. Tutorial will be coming tomorrow
Administrador
Denzil says
Great! How timely! Thanks guys, looking forward to it.
Kate BP says
Absolutely cracking article – really helpful, thanks so much!
akash says
After clicking on phpmyadmin,,,,,,,
i am getting redirected to directly php my admin webpage and not the database entry option which is shown above.
thereafter the details are not matching afterwards in database,username and password.please give me its solution as soon as psbl.
Amitoj Gautam says
User Name: Root
Password: None (Leave this space empty)
Click on the Go button. You will be directed to the page you are looking for.
Dana says
Hi! Once I’ve created a site on my WAMP server, could I then transfer it to an existing domain name? I’m trying to create a new site without shutting down the old one. Once the new one is finished, I would want to replace the old one, but use the same domain name. Thank you!
Editorial Staff says
Yes you can do that. We have updated the article to add a link to the tutorial.
Administrador
vahid says
Thank you so much
chris martin says
Hi, I am having trouble with links not working. Could you help me or give me some direction on how to fix that? On my site “chrisjamesmedia.com” click menu, then “blog” and i get “not found”. This also happens with links as well.
Also, do you have a tutorial on how to host multiple domains from this as well, or point me in the right direction.? I have looked up several things about virtual domain, localhost, and everytime I find something they want me to edit httpd conf, but what they have doesnt match mine.
Thank you so much!!!!
Tamsin says
Hi,
Great article, very clearly explained.
Would you be able to tell me the best way to add a second WordPress site to Wamp? I have read a lot of conflicting information and would rather not make a massive mess of things!
Editorial Staff says
Create a new folder inside your www folder, then repeat this process.
Administrador
Tom Smith says
Hi,
Thank you for providing this excellent tutorial! It’s going to be great to get use to using WP onn my PC before I install it on my host server and create my website.
I followed your instructions and installed WAMP and then WordPress and got all the screens you showed here… and with the tweaking you suggested, I was finally able to open WP – saw the Dashboard, etc. Then I closed it.
But now I can’t seem to open WP. I open WAMP and click on Localhost – and it just sits “waiting for response from localhost” – does not open anything. I’ve tried http://localhost/my database name – it will not open – I get “HTTP 500 Internal Server Error”. Just in case, I also followed your instructions on SKYPE and unchecked that Port 80 box.
What am I missing?
Editorial Staff says
Did you shut down your computer? You have to launch WAMP Server every time you restart your computer.
Administrador
Imran says
When i try to Setting Up a Database for WordPress, it was saying like this : Forbidden
You don’t have permission to access /phpmyadmin/ on this server. what is the reason ? can you please guide me. thank you in advance….
Editorial Staff says
That’s weird. Since you are the admin of your Wamp install, then you shouldn’t get this error.
Administrador
Imran says
Finally i got the solution…
I think it will be useful for others.
for phpmyadmin
Goto c : wamp/alias/phpmyadmin.conf file, open with notepad.
find
Options Indexes FollowSymLinks MultiViews
AllowOverride all
Order Deny,Allow
Deny from all
Allow from 127.0.0.1
replace with
Options Indexes FollowSymLinks MultiViews
AllowOverride all
Order Deny,Allow
Allow from all
thats it…
Imran says
Thank you very much EDITORIAL STAFF, this is a nice post and very usefull.
Melanie says
I had this same problem with the phpmyadmin and I found and made the changes cited here to the alias file, then restarted WAMP and I was able to create my database. However, now I’m getting the same Forbidden message when I try to install WordPress on my localhost, exact text below:
Forbidden
You don’t have permission to access / on this server.
I can get to the WP install screen from 127.0.0.1, but not localhost. I’m running Windows 8. Any ideas on how to get this to install? Thanks in advance for any help you might be able to give me.
Akshay says
Hi.
I wanted to use this method to test out plugins before installing then on my live site. So in your tutorial, instead of copying in clean WordPress files, I copied in a full backup of my site made using BackupBuddy.
However from this point on I’m not sure what to modify in order for my site to function correctly offline. I edited my wp-config file to the new database details, and imported my database from my online phpmyadmin to the WAMP one. However it seems like there’s something I’m missing, as when I try to access localhost/site/wp-admin I am redirected to my online login page.
Do you have any suggestions?
Thanks very much for your help.
Akshay
Brandi says
I’m in the same boat – did you ever find a solutions?
Christophe R. says
Another (lazy) point for XAMPP : I know there are some differences in the config files, but I use both linux (at home) and Windows (Seven and 8) at work, so I appreciate having the same interface for I only have to learn once.
Andre says
Great article and easy instructions for those who want to venture into WAMPP….however, for myself, I still prefer XAMPP and do run it on it’s own on a second drive without the installable version. Updating is a breeze, although I rarely need to.
I’ve used XAMPP for many years now for both WordPress and Joomla theme development, as well for a testing server. Never had issues and I do find it quite easy to use. I used to use the full version but I found that the Lite version works extremely well.
I noticed someone said AMPPS, but I’ve never tried that…perhaps in my spare time I will try it out.
Nicholas says
Its click and install that’s how easy it is and just open to localhost/ampps i use it for all my scripts that this includes as downloads and install on the service. no worries on xamp and wamp that i found to limited in some ways.
Adrian says
Thanks alot it was really helpful
Thomas says
Hi everyone,
I’m a very beginner with WordPress and I have created a site with it and WAMP on my computer.
Now I want to put it online, but I don’t know how to do it.
Where does a tutorial exist for that?
The thing is that I want to replace the current site, which is hosted somewhere else, and so keeping the domain name.
Does anyone know where I can find this kind of information?
Thanks a lot!
Nicholas says
WAMP in the older days was great! Now there is a far more better and less embarrassing way when it comes to configuring things with WAMP. WAMP is in the past and gone for me. I use AMPPS far more better no configurations, just install and a few dips of changes in the options section that’s it. Open your browser go to your localhost and install any cms or other scripting lang within your browser using ampps. You’ll be amazed! No more downloading then extracting in www folder and then reconfiguring. WordPress is just a click and install on ampps. No hassle! Shouldn’t you guys write something about AMPPS? This is a lot more better than WAMP! WAMP lags a lot of things like cgi and stuff those are extras, but on ampps everything is included. Ever since ampps I never looked back to wamp! Sorry!
Editorial Staff says
Have been using WAMP for so long that didn’t even bother with another option. AMPPS sure looks good. Good to see that it is made by the folks from Softaculous. Will have to give it a try.
Thanks for the suggestion Nicholas.
Administrador
Zimbrul says
Why do you say you prefer WAMP over XAMPP?
Alexander Gounder says
WAMP is much simpler and easier to use compared to XAMPP.
Editorial Staff says
Would second that. WAMP is easier to use. Several years ago when we used XAMPP the upgrade process was complicated and it was buggy. We switched over to WAMP and it was awesome.
Administrador
Parth S. says
Hi, Thank you very much for this. It’s very informative and easy to follow. However I’d suggest you mention the skype thing a lil early around the localhost point, because, there ppl start to worry when they see a blank screen with skype on in their PC.
Great post though. Keep it up.
Mladen says
Just to mention, that Team Viewer also causes problems with WAMP.
Christophe R. says
I actually do prefer XAMPP and DTX-Control for I can overcome security policy : Installation without administration rights (zip file pour the web server) and full access to blocked ports (80, 443, 3306).