
Are you looking for a way to see ‘not provided’ keywords in Google Analytics UA?
Google Analytics is a powerful tool that shows how people discover and interact with your website. However, when you try to view which keywords they use to find your site, you might see ‘not provided’ in the old Universal Analytics (UA) reports.
In this article, we will explain ‘not provided’ keywords in Google Analytics UA and discuss whether they can be unlocked.

What Is ‘Keyword Not Provided’ in Google Analytics?
Google Analytics collects information about visitors to your WordPress website and displays it in easy-to-understand reports. It shows you data about the types of people who visit your website and what they do once they get there.
However, Google introduced a more secure search experience for users in 2011. To protect user privacy, Google started to encrypt the searches of visitors who are logged in to their Google accounts. This is so website owners are unable to identify individual users.
Then, in 2012, a new version of Google Analytics called Universal Analytics (UA) was released. It provided a detailed report of the number of visitors using each keyword that brought them to your website.
However, because Google couldn’t determine which keywords were used when users were logged into their Google accounts, it combined those statistics under a single heading of ‘not provided’. We will talk more about this in the next section.
Google Analytics 4 (GA4) was launched in 2023 and introduced many changes, such as a new reporting system and metrics. GA4 collects and processes data differently from UA.
You won’t see ‘not provided’ keywords in GA4 because it doesn’t offer keyword data for organic traffic at all. However, there are other ways to unlock that data, and we will show you how in the last section of that article.
How to Access Your Old Google Analytics UA Data
If you have been using Google Analytics for a while, then you can still access the data that was collected by the previous version of Google Analytics (UA).
While your old Google Analytics properties are no longer gathering new data, the historical data is still there. This allows you to check the website statistics that were collected before you switched to Google Analytics 4.
When you look at your list of Google Analytics properties, Universal Analytics properties will have a tracking code starting with ‘UA’.

You can check which keywords were being used to find your site by visiting the Acquisition » All Traffic » Source/Medium report.
You will see the ‘not provided’ heading if any of your website traffic came from encrypted searches.

You may be wondering if there is a way you can unlock the ‘not provided’ keywords to discover the search phrases that were actually used to find your content. Let’s take a look at that now.
Can I Unlock ‘Not Provided’ Keywords in Google Analytics UA?
Unfortunately, for most users, the answer is no. You will no longer be able to unlock the actual keywords used behind the ‘not provided’ statistics.
In the past, this was possible by using Google Search Console (formerly Google Webmaster Tools), which is a free tool that measures your site’s traffic independently from Google Analytics.
There is an option to link Google Search Console to Google Analytics UA by clicking the Admin gear icon at the bottom left and then selecting ‘All Products’. On that page, you will find a button labeled ‘Link Search Console’.

However, if you sign up for a Google Search Console account now, then there is no way for it to go back in time to track keywords. It will not know which keywords were being used to find your site during the period that Google Analytics UA was collecting data.
Your only chance would be if you linked the two services in the past. In that case, you would be able to see the ‘not provided’ keywords by visiting Acquisition » Search Console » Queries in Google Analytics UA.

Note: Google Search Console only keeps data for the last 16 months, so the keyword statistics you see will be limited.
The good news is that you can connect Google Search Console to Google Analytics 4 and track your keywords going forward. We will take a look at that next.
What Is the Best Way to View Keywords for My Website Today?
The best way to track your keywords today is with Google Search Console.
You can connect this tool with Google Analytics 4 and even view its keyword reports from your WordPress dashboard using tools like MonsterInsights.
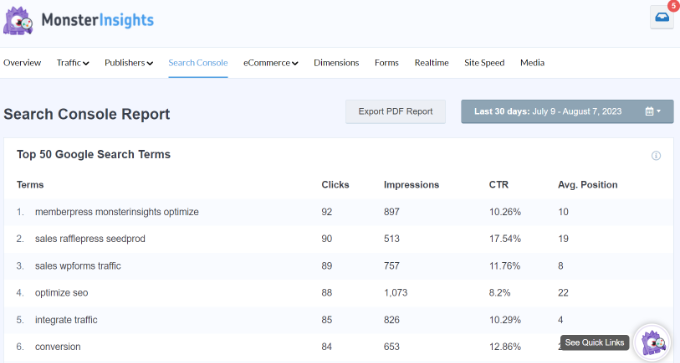
MonsterInsights shows you your Google Analytics and Google Search Console data within your WordPress dashboard, including traffic sources, your top 50 Google search terms, eCommerce analytics, and more.
Once you add your website to Google Search Console, you can use WordPress SEO tools to track your keywords and improve your site’s ranking.
You can learn how to do all of this by following our step-by-step guide on how to see the keywords people use to find your WordPress site.
Our Best Guides for Finding and Tracking Keywords
Now that you understand ‘not provided’ keywords in Google Analytics, you may want to see some of our other guides on how to use keywords in WordPress:
- How to Do Keyword Research for Your WordPress Blog
- How to Check If Your WordPress Blog Posts Are Ranking for the Right Keywords
- How to Add Keywords and Meta Descriptions in WordPress
- How to Properly Use Focus Keyphrases in WordPress (Beginner’s Guide)
- Best Long Tail Keyword Generators (Compared)
We hope this tutorial helped you understand ‘not provided’ keywords in Google Analytics UA and learn the best way to see the keywords people use to find your WordPress website. You may also want to see our guide on how to analyze keyword density to boost rankings or our expert pick of the best keyword research tools for SEO.
If you liked this article, then please subscribe to our YouTube Channel for WordPress video tutorials. You can also find us on Twitter and Facebook.


")
Mrteesurez
I appreciate this post for introducing a topic I wasn’t familiar with before: “Not Provided keywords” in Google Analytics. It’s a real eye-opener because I’ve often wondered how to access those hidden keywords that could be crucial for my SEO strategy. In the past, I found it challenging to optimize content without knowing the exact keywords driving traffic. This guide gives me a practical approach to uncovering those insights, which I believe will help refine my keyword targeting and boost my organic traffic.
Thanks WPbeginner.