Over the years, we’ve tested lots of email marketing services and helped WordPress users create subscription forms for their sites. Recently, one of readers asked the best way to add a Mailchimp subscribe form to their WordPress website
Mailchimp is a popular email marketing tool that offers a form builder. However, this builder has limited features and customization options. Adding a custom subscribe form gives you more flexibility and helps grow your email list.
In this article, we will show you how to create a Mailchimp subscribe form in WordPress with custom fields.
Why Add a Custom Mailchimp Subscribe Form in WordPress?
Adding a subscription form to your WordPress website is a great way of communicating with your users.
You can send newsletters, new product releases, announcements, and other information while creating a direct connection with your audience.
Mailchimp is one of the most popular email marketing services. It helps you build an email list, send emails, and set up automated email campaigns. Plus, it also offers a form builder that you can use to create a subscription form and embed it on your website.
However, Mailchimp’s form builder is very basic and doesn’t offer a lot of customization options. You get limited form fields to choose from, and there are no settings to change color, font, and more. It also adds Mailchimp branding at the bottom.
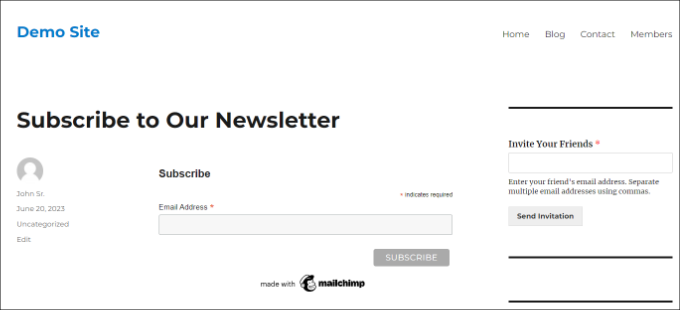
Creating a custom Mailchimp subscribe form gives you more flexibility and control. You can add all types of form fields, edit their appearance, add conditional logic to show fields based on the user’s responses, and more.
Since Mailchimp has limitations, you may also want to see our guide on why WPBeginner switched from Mailchimp to Drip.
That being said, let’s look at how you can create a Mailchimp subscription form with custom fields.
How to Create a Mailchimp Subscribe Form in WordPress
The easiest way of adding a Mailchimp subscribe form WordPress is by using WPForms. It is the best contact form plugin for WordPress that’s used by over 6 million professionals.
WPForms is a beginner-friendly plugin that offers a drag-and-drop form builder, 1300+ pre-built templates, and lots of customization options. The best part is it easily integrates with Mailchimp.
Note: For this tutorial, we will be using the WPForms Pro version because it includes the Mailchimp addon and custom form fields. There is also the WPForms Lite version that is available for free, but it doesn’t offer a Mailchimp integration.
Step 1: Connect Mailchimp With WPForms
First, you will need to install and activate the WPForms plugin. If you need help, then please see our guide on how to install a WordPress plugin.
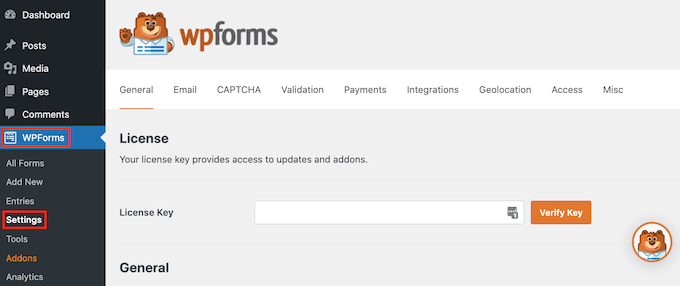
Upon activation, you will need to go to WPForms » Settings and add the license key. You can find the key in your WPForms account area.
After entering the license key, go ahead and click the ‘Verify Key’ button.
Next, you will need to install the Mailchimp addon.
You can do that by going to WPForms » Addons from the WordPress admin panel. From here, navigate to the Mailchimp addon and click the ‘Install Addon’ button.
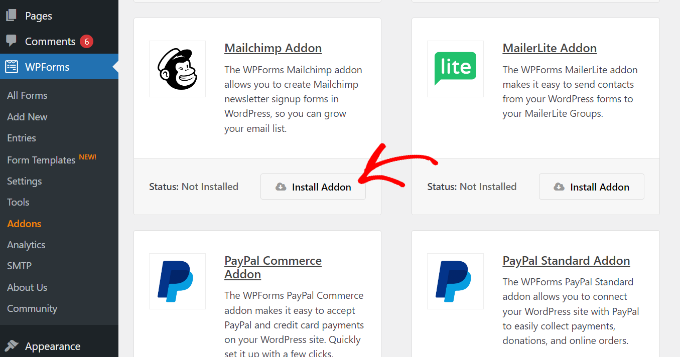
The addon should now be installed and activated.
Once that’s done, simply go to WPForms » Settings from your WordPress dashboard and switch to the ‘Integrations’ tab.
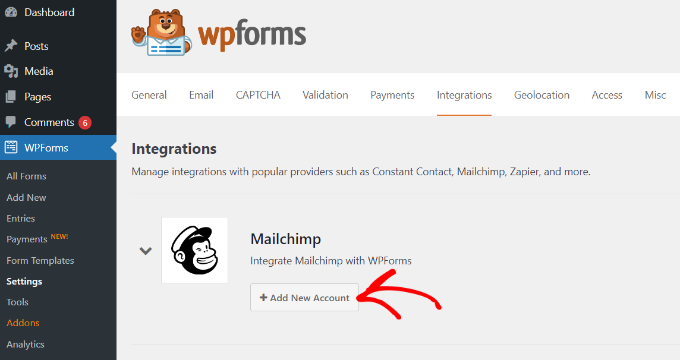
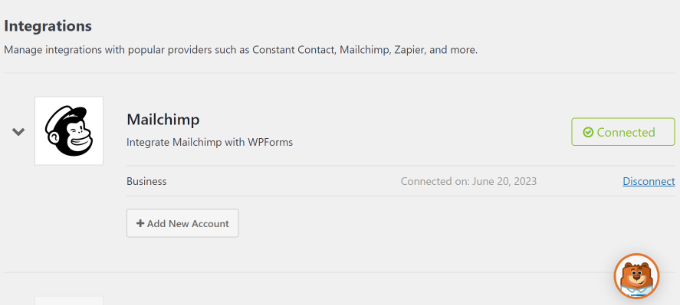
Next, you can expand the Mailchimp settings and then click the ‘+ Add New Account’ button under Mailchimp.
As soon as you do that, you will see more options. To integrate Mailchimp, you must enter the API key and account nickname. This will allow WPForms to communicate with your Mailchimp account.
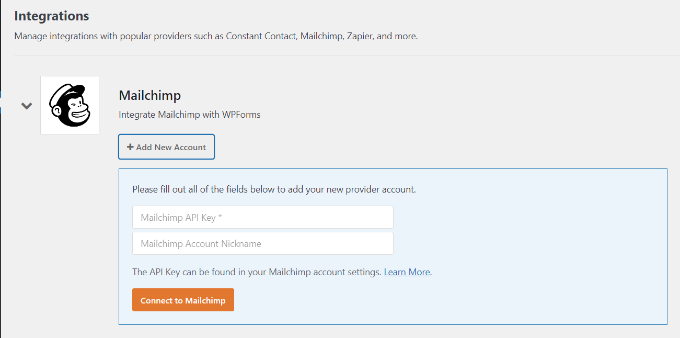
Creating Mailchimp API Keys for WPForms Integration
To create an API key to connect WPForms, you will first need to log in to your Mailchimp account.
Once you are logged in, simply click on your avatar in the top right corner and select the ‘Account & billing’ option.
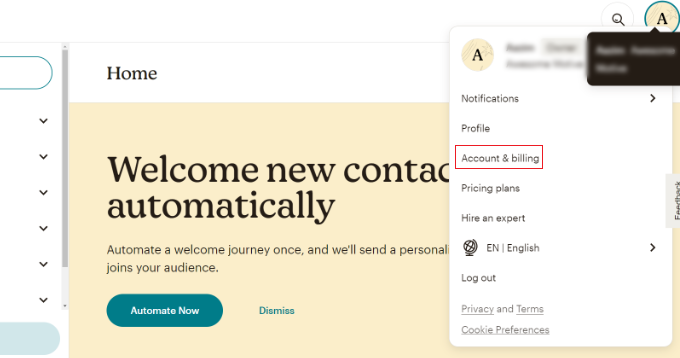
On the next page, you will see different account settings.
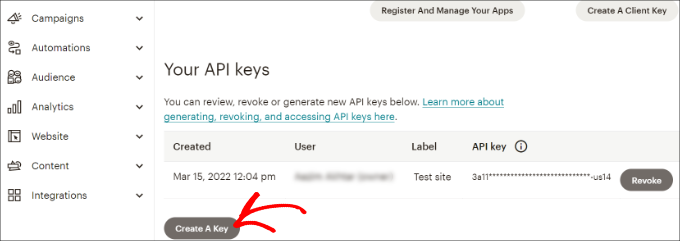
Simply click the ‘Extras’ dropdown menu and then select the ‘API keys’ option.
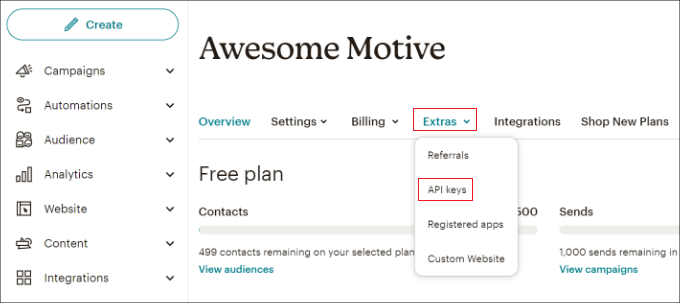
Next, you can copy an existing API key to use for your WPForms integration.
If you haven’t generated a key previously, then simply click the ‘Create A Key’ button.
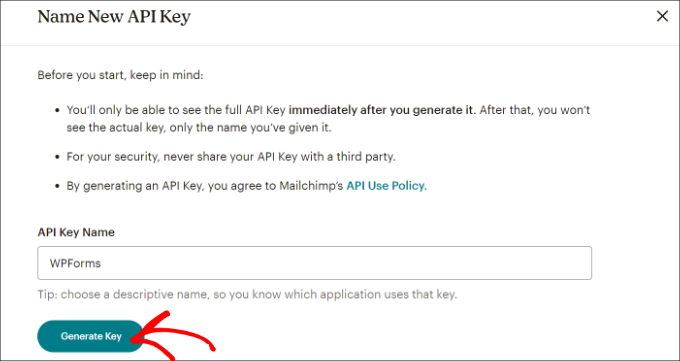
After that, you can enter a name for your new API key.
Once that’s done, just click the ‘Generate Key’ button.
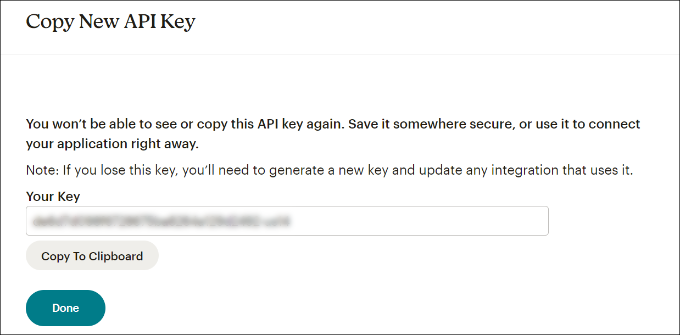
Next, you will see the new API key.
Go ahead and copy the key and click the ‘Done’ button.
You can now return to the browser tab or window with your WPFroms integration settings.
From here, simply paste the key into the ‘API Key’ field. You can also add a Mailchimp account nickname to remember which account you are connected to.
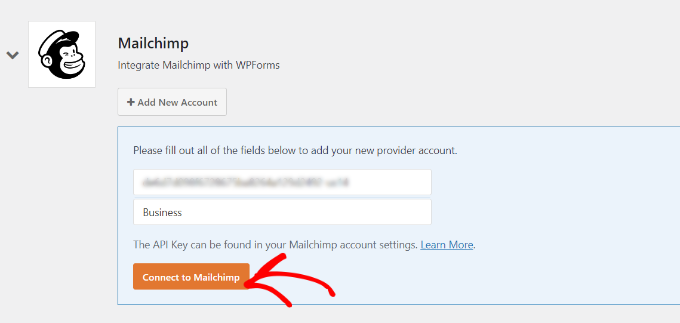
After entering the key, go ahead and click the ‘Connect to Mailchimp’ button.
You should now see a green ‘Connected’ button next to the Mailchimp settings, showing that the email marketing tool is successfully integrated with WPForms.
Step 2: Design a Mailchimp Subscribe Form With Custom Fields
Now that you have integrated Mailchimp with WPForms, the next step is to create a subscription form with custom fields.
First, you will need to go to WPForms » Add New from the WordPress dashboard. Next, you can enter a name at the top and select a form template.
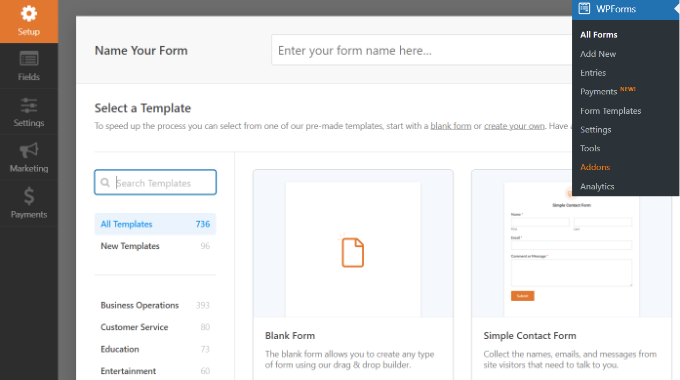
WPFomrs offers lots of prebuilt form templates, so you can quickly pick one and customize it.
It even offers form templates for Mailchimp. For instance, you can create a signup contact form, newsletter signup form, or email marketing form.
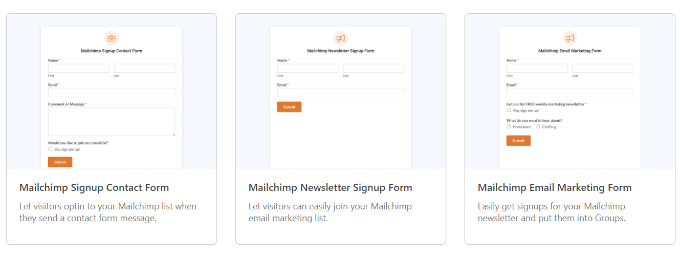
For this tutorial, we will choose the Mailchimp Newsletter Signup Form template.
On the next screen, you will see the WPForms drag-and-drop form builder. Here, you can customize the form and add custom fields from the menu on the left.
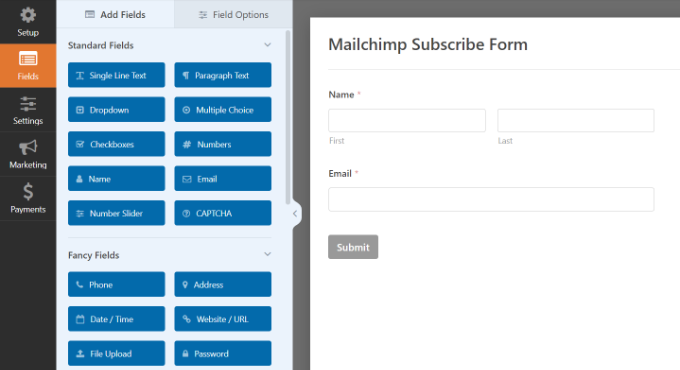
The default form template will come with a Name and Email field.
However, you can simply drag any form field and drop it onto the template. There are fields to add text, dropdown options, multiple-choice questions, phone numbers, addresses, date and time, websites, passwords, and more.
For instance, if you are using a business phone service, then you can add a Phone field. This will help you send SMS messages or reach out to subscribers via phone calls.
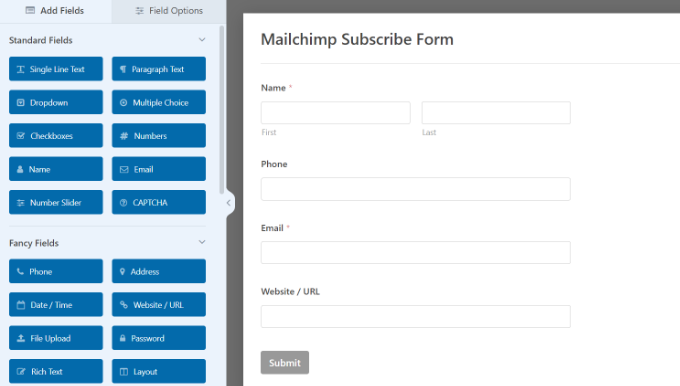
You can add a checkbox field and allow users to select their interests. This way, you can segment your subscribers and send them targeted emails.
Next, you can further edit each form field in the template. Simply choose a field, and you will see more options in the left panel.
For example, we changed the options in the Checkboxes form field.
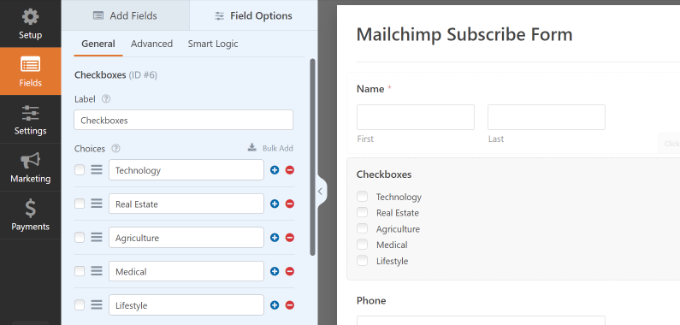
You can also edit the label of the form field, make it a required field, add images to the checkbox options, and more.
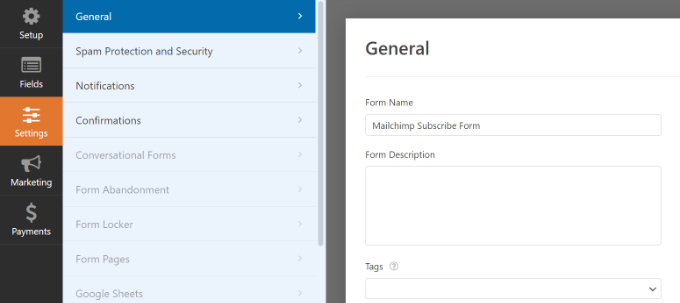
Once you have finished adding custom form fields, switch to the ‘Settings’ tab from the left menu. In the General settings, you can change the form’s name and description, add tags, edit the submit button text, and more.
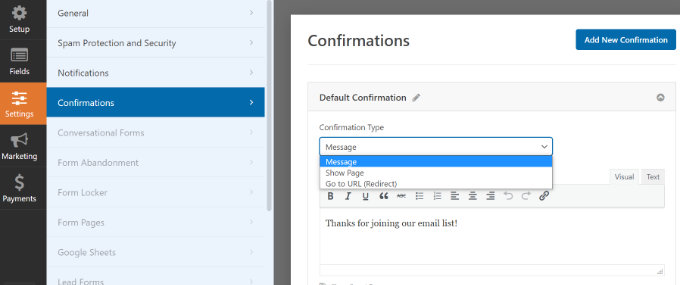
Next, you can switch to the ‘Confirmations’ tab and choose what subscribers will see once they submit a form.
WPForms lets you show a message, a specific page like a thank you page, or redirect users to a URL.
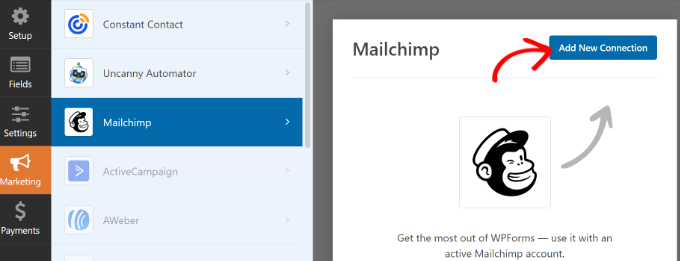
After that, you can go to the ‘Marketing’ tab from the left panel and then select Mailchimp.
From here, simply click the ‘Add New Connection’ button.
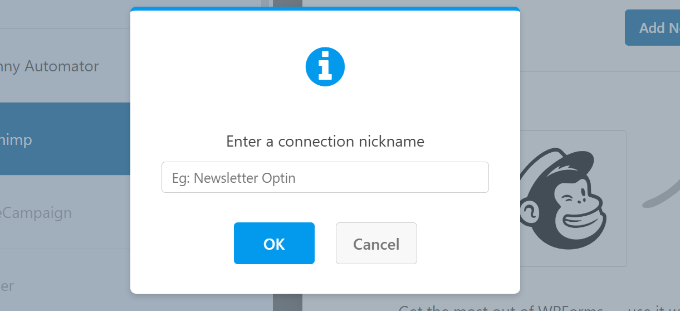
Next, a small popup will open where you will need to enter the Mailchimp nickname.
After entering it, go ahead and click the ‘OK’ button.
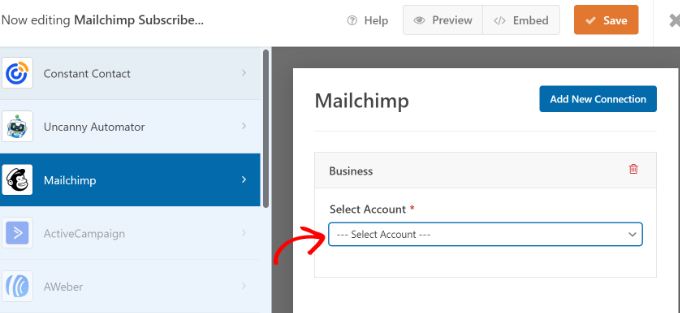
Next, you can pick the Mailchimp account that you connected to earlier.
Simply click the ‘Select Account’ dropdown menu and choose your account.
After that, more options will appear.
You can go ahead and select the audience from the dropdown menu to which the new subscribers will be added.
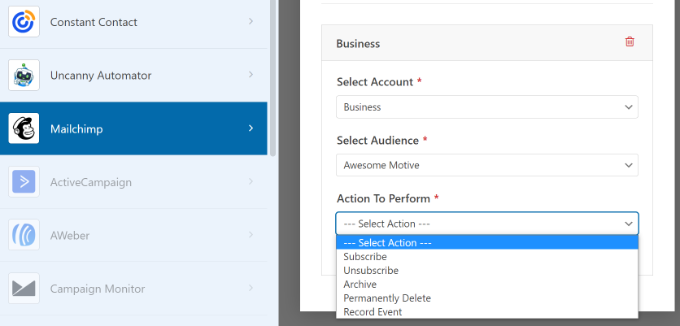
There are different actions to choose from, but for this tutorial, we will select the ‘Subscribe’ option. This will add the user as a new contact to your Mailchimp account.
Next, you can scroll down to see additional settings. For instance, there is an option to choose the WPForms field where users can enter their email addresses.
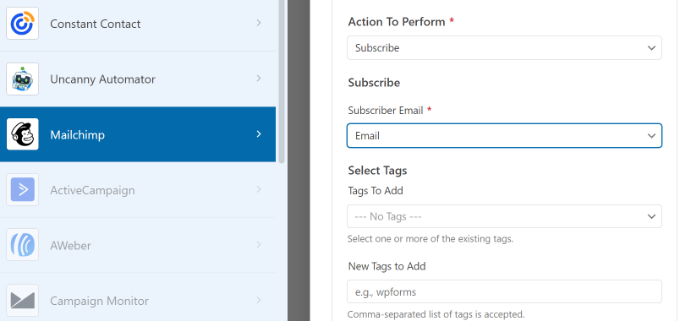
You also have options to add tags to new subscribers and a note to the user’s profile.
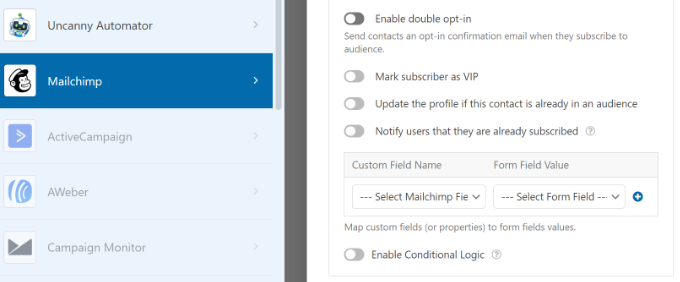
If you scroll down further, then you will see more optional settings. For instance, you can enable double opt-in, mark the subscriber as VIP, update their profile if the contact is already in an audience, and more.
Now, you are ready to add your Mailchimp subscribe form to your WordPress blog or website.
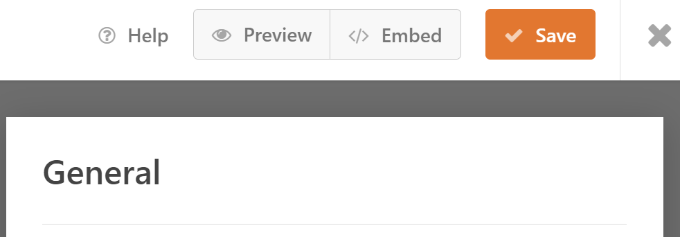
In the WPForms form builder, you will see an ‘Embed’ option at the top. Go ahead and click on the ‘Save’ button to store your changes, and then click the ‘Embed’ button.
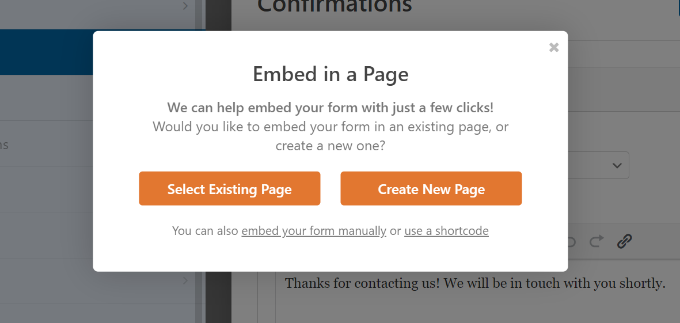
Next, a popup will open, asking you to select an existing page or create a new one.
For this tutorial, we will use the ‘Create New Page’ option.
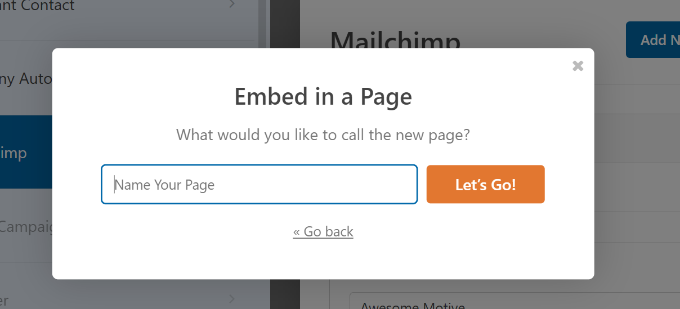
After that, you will need to enter a name for your new page.
Once that’s done, simply click the ‘Let’s Go!’ button.
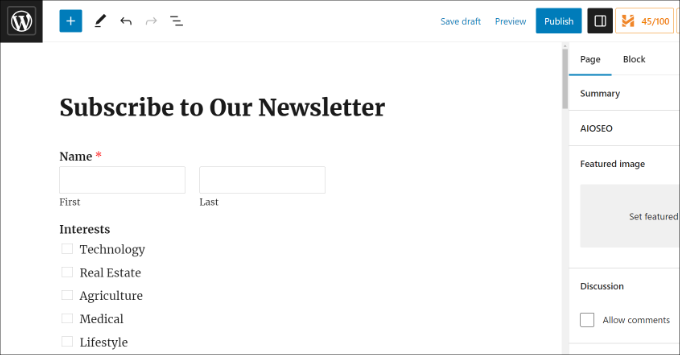
Next, you will see a preview of your form in the WordPress content editor.
You can then click the ‘Publish’ button at the top to make your Mailchimp subscribe form live.
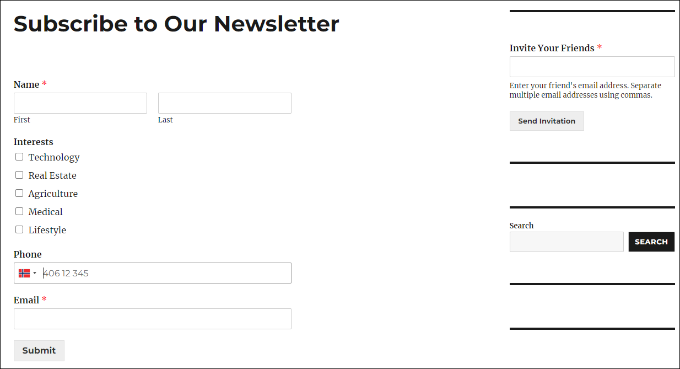
You have now successfully created a Mailchimp subscribe form with custom fields.
You can go ahead and visit your website to see the form in action.
You can also do a lot more with Mailchimp and WordPress. For instance, you can integrate it with OptinMonster and show your subscribe forms in popup campaigns.
To learn more, please see our ultimate guide to using Mailchimp and WordPress.
We hope this article helped you learn how to create a Mailchimp subscribe form in WordPress with custom fields. You may also want to see our guide on easy ways to grow your email list faster and our expert picks for the must have WordPress plugins to grow your website.
If you liked this article, then please subscribe to our YouTube Channel for WordPress video tutorials. You can also find us on Twitter and Facebook.


Syed Balkhi says
Hey WPBeginner readers,
Did you know you can win exciting prizes by commenting on WPBeginner?
Every month, our top blog commenters will win HUGE rewards, including premium WordPress plugin licenses and cash prizes.
You can get more details about the contest from here.
Start sharing your thoughts below to stand a chance to win!
Ralph says
Really good and easy guide I upgraded my form with it.
However after 4 years with mailchimp I think about moving on. Pricing became a little bit expensive. What alternatives do you recomend for someone with small email list (2k contacts) that sends 2 newsletters per month? You guys know a lot about good alternatives and probably have guides for them already
WPBeginner Support says
We have a few different ones to consider in our list below!
https://www.wpbeginner.com/showcase/best-email-marketing-services/
Admin
Jiří Vaněk says
Thanks for the detailed breakdown on how to register and use Mailchimp. I wanted to create a newsletter for a friend and didn’t expect something so common, used by so many, to be so challenging for me. I spent quite a bit of time on Mailchimp, and the most challenging part for me was importing emails and then connecting them to Mailchimp. Thanks!
WPBeginner Support says
You’re welcome
Admin